• Skip to main content
  • Skip to primary sidebar
  • Skip to footer

  • Home
  • About
  • Gallery
  • Classes
  • Trips
  • Books
  • Blog
  • Contact
  • Sign Up For My Blog

Blog

Quilting a Sommer Quilt

December 14, 2014 2 Comments

As most of you know, Mike and I watch our granddaughter, Sommer, full time. She is a joy, and next year we’ll be doubly blessed because daddy and mommy are expecting her baby brother in February. During breakfast a few weeks ago, I asked her what we should name her baby brother and she responded “Minnie Mouse sticker”. We smile a lot around here  🙂 !

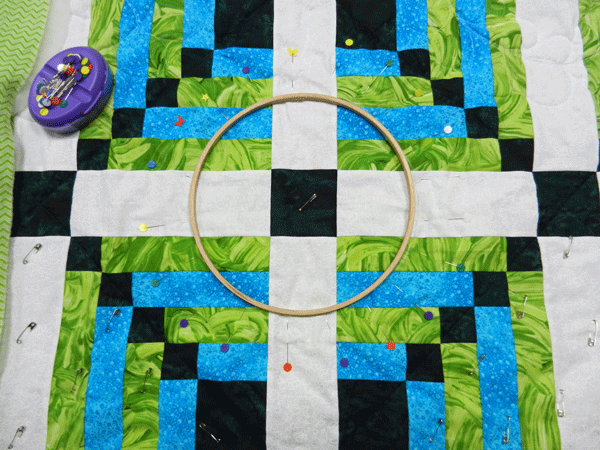
Sommer will be moving into a big girl bed after Christmas, so grandma Chris needed to make her a quilt – of course. Her bedroom colors are pink, gray, black, white and teal – and the decor is very modern. A “modern” quilt would be ideal, but Sommer really loved the I Spy quilts she helped me make for her cousins. What to do? Back the modern quilt with an I Spy quilt!

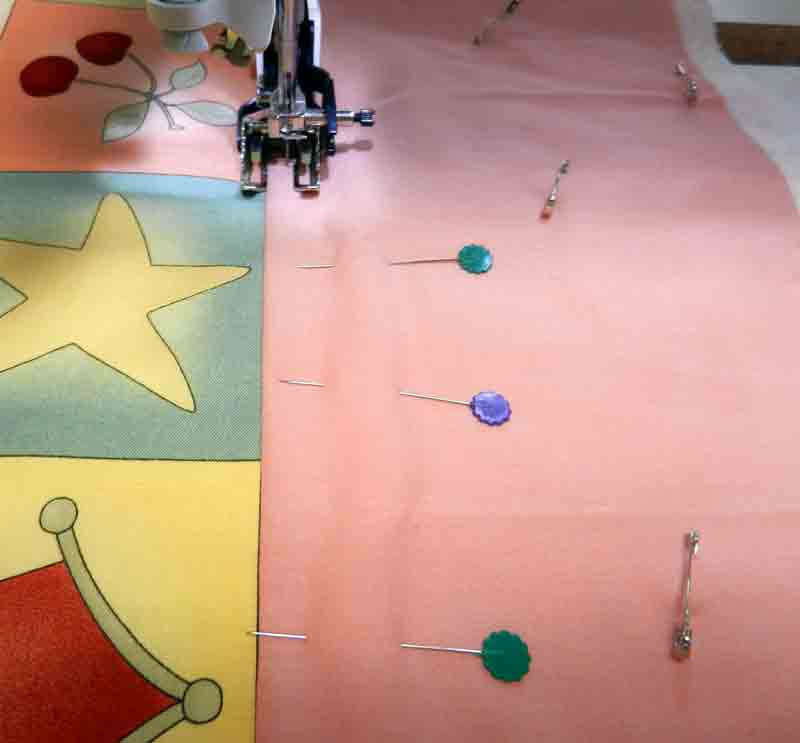
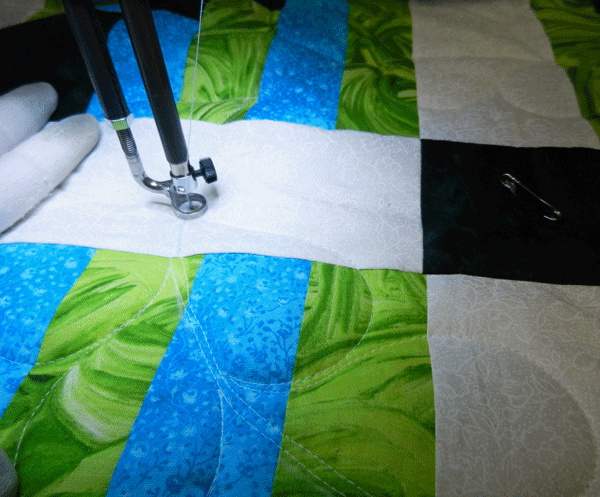
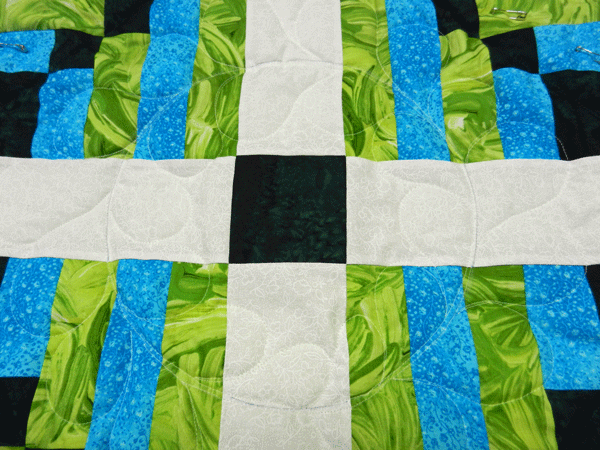
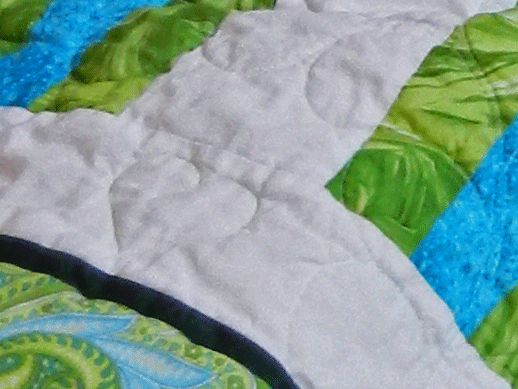
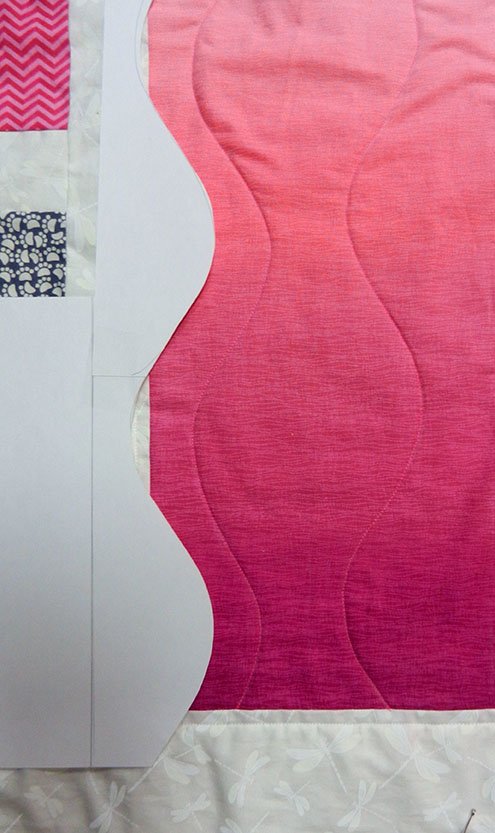
Once both sides were finished, the sandwich was layered and it was time to quilt. The modern side has one wide, vertical band of a pink gradation fabric, and 6 different, wide, horizontal bands. I quilted around each of these areas with a walking foot first, and then the fun began. I made a curved template from card-stock to mark lines in the vertical band.

curvy template

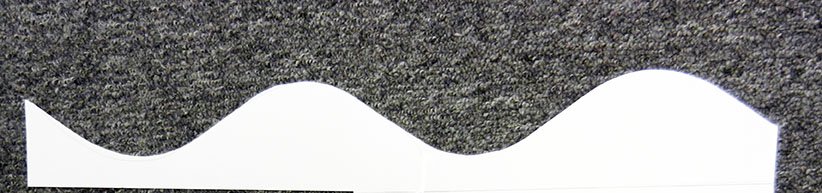
I originally thought I would keep the curves lined up, but after a bit of experimenting, an hourglass shape seemed best. I marked the lines with a sliver of soap and continued to use the walking foot:

marking curvy quilting lines

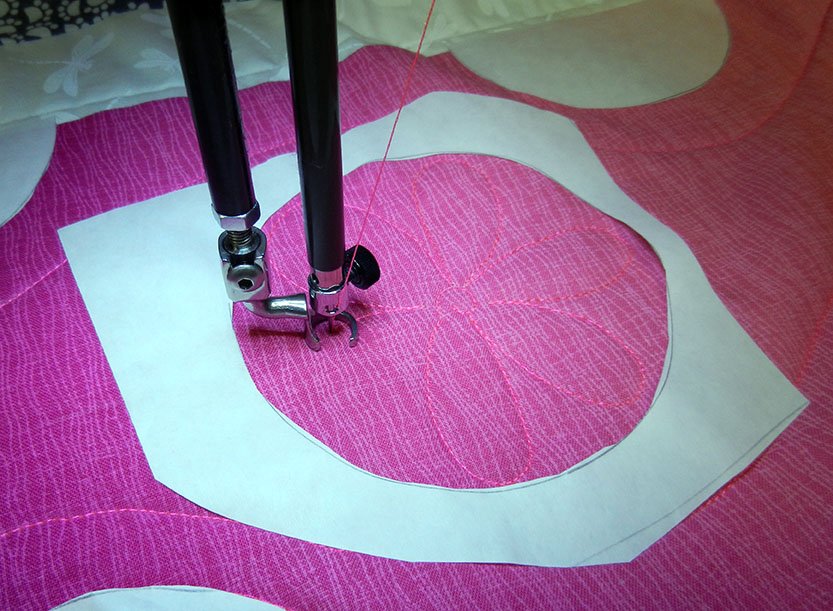
This design simply hollered for circles to be added. I cut a bunch out of freezer paper, keeping the circles and the holes they were cut from, and ironed them to the quilt top.

freezer paper templates

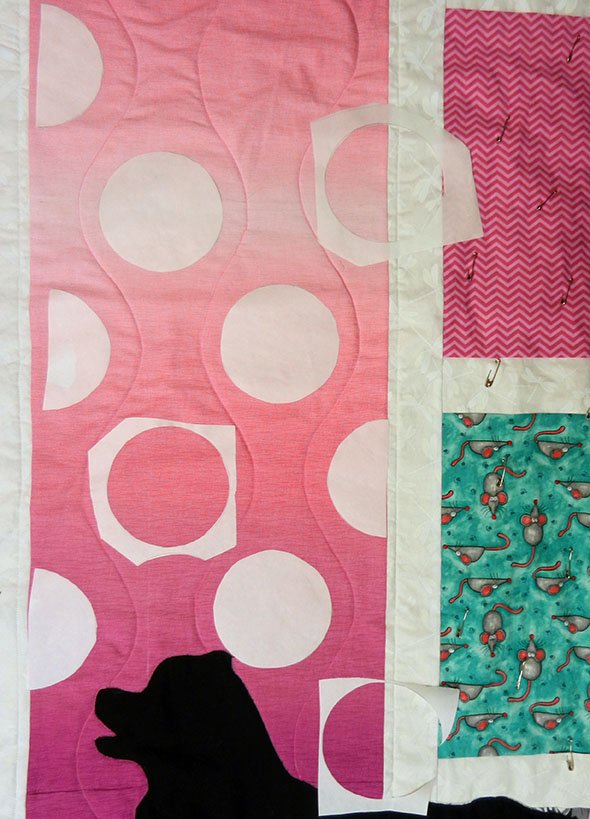
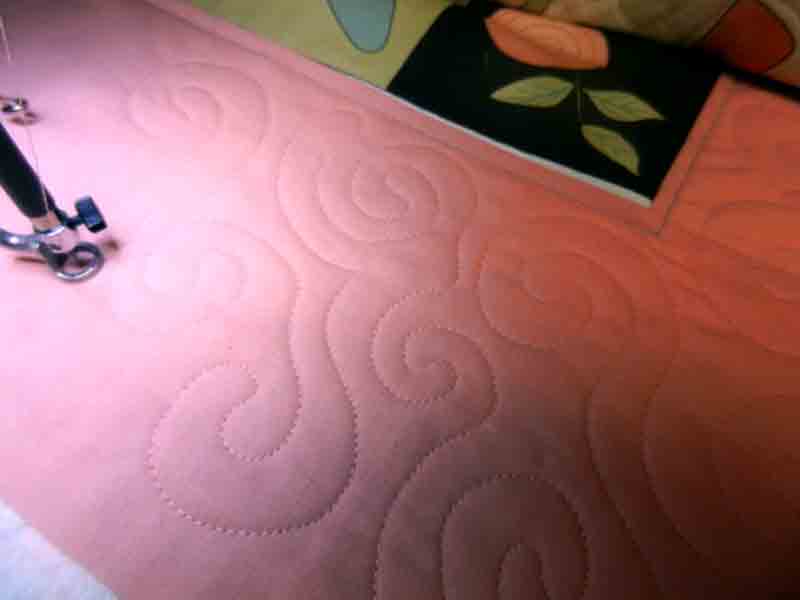
I free motion quilted around the outside of the paper circles, and filled the empty holes with posies.

quilted flowers fill the freezer paper holes

And here’s the quilted vertical band:

vertical quilting full

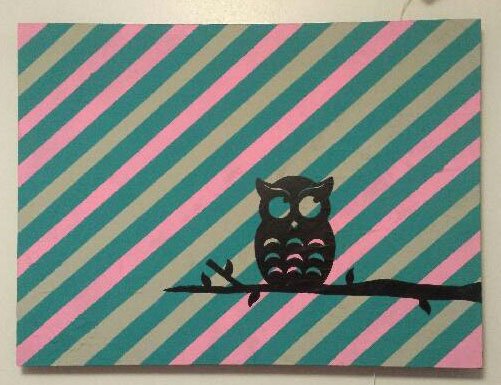
You may have noticed that I personalized the simple “modern quilt” pattern. The owl is from a canvas Sommer’s Mommy painted for her room.

Sommers owl

and her doggies, Nirshey and Mosely, just had to be a part of the fun!

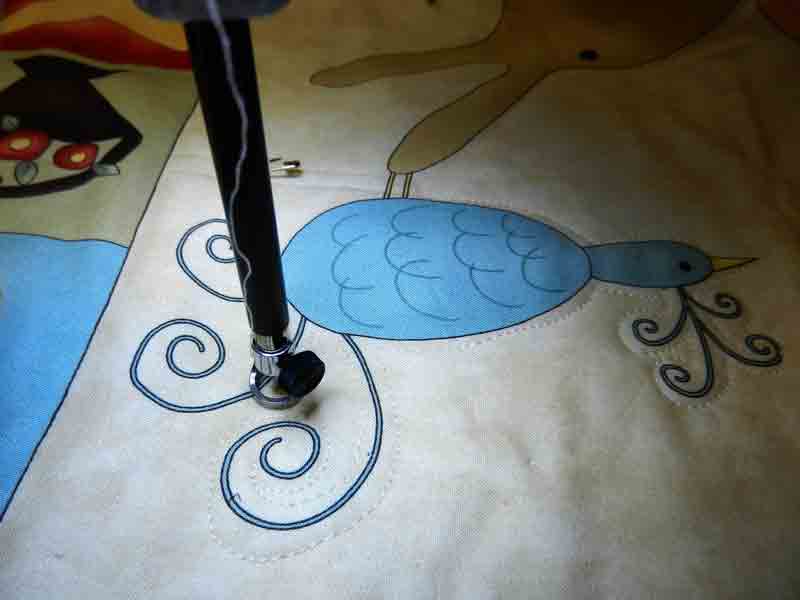
Next, I’m quilting around a variety of freezer paper circles and filling in around them with spiral designs. Stay tuned for a photo of the finished quilt.


Thread Portraits

June 22, 2014 1 Comment

This week I’d like to introduce you to a very talented fiber artist and dear friend. When Sandy Hendricks joined the Milwaukee Art Quilters a number of years ago, she brought with her a portfolio of some of her work, and we were blown away. She’d devised a free motion machine embroidery technique to do portraits in thread of residents in a senior living facility. Sandy was kind enough to allow me to photograph some of these works. Even though I took these pictures rather quickly, and with my phone, I think you will still be amazed at Sandy’s ability to capture the essence of these dear people.

thread portraits sandy 2 sandy 3 sandy 4 sandy 6

When my Mother-in-law passed away, I asked Sandy if I could hire her to do a thread portrait of Johanna and her response was “you should do it”. I remember that I chuckled and repeated my question. That time she said she would show me how. Well, life got busy and I didn’t bring it up again for over a year.

Sandy and her husband Jon have traveled to both Italy and the Baltic Sea with Wendy and me. Here’s a photo of them with Wendy having breakfast at our villa in Sienna.

Sandy, Jon and Wendy

While on this last cruise I brought up the subject again. Sandy said she was serious and she’d be happy to teach me how she does her portraits. So, last week I finally took her up on her generous offer!

I brought an 8″ x 10″ photo of my Mother-in-law to Sandy’s home

Mom V small

and we began by tracing some of the details of the picture onto tracing paper. Then she helped me pick out a variety of threads from her substantial collection and encouraged me to do a bit of practicing with the threads to decide which ones would work (after posting this picture I realized that the practice piece on the right looks like some sort of weird modern art).

sketch and practice

Sandy does her portraits on a product called Lutradur. It’s a stiff material that seemed to me to be a cross between paper and fabric, that comes in different weights. I did my practicing above on a medium weight sheet.

Lutrador

Next I traced Mom onto the Lutradur – and began stitching in the lines. Sandy’s advice was not to overdo, and my first attempt was a bit heavy handed. At that point I thanked her and headed to Ben Franklin in Oconomowoc for some Lutradur. I went home, began again, and I was fairly happy with the results this time.

Johanna in thread

I think the piece needs to have some areas shaded in more, but I don’t seem to have the right variety of flesh toned thread – at least thats my excuse!

God has truly blessed Sandy with a wonderful talent and she is very humble about it and so generous to share. Thanks Sandy, for a fun morning!

I’ll leave you with something Jon told me that just might make you smile. He came home while I was stitching and when I asked him where he’d been he said he was having breakfast with the Romeo’s. When I questioned him about it he responded that it stands for “real old men eating out”. Too funny!

One more thing I just need to share :-)!

When we had dinner at the quilt shop near Copenhagen, a Danish quilter named Kirsten, dined at our table with us. Here’s the picture from a previous post (Kirsten is in the center).

dinner shot1During our conversation she told us she was very excited because she was planning on attending the IQA Quilt Show in Rosemont near Chicago this month. This past Thursday Nancy (next to Wendy on the left) sent me this email:

“Hi Ladies, I just had to tell you the neat thing that happened today.  I was at Rosemont for the day.  I knew that Kirsten from the quilt shop in Denmark was going to be there, so I was watching for her–and I found her!  Had a nice chat with her, and then we found Kristi and Pam.  Since Pam drove down, they were able to have dinner tonight with Kirsten. Isn’t that great?  Just had to share.”

What a delightful continuation to our Sew We Go adventure, but it gets better! Saturday morning Kristi called everyone who had been at that table, to tell us that Kirsten was taking the bus from Chicago to Milwaukee. Kristi was going to pick her up and take her to Patched Works Quilt Shop and out for lunch. She invited us along. None of us was able to make it, but we were able to meet up with them a little later at Kristi’s home for a lovely time of conversation, snacks and eventually – pizza! (all except Lisa, who had to work 🙁 )

Kirsten

This was a special, and unexpected, treat for us all. Kirsten took the bus back to Chicago that night, and Monday morning she flies to LA to meet up with her 3 daughters. The plan is for them to rent a car,  and tour California, Utah, Colorado, Wyoming and South Dakota (I may have missed a few). We wish her safe travels and count ourselves very blessed to have had the chance to get to know this sweet quilter from Denmark, just a  little better :-)!


Free Motion Fun

March 30, 2014 Leave a Comment

I recently completed a challenge quilt I’d been working on since the beginning of the year and it was time to do something easy. Months ago I’d picked up a kit to make a charity kid’s quilt while at my quilt guild – Patched Lives. This is a very generous guild and I’m proud to be a part of it. Our wonderful charity quilt committee recently wrote in the newsletter that since they began working on the committee, the guild has donated 207 quilts! The fabric in the kits is donated, and the kit I picked up was especially cute. It contained a pre-printed panel, borders and backing. This proved to be the perfect simple project for my mood. I added the borders and safety pinned the layers together. As I began to think about the quilting, I thought it might be fun to share my process on the blog.

First, I like to do a bit of machine guided quilting to hold things together. Since I hate to stitch in the ditch, I chose to quilt 1/4″ from the seam using the walking foot and my “3 pin technique“. When quilting long straight lines it’s not uncommon to have the top layer shift a bit by the end of the line, resulting in puckers, even with a walking foot. To prevent this I sink the needle into the quilt at the beginning of the line, then place 3 straight pins, about 1 1/2” apart, in front of the needle.

walking foot quiltingI pull the pins out as I sew up to them, and when I reach the third pin, I re-pin once again. It may seem a bit tedious, but I get great results!

Next, it was time to free motion quilt. I moved to my Sweet 16 and positioned the quilt in my Quilt Float. When I was teaching Beyond Meandering at the FVTC Quilt Expo recently, I explained the quilt float to the students and told them I’d put a photo on the blog. Here it is:

free motion quilting made easy

If you’d like to know how to make your own (and it works great with a domestic machine too!), just click here.

I recently received a delightful email from Sheila about the Quilt Float. She gave me permission to share it here:

“A little late for starting to use a Christmas present.  A busy schedule and a knee replacement didn’t help me start using my Christmas gift from my husband.  I had shared with  him the description in one of your blogs showing a plan for hanging a quilt sandwich in a way that made the quilting easier to do on my “regular”  Viking machine (floating with the poles and clamps).  So he purchased the needed supplies for the project as my Christmas gift.  Was I ever surprised that he remembered my sharing your blog with him so long ago.
Today we set up the equipment and I started quilting a sandwich that I plan to give to his grand-nephew and bride at their June wedding.   I had a wonderful afternoon with the floating process.  The system made it so much easier to move the quilt sandwich through my machine.”

When I asked Sheila if I could quote her she said “I hope others enjoy the system like I do”.  Thanks so much Sheila, I’m really glad it’s worked so well for you!

As I had stated previously, the kit was made up of a panel, so how should I quilt it? Well, if I stitch on the lines of the design, I will need to stay on the lines – ugh! It would be much more fun to stitch 1/8″ away (or there abouts – notice how I used thread to match the background so it wasn’t obvious if my 1/8″ wasn’t consistant?).

free motion funIt was fun, and I had the center quilted in no time. Then I got to the plain, peach borders and, without much thought, decided to “spiral”. This is my “default”, because I love to “spiral”. I put in a matching thread and got the machine humming. After a while, Mike walked by and I stopped and said “have I thanked you recently for buying me this wonderful machine?” (that was a story from last year  called “Sweet 16” – click here to read about it :-))

He walked over, looked at my quilting and said: “how do you keep the spacing between your lines of stitching so even?”

free motion fun

I jumped up and gave him a big kiss! Sometimes he says just the right thing. And the answer is… practice! And aren’t charity quilts the perfect place to get that practicing done?

I have one more trick that came in handy on this quilt, but this has gone a bit long, so I think I’ll save it for next week. Stay tuned for a slick way to cut your bobbin thread from the top!

And just one more thing! I continue to be very busy traveling and teaching. I had the privilege of judging the Evergreen Quilters Show in Green Bay, WI this weekend. It’s a wonderful guild and the show was great. I’d like to share a picture of the Best of Show award winner, Toni Bergeon, and her quilt: “Reverie”. It was spectacular!

Green-Bay-winner

Wool Batt and Border Quilting

August 31, 2013 7 Comments

In our last episode :-):Brianne Scott

Brianne and Scott were married, the wedding quilt was given as a gift and they are now on their honeymoon (no word as to their response about the quilt).

I had written about a portion of my quilting journey on their quilt in last week’s blog and will now continue …

Once the center of the quilt was done, it was time to quilt the borders. The border fabric is quite busy and I was sure any design would end up being seen as mainly texture. I have found “writing” in borders to be a delightful and fun way to finish this process. So I put in a dark green thread and began by writing “Scott and Brianne Trevorrow” across the bottom border.

(here is where I have to apologize and add a “learn from my mistake” portion to the blog. While working with the pictures I took of the border quilting in Photoshop Elements, I neglected to save them while in progress and the program closed down unexpectedly. Photoshop doesn’t do regular saves – and I should have – and the pictures were lost :-(. Since I no longer have the quilt, I couldn’t just snap a few more pics, so I’m hoping your imagination will fill in the blanks)

Next, starting at the lower left corner of the side border. I quoted Matthew 19:5-6 up the left side, across the top, down the right side, and ended with their wedding date in the lower right hand corner of the side border. The words were rather inconspicuous, and it was easier to see them from the back of the quilt, but they are there and I’m hoping it will be a special surprise to them some time in the future.

Once the quilting was done it was time to bind. I did this in the same flannel I used on the back – in keeping with the snuggly theme. I attached the binding first by machine to the back of the quilt, then I folded the binding to the front and secured it on the front with a zig-zag stitch in a matching thread. I typically sew the binding to the front and then hand-stitch it to the back because I find the quilt edge lays best this way, but again, since the quilt was meant for cuddling, I went with this quick way and then attached the label (did I mention I finished attaching the  label the morning of the wedding???)

9-label


I made the label on the computer and printed it on a colorfast printer fabric. This was the first time I included washing instructions on a label, because I felt the wool batt required it.

Next was the scariest part of the adventure. Since the majority of my quilts are made to hang on a wall, I strive for smooth and flat results. I have used washable wool batts in some of my wallhangings for the faux trapunto effect – with very good results, but the difference is I never planned to wash those quilts. This time I’d marked the circles and hearts with a water soluble marker that needed to be removed, and I wanted to see how the “washable” wool batt would react to washing, so I threw it in the washer (front loader) and washed with cool water on a gentle cycle. Then it went into the dryer on very low heat. I had not washed the fabrics in the quilt top or back, because I knew the batt was going to do a bit of shrinking and puckering (even with the cool temperatures), but when I pulled it out of the dryer I noticed immediately that it did shrink up even more than I expected.

So, I took a breath, wrapped myself up in it, and it was VERY SNUGGLY! I then laid it across a chair and got used to the  new effect.

8-quilt-in-chair-

I like it! Different can be good! I would do it again! I feel this was a good experience and hope it was helpful for some of you.

I can’t wait to hear from the newlyweds … and you too! Do you have any wool batt stories to share?

Wedding Quilt

August 25, 2013 1 Comment

First of all, I must begin with a huge thank you to everyone who responded with opinions concerning the cover for my new book. I was blown away by the number of responses and grateful for all of the thoughtful comments. I did not take that decision lightly and feel good arguments were presented for both covers. That being said, I’m not telling which way I went yet :-)! “Where Do I Start With Fiber Art?” is now at the printers and should be ready for my classes at Expo in Madison next month. It will be available on my website shortly after that.

Now for this week’s topic. My August 11th post began with a picture of me basting a quilt in the driveway. I was making it for my niece’s wedding and Brianne and Scott were married this past Friday. They are a very sweet and special couple and their day was beautiful! It was such a blessing to celebrate this joy filled time with family and friends.

Brianne and Scott

Quilting and finishing their quilt was an adventure for me and I’d like to share some of the things I tried and the results. It was actually made for a class sample last semester and as soon as I got the top together and decided on a border (click here for that story :-)) I knew it was the one I wanted to finish for Brianne and Scott. The colors are bright and modern, and I could just picture them cuddled up under it.

When it came time to layer and quilt it, I chose to use a washable wool batt to make it extra snuggly and, while basting it in the frame, I had a thought: I’m always telling my students that quilting the quilt should be as much fun as making the top. So, how should I quilt it?

Sparingly was the answer. No tight and tiny filler designs this time! I didn’t want to flatten the nice poofy wool. I also didn’t want to drive myself crazy with a lot of marking and planning. This quilt wasn’t going to competition, it was meant to keep 2 people I love warm. Here’s what I did:

1. Gridded the quilt on the diagonals, through the dark squares, with a walking foot.

grid quilting

2. Prepared to make fast and fun feathered wreaths by marking a circle around an embroidery hoop,  straight pinning up to the circle and removing any safety pins that were in the way.

quilting simple feathered wreath

3. I began by free motion quilting the marked circle and then “feathering” around the outside. I’ve found feathers to be much easier since I took a class with Diane Gaudynski and she taught that a feather is half of a heart. I doodled loads of hearts when I was a young girl, so I had the shape down. She also showed us how it was easier to “draw” a half heart from the indent at the top, around to the point at the bottom. Here is my first “outside the circle” feather. I’ve come back up from the point and am at the top of the bump which will be the second feather.

quilt simple feathers4. As you can see – my feathers are big. Once I made all of the feathers around the outside, I stitched a second circle inside the first to create a “spine” and then I feathered the inside.

quilt simple feathers

5. They were a joy to make and the wreath was done so quickly I couldn’t wait to start the next one. Here’s a view of a wreath from the top:

quilt simple feathers

and from the back:

5-gridding-and-feathers-back

Notice how the feathers are not consistent in size or shape and yet they look good when all were done? Don’t agonize over each little stitch – revel in the finished effect!

quilting a large quilt

I did the free motion quilting on my HQ Sweet 16 and I used my “Quilt Float” system to lift the quilt and keep the weight of it from dragging me down. Quilts can be floated with a domestic machine also. For info on the “Quilt Float” from 2 previous posts, click here and then here :-).

heart

When all the wreaths were made it was time to fill in the open areas. I did this with free motion hearts.

The adventure didn’t stop there, but the post is getting a bit long. Next week I’ll share my thoughts on border quilting and working with a wool batt.

Oh – just one more thing. I’ll be presenting a program at the library in McHenry, IL in September and I wanted to share their flyer in case you can make it!

Screen Shot 2013-08-24 at 8.59.56 AM


Feel Good Quilting

November 25, 2012 5 Comments

It’s Tuesday and I’m adding a short extra bit of information before you read about Feel Good Quilting. I have the great honor to be this month’s Featured Quilter on the National Quilting Association website. The NQA is a wonderful quilting organization. They put on a great quilt show each year and do much charitable and educational work in the quilt world. Please go to: http://nqaquilts.org/ to read all about it, then return here for the rest of the post :-)!

So now for “Feel Good Quilting”

Last summer I was very excited about purchasing my new HQ Sweet Sixteen mid-arm machine. I’ve since found that watching an infant 5 days a week really decreases time for quilting. This weekend I decided I just needed to make time …. and I did! Prior to our trip to Italy Wendy and I held a class for making a “Tuscan Sun” block and everyone was given instructions for autograph blocks to be exchanged on the trip. Well, I bordered my sun with the blocks, pinned the layers together and was ready to go. I really was in the mood for free motion fun, so I looked at the top and asked myself “what do I feel like stitching today?”

My first urge was to stitch some feathers, which I chose to place in the rays of the sun.

Then I was in the mood to “bubble” the sun’s interior.

So now how to quilt the background behind the sun? Add more rays! I took a ruler and a sliver of soap (my favorite marking tool) and I drew lines on the background that radiated from the center of the sun and then I used those lines as a guide to keep the rays shining. It was even more of a good time than I imagined it would be and because I was enjoying the process it was done almost too soon.

For the first border I decided to play with a design I hadn’t tried before. Laura Wasilowski refers to it as ME ME quilting (because it sort of looks like M’s and E’s) and it was a blast! Once again I marked some boundaries with the soap and I was off and running.

The MEME’s went through the center of the inside border, so what to do around it? I decided straight lines in yellow would work (remember I don’t need a good reason, it’s all about what feels like fun at the moment :-)). Now my Babylok with a  walking foot does a much better job of straight lines then I do in free motion, so I changed the feet and jumped in using my “3 pin technique” to prevent puckers. I’ve covered this in a past post. Click here to read about it.

All that’s left now is the outer border. How would you quilt it?

I’m not sure what I’ll do and the Packer game is about to begin, so this post will remain a cliff hanger until next week. Go Pack Go!!!


Sweet 16

May 27, 2012 9 Comments

I’d like to share a short story about my dear husband, Mike. We met in High School and were dating when I was “sweet 16”.

This past Tuesday we celebrated our 36th anniversary! The time has flown by.

Well, a few months back Mike came home from work rather excited because he had received a bonus for the first time in 4 years (the economy and a brief trial run at retirement were the reasons). The next thing he said was “what do you want to buy?” – What a nice guy!!!

I thought for a moment and actually responded that I really had everything I needed and he came back with “don’t you want one of those long-arm things?” – That took me by surprise. After a few seconds of contemplating this I explained to him that the bonus was not big enough and he’d have to empty all his stuff out of the barn so I’d have room for it. That took him by surprise and he replied that that was not an option. Then he asked if there was something somewhere in between…and I immediately thought about a mid-arm. My concern was where to put it and he said if I could figure that out – I should get one. It didn’t take me long to decide the “where” part and I made plans to test drive all the mid-arms I could find at the quilt show in Paducah.

The Quilting Connection is a shop not far from me in Elkhorn, WI that carries long and mid-arm machines. I usually try to buy local, so I visited them prior to my Paducah trip and did a test drive. I was very pleased to realize that, after looking over the competition in Paducah, the Handi Quilter Sweet 16 from the shop in Elkhorn was the one for me. It was delivered on our anniversary and I quilted a small quilt on it by the time I went to bed that night. What a joy and a blessing!

I’ve positioned the new machine just to the left of my regular sewing machine so I just have to swivel my chair to use it.

I’m very pleased with the way the head is situated, the bright lights and the stitch quality.

It is easy to set up and easy to use and I’m hoping my quilting will really improve :-).

I’m especially pleased that I could buy locally. Not only does it help the economy, but I have a technician nearby and that is worth a lot!

Do you quilt on a home sewing machine or do you have something bigger? If you have a quilting machine, would you recommend it to others? What do you love about it? Any complaints?

PS I guess I now have to admit to owning 8 machines. This was a topic of discussion in my July 31st post entitled “Howe Many Machines do You Own?”. It was inspired by the purchase of an 1867 Elias Howe sewing machine. To read all about it go to: http://clkquilt.wordpress.com/category/vintage-quilts/ and scroll down.

Quilt Floating 2

April 1, 2012 5 Comments

Last week’s post explained what quilt floating is and the supplies required. This week’s post is about putting it all together so quilting the quilt can be as much fun as making the top! (for those who missed last week’s post, just scroll down to read all about it)

There are 2 different ways to construct the frame, depending upon your machine/table set up. Both are described here.

Side Mount: If your table/cabinet is less than 6’ wide and more than 1½’ deep you’ll want to place the clamps on the sides. To do this clamp the Slide Clamps to the table/cabinet on each side about 1½’ behind the sewing machine.

Attach the aluminum slat to the holes in the clamps with bolts and wing nuts.

***

Back Mount: If your table/cabinet is more than 60” wide and less than 2 feet deep, you’ll want to place the clamps along the back. To do this clamp the Slide Clamps to the table/cabinet along the back – about   3 1/2’ apart.

Then slide the metal rod through the holes in the clamps (this is shown 2 pictures down).

Attach one chain to each Spring Clamp by opening an end link, inserting it through the hole in the clamp and closing the link.

Place the end of one chain over the top bar and Bull Nose clip the chain to itself so the Spring Clamp is at a good height (this can be easily adjusted depending on the size of the project). Repeat for the other chain/clamp.

Place the quilt under the sewing machine needle in the area you want to begin quilting.  Be sure that you have the bulk of the quilt behind the machine.

Grab a bunch of the quilt even with the right side of the machine and about 3’ back on the quilt, raise it up and grab it with the right clamp.

Repeat behind the left side of the machine with the left clamp and you’re ready to begin quilting. As you progress across your quilt simply unclamp and reclamp as seems necessary.

I hope many of you will find this helpful and will let me know how it works for you. Please feel free to share this information and/or forward my blog to your quilting friends!

  • « Go to Previous Page
  • Page 1
  • Page 2
  • Page 3
  • Go to Next Page »

Primary Sidebar

Archives

Recent Posts

  • London ~ and More
  • Designed For a Purpose
  • Squirrel Quilts and More
  • Vintage Appliquéd Arrows and More
  • Fascinating Tidbits

Recent Comments

  • Karen Ann Moore on London ~ and More
  • Cheryl McLean on London ~ and More
  • Sue Halpern on London ~ and More
  • judy raddatz on London ~ and More
  • Joanne Corrigan on London ~ and More

Categories

Footer

My Guide

Whatever you do, do your work heartily, as for the Lord rather than for men.

—  Colossians 3:23

Contact Chris!

  • Home
  • About
  • Gallery
  • Classes
  • Trips
  • Books
  • Blog
  • Contact
  • Sign Up For My Blog

Copyright © 2026 · Chris Quilts · Website by Adunate · Privacy Policy