• Skip to main content
  • Skip to primary sidebar
  • Skip to footer

  • Home
  • About
  • Gallery
  • Classes
  • Trips
  • Books
  • Blog
  • Contact
  • Sign Up For My Blog

Blog

Quilt Problem Solving

February 24, 2019 12 Comments

Last Fall I was contacted by Renee. She lives in the Milwaukee area and she had a quilting problem. She’d begun an adventurous project, sewn quite a few portions together and then had to stop to have knee surgery. When she went back to it – it was a mass of pieces and she couldn’t make heads nor tails of it.

She invited me to come and see what we could do with her jumbled pile of pieced wedges. When I arrived I began by reading over the pattern. This only confused me more and I felt a little overwhelmed as to what to do next. Then I started looking at the wedges and realized they were numbered, and marked left and right! I told Renee how great it was that she had done this and then I said “let’s lay out what you have so we can figure out what you have left to do”.

With the first layout it was evident she had already done a large portion of the piecing. Whew!

We just needed to figure out which pieces were missing. A sense of relief filled the kitchen (from both of us :-)). We discovered there were 2 more shorter wing portions missing at the top, but we decided they weren’t essential and she could substitute 2  purple background wedges.

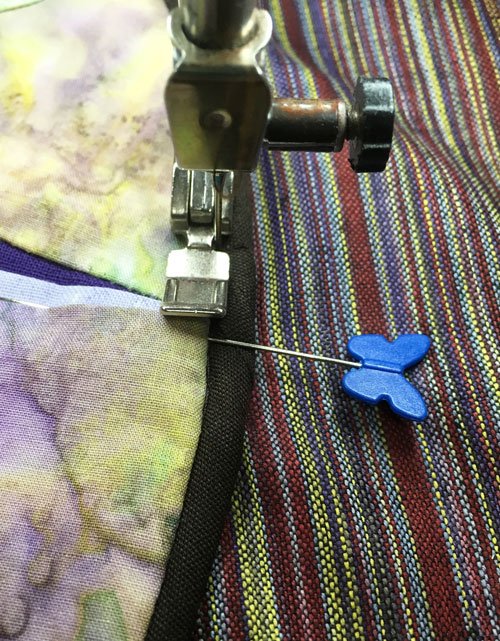
The tail portion was missing from the labeled pieces, but portions of it had already been made. Renee was short a few of the “chunks” the pattern called for, so we set up her machine and patched together what was needed from her leftovers. Even though placement of the gradation was not exactly the same as the original pattern, she had enough to get ‘er done .

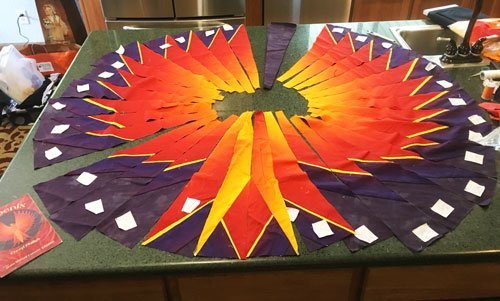
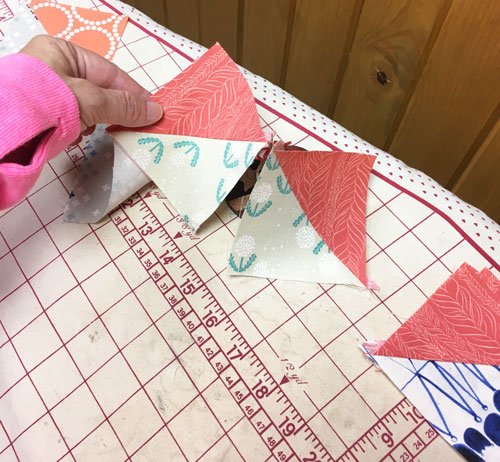
At this point she felt confident she could piece it together, so we had a lovely lunch and I went on my way. She continued to work on it and got the wedges sewn together:

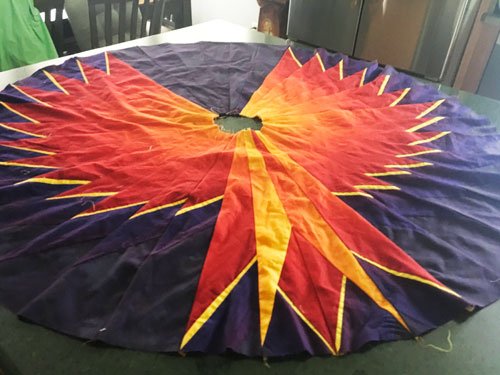
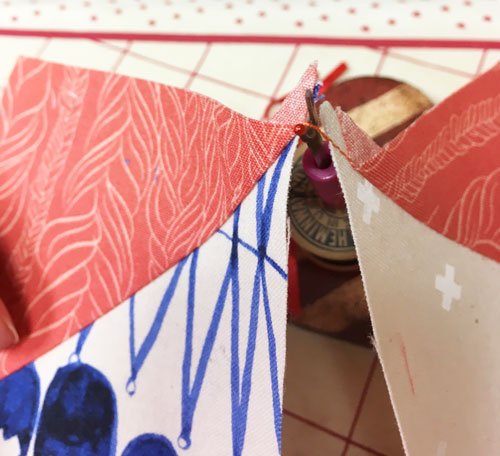
next she appliquéd the body:

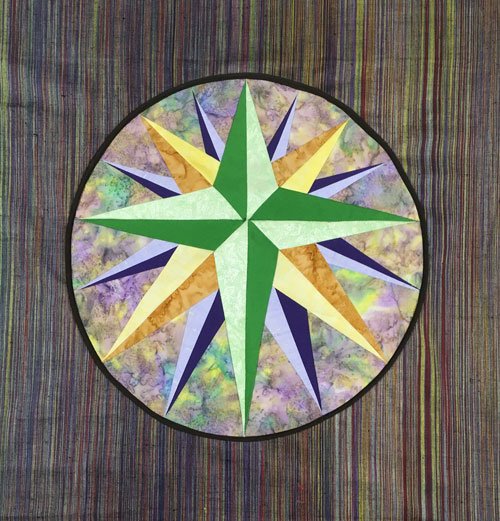
and her Phoenix was ready for the quilter!

I waited a few months to share this post because I wanted to end it with a photograph of Matt and his quilt. Here’s Matt and Grandma Renee after he  got his Phoenix at Christmas. 

She said he was one very happy young man, and added:

“Actually we all thought it looked perfect on our fireplace, so guess what?  I’ll be making another one soon!”

Atta Girl Renee! I’m sure you won’t have any problems with the second one now that you’ve figured it out!

So my advice to anyone who is trying to get back into a previously started project – lay out what you have done before you do anything else.

Half Square Triangle Tricks – Trimming

October 14, 2018 5 Comments

Just a quick warning concerning last week’s post. May wrote to say that the “ripper perch” looked a bit dangerous. We should always be careful with any of our tools, but I wanted to assure you that I keep the ripper’s cover on it when not in use.

As I mentioned last week (click here for that post), the center of the quilt that I’m working on contains 336 – 3″ finished half square triangle blocks (there will be more needed for the border). They’re pressed and cut apart and now it’s time to trim.

I find the most time consuming part of trimming is aligning the ruler for every cut. That prompted me to get a Bloc Loc™ ruler – and I’m very happy with it.

This ruler has a groove on the bottom for the seam allowance to nest in.

This means the seams must be pressed to the side. To begin I lined up the Bloc Loc™ groove on the seam, and centered it on the block (I’m trimming my blocks to 3 ½”).

I rotary cut the top and right sides:

Next comes the tricky part. The ruler and block need to be rotated to trim the other sides. I began with a “lazy susan” style cutting mat, but it was awkward and didn’t turn easily. Then I decided to try one of the mini cutting mats in my collection. I found this one spun quickly on my table. It worked great! So here it is rotated:

I simply slid the ruler down the seam allowance to the correct measurements:

and rotary cut the remaining two sides:

The best way to get great points when making half square triangle blocks is to be sure the diagonal seam drops off the block at the exact corners. The groove on this ruler guarantees it!

It’s amazing how long it takes to trim that many blocks, but I am really pleased with how accurate they all are:

After my last post Nancy commented that she likes using the Clearly Perfect Slotted Trimmers™ for squaring up her half square triangles. I’ve watched a You Tube video on them and I think I may need to give them a try – to compare them with the Bloc Loc™. Stay tuned.

Half Square Triangle Tricks – Pressing and Cutting

October 7, 2018 6 Comments

My neighbor Di is a dear friend, great walking partner, and talented website designer. She has her own business: Adunate Word and Design, and she designed both my website and my blog. A while back she mentioned that both of these items were a bit ancient and they might begin to malfunction if I didn’t do a bit of updating. My response: “may I hire you?”

Figuring out the nitty gritty of how things work on the internet gives me the heebie jeebies. Her response made me smile. She asked me if I remembered her talking about the quilt she started for her daughter’s wedding – 4 years ago. Well, the fabric was in a bag, and much of it was cut into little pieces. I now have the bag and she’s in the process of updating my web presence  😀 !

I was sure I had the better end of that deal until I looked at the pattern for the king sized quilt:

and realized she had already cut out all the light triangles and 2″ squares. There was no opportunity to strip piece the 4-patches or the half square triangles! Yikes! Did I say KING SIZE?!?

I decided it was still a good deal – and began cutting all the dark triangles. I’m not sure I’ve ever done a quilt with this many small pieces, but I’m up for the challenge. I chain pieced all 336 half square triangles for the center of the quilt. When making half square triangles, the amount added for seam allowance is 7/8″ (½” for the square and an additional 3/8″ for the diagonal seam). In a perfect world, cutting at this measurement, sewing a perfect ¼” seam allowance, and pressing accurately, should yield accurate blocks that don’t need to be squared up. But only God is perfect. In my case I prefer to cut everything a bit larger than needed and do that trimming thing. So I added 1″ for seam allowance and stitched with a scant ¼” seam allowance.

I have two great gizmos to help with this project: a Tailor’s Clapper I purchased at the Madison Quilt Expo this year, and a Ripper Perch (I made that name up because I don’t know what it’s really called  🙂 ):

I left the half square triangle blocks chained together to make laying them out easier, and placed the first 9 on my ironing board. I pressed them, with the dark triangles on top, to set the seam (this will give you a crisper press):

Next I finger pressed the first one open and set the iron on it:

I then finger pressed the next one, set the iron on it and laid the “Tailor’s Clapper” on the previous square. It holds in the heat to give a great press:

I moved down the line in this way until I had all the blocks on the board pressed.

Now to cut them apart. I was given a very useful tool by my friend Judy a few years ago.

It’s a seam ripper set in a spool that velcros™ to a heart shaped base:

You simply pick up a pair of squares and pop the threads between them onto the ripper:

Voila – the thread cuts quickly and cleanly, then you move down the line.

Once the pressed triangles were stacked I could repeat the process for the remaining 327 half square triangle blocks!

Next week I’ll share my favorite tip for squaring up blocks!

**************************

And one more thing…

Next Saturday I’ll be the featured speaker at the Festival of Quilts in Spring Grove, Minnesota!


If you’re in the area – I’d love to have you join me for my Gradation Play lecture.

Piped Circles Made Simple

September 2, 2018 3 Comments

A few years ago I put together a lecture entitled “Going Round and Round”. In it I shared many ways to add circles and curves to quilts. One of the methods used a flange, piping, or rick-rack, to attach curved edges to a background by machine. I knew it would work for circles too, but hadn’t done it. Since then, when I teach my Mariner’s Compass class, I tell the students the compasses can be attached using piping, and this would be a blog topic soon. The time has come! And this will work for any circle – not just compasses  🙂 .

Here is a compass made by my friend Ida Porzky. She made me a number of different shaped compasses to use as samples when I wrote Compass Capers.

For this tutorial I’m using pre-packaged corded piping, but homemade would work just as well.

Whatever piping you use, measure the distance from the long raw edge of the piping to the stitches holding the cording in place. It should be about ¼”. Trim the seam allowance around the circle to this measurement:

On the right side of the circle, place the piping along the curved outer edge, with all raw edges even. Using a cording foot or a zipper foot on your machine, stitch on top of the stitches on the piping, all the way around, leaving about a 3″ space to connect the tails:

To connect the ends of the piping, remove an inch or two of the piping stitches to expose the cording. Overlap the cording ends:

Cut through both, and butt them together:

Pull the piping fabric back over the cording, trim the excess, turn under a ¼” hem on the outer piece, and wrap the fabric back around the cording. Pin in place:

Sew the remainder of the piping to the circle. Fold the raw edges to the back, rolling the corded portion to the outer edge (I drew the stitches in in white so you could see them):

Place the piped circle on the background fabric, with the cording around the outer edge. Pin in place:

Stitch in the ditch all the way around, in a color thread to match the piping fabric.

And you’re done!

No hand sewing and everyone will wonder how you got that skinny bit of piping in there so perfectly  😀 ! Please give it a try and let me know what you think!

Thank you Ida for making your wonderful compass. I hope you like the background fabric I chose.

And by the way, I’ve added my Circle lecture to my list of offerings on my website: https://www.chrisquilts.net/classes/. If your guild is looking for a speaker, I’d be thrilled to make a visit! And, if you’d like to learn to make an off-center mariner’s compass, you can purchase my book at: https://www.chrisquilts.net/books/.


Stripped pinwheel Topper

January 21, 2018 10 Comments

Last semester I taught a pinwheel table topper class at WCTC.

It was the first time I’d taught this class and I’m always a bit anxious about timing, and the possibility of handout errors. It can be hard to gauge how much students can accomplish in the time allotted. I had them cut their fabric strips ahead of time, and there were no problems with the handout, but I really underestimated how long it would take to sew all the strips together. After lunch everyone still had more strip sewing to do and I was getting nervous.

As some of the students finally began to reach the triangle cutting stage it became obvious that the triangle cutting and sewing was actually fun and it was great to see how the fabrics were coming together. But half the class was still sewing away on their strips and I could sympathize with their frustration. Well… by the end of class Carmen had her top done.

A few more were close to done, but – praise the Lord – everyone had at least 1/4 of the topper cut out and sewn or pinned together. I felt sure they all knew what they needed to get them finished. On the way home I still felt uneasy about the class – I always want it to be a good experience for everyone.

That night I received an email from an address I didn’t recognize that began: “It’s all your fault!!!”. I gulped, but I knew it was not spam because the rest of the message (readable prior to opening) said “I came home and the one we made in class”. That’s all I could see, but I felt I had to read the rest of the email and when I opened it this was the entire statement:

“I came home and the one we made in  class was too large for our table so I shrunk it. Thanks for the technique. Deb”

She made a second, smaller one that same day! And here’s the picture  🙂 :

Wow! What an overachiever. I responded with how impressed I was, and congratulations. When I asked Deb how she did it and if I could include it in my blog she wrote: “Sure. I cut 3-1″ strips. I’m a goof ball who went home and made more. ? Turned out!!  Thanks again!”

This made my evening. I then wrote to the other students and asked them to send me pictures if/when they got their tops done. Here’s what I received back!

Alice

Mary

Jacque

Mary Ann

Jean

Jane

Barb

Great job ladies. I’m so impressed with the results! They’re all lovely and it’s fun to see them in so many different colorways.

Go Team!

September 17, 2017 1 Comment

Even if you’re not a Packers fan, I’m sure you’ll get a smile out of the following story. Marilyn brought this wonderful t-shirt quilt to show and tell in my Open Lab last semester.It was beautifully made, but I decided to save this post until football season began, to make it more timely. The time has come and I’m pleased to share it. I asked Marilyn to write something about her quilt for the blog and here’s what she sent me:

“For My Husband? Absolutely Not!
My Lambeau Leap Quilt is only for those who love green and gold – that excludes my husband. However, my daughters, my granddaughters and a few of my sisters are big Packer fans and come to watch the game and snuggle under the quilt for good luck. This is dedicated to them. All of them had a hand in it. We all collected Packer t-shirts from our local Goodwill, which in turn helped others. So this is definitely a feel good blanket that gives us a warm feeling literally and figuratively.”

Marilyn did a wonderful job! When she showed it in class she told us all about collecting the t-shirts. Then I made the mistake of asking if she made it for her husband. She responded with the quilt’s title: “For My Husband? Absolutely Not! Followed by “he’s a Cowboys fan”! We all laughed at that one :-).

Have you made a fun quilt for your favorite team? Please send me a picture – I’d love to see it!

Looks like it’s going to be a good season. Go Pack!


Seminole Piecing – Part 3

August 27, 2017 7 Comments

Last week I shared a picture of 3 Seminole Indian dolls Tomi Fay Forbes brought to my Seminole workshop.

Just look at the lovely piecing in the skirts!

I asked Tomi to please share their story and she replied that she would do some research and send me what she found. Her research began: “When I was a little girl in the early 1960s my grandmother bought me three Seminole Indian dolls, each one outfitted in the dress of the Seminole Indians.” (pictured above)

Tomi continued with a 7 page research article, including sources, and it is well written and fascinating (if you would be interested in reading Tomi’s essay, please let me know and I’ll send it to you via email – I’m unable to post it in the blog). She tells of the history of the Seminole Indians and how the women began making patchwork and dolls, which they would trade for other goods. Here is an excerpt telling about the dolls:

“Foraging in the forests, the women collected palmetto fronds. The Seminole women were familiar with the traits of palmetto because they used palmetto and cypress to build their homes, called chickees. One palmetto plant provided enough material for about five dolls. The Seminole woman shaped the palmetto into a doll’s body, stuffing the body with more palmetto. She cut a round of cardboard and inserted it at the base of the body to give the doll a sturdy footing so it would not tip over. She then sewed a rough seam in the palmetto to retain the stuffing. She shaped the head and used thread to embroider eyes.

One would assume that the protruding ridge on the top of the doll’s head, covered with black cloth, represents a hat. It looks very much like a bonnet one would expect to see on an Amish doll. Not so. In the nineteenth century, the Seminole women pulled their hair back into a simple bun. With the acquisition of hair nets and hair pins from the traders, the buns grew in size and complexity. By the 1920s the Seminole women were combing their hair forward over their face, placing a roll of soft cloth across their hairline over their forehead, and combing their hair smoothly over the roll.

During the next two decades, the women competed as they developed complex hairdos held in place over rolls of fabric or hair boards.


Seminole doll-makers reflected their hair traditions by placing a piece of shaped cardboard over the crown of the doll’s head and covering it with black cloth. Today many Seminole dolls have braids rather than the black fabric head covering.

The Seminole woman then dressed the doll in the traditional cape and skirt. The clothing of the smaller six-inch dolls are decorated with rows of colorful rickrack. The larger 9.5 inch dolls will often have a tiny, intricate pieced pattern inserted in the skirt. Hence the name Seminole patchwork.

Finally, the seamstress gave the doll beaded earrings and tied rows of beads around its neck. Historically, the Seminole women proudly wore as many necklaces of genuine glass beads as they owned. A stack of multiple necklaces could fill the entire neck. Today we would find these necklaces heavy and cumbersome to wear. We would wonder if the women’s necks ached all the time.”

Tomi then included information about her grandfather and his history living in that portion of Florida. I am so grateful to have “the whole story”, but the icing on the cake was that Tomi told me of a doll available on Ebay! I wasted no time in making her my own!

Thank you so much Tomi!

I will be teaching this workshop at the Madison Quilt Expo next month – and the class is full!  If you’d like to learn how to do Seminole style piecing, and if you think my class on Seminole Piecing would be of interest to your quilt guild, please share my website, https://www.chrisquilts.net/classes/ with the program committee at your guild. Thanks!

Seminole Piecing – Part 2

August 20, 2017 4 Comments

Two weeks ago I introduced one of my latest quilting fascinations – Seminole piecing. This week I’d like to share pictures from the class I taught on this technique at the Wisconsin Museum of Quilts and Fiber Arts  in June. I made kits for the students, so they could focus on the piecing techniques. They did a great job and everyone went home with samples of 5 different border patterns to refer back to when they’re ready to add some extra excitement to their quilts.

I will be teaching this workshop at the Madison Quilt Expo in September – kits and all, and I’m hoping it will be a hit! If you’d like to sign up go to:  https://store.wiquiltexpo.com/collections/sit-sews.

I will also be teaching half day workshops on a class I call “Where Do I Start With Fiber Art” (formerly “Parallelisms”). It is based on my book of the same name. To register for that class please go to:  https://store.wiquiltexpo.com/collections/hands-on-workshops.


A few days after the Seminole class in Cedarburg, Beth sent me this picture of the project she bordered with the Seminole braid pattern she’d learned in the workshop:

She used a striped fabric in the braid and I think it’s spectacular. Beth said that each length of striped fabric only made 8 units so the braid changed looks every so often. I can’t wait to try striped fabric in my Seminole borders. Thanks Beth!

Tomi was in the class too and she brought along a trio of Seminole dolls she was given by her grandfather.

She had some fascinating information about these dolls. Next week I’ll share their story and how I acquired my own Seminole doll!

Have you used Seminole piecing in your quilts? Do you have any pictures you’d like to share? Please email them to me at .

  • « Go to Previous Page
  • Page 1
  • Page 2
  • Page 3
  • Page 4
  • Page 5
  • Go to Next Page »

Primary Sidebar

Archives

Recent Posts

  • London ~ and More
  • Designed For a Purpose
  • Squirrel Quilts and More
  • Vintage Appliquéd Arrows and More
  • Fascinating Tidbits

Recent Comments

  • Karen Ann Moore on London ~ and More
  • Cheryl McLean on London ~ and More
  • Sue Halpern on London ~ and More
  • judy raddatz on London ~ and More
  • Joanne Corrigan on London ~ and More

Categories

Footer

My Guide

Whatever you do, do your work heartily, as for the Lord rather than for men.

—  Colossians 3:23

Contact Chris!

  • Home
  • About
  • Gallery
  • Classes
  • Trips
  • Books
  • Blog
  • Contact
  • Sign Up For My Blog

Copyright © 2026 · Chris Quilts · Website by Adunate · Privacy Policy