• Skip to main content
  • Skip to primary sidebar
  • Skip to footer

  • Home
  • About
  • Gallery
  • Classes
  • Trips
  • Books
  • Blog
  • Contact
  • Sign Up For My Blog

Blog

Merry Christmas 2013!

December 22, 2013 5 Comments

Christmas joy

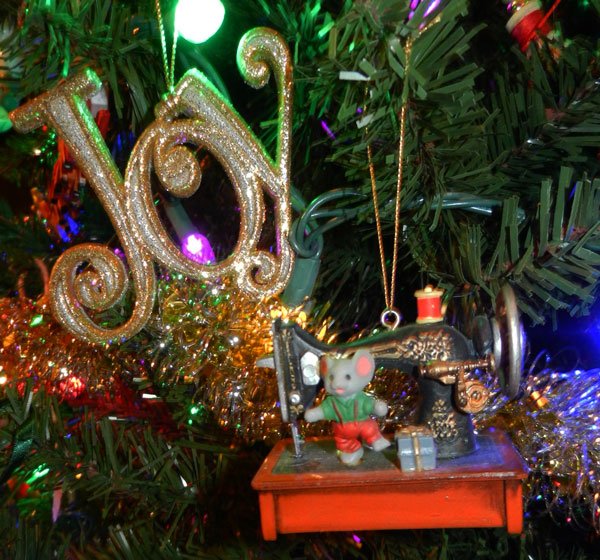
Recently I’ve been contemplating how wonderful it is to be able to end each year with the “joy” that is Christmas! No matter what is going on in our lives, we can focus on the birth of our Savior and what He did for us.

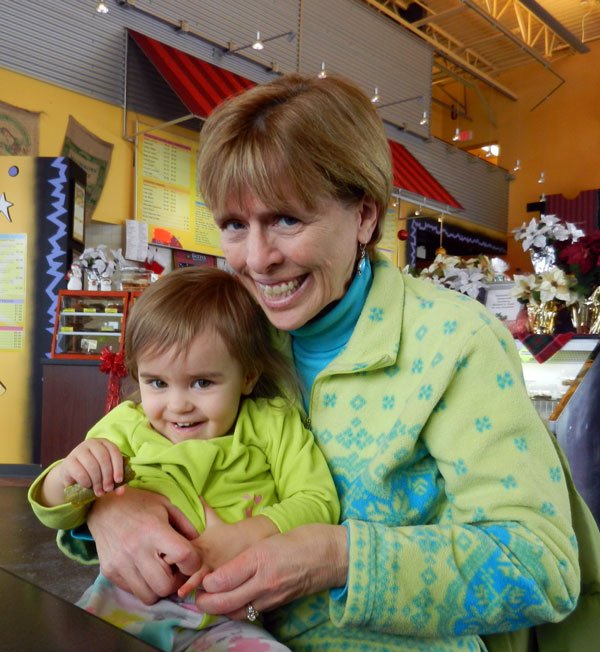
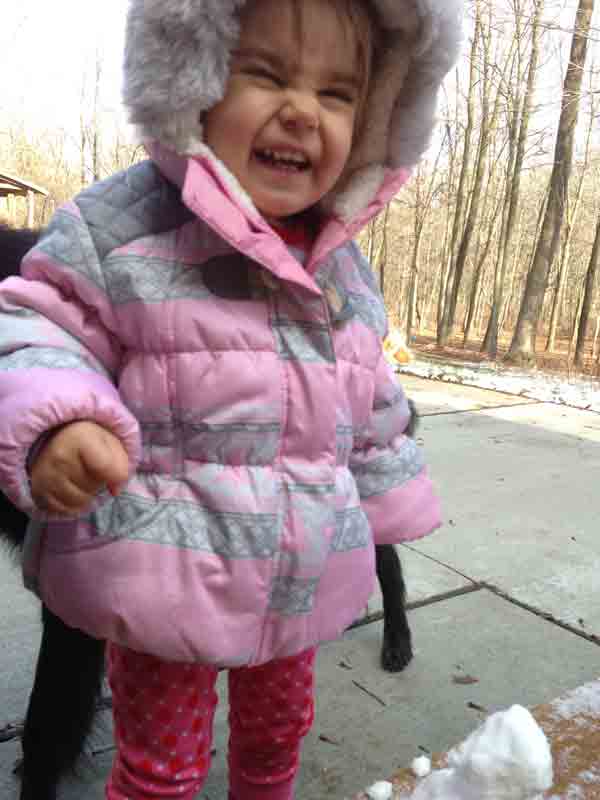
Then I began thinking about the little blessings I’ve enjoyed this Christmas season already. When we had our first snow, Sommer and I tried to build a snowman. There wasn’t much snow and she didn’t want to wear her mittens or touch the unusual white stuff, but once I had put the little snowman head on the body, she couldn’t resist picking it up! I call this picture: “Grandma, snow is cold!”

snow is cold
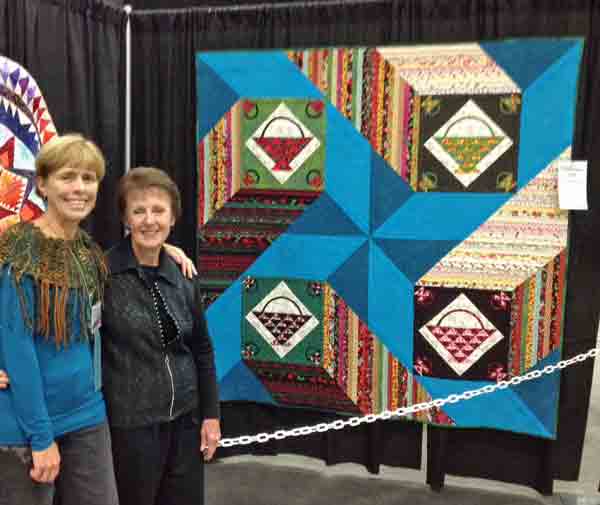
This past week my friend Sharon and I kept our 10 year tradition alive and “rang and sang” for the Salvation Army. It is one of my favorite Christmas activities. The ringing is fun, but the singing makes it pure joy (even if we’re not always on key). This article was in the Watertown paper last year .

Christmas-2013

Sharon and I looked pretty much the same this year, so I thought our silliness in this picture might bring a smile to your face. I recently read a blog post entitled: “10 Things Salvation Army Bell Ringers Want You to Know”. Please click on the title to read it – I’m sure you’ll find it interesting.

Another favorite tradition of mine is baking cookies with my mom. We’ve done it together every year since I was old enough to help. The men hang out in the living room and offer to be the taste testers. Over the years the kids have actively helped when they were around. This year Mike was out of town, but Dad, Mom, Brad and Sommer all were here. Here’s my mom making Spritz cookies (a family tradition) with the “new” old cookie press I found on eBay to replace my grandmother’s (which broke), along with Dad, who’s taking the taste testing part seriously.

cookie-deco1

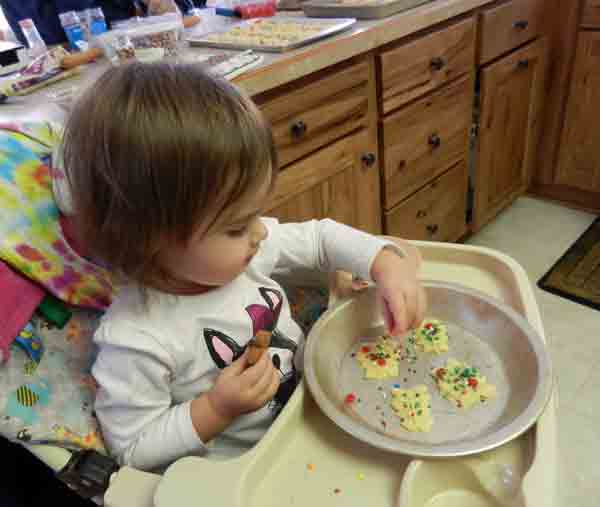
And this one is of Sommer doing a bit of decorating. She got more on the tray than the cookies, until daddy tossed a candy decoration in his mouth. Then she got most in her tummy!

cookie-deco2

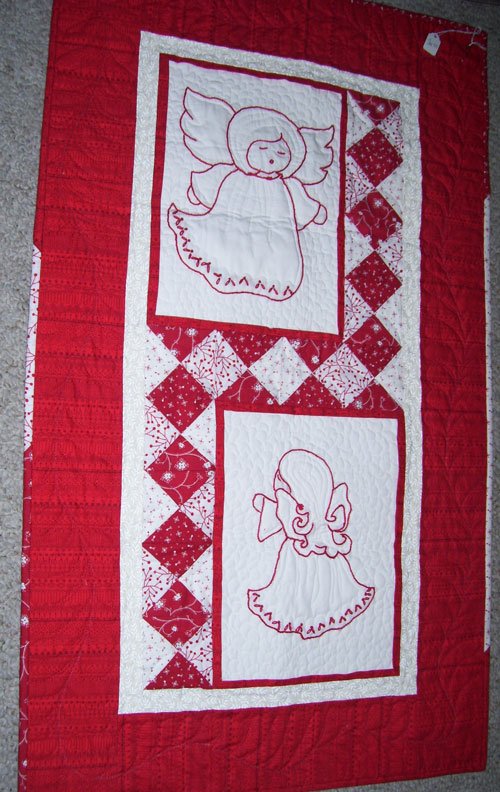
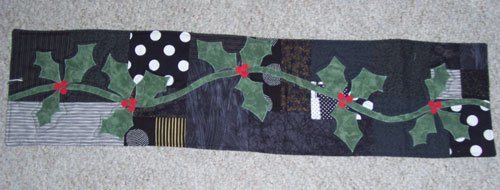
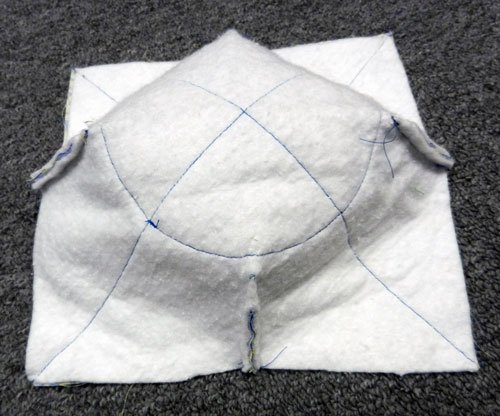
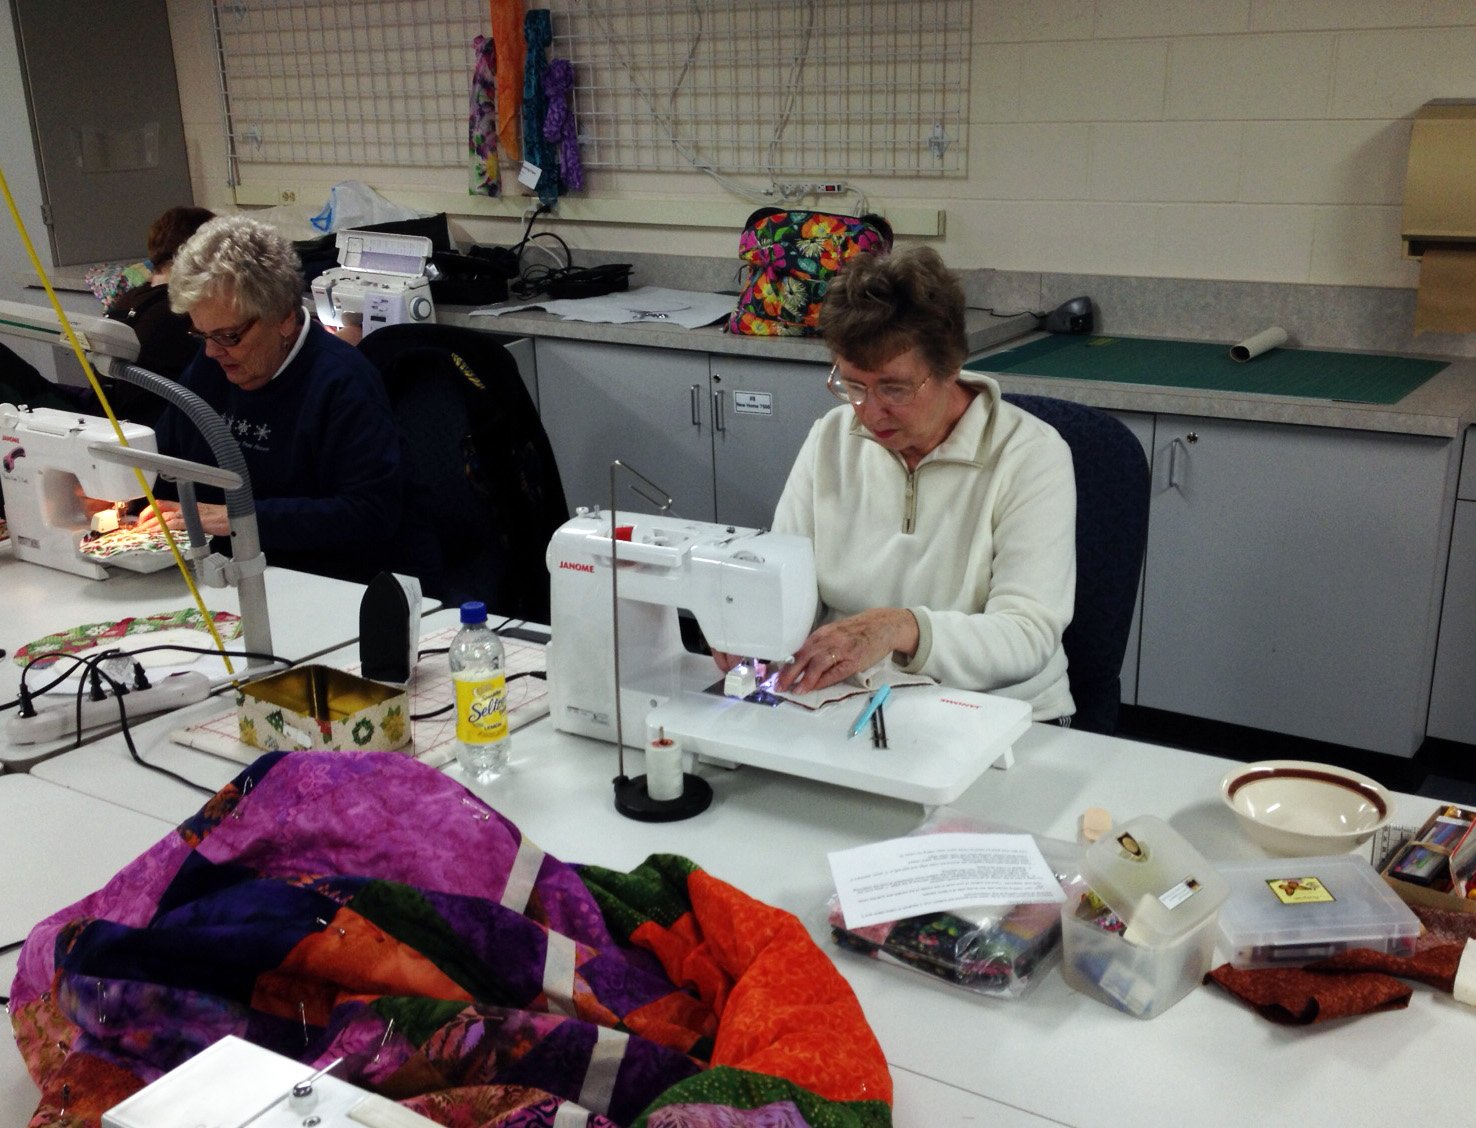
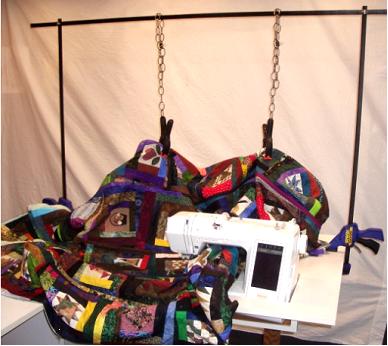
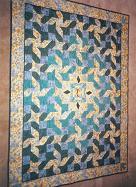
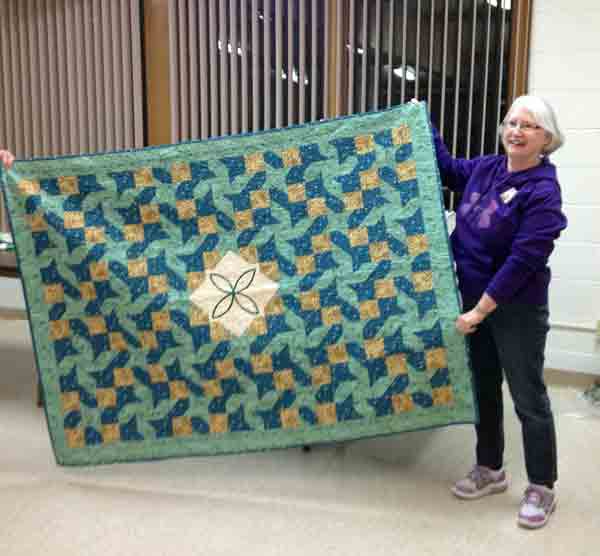
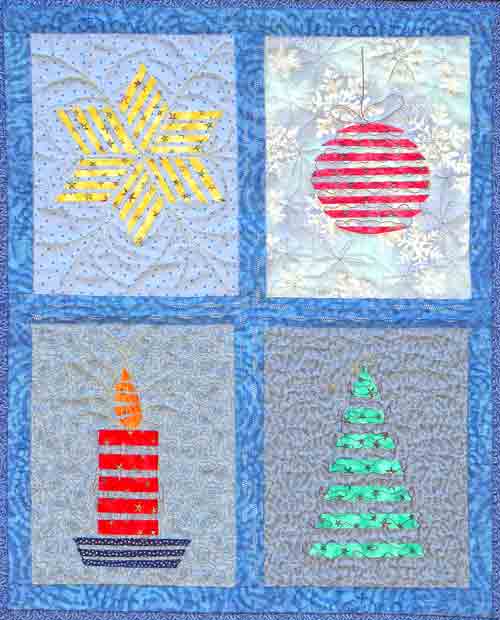
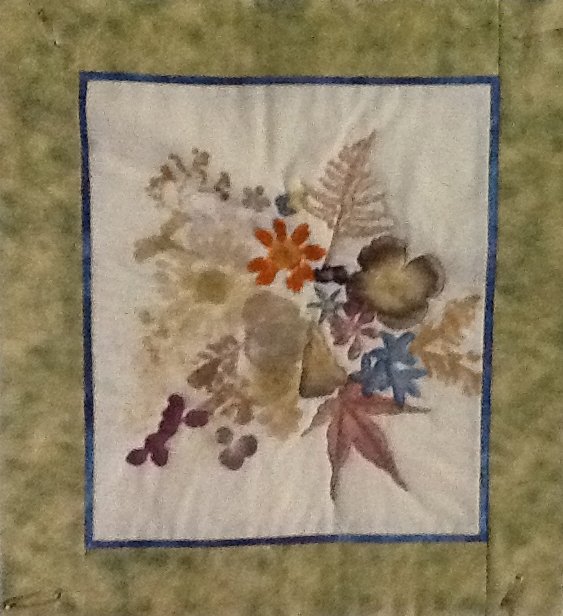
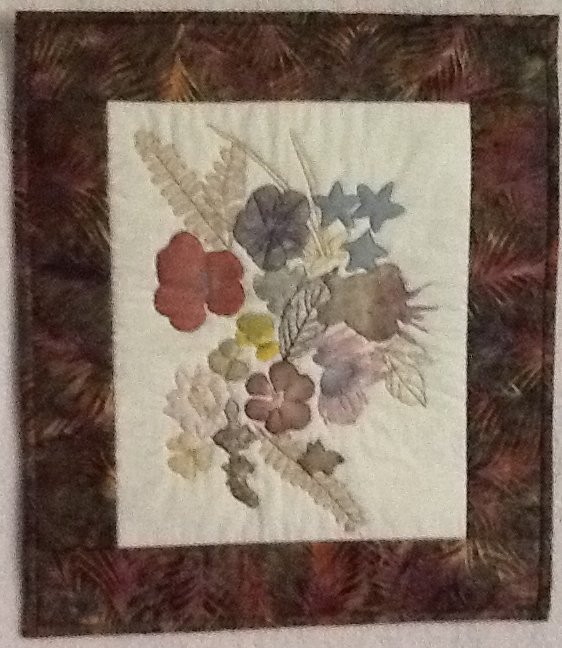
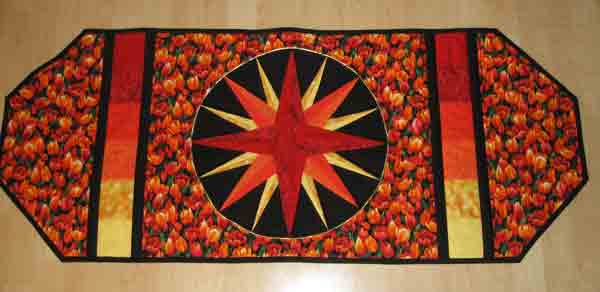
There’s one more blessing I’ve really been contemplating. Quilting certainly brings me a great amount of joy. What a blessing to be able to do what I love. Teaching is another happy part of my life. Each of you who take my classes or read my blog posts are a huge encouragement to me and I’d like to take this time to send you a great big THANK YOU!

From my family to yours – MERRY CHRISTMAS!

Christmas-2013-gma-som


A New Bead Adventure

December 15, 2013 Leave a Comment

Last month I had the opportunity to take a class with Betty Pillsbury. She is a crazy quilter from Albany, NY. Oddly enough, this particular workshop was not about quilting, but in it Betty taught the peyote stitch to attach a cabochon to a cuff bracelet. A cabochon is a flat backed stone or bead that has no hole to attach it with. I’ve always wanted to learn how to attach a stone in this way, hoping to use it in embellishing my quilts. I didn’t think I’d get hooked on this type of bead work. But I did! I’m now on my second bracelet with visions of #3 dancing in my head. I think I will use it in future quilts, but for now I’m dabbling just a bit in jewelry. Wanna see :-)?

Here is a front view with the cabochon attached. For a first effort, I’m pretty pleased.

beaded cuff bracelet

Once the cabochon was placed in the center, Betty encouraged us to just fill in the rest of the space. She had many samples and I had a blast choosing beads and filling around them. The bracelet was done in just over a week.

Here’s one side view:

beaded cuff bracelet

and the other:

beaded cuff bracelet

The base of the bracelet is called an aluminum blank. These come flat, are bent to shape and then the inside is covered with fabric. The original blanks from class had 90 degree corners and were a bit wider, the ones I just purchased are rounded.

beaded-cuff-blanks

The beading is done on a thick interfacing. Here’s my second bracelet in progress. Instead of one cabochon, there are 5 (chosen to match a new holiday outfit!).

beaded-cuff-bracelet-rainbow

And here’s the back:

beaded-cuff-back

Once the entire piece of interfacing is beaded, it’s glued to the cuff and then it’s all stitched together around the outer edge with more beads.

I’m not sure I needed one more addiction, but beads are such fun to collect and I’m really excited to see how this will meld into my future quilting projects. Do you bead?

*********************

One additional note. Back in April/May I wrote a number of posts about the Jenning’s Quilt. This was a group quilt made by the Milwaukee Art Quilters that has won many awards. It was a winner in this year’s AQS show in Paducah, KY. While at the show Judy Levine, Toni Mitt and I were part of an interview and it has just been posted by AQS.

Click on the picture below and you’ll be taken to the AQS website with the interview. Scroll down and simply click on the arrow in the center of the video box to watch it.

Jennings-interview

Judy did the lion’s share of the work on the quilt and I think she did a great job of speaking for the group in the interview.

Christmas Gifts

December 8, 2013 1 Comment

In last week’s post I asked to see pictures of Christmas projects you were making and Nancy sent me these:

Christmas-projects-Nancy-Hansen2


Christmas-project-Nancy-Hansen1

Delightful! Thanks Nancy!

********************

A few quilters in my Open Lab class at WCTC have recently made variations on the “microwave bowl holders” that are so popular right now. The idea behind them is great! You place your bowl of soup (or whatever) in the holder and put it in the microwave. Once the cooking is done, the bowl can be removed by holding the pad without burning fingers. It can also be used to keep your fingers warm when eating ice cream :-)!

bowl-pads-in-micro

I decided I wanted to make some as gifts and my friend, Barb, shared the web address for a blog with great instructions. Click here to visit that blog and learn how to do it:  http://syzygyofme.blogspot.com/2012/06/microwave-bowl-potholder-and-tutorial.html,

I made a few and loved using them. One addition I would make to Karen’s instructions on her blog concerns the quilting of the sections. She recommended just quilting with an “X”.

On mine I also quilted a circle a little larger than the bottom of the bowl in the center of each piece. In this way I knew where to end my darts … 1/4″ from the quilted circle!

bowl-stitching

I highly recommend pinning along the 4 lines the darts will be sewn on  and then setting the bowl in place before stitching, to make sure it will fit. Adjust as needed.

Here are a few pictures of the ladies making them in the Open Lab class.

bowl pads2

bowl pads3

bowl pads4

We had a good time and the pads were lovely!

bowl pads 1

********************

Just one more Christmas gift suggestion that was made by Barb M.  on Facebook  a few days ago (she was the quilter I wrote about in my November 3, 2013 post, who finished the quilt her Aunt Jeanette had started on my first cruise).

Barb wrote: “I NEED a Chris Kirsch style quilt float–it would make quilting this quilt so much easier! Oh why didn’t I make one sooner. May have to take a break from quilting (when the fog lifts) and make a trip to Home Depot for the necessary components. Chris Kirsch, you may want to consider reposting the instructions for making your quilt float in one of your upcoming blogs. There may be others that would like to request the components for Christmas!”

quilt float

So, if you are planning on quilting a crib quilt or larger in the near future and someone is asking you what you want for Christmas; the needed supplies and assembly instructions can be found in 2 past posts. Just click here for part 1, and here for part 2!


Jewelry Wreath

November 24, 2013 10 Comments

This post may not focus on quilting, but there are “pins” involved :-)!

When my mother-in-law passed away this past January, I inherited a jewelry box filled with costume pieces not claimed by any other relatives. There were many clip earrings and a lot of things I would never wear, but I couldn’t part with because they were mom’s, and some pieces were from her mother and grandmother!

A friend said she was collecting costume jewelry at rummage sales in the hopes of making a wreath. I found that idea very appealing and did a quick Pinterest search for jewelry wreaths. A few pictures came up and the one that grabbled me was done in mainly white, gold and silver. So, I called my mom and asked if she had any old jewelry she would be willing to part with. She had pieces of her own, plus jewelry from both of my grandmothers, my great-grandmothers and a great aunt!

Next I went through my own jewelry box and unearthed charm bracelets from years ago. I hadn’t worn them for years, so into the wreath pile they went. I then raided Mike’s jewelry box and found the ID bracelet I gave him when we were dating, and both our class rings. He also had many tie tacks, award pins collected over his flight career, and a few treasures that had belonged to his father.

I was excited. At JoAnn’s I found a straw wreath, thin florist’s pins, and a couple of spools of wide satin ribbon. I wired a hanging loop to the back, wrapped the wreath in ribbon (and a bit of leftover lace) and let the fun begin! Are you ready to see it :-)???

jewelry wreathThe locket hanging at top, center belonged to Mike’s great-grandmother. It is rather chunky and ornate, and we were assured by a jeweler that it’s value was only sentimental. Still, it makes a lovely focal point. Here are a few close ups of the rest of the wreath:

jw-ringsThe zebra pin in the next photo was my maternal grandmother’s. I remember being allowed to wear it on special occasions when I was a child.

jw-zebraMike’s father had been a naval aviator and the tie bar below was his.

jw-shipSome of my memory charms dangle over Mike’s volunteer firefighter badge on the right side of the wreath.

jw-leafA variety of pearl necklaces and chains are wrapped liberally around the wreath.

jw-clkThis project was a joy and resulted in an heirloom my family will hopefully treasure for generations.

Turning a Block On-Point

November 17, 2013 11 Comments

Before we jump into this week’s topic, I would really like to share the creative gift my dear friend, Wendy, made for my birthday. As many of you know, Wendy and I lead quilting adventures, and our upcoming trip will take us to the Baltic Sea in May. We’ve been working on project ideas for the trip and both of us have been stitching Russian Nesting dolls that don’t nest :-)! These are Wendy’s:

Baltic felt-dolls

I appliquéd mine to a shoulder bag:

nesting-doll-purse

They are such fun to make and we’re sure they’ll be a hit with the hand stitchers on our cruise. So, Wendy took this a step further for my birthday and used her amazing skills with wool to make me new mittens!

Baltic mittens

I’m hoping they won’t be needed on our trip, but I love them and will enjoy wearing them all winter long here in Wisconsin!

Now for this week’s topic!

Last week I taught a class at WCTC called Scrap Happy. The idea behind it was to use up all the “orphan” blocks, strips and scraps leftover from previous projects.

scrap happy quilt  by Chris Lynn KirschOne of the techniques we used in class was to enlarge a block by adding corners to it, and thus turning it “on-point” (as in the Sun block in the upper left and the house block in the lower right). It struck me this would make a good blog topic! When I’m turning blocks I like them to have a bit of “float” around the original square. By adding this extra fabric at the block corners, there is no danger of chopping them off. I’ve discovered that I don’t like to go to the effort of turning these blocks to an exact size, so I make them a bit larger and square them back to the size I want. It’s a “non-math”, “seat of your pants”, method and I hope you like it.

1. Square up the block. Then place a square ruler over the block as in the picture:

turning a block on point

The diagonal line of the ruler is lining up along the vertical center of the block, and the upper corners of the block are at the same measurement along the rulers edges (mine are at about 6 1/4″).

2. Add 2″ to this measurement and cut 2 squares of your chosen corner fabric this size (mine were cut 8 1/4″). Cut both these squares on 1 diagonal.

turning a quilt block on point

This will yield 4 triangle with the bias on the long, diagonal edge. By cutting the triangles this way, the outside of the block being created will be on the straight-of-grain.

3. Place a triangle, right sides together, along one side of the original square. To center it, make sure the point of the triangle is on the center seam of the block. If your block doesn’t have a center seam, press it in half in both directions, and line the point of the triangle up with your creases.

turning a quilt block on point

4. Stitch with a 1/4″ seam allowance and press the seam towards the triangle. There will be portions of the triangle not stitched down on the sides.

5. Repeat for the opposite side of the block.

turning a quilt block on point

6. Repeat for the remaining 2 sides. This time the seam will go the entire length of the long edge of the triangle.

turning a quilt block on point

7. Square up the block to the desired size.

turning a quilt block on point

I find this a simple way to turn a block and I hope it was helpful.


Tropical Breezes – A Quilt’s Story

November 3, 2013 Leave a Comment

C-cruise3

The very first time I led a quilting cruise was a trip to the Caribbean in 2000. We actually brought Singer featherweight sewing machines along as our carry-ons (it was pre-September 11!) and we sewed on them while sailing between ports. I designed a pieced quilt as our project and called it “Tropical Breezes”. One of the dear ladies who traveled with me was a garment sewer and “not a quilter”. Jeanette was a great sport and decided to try the project. She did join Wendy and me on our Mississippi Riverboat Cruise the following year, but she never mentioned what had become of her Tropical Breezes “quilt”.

Well, a few years went by and I received this email in February of 2011:

“Dear Chris,

My aunt, Jeanette Richter was on your quilting cruise to Cozumel in April 2000. She did not finish the quilt “Tropical Breezes” during the cruise and last year, after a major medical set-back, she gave me the fabric from the quilt to “finish” for her. Being a new quilter, myself, it looked overwhelming to me, so I set it aside while I worked on other projects to get a feel for quilting. I am now (I hope) ready to make her quilt, but as I was going through everything she gave me, hoping to read instructions and figure out what to do, I was dismayed not to find any instructions for piecing the blocks.  I am wondering if you might still have any instructions for this particular quilt and if so, could I get a copy? I would like to get the quilt pieced in the near future so that I have time to send it out to a professional quilter and be able to present it to my aunt for Mother’s Day (nothing like short notice, right?) I do have the lay-out pattern for the finished blocks, but just need to know how to piece the blocks.“


I was thrilled and offered to help Barb in any way I could. In April of 2011 she sent me another email saying she had finished the quilt:

“I love it, it’s perfect (well, not really, but it’s perfect!) Amish folk lore says no quilt should be perfect because only God is perfect and we aren’t to compare ourselves with God”. So, to my aunt, it was as perfect as it was allowed to be–if you get my drift. She loved it and I am so blessed just by watching her joy in receiving the quilt. It has been a very beautiful day! Her response – “I couldn’t wait to see it finished, but is it really for me?””
Jenette with quilt


Two years passed. A few months ago I had the opportunity to speak to a guild in Janesville, WI and Barb was there – with the quilt!

caribbean quiltand label

Jeanettes-breezes-1

I asked her to tell me the rest of the story and here it is:

“When I gave my aunt the quilt, we took pictures of her with it and chronicled her reactions. Jeanette (or Aunt Net to me) was a very special lady who gave so much to others, I couldn’t say no to finishing her quilt for her. Now that she is gone, I feel so close to her each time I see or handle her quilt. I felt honored to finish the quilt for her and blessed when I received the quilt back after she passed away. I am also so very grateful to you for your help in completing this project. You are awesome!”

Here’s one more picture of Jeanette with her quilt, and the pillows Barb also made. After the cruise, I made quilt labels for everyone with the picture of the group “photo-transfered” on them and Barb placed this label on one of the pillows!

Screen Shot 2013-11-01 at 8.43.54 PM

What a blessing it was for me to hear the story and see the pictures of Jeanette and her quilt. Thank you Barb, I’m so pleased to have been a part of this heart-warming story :-)!

**********************************

I’ve received some interesting pictures lately of quilts that relate to recent posts, and this seemed like a good place to share them.

When I was visiting Evelyn in Arizona a few years ago, I taught a few “Parallelisms” classes  (this is the class that morphed into my latest book: “Where Do I Start With Fiber Art?”). Margit is a member of the Maverick’s fiber art group and she was in one of the workshops. She is a very talented and award winning artist and I was so pleased to have her in class. She recently sent me this note and picture:

“I just wanted to share a little project. I ‘borrowed’ your technique of Parallelisms for a small Christmas wall hanging. It was quick and fun. The wall hanging is for a bazaar to support our local library. I am a volunteer at this library. Hopefully someone will fall in love with the piece. I am so glad that I took your class.”

Christmas fiber art quilt

Adorable! Thanks for sending the photo Margit!

Dorothea sent me some pictures also. These were in response to the Flower Pounding post and here’s her message:

“Hi Chris, I have been a fan of your blog ever since you came to speak at Mad City Quilt Guild .  In one of your recent blogs on flower pounding I became excited because I had done some a few years back with my two sisters–a special Sister Weekend with that being our project.  It took a couple of years to make a quilted project of my poundings but thought you might like to see the results.  By the way, we did treat our fabric to keep it more colorfast with washing soda.”

flower pounding DM1

flower pounding DM2

flower pounding DM3Dorothea certainly was successful with her poundings! Thanks Dorothea!

I hope you enjoyed all the stories included in this week’s blog as much as I enjoyed posting them! I’d like to leave you with information on a local gallery show the Milwaukee Art Quilters are exhibiting in:

Screen Shot 2013-10-31 at 9.01.20 AM


A Quilted Memorial

October 6, 2013 6 Comments

I’ve been on the road again this week. This time to teach at the AQS show in Des Moines, IA. It was a great show – over 1600 quilts and loads of great vendors! I went with my dear friend, Linda, and we had a wonderful time. Here we are in front of one of my entries entitled: Cherry Baskets.

DM-13-with-linda

I made this quilt with my rather large collection of cherry fabrics and it really makes me smile. Here’s a second floor overview of the show with a big finger pointing at my quilt (just for fun :-))!

Des-Moines-overview

Now that your up to date on my latest travels (it’s been crazy :-)), here’s this week’s topic:

A few months ago I received an email from Lynn, a neighbor who lived behind us when we lived in Dousman. This was her message:

“My mom passed away 4 months ago and the hospital gave our family a quilt.  There are 4 siblings and one quilt, which is the dilemma.  Can you help me or direct me to someone that could?  My thought would be to have the quilt divided into 4 pieces, however I’m not experienced at all, in how to do that.  Thank you in advance for your time, I truly appreciate it. I look forward to hearing from you.”

And here was the picture she attached to the email:

Divided-Quilt-1

I called her and said I would be happy to help. We both agreed that cutting the quilt into quarters wouldn’t be the best option.

Because it was only tied, I recommended she cut the knots, un-sew the binding (it was actually the back of the quilt turned to the front), take off the borders, and then we could get together and discuss the next step. She brought the disassembled quilt over and we sat on the floor brainstorming.

Since it was made of 8″ squares of Christmas fabrics, I suggested we take the quilt apart a little further and resew the squares into 4 table runners. She liked the idea! Here are the runners pre-borders (only one white square needed to be added to the original 15):

memorial quilt remakeNext, the borders were attached. There was enough fabric from the original borders to do one in the light green and two in the dark. Praise the Lord, I had the same green fabric in my stash for the border on the fourth runner:

Memorial Quilt remake

Next they were layered with batt and backing (there was enough from the original for all 4). I decided to turn them, rather than using binding (this will be the topic of next week’s post :-)). Once they were turned, I machine quilted them 1/2″ from the edge and in the ditch around the blocks (even though I greatly dislike “ditch” quilting). Then I chose to quilt hearts in the squares. I used a heart shaped “Mix and Match Template™” and traced around it with a sliver of soap in the red and a “Frixion™” pen in the white.

memorial-marking-1I’ve been wanting to try the Frixion™ pen for awhile and was pleased with the ease of marking. These pens are made by Pilot™ and were created for use on paper. The ink disappears with heat, like the friction from erasing on paper. The quilt world discovered them because the ink disappears with the heat of ironing! I was a little concerned about the long term effect of using this tool. I did a bit of testing and will share my results in a future post.

So – on to the memorial runners:

The free-motion quilting of the hearts was a joy and the table runners were finished quite quickly.

memorial-done

I hope Lynn and her siblings will be pleased.

Have you created a memorial quilt? Have you received one? Have you ever needed to make one quilt into more than one? We’d love to read your story!

PS I received pictures of quilts made by quilters in the Mariner’s Compass class I taught in Janesville a few week’s ago and I thought you might like to see them. This one is from Peggy Nelson:

mariners compass quilt

And this table runner is by Valerie Cook:

Mariners Compass quilted table runnerGreat job ladies! Thanks for sending pictures!

Where Do I Start With Fiber Art?

September 28, 2013 4 Comments

I’m very pleased to announce that my new book is in print!!!

Where-Do-I-Start-With-Fiber-Art

Thanks to everyone who commented on the cover choices. I had over 80 responses to my request for opinions and the vote was overwhelming for the above cover (only 14 for the the otter, which did make it on the title page).

This book is based on my “Parallelisms – Beginning Fiber Art” class. Many students have asked that it be made into a book some day – and some day is now. It is written for traditional quilters who think they’d like to try making an art quilt, but don’t know where to begin (or even if they can :-)). I’ve included loads of pictures, and simple, step-by-step lessons for fusing a variety of strips and shapes as well as instructions for working with sheers and some of my favorite beading techniques. Many people have asked how I bead my “Crossings” quilts together – and that’s one of the techniques included (for info about my “Crossings” series please go to this previous blog post: https://chrisquilts.net/?p=3168 , and scroll down to #7).

Peg O’Donnell took my Parallelisms workshop at the Madison Quilt Expo this month and she gave me permission to post a comment she emailed to me about the class:

“I LOVE the new book.  Very helpful and inspirational information for the beginner. Plenty of clear to understand information to get anyone excited about trying fiber art.  You prove you are only limited by your imagination. I really enjoyed your class last Thursday.”

Thanks so much, Peg!

Sommer found the cover intriguing!

Fiber Art - Sommer PSclosed

And she seemed to like all the helpful pictures :-)!

Fiber Art - SommerPS

So, if you’d like to have your very own copy you may click here to get to the “books” page of my blog; then click on the “add to cart” button at the bottom of the book description, and you’ll be taken to a site that’s administered by PayPal. You do not need to have a PayPal account to purchase a book through this site. You can safely and securely purchase the book using a credit card or you can use a PayPal account if you have one.

If you’re not comfortable ordering on line, I’d be happy to have you send a check made out to me, for $22 to: Chris Kirsch, N7568 Ceasar Road,  Watertown, WI 53094. I will put a signed copy in the mail as soon as I hear from you.


  • « Go to Previous Page
  • Page 1
  • Interim pages omitted …
  • Page 36
  • Page 37
  • Page 38
  • Page 39
  • Page 40
  • Page 41
  • Go to Next Page »

Primary Sidebar

Archives

Recent Posts

  • London ~ and More
  • Designed For a Purpose
  • Squirrel Quilts and More
  • Vintage Appliquéd Arrows and More
  • Fascinating Tidbits

Recent Comments

  • Karen Ann Moore on London ~ and More
  • Cheryl McLean on London ~ and More
  • Sue Halpern on London ~ and More
  • judy raddatz on London ~ and More
  • Joanne Corrigan on London ~ and More

Categories

Footer

My Guide

Whatever you do, do your work heartily, as for the Lord rather than for men.

—  Colossians 3:23

Contact Chris!

  • Home
  • About
  • Gallery
  • Classes
  • Trips
  • Books
  • Blog
  • Contact
  • Sign Up For My Blog

Copyright © 2026 · Chris Quilts · Website by Adunate · Privacy Policy