• Skip to main content
  • Skip to primary sidebar
  • Skip to footer

  • Home
  • About
  • Gallery
  • Classes
  • Trips
  • Books
  • Blog
  • Contact
  • Sign Up For My Blog

Blog

Getting Random Quilt Blocks to Fit Together

March 29, 2015 1 Comment

Grand Canyon for blogI’ve returned from the sunshine of Arizona to the freezing rain of Wisconsin. It was a wonderful trip and the beauty of God’s creation is truly awe inspiring.


I’m glad to be home and excited to be back in quilting mode. So, here’s the quilty post I promised  😀 !

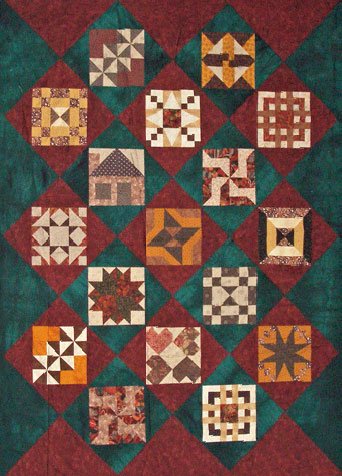
If you’ve ever won a stack of blocks at a guild meeting and wanted to put them together into one quilt, but found they were not all the same size – read on! I often see stacks of blocks like this brought into my open lab classes. I must admit, I’ve had two projects of my own – “block of the month”stacks,  that were supposed to become a sampler quilt, but they didn’t all match up. I’ve tried a number of solutions, and this one is my favorite. It uses a technique I shared in a blog post a few years ago (https://chrisquilts.net/?p=4070), and I’d like to revisit it now. In essence, each block is turned on point, and these added triangles make alternate hourglass blocks.

Making quilt blocks measure up

Another advantage to this technique is that your quilt doubles in size from the area covered by the initial blocks.

Turning all the blocks on point

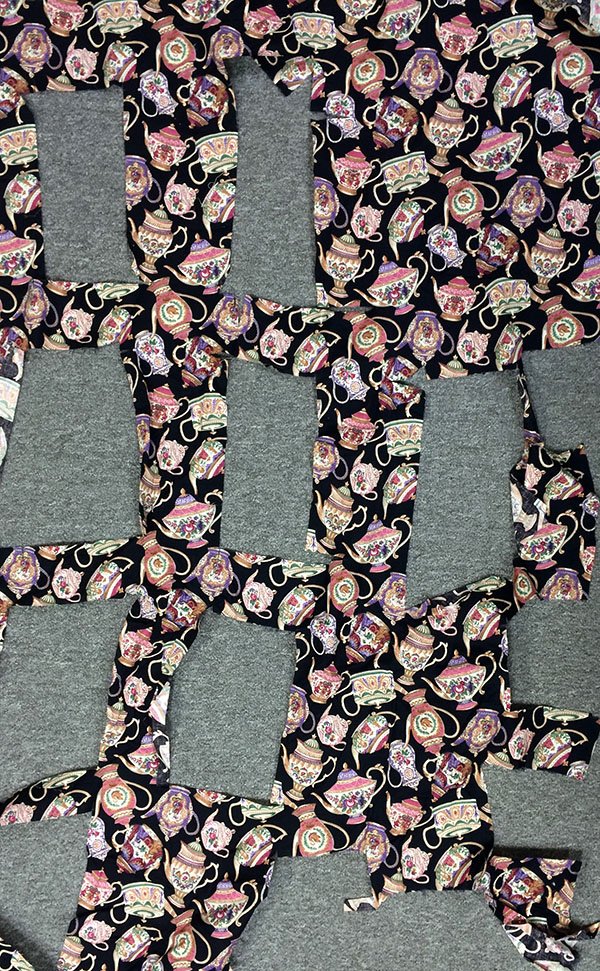
1. Square up all your blocks (they will be different sizes, but that’s ok – they just need to be square).

2. Choose two fabrics to be the “hourglass” corners.

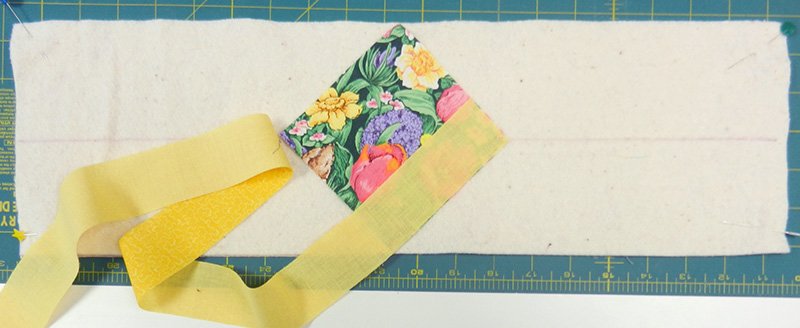
3. Find the largest block and place the ruler as in the picture (diagonal line on vertical center of block, and even along both edges – mine are at 6 1/4″).

turning a block on point

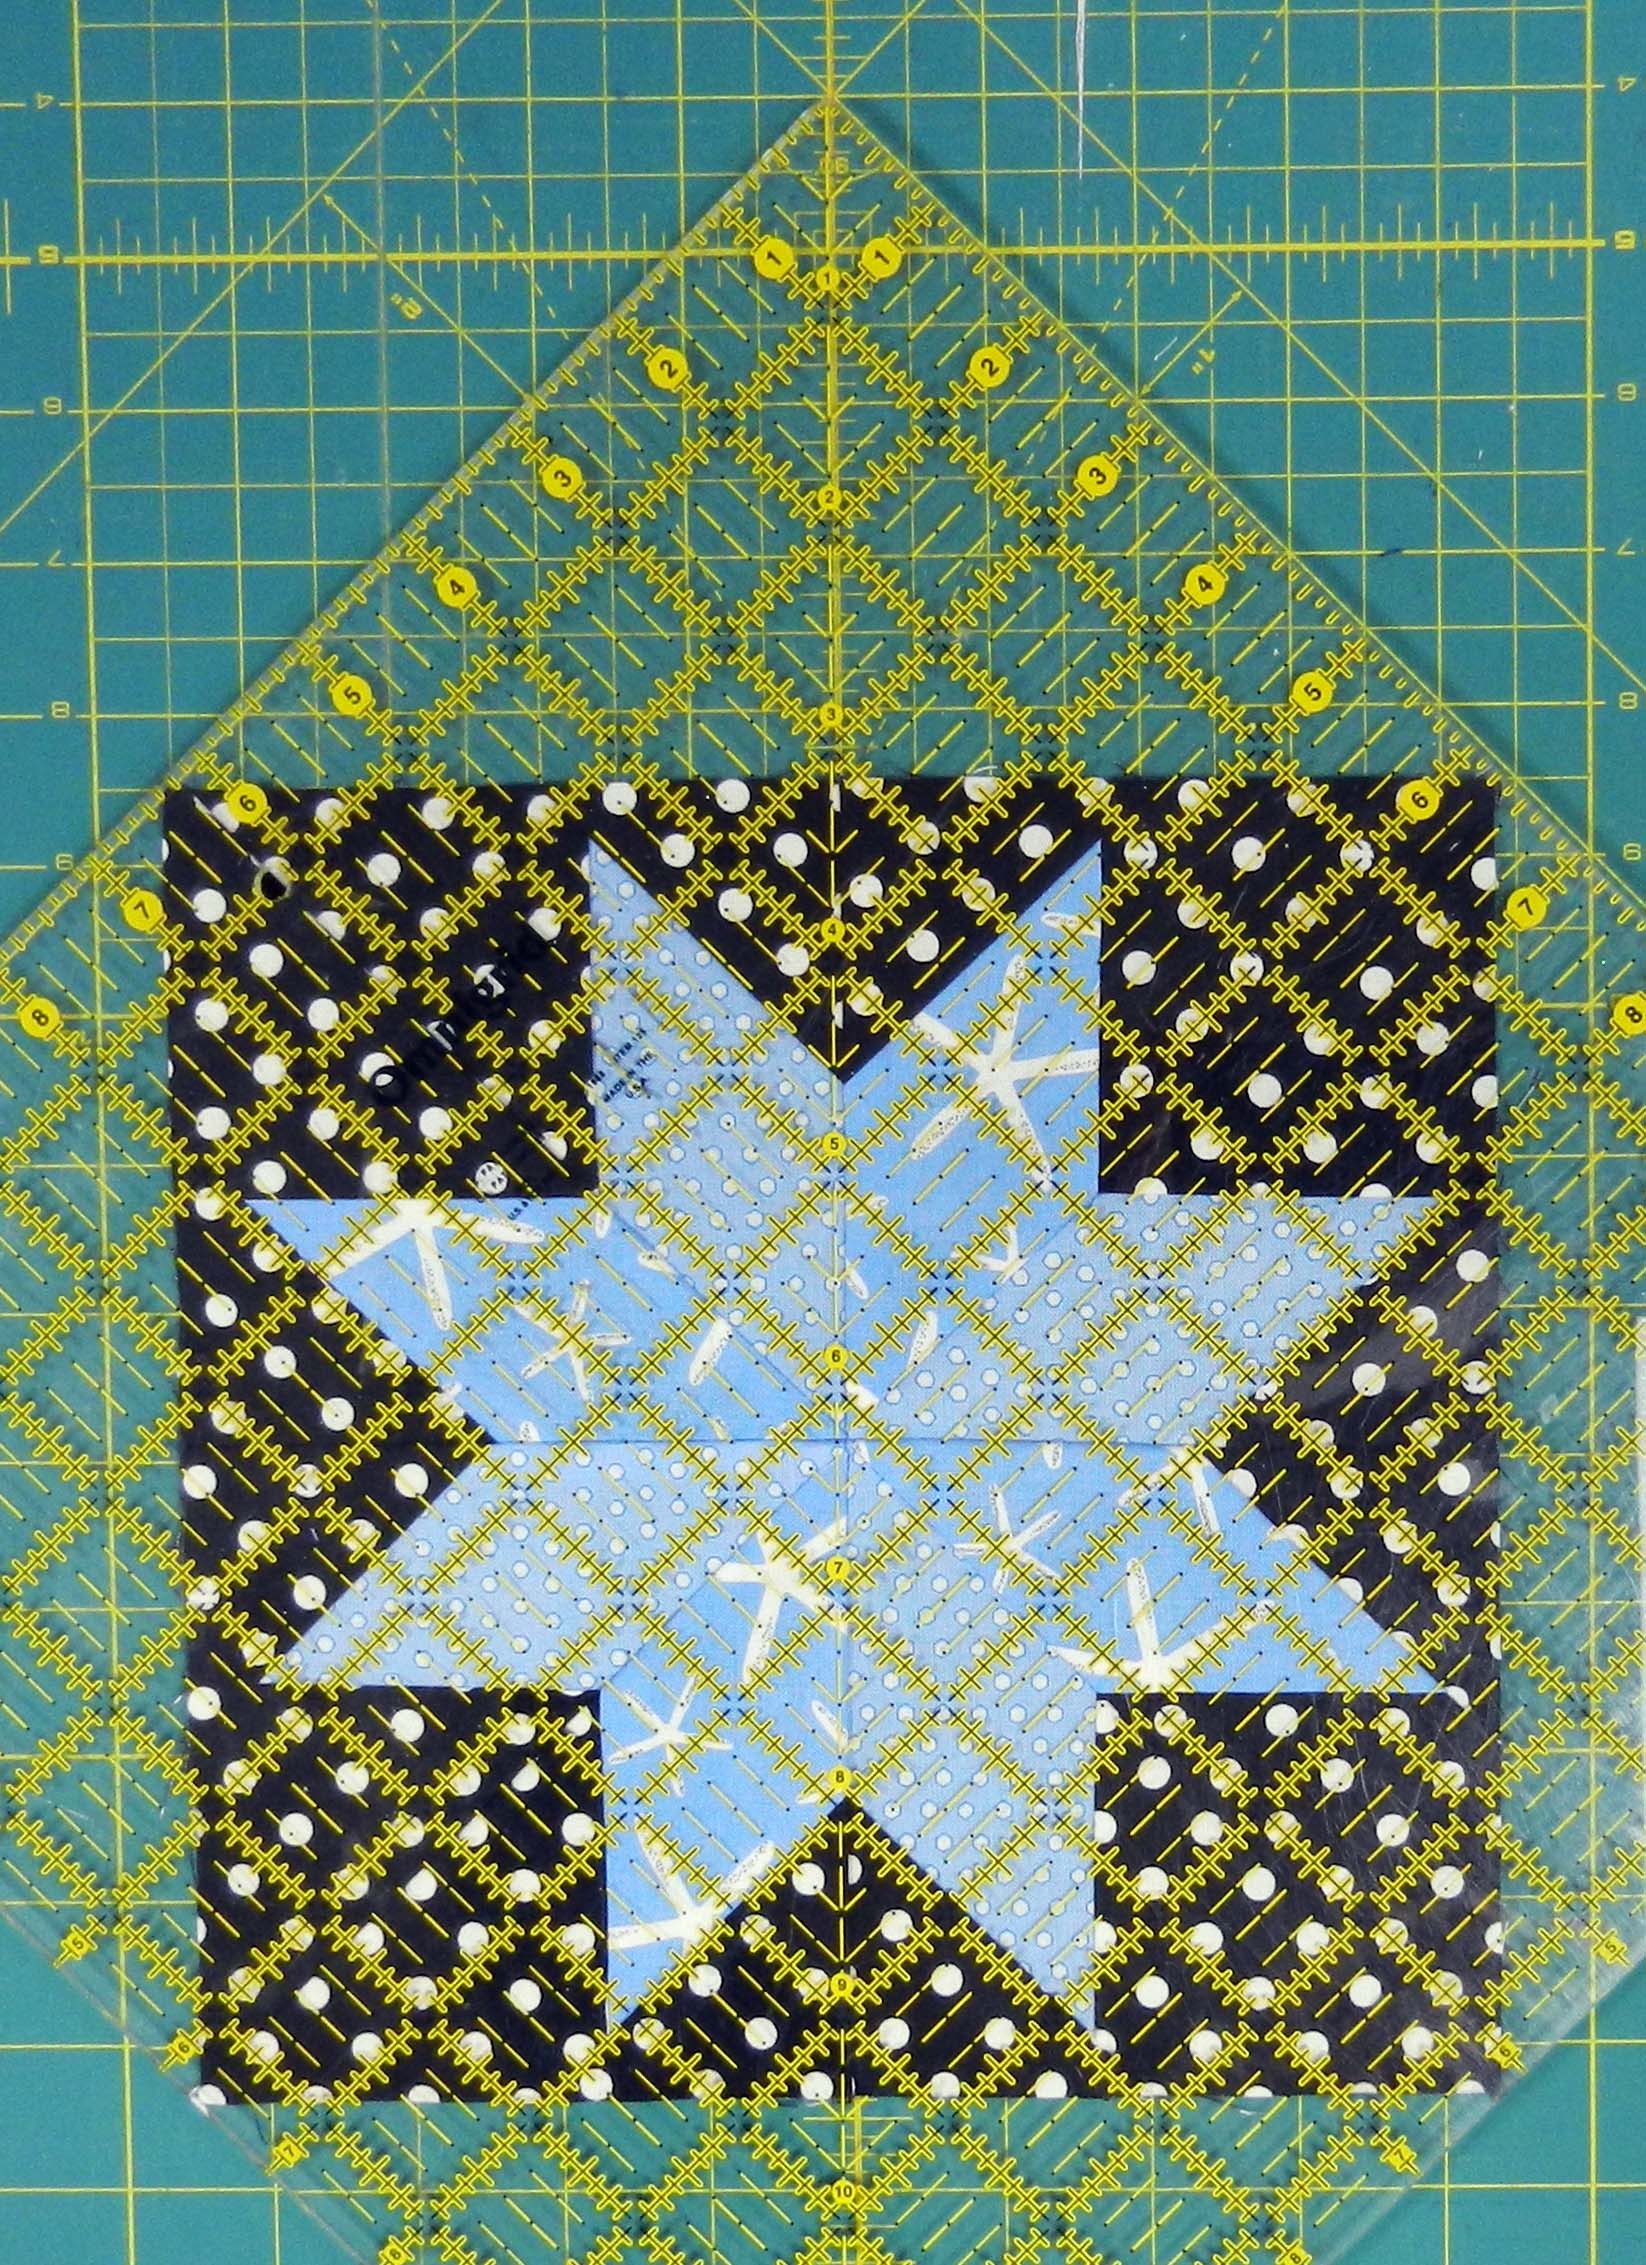
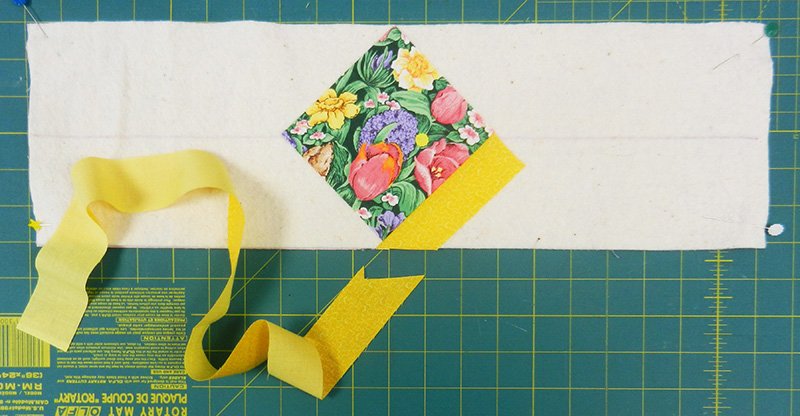
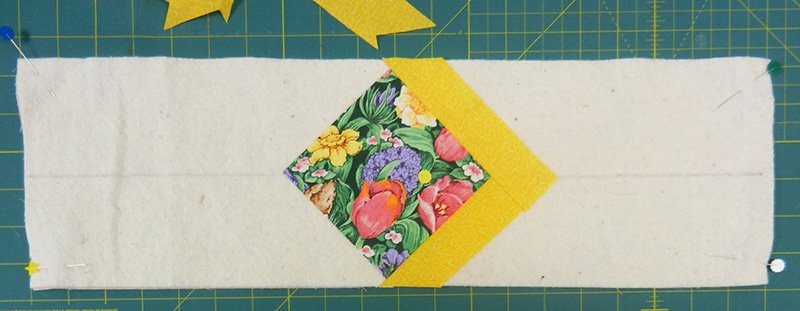
Add 2″ to this measurement and cut out two squares of one “hourglass” fabric this size. Cut both squares on one diagonal, and sew to all four sides of your block. This will turn the block “on point” (for the more detailed instructions from my previous post, please click here and scroll down to the blue/black star block).

turning a quilt block on point

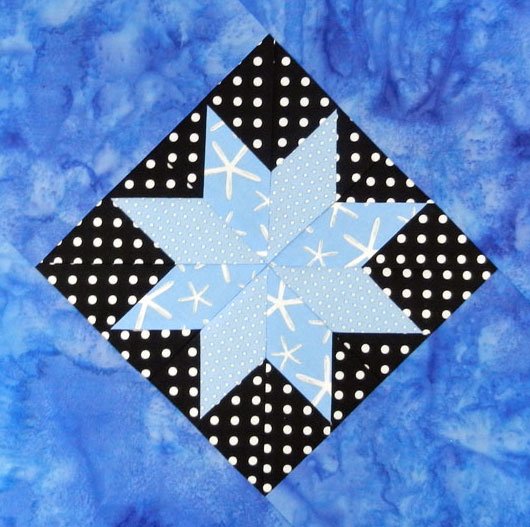
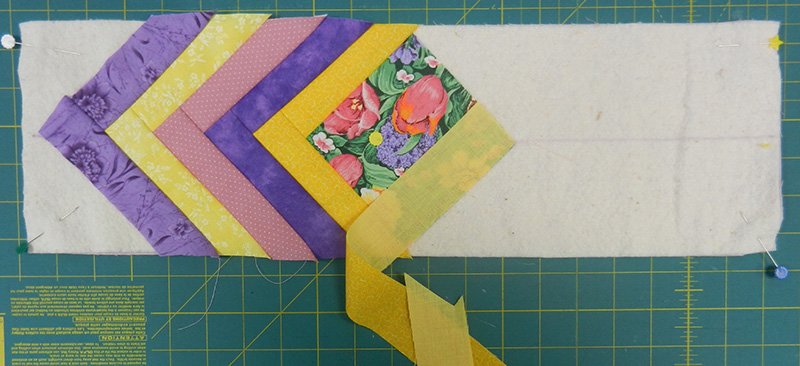
You’ll need to cut 2 squares (yielding 4 triangles) for each block from one “hourglass” fabric. Half of the blocks will be from one fabric, and the other from the second fabric. In this way you’ll be able to “checkerboard” your blocks, by alternating the hourglass fabrics, when you put the top together.

4. Square all the blocks up to the size of the smallest.

5. These blocks may now be sewn together into a lovely quilt, but I would be remiss if I didn’t mention that they need to be put together on the diagonal. If you don’t know how to do that, I found wonderful instructions on this site:  http://delawarequilts.com/HelpfulHints/DiagonalSet.html. The measurements given are for an exact fit. Since I like to give myself a little margin for error (and I like a bit of float around my points), I would add 1″ to the cut sizes for the squares.

Modern Quilts

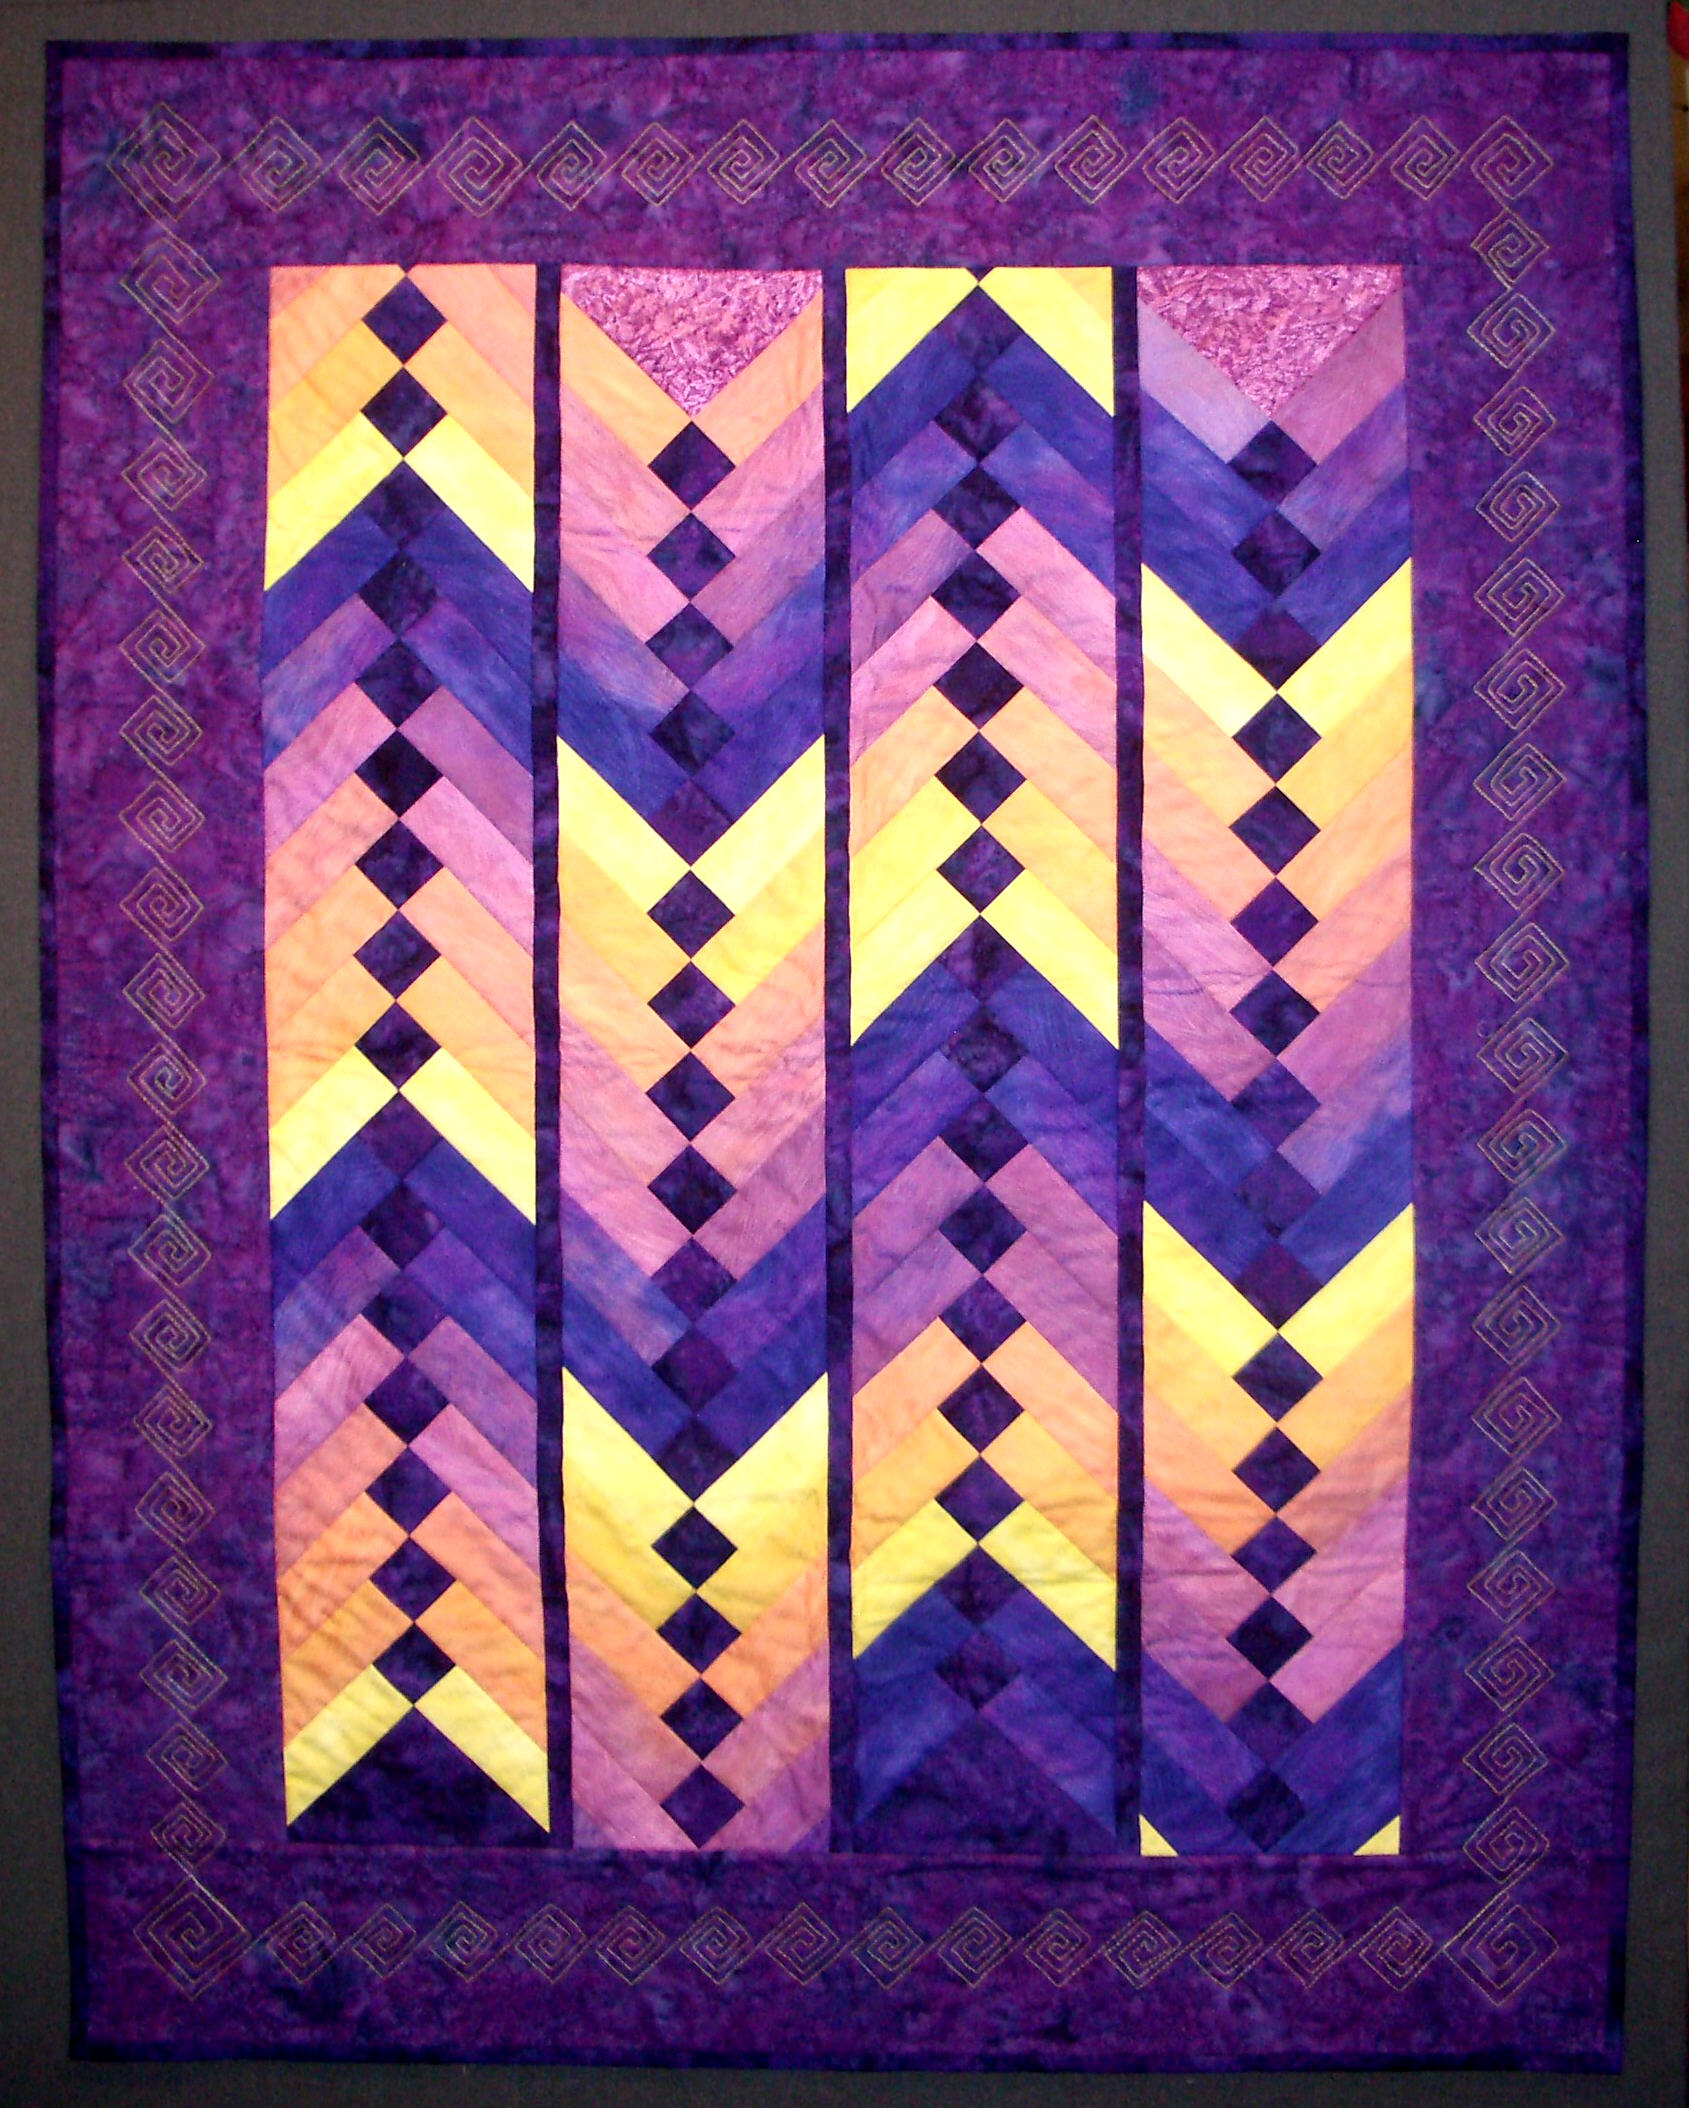
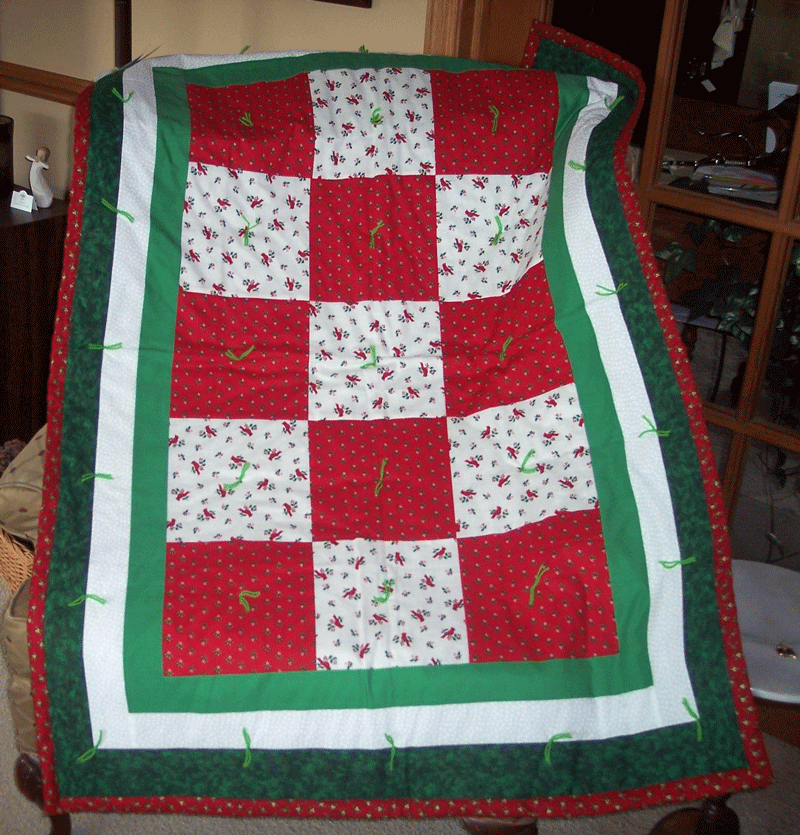
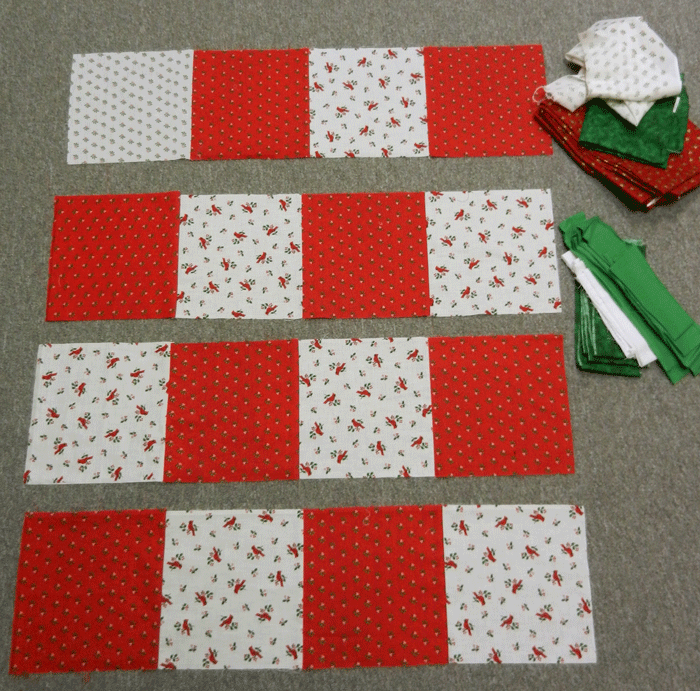
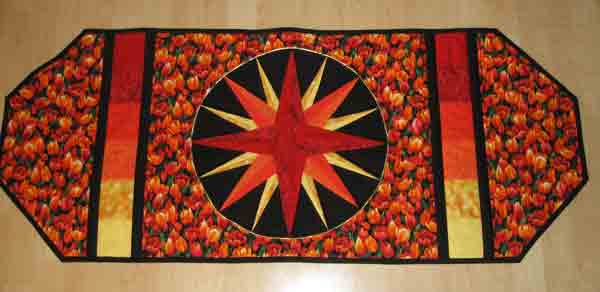
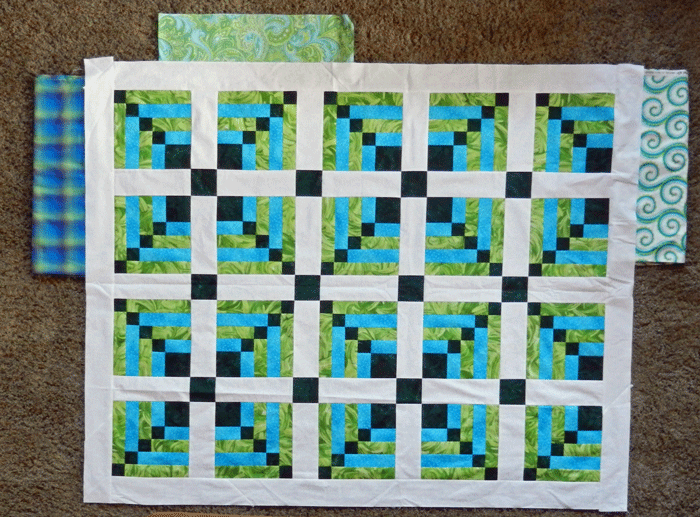
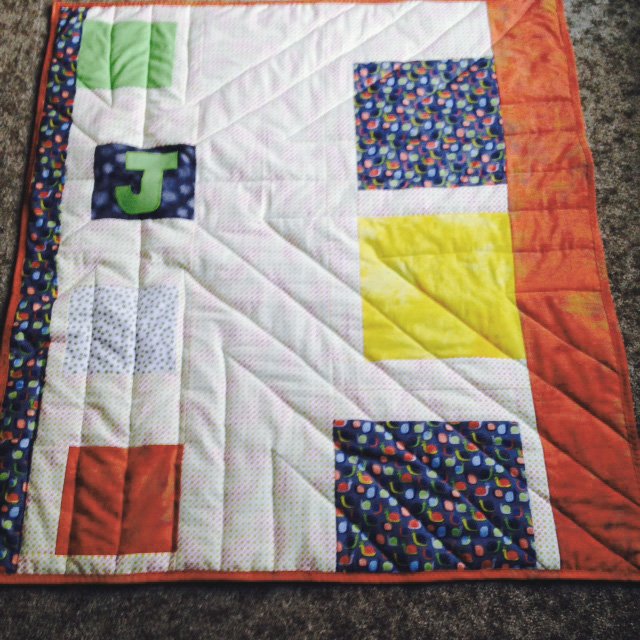
A few weeks ago I invited readers to send pictures of their modern style quilts. Mary Ann and Juleen did just that, and I know you’ll enjoy them. Mary Ann’s is a crib quilt she’s been working on in my Open Lab class. She finished it since our last class and sent this lovely photo:

Mary Anns modern crib quilt

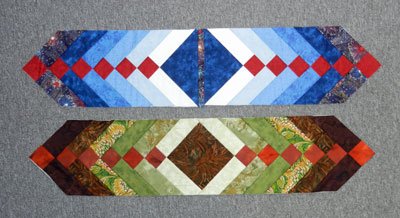
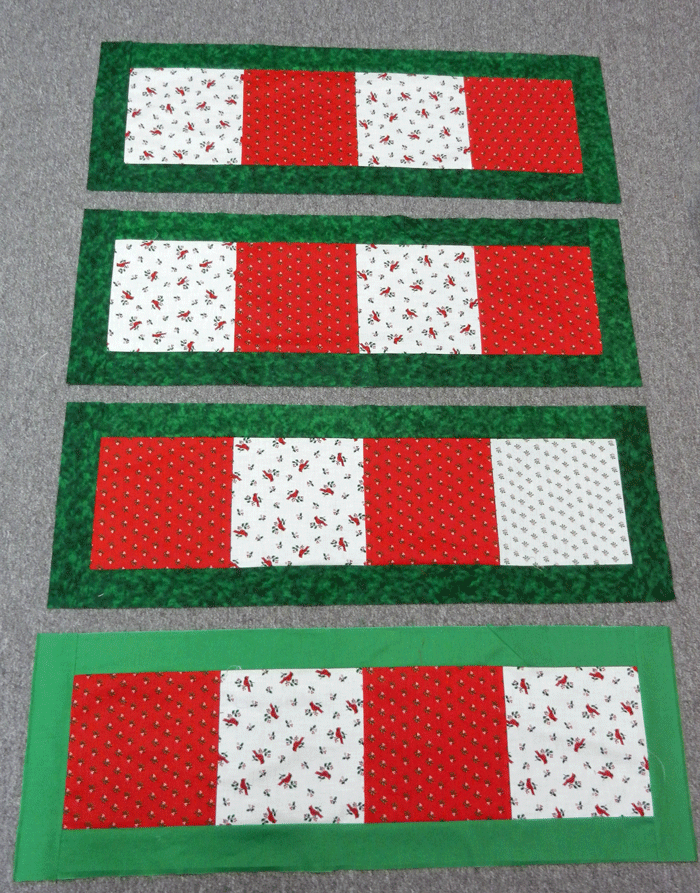
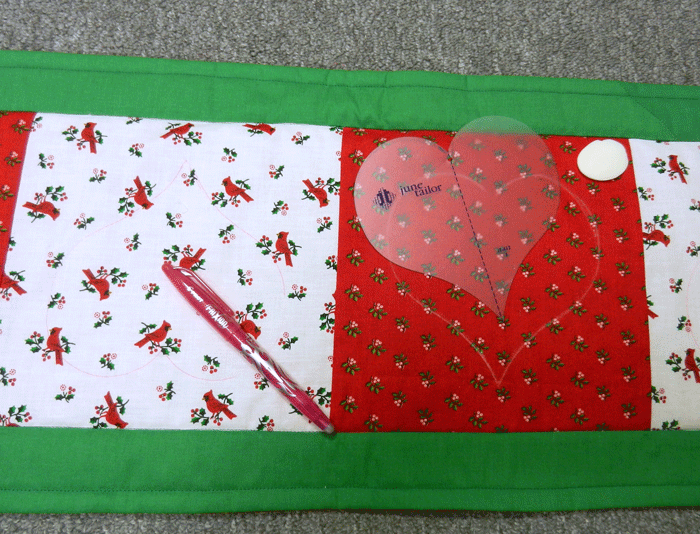
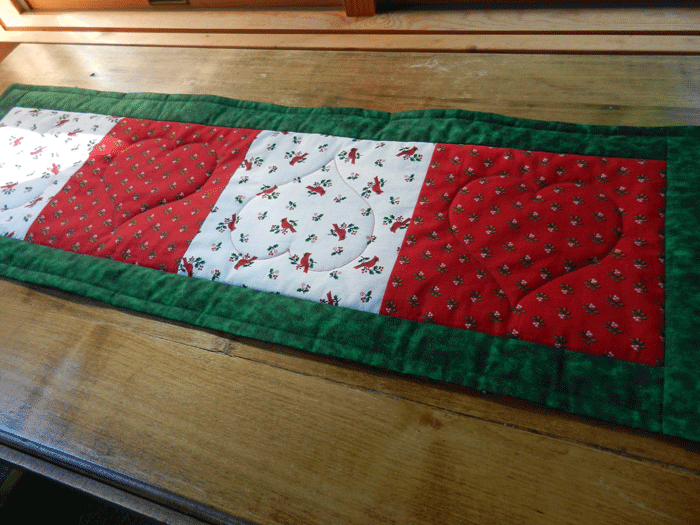
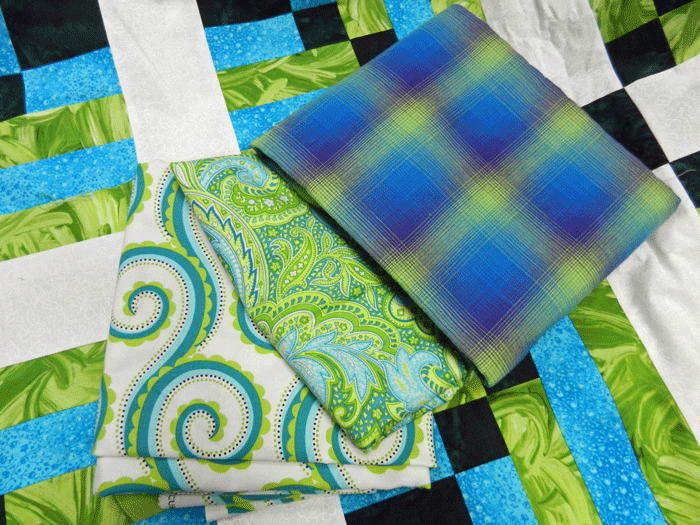
Juleen sent photos of two of her recent projects. Both are delightful!

modern quilt - Jaeger1Juleens modern quilts

Thanks ladies!


And the Floss Frenzy Winner Is:

March 8, 2015 3 Comments

Because of some time-sensitive information, I’m actually sharing two blog topics this week. The challenge results are the most exciting, so they come first. But please continue to the end for a bit of sharing about the French Braid pattern.

I’ve had an exciting week of tallying votes in the Floss Frenzy Challenge. All of the entries were delightful! They received so many wonderful comments, and many voters mentioned that they wished they could vote for more than one. But one vote a piece was all that was allowed and the winner is:

Ida Porzky of Watertown, WI,

for her crocheted button flower wall quilt!

FF Ida Porzky

Ida is a dear friend of mine. She is a talented quilter and her crochet work is spectacular also (I have the privilege of owning a number of her doilies!). She has won a basket full of floss – 237 skeins to be exact, one each of all the different colors I was originally gifted   😀 ! Congratulations Ida!

Next I need to make a special mention of Patt Nieman’s quilt. Patt had requested only red floss, because she wanted to make a redwork quilt. She completed her beautiful quilt, and sent me pictures well before the deadline. I’m sorry to say, I misplaced her picture and it wasn’t included in the initial posting of the challenge. Patt emailed me concerning my error a few hours after the challenge began. I put it into the blog as soon as I could and, even with the late start into the viewer’s choice voting, her quilt still won second place!

Patt Nieman quilt

Patt will also receive a prize of embroidery floss!

Thanks so much to all the participants. You are all winners to me!!!

A few interesting challenge statistics:

37 packs of floss were sent out.

18 stitchers returned pictures in time for the challenge.

Over 120 votes were cast.

Quite a few people have let me know that they are still working on their projects, but they just couldn’t get them done in time. If you’re one of these – keep at it – and then send me a picture when it’s finished. I plan to feature a Floss Frenzy II showing in a future blog post!

Braids and French Braids – Quilt As You Go

Doing a braided table runner – quilt as you go, is a quick and easy way to complete a pretty project. Many of you may know how to do this, but just so we’re all on the same page, I’ll share a brief “how-to”:

1. Cut a piece of batting and backing fabric slightly larger than the size of the runner you desire. Layer the backing, wrong side up, on the work surface. Smooth the batting on top of this. These layers may be held together with basting spray, or a few pins. Mark center lines down the length and the width on the batting, with a removable marker.

quilt as you go

2. Cut a square of fabric that will fit the width of the runner, when placed on the diagonal. Pin in place at the center.

quilt as you go

3. Cut strips of fabric for the braid. It looks nice in either a planned palette or scrappy. You will complete one side of the runner first, and then the other. The strips will be added chevron fashion on two adjacent sides of the center square. Choose a strip and lay it, right sides together, even with one edge of the center square, and with the tail hanging off the edge of the runner. Stitch in place with a 1/4″ seam allowance.

quilt as you go

4. Carefully press the strip open, and trim off the tail even with the runner edges.

quilt as you go

5. Lay a strip of fabric along the adjacent side of the center square, even with the square/strip portion of the runner, and with the tail hanging off the outer edge of the runner again. Stitch as in step 4, press open and trim the tail.

quilt as you go

6. Repeat steps 4 & 5 until one half of the runner is pieced and quilted. Finish the other half of the runner the same way.

quilt as you go

8. Square off with pointed ends (as in my sample) or rectangular, bind and enjoy!

quilt as you go


A technique with a similar look, but an added bit of pizazz is called a French braid. This pattern became very popular a few years ago. The original book constructed the pattern as a top, in need of quilting. It struck me that doing it “quilt as you go” would be a great option. I played a bit and created this lap sized quilt:

french braid

Adding the squares was the tricky part, but I came up with a fun way to make it work. Each row was made separately and then I put them together with the Reversible Quilts method I used for Hanna and Willy’s I-Spy quilts (to read the post on that technique – click here). Each row was actually a runner, so I made that option into a class and I’ll be teaching it the end of this month at Waukesha County Technical College. Here’s the info:

CRN 21783 French Braid Runner


Quilting Workshop: French Braid Runner – Friday, March 27th, 9 – 2:30

Use a gradation of color or value to create this stunning table runner. The best part is the piecing is done “quilt-as-you-go”. Once the top is done, the quilting is too! This technique can be used to create a bed-sized quilt and instructions for doing so will be included in the class.

If you are interested, please sign up soon!  You can register on-line at  http://www.wctc.edu/ or by phone at 262.691.5578. The Course Reference Number (CRN) is 21783.

Spinning Stars

January 4, 2015 5 Comments

Fussy cutting motifs from fabric is a technique that has been around for generations. It was made incredibly popular about 20 years ago by Bethany Reynolds (click here for her website). At that time I was intrigued by Bethany’s quilts and started playing with my own style of cutting identical triangles from large print fabric. To begin, I chose a teapot fabric with a lot of thin lines and curves.

ss teapot fabric

I found a traditional star block I liked, and devised a fun way to piece it.

ss teapot top

Isn’t the variety of stars amazing? And the fun part is, if I had cut the triangles just an inch away from where I did, every star would be different from these. I must admit, it’s addicting. I showed this quilt to friends and students, and my Spin Star class was born. It has been extremely popular over the years and I think the appeal lies in the fact that each star is a surprise! The down side is that it makes “swiss cheese” out of your fabric:

ss teapot holes

My stars begin as four stacks with 8 identical triangles in each. Here’s a portion of a Jane Sassamann fabric that worked great, and just one triangle stack:

ss sas fabric

ss sas triangles

This one stack of triangles can be put together 2 different ways – with the top right point at center:

ss sas star2

or with the lower left point there:

ss sas star

Here they are together so you can see how much variety there is in just one stack of triangles.

ss star compare

I think it’s time I sew those stars together!

These are the blocks I made from a Christmas poinsettia fabric:

ss poinsettia

Did I mention this is addictive?

During one class I decided to make stars from a fabric printed with adorable children.

ss kid fabric

These blocks have never been stitched together because, even though the star is pretty, it bothers me to see cut up kids swirling around:

ss kid star

If this type of play is of interest to you, I’ll be teaching my Spin Star class at WCTC on Saturday, January 17th, and we need 3 more students to sign up for the class to run. Please consider joining us! The deadline is this Wednesday.

Have you had fun with fussy cutting? Please send pictures. Oh, and those of you who have taken this class – I’d love to get photos of your star creations. Perhaps it would be fun to do a virtual quilt show on a future blog. Send pictures to me at:

A Quilted Memorial

October 6, 2013 6 Comments

I’ve been on the road again this week. This time to teach at the AQS show in Des Moines, IA. It was a great show – over 1600 quilts and loads of great vendors! I went with my dear friend, Linda, and we had a wonderful time. Here we are in front of one of my entries entitled: Cherry Baskets.

DM-13-with-linda

I made this quilt with my rather large collection of cherry fabrics and it really makes me smile. Here’s a second floor overview of the show with a big finger pointing at my quilt (just for fun :-))!

Des-Moines-overview

Now that your up to date on my latest travels (it’s been crazy :-)), here’s this week’s topic:

A few months ago I received an email from Lynn, a neighbor who lived behind us when we lived in Dousman. This was her message:

“My mom passed away 4 months ago and the hospital gave our family a quilt.  There are 4 siblings and one quilt, which is the dilemma.  Can you help me or direct me to someone that could?  My thought would be to have the quilt divided into 4 pieces, however I’m not experienced at all, in how to do that.  Thank you in advance for your time, I truly appreciate it. I look forward to hearing from you.”

And here was the picture she attached to the email:

Divided-Quilt-1

I called her and said I would be happy to help. We both agreed that cutting the quilt into quarters wouldn’t be the best option.

Because it was only tied, I recommended she cut the knots, un-sew the binding (it was actually the back of the quilt turned to the front), take off the borders, and then we could get together and discuss the next step. She brought the disassembled quilt over and we sat on the floor brainstorming.

Since it was made of 8″ squares of Christmas fabrics, I suggested we take the quilt apart a little further and resew the squares into 4 table runners. She liked the idea! Here are the runners pre-borders (only one white square needed to be added to the original 15):

memorial quilt remakeNext, the borders were attached. There was enough fabric from the original borders to do one in the light green and two in the dark. Praise the Lord, I had the same green fabric in my stash for the border on the fourth runner:

Memorial Quilt remake

Next they were layered with batt and backing (there was enough from the original for all 4). I decided to turn them, rather than using binding (this will be the topic of next week’s post :-)). Once they were turned, I machine quilted them 1/2″ from the edge and in the ditch around the blocks (even though I greatly dislike “ditch” quilting). Then I chose to quilt hearts in the squares. I used a heart shaped “Mix and Match Template™” and traced around it with a sliver of soap in the red and a “Frixion™” pen in the white.

memorial-marking-1I’ve been wanting to try the Frixion™ pen for awhile and was pleased with the ease of marking. These pens are made by Pilot™ and were created for use on paper. The ink disappears with heat, like the friction from erasing on paper. The quilt world discovered them because the ink disappears with the heat of ironing! I was a little concerned about the long term effect of using this tool. I did a bit of testing and will share my results in a future post.

So – on to the memorial runners:

The free-motion quilting of the hearts was a joy and the table runners were finished quite quickly.

memorial-done

I hope Lynn and her siblings will be pleased.

Have you created a memorial quilt? Have you received one? Have you ever needed to make one quilt into more than one? We’d love to read your story!

PS I received pictures of quilts made by quilters in the Mariner’s Compass class I taught in Janesville a few week’s ago and I thought you might like to see them. This one is from Peggy Nelson:

mariners compass quilt

And this table runner is by Valerie Cook:

Mariners Compass quilted table runnerGreat job ladies! Thanks for sending pictures!

Talking Quilts

March 10, 2013 5 Comments

Do your quilts talk to you? I’ve discovered mine do and when I don’t listen, they usually don’t turn out as well. This is the story of a conversation I had with a recent quilt. A few weeks back I was piecing a quilt top for an upcoming class at WCTC. I’ve discovered that any class that involves some variation on Log Cabin will be popular, thus I need to make one of these every so often. Once the top was finished (and made totally from my stash :-)), I couldn’t decide which fabric to use for the border.

bordering quiltsI was really leaning towards the plaid (just because I think it’s pretty and I’ve been wanting to use it). I laid the fabrics out around the top and the quilt virtually screamed “use the paisley”!

bordering quiltsI, of course, asked “are you sure”? The quilt answered “yes”, so I decided I needed a second opinion and took it to Open Lab where the class  unanimously voted for the paisley. Well, I gave in and added a 5″ paisley border with a 1/2″ dark green flange tucked into the seam for drama (if you’re unfamiliar with adding a flange, click here! This was a topic of conversation at my WCTC Open Lab this week :-)).

Go figure. The quilt was right!

quilt bordered

Do your quilts talk to you? Have you had an experience where you refused to listen? Please tell us about it.


Have You Ever Made a Double Wedding Ring Quilt?

December 31, 2012 6 Comments

The past few days I’ve been getting back into some creative stitching by starting on a “small challenge” quilt through the Milwaukee Art Quilters. The challenge is called Objet D’arc and each participant was given a vintage double wedding ring (DWR) arc from a rummage sale find and asked to do something with it.

Double Wedding Ring arcs

I’m not ready to unveil the plan for my quilt yet, but part of it involves making a traditional DWR block with modern fabrics. The problem is I don’t enjoy curved piecing. I have a garment background and am capable of doing it, but it’s just not my favorite technique. I do however enjoy coming up with ways to avoid curved piecing! First I needed a pattern, so I did an image search, cropped a block out of a quilt photo, printed 4 copies, and outlined the arcs with a black marker.

I then cut out the curved strips and paper pieced them from my fishbowl of bright scraps!

At this point I decided to appliqué the curved edges, so I wet the seam allowances with liquid starch and a q-tip and pressed over the edge of the paper (be careful not to get the paper wet).

The next step involves clear thread. Be sure to use a good quality polyester invisible thread (not nylon – I prefer Superior or Sulky). At this point I’d like to insert a few tips on machine stitching with this thread.

1. If your machine warns you when the bobbin in nearing empty, it may not read low levels of the clear thread and thus stop you from sewing long before you reach empty. To avoid this, wind a bit of a cotton thread on the bobbin first and then wind the clear thread over the cotton thread.

bobbin filling

2. This is a very thin, strong thread and it winds very tightly on the bobbin. I’ve seen bobbins actually break from the pressure, so it’s a good idea to only fill them 1/2 to 3/4’s full.

working with invisible thread

Now back to appliqué. I pinned the arcs in place on the background fabric and stitched them down with the invisible thread and a very narrow zig zag (set stitch width and length at 1).

machine mock hand applique

This looks best when the needle pierces the appliqué piece as it swings left (in the picture above) and goes into the background only when it swings right, thus capturing the folded edge. I appliquéd all of the arcs in place this way and here’s the block:

double wedding ring

Then the paper needed to be removed by cutting away the background fabric:

It worked quite well. I don’t think I’ll ever do a bedsized DWR quilt this way, but it was fun in one block.

Have you ever made a DWR quilt the traditional way? I’d love to know how many of you enjoy curved piecing. Please comment and let me know.

And the Capers Continue

June 3, 2012 Leave a Comment

I recently received an email from Cindy Frese and here’s what she had to say:

“Hi Chris, I was searching for patterns to piece flowers for the border of a quilt I’m currently working on. I couldn’t quite find what I was looking for so I used your folding method from Compass Capers to create what I wanted. It worked great for all of them including the tulips. Thought I’d let you see how they turned out. Thanks, Cindy”.

Here’s the picture of her blocks:

My response to her email was: “WOW”! It is such a thrill for me as  a teacher to see students take something from my class and make it truly their own.

I asked her for a few more pictures to see what she was doing with the blocks. Within a day she had the blocks on the quilt and sent the pictures my way, saying that this is a queen size quilt and the blocks were meant to anchor each corner of the quilt because they looked a little plain. Here’s the whole quilt top:

And a close up of a corner:

A very clever border idea!

Another example of this was sent my way a few months ago by Michelle Costen.

This is a very creative piece. What a blessing it is to me to know that I played a part in these wonderful quilts. Praise the Lord – and thanks so much Cindy and Michelle.

When Wendy Rieves and I made our quilt, “Welcoming the Son Into Our Garden”, for the National Quilt Museum’s New Quilts From an Old Favorite contest, I wanted to piece a variety of “sunflowers” into the background to compliment her wonderful raw edge flowers. Some of the background “sunflowers” were made like traditional Dresden Plates, but others were compass variations – including the Sun!

If you have made a unique compass using my technique, please let me know…or better yet – email me a picture please :-).

If you would like to learn how to draft your own compass blocks, you may purchase my book, Compass Capers, by clicking on it in the sidebar at the right or email me at .


A New Look For My Blog & a Quick Miter Tutorial

May 6, 2012 4 Comments

Welcome to my new blog look!

Diahann Lohr, of Adunate Word and Design, inspired me to create my blog over a year ago. I then hired her to design my website, now she has integrated the two. I’m thrilled and I hope you enjoy the change!

The address for my new blog is: www.chrisquilts.net/blog. It’s shorter and simpler than my previous blog address, and the good news is that if you usually access my site by clicking on the link in my emails, you can continue to get here the same way. Please feel free to offer feedback by clicking on the word “comment” at the end of this post.

This week’s topic is about my favorite way to miter a border. Once you have sewn on the border strips, stopping both seams 1/4″ away from the corner to be mitered, it’s as easy as:

1. Fold diagonally through the quilt while aligning the border strips on t0p of each other (right sides together), and lay a ruler along the fold with the 45° line along the stitching.

2. Draw along the edge of the ruler on the border strip, remove the ruler and pin.

3. Sew on the line!

I’ve been doing a bit of mitering lately because I was designing a new Attic Window project for a Summer class at WCTC in Waukesha.

  • « Go to Previous Page
  • Page 1
  • Page 2
  • Page 3
  • Page 4
  • Page 5
  • Go to Next Page »

Primary Sidebar

Archives

Recent Posts

  • London ~ and More
  • Designed For a Purpose
  • Squirrel Quilts and More
  • Vintage Appliquéd Arrows and More
  • Fascinating Tidbits

Recent Comments

  • Karen Ann Moore on London ~ and More
  • Cheryl McLean on London ~ and More
  • Sue Halpern on London ~ and More
  • judy raddatz on London ~ and More
  • Joanne Corrigan on London ~ and More

Categories

Footer

My Guide

Whatever you do, do your work heartily, as for the Lord rather than for men.

—  Colossians 3:23

Contact Chris!

  • Home
  • About
  • Gallery
  • Classes
  • Trips
  • Books
  • Blog
  • Contact
  • Sign Up For My Blog

Copyright © 2026 · Chris Quilts · Website by Adunate · Privacy Policy