Over the years I’ve had the opportunity to organize group quilts for charity events. I’ve also been the recipient of stacks of blocks made by a number of different people. And – I can’t count the number of times quilters in my Open Lab classes brought stacks of blocks like this in, in hopes of my having a method to put them together. The following are some techniques I’ve used a lot and posted about before, but some things just bear repeating. I hope you’ll find them helpful.
No matter how we try, there is no way for all quilters everywhere to sew with identical seam allowances. So what do we do when we want to make these types of group quilts?
Well, if you are in a group where each member is making the same block, I do have a suggestion from a post I wrote about back in 2011. It’s a great technique for keeping your own seam allowances consistent too, and I share it often in my classes. Here’s the story that confirmed it really works:
In 2006 I was asked to organize the making of a queen sized quilt that would hang in the sanctuary of the church I was attending at that time. I recently realized I never took a photo of that quilt, and was saddened not to have it included in my photo collection. So I made a call and was so pleased to have the church secretary send this to me:
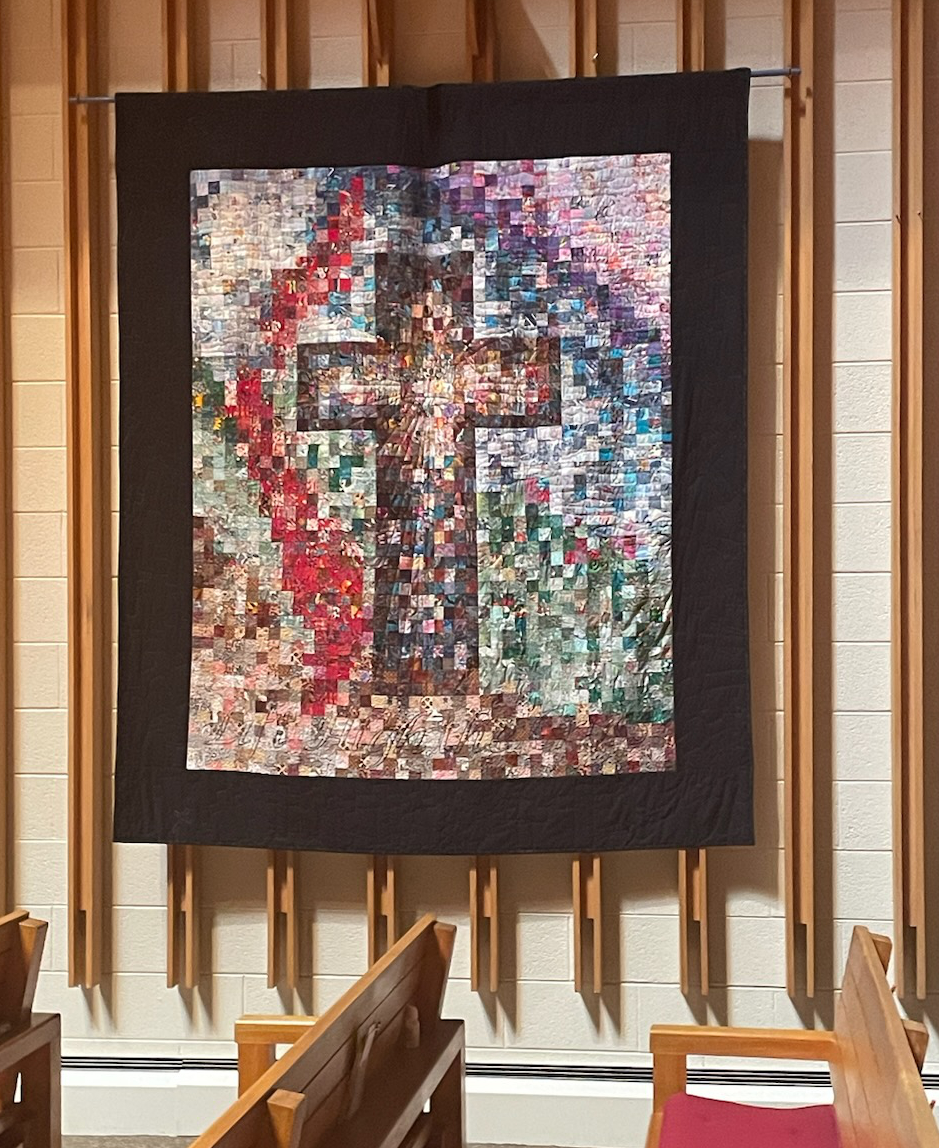
As you can see, the “quilting committee” decided on a watercolor style quilt. We asked the congregation to donate woven cotton fabrics. After removing the “bad” ones, we began sorting by value, cutting them into 2 1/2″ squares and laying them out on a huge, gridded piece of flannel. We had enough quilters in our church that this part came together quite well. Once it was laid out it was time to sew. Five of the women brought their sewing machines into the fellowship hall, and five others volunteered to be the runners and pressers. I started at a bottom corner and laid out 5 x 5 groups of squares on trays, labeling them so I could put them back together. The runners would take a tray to the stitchers and, once sewn, they’d be taken to the pressers, and then put back on the flannel in place.
In order to assure the blocks were the same size I went to each machine with an index card and marked a scant 1/4″ seam allowance with masking tape on each machine. When I got to the fifth one the quilter said “you will not put tape on my machine – I have a perfect seam allowance”. She couldn’t be persuaded. The next day I attempted to put all the 25 patch blocks together and every fifth block was too small! The others were perfect. Grrr. After quite a bit of unsewing and resewing, I layered and machine quilted the center. It then was pinned into my hand quilting frame (the only time it’s been used to quilt a bed-sized quilt 😕), and everyone from the congregation was invited to add their own stitches in the black border. It ended up being a delightful project.
This technique really does work. Here are the instructions from that long ago post:
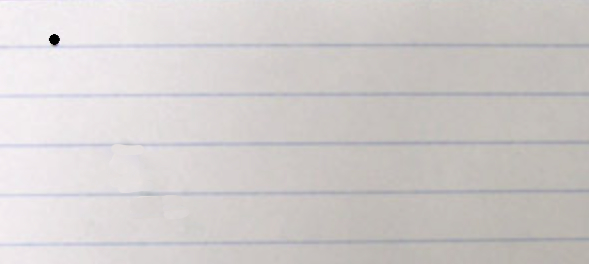
The trick is to use an index card with 1/4″ lines. Cut the bottom of the card on the last line. Place it under the machine and lower the needle into the card so that the left side of the needle just “kisses” the next line. That’s the trick that makes a scant 1/4″.

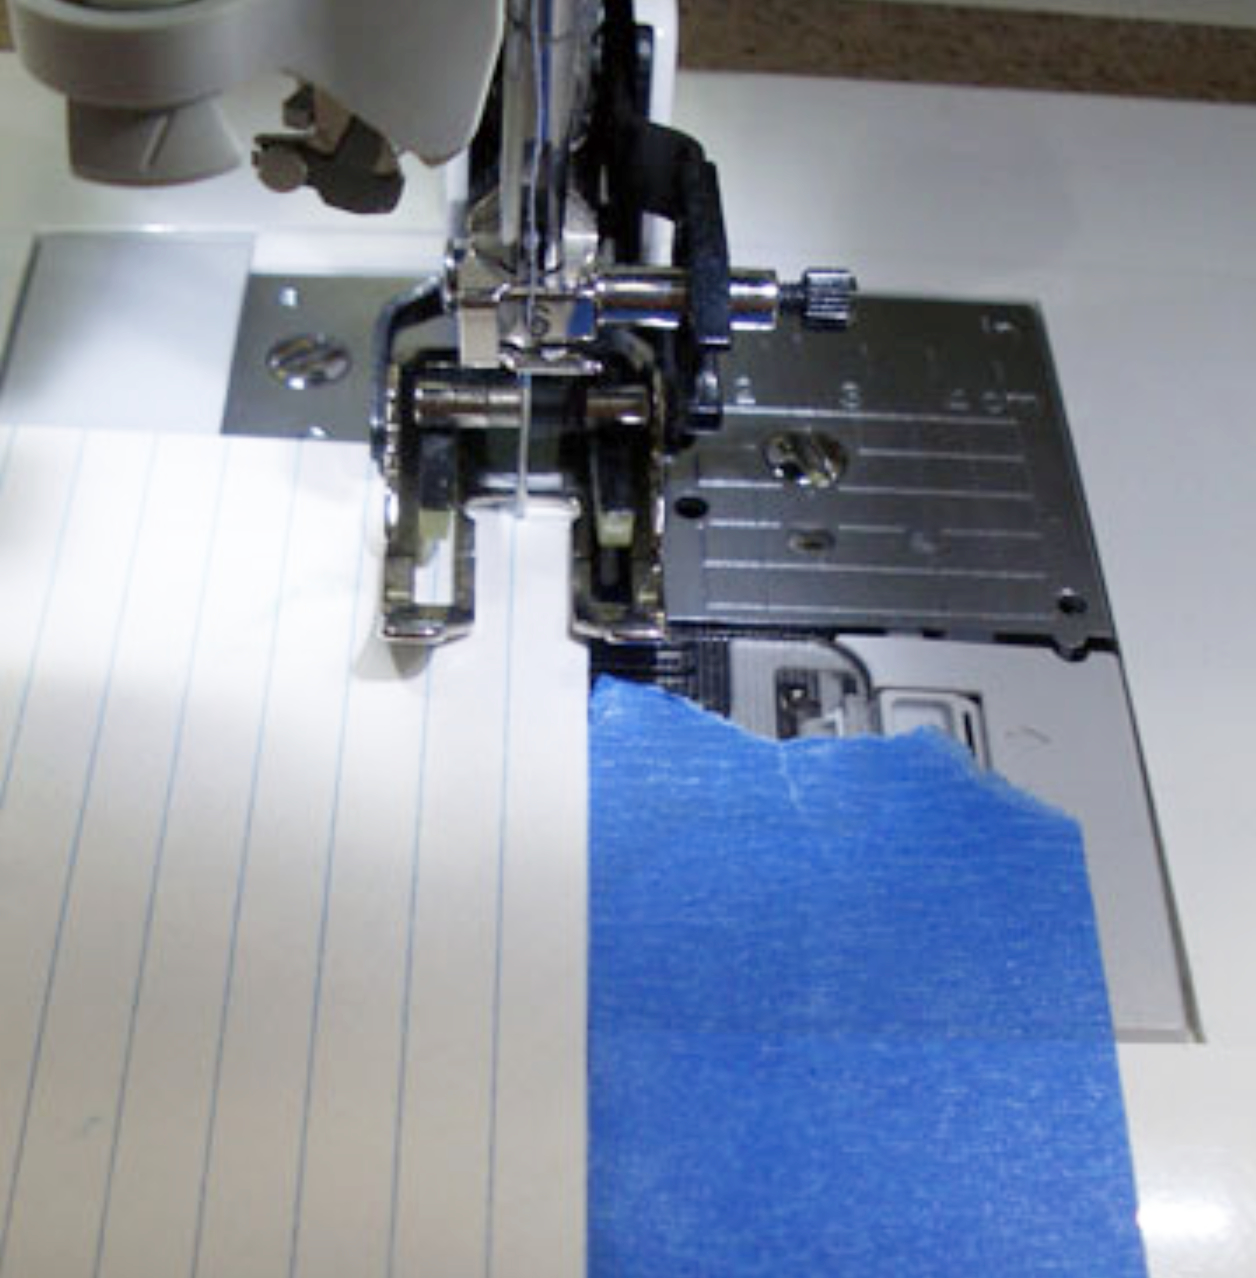
Now you simply need to place a piece of tape along the edge of the card, being careful not to tape over the feed dogs.

Remove the card and use the edge of the tape as your guide.
An added benefit is that this technique can yield identical seam allowances on different machines! Let me explain. There are times when I stitch on the same project on 2 different machines (like when taking a class). I can mark the seam allowance on my home machine, take the card with me to class, place the needle on the school’s machine in the hole and tape next to it.

Voila – it works no matter what foot is on the machines.
Let me know if you use this technique!
I’ve also come up with a few ways to get random quilt blocks to fit together. The first is by turning them on point. To read my previous “how to” post on this great technique (that was pinned on Pinterest oodles of times – praise the Lord 😁) click here.

Here’s a sampler quilt on which I used this technique to make all the different blocks fit together, and look like they are all the same size (I apologize for the fussiness of the photo, but you get the idea):

Another method I’ve discovered was used by my friend Maria on her barn quilt. She was able to make these pre-printed panel blocks (which are never square or of consistent size) fit together by bordering each one with the same fabric, and then trimming all the blocks to the same size. She added a contrasting sashing between the blocks and folded black triangles to the corners to give the feel of an old fashioned photo album.

I’ve found these techniques to be more fun than re-stitching all the blocks, and the resulting quilts are even more interesting.
Do you have a different technique that works to make unequal blocks fit together? Please let us know! I always love to add new quilting techniques to my tool box.
*****************
And… if you would like help with any of these techniques, or you’ve hit a roadblock in a current project, or you need help with a “project in your mind”, or you just want to sew with friends…

I’m offering a Stitching Together open lab class in Watertown on March 23 from 9-1! For all the details click here!

Mary Wedor says
Wow, this is wonderful, can’t even digest it all in one sitting… as Chris says, “noodle on it for a bit.”
Thank you Chris!
Blessings, Mary
Barb Jordan says
Hi Chris,
Is the Stitching Together going to be a regular gathering? I’m very interested but will need some help.
clkquilt says
This will just be a one time class, but if the response is good I’ll schedule more!
And you know I’d be happy to help 😊.
judy raddatz says
Such good tips. Thanks
Gail says
Wow, what great ideas in this post. My quilt group’s project last year was to make and trade 12 1/2″ blocks so that we would all have 12 blocks at the end of the year. I got only 9 blocks back and several were too small. Now I know how to deal with that in the future. THANKS for the tips!!
Margaret says
Your “1/4 inch” advice is excellent! I cannot believe I never heard that one before!
And great ideas on how to deal with various sizes of blocks. Thank you for your continuing good tips.
Laurelie Neubauer says
Hi Chris, thanks for the tip for 1/4” seams. I also saw how Maria sewed those barn quilt blocks together and it was quite creative! Anyway, her unique photo album creation won her a ribbon at the Wis. State Fair. Enhancing our quilts gives them uniqueness and beauty! Creating quilts is our thing!!!!
Blessings, Laurie
Jodi Grzeczka says
I love your index card trick! I am going to try that one because my Quarter Inch Foot is OFF! I don’t use it for that reason. This sounds awesome. The other suggestions all sound like methods I would also use at different times. Thanks, Chris!