Last week I did a silly post about birds, and in it I had a link to view my video of a starling murmuration. I didn’t realize I’d posted it to YouTube as “private”, and some of you weren’t able to see it. I fixed that problem – so if you missed it please click here.
Thanks to my many readers who have sent photos of their bird quilts. I will be sharing them in a future post, and if you have one you’d like to have featured in my blog ~ there’s still time to email them to me 😊. Please send them to .
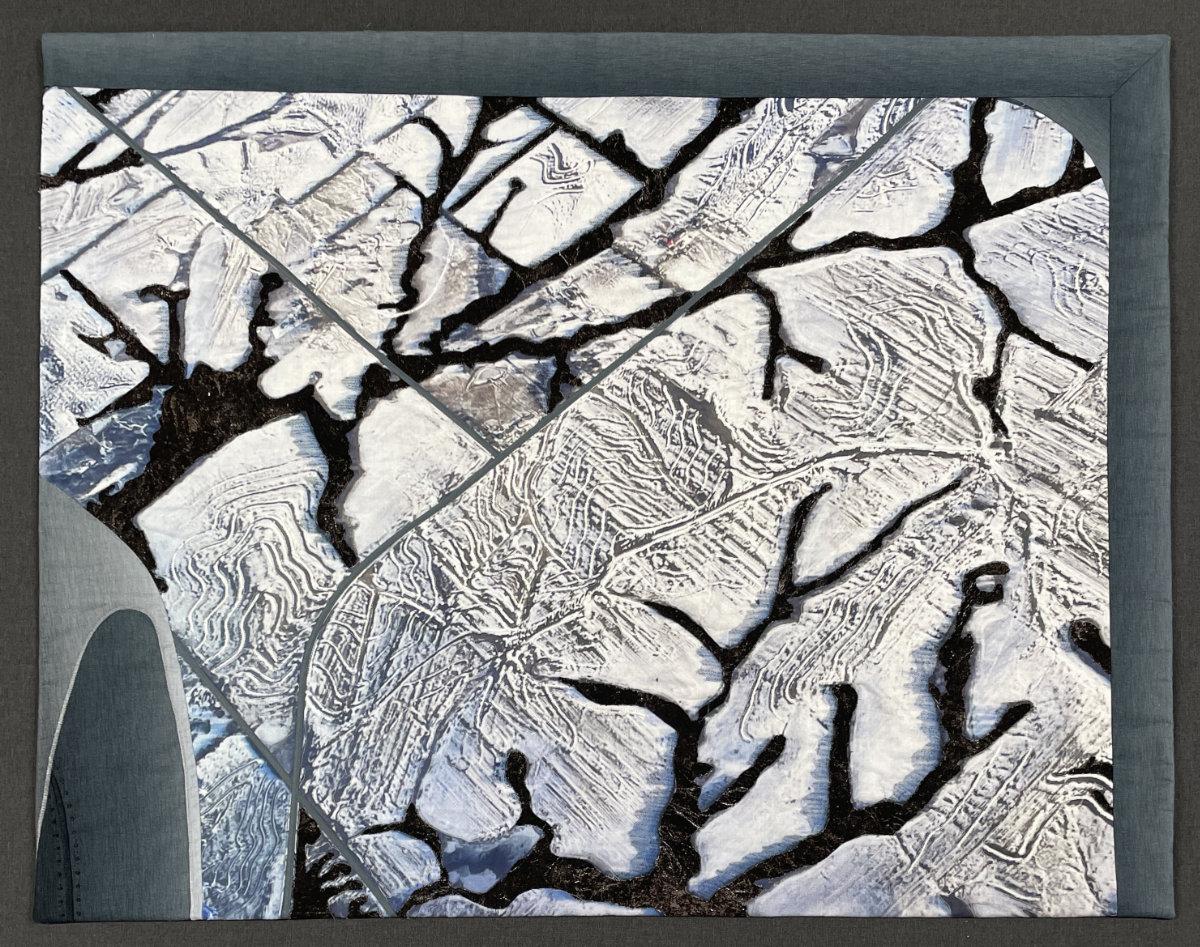
This week’s post isn’t silly, and it’s not really about birds. It’s the theme of our current “BIG” challenge at ThreadBenders. I got the idea for this challenge when I was flying home from Florida last winter. The South had been hit with an unexpected snow storm, and the view out my window as my second flight took off out of Kansas City was fascinating!
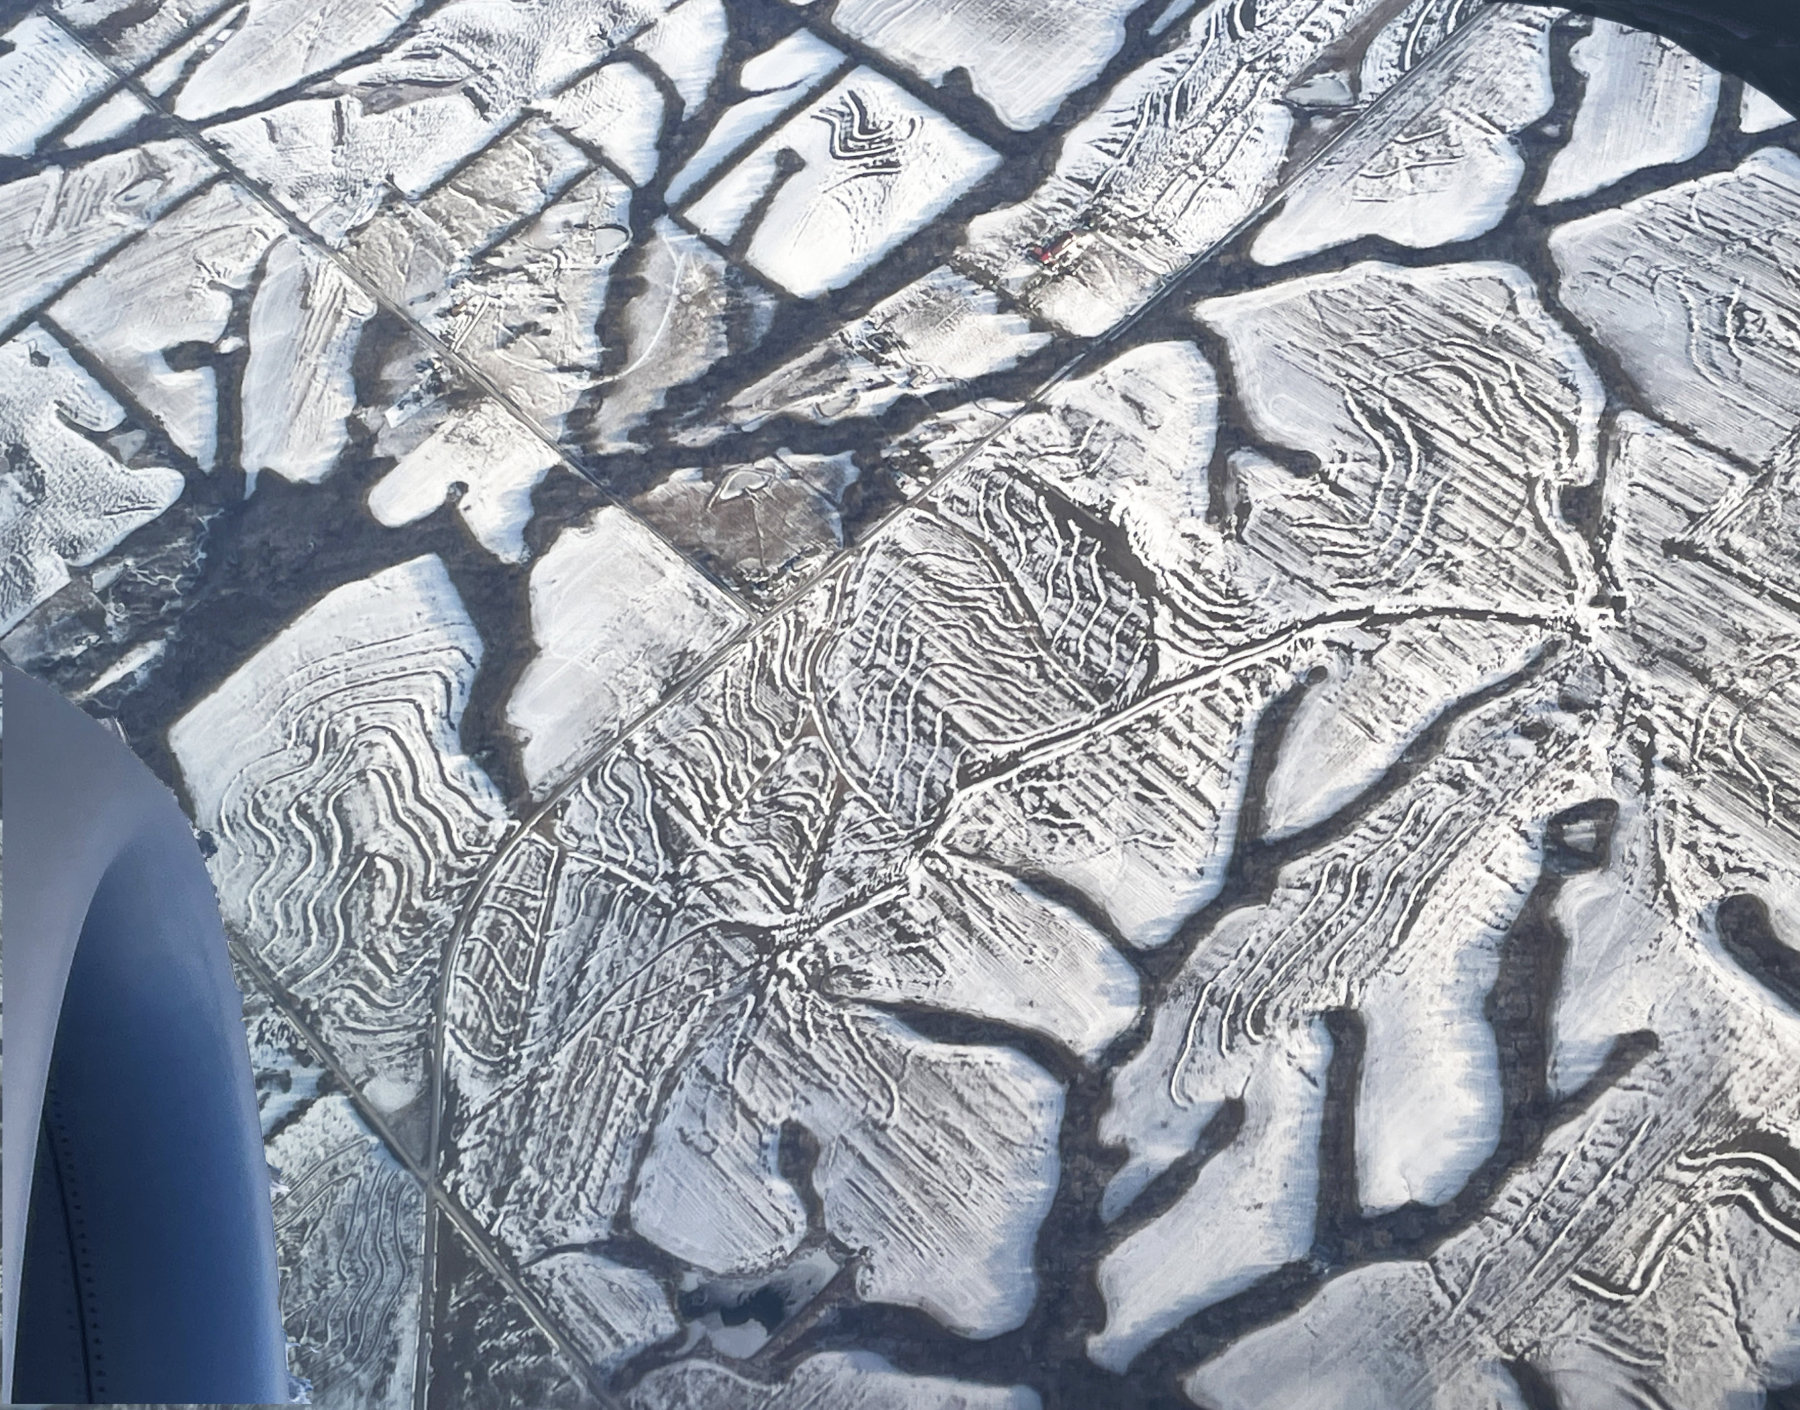
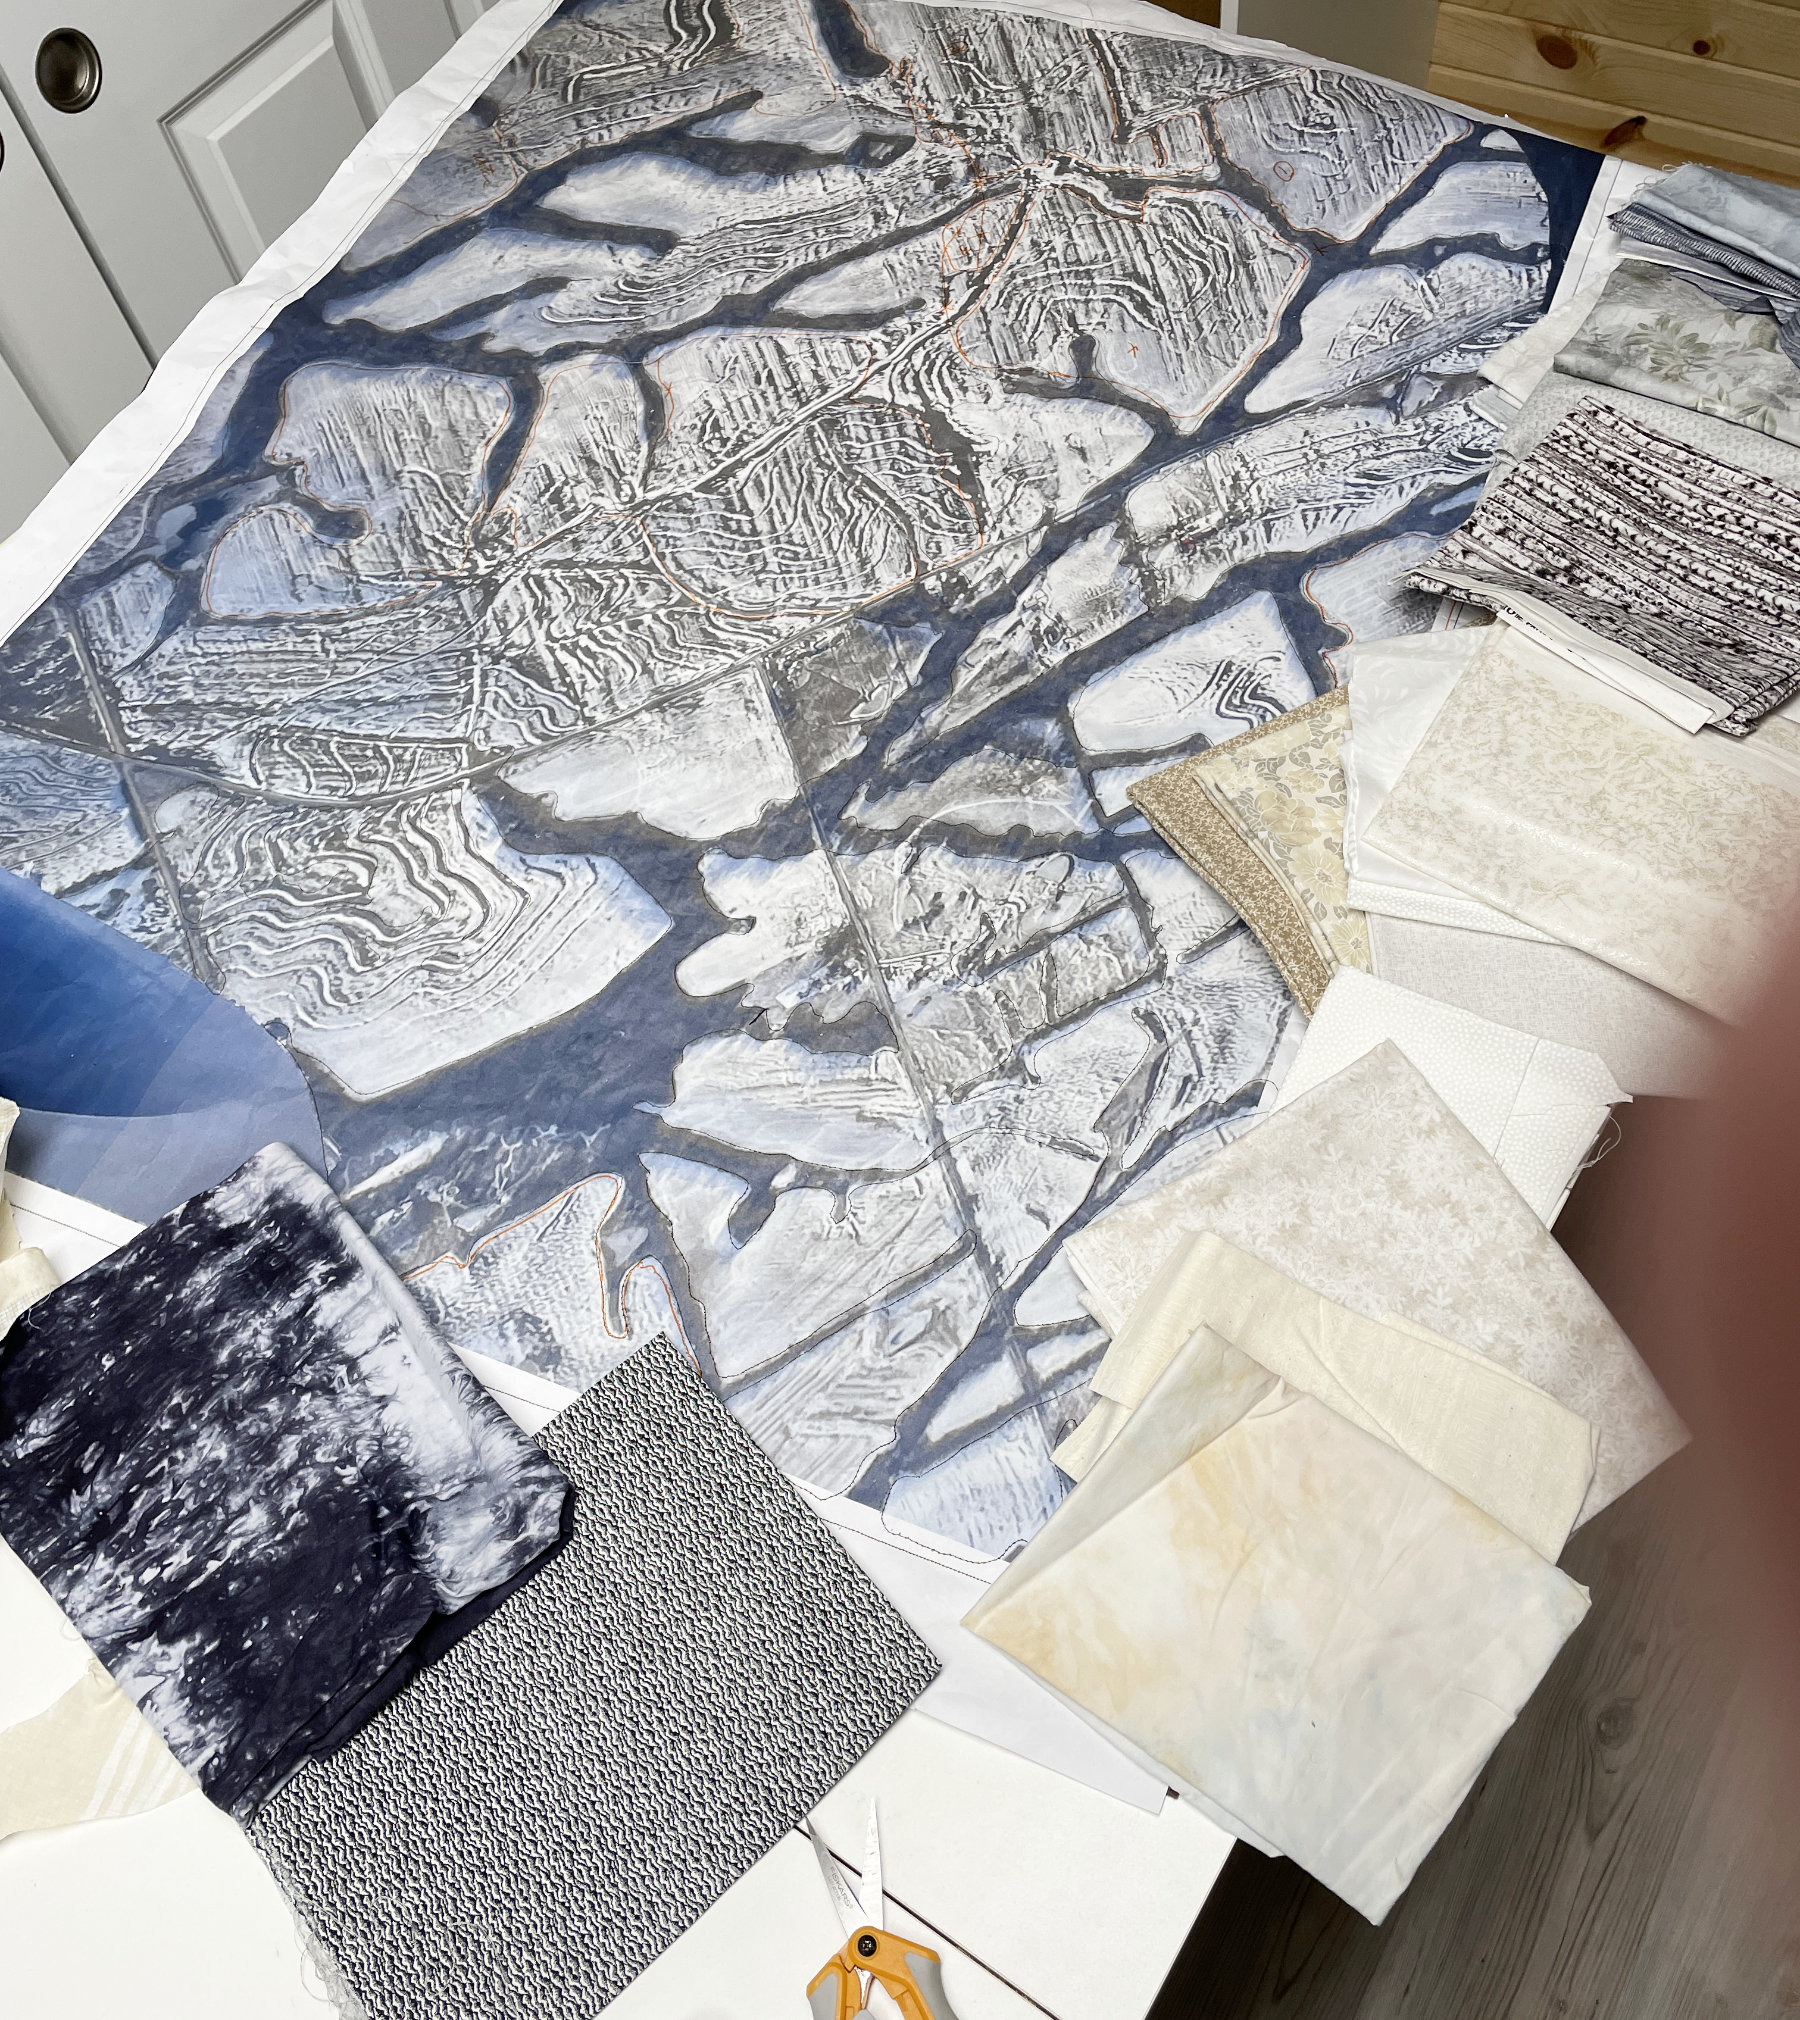
The snow showed off the texture of the fields in such an interesting way. I assumed the dark branching lines were water, but upon closer examination I discovered they were all tree lines. And the jet engine gave the the photo perspective. This type of photo could be called a “birds eye view”. I presented this idea to the group and it was voted in as our current challenge theme. I was pleased because I really wanted to make this into a quilt. I began by enlarging the photo to the correct size on paper in order to repliqué the different areas. I chose a bunch of fabrics from my stash to accomplish this:
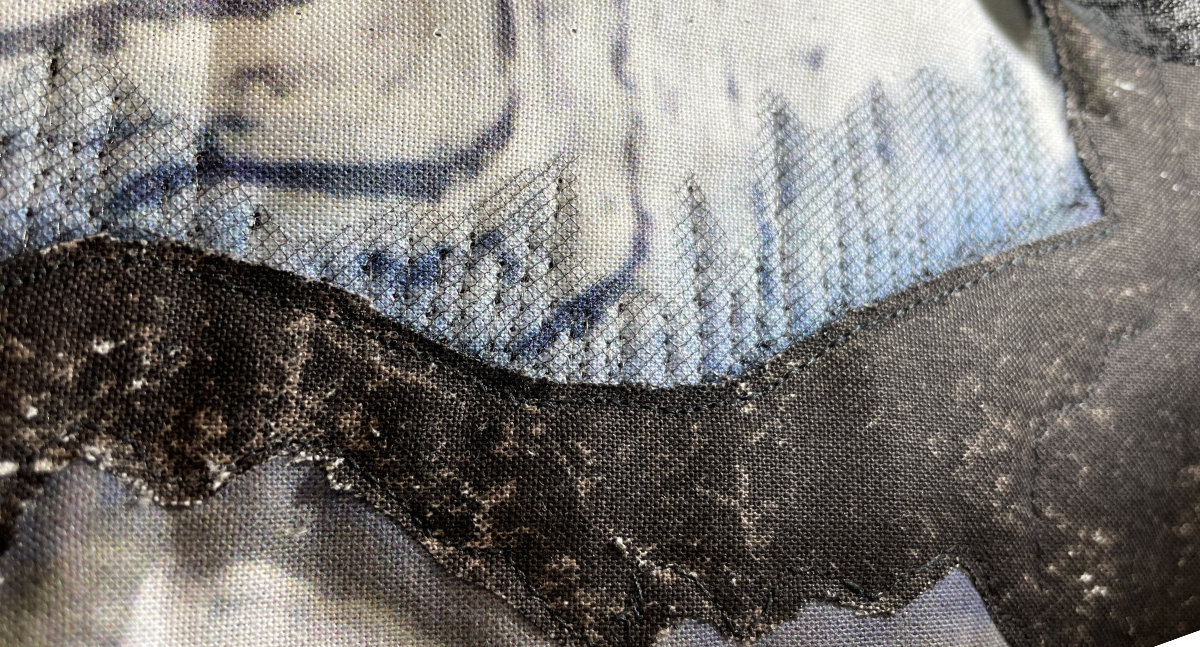
Once the fabric was ready I began, but after quite a bit of stitching, the results of my efforts were disappointing (sorry – no photo). I was still excited about the project, but there had to be a better way. That’s when I decided to have my photo printed on fabric at Spoonflower.com. Wouldn’t it be even more fun to thread paint and embellish the photo I loved? And it was. I began by covering the shadows of the trees with tulle and stitching in the tree trunks. Then I repliquéd the wooded areas in a dark fabric. Next I machine quilted around many of the furrows in the fields and made them 3D by running yarn through them with a large needle – trapunto style.

This photo shows the yarn tails sticking out of the furrows.

The main highways were added with fusible bias tape.
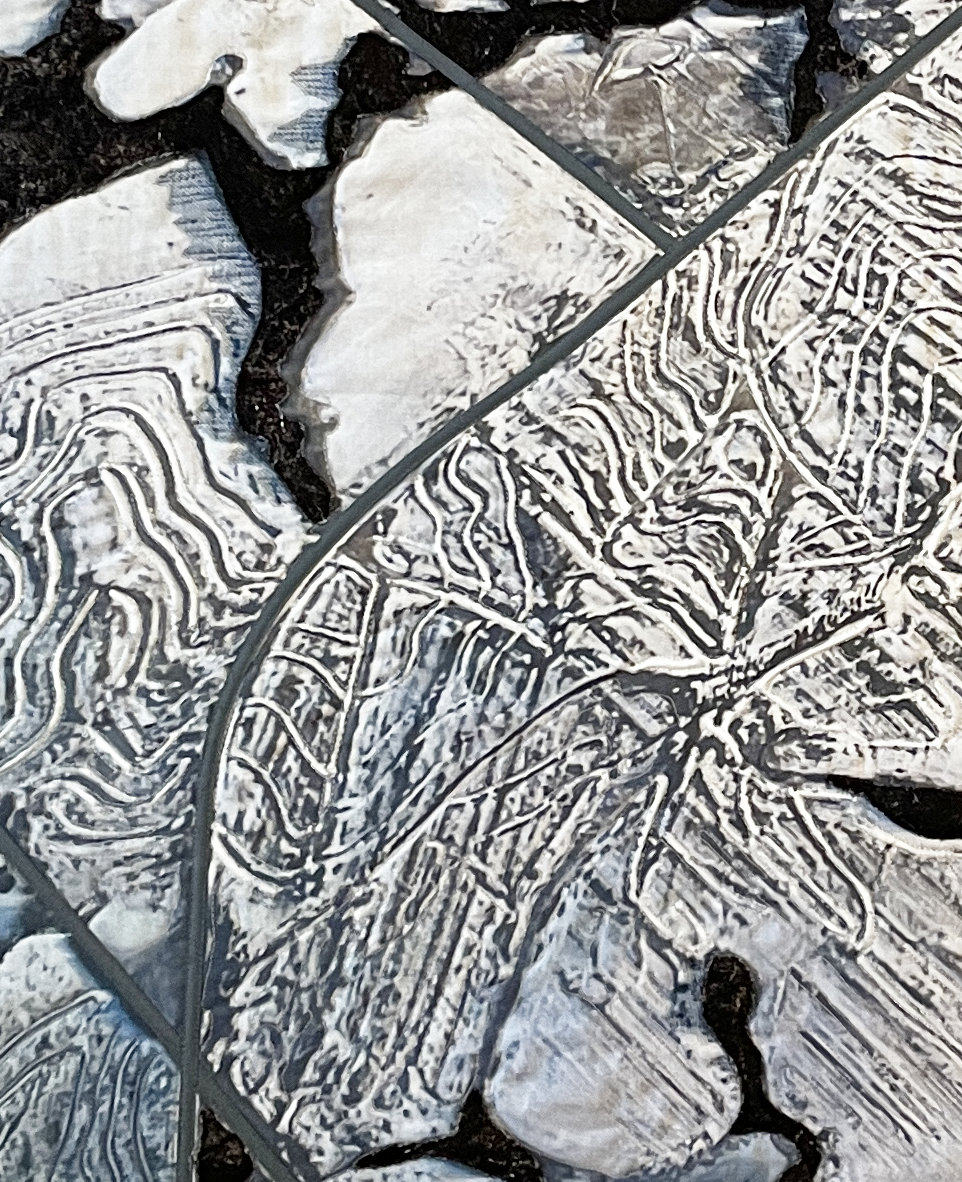
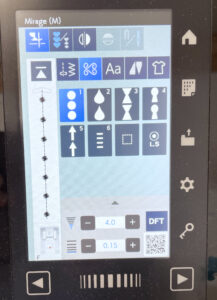
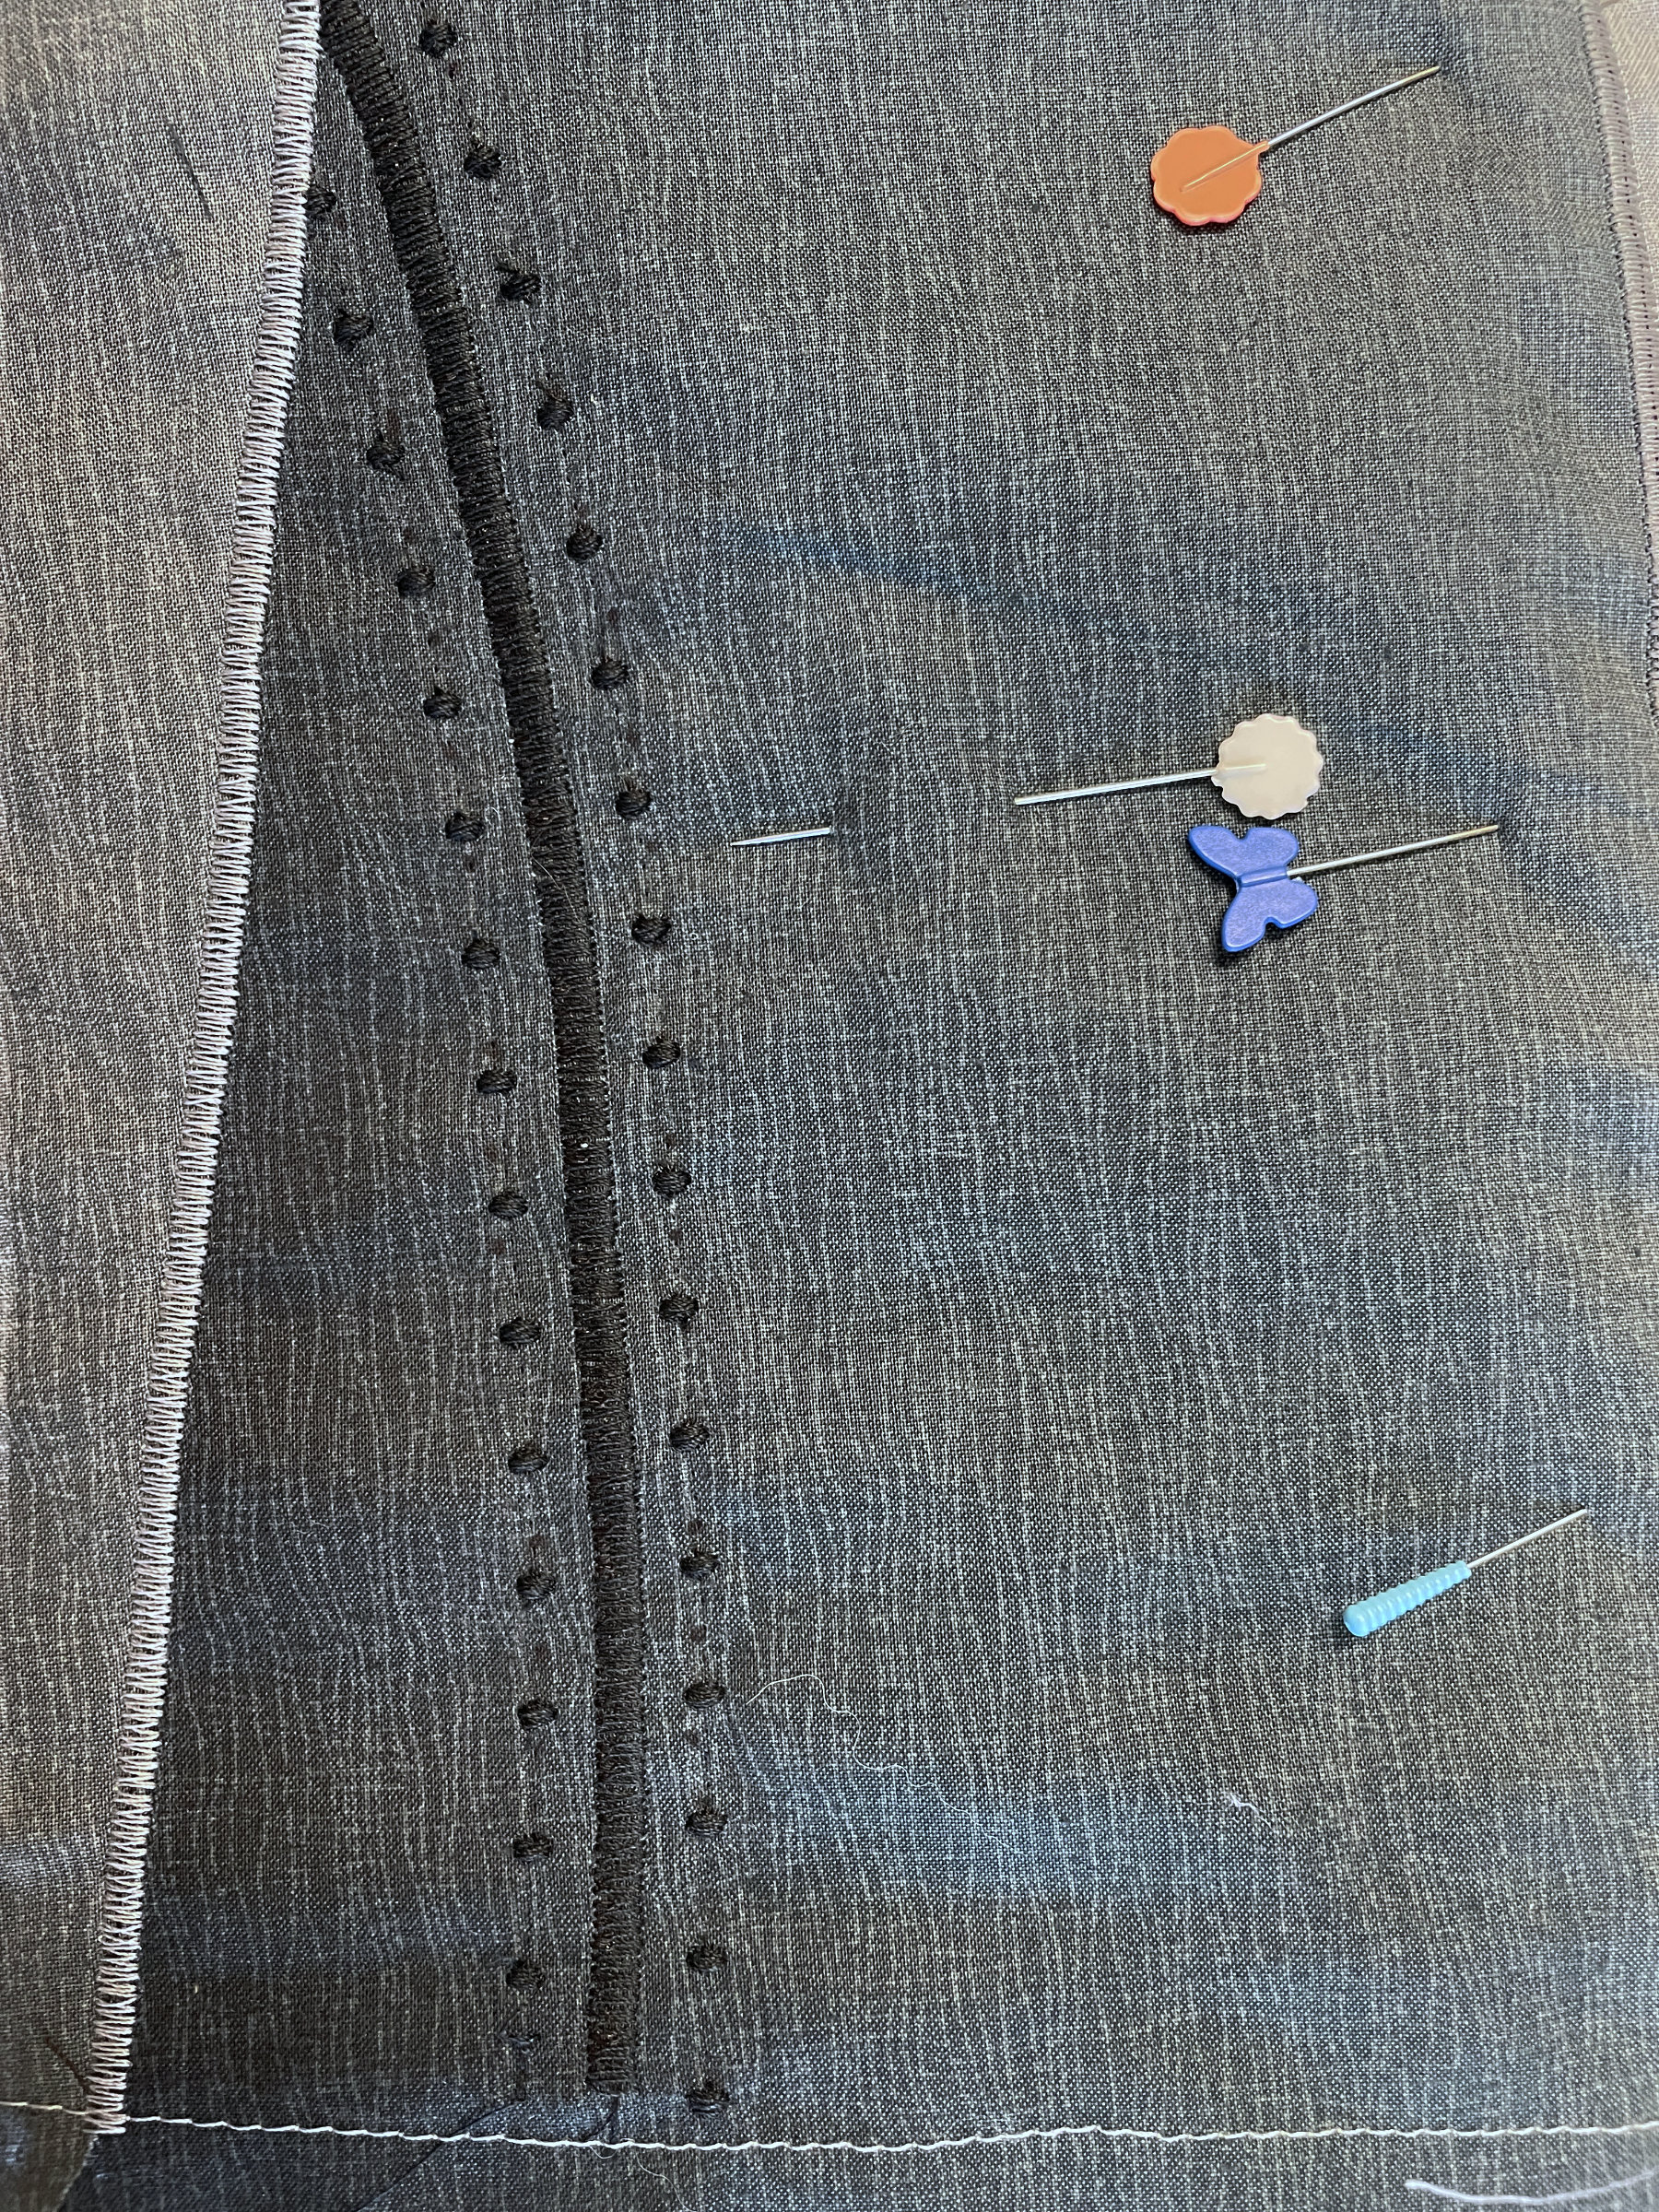
The jet engine was repliquéd with a “black to gray” gradation fabric. I noticed the photo had a “seam” inside the engine with rivets. The seam was easy enough to stitch from behind on the pattern, and then widen with satin stitches on the fabric side. But how would I do the rivets? I found a stitch on my Janome that might work.
But after stitching it I didn’t like the stitches that connected each “rivet”. So I placed a dab of glue on the back of each one to secure the threads, and then removed the stitches between them.
It was looking good. That’s when I measured it and found the entire quilt was 1″ too short. Ugh – how do I do this to myself? I decided the frame of the plane window (which I’d cropped off of the original photo) needed to be put back in. And that worked! All that was left was some sort of an edge finish. Binding or facing???
I decided facing this quilt would be the best option. And it’s finished!
We had the big reveal of our Birds Eye View quilts at our last meeting, and it’s a fascinating collection. To see them all together click here. Oh, and they will all be displayed at the Crazy Quilters Quilt Show in Mukwonago, WI, March 28th and 29th. Click here for the show information (and a map with information about parking because of construction issues).
PS If you ever want to put a facing on a quilt rather than a binding, please go to the previous blog post about my favorite facing technique. You can access it by clicking here. The advantage to this method is that it has a slick trick for removing the bulk in the corners.

Karen Ann Moore says
Chris, thanks for the shout out about the Crazy Quilters show. Looking forward to seeing ThreadBenders display at the show!
judy raddatz says
Inspired by your use of a simple glance out the window. I need to stop and see the world!
Lois says
This was so beautiful! I look forward to seeing it up close and personal at Mukwonago’s Quilt Show.
Laurie Neubauer says
Boy Oh Boy – It is so amazing how a picture can be turned into a quilt and illustrate exactly what the picture is saying – down to the rivets on the planes engine. Great job of “Birds Eye View.” Love it all!!!!
Tomi Fay Forbes says
I’ve often thought the same thing when flying on a clear day. What fun it would be to quilt farm fields as seen from an airplane>
By the way, are you familiar with Birds Eye maps? An artist would visit a community, walking the streets and sketching each building. Then he went back to his studio and drew the town in detail from his sketches. The view of the town was not directly overhead but at an angle. Those maps are valuable to those who study the history of a town because they are so accurate. If you are restoring a house, and it is on a Birds’ Eye map, you can depend on the accuracy of the picture – how many windows, where the door is, if there is a porch. They are extremely reliable. And simply amazing!