A number of years ago my friend Jean showed our Open Lab class a clever way to control binding while attaching it to a quilt (to read a previous post about some lovely placemats Jean made, click here!). I thought I had posted about it, but can’t seem to find that post (after 6 years of blogging I’ve covered a lot of topics!)
The concept is quite simple and it requires 2 easily obtained supplies: an empty toilet paper roll and a piece of ribbon. After making enough binding to go around her quilt, Jean rolls it onto the toilet paper roll, threads the roll onto a length of ribbon, ties the ribbon around her neck, and stitches the binding to her quilt. The binding feeds evenly off the roll in an extremely organized fashion. Brilliant!

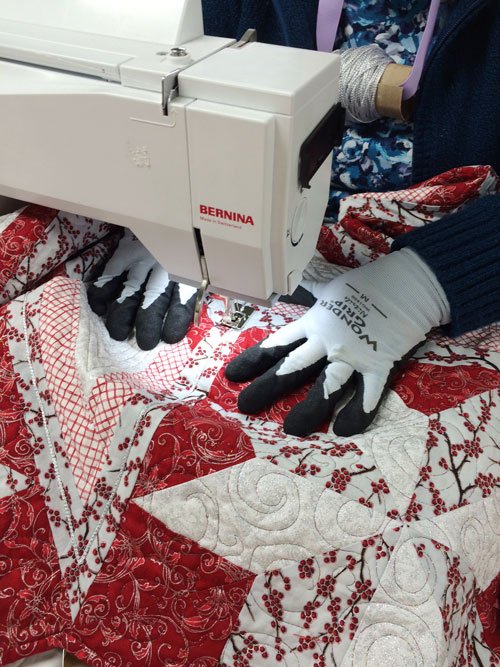
Fast forward to this past Christmas. Connie, another Open Lab friend, was making tree skirts (I posted about them in December – click here for that post). She chose to couch silver cording onto one of the tree skirts (for couching instructions click here). Jean just happened to have one of her special rolls with her and it made the couching oh so much easier:

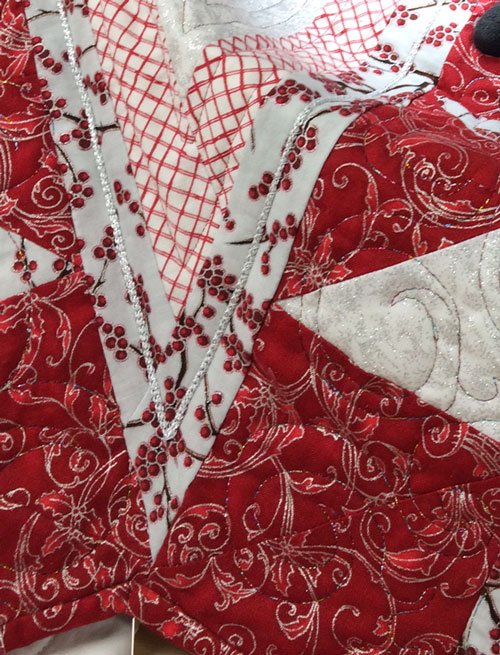
Here’s a close up of the couching. It really added some extra zip to the tree skirt!
Thanks Jean, and Connie 🙂 !
I don’t know why I haven’t tried this yet, but I know what I’ll be doing with my next empty toilet paper roll.
Let me know if you try this. A picture of your project would be fun too!

Jackie Iannarelli says
What a cleaver idea.
quiltedcookiecrumbs says
I think I’ll give it a try on my next project as the binding always seems to get twisted when it’s left loose hanging next to my quilt. Thanks for the tip! ?
Jan Hartwig says
I wrap mine around an empty ribbon spool, but never thought about hanging it from my neck. Perfect idea!
Sandy Kozich says
wow! we can always learn as we age. thank you.
Dawn E Weideman says
I’m happy to be in a class with such creative and talented women — instructor included!
Doris Ast says
I have heard of this before, but never used it because I like to make sure there is no seam of connecting strips that would meet at a corner. I just lay the binding on the edge of the quilt and pin it in several places to make sure that doesn’t happen.
Camille says
Several friends and I have used this “tool” for several years and I highly recommend it!. It really keeps the binding from twisting and tangling and is especially helpful on large binding projects. We used a sturdy wrapping paper roll, cut it into segments, and added the ribbon to hold it around our necks.
Rosemarie Ulmer says
What a great idea. I know I will do this. I try to cut my binding soon after I finish my quilt and that way I don’t use that fabric for other quilts. I store in a plastic freezer bag, marked with the quilt name. Thanks for the great hints!……Rosie U.