• Skip to main content
  • Skip to primary sidebar
  • Skip to footer

  • Home
  • About
  • Gallery
  • Classes
  • Trips
  • Books
  • Blog
  • Contact
  • Sign Up For My Blog

Blog

Quilted Memories – A Contemporary Twist

June 17, 2018 4 Comments

Shortly after I posted to my blog last week, Cheryl commented that she has a booklet about the Sunday School Picnic quilt.

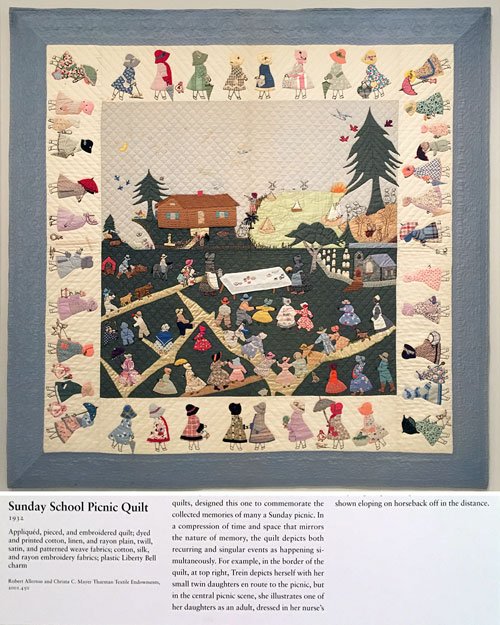
That led me to do an internet search and I was thrilled to discover the whole story of this amazing quilt. I added the link to my post, but by then over 300 people had already read it, so I thought I’d better share the link again here for those of you who might be interested. It’s a fascinating story and well worth the read. Click here for the link.

**********************

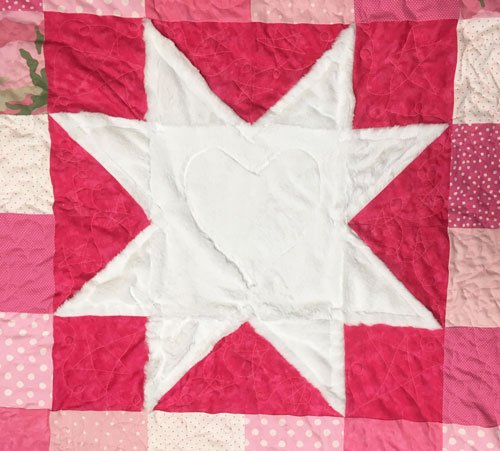
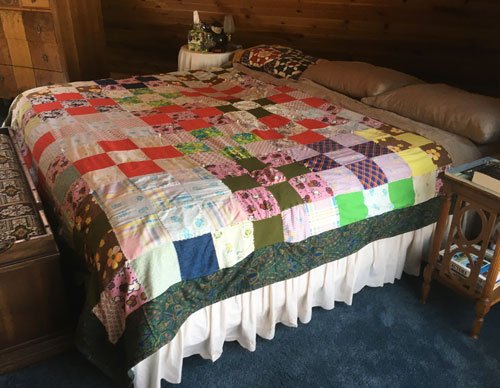
This week I’m going to follow up on the vintage memory quilts by showing my own modern version. The majority of those antique quilts were bed sized and hand quilted. You don’t see many memory quilts like those being made today. But we still want to make quilts to commemorate people, places and events. I love to travel and I’ve often thought about making one quilt about my travels. The problem is I’ve been so many places – praise the Lord – that it seemed to be overwhelming.

Last year while planning for our Sew We Go cruise from Quebec to Boston I had a “light bulb” moment. What if I would choose one photo from each trip that triggered all the wonderful memories of the entire vacation? Then I could make each photograph into a block and …

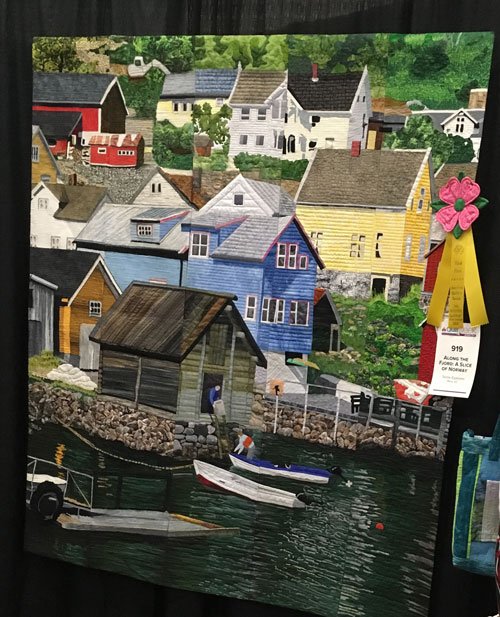
Modular Memory Quilts was born! I gave a lecture on this “quilt”, and all the techniques I used to make the blocks, for our group while on board the Norwegian Dawn and it went over quite well (to read about the projects on that trip click here).

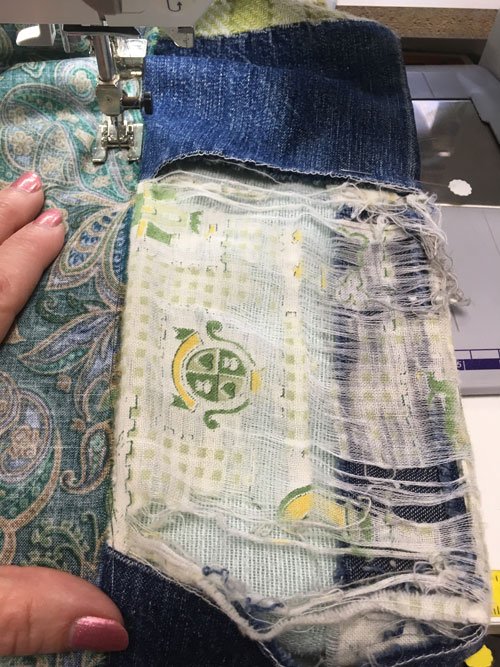
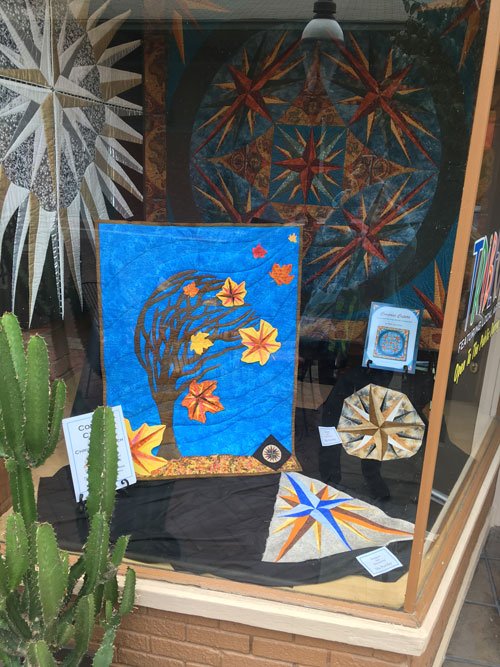
This block is one of my favorites from the “quilt”.

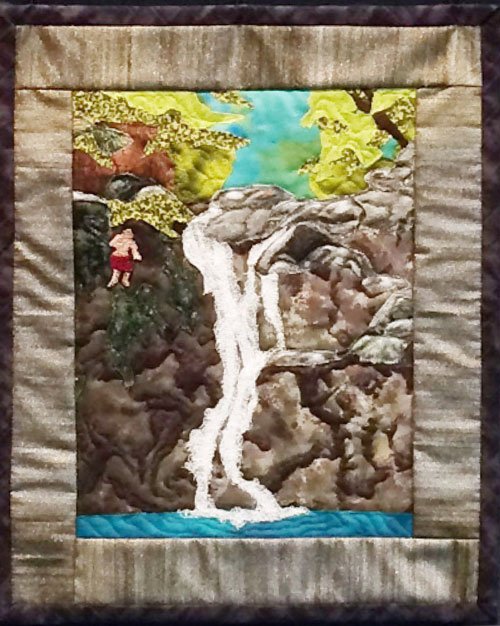
It’s from Mike’s and my first visit to Hawaii when our son, Brad, was a senior in High School. We invited his best friend along and, while stopping at a waterfall on the Road to Hana, the boys decided to climb to the top and jump!

Others were doing it and it was a real case of “monkey see, monkey do”.

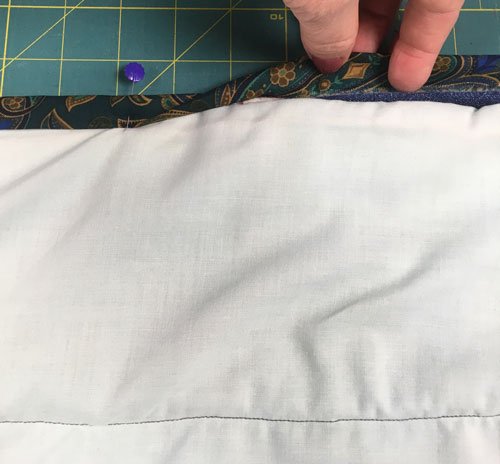
To make the block I used a bunch of techniques: glue-stick raw edge appliqué, stitched cheesecloth, and even thread painting on tulle to create my jumping Brad. What fun – and what a great memory.

As you may know, Wendy and I are taking a group of quilters to Hawaii this January. We still have a few cabins available, but since this trip will fill, Norwegian Cruise Lines is requesting all the “non-spoken-for” cabins be returned to them soon. If you have been thinking about joining us – click here for all the details and instructions for signing up while you still can!


Now back to Modular Memory Quilts  🙂 .


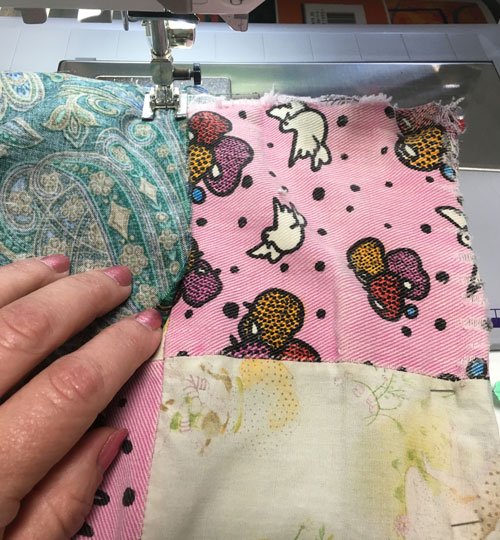
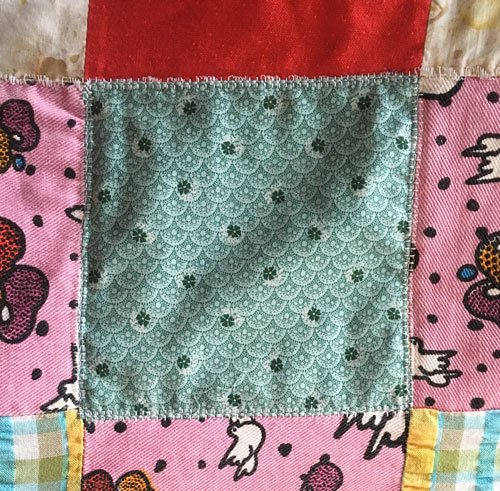
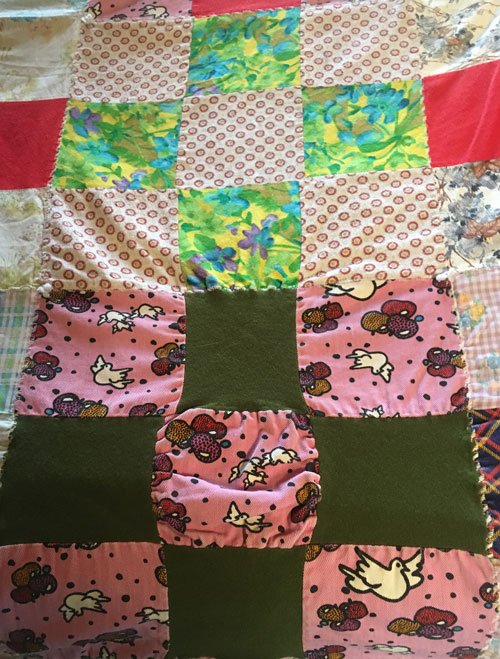
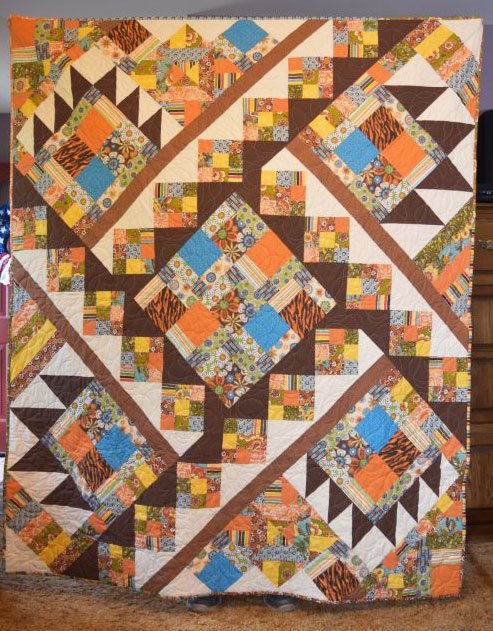
One of my favorite parts of making Modular Memory Quilts is that each block is made, bordered, quilted and bound as a separate unit. There’s no quilting and finishing a big quilt! Then I connect them together with my own unique technique, using hair bands and safety pins (yes – really 🙂 ). This is what makes it completely modular. The blocks can be moved around; additional blocks can be added over time; other’s can be taken away; or, if the “quilt” becomes too large, it can be broken up into two separate quilts.

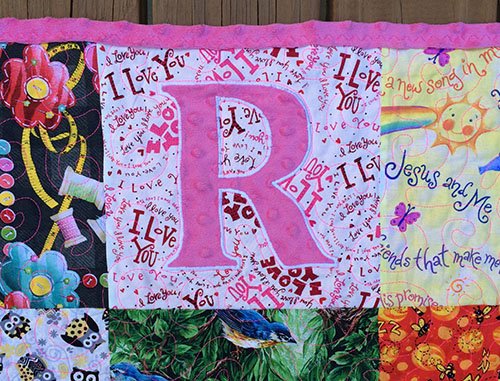
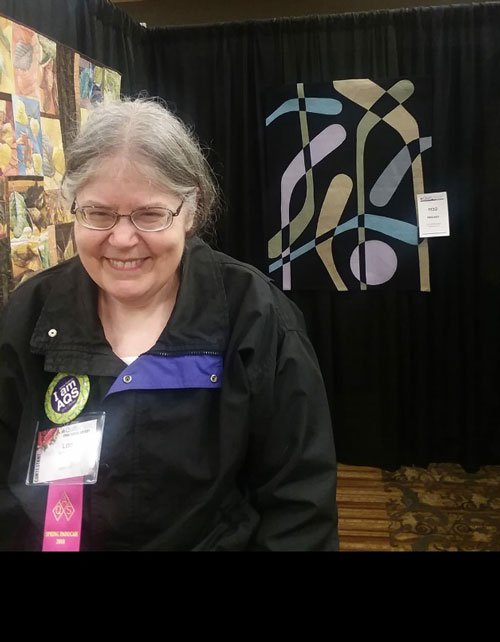
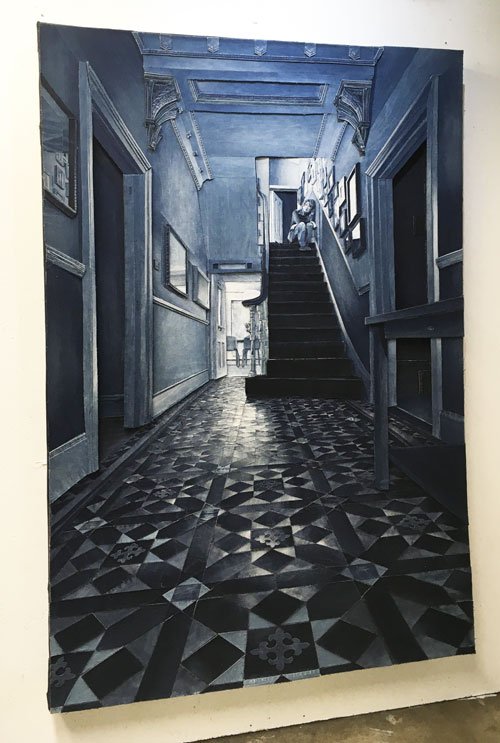
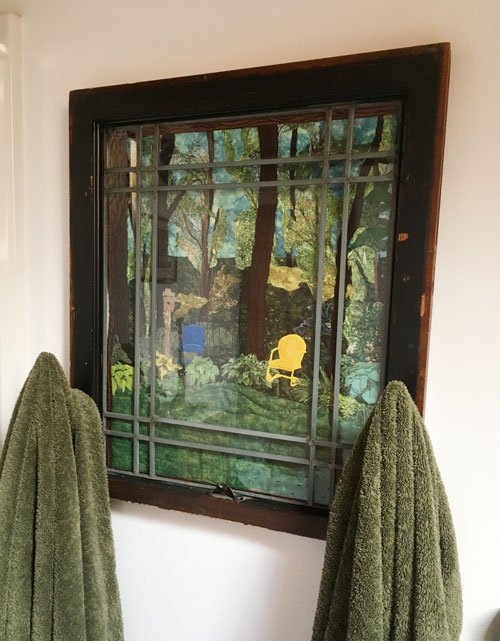
I was working on this project during the Madison Quilt Expo last September and, while walking through the show, I was delighted to see my friend Wendy Butler Berns had made a quilt in a similar fashion and entered it in the show (click here to visit Wendy’s website).

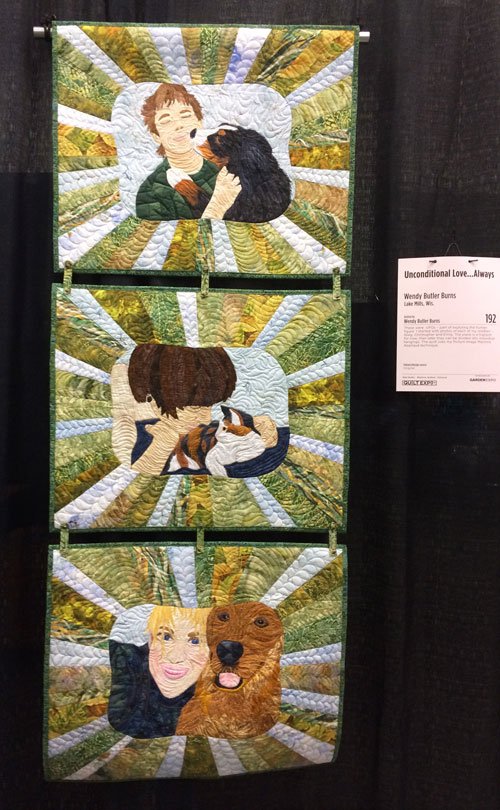
“Unconditional Love – Always” was made as a triptych of quilts of her children with their pets, using her Picture Image Machine Appliqué technique. She put them together with strips of fabric and buttons, so they can eventually be separated and each child can have their own quilt at some point in the future. What a wonderful idea!

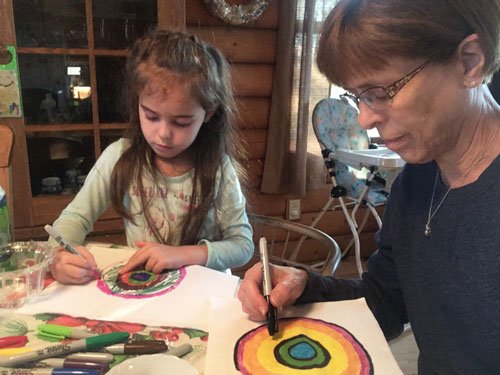
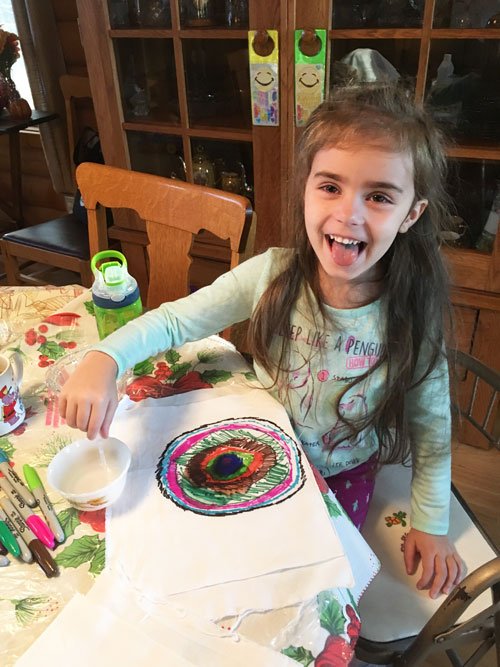
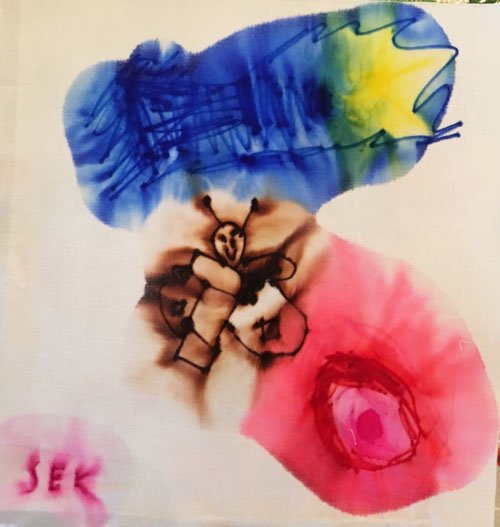
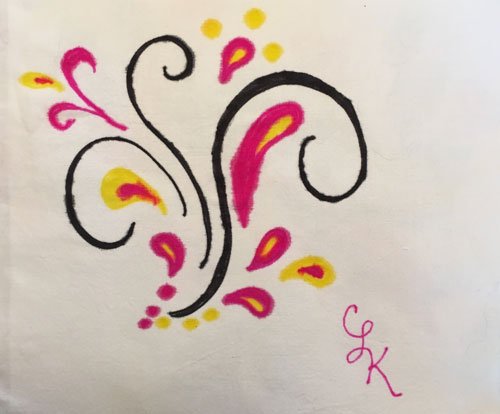
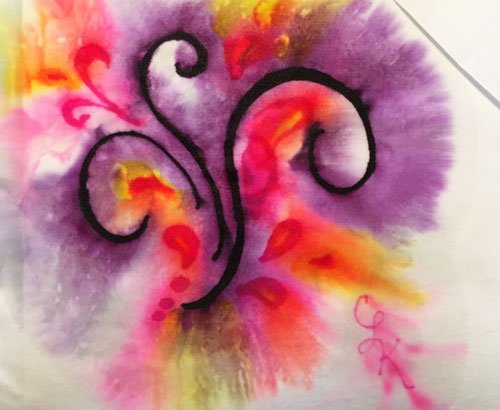
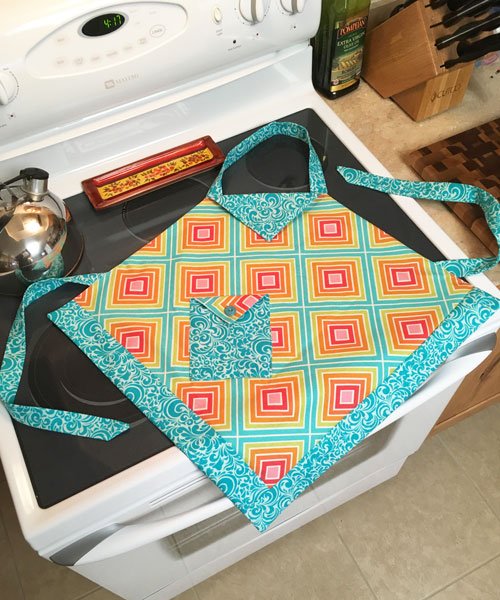
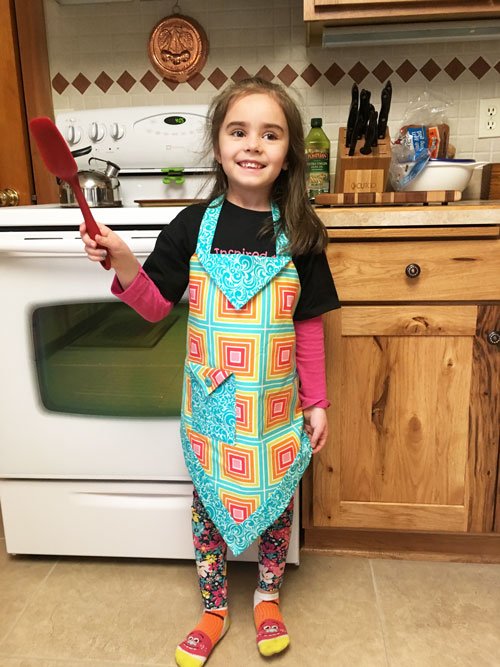
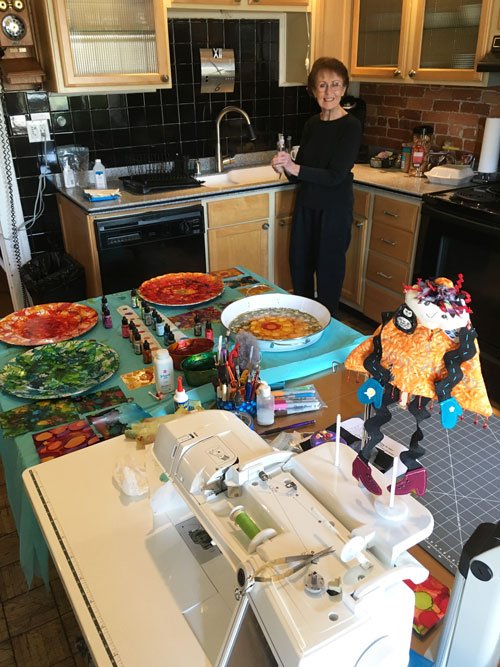
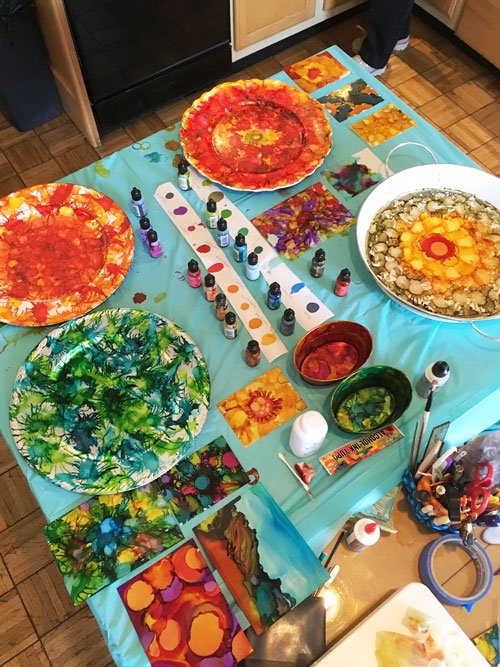
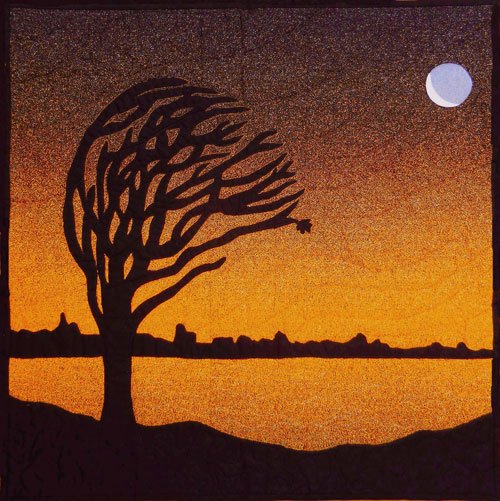
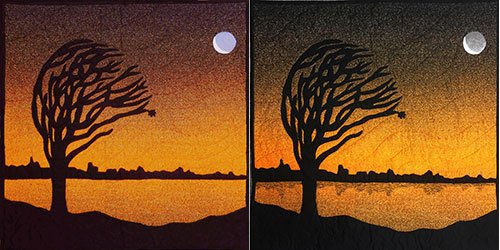
Since making my travel quilt, I’ve thought of many more types of memory quilts that would work well as a Modular Memory Quilt: children’s art, grandma’s embroidered squares or hankies, workshop samples … just think of the possibilities! Here’s one – the project we’ll be making on the Hawaiian cruise is a type of “Paint-stik™ appliqué” I wrote about a few months ago (click here for that post). I made three quilts with this technique and decided to combine them “modularly”.

I’ve since made a few other of these “quilts”. Completing small, individual block quilts is quick and a lot of fun. I’m very excited about the results and I’ll be doing a lecture on these fun souvenir quilts at the Madison Quilt Expo this September. Not only will I talk about the quilts and my connecting technique, but I’ll also demonstrate step-by-step instructions for many of the techniques I used to create the blocks. Perhaps I’ll see you there!

Child’s play – Markers on Fabric

June 3, 2018 8 Comments

Oops! If you linked to this post and were looking for my recent post about aprons, I apologize for the linking error. Please click here to be redirected.

And now for the Markers post: A few years ago my friend Linda and I played around with Sharpie™ Markers, muslin and isopropyl alcohol (to read that post go to: https://chrisquilts.net/?p=6023)

A while later I decided to try it with Sommer. We colored circles:

Then added alcohol with an eye dropper:

Here are our results:

Then we tried again. Sommer drew anything she wanted (these are lighter and brighter, and make me smile):

I decided I liked the way the black bled to purple and made it the focus of my design, allowing some space between the elements:

I was happier with these results:

Have you played with markers like this? Any pictures you’d like to share?

***************************

And one more note on Sommer and crafts – our passion is not always their’s!

A few months after Sommer made her first quilt (you can read that post at:  https://chrisquilts.net/?p=9537 )  I wanted to make her an apron. She was excited and wanted to help. We pulled out a pattern I’d purchased a while ago and she picked a pretty fabric from my stash. I ended up cutting it out with my rotary cutter and she didn’t like the waiting and watching, so she lost interest for that day. The next afternoon, while Trey was napping, she helped me set up the featherweight, we pinned a seam together and she began to sew.

Three seams later she asked if she could go play. When I asked her if she wanted to work on it tomorrow or if I should finish it – she perked up and said I could finish it  😕 . So I did.

She’s happy to wear it and help me cook. Her favorite part is tasting the “gredients”.

Quilting with Difficult Fabrics

May 13, 2018 1 Comment

I’ve put Minky™ fabric on the back of a few quilts to make them extra snuggly – with good results. In fact, on my granddaughter Rainee’s quilt I put it on the back and turned it to the front to make the bound edge; and I reverse Repliquéd it into an “R” on the front of the quilt too (this is a technique in my book “Snuggle and Learn Quilts for Kids)! To read about that quilt go to https://chrisquilts.net/?p=6186 .

turned back to front binding

Recently I was making a quilt for my dear niece Kate. She and her husband are expecting a little girl in June and I couldn’t wait to make her a quilt. The problem was I chose to piece with Minky™ this time. I found the fabrics I wanted to use at Vogue Fabrics near Chicago. Minky™ is an ultra soft, plush type of fleece, and what I found there was similar, but I’m not sure that’s what it’s actually called. The pink check on the right is for the back of the quilt and the white was what I decided to piece into a star – just look at the height of that nap! What was I thinking!!!

I cut squares of a pink cotton and drew a diagonal line on the wrong side. I then placed them right-sides-together with the “furry nightmare fabric” called “fnf” from now on 🙂 , pinning intensely. I sewed on both sides of the line and cut down the middle. The nap made everything squish and squirm. I was really glad I’d oversized the squares. After trimming them down I needed to pieced these half-square triangle units into a star. That meant “fnf” right sides together with “fnf”. It was awful. I’ve sewn on velvet and this was much worse. But I refused to give up.

Done!

Once the star was finished the entire perimeter was the cotton fabric, so I could breathe a little easier and lay out all the other pink squares.

Did I mention the nursery theme is pink with stars? And Kate and Ryan are both hunters, thus the pink camo fabric (thanks Maria!) The rest of the piecing was a breeze.

What I learned is that one should never try to put a really high nap fabric right-sides-together with anything else and expect to have great results. I decided I could still use the pink checked Minky™ for the back because it wasn’t sewn right-sides-together with anything, and it worked well. To quilt the “fnf” star, I cut a heart from freezer paper, ironed it in place on the back of the quilt,

and quilted around it from the back.

It all came together and I was happy with the results. Especially when I saw the smile on Kate’s and Nonna Deb’s faces.

Can’t wait to meet this little sweetie in June. Love you guys!

Repaired and Back on the Bed!

May 6, 2018 4 Comments

In last week’s post I told the story of a quilt (it’s really a comforter because it’s tied, not quilted) that has kept Mike and me warm for 42 years. I was overwhelmed with the wonderful comments and suggestions to that post. I washed it, hung it outside (Spring is finally here!) and took a few minutes to simply look at it.

As puckery and worn as it is, it has too many wonderful memories to end it’s usefulness now. But how to repair it? Since almost all of the worn blocks were on the edge – why not cover them with a border “quilt-as-you-go” style? Please bear in mind my original comforter was layered with a sheet and a sheet blanket, stitched around and turned; then it was tied with yarn every 16″ – so it never laid flat, even before the wool shrunk. That added a minor layer of difficulty to this process, but I persevered.

I pulled out a pretty fabric from the “multi-yard” area of my stash, and cut a strip of fabric the length of each side of the comforter by the width of the outer row of blocks + 1 ½”. I laid a border strip, right sides together, with it’s appropriate side of the quilt, covering the outer row seam by 1/8″ and stitching with a ½” seam allowance.

As I continued stitching I found a block that shows why something had to be done  🙂 !

Once the seam was done I folded the border strip over the row of worn blocks, turned everything over to the back, and folded the border back on itself to create a “self-binding”.

I stitched it in place from the front with a decorative stitch.

I repeated this for the other side, then I added the top and bottom strips, this time leaving 1 ½” extra on both ends to finish the corners.

While working on the borders I did find 2 squares in the interior that were threadbare. To fix them I went through my box of 6″ squares, chose 2, trimmed them down to the right size, pressed under 1/4″ hem, and topstitched them in place with a mending stitch on my machine.

My old friend is still quite wonky, and there were some unavoidable puckers on the back (which I will not share pictures of), but it’s back on the bed and ready for another 42 years!

Thanks for all of the encouragement!

Retire or Repair an Old Friend?

April 29, 2018 27 Comments

My mother taught me to sew when I was seven and we made many of our clothes during the subsequent years. Mom especially liked to make pajamas for us kids, while I enjoyed making the outfits I would be seen in. A few years ago I put together a lecture comparing some of my quilts with garments from my youth (yes! I still have many of them  😀 ). The lecture is called “Gone to the Dark Side”  and you can find information about it at https://chrisquilts.net/?p=4370

When I graduated from high school my parents gave me a brand new Sears Kenmore sewing machine.

I was thrilled! I decided my first project should be a quilt for my “hope chest”. I cut a 6″ square from cardboard and dug out all of the scraps from our sewing projects. There were cottons, denims, flannels, crepe d’chine, seersucker and even some wool! I traced around the cardboard on the wrong side of each scrap and cut out all the squares with a scissors. Once the squares were cut I laid them out in 9-patches (I didn’t know that’s what they were called then) and sewed them together.

I assembled these blocks into a top and it ended up being king sized. I couldn’t wait to use some of the fancy stitches on my machine (my mom’s old Singer didn’t have any of those), so I did a line of decorative stitching over the seams of all the blocks.

Once the top was finished I layered it with a sheet, and a sheet blanket for the filling, and sewed all the way around the outside – leaving an opening for turning; only to find out I’d layered it incorrectly (the sheet was on the inside). So I ripped it apart, sewed around, and turned once again. To finish I tied it with knots of 4 ply polyester yarn at the block corners. What a delight for the eyes!

Even though it’s pretty ugly (don’t you love oxymorons?), it’s kept Mike and me warm for 42 years!

But lately it’s showing it’s age. Many of the fabrics are just plain disintegrating.

The green wool from a vest I made shrunk up years ago, but that didn’t keep me from tossing it into the washing machine many, many times.

Yet the fabrics are filled with memories. The pink denim with doves above was used in my favorite pair of hip hugger, bell bottom jeans (just picture that – it was the 70’s). In the following photo the brown floral was a sundress, the light blue flannel was a nightgown of mine, and the purple with flowers was from an apron I made for my German “mother” when I did a class trip to Germany my junior year.

So… do I retire it to the actual cedar chest Mike bought me as an engagement gift (at the foot of the bed)? or ???

While taking these pictures I realized the worn blocks are all around the outer edge. Perhaps I need to remove the last row of squares all the way around, add a binding and use it for another 42 years. What do you think?

Paducah 2018!

April 22, 2018 7 Comments

Linda and I are driving home from another wonderful trip to Quilt Week in Paducah! As I mentioned last week – we had a snowy start, but it was all up hill from there. The sun shone almost the entire week and the tulips were blooming (although the dogwoods were only just beginning to bloom).

As I do every year, I’m going to share a few pictures of some of my favorite parts of the trip, and I need to begin with the sign that “we’d arrived” – the Flying Goose Bridge!

We got to the 1857 B&B in the heart of Paducah, unpacked and then put up a display of my Mariner’s Compass quilts in the front window of Tribeca restaurant, just downstairs from our living quarters.

What a blessing to be able to show my quilts during Quilt Week. We helped to hang the show on Tuesday and I couldn’t wait to see my friend Lori Schloesser’s quilt.

I’ve featured my friend Evelyn in quite a few of my posts and this year she was part of a new group slice quilt that was awarded a third place (Evelyn – tell me again – which of the 5 strips was yours 🙂 )?

There were so many incredible quilts and it was a privilege to see them all.

This year AQS hosted a special exhibit that I feel was one of the most interesting I’ve ever seen. It was called “Art in Denim” by Ian Berry. The pieces were not quilts, but they were fiber art. He uses only denim, scissors and glue to created portraits and landscapes that truly amaze.

My picture doesn’t do this piece justice. To really experience Ian’s work you need to visit his website at http://www.ianberry.org/. Linda and I had the chance to meet and talk with this endearing young man. His work is incredible and yet he is funny, soft spoken and very approachable.

We set up our kitchen studio and did some sewing, but our special playtime this year was with alcohol inks.

I’d taken a class at Sew Much More in Waukesha this winter. It was so much fun I bought the supplies and have been sharing them with my quilting friends. I’ll be doing a post on this in the near future, but I wanted to show you our Paducah creations – plates and trays!

We had to do our traditional bubble tea stop at Etcetera (actually we had to do that twice).

As we left this morning, I couldn’t resist just one more picture – the compass quilts are back in my suitcase and the rain is gently falling.

It was such fun to catch up with friends, find some new treasures at the vendors, eat fun food and escape the snow and “reality” for a week. Thanks, Linda, for a great time!


A New Trick for Attaching a Quilt Label

April 8, 2018 4 Comments

I did a series of posts earlier this year on using Elmer’s School Glue™ to baste things together while quilting. I’ve discovered one more use that’s been a real help when stitching labels onto my quilts.

It’s really quite simple:

Create your label in any way you like. I usually design them on the computer and print them onto colorfast printer fabric.

Press under a 1/4″ hem all the way around.

Scribble a line of glue all over the wrong side of the label.

Place it on the back of the quilt and iron in place to dry the glue.

Now stitch it down without worrying about the label shifting, or the thread tangling around any pin heads! In the picture above I haven’t stitched it yet, and you will notice corners of the pressed hems peeking out along the edges. This is not a problem because I’m able to use my needle to tuck these corners under the label as I appliqué it in place.

I backed this quilt with a fabric I got in Alaska a few years ago. It was the perfect back.

I’m currently putting this label on my Winter Window quilt because I didn’t add a label when I finished it back in 2015. It hangs in our “master bath window towel rack” (to read my post about this quilt click here).

At the end of that post I stated that I already had an idea for my “Spring” quilt. The picture I used for this new quilt was the view from my kitchen window.

Working on a Spring quilt helped me to endure portions of this very cold winter, and this week I decided it was time to replace the winter quilt in my window (and finally add a label – two winters after it was completed).

Now if we could just warm up past 36 degrees!!!

Added Shadows

March 25, 2018 3 Comments

A few years ago I made a quilt using an orange/yellow pointillism fabric, silhouetted with black.

I loved the way the pointillism fabric added depth. I loved the color, I loved the silhouette of the tree. I was pleased with the moon. It was exhibited in a number of shows and I shared it in many lectures.  It hangs in our home every Autumn. But something never seemed quite right.

Recently I pulled it off the shelf as I was packing up for a lecture in a nearby town. I got the feeling I should hang it on the design wall and stare at it for a bit (which was impractical – as Trey was napping and I really needed to use the time to prepare for the talk). All of a sudden it hit me –

Why hadn’t I noticed this before? Why hadn’t anyone mentioned it to me?

I threaded the machine with black and began rapidly free motion stitching horizontal “wavy” lines on the lake. A few moments later – SHADOWS!

Here’s the before and after, side-by-side pictures, for comparison:

I’m so glad that when a quilt is finished, one can always change their mind and add a bit more quilting!

Now I love it even more   😀 .

Have you ever added to a quilt long after it was “finished”? I’d love to hear your story. Please comment to this post or email me at .

******************

And here’s a little extra about last week’s post :-). You may remember I shared pictures and stories about Bears Paw quilts. I asked for readers to send me pictures of their bears paw quilts and Donna responded with this email:

“After reading your last blog entry about the bears paw quilt, I thought I’d send you a picture of my quilt.  It’s not really a bears paw quilt, it’s what I started in your “Scrap Happy” class at WCTC a while back, but it does sort of have giant bears paws in it.”

It definitely has bears paws on it and it’s wonderful! Thanks Donna!

To see the original post about the Scrap Happy class I taught at a retreat go to: https://chrisquilts.net/?p=7287

********************

And one last item for anyone who lives in the Milwaukee/Madison area. This coming week is a special one and my church, Calvary Baptist Church in Watertown, WI, will be presenting a “Walk Through Jerusalem” on the evening of Good Friday. It’s a wonderful family event! Come anytime between 5:30 and 8pm. The address is 792 Milford Street.

If you’d like more information, please watch this invitation from our Pastor!

https://www.facebook.com/calvarywatertown/videos/1574850162568361/?t=0

Maybe I’ll see you there  🙂

  • « Go to Previous Page
  • Page 1
  • Interim pages omitted …
  • Page 43
  • Page 44
  • Page 45
  • Page 46
  • Page 47
  • Interim pages omitted …
  • Page 77
  • Go to Next Page »

Primary Sidebar

Archives

Recent Posts

  • Quilting in Bloomington ~ Part 2
  • The Indiana Heritage Quilt Show ~ 2026
  • Bird’s Eye View
  • The Birds
  • Sew Much Creativity

Recent Comments

  • Kathy Wuhrmann on The Indiana Heritage Quilt Show ~ 2026
  • Doris Ast on The Indiana Heritage Quilt Show ~ 2026
  • judy raddatz on The Indiana Heritage Quilt Show ~ 2026
  • Jeanette Bussard on The Indiana Heritage Quilt Show ~ 2026
  • clkquilt on The Indiana Heritage Quilt Show ~ 2026

Categories

Footer

My Guide

Whatever you do, do your work heartily, as for the Lord rather than for men.

—  Colossians 3:23

Contact Chris!

  • Home
  • About
  • Gallery
  • Classes
  • Trips
  • Books
  • Blog
  • Contact
  • Sign Up For My Blog

Copyright © 2026 · Chris Quilts · Website by Adunate · Privacy Policy