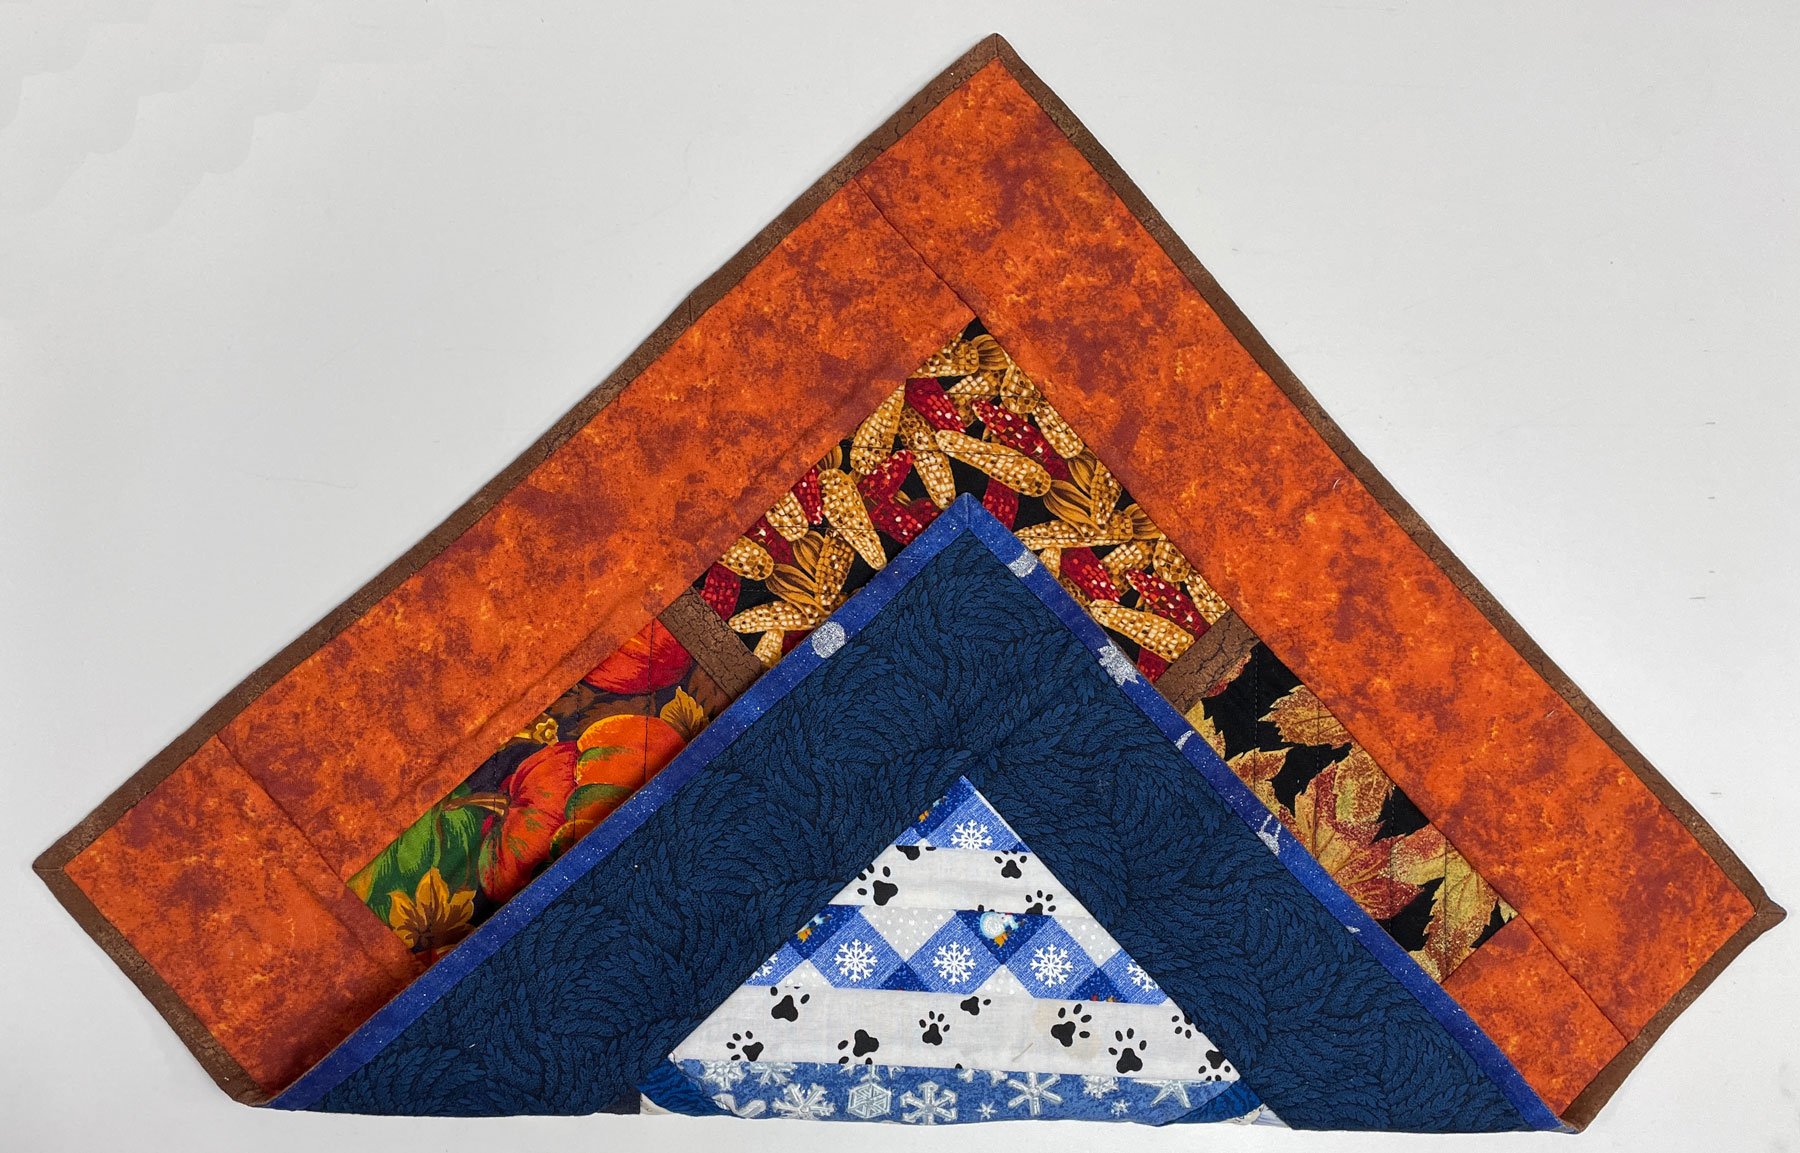
I came up with this method years ago when I made a small reversible table topper. There was no binding color that would look good on both sides since they represented two different seasons.


So I played around a bit and discovered a way that’s really quite easy to do! I find it works best done as a single binding.
Determine the width of the finished binding, multiply by 2 and add ¼” (ie. a ½” finished binding would be ½” x 2 = 1”; and 1” + ¼” = 1 ¼”). Choose a fabric to match each side of the quilt and cut enough strips from each (selvedge to selvedge) the above measurement in width, to go around the outer edge of the quilt. Sew all of the matching strips end to end to make a length of binding for both the front and back fabric.
Stitch these 2 long strips to each other with a 1/4″ seam allowance and press it open.

Now fold the binding in half and press again. By pressing the seam twice a sharp fold will result.

Lay the appropriate binding strip, right-sides-together and raw edges even, with one side of the quilt. Stitch in place (leaving a tail for a no-end finish). Use your binding width measurement as the seam allowance (mine was 1/2″). The distance from the edge of the quilt to the line of stitching should be equal to the distance between the two seams (note arrows below).

At the corner stop stitching at a spot a seam allowance away from the next edge of the quilt (for a tutorial on this click here). Fold the strip up at a 45 degree angle and then back down against the next edge, and continue to stitch in place.

Attach the binding all the way around.
There is nothing tricky about turning this binding to the back. Simply bring the binding around to the back (it will naturally cup at the corners),

and place the raw edge of the binding even with the raw edge of the quilt.

Fold it over flat against the quilt (the seam should lay at the outer edge of the quilt). This will create an angled corner (similar to wrapping a gift):

Carefully fold the adjacent binding over the edge of the quilt and pin/clip in place:

I like to hand-stitch the binding in place to finish – and it looks great front and back!

I hope you’ll add this technique to your “bag of tricks”. Over the years I’ve posted many tutorials on different techniques. If you ever want to find one from the past, simply type the topic into the search box on this site. If you have trouble locating what you’re looking for – please don’t hesitate to send me an email 😊. Enjoy!
********************
This week’s bonus! Jodi sent me this email:
“I had taken your class at Expo a couple years ago, and have been waiting to use it. Did a simple layer cake quilt for a friend because we both love this fabric. Decided to try the Seminole on it. Took me 2 days of piecing, but I’m LOVING it! Thank you for the inspiration!”

By cutting every other strip narrower, the size of the chain of squares down the center alternates and is more interesting. Great job Jodi – please send a photo of the completed quilt!

Laurelie Neubauer says
Hello,
Very interesting on how to do a two tone binding. I will try it sometime. What do you mean by a “no end finish?”
Thank you,
Laurie
Patti N says
I believe she’s referring to the method by which you connect the two ends of the binding together on the diagonal so you can’t tell where the end join is.
clkquilt says
Patti is correct! For a post on my favorite way to do a “no-end binding” go to: https://www.chrisquilts.net/9970/
Cari janssen says
Thank you…I’m going to use the information today as I back a summer table topper with fall fabric. Cari janssen
Mary Miller says
Thanks. I have run into this need for 2 different binding situations a number of times and just resorted to black or grey, if I recall, to get it done.
Linda says
This is a very good tip. I am sure it it will come in handy sometime. Thank you.
Judy Thurman says
I have had the same idea for my queen size quilt I want to have judged ata show. Do you think this will be okay with judging?
Marty says
Thank you so much for this tutorial. I am a beginner and ready to start my very first project…a reversible casserole hot pad. I have the same issue as another commenter, where I don’t know what binding to use for different patterns. Your tutorial is a Godsend. I do need some advice regarding the batting. I have read that it’s a good idea to prewash my fabric because I have red fabric mixed with other light colors and I’m terrified of color bleeding. With that said, should I also prewash the insulbrite and cotton batting? If so, is there a special technique? I would appreciate any advice you can provide. Thank you.