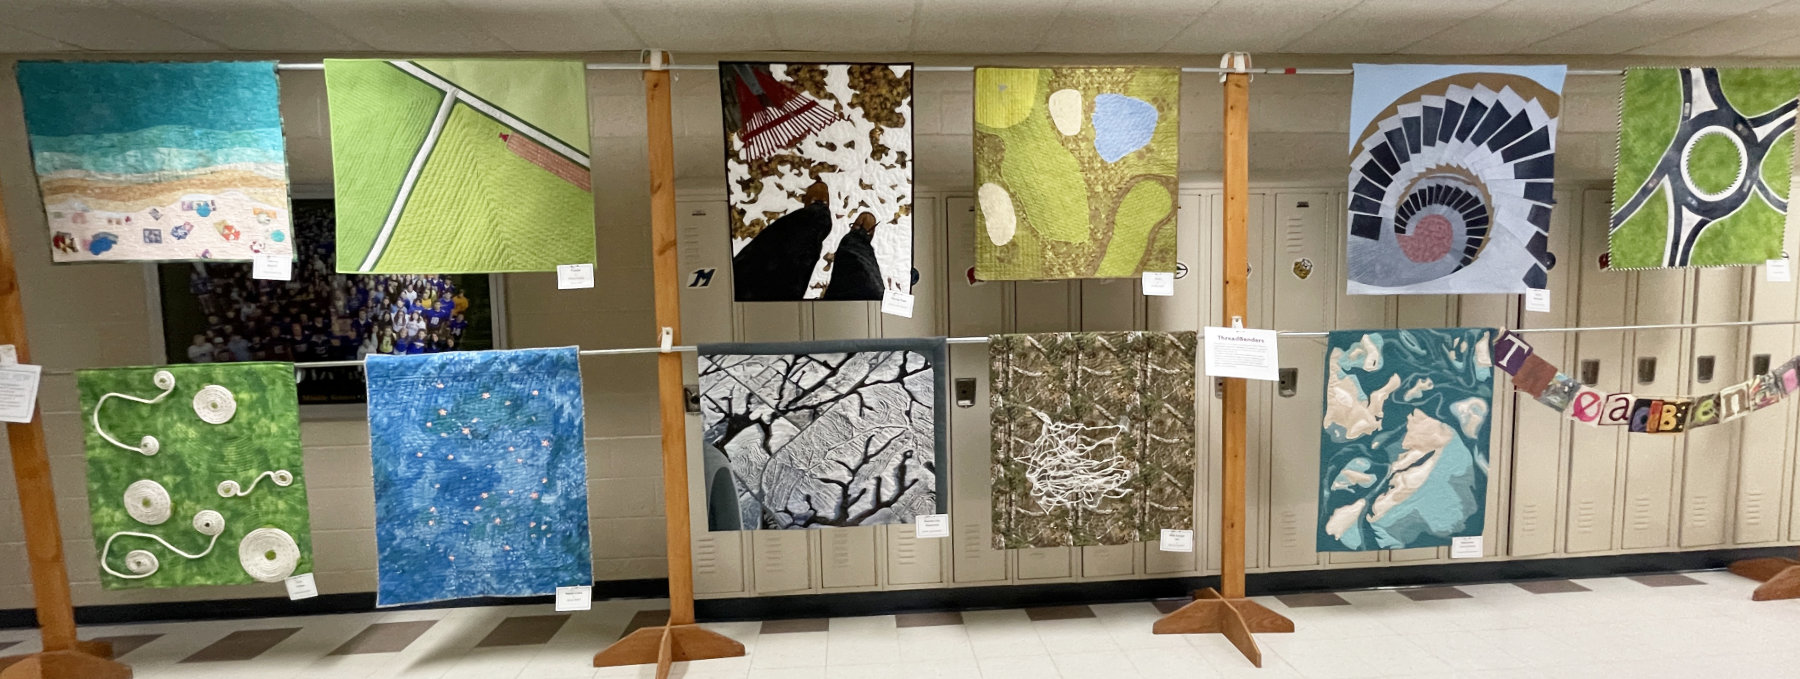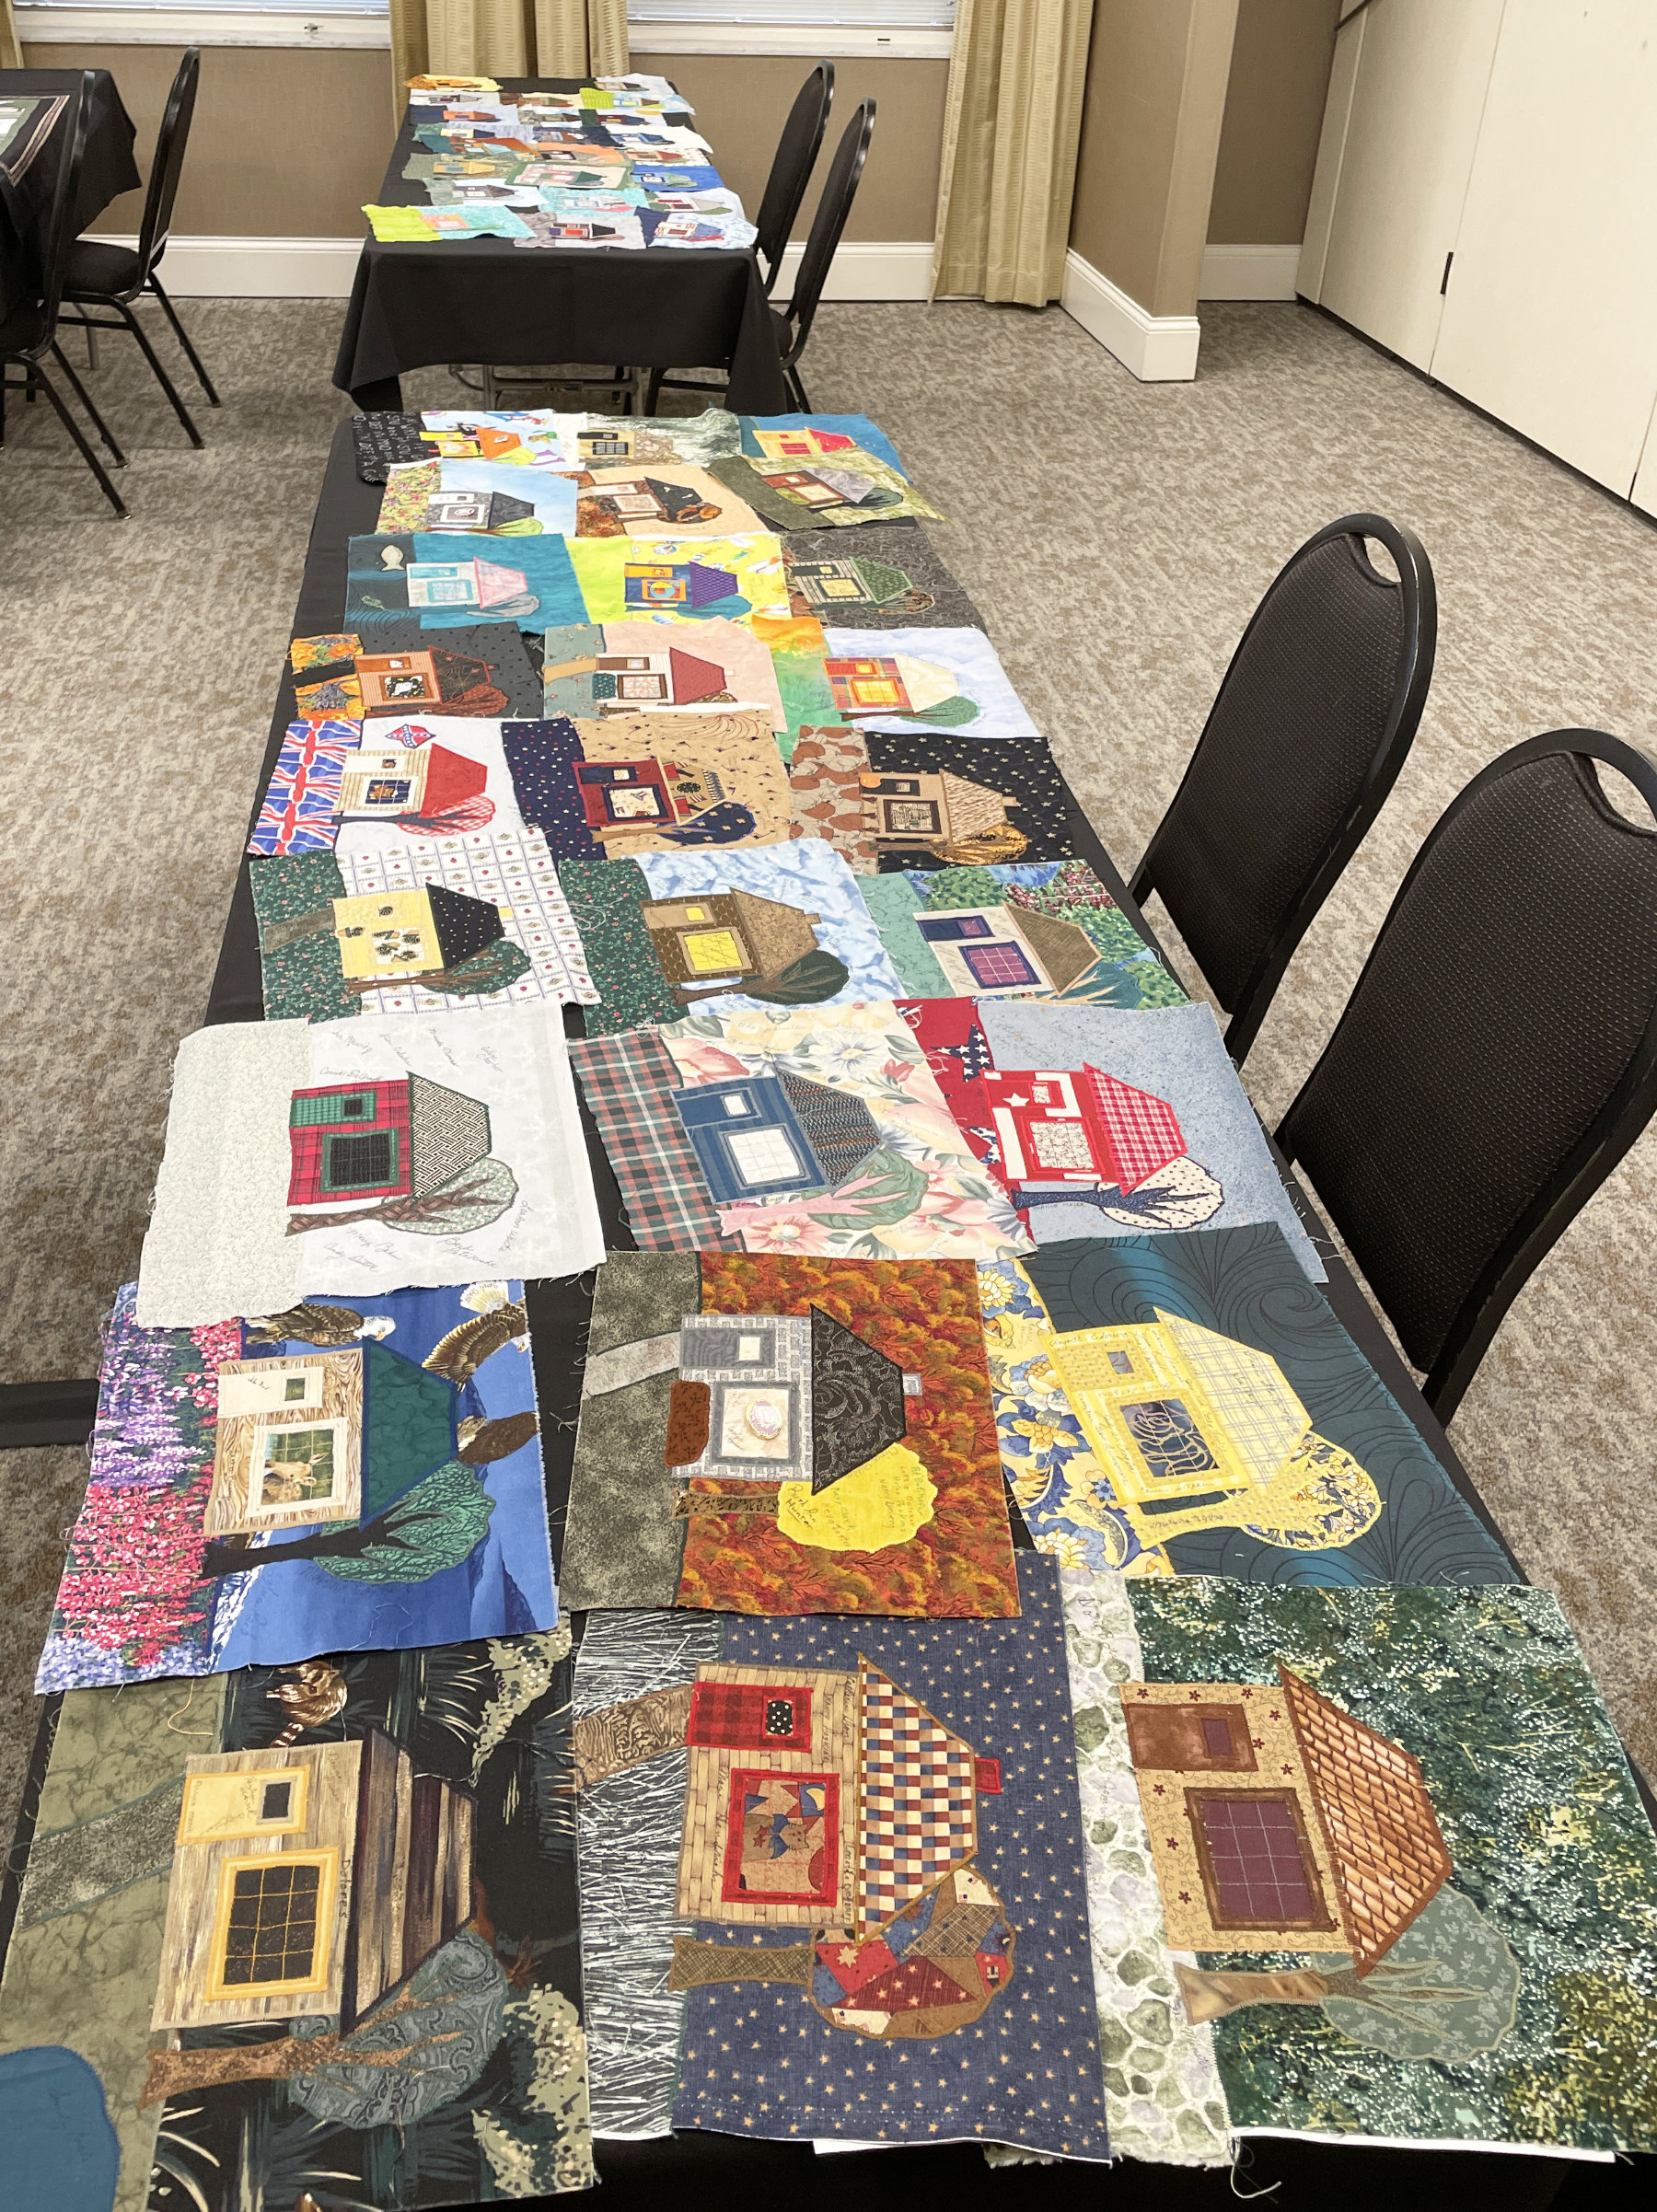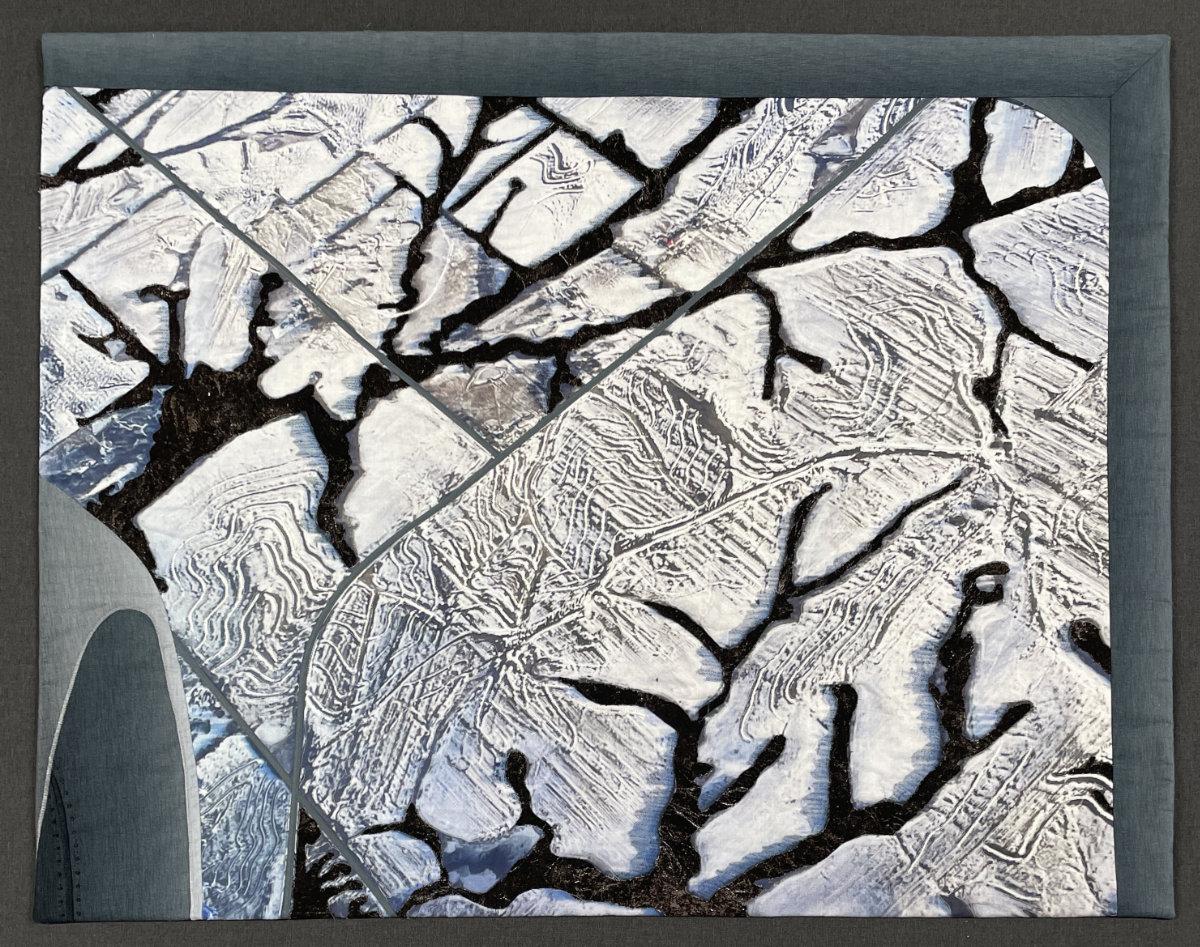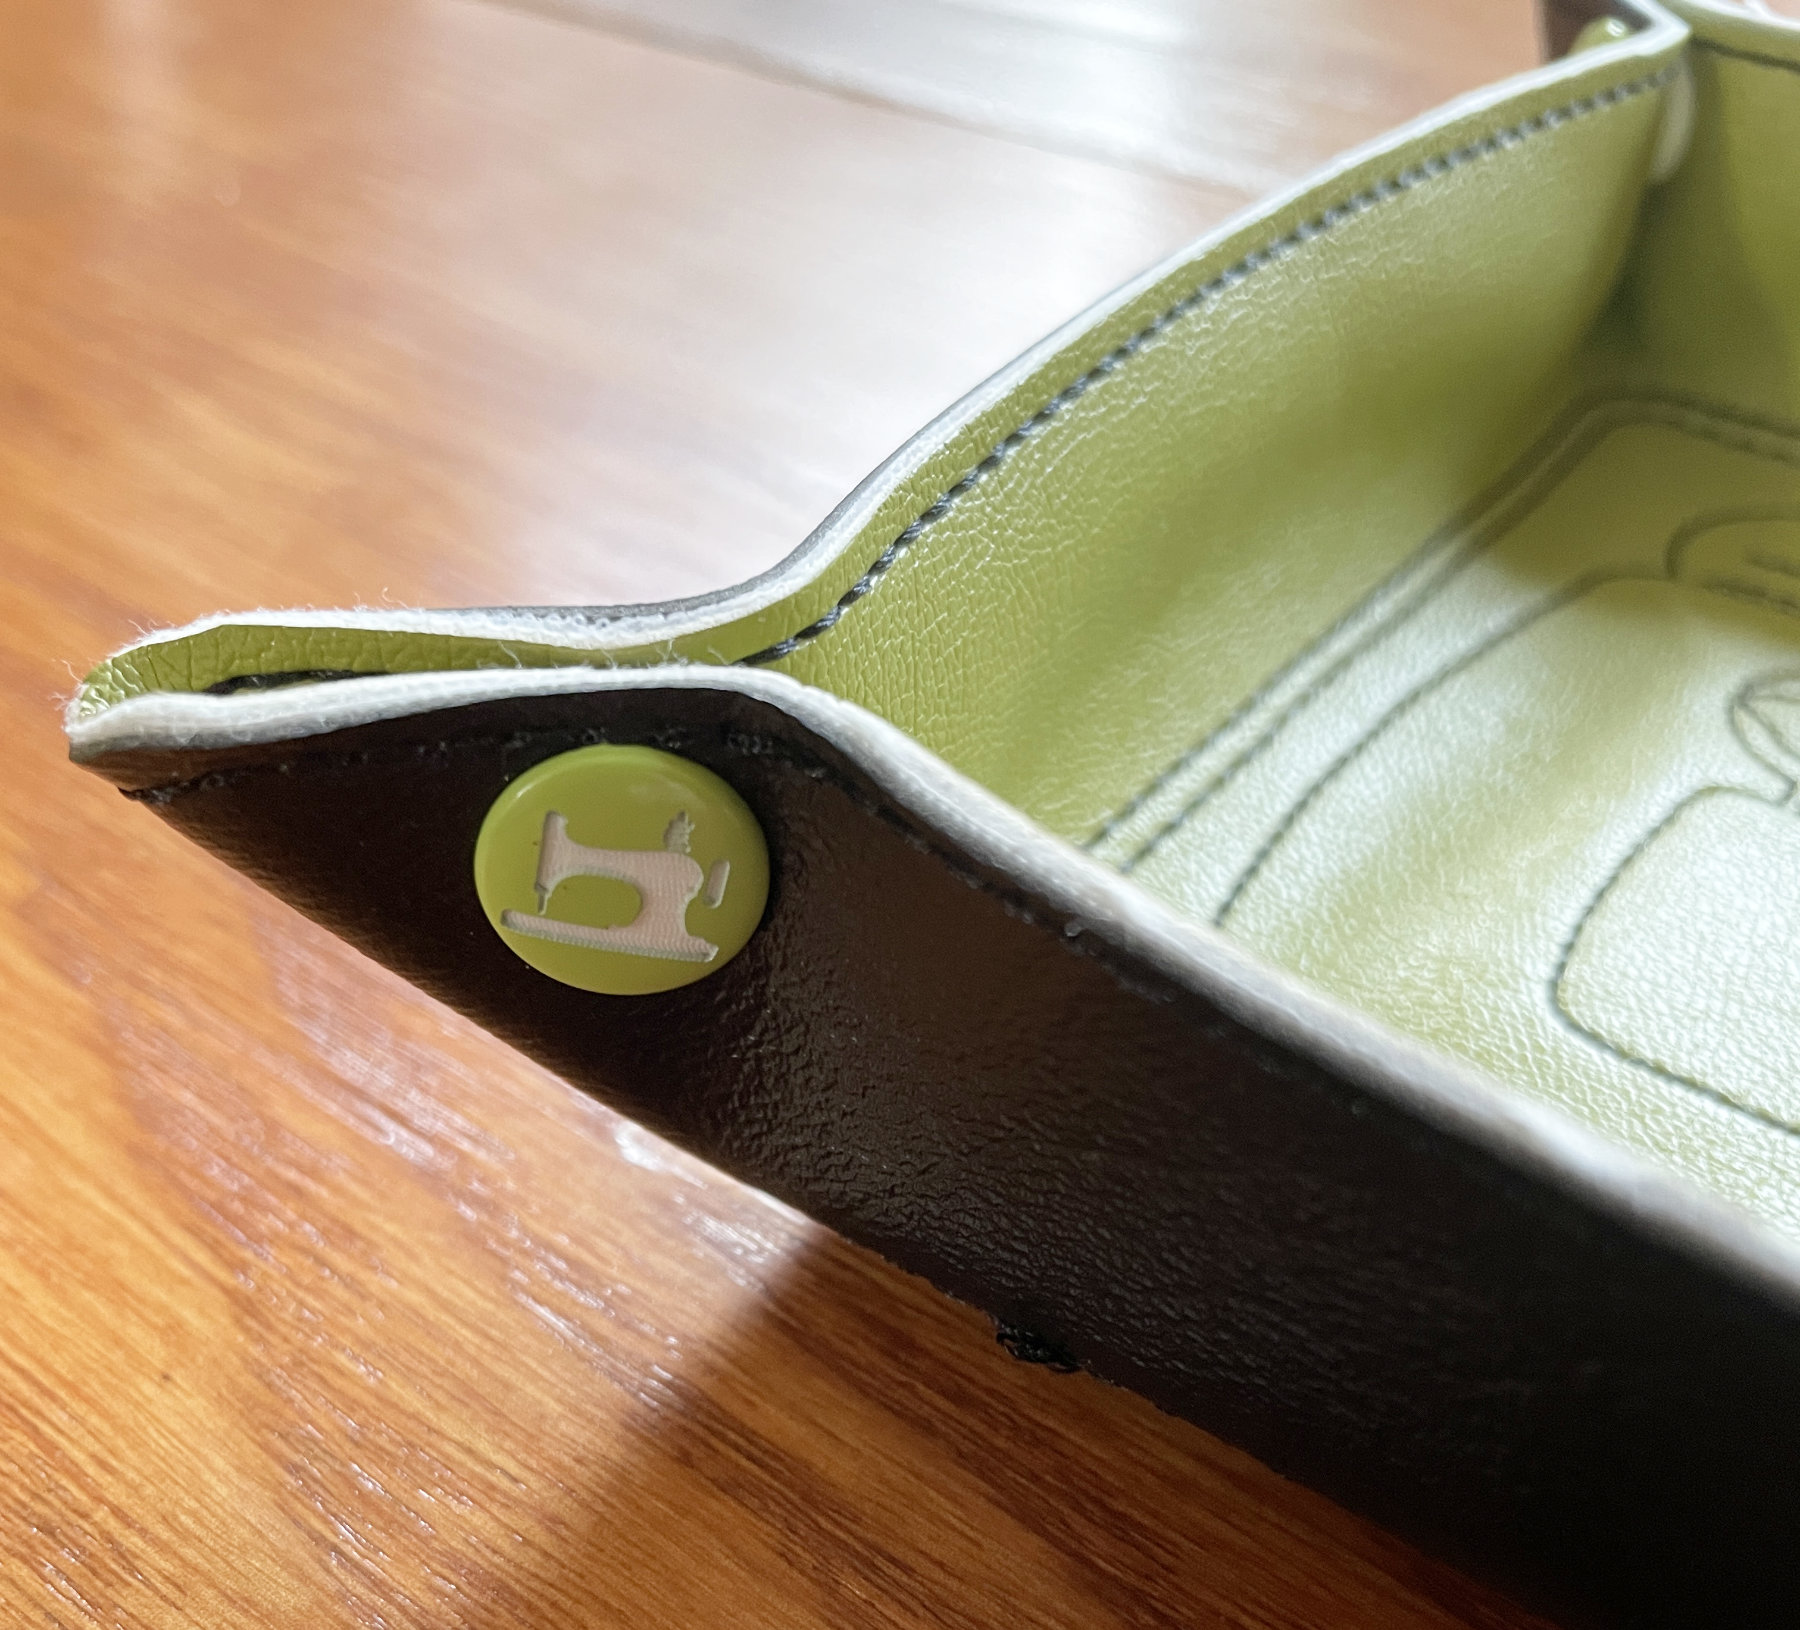
Last week’s Crazy Quilters show was sew well done. As usual I like to go through the show and pick a few of my favorite quilts to share with all of you. I look for the little things that make each one special. As always, I wish I could share every quilt because I love them all, but that isn’t possible. So here are the ones that intrigued me. To start with, I had the privilege of giving a Judge’s Choice ribbon. As I’ve said before, this is fun because I can take off my judge’s hat and just pick a favorite. This year I chose Peggy Otto’s “My Lifetime Sewing Journey”.
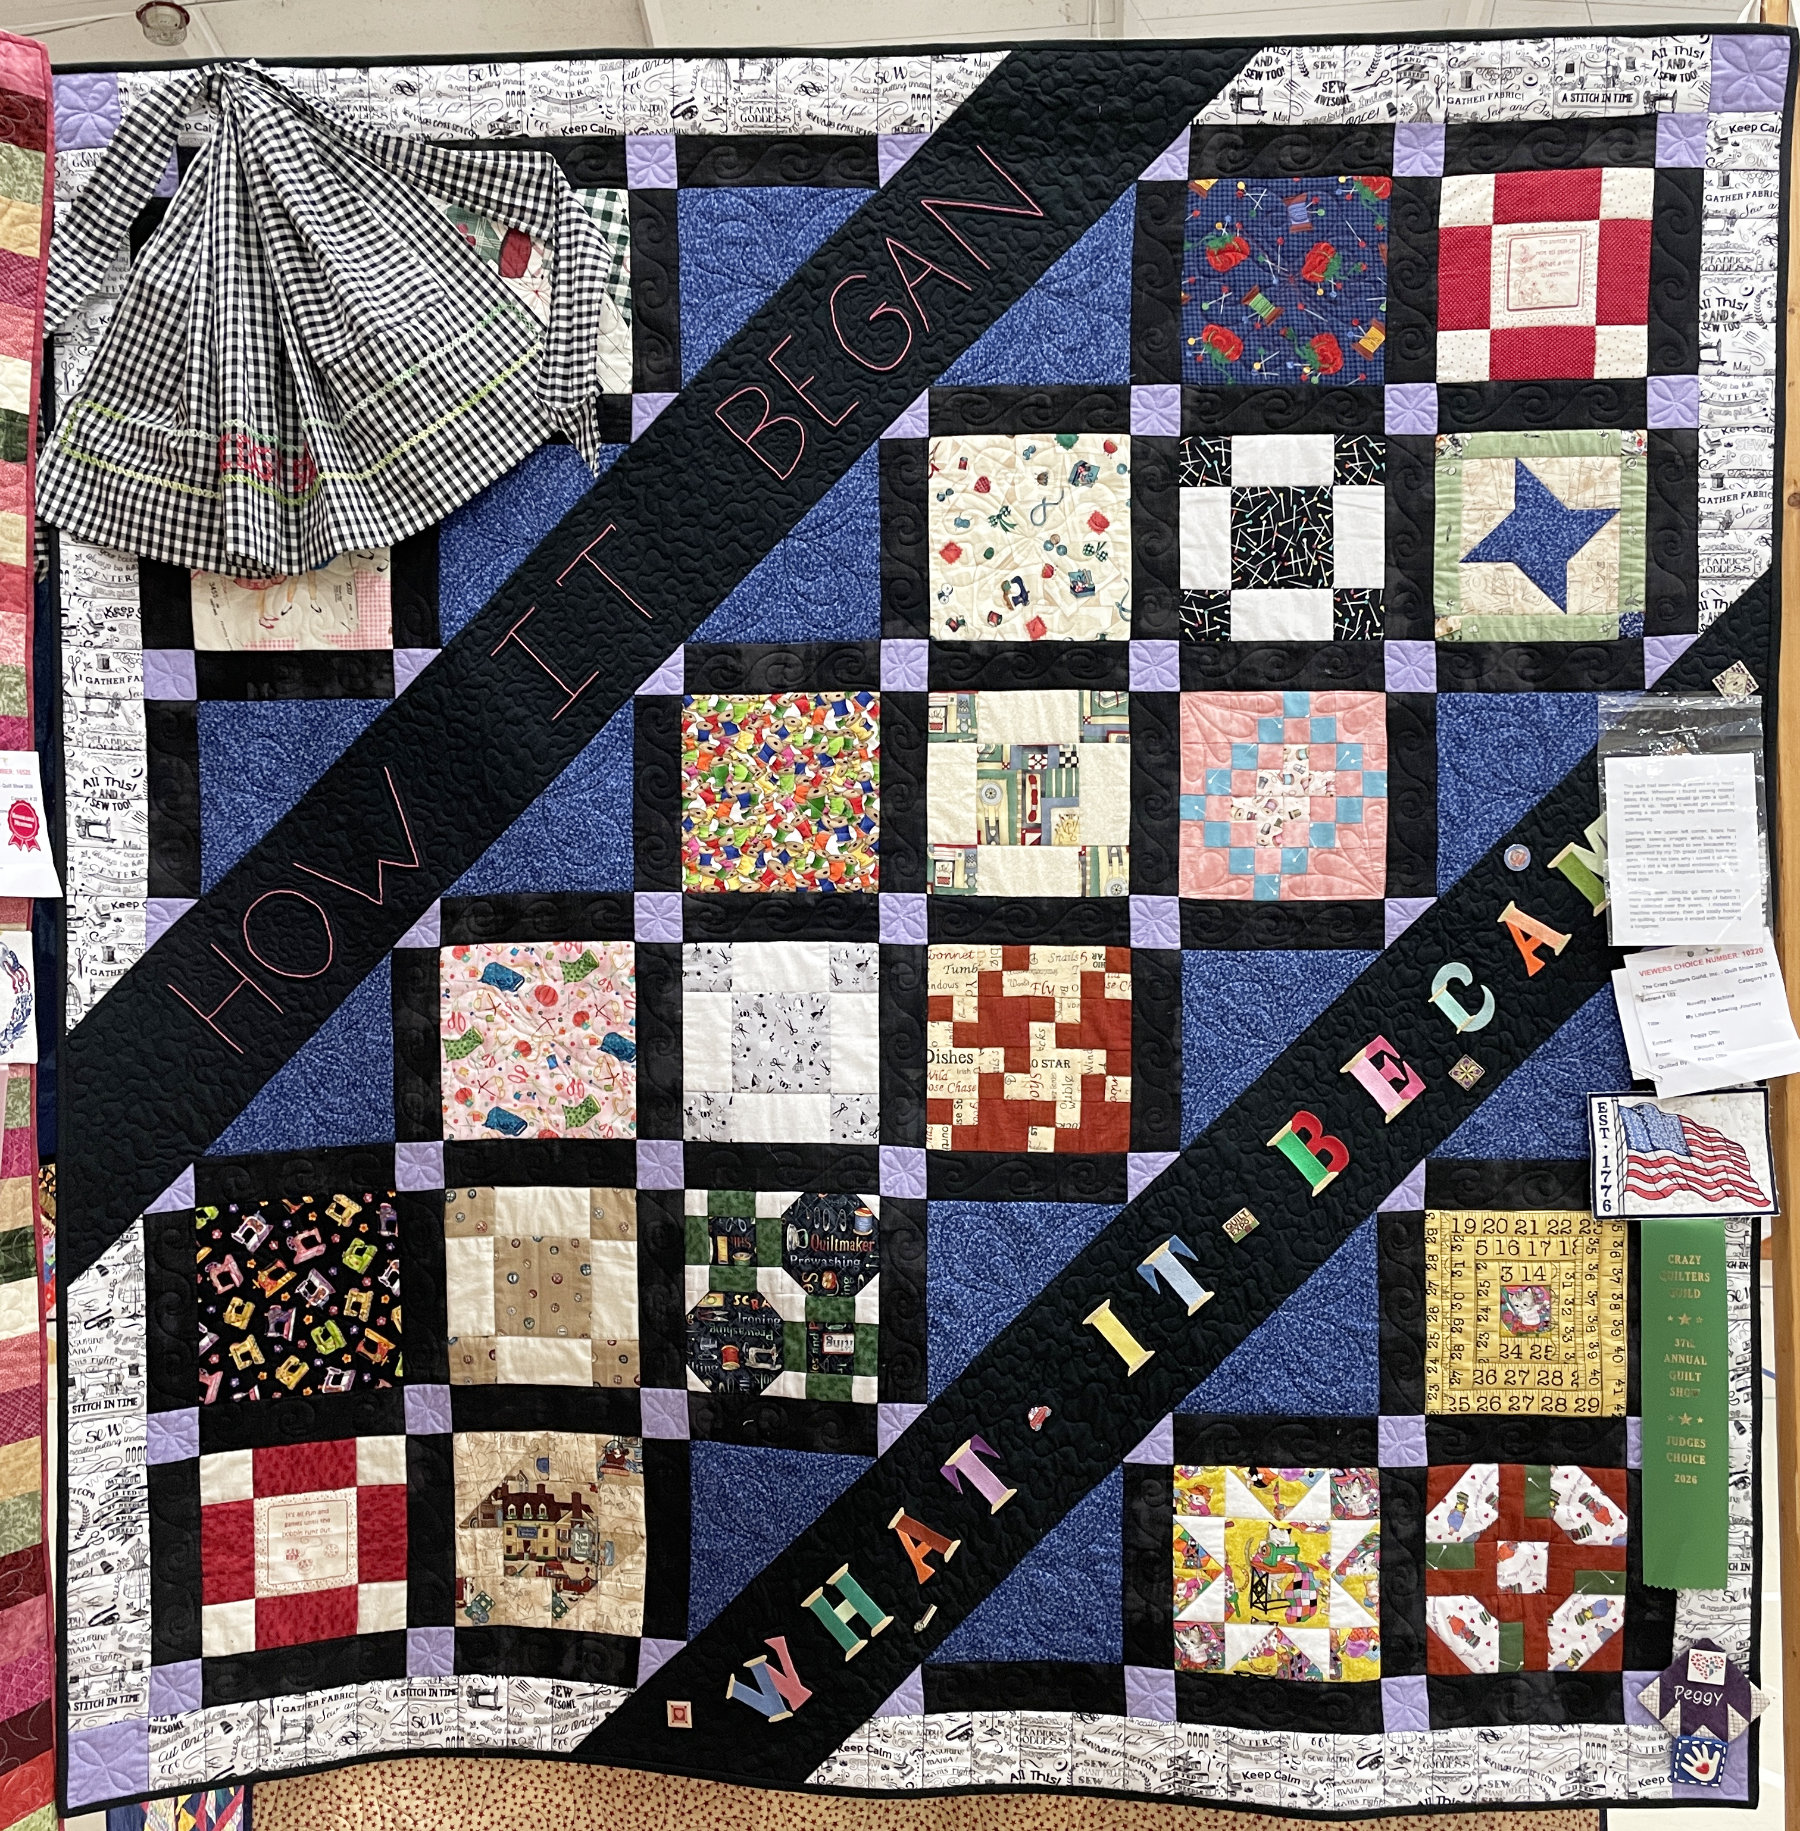
She starts in the upper left corner with a gingham apron, and a photo transfer of the pattern ~ with “Peggy Sue” embroidered in chicken scratch.
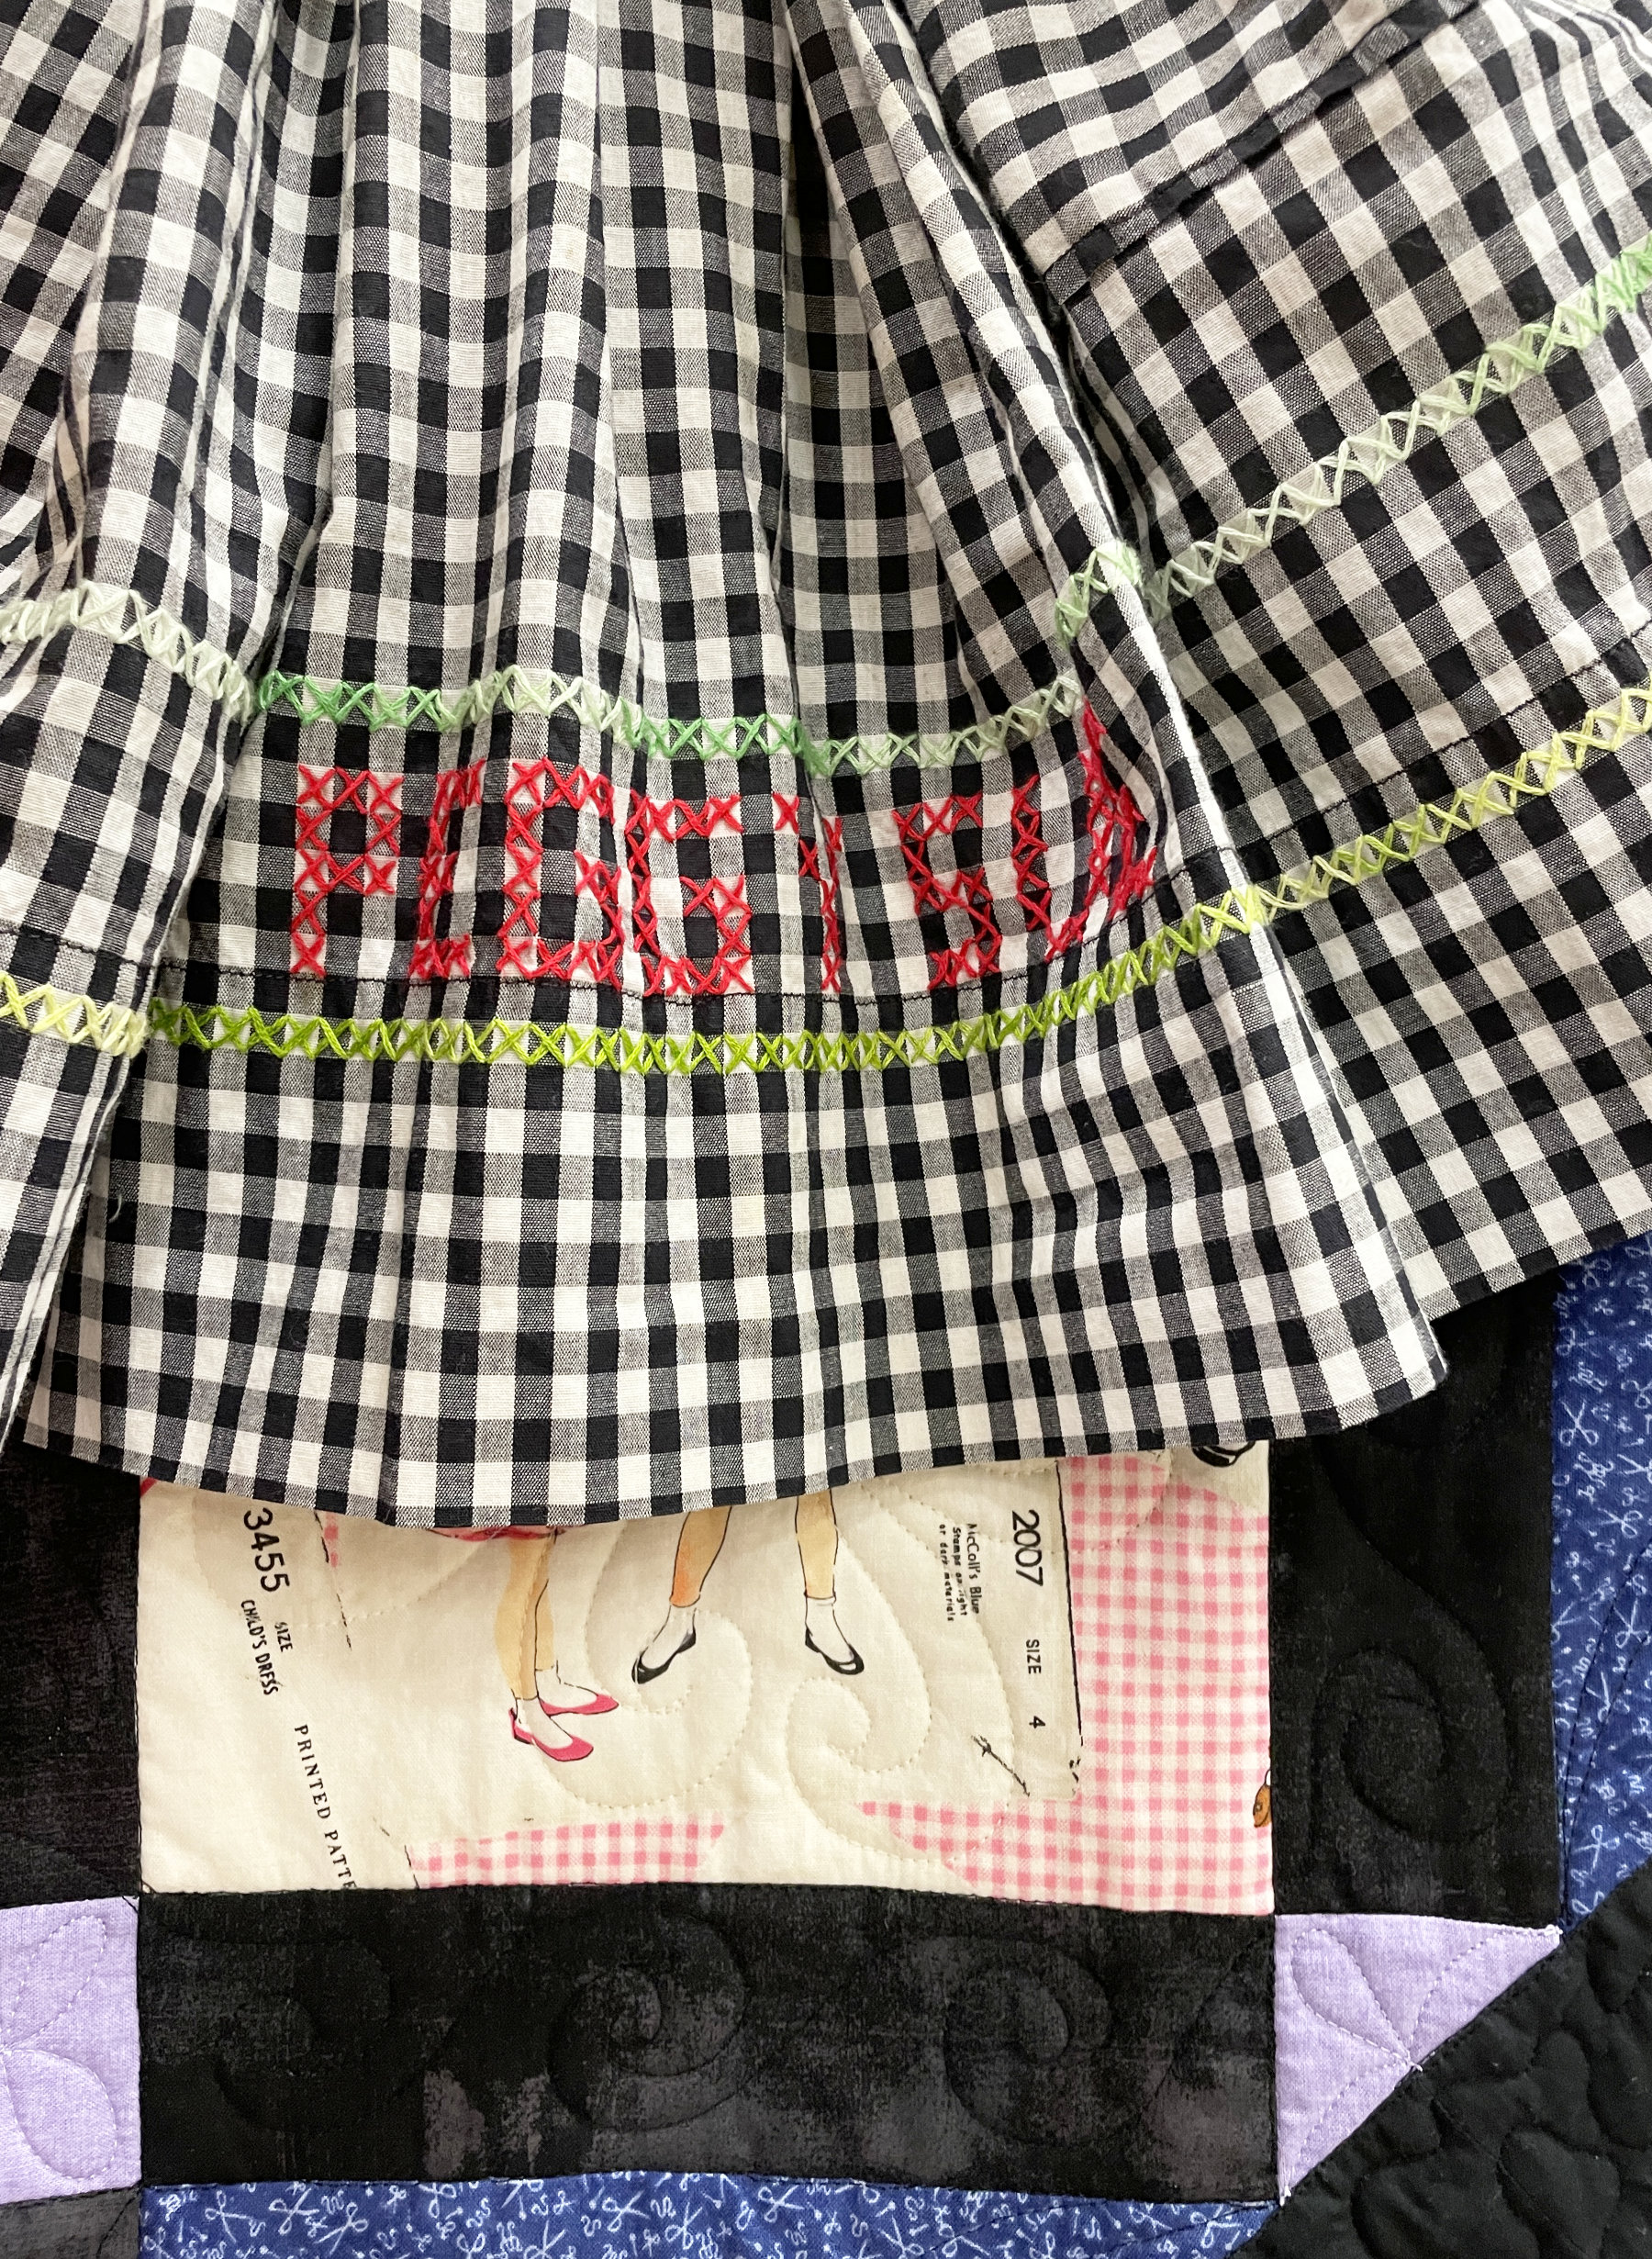
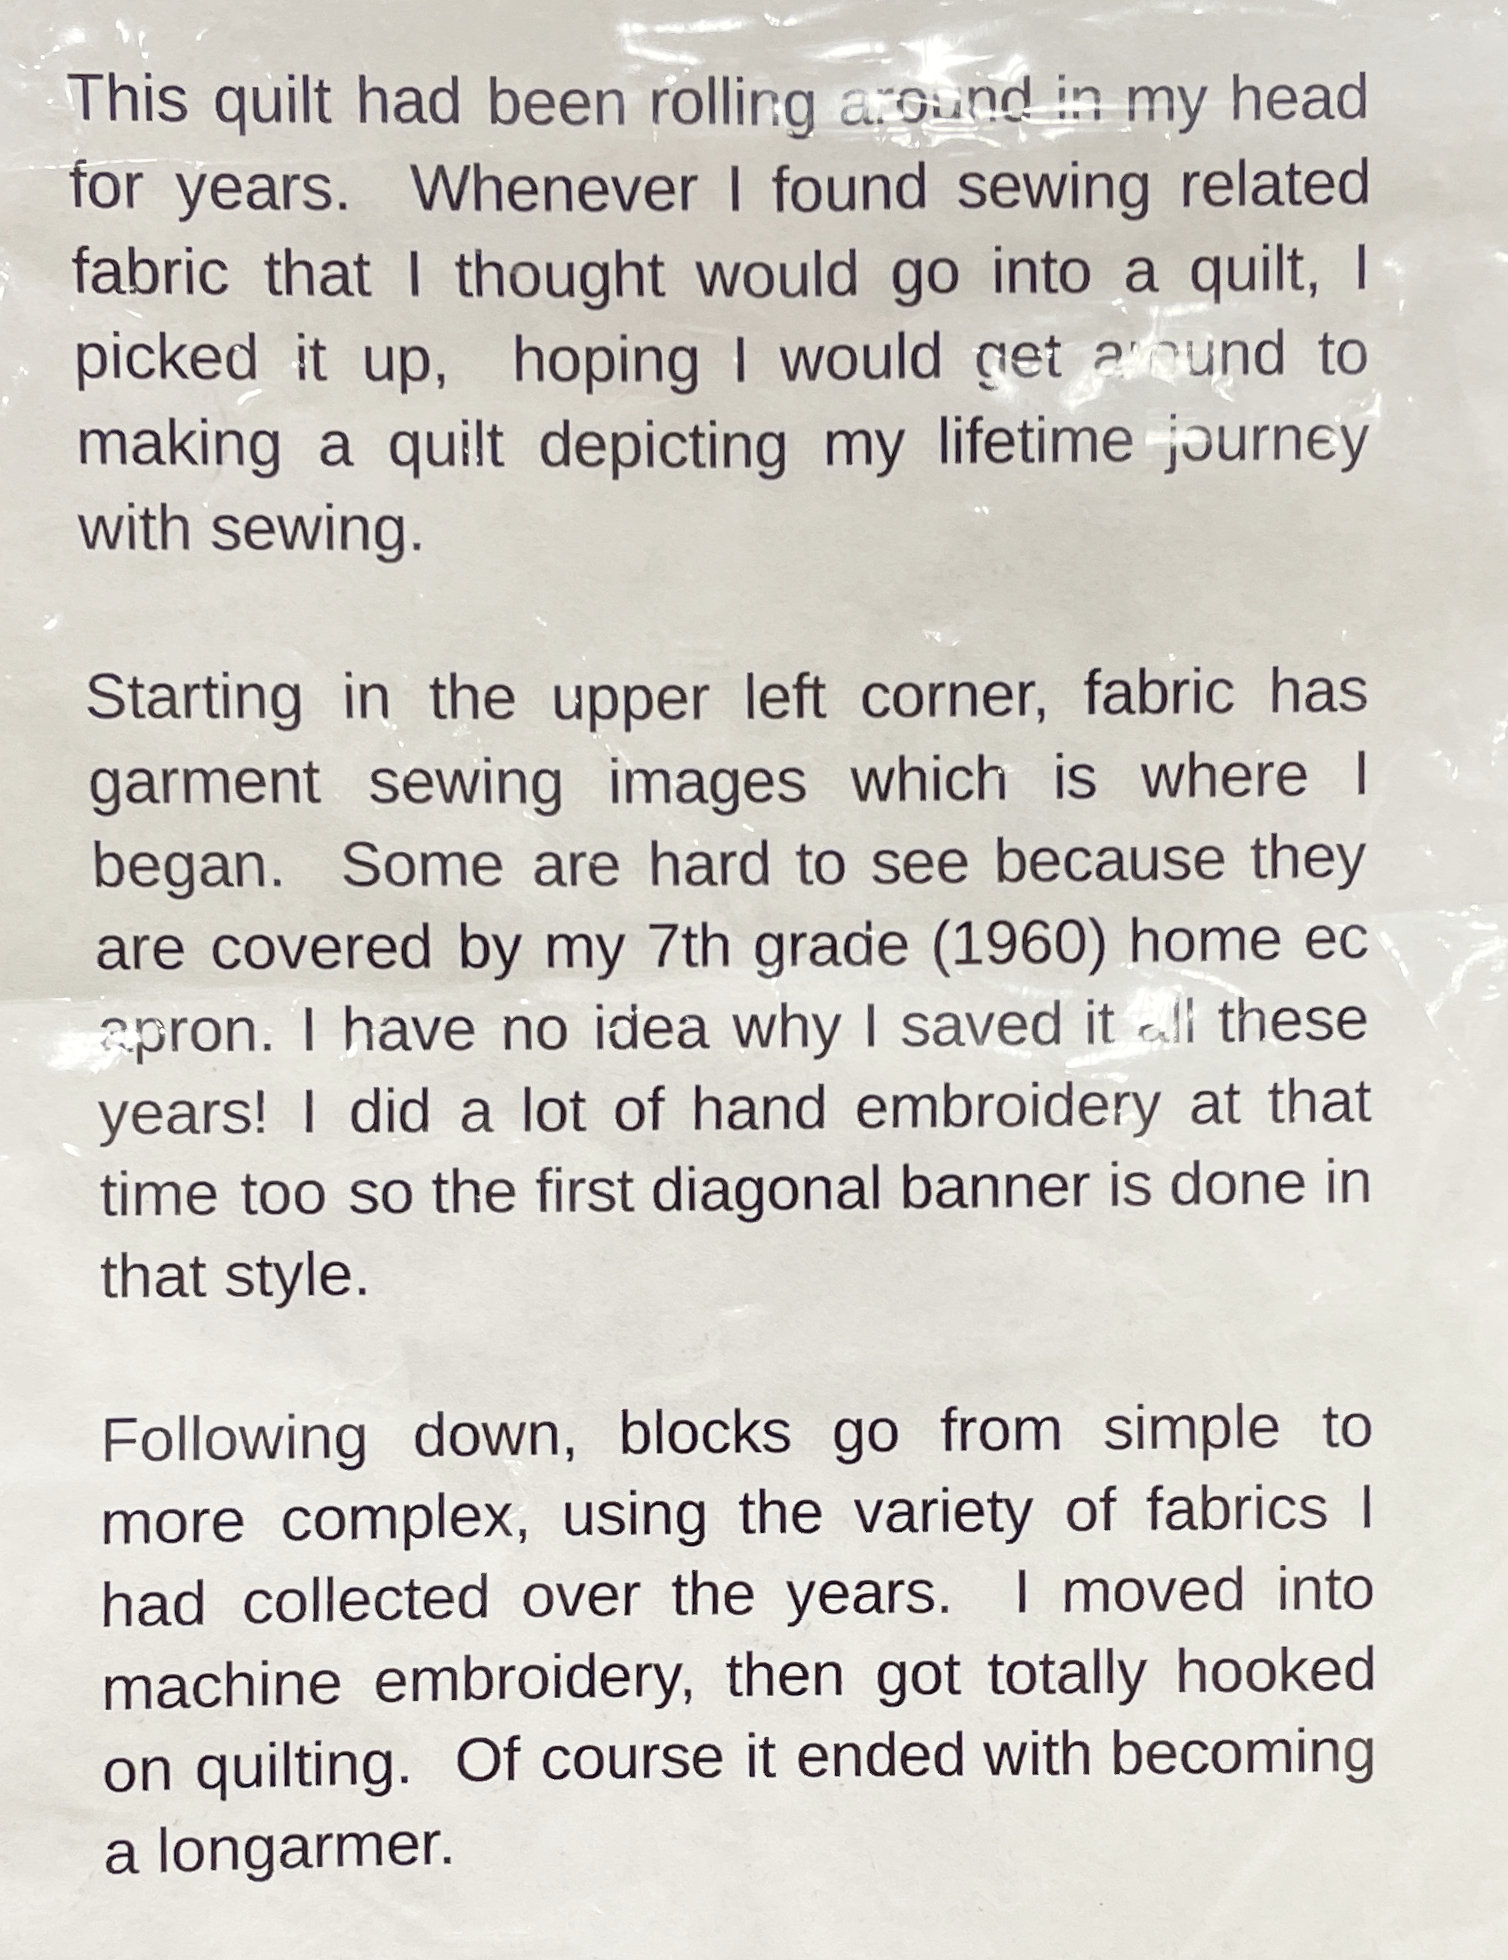
I’ll let her tell you the rest:
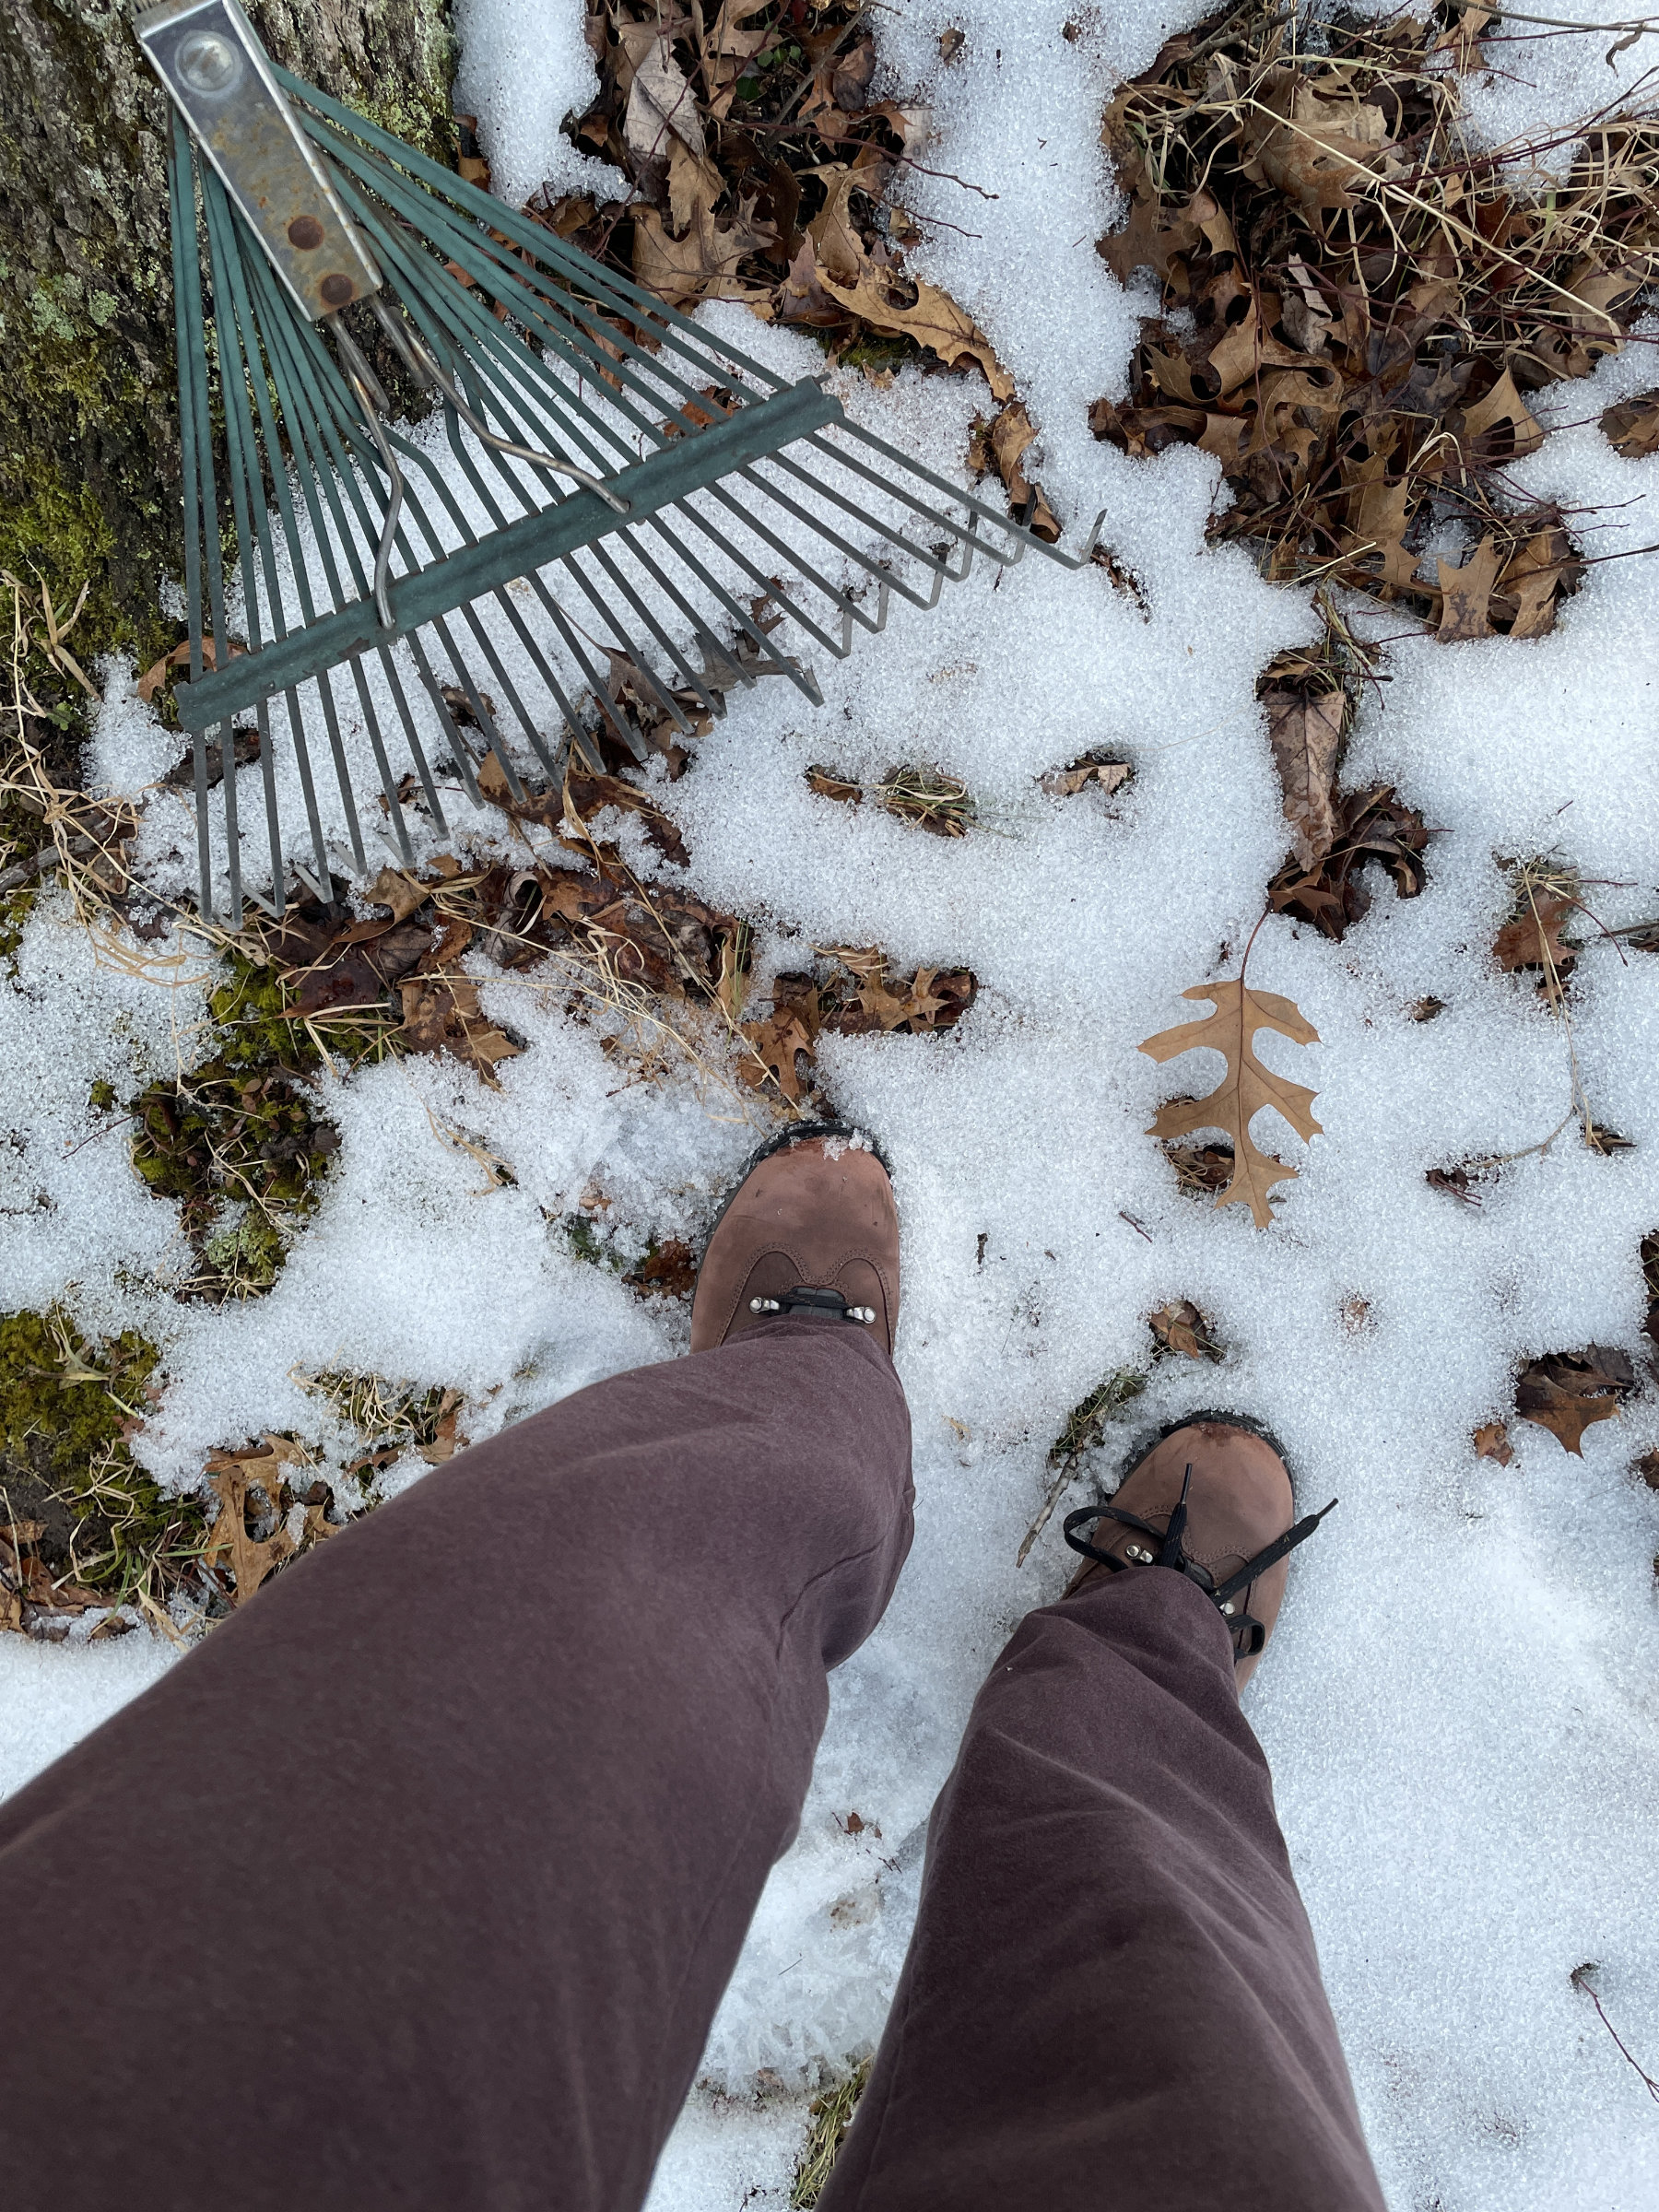
I think it really appealed to me because back in the 90s I made a sewing journey quilt for a contest entitled “Reflections”. I chose to name my quilt “Reflections of My Quilting Heritage”. It was my first “Accordion Door” quilt, so it was made from three quilts: two were cut into strips and sewn together into the accordion part, and they hung from the back quilt via Velcro (I wrote a post about this technique back in 2021. Click here to read it). At the top of this photo you’ll see the view from the right. It includes hand mirrors with the faces of the my great, great grandma Mary who was the only quilter in my family tree. Then there is my mom who taught me to sew, my friend Sharon who taught me to quilt, and me; along with sewing tools and garment/quilt motifs.
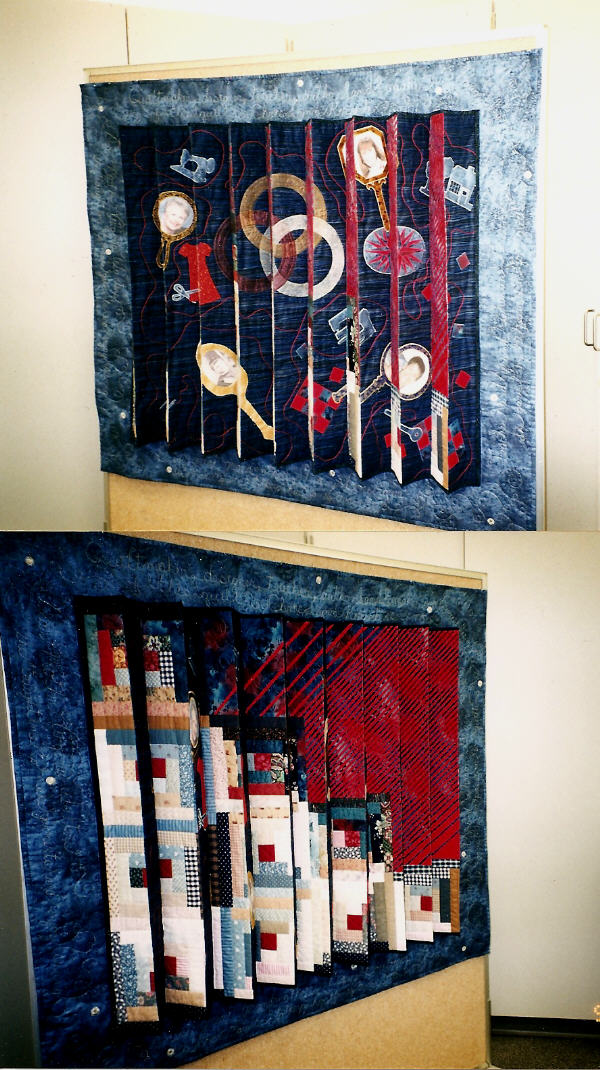
The view from the left (at the bottom of the photo) begins with a replica of one of the log cabin quilts made by grandma Mary. The artsy stripes in the upper right are done in my Parallelisms style, which I’d just started doing at that time. The back quilt is sprinkled with shisha mirrors to add more reflection. What a blast from the past! I haven’t pulled that quilt out in quite a while. Maybe it’s time has come 😊.
I apologize for making you join me down that bunny hole ~ let’s get back to the CQ show.
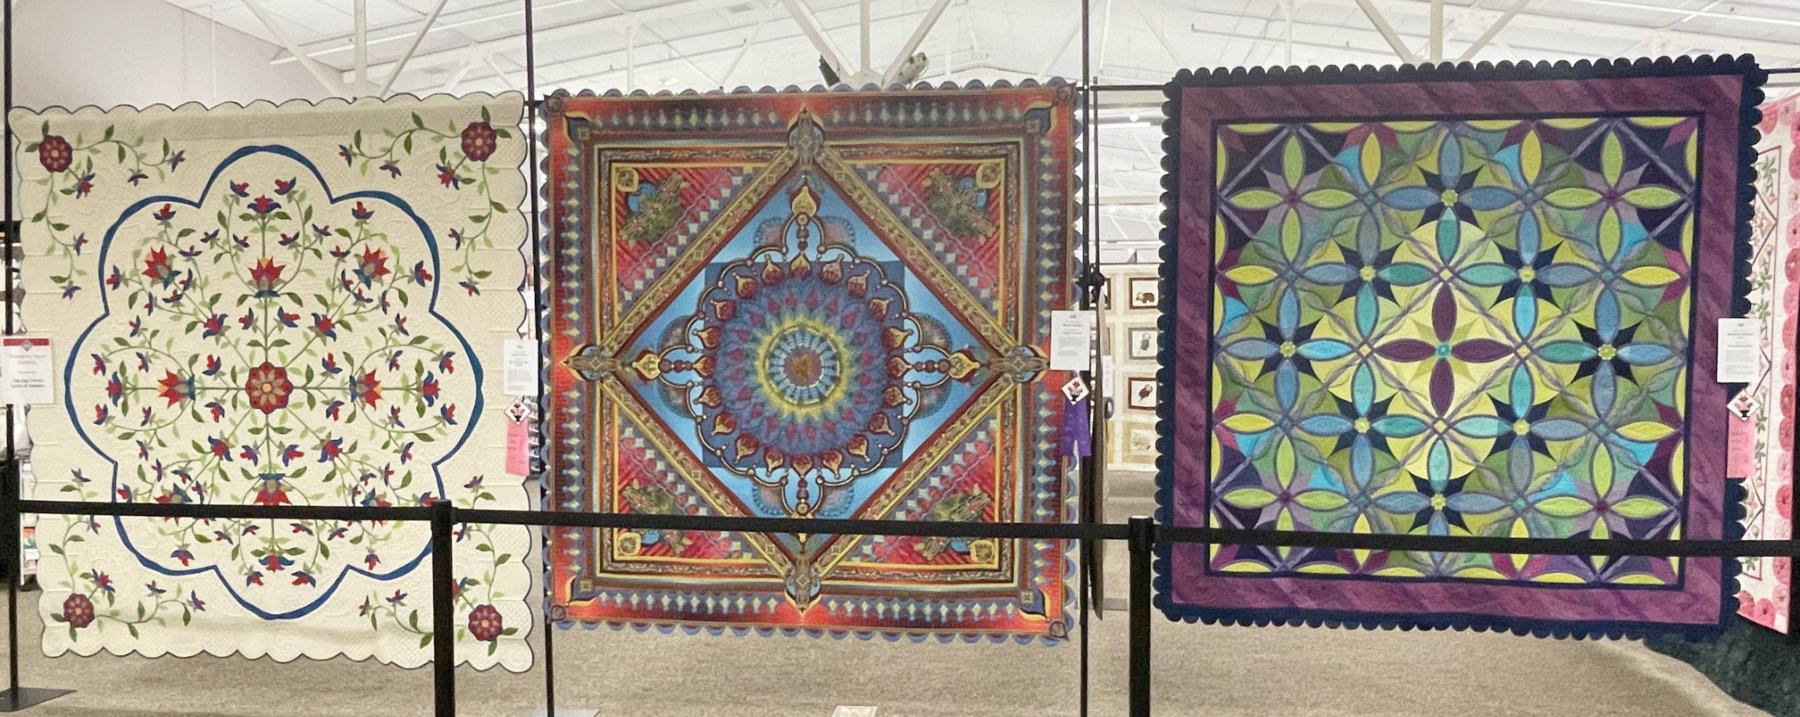
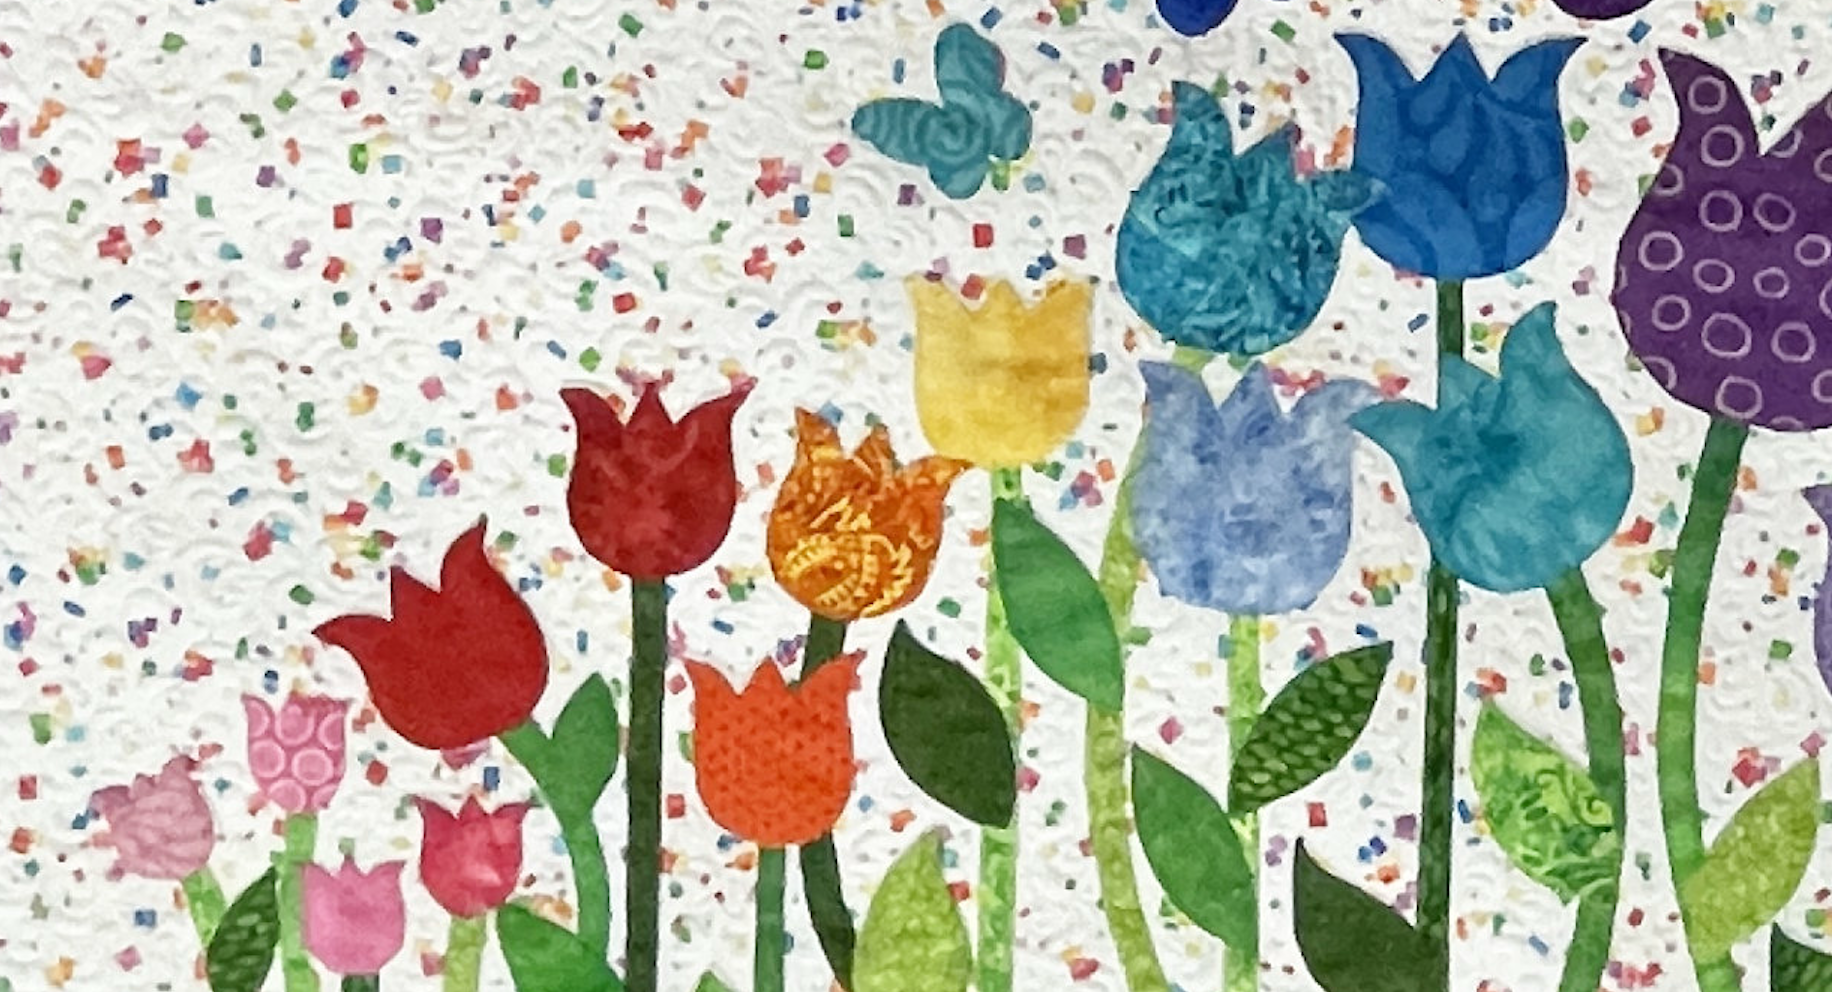
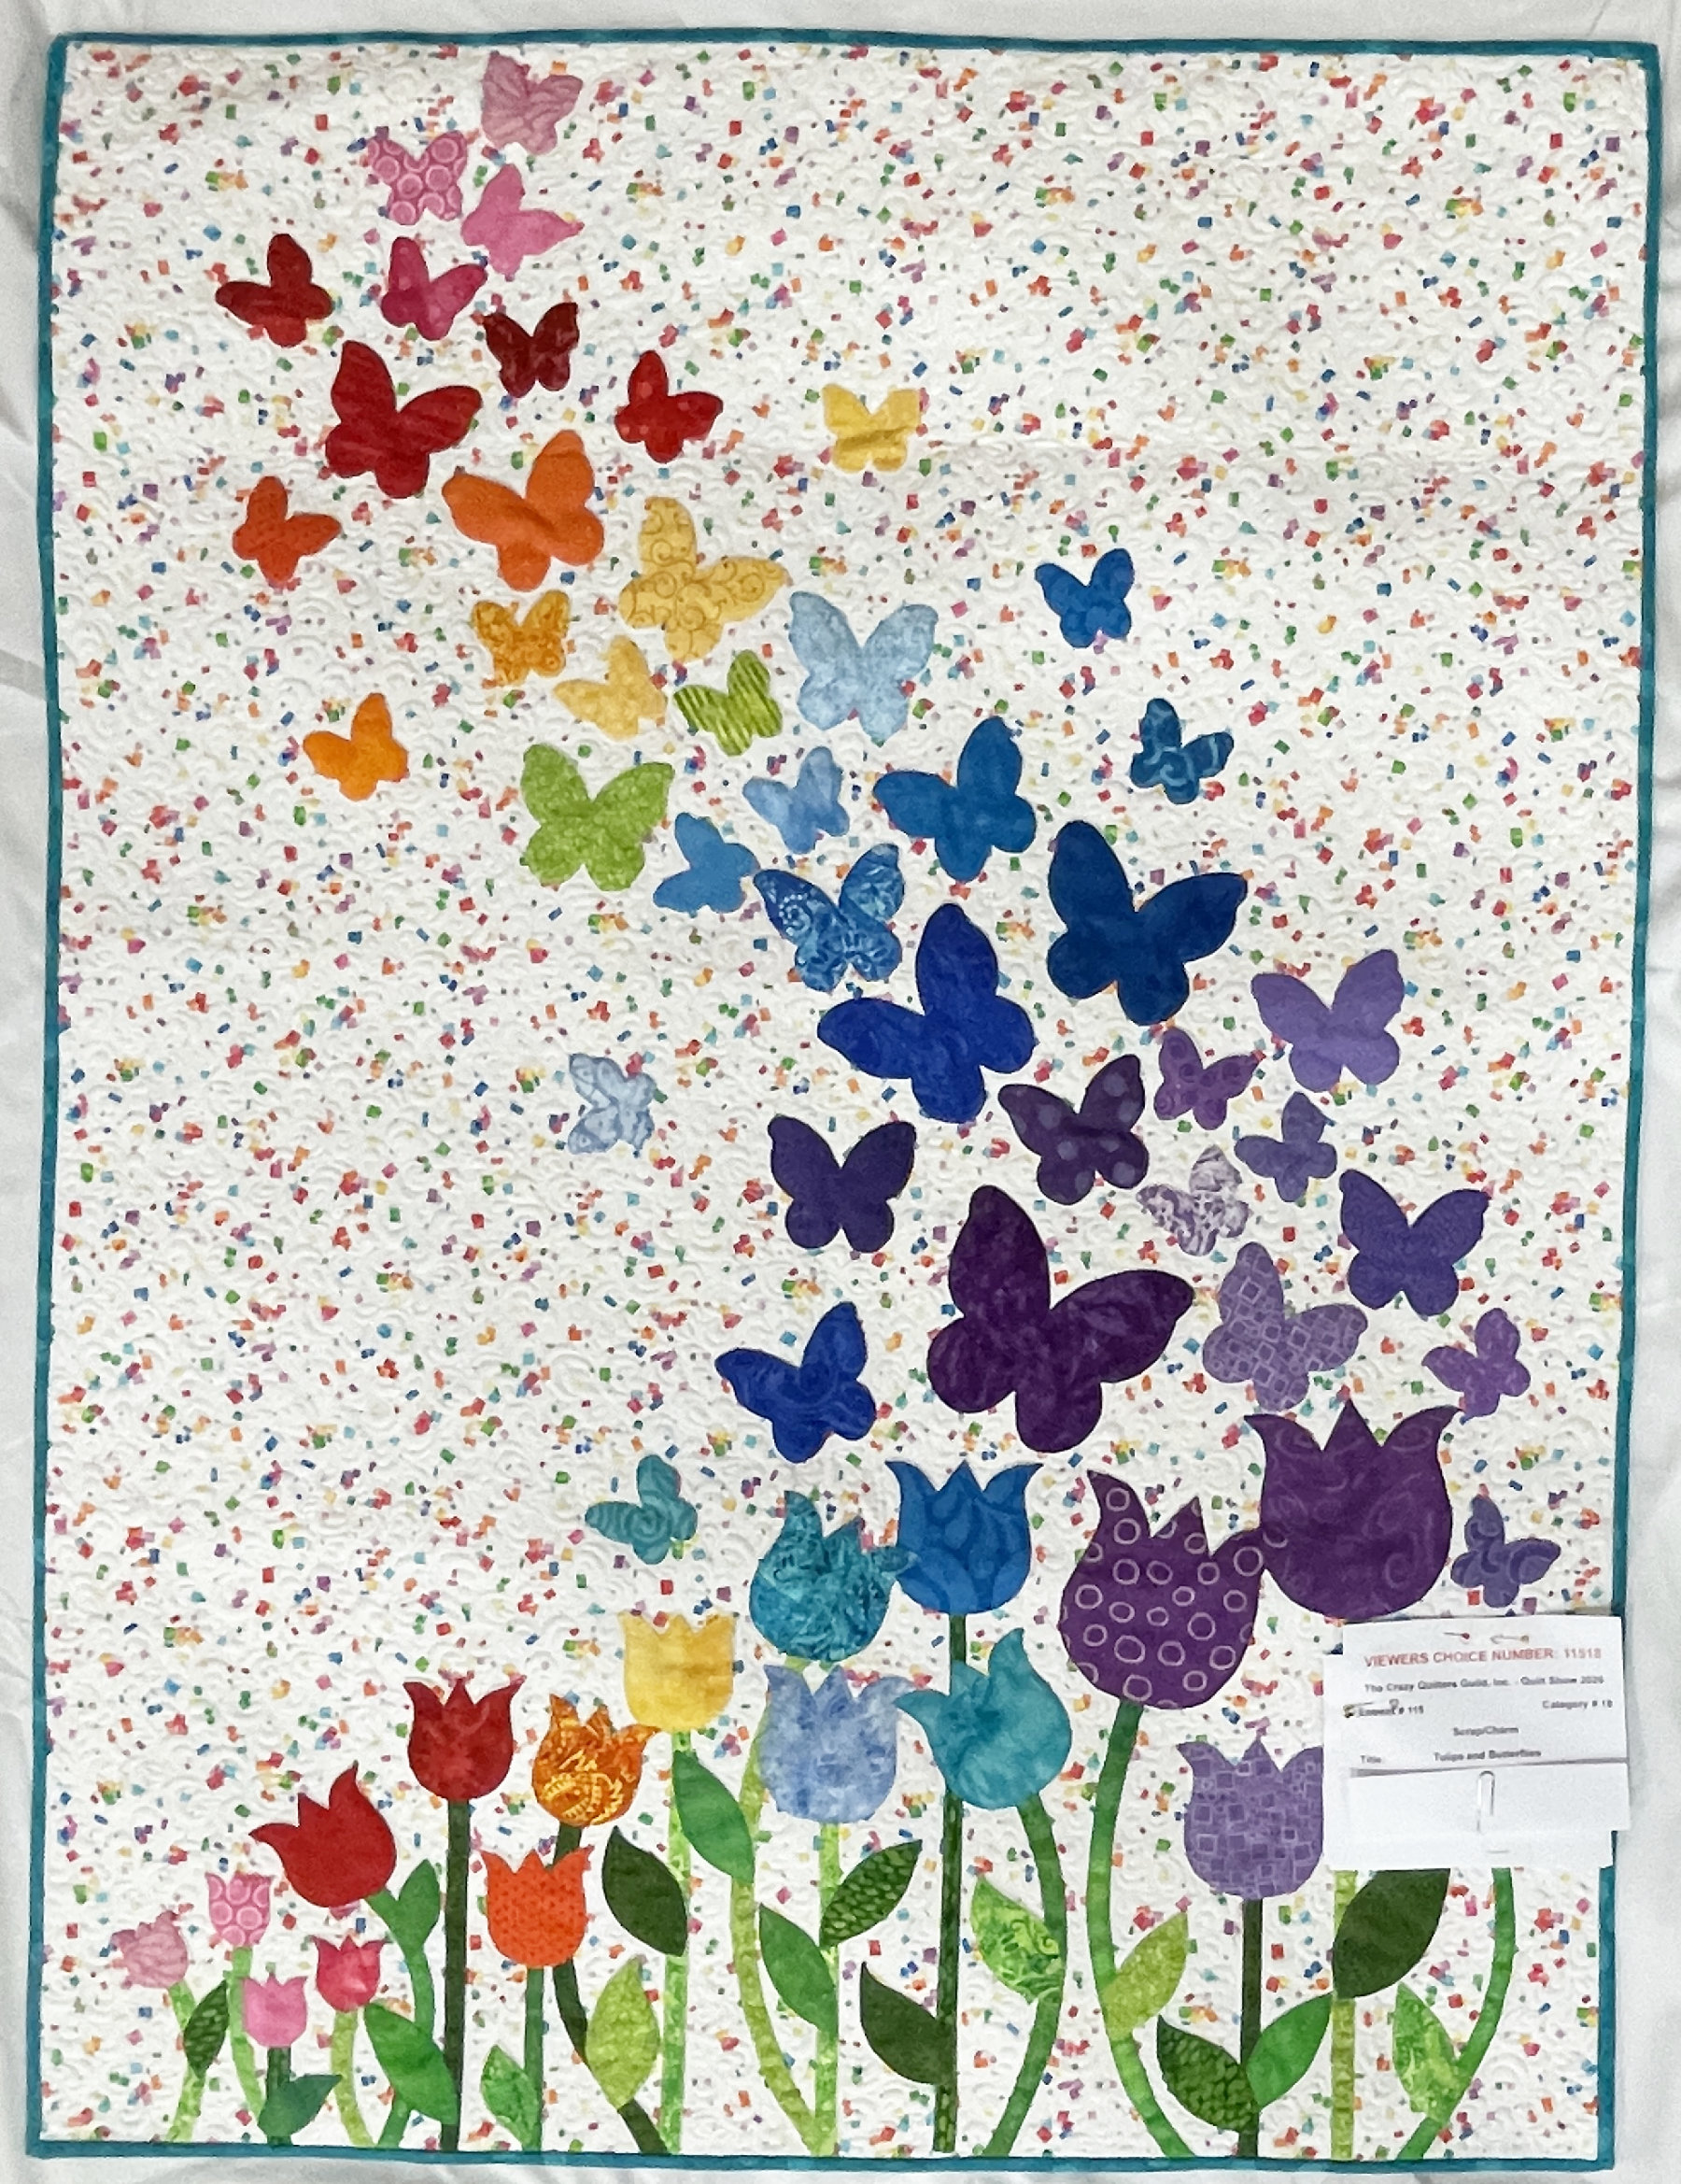
If I could have given a second place “Judges Choice” ribbon, it would have gone to “Tulips and Butterflies” by Linda Schubert. Her color gradation of fabrics through both the flowers and butterflies is delightful, especially on the colorful confetti background.
The quilt which won the Best of Show ribbon was “Forest Galorest” by Mary Enge. Everything about this quilt was well done! And each and every animal is delightful! I took my photos right after the judging, and before all the signs were pinned to the quilts, so I don’t know if this was a pattern or Mary’s original design. Either way she did it so very well!
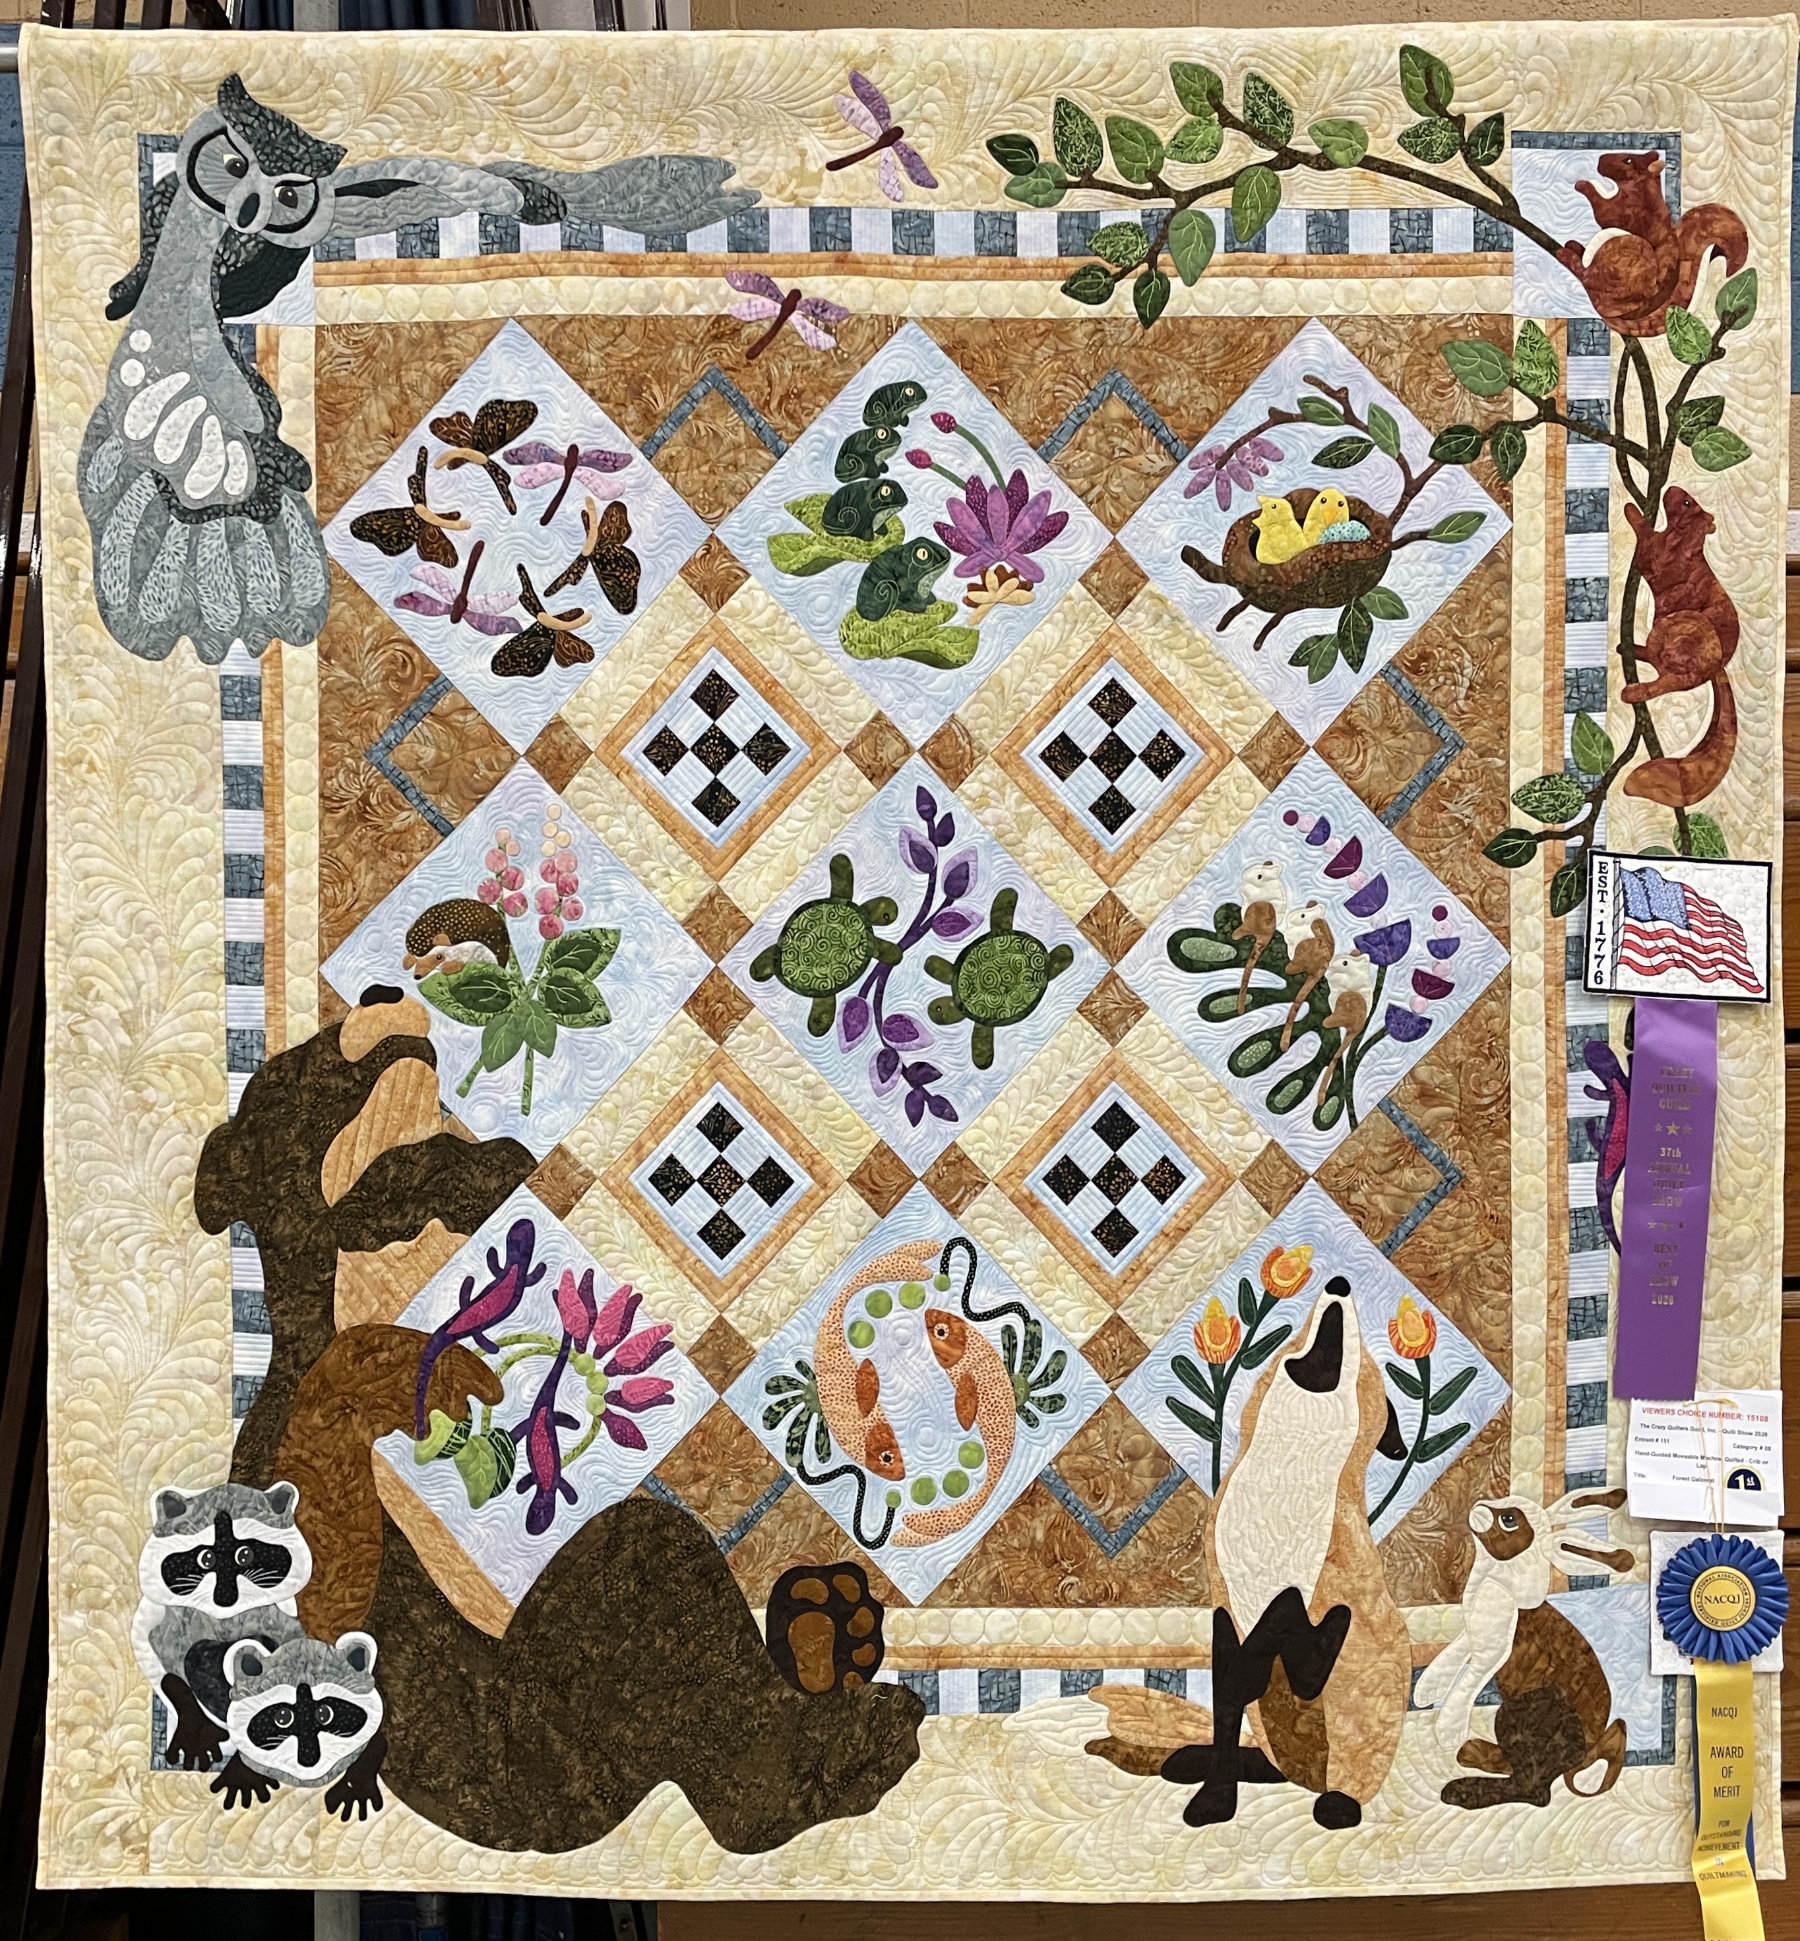
Congratulations Mary!
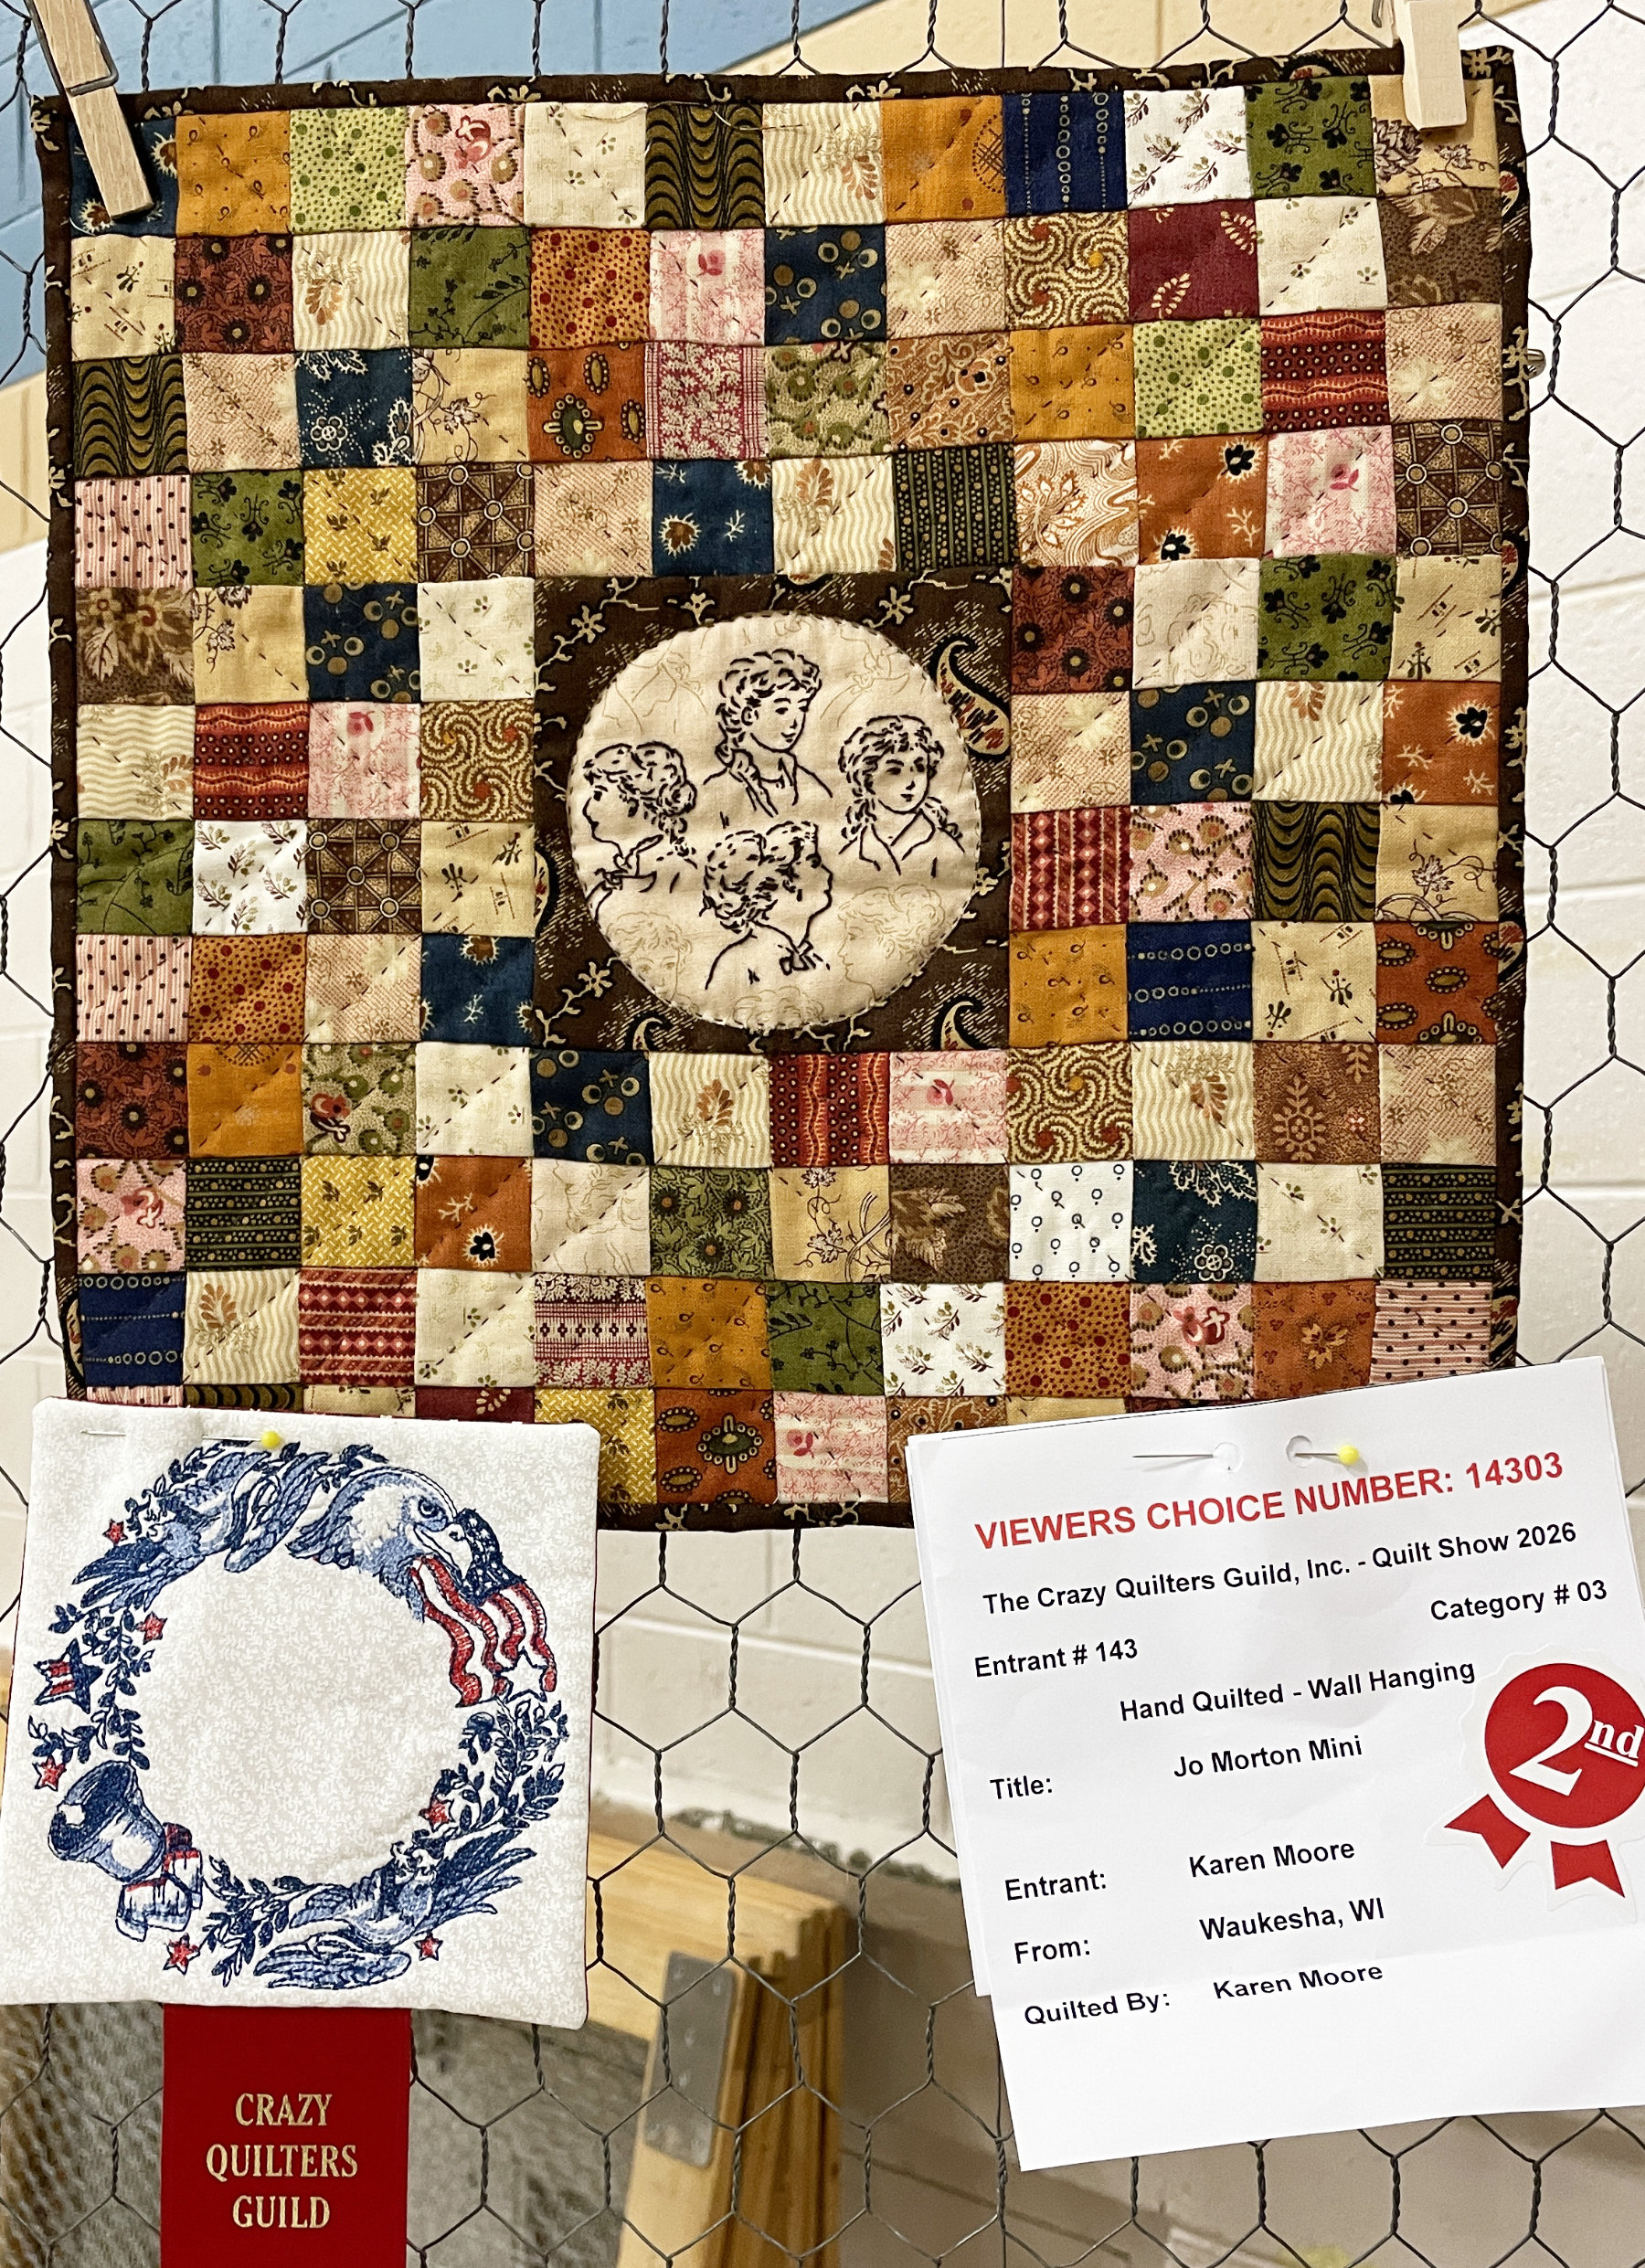
One of the first quilts I saw when I entered the show was “Jo Morton Mini” in honor of the book Little Women. This is my granddaughter Sommer’s favorite book, and we’re going to a local production of the Broadway play for her birthday next week. So I had to snap a pic, and then I realized it was made by my friend Karen Moore. I didn’t know she made minis! Great job Karen! ~ and congratulations on the ribbon.
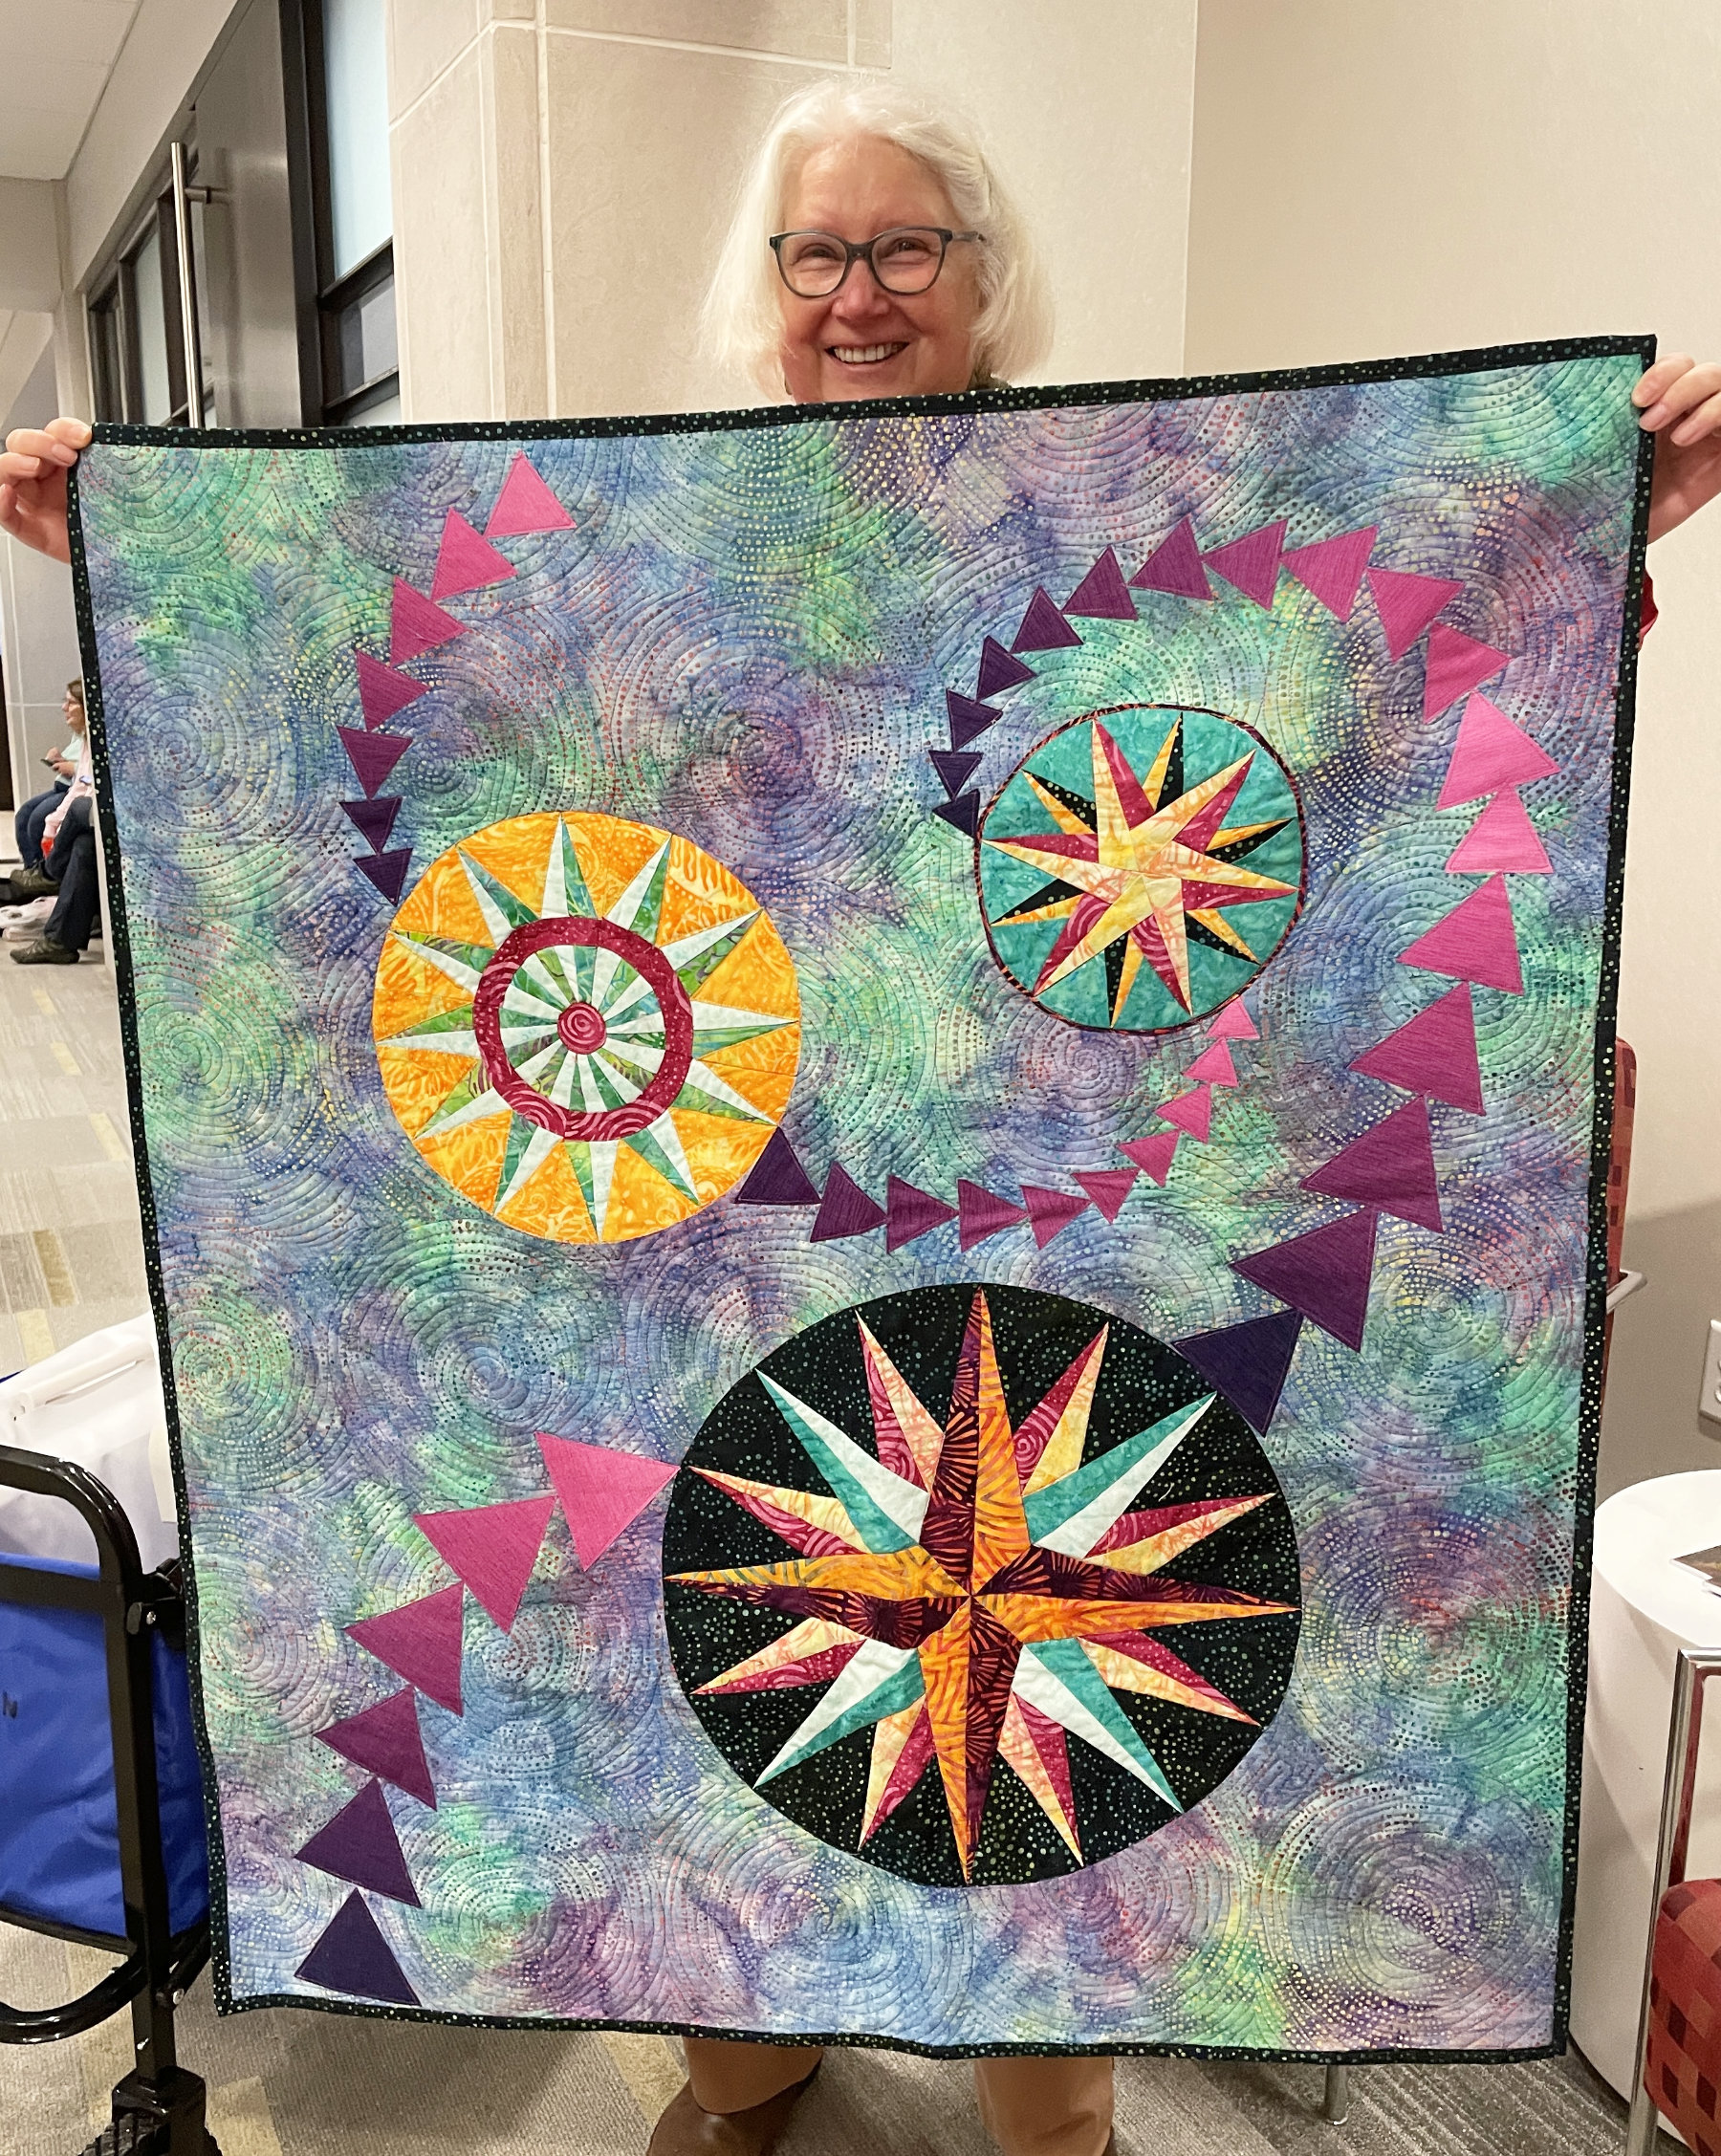
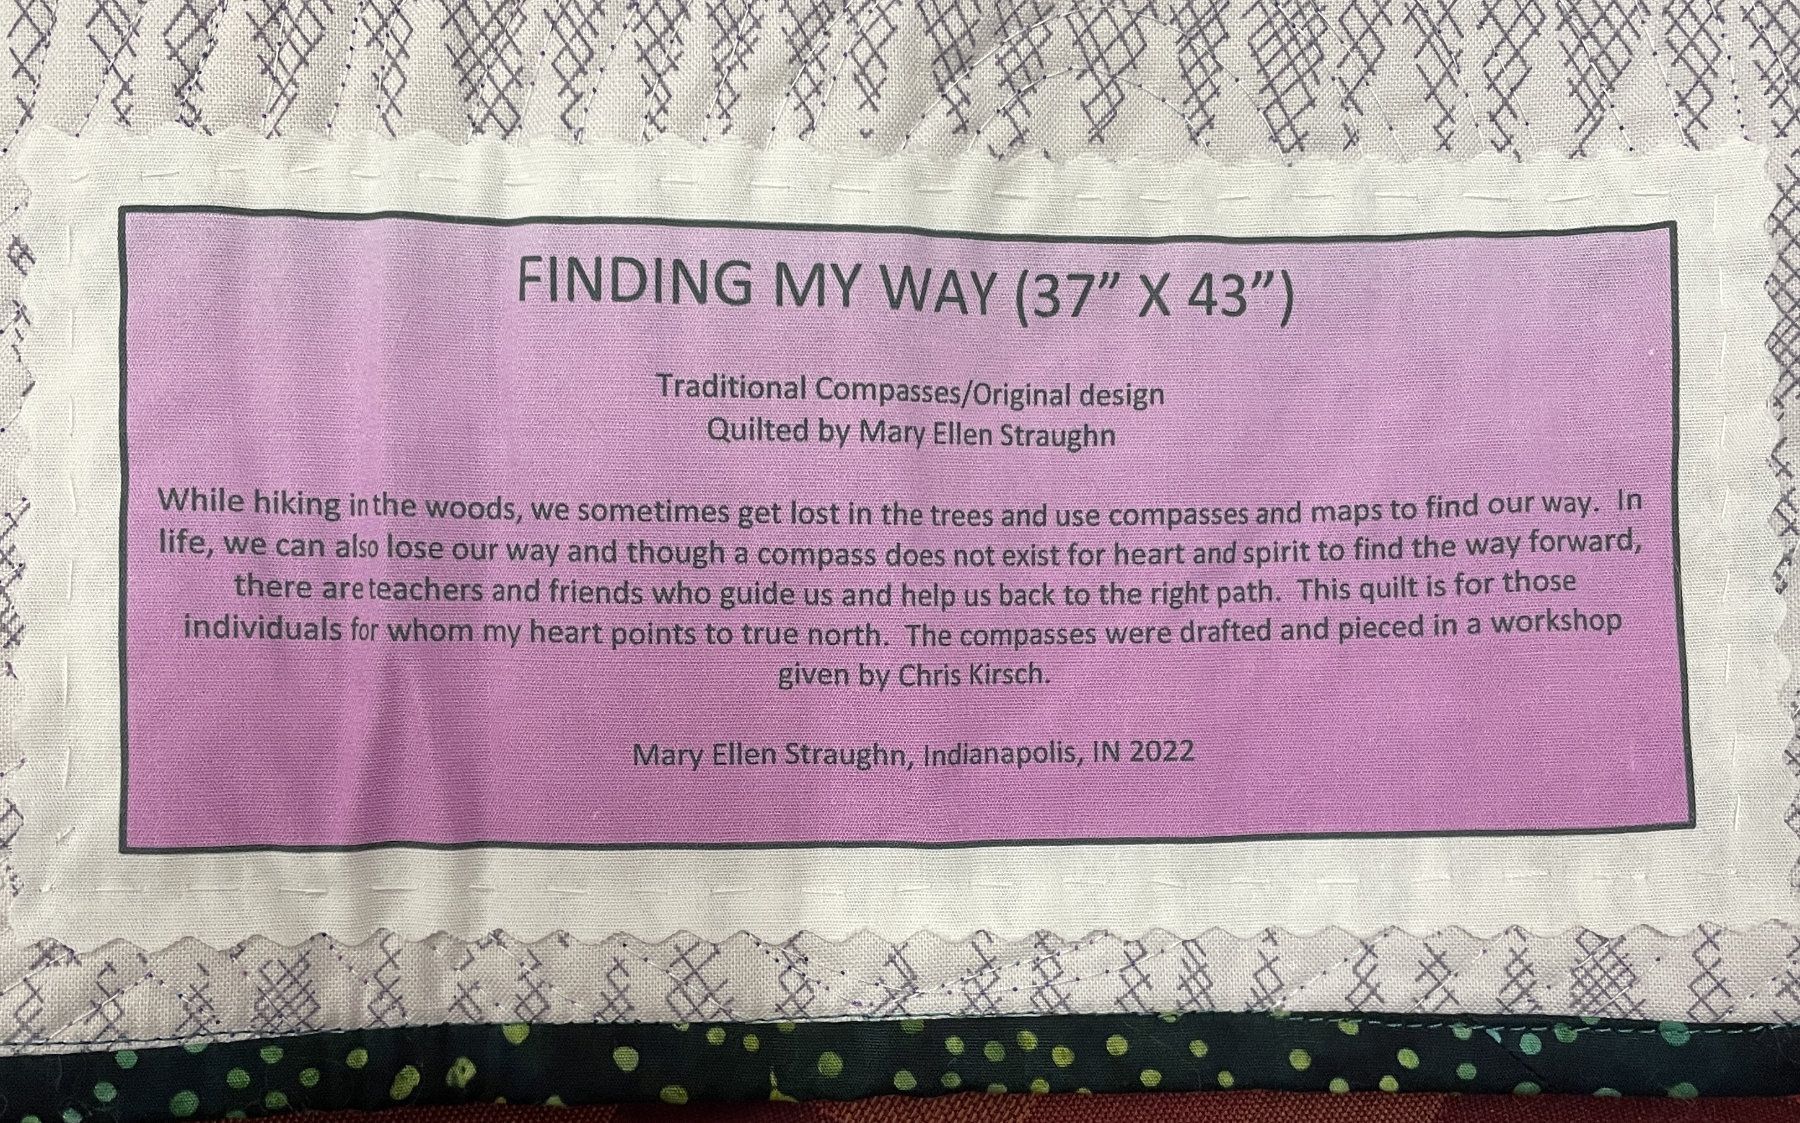
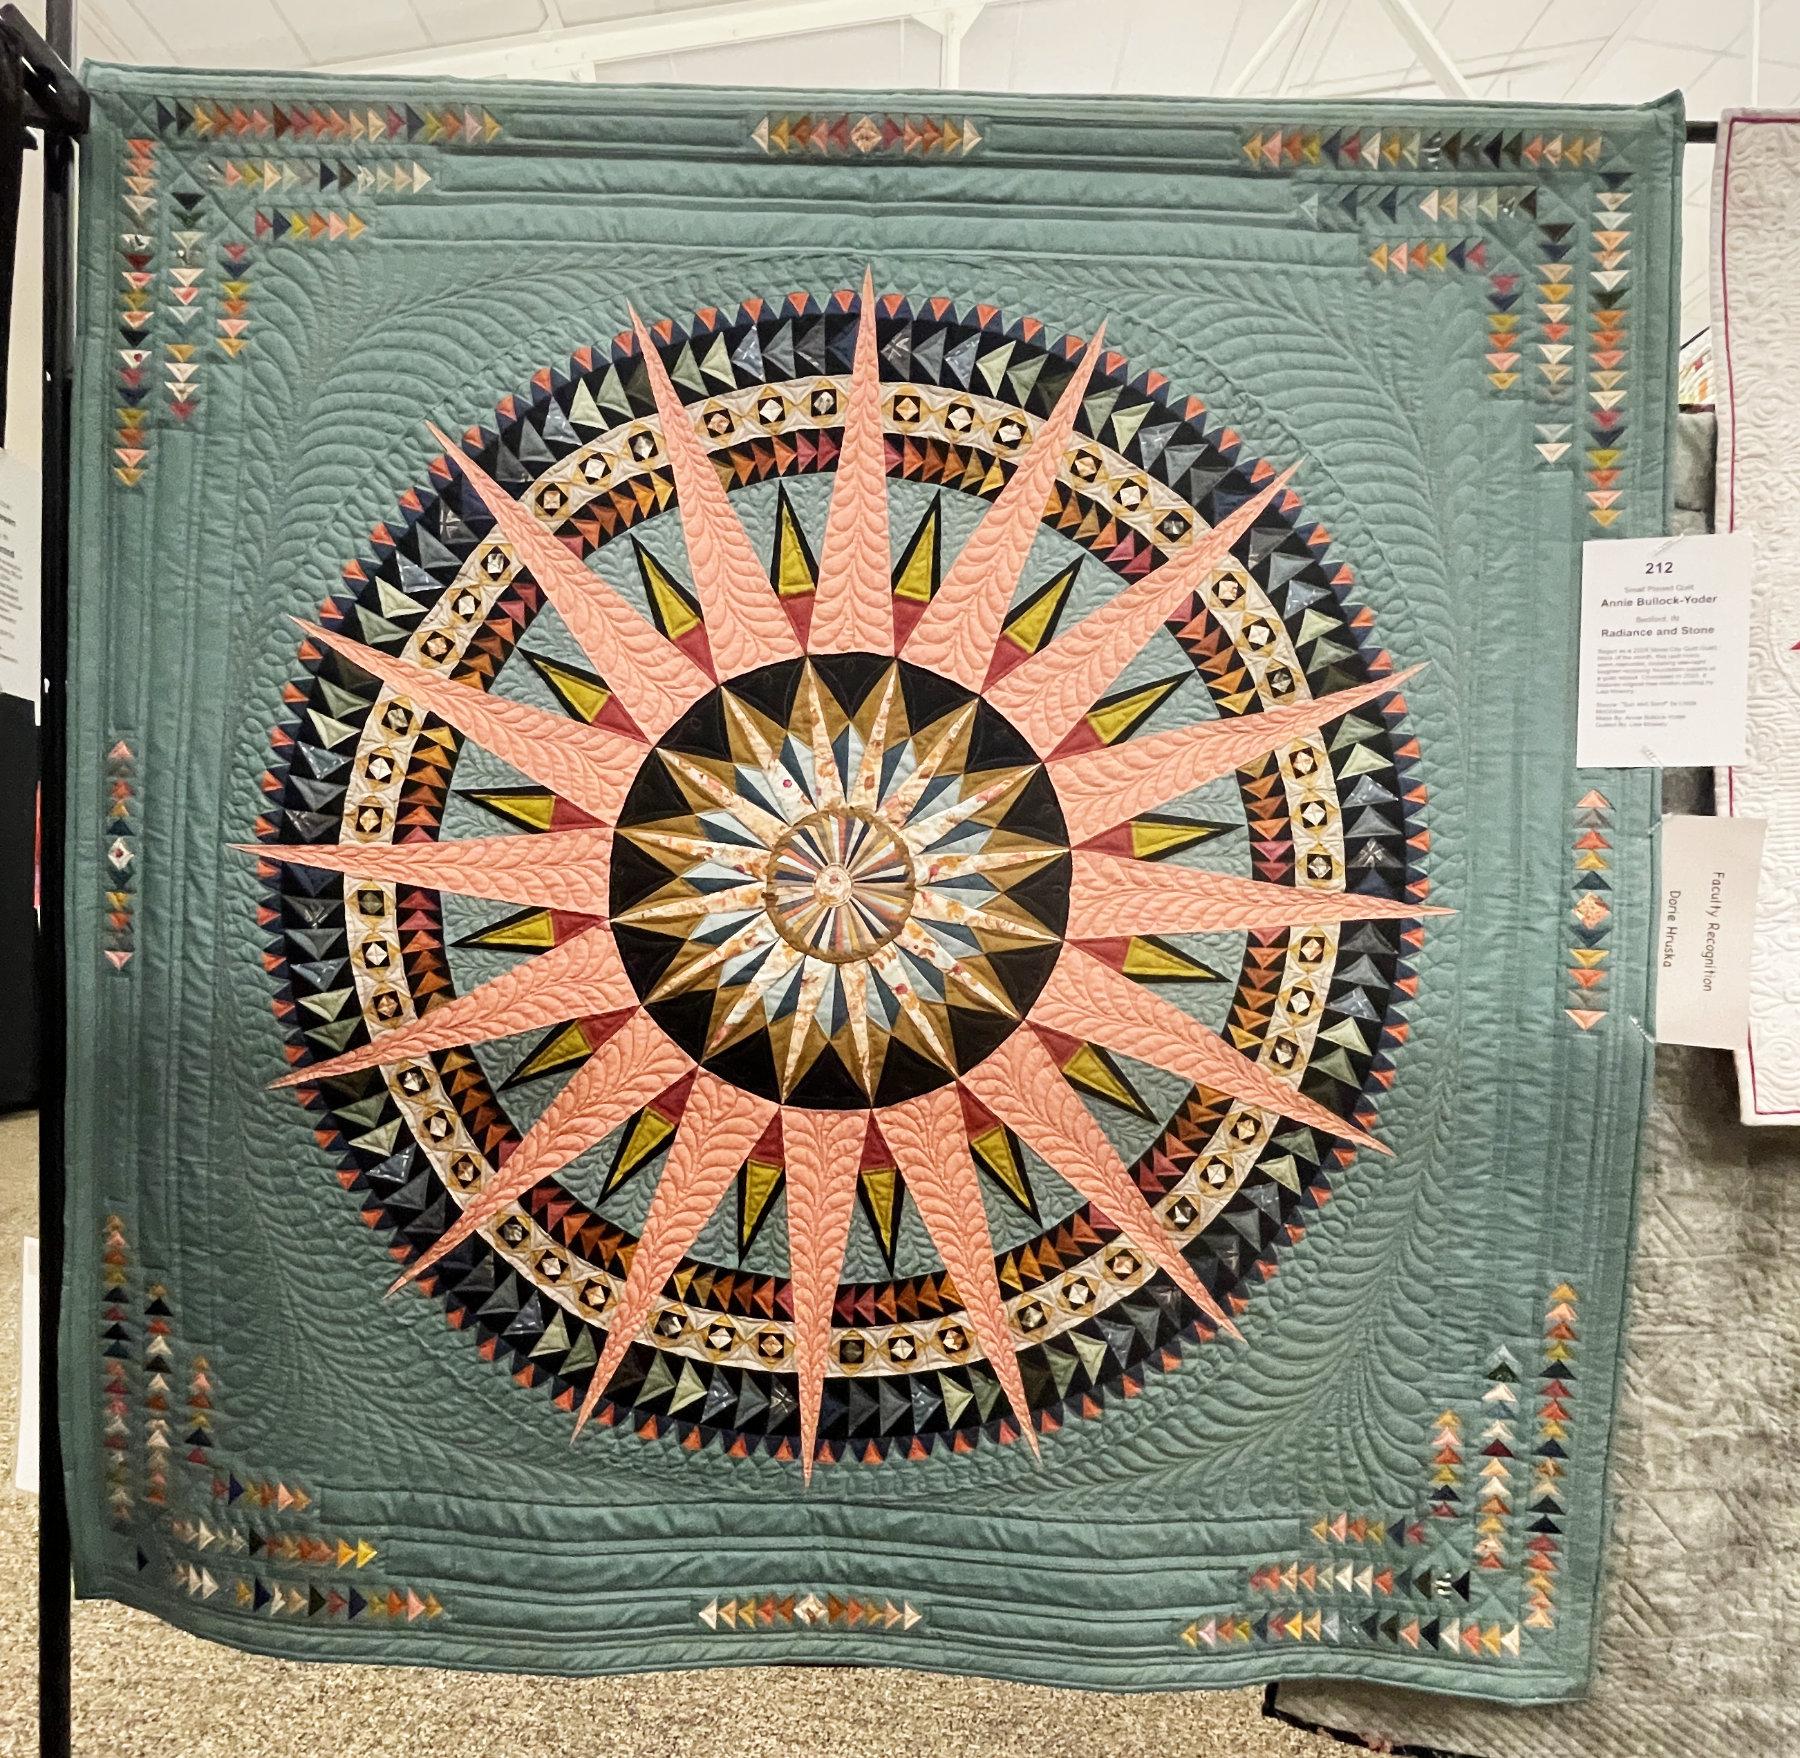
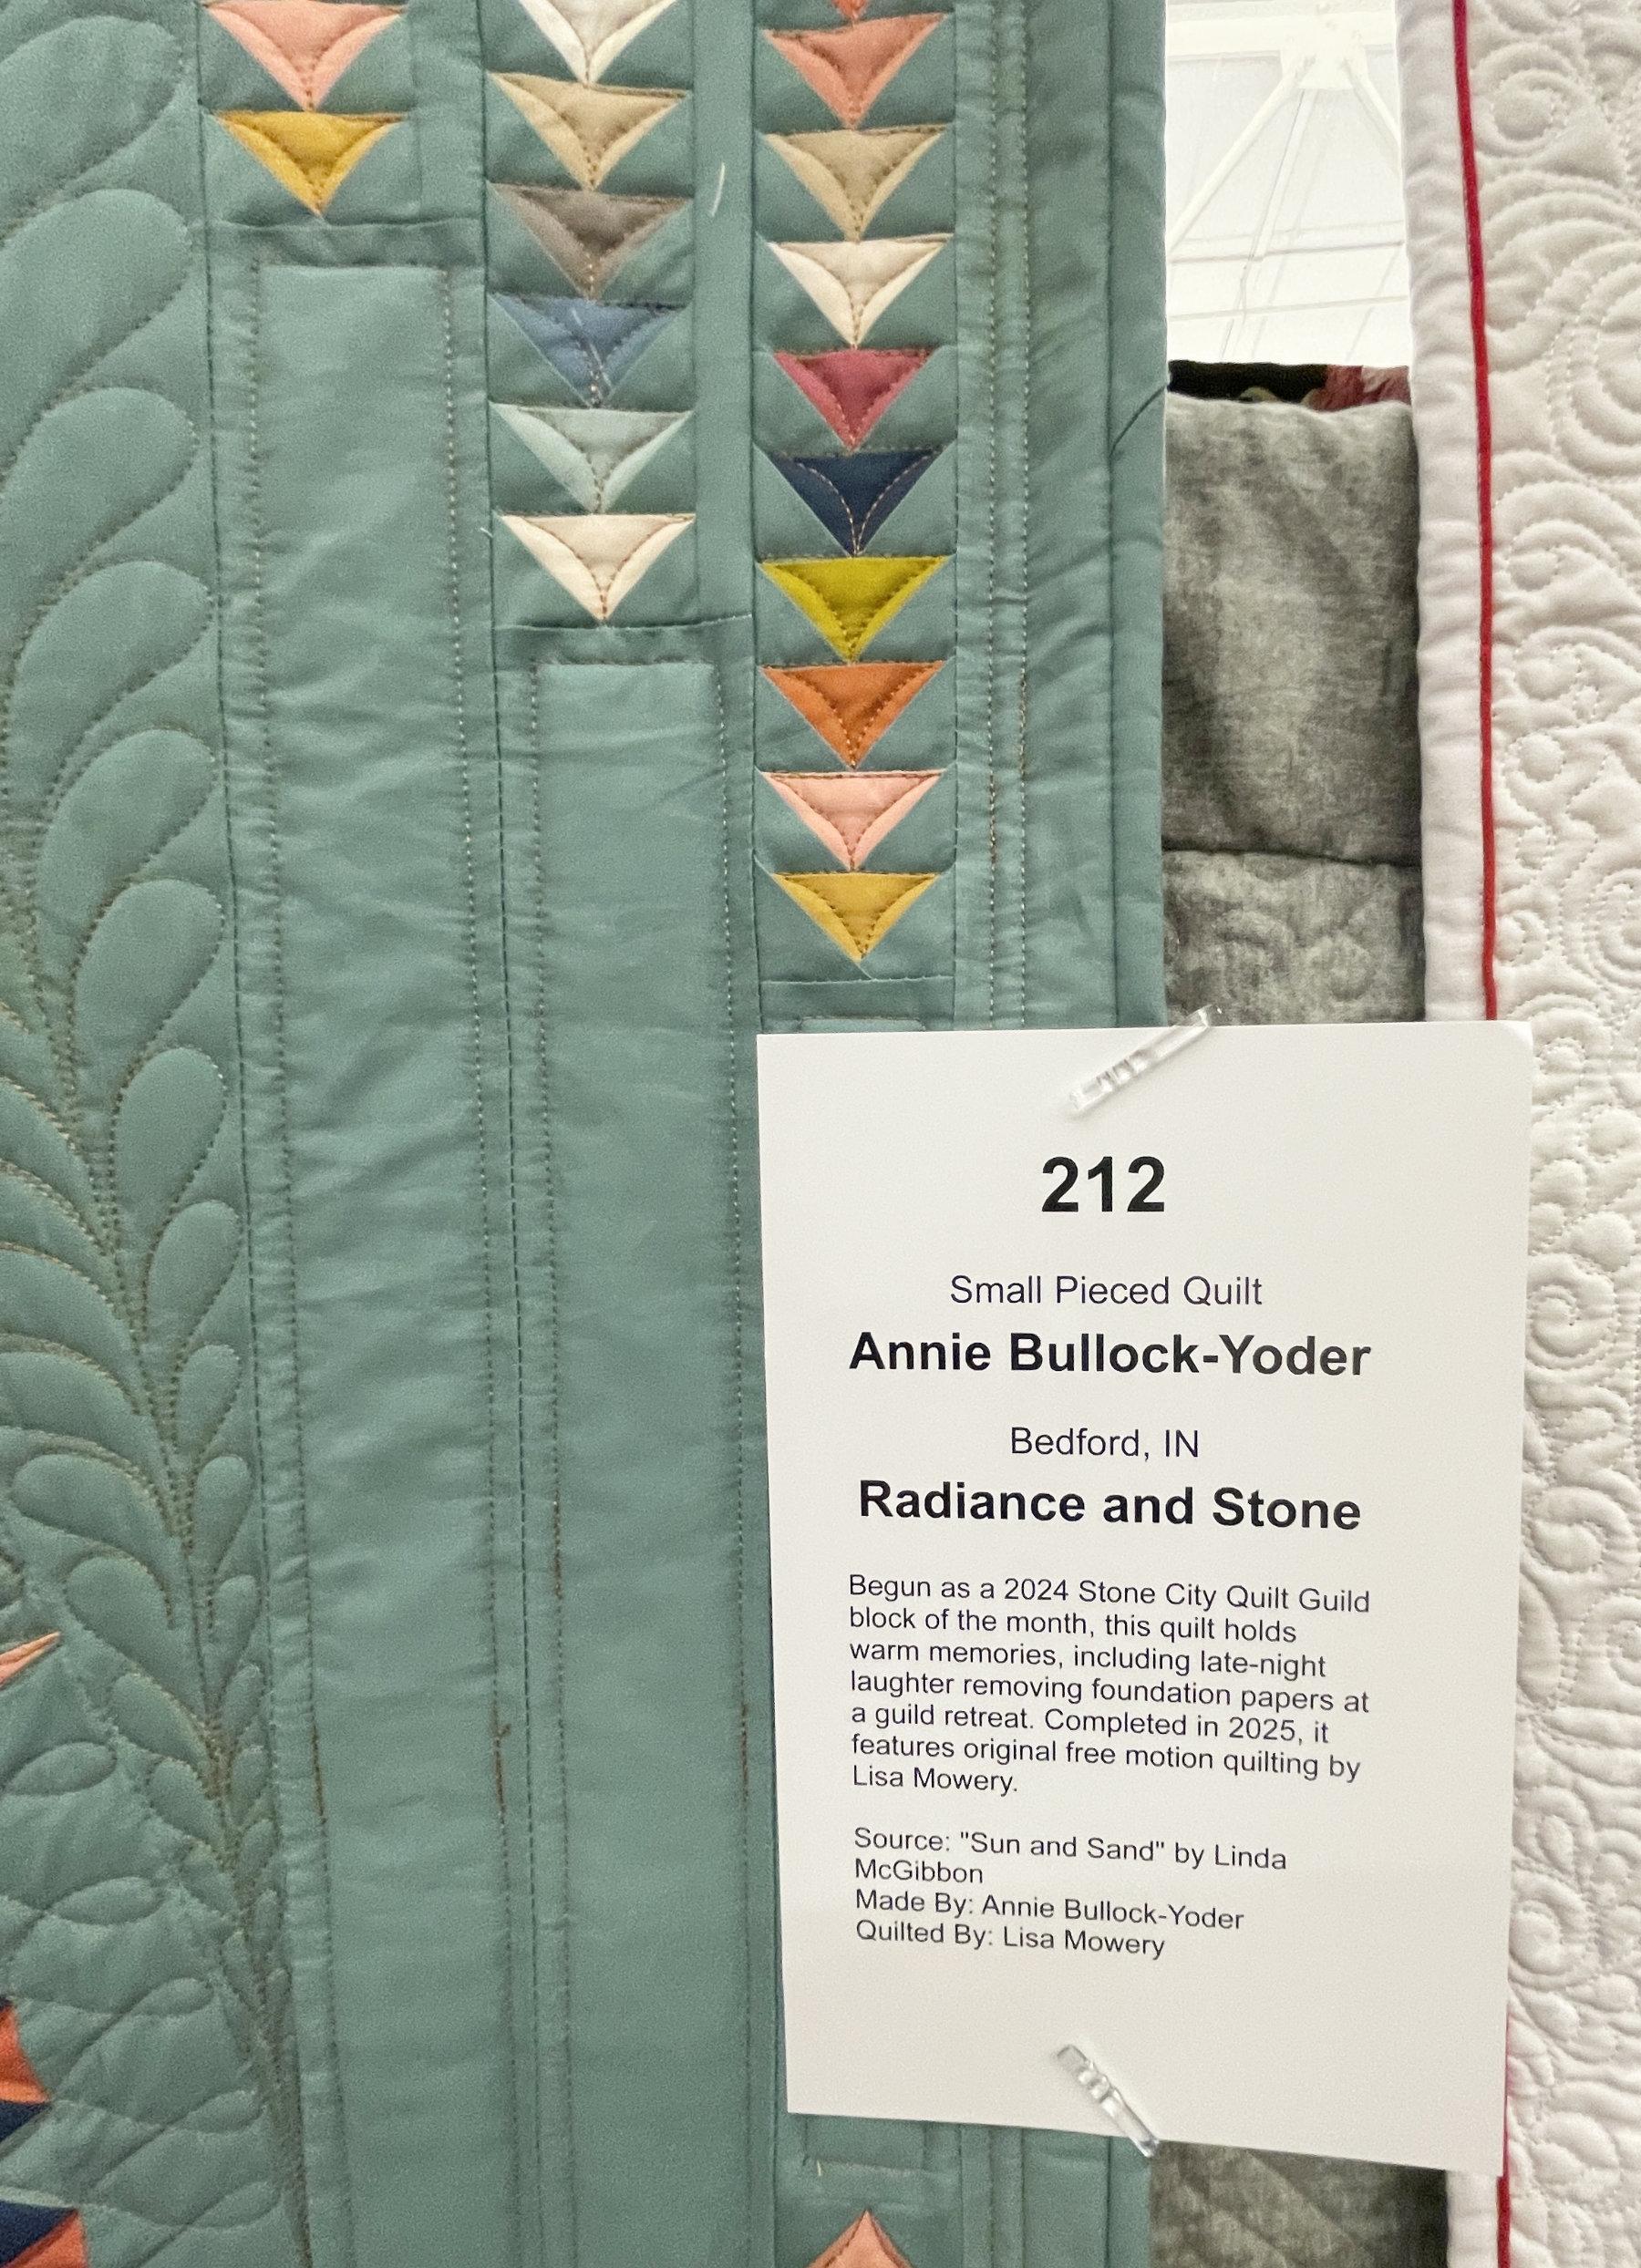
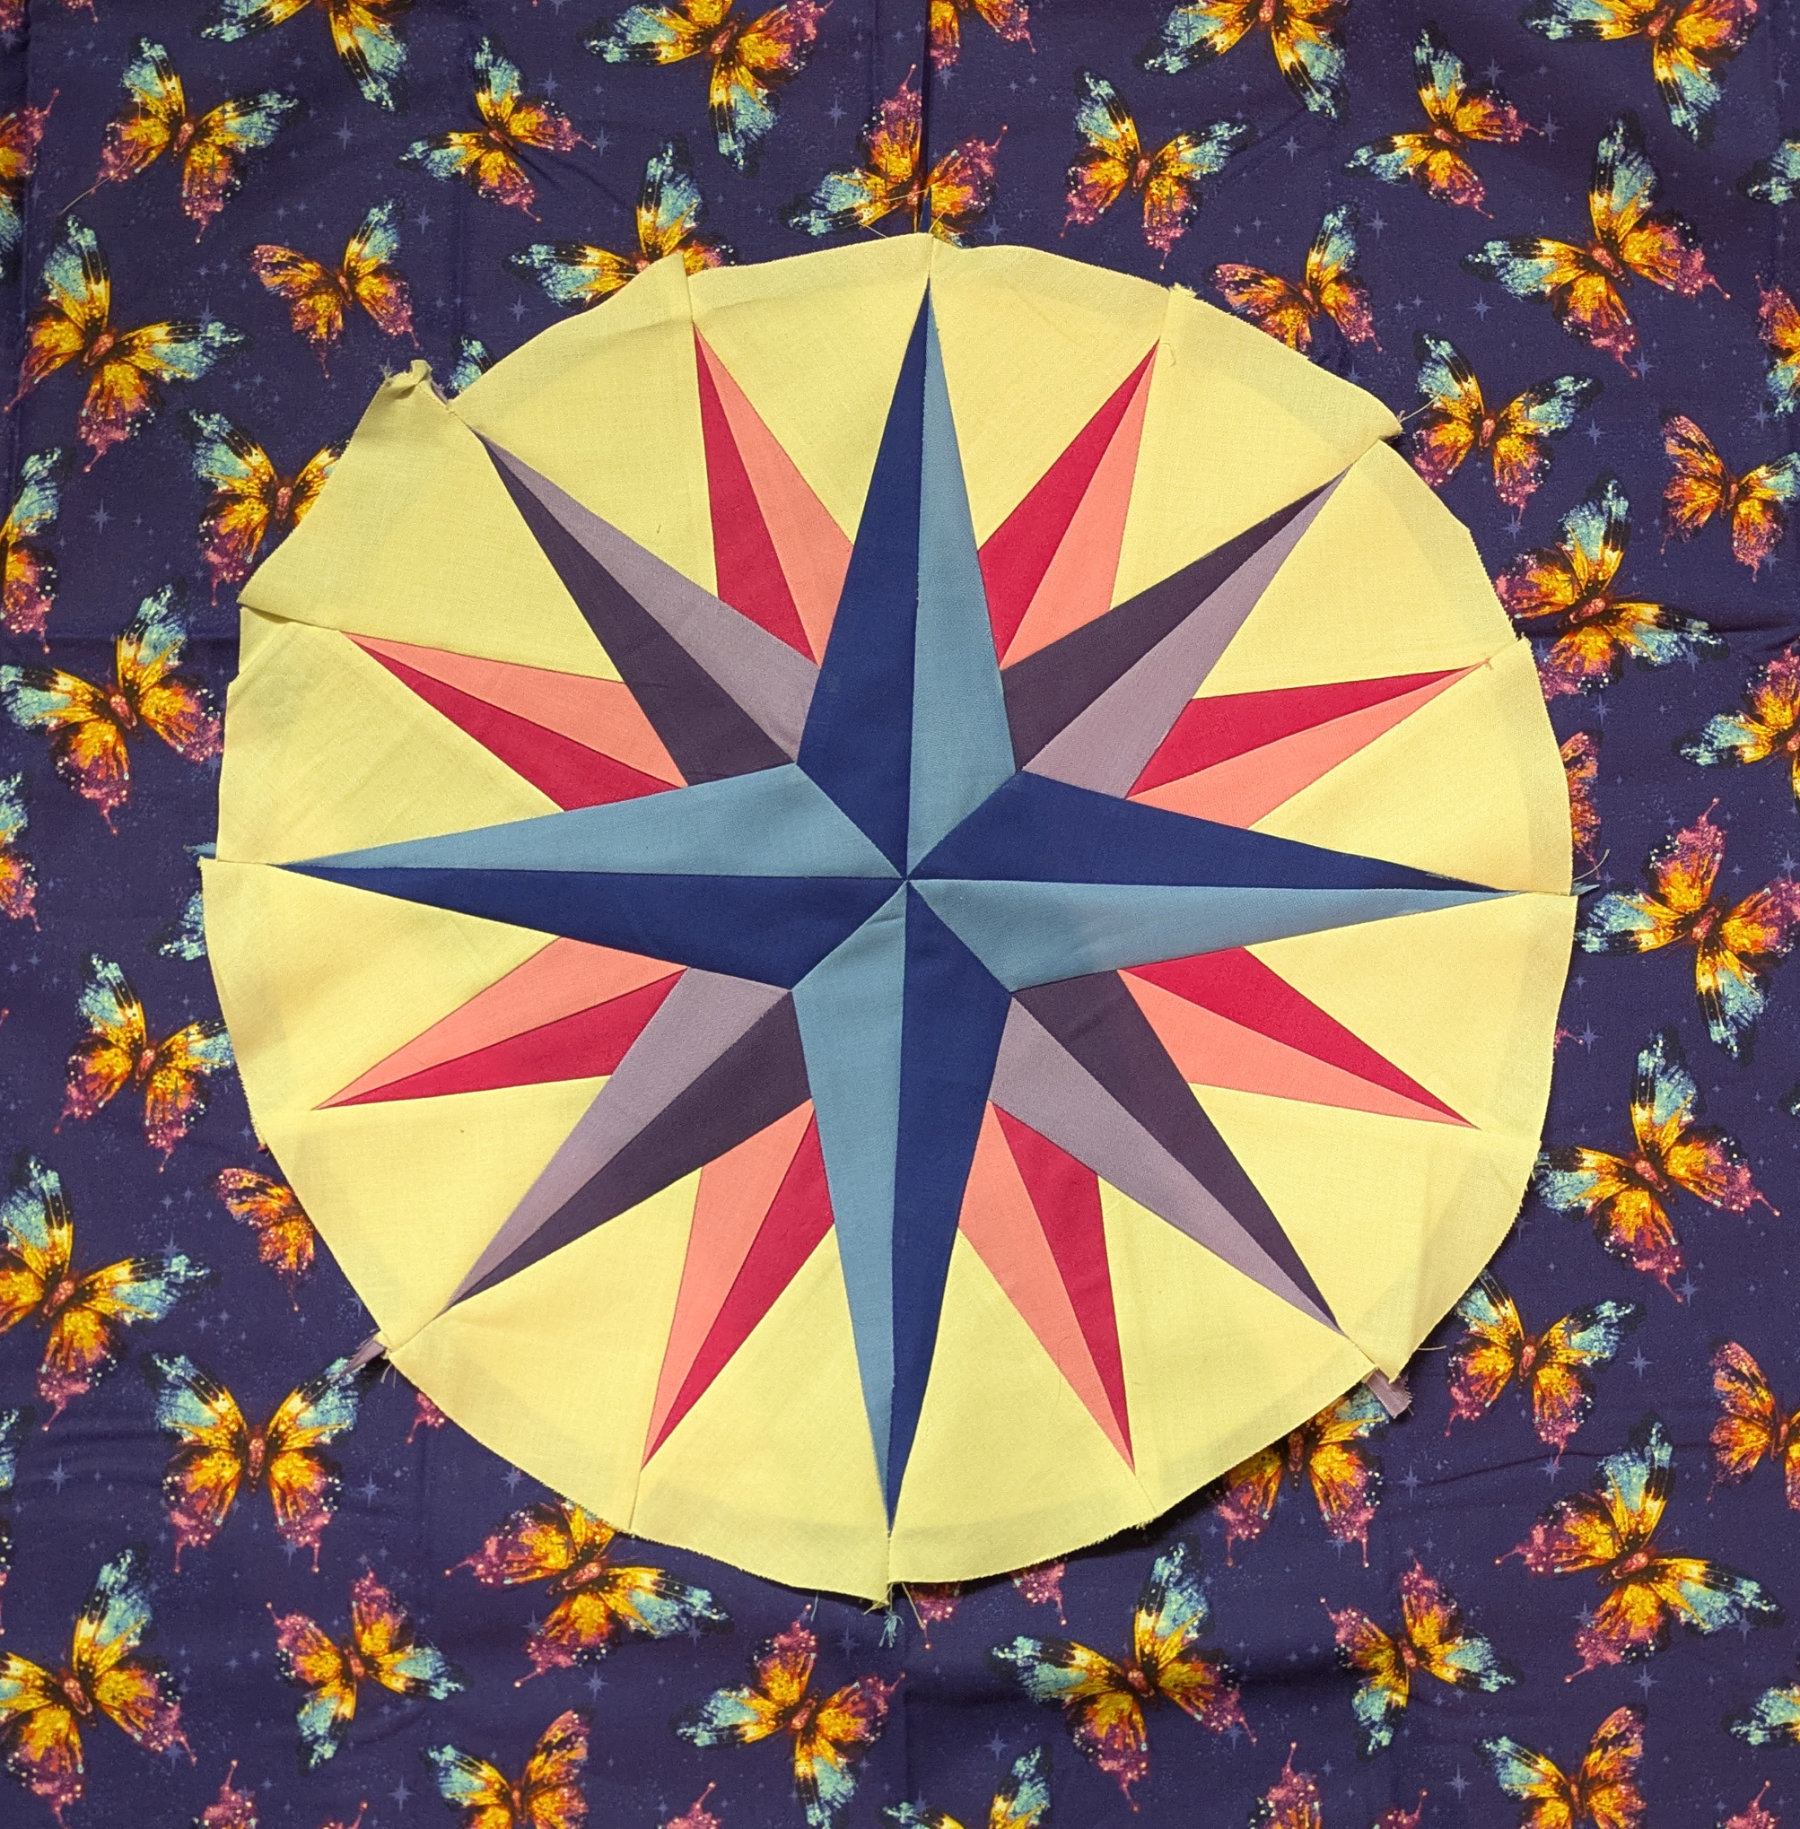
Around Town by Lois Smith is simply striking!
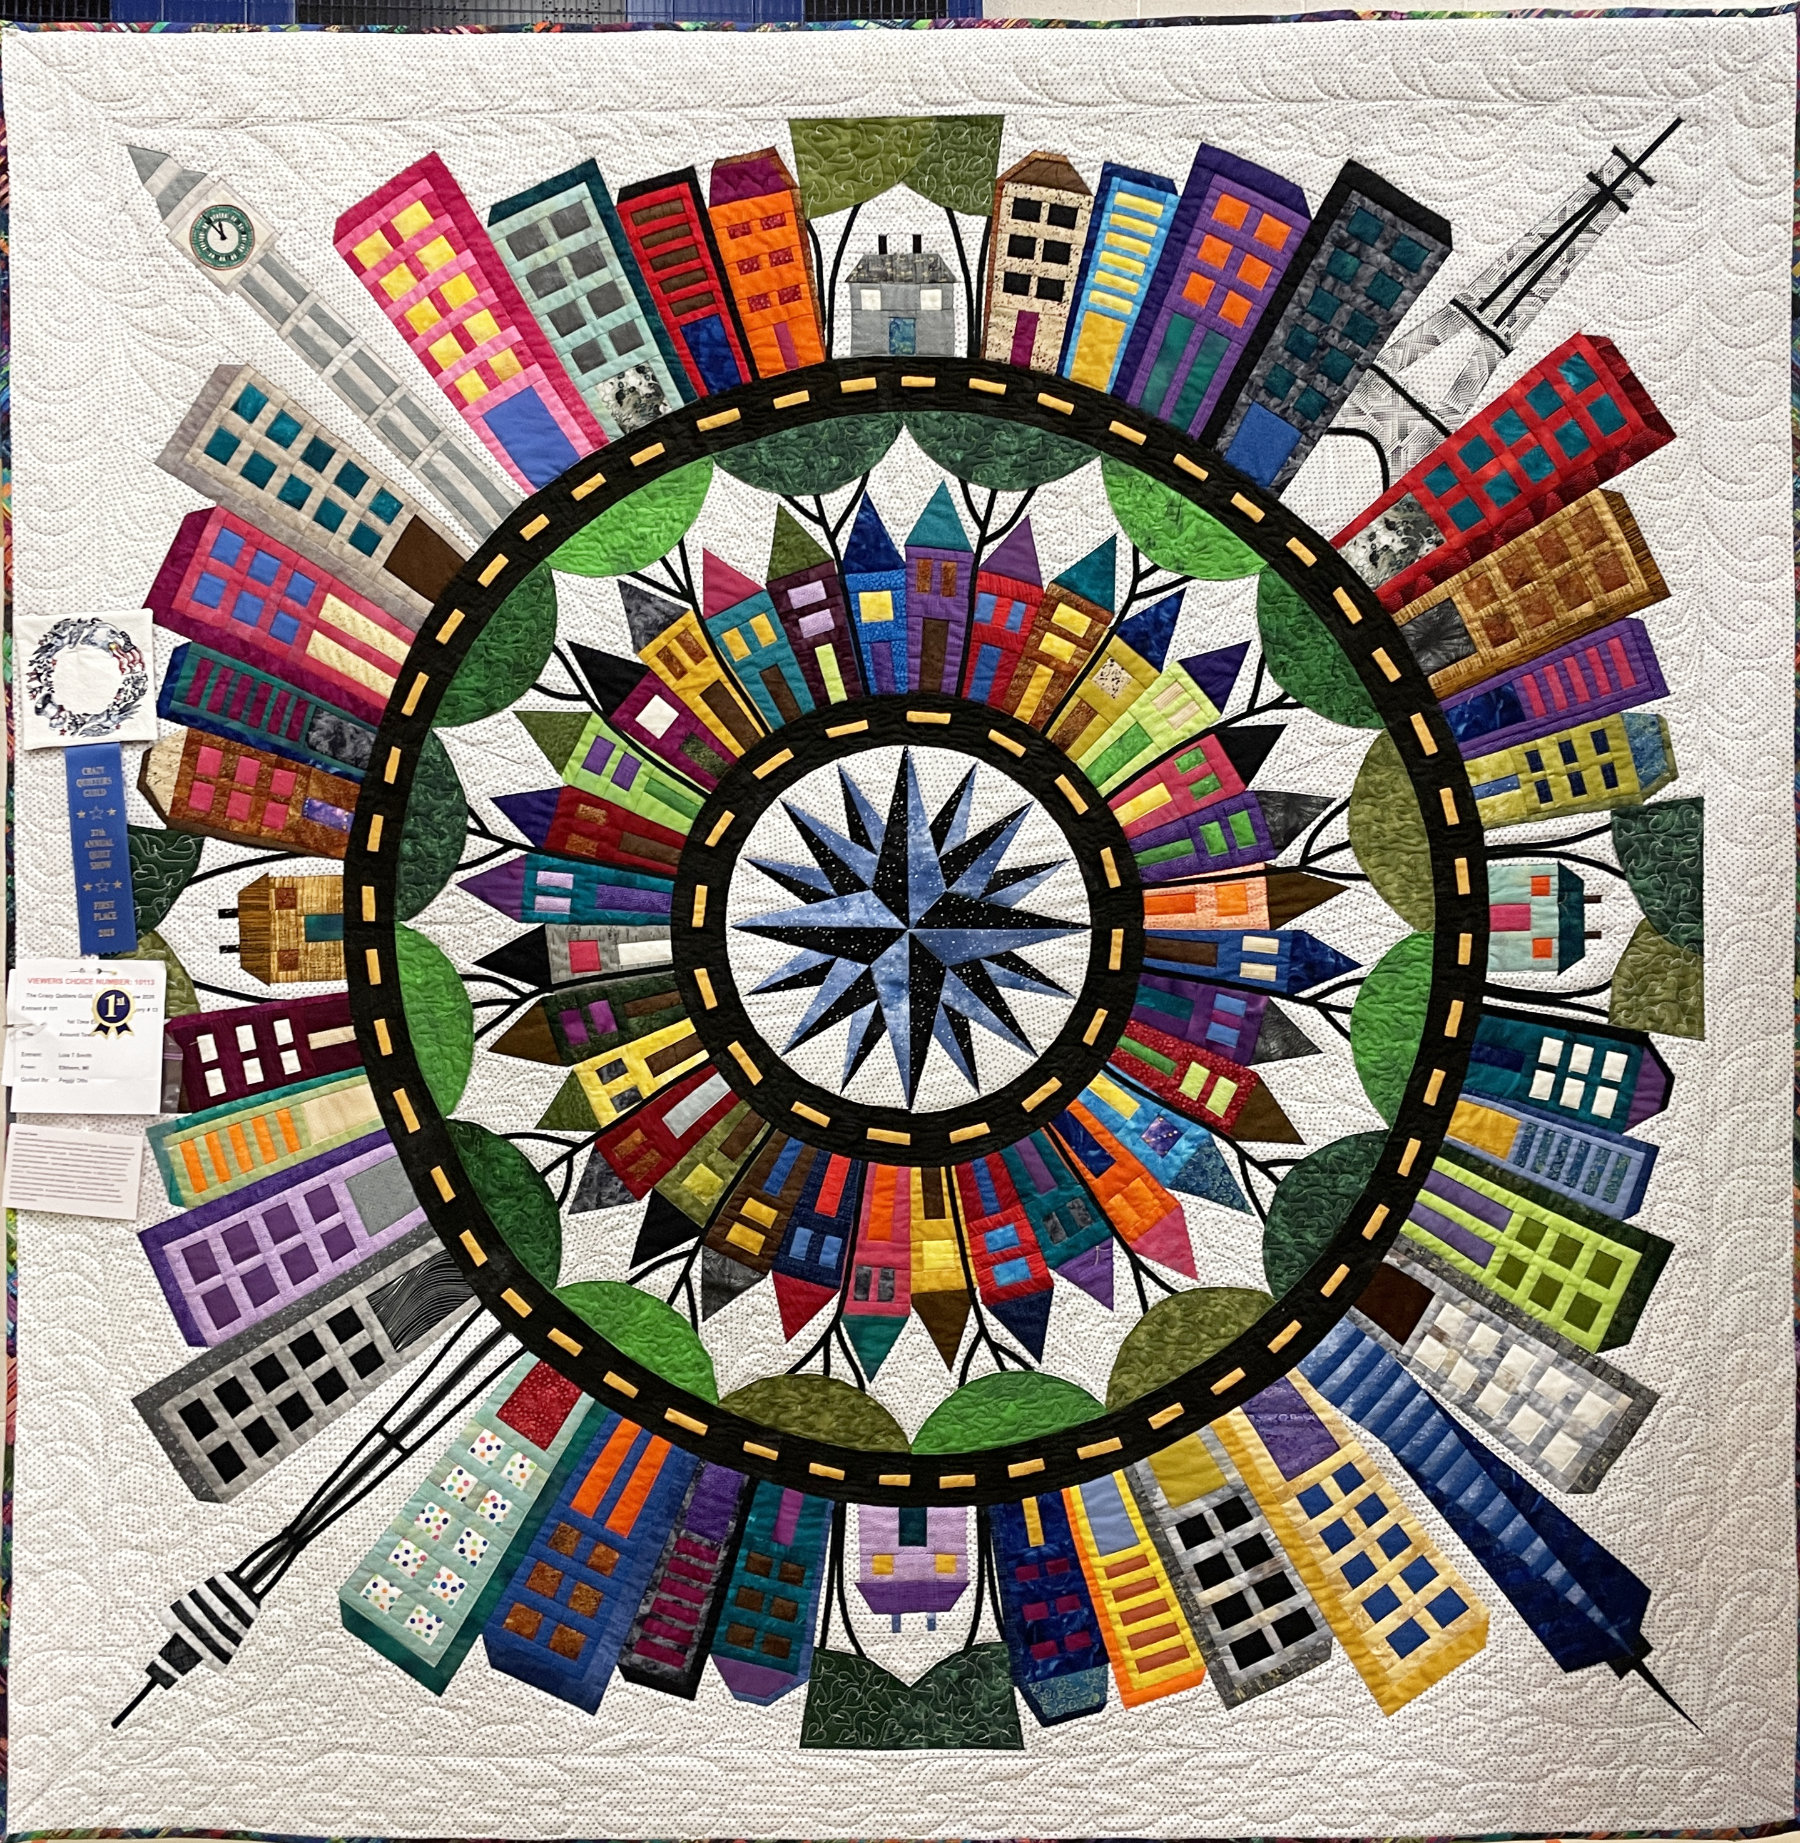
The colors, fabrics, appliqué and piecing are all well done… and there was a mariner’s compass in the middle! I love it! Here’s the story:

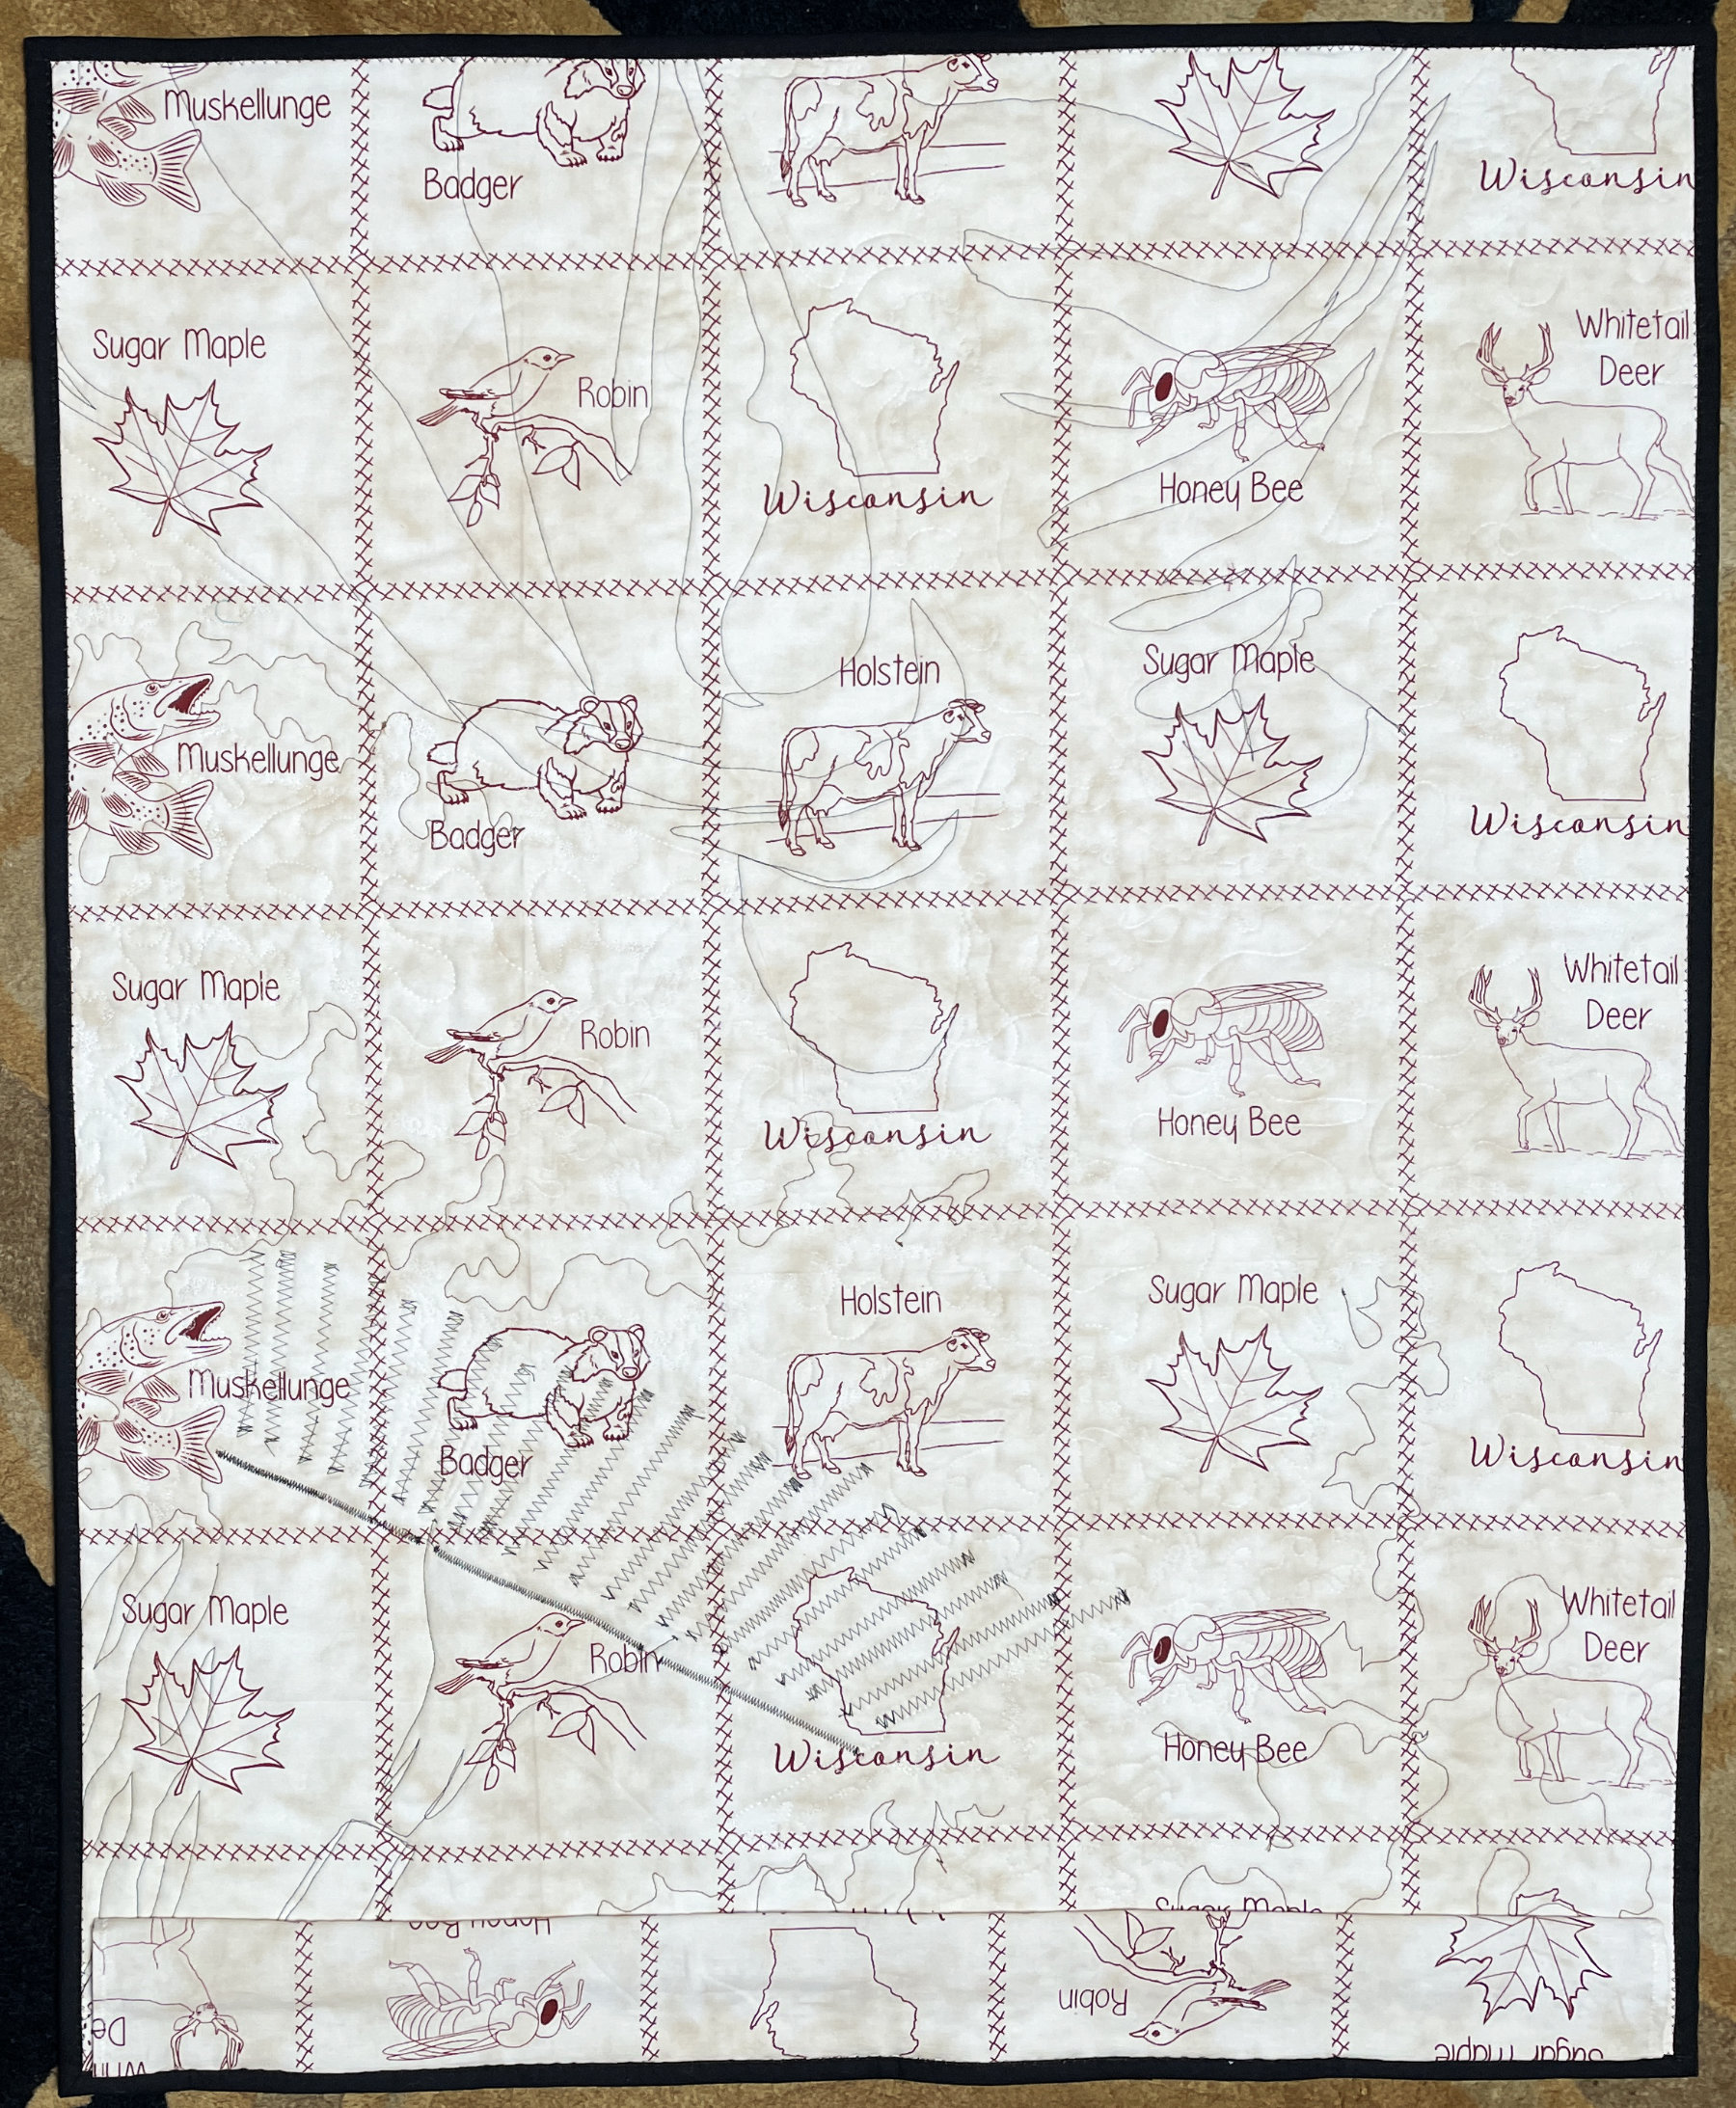
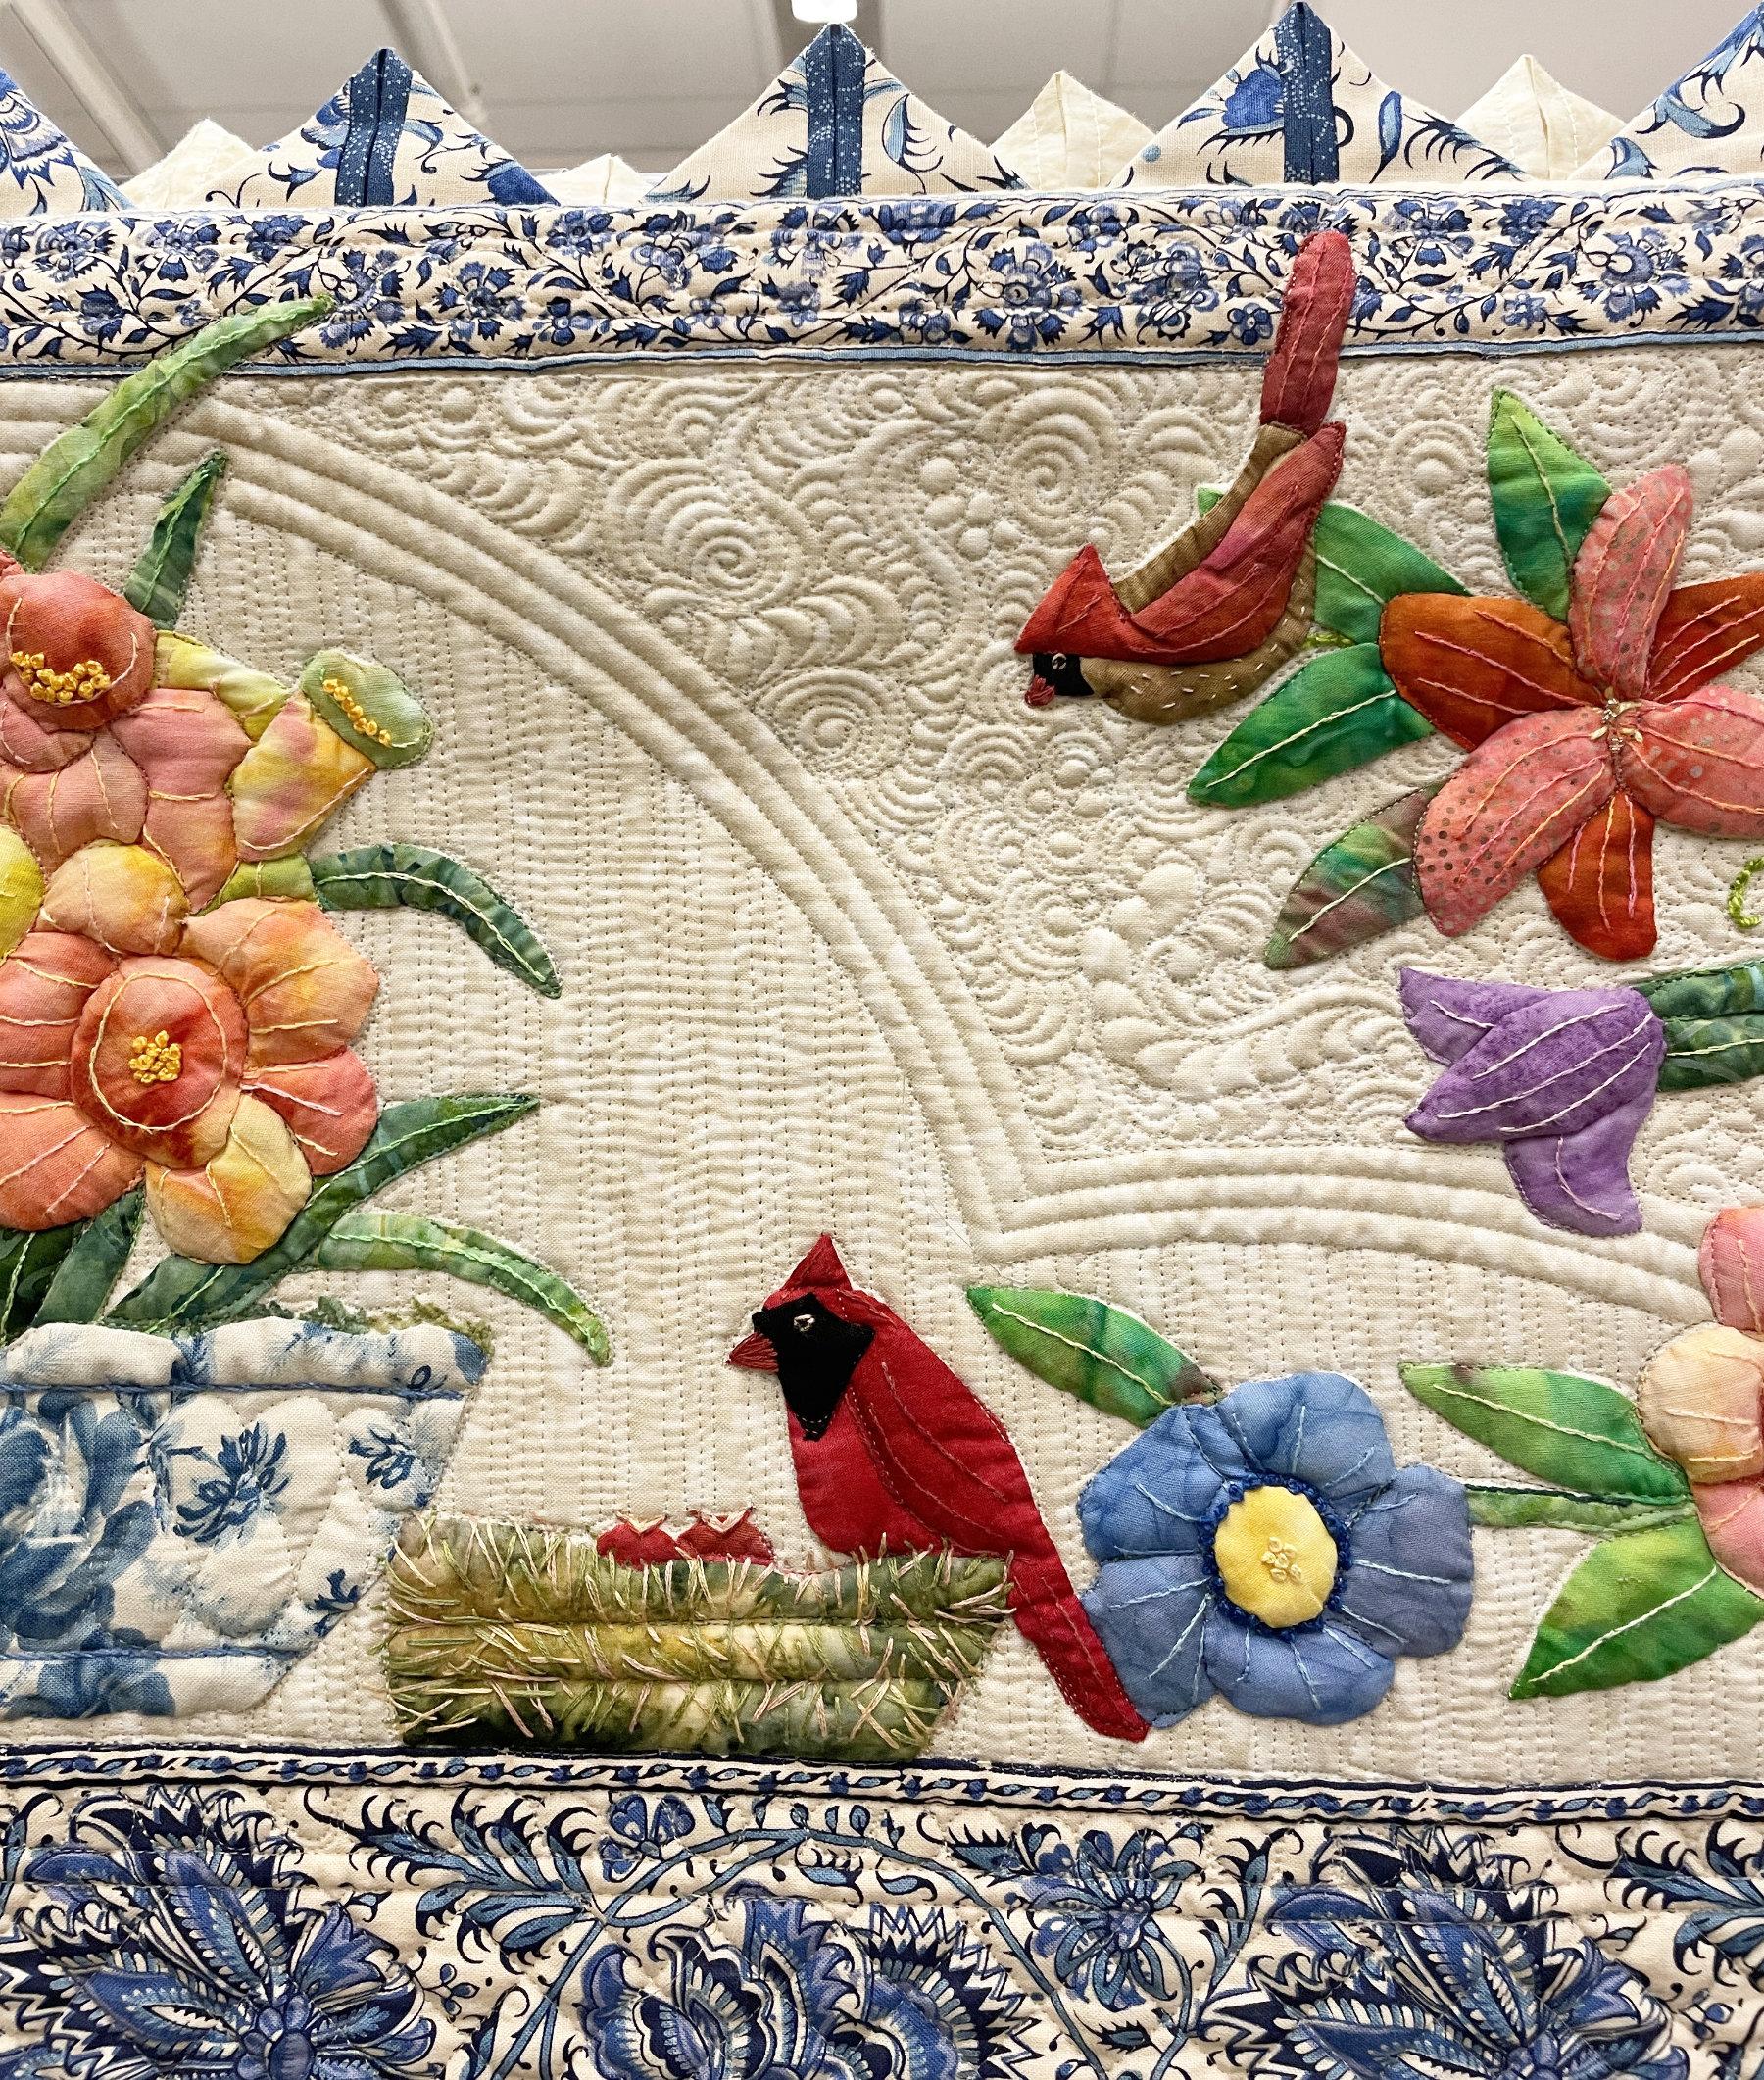
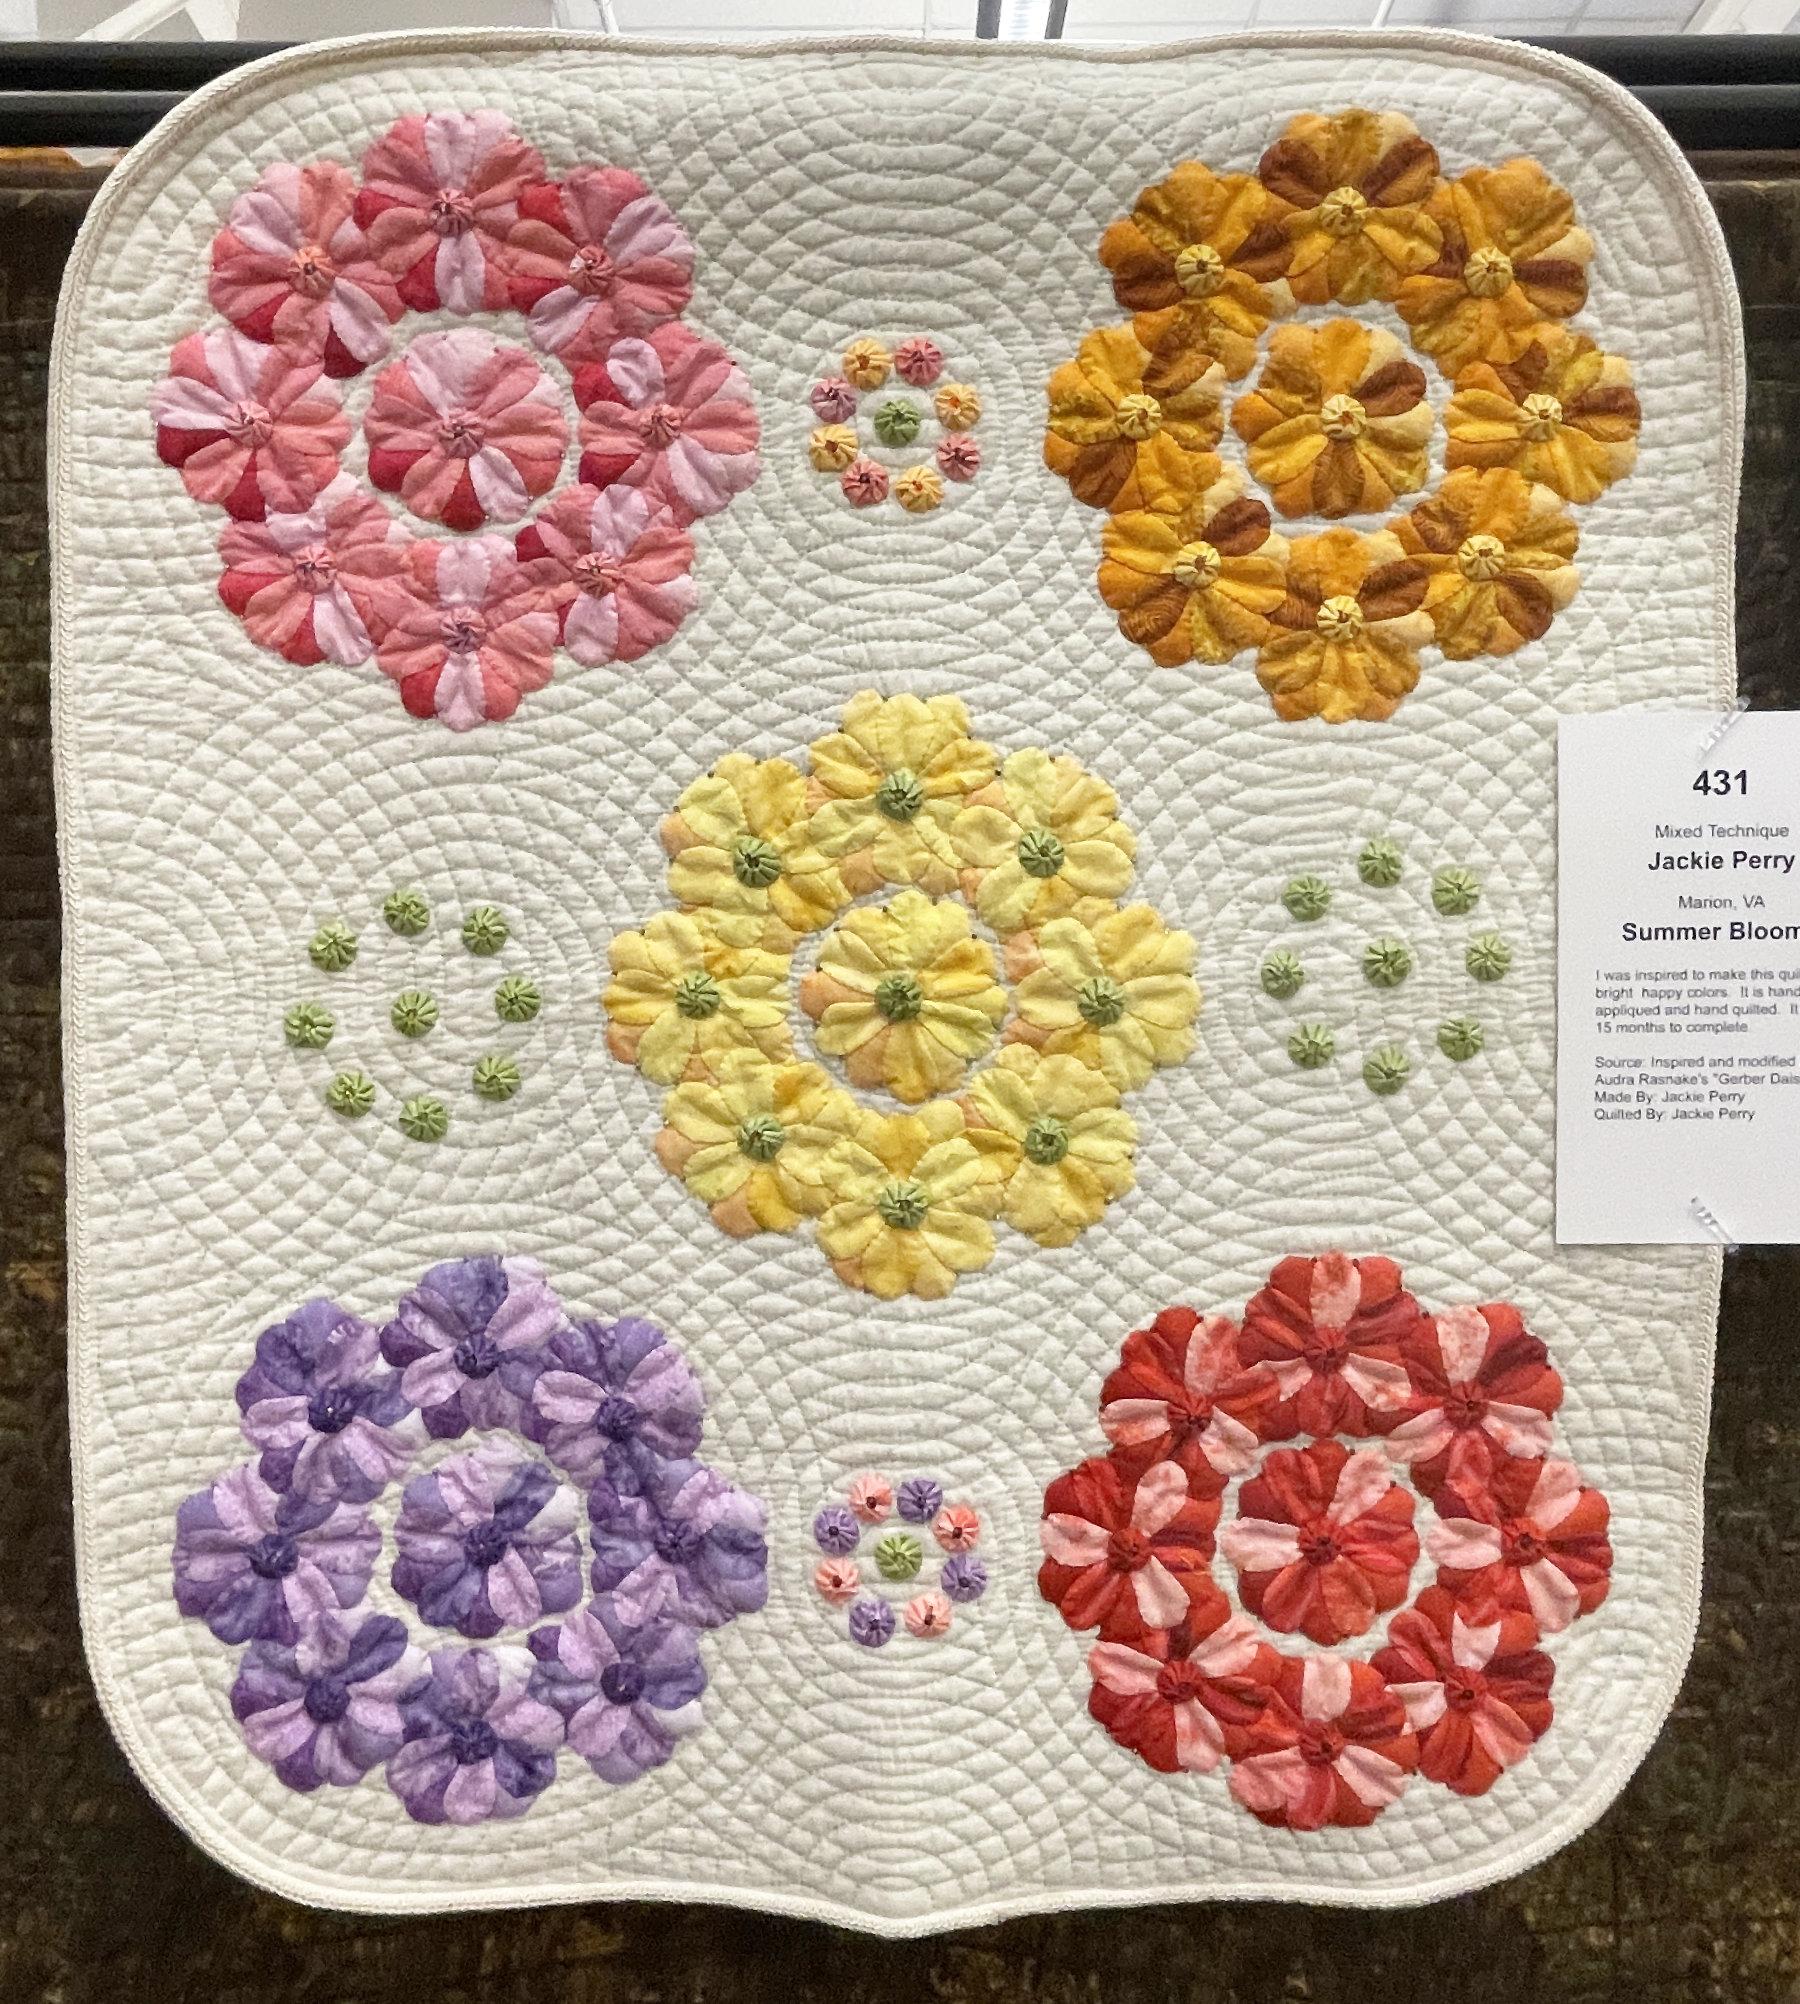
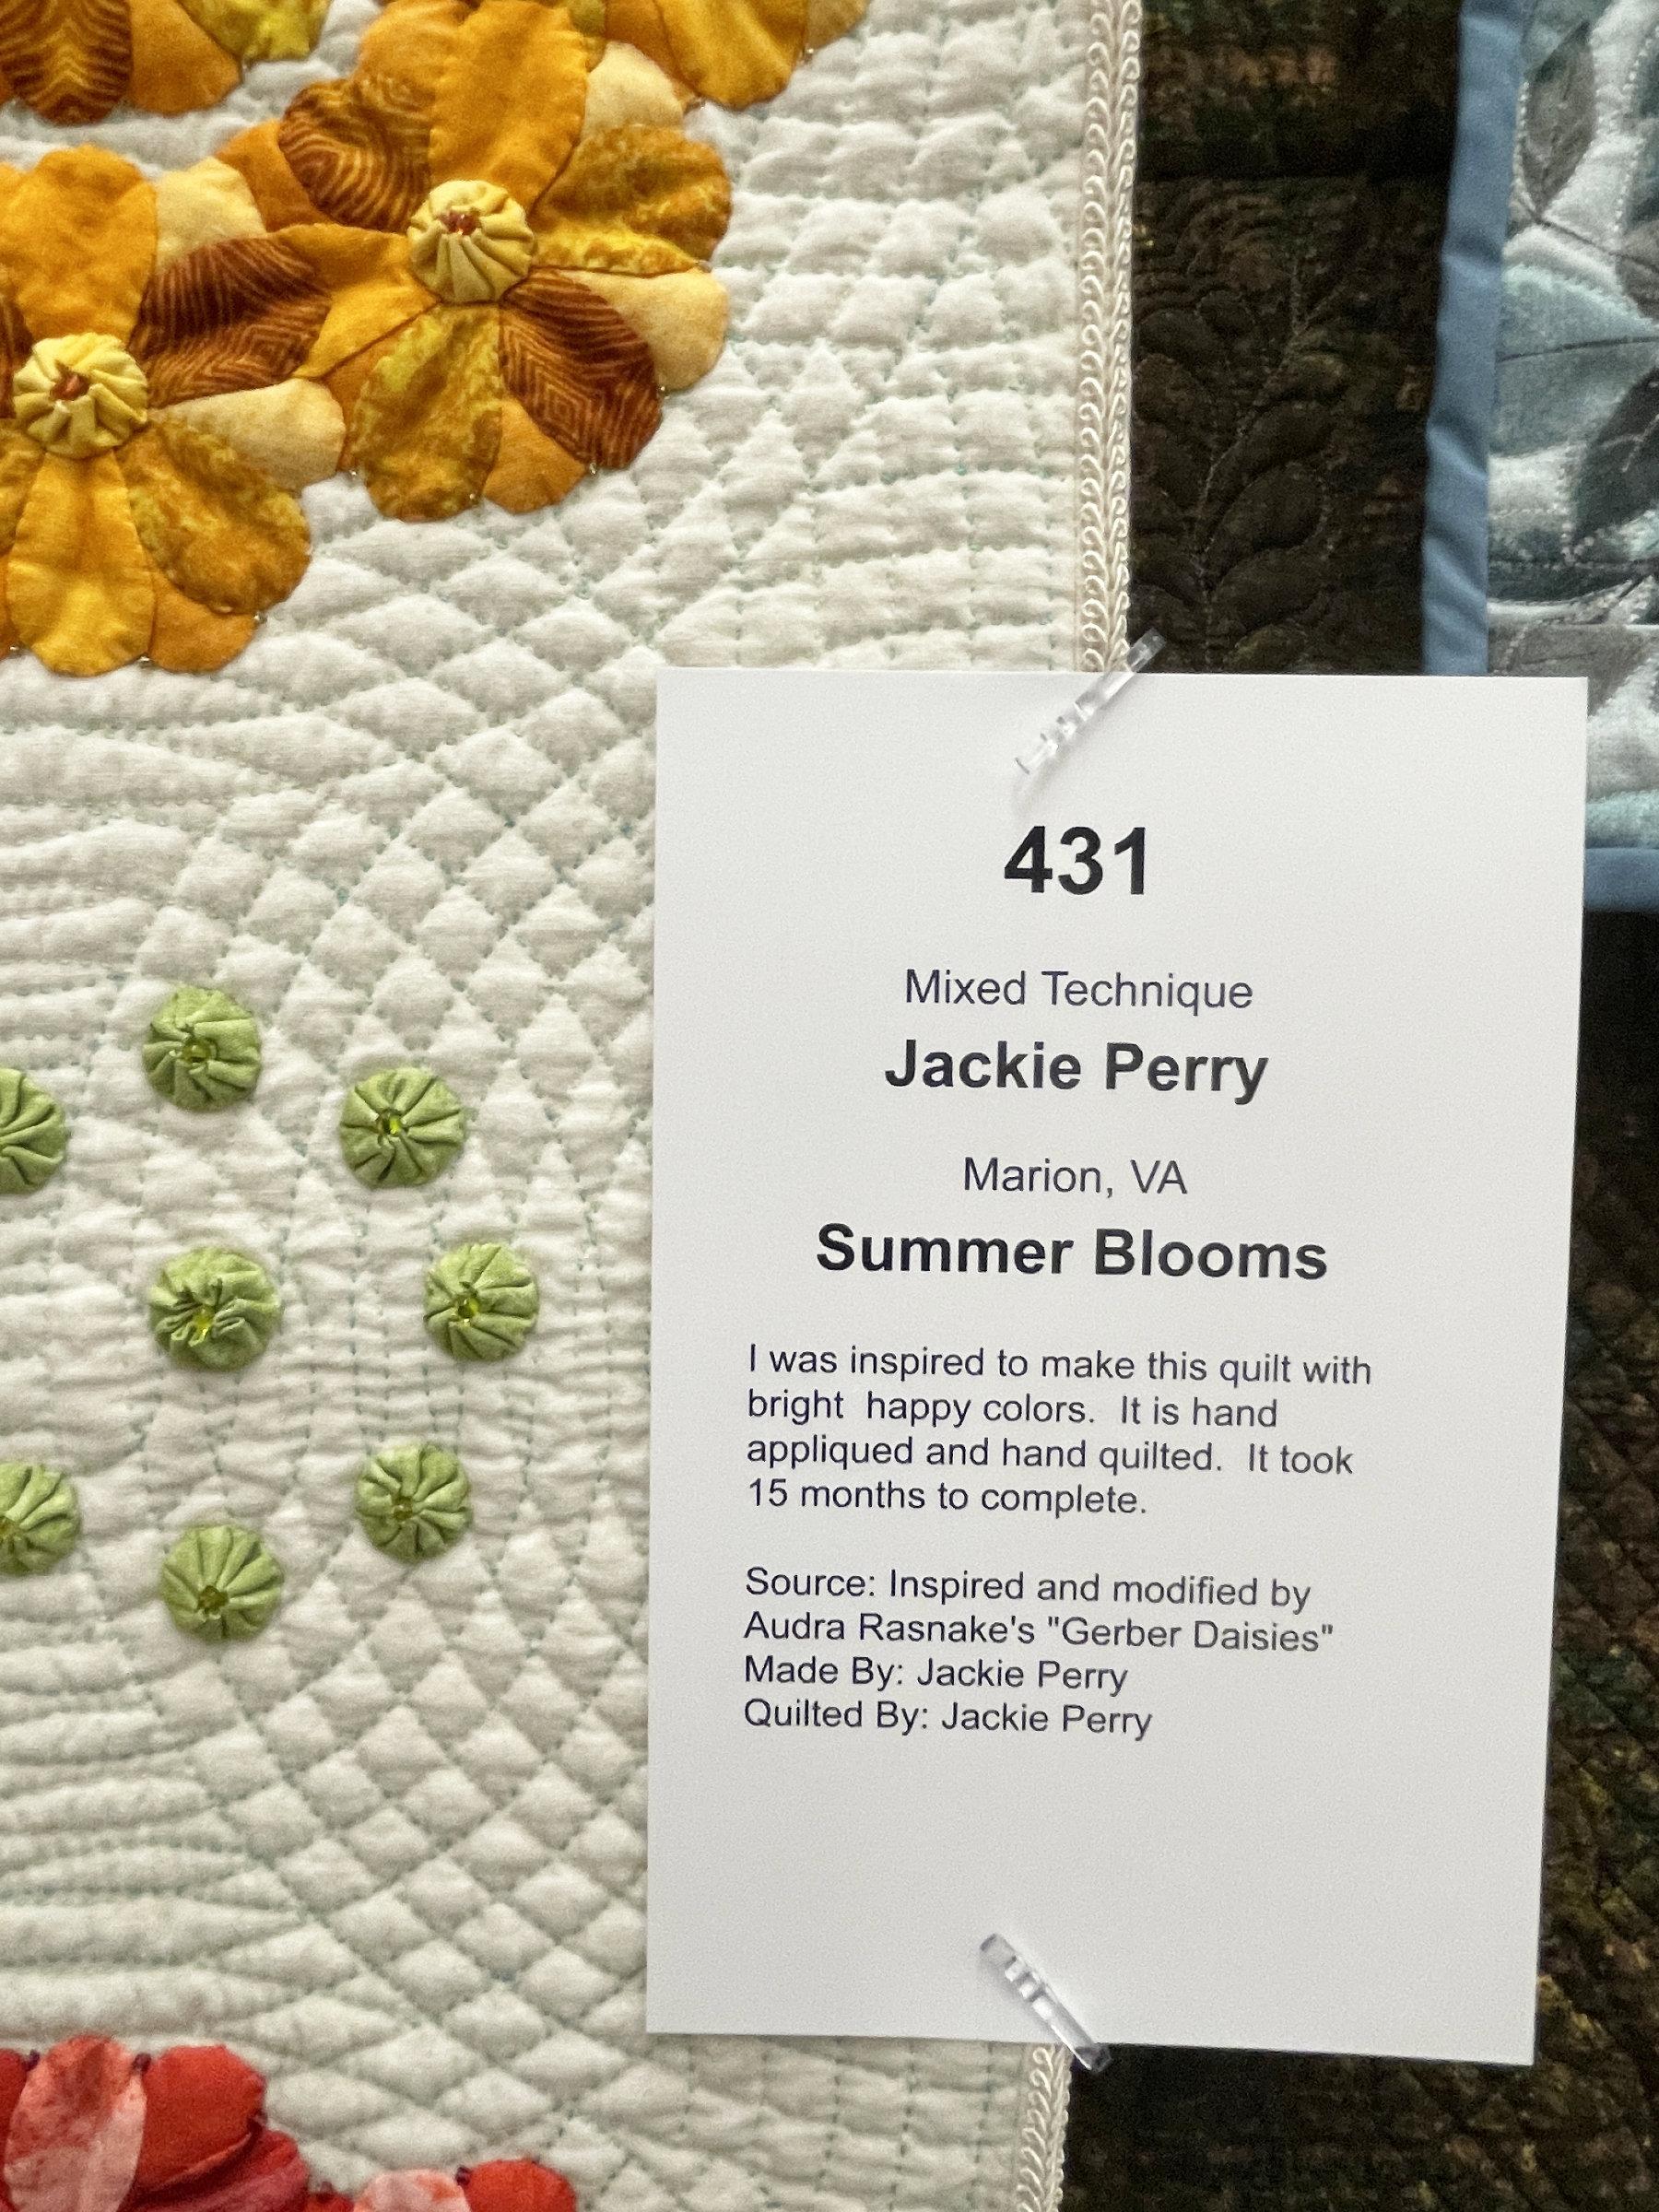
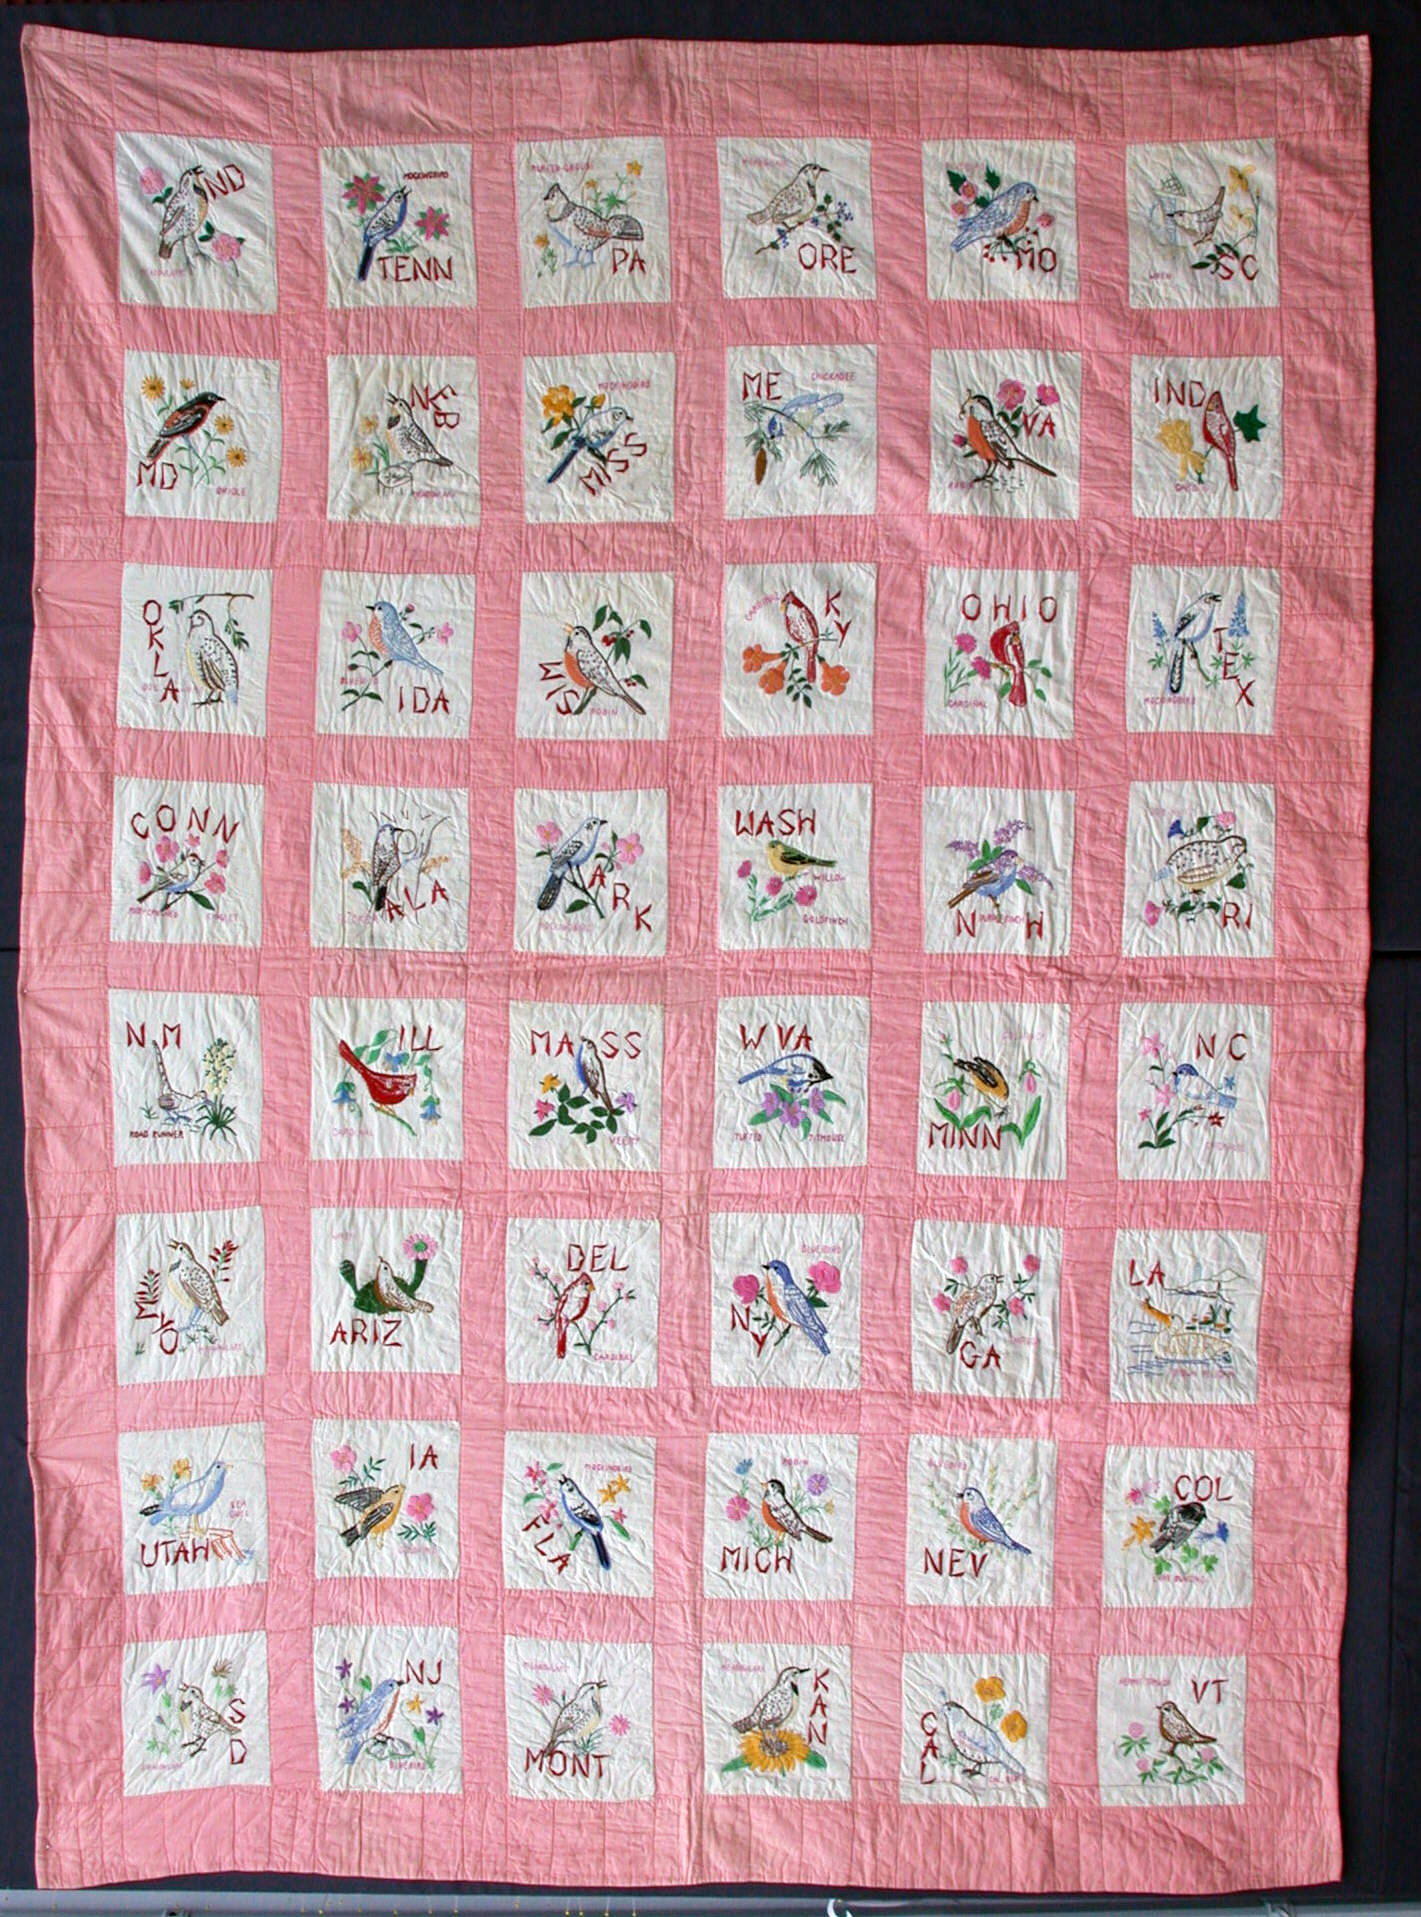
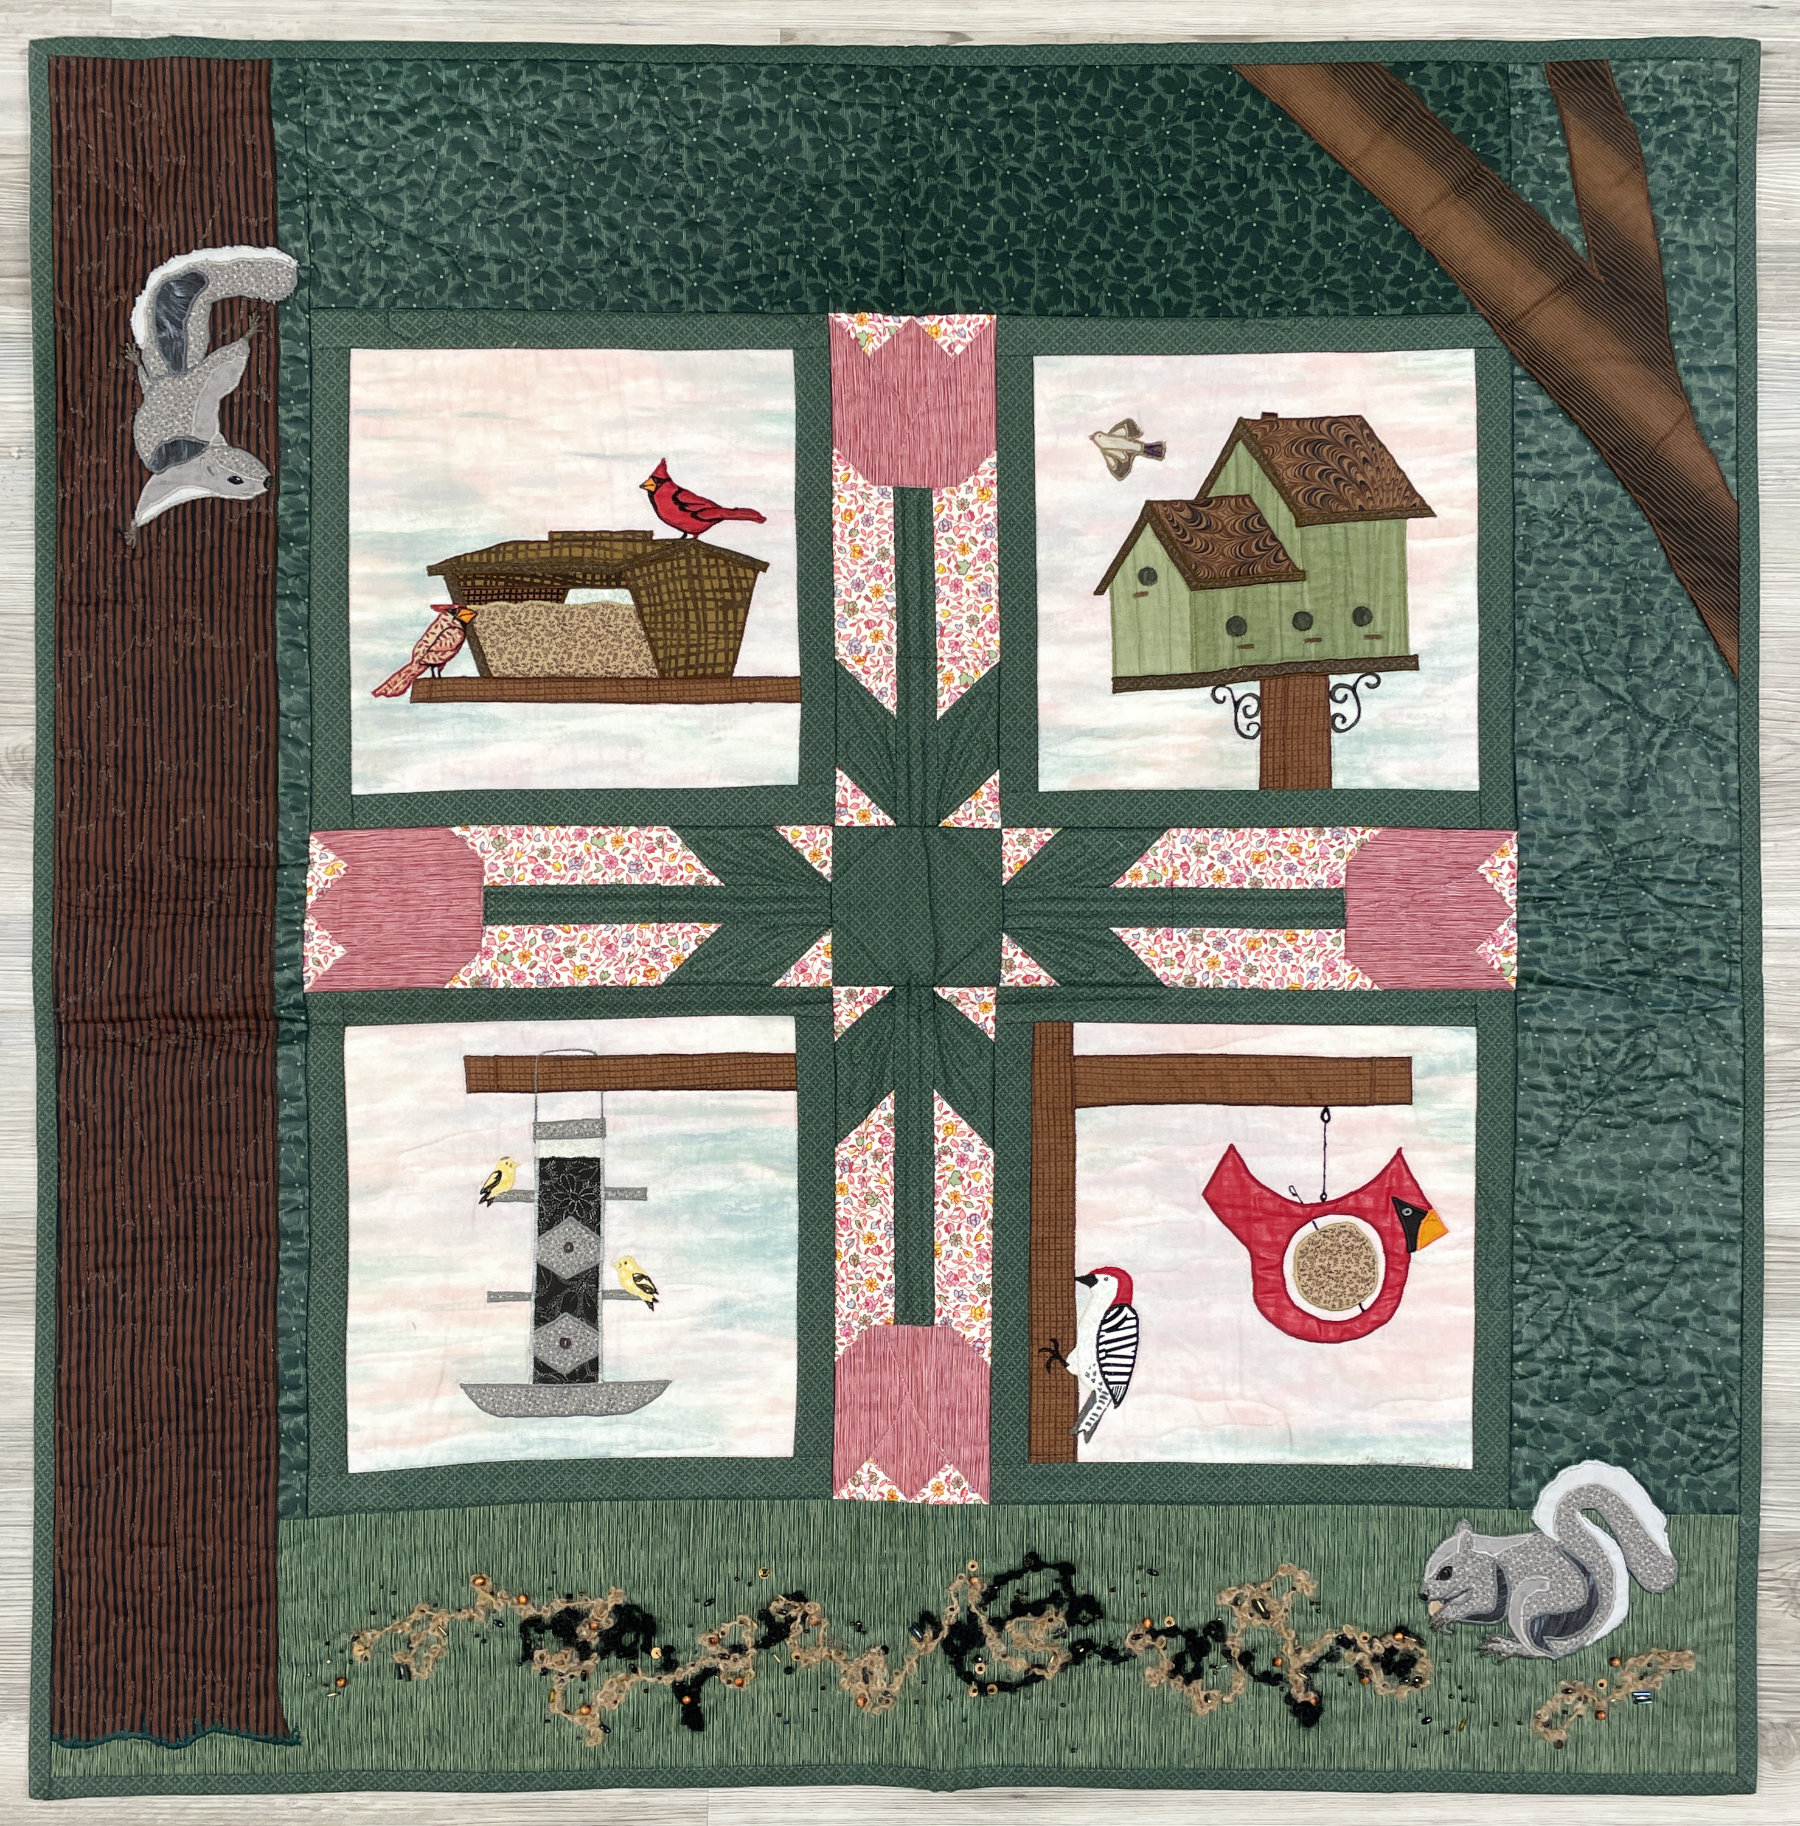
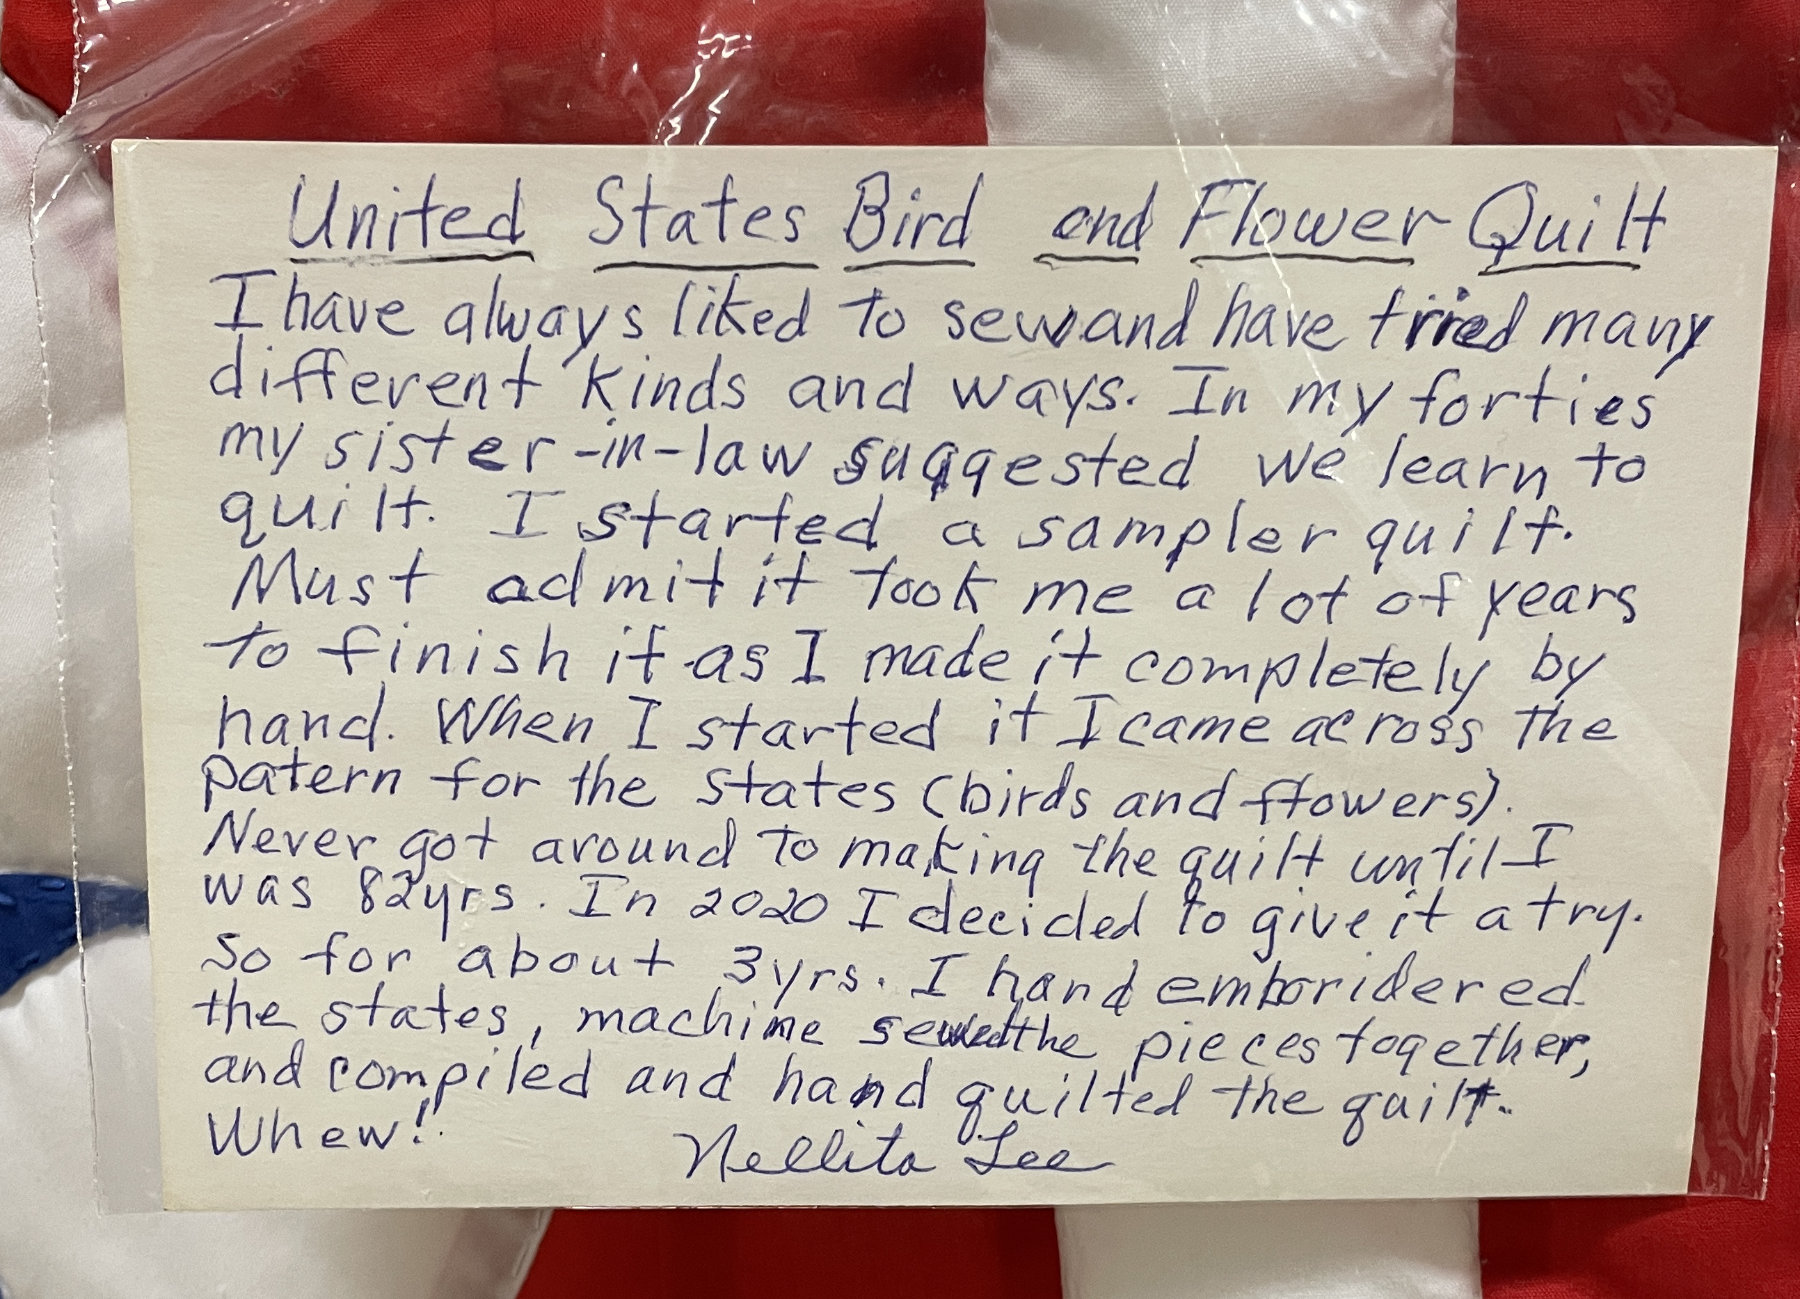
The “United States Bird and Flower Quilt” by Nellita Lee brought back memories of quilts from long ago. Her story makes this quilt even more special.
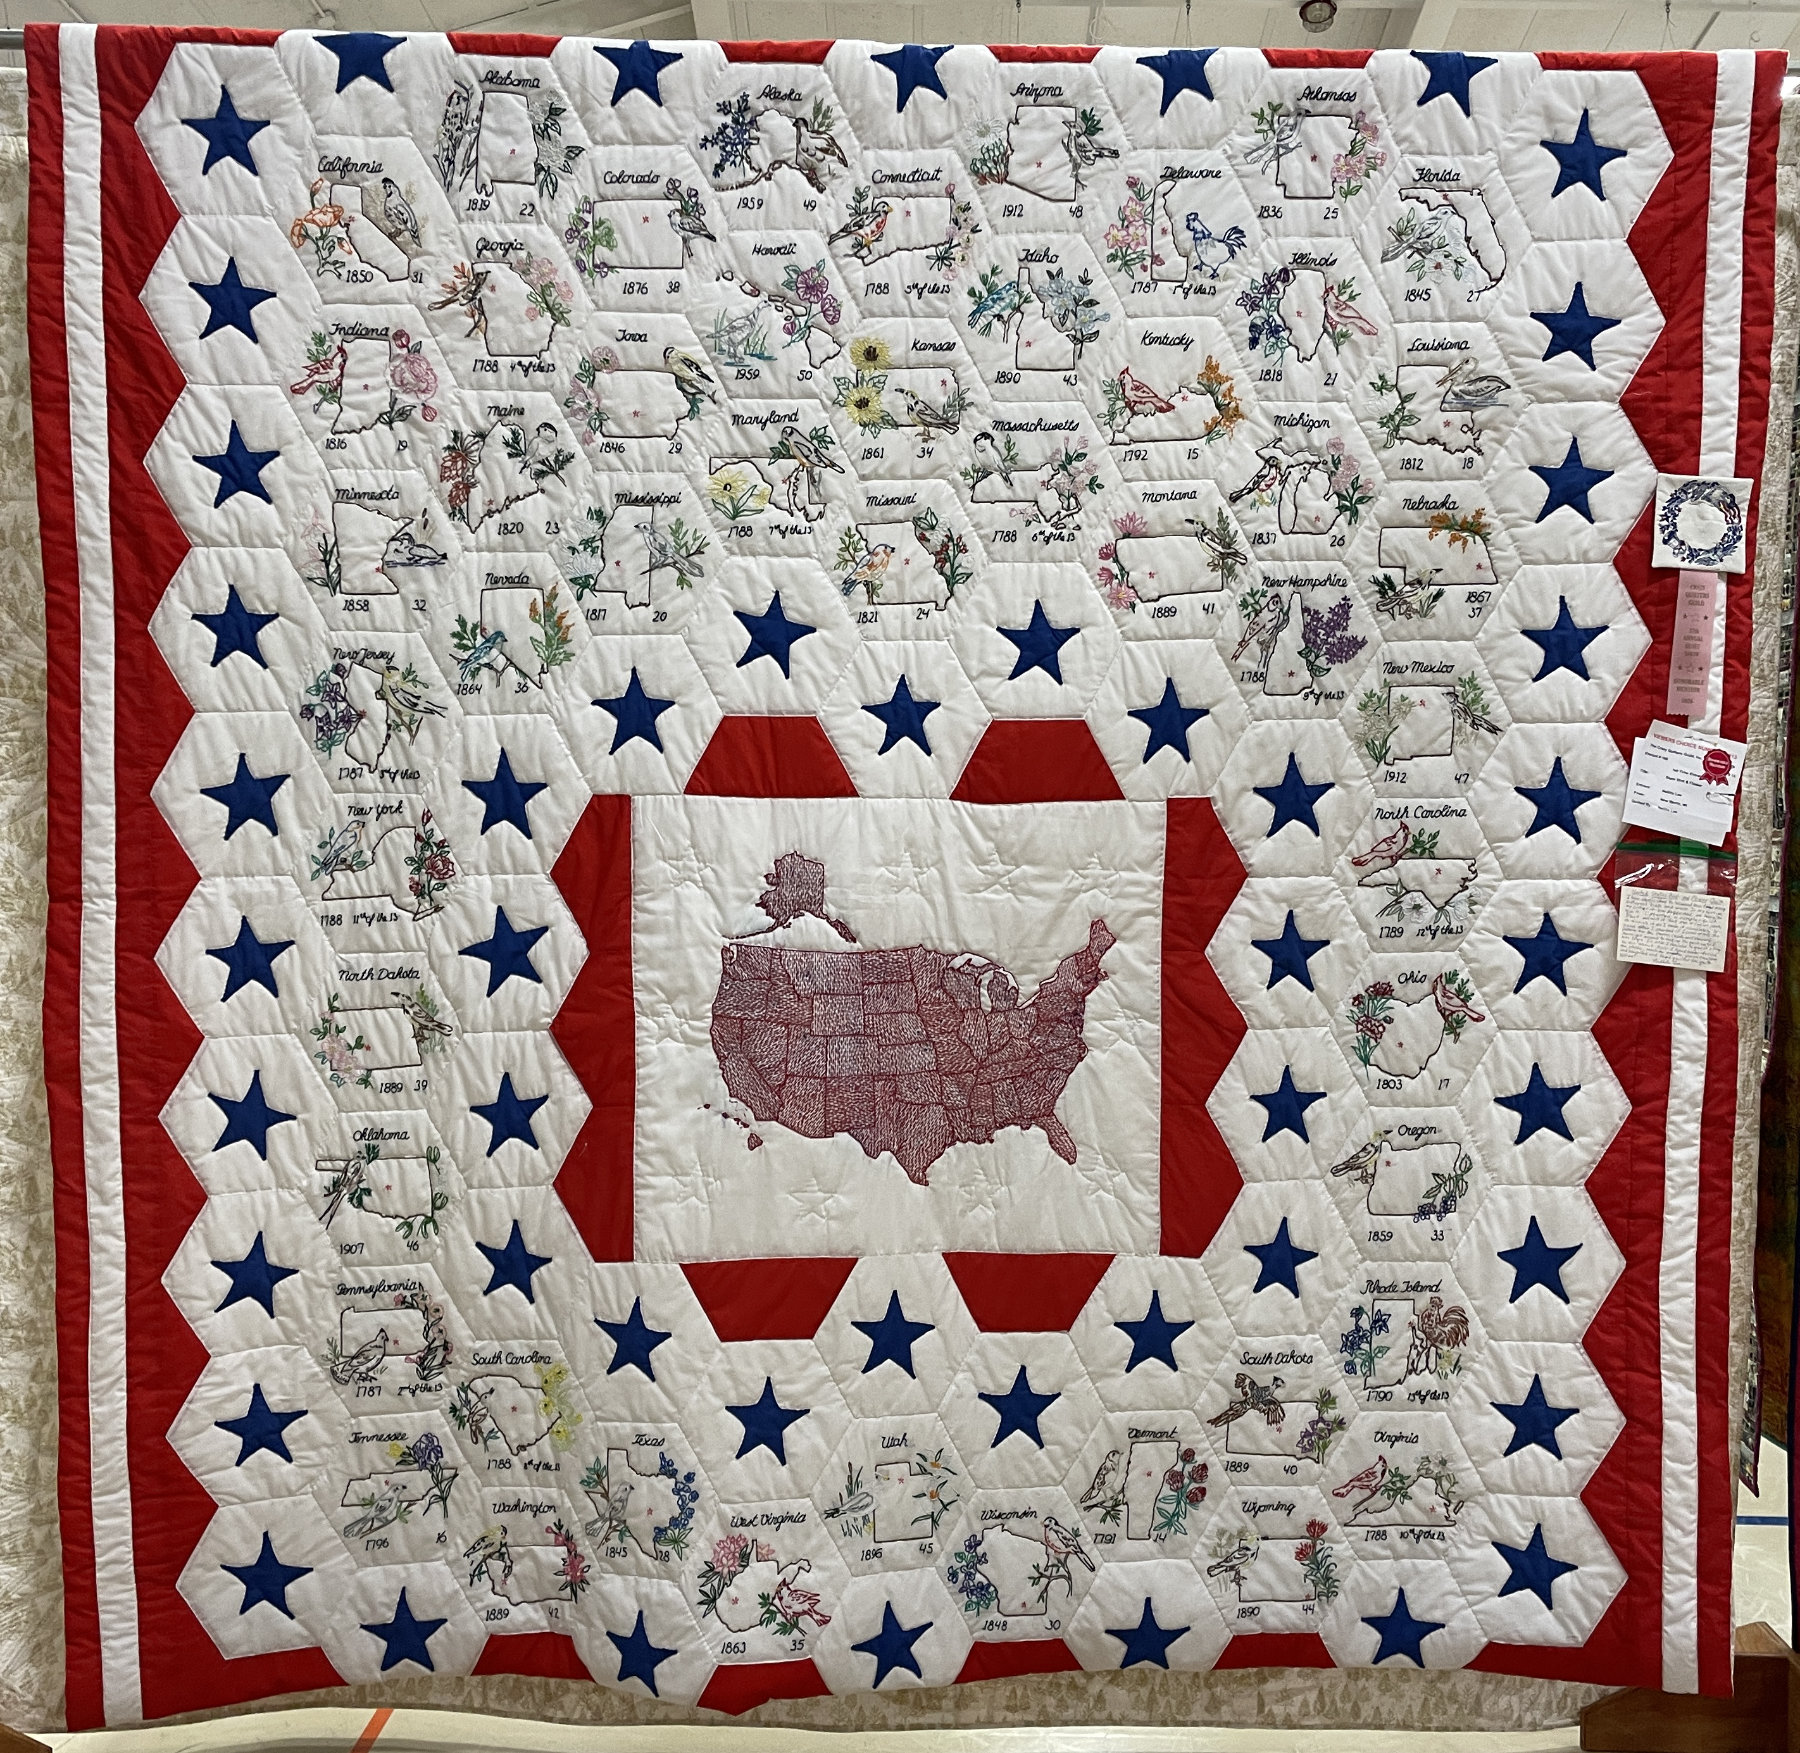
and here’s a close up of the Wisconsin block:

Such lovely embroidery. Well done Nellita!
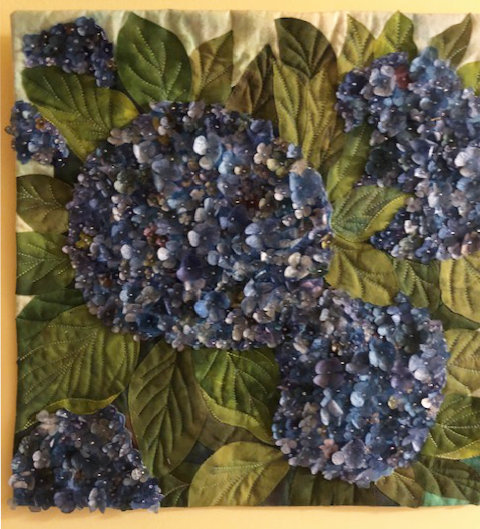
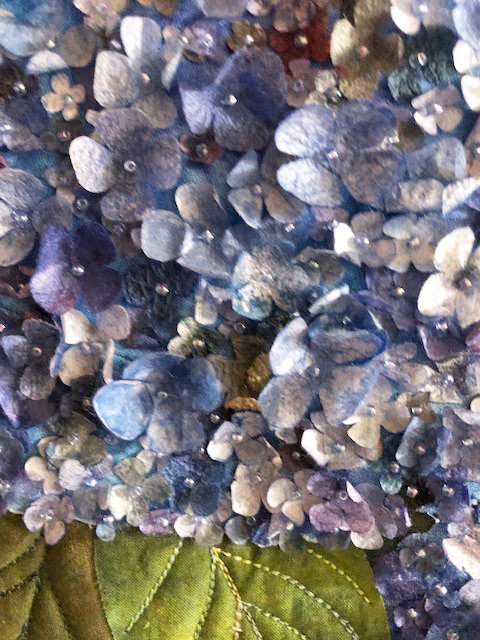
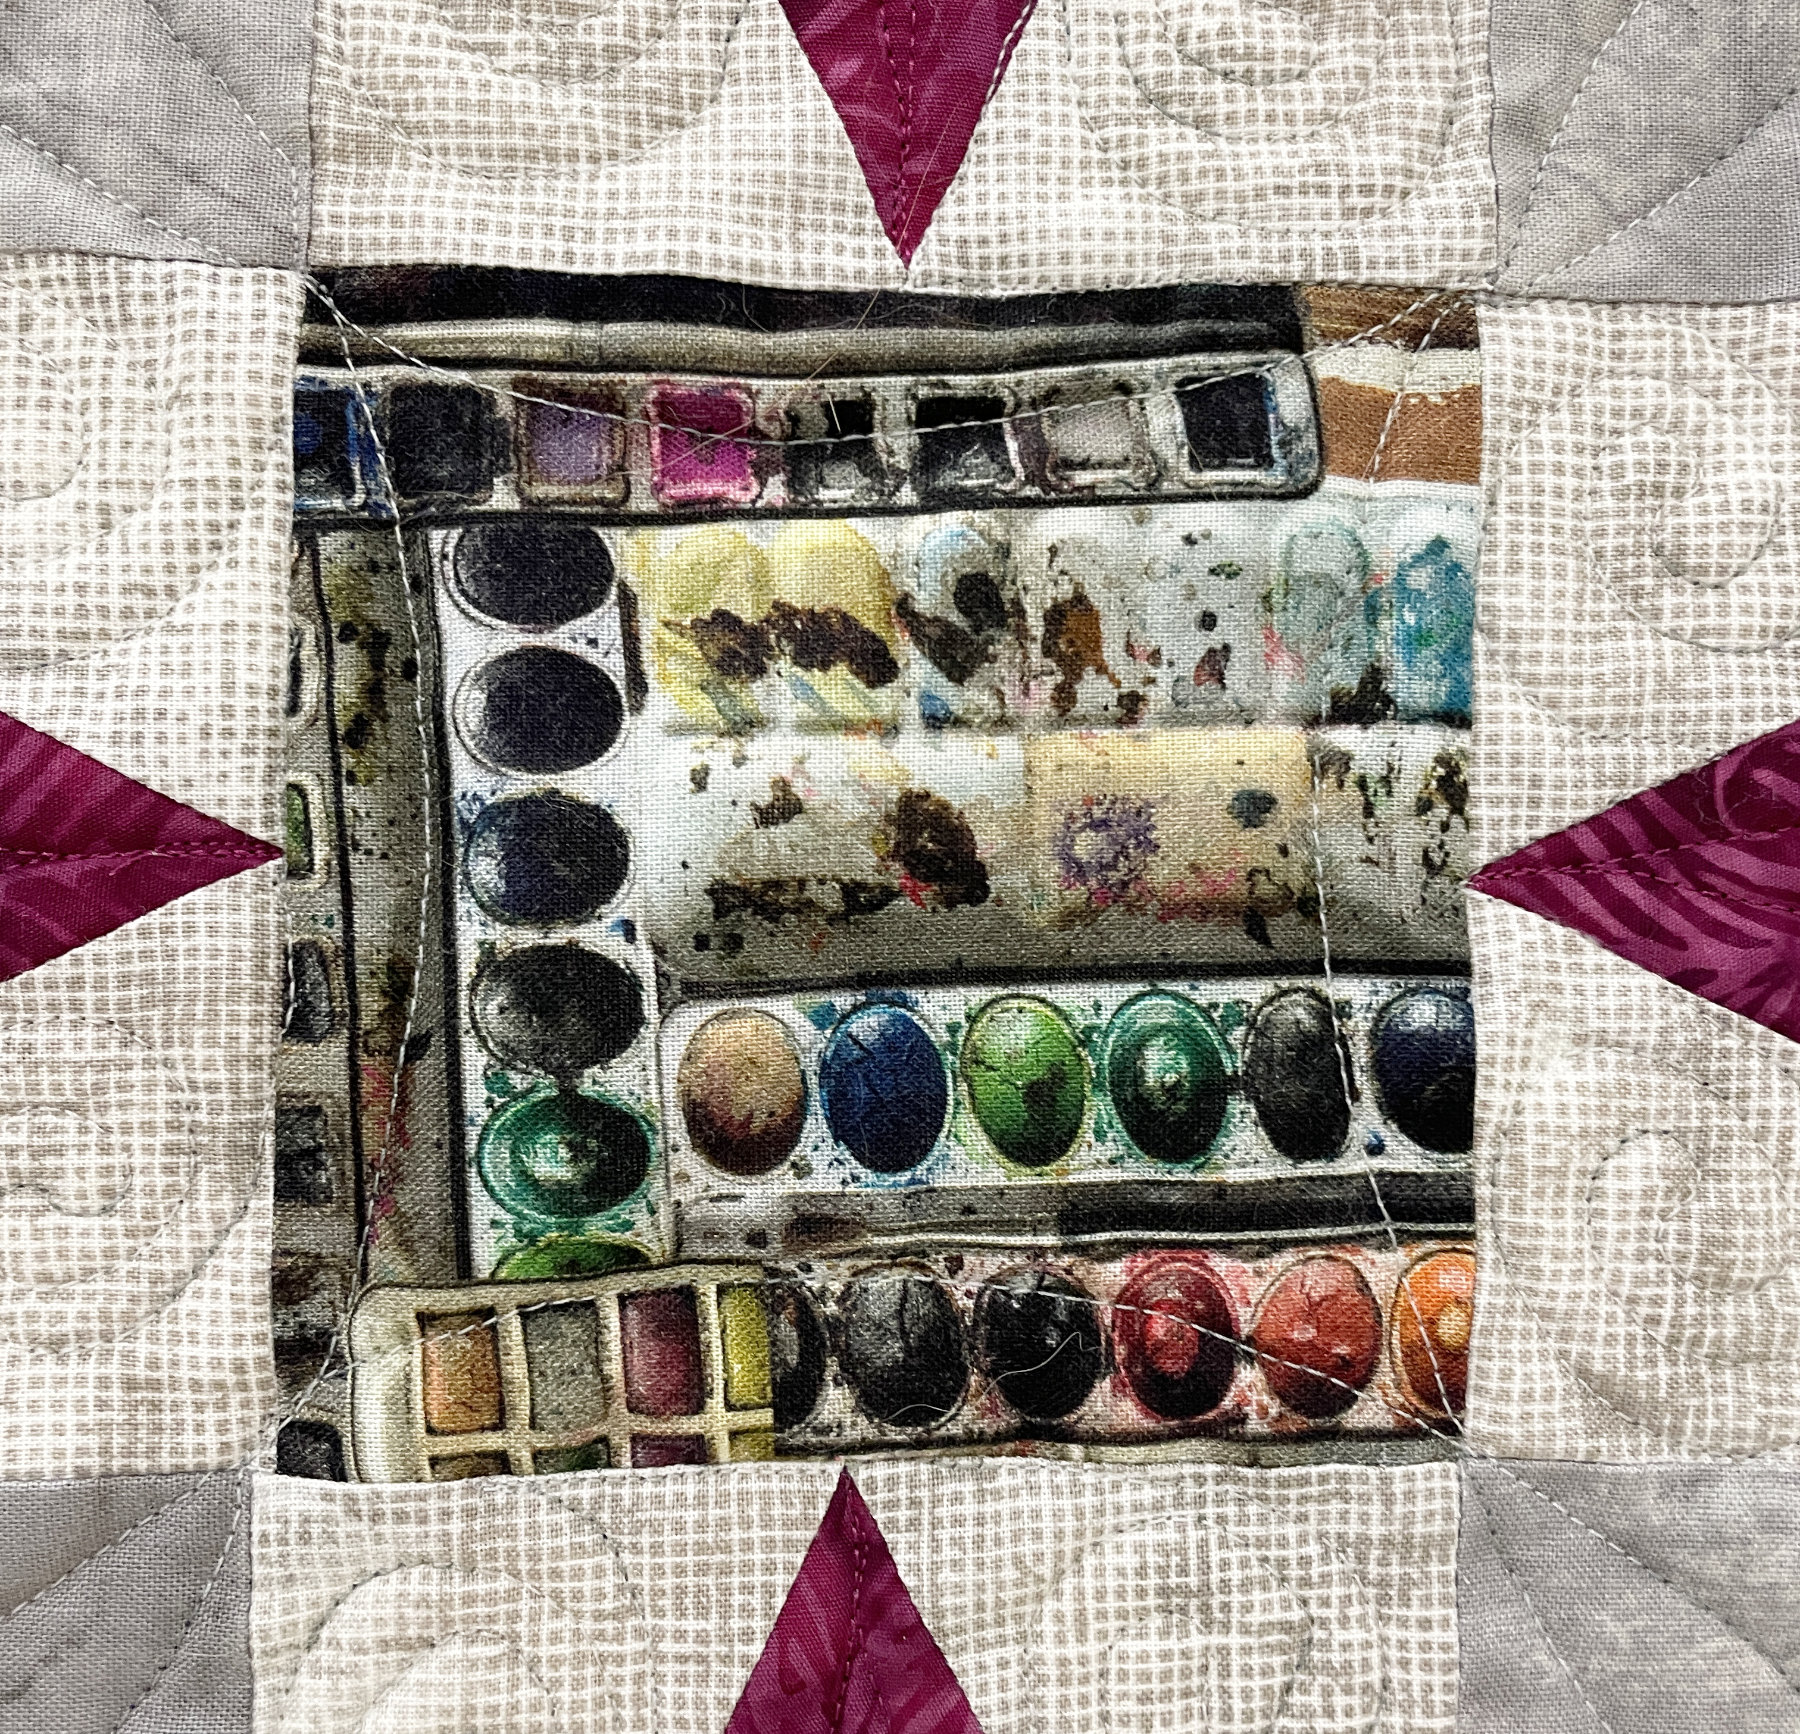
Suzi Bank’s quilt “Viva Las Vegas Mystery Quilt” had an intriguing feel about it that drew me closer to discover why.
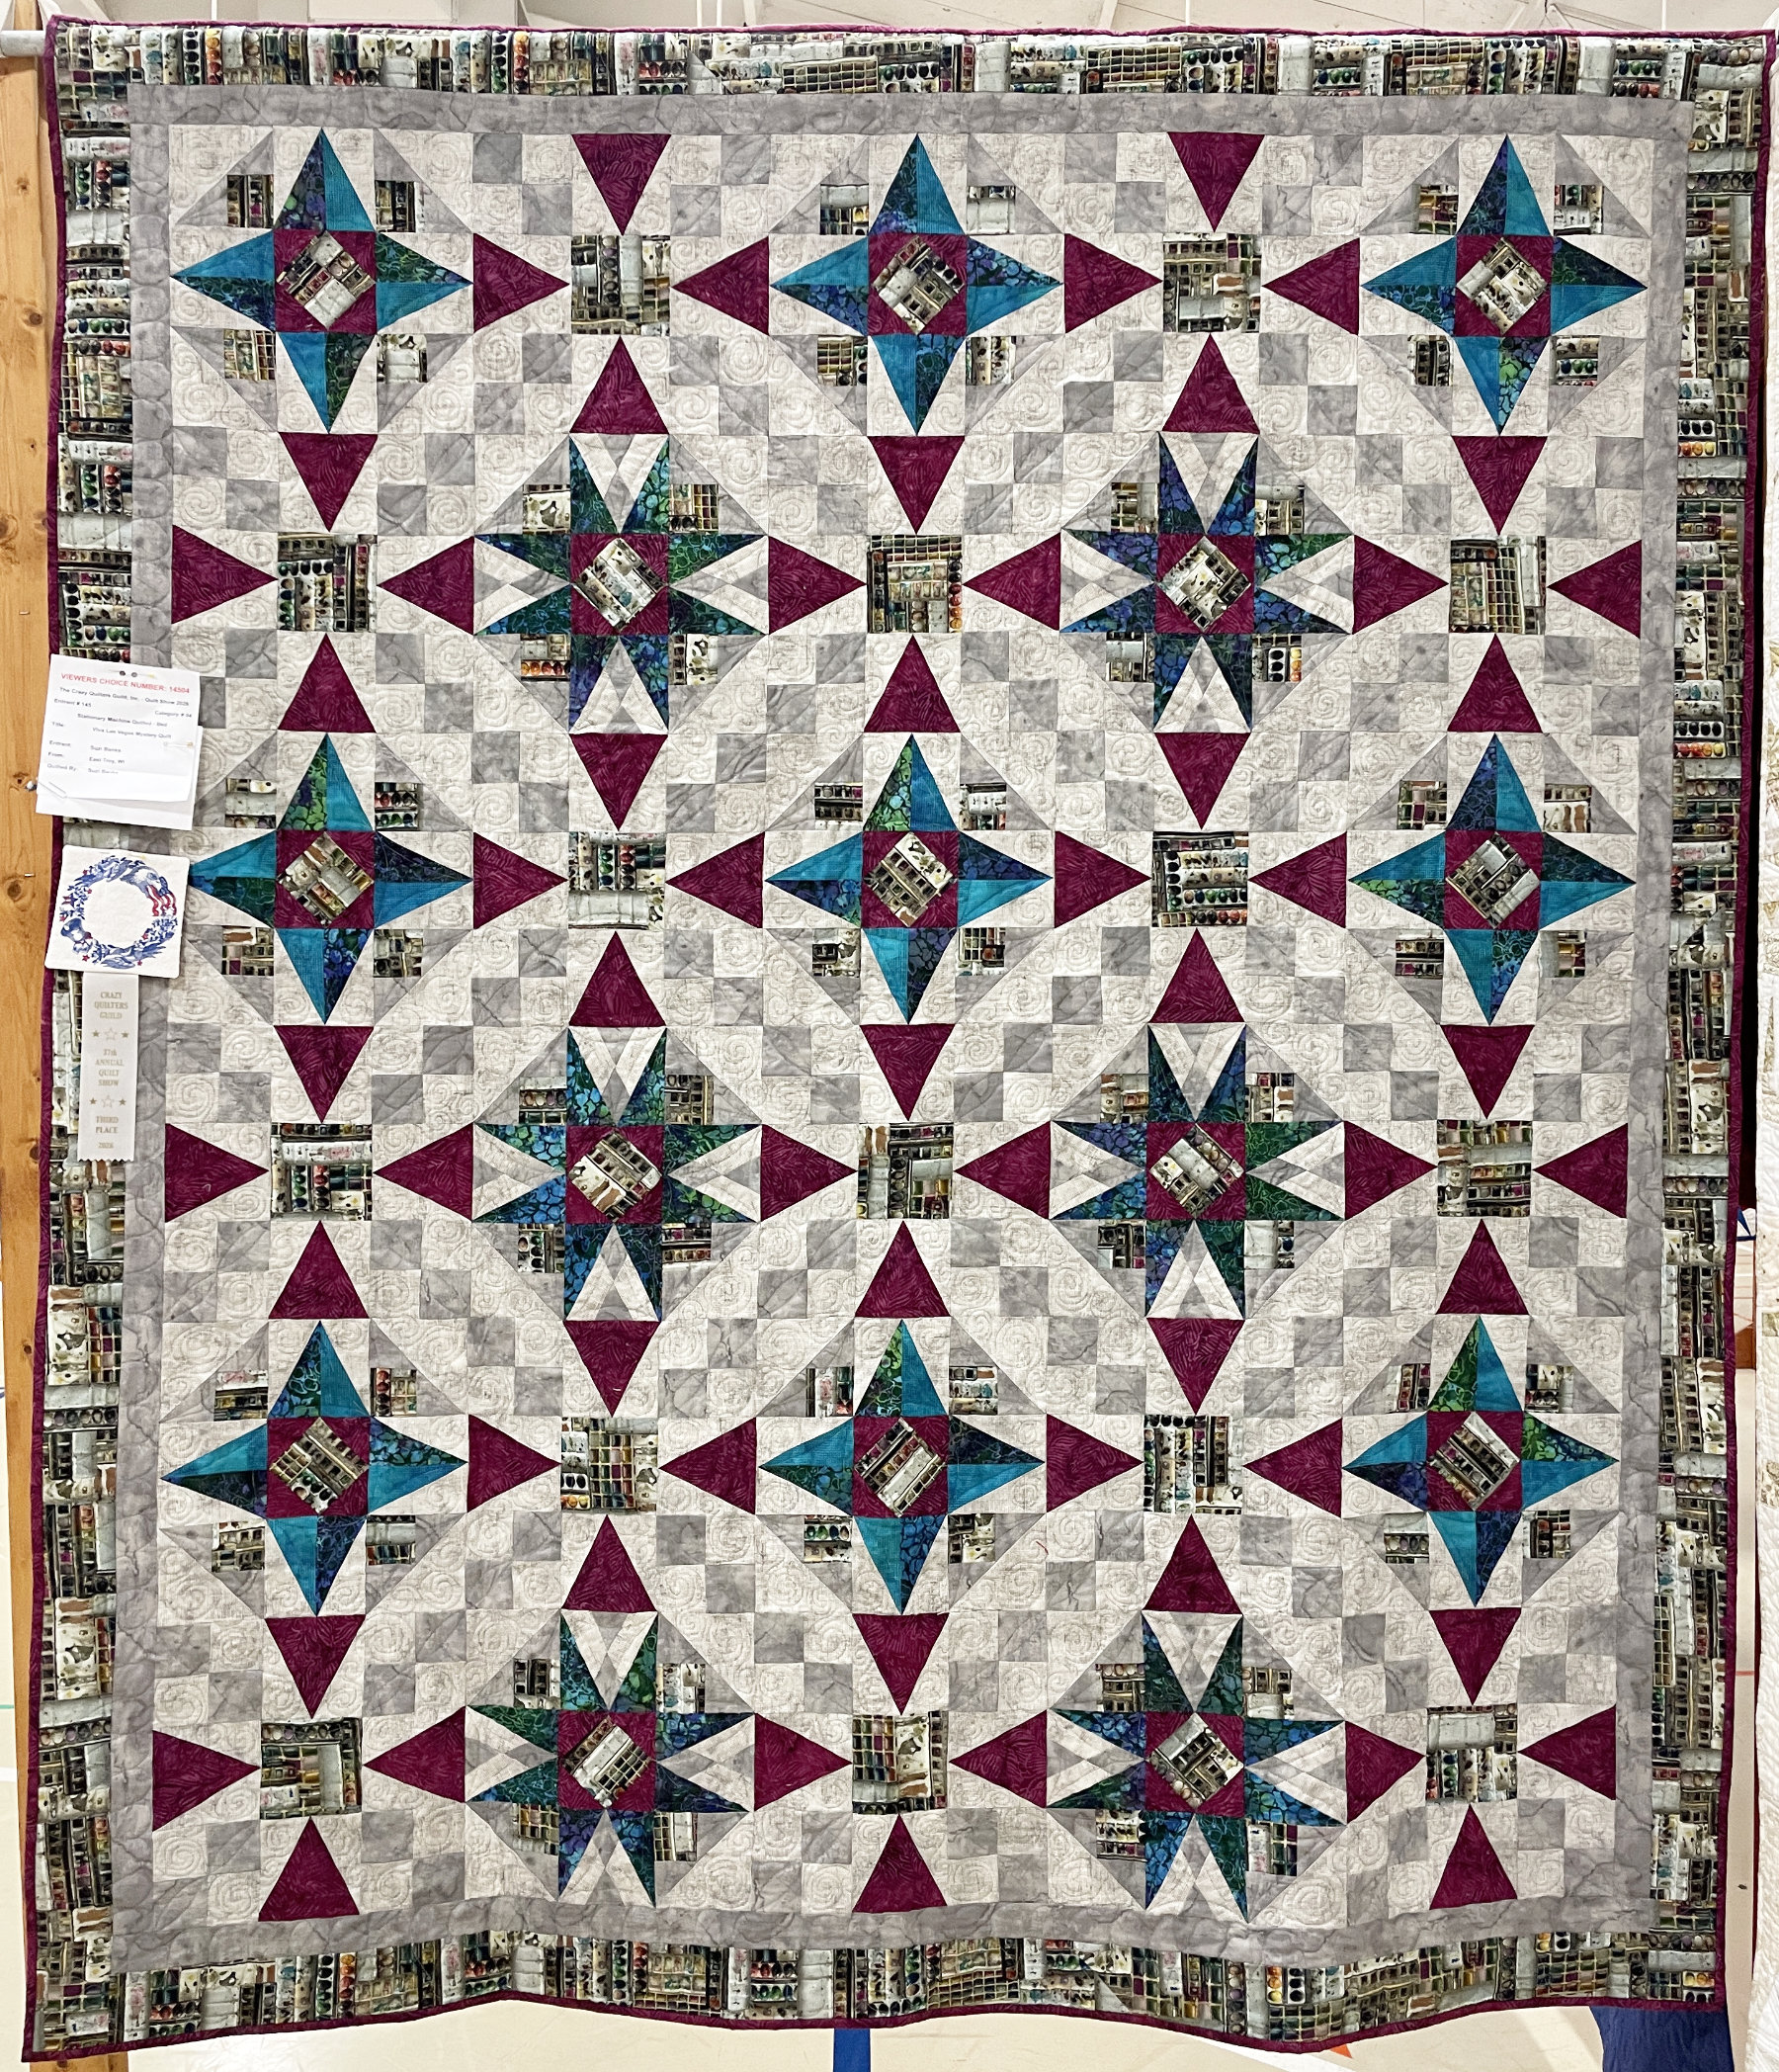
It turns out that the border and many shapes in the center of the quilt were made from a very interesting digitally printed fabric of used watercolor paint trays. Her color choices made it come together beautifully.
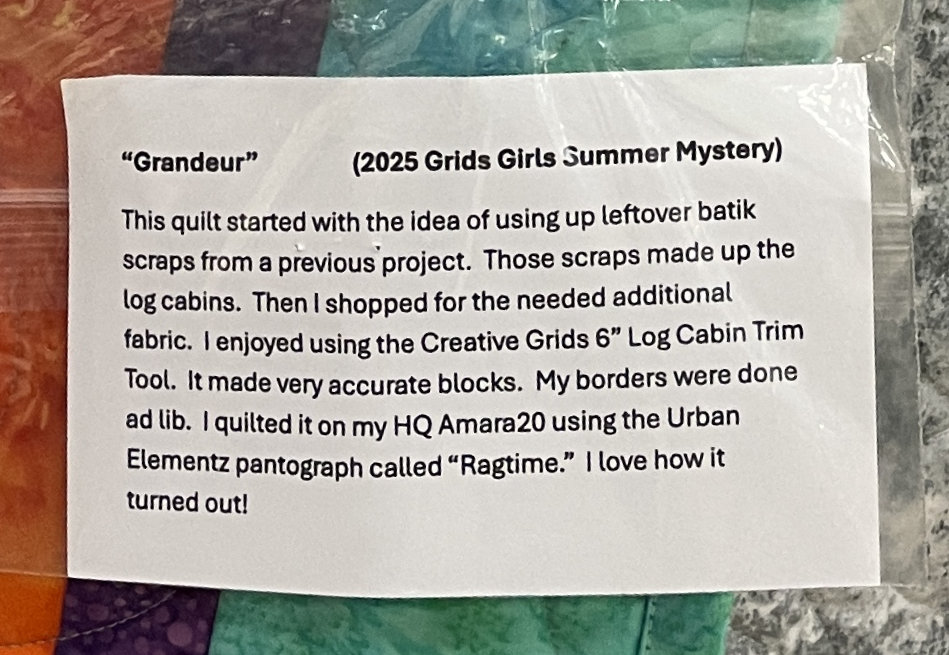
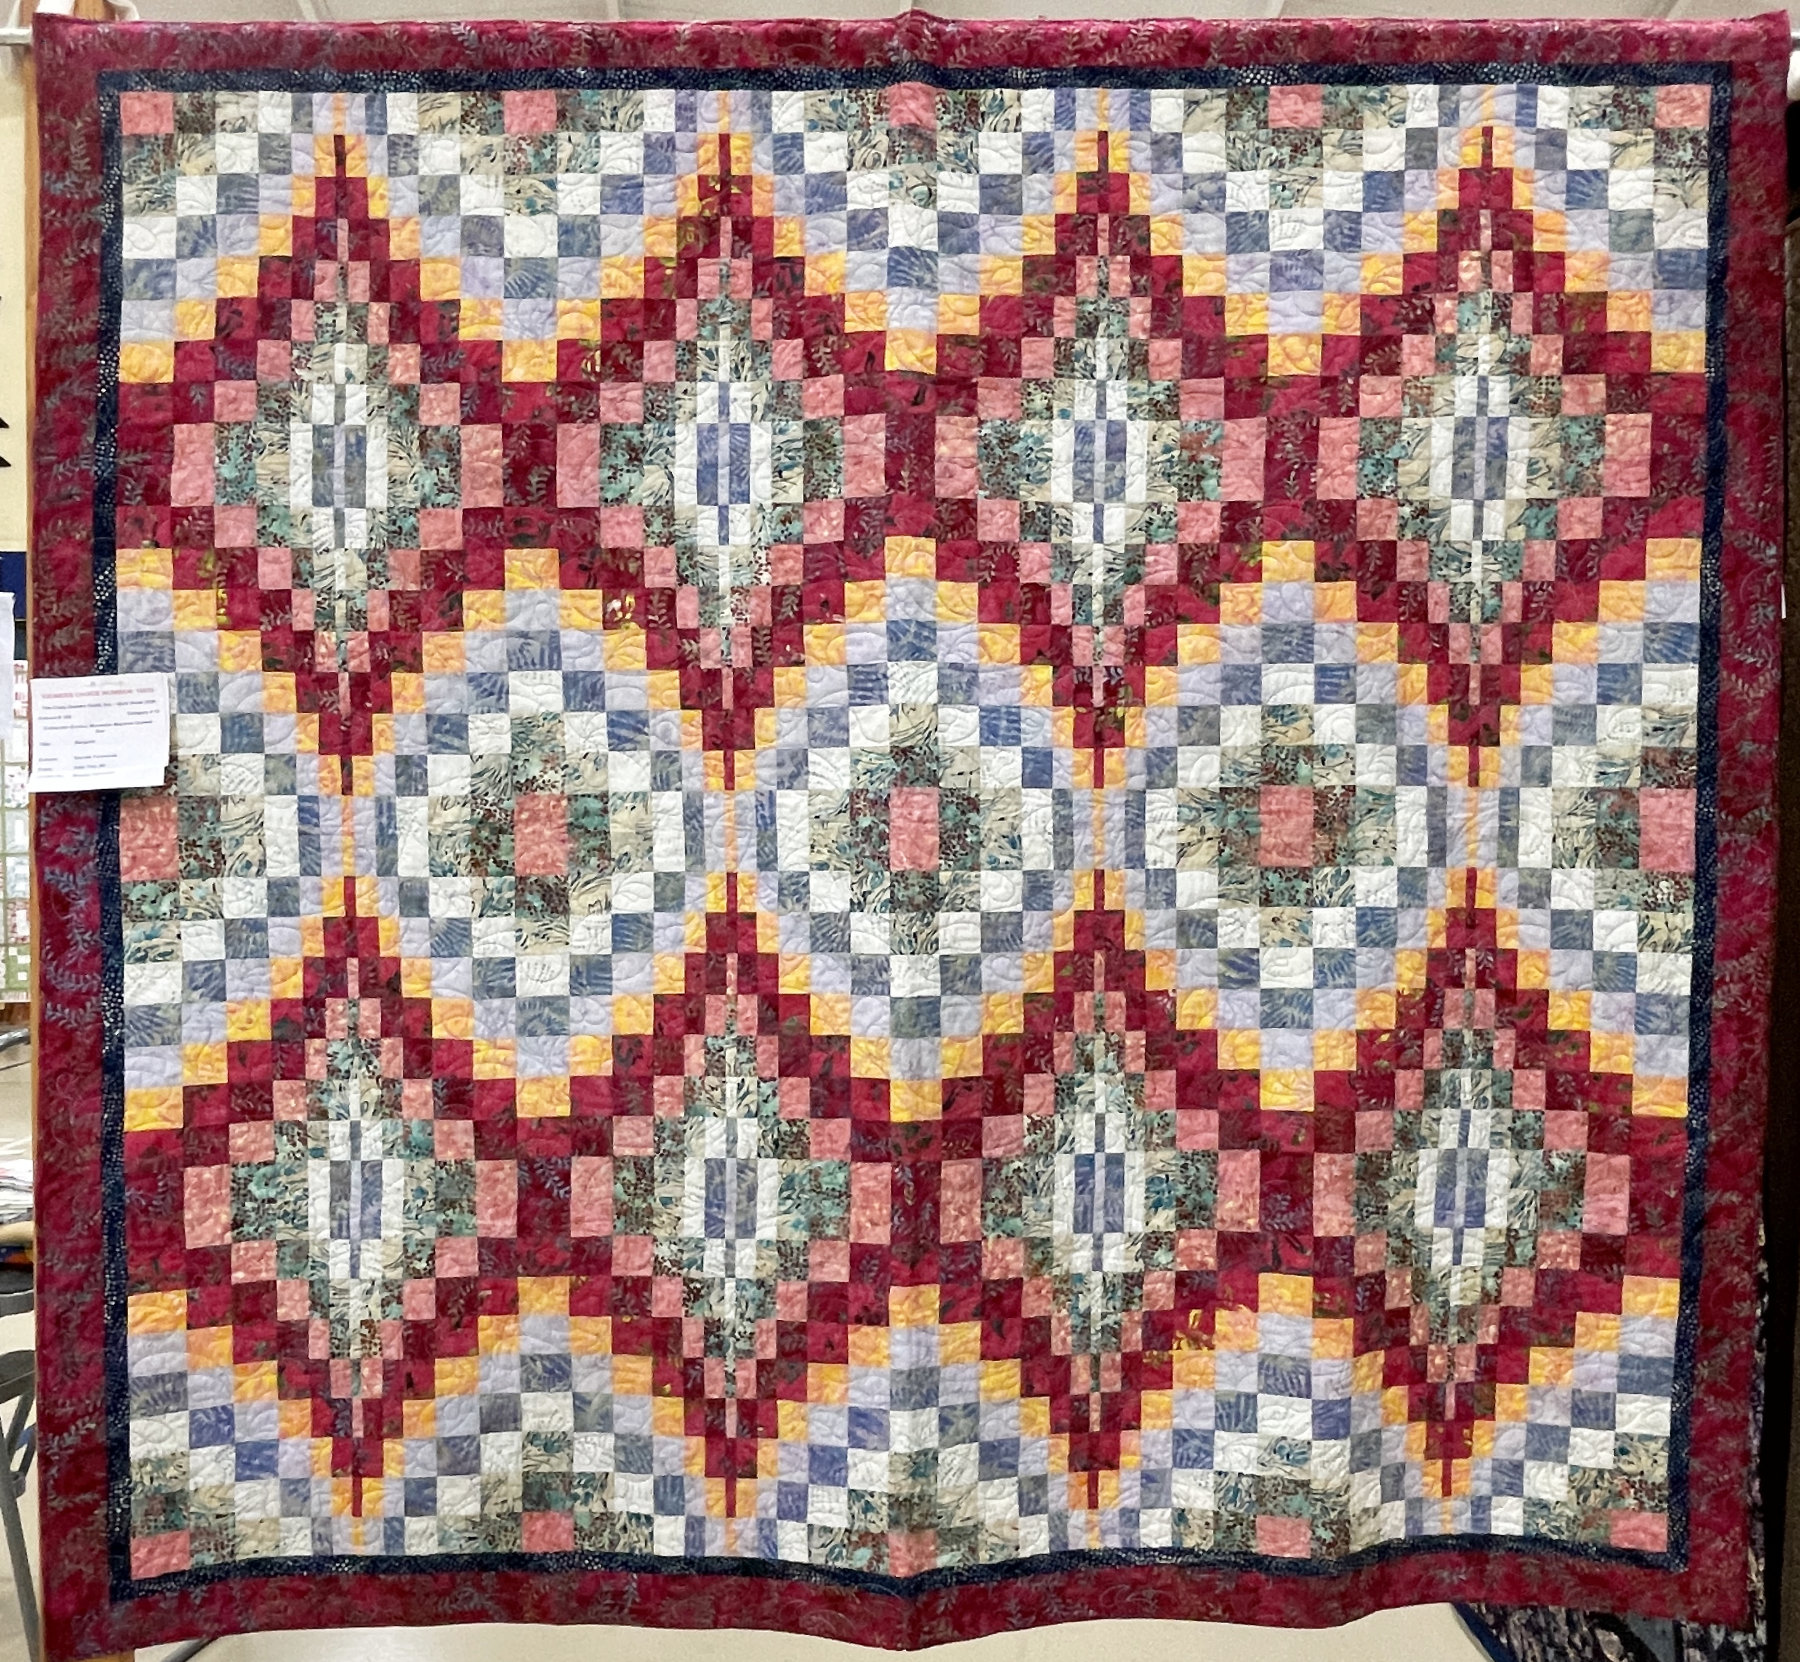
The colors in “Grandeur” by Nancy Andritsch drew me in too (I really am a color junkie!)
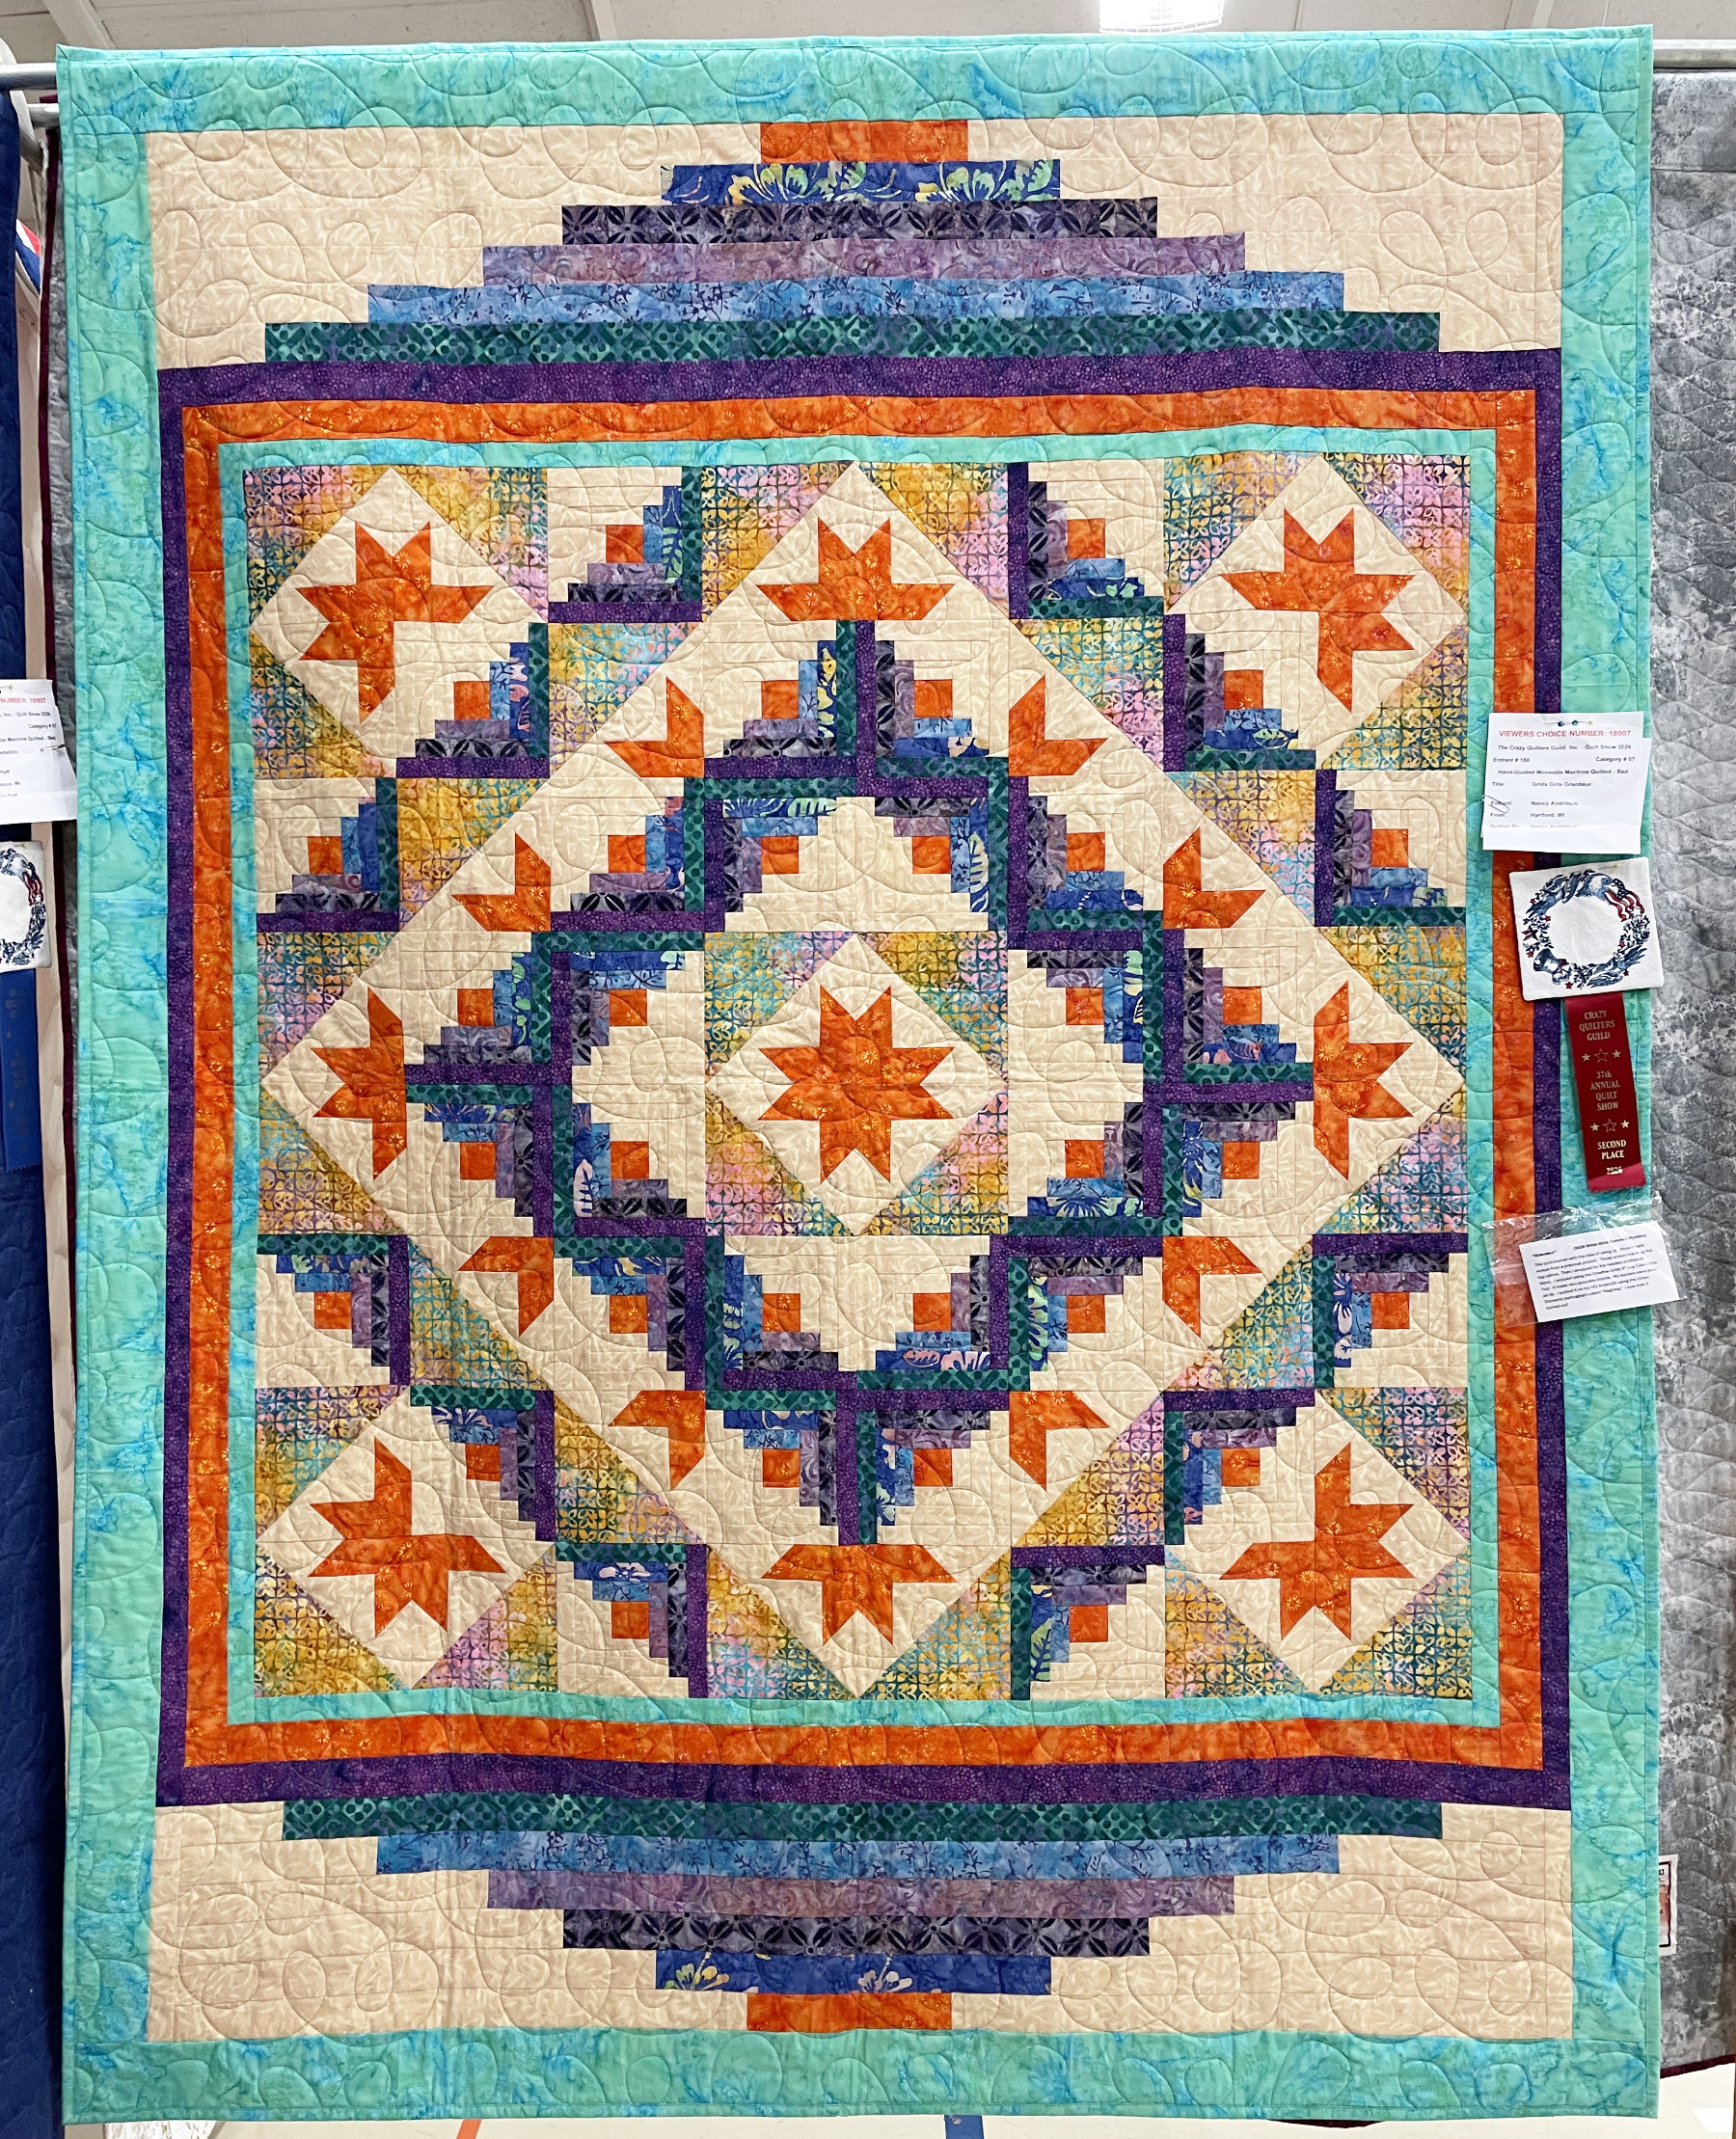
Then I realized her “ad lib” border was another reason this quilt “grabbed” me.
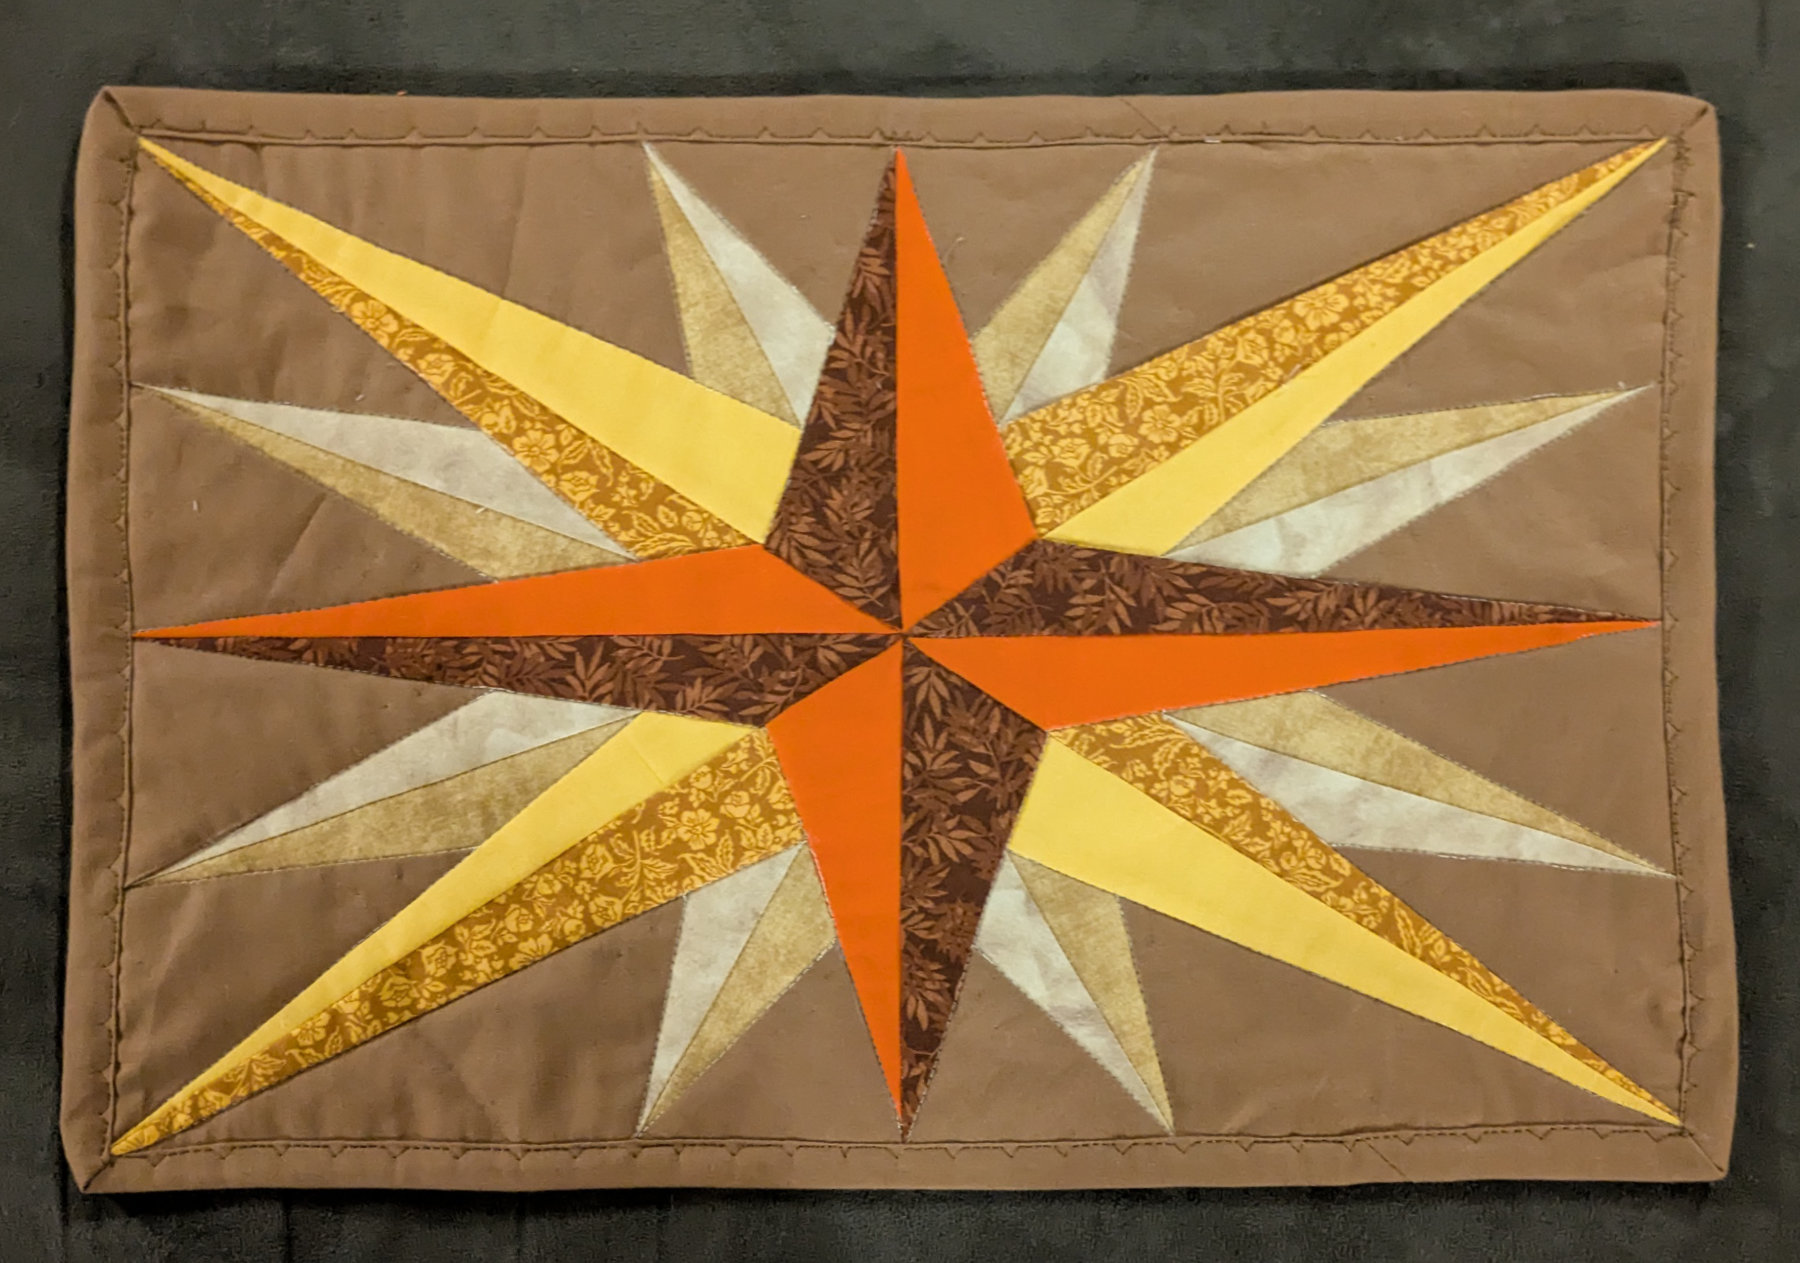
“Starburst” was made by 12 year old Millie Lebeck. Wow! You’ll love reading about it in her own words.
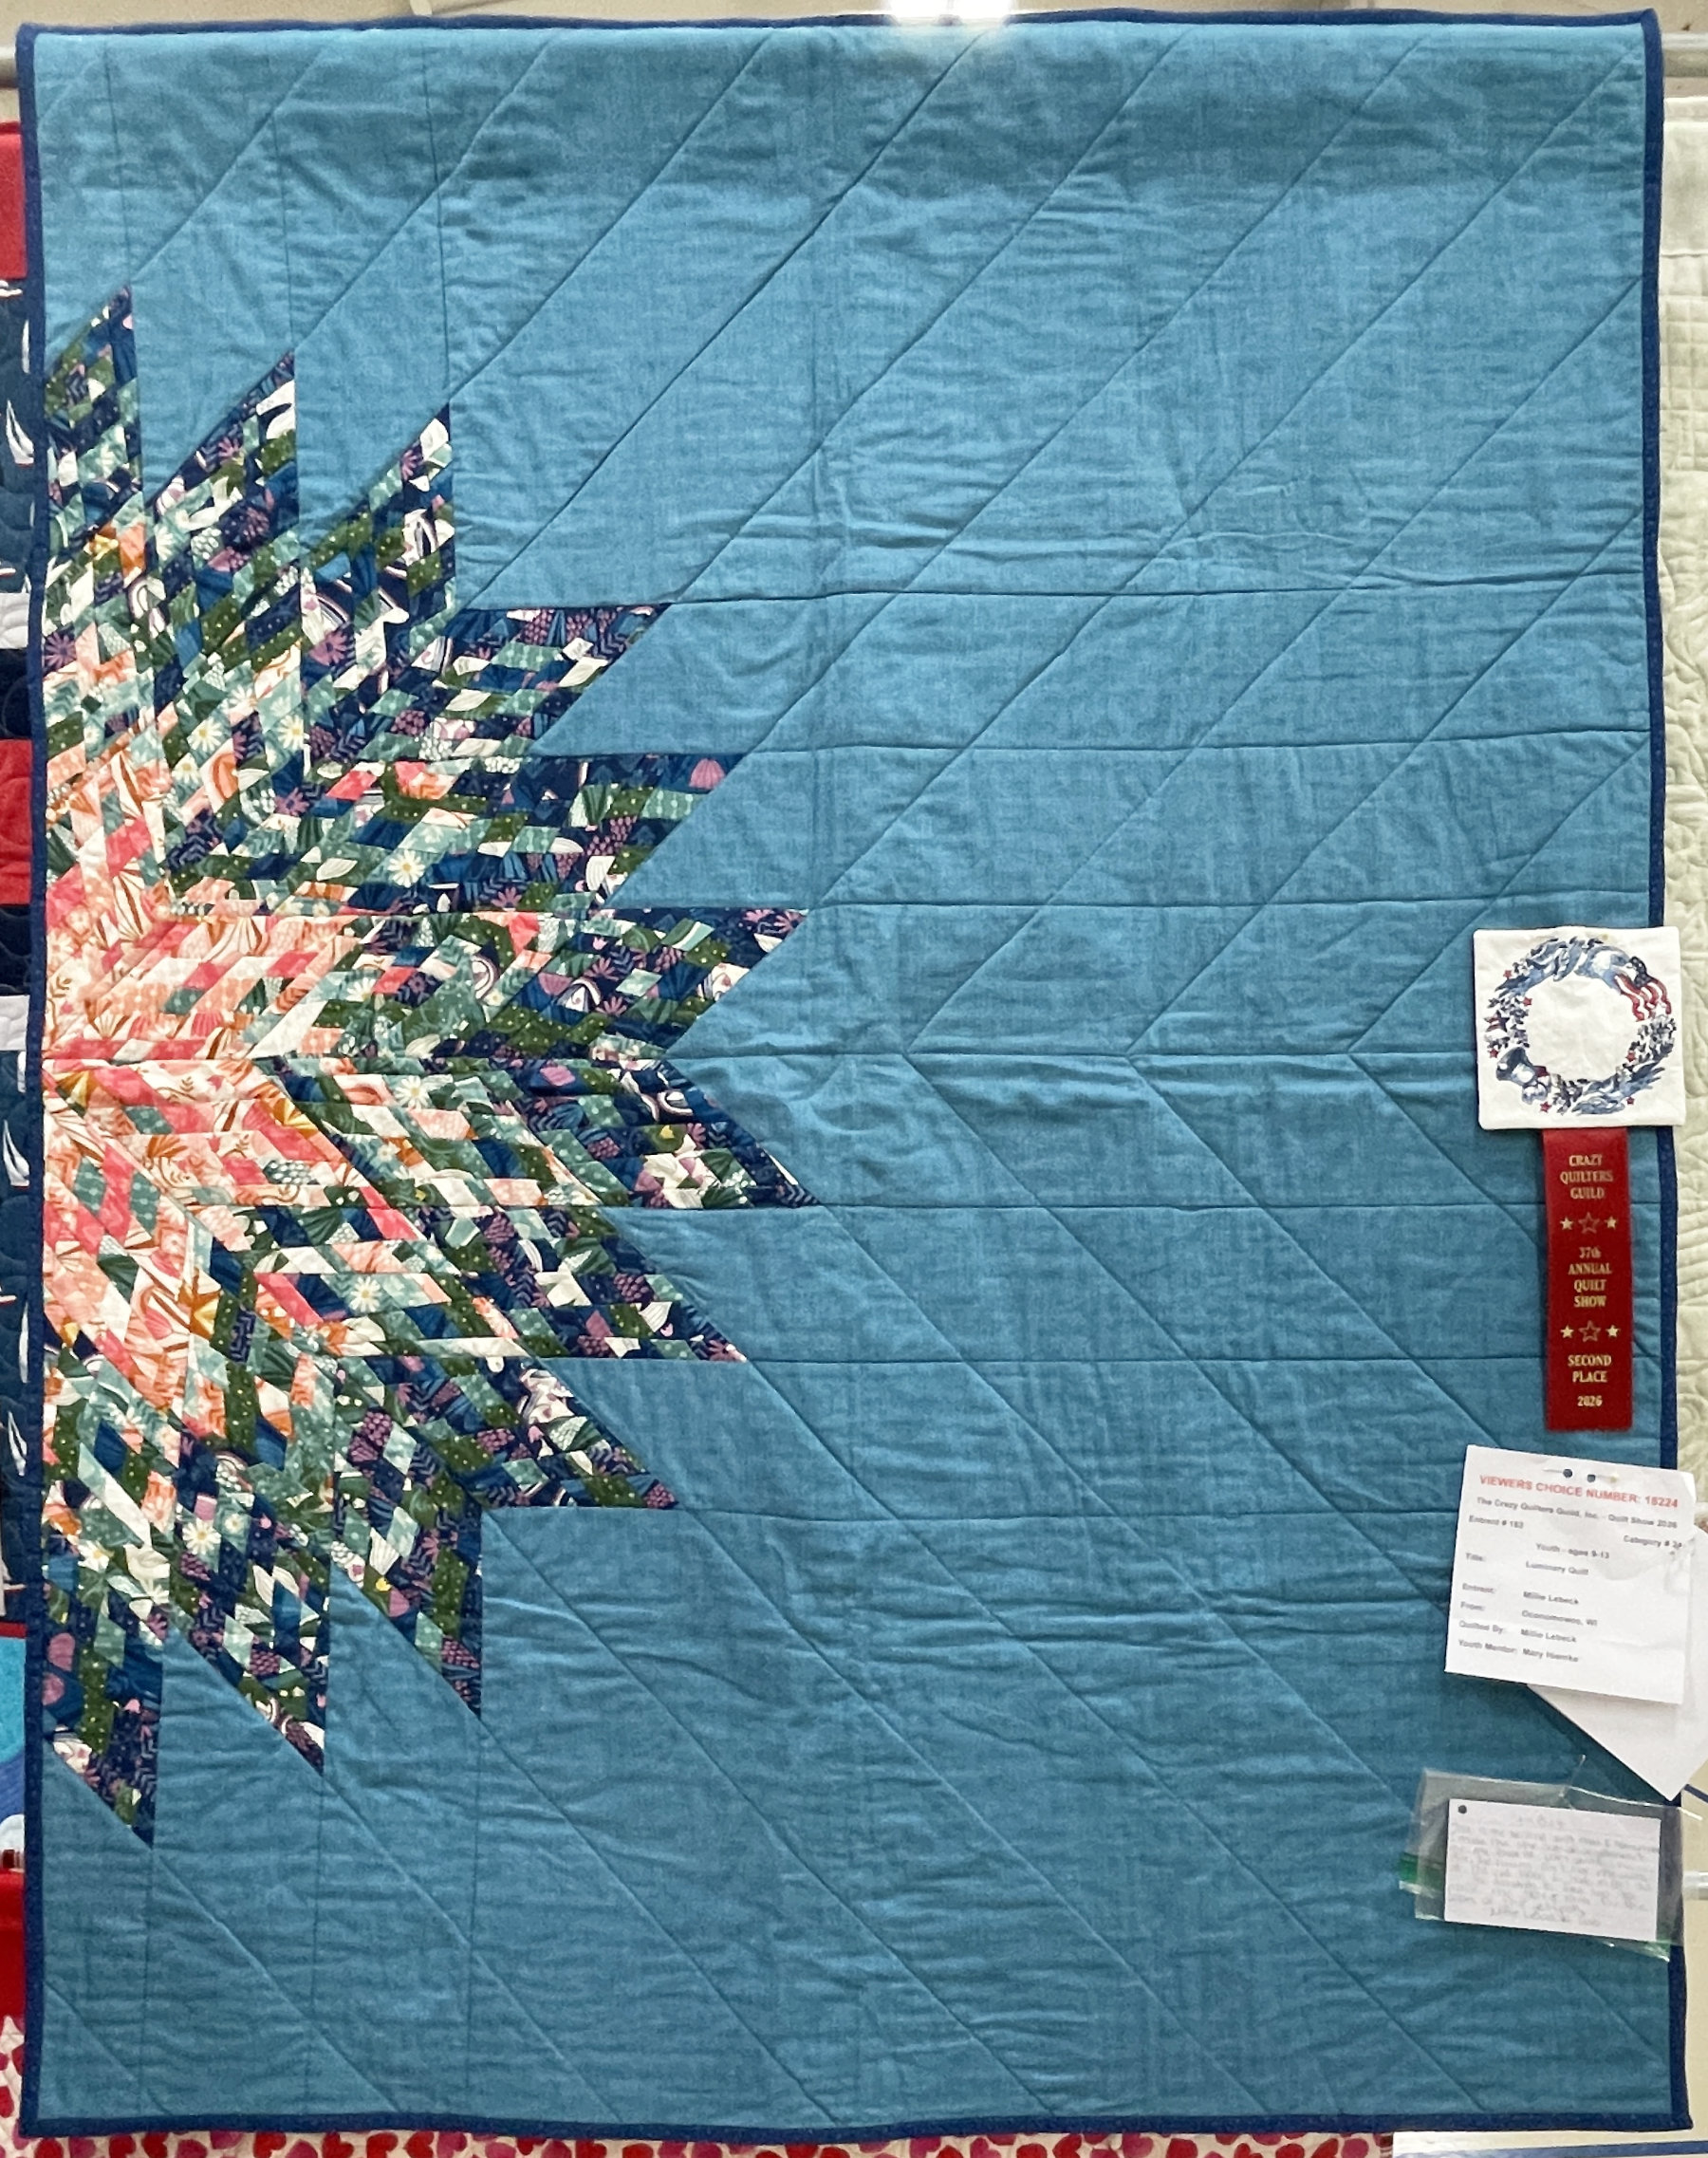
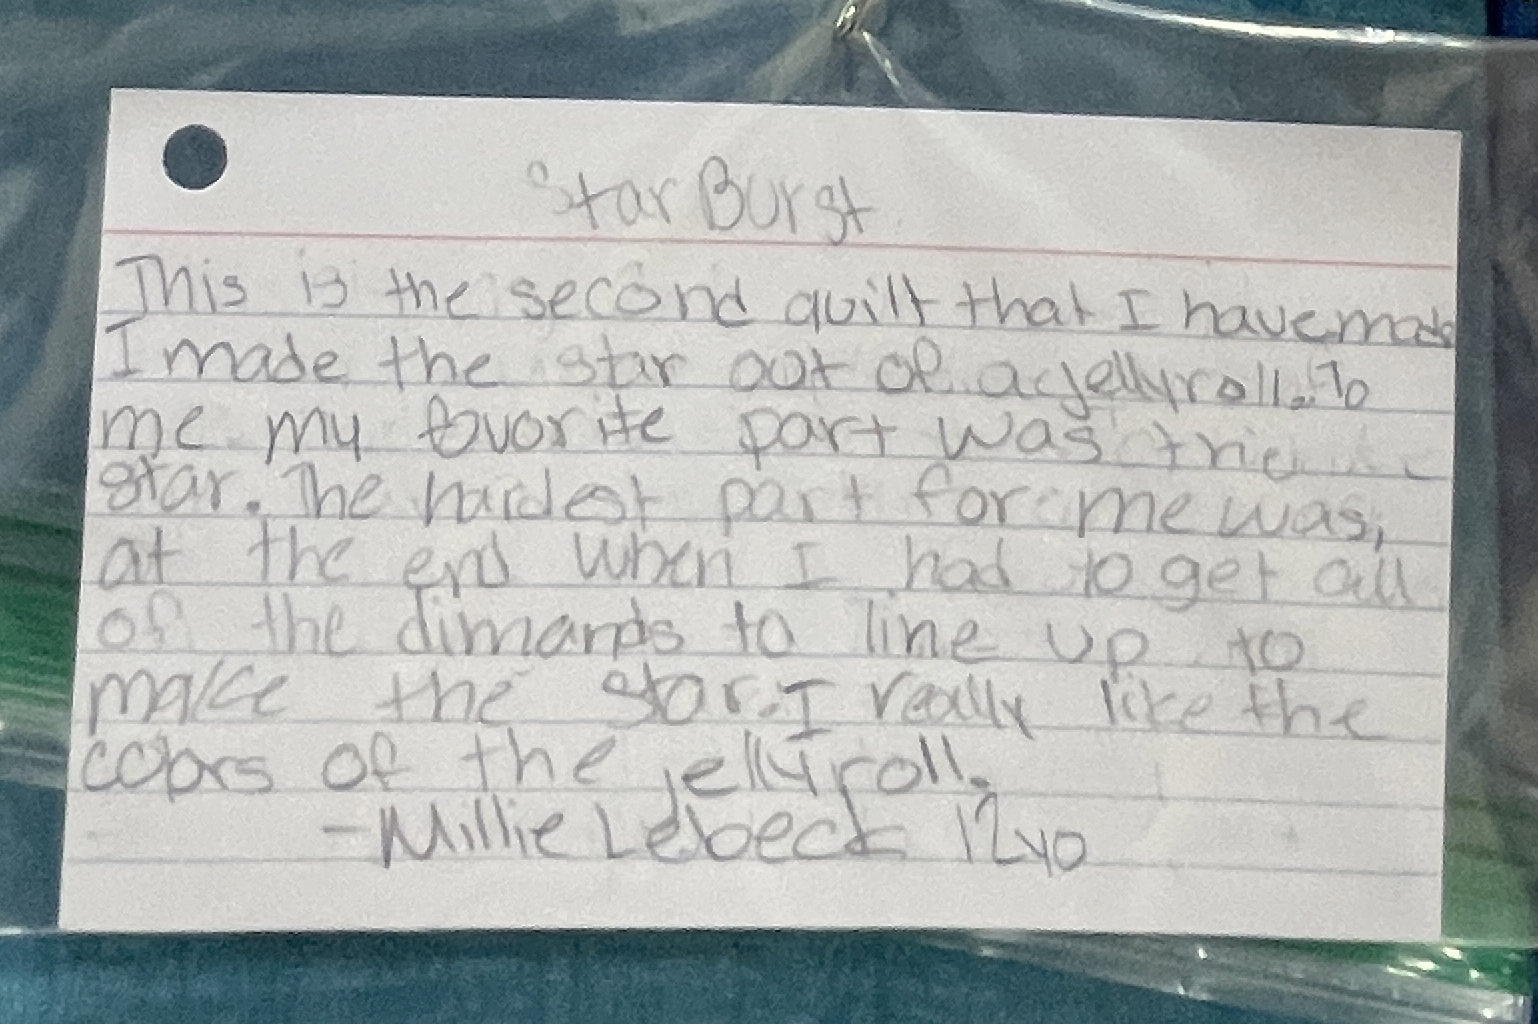
Great job Millie! Keep up the good work 😁.
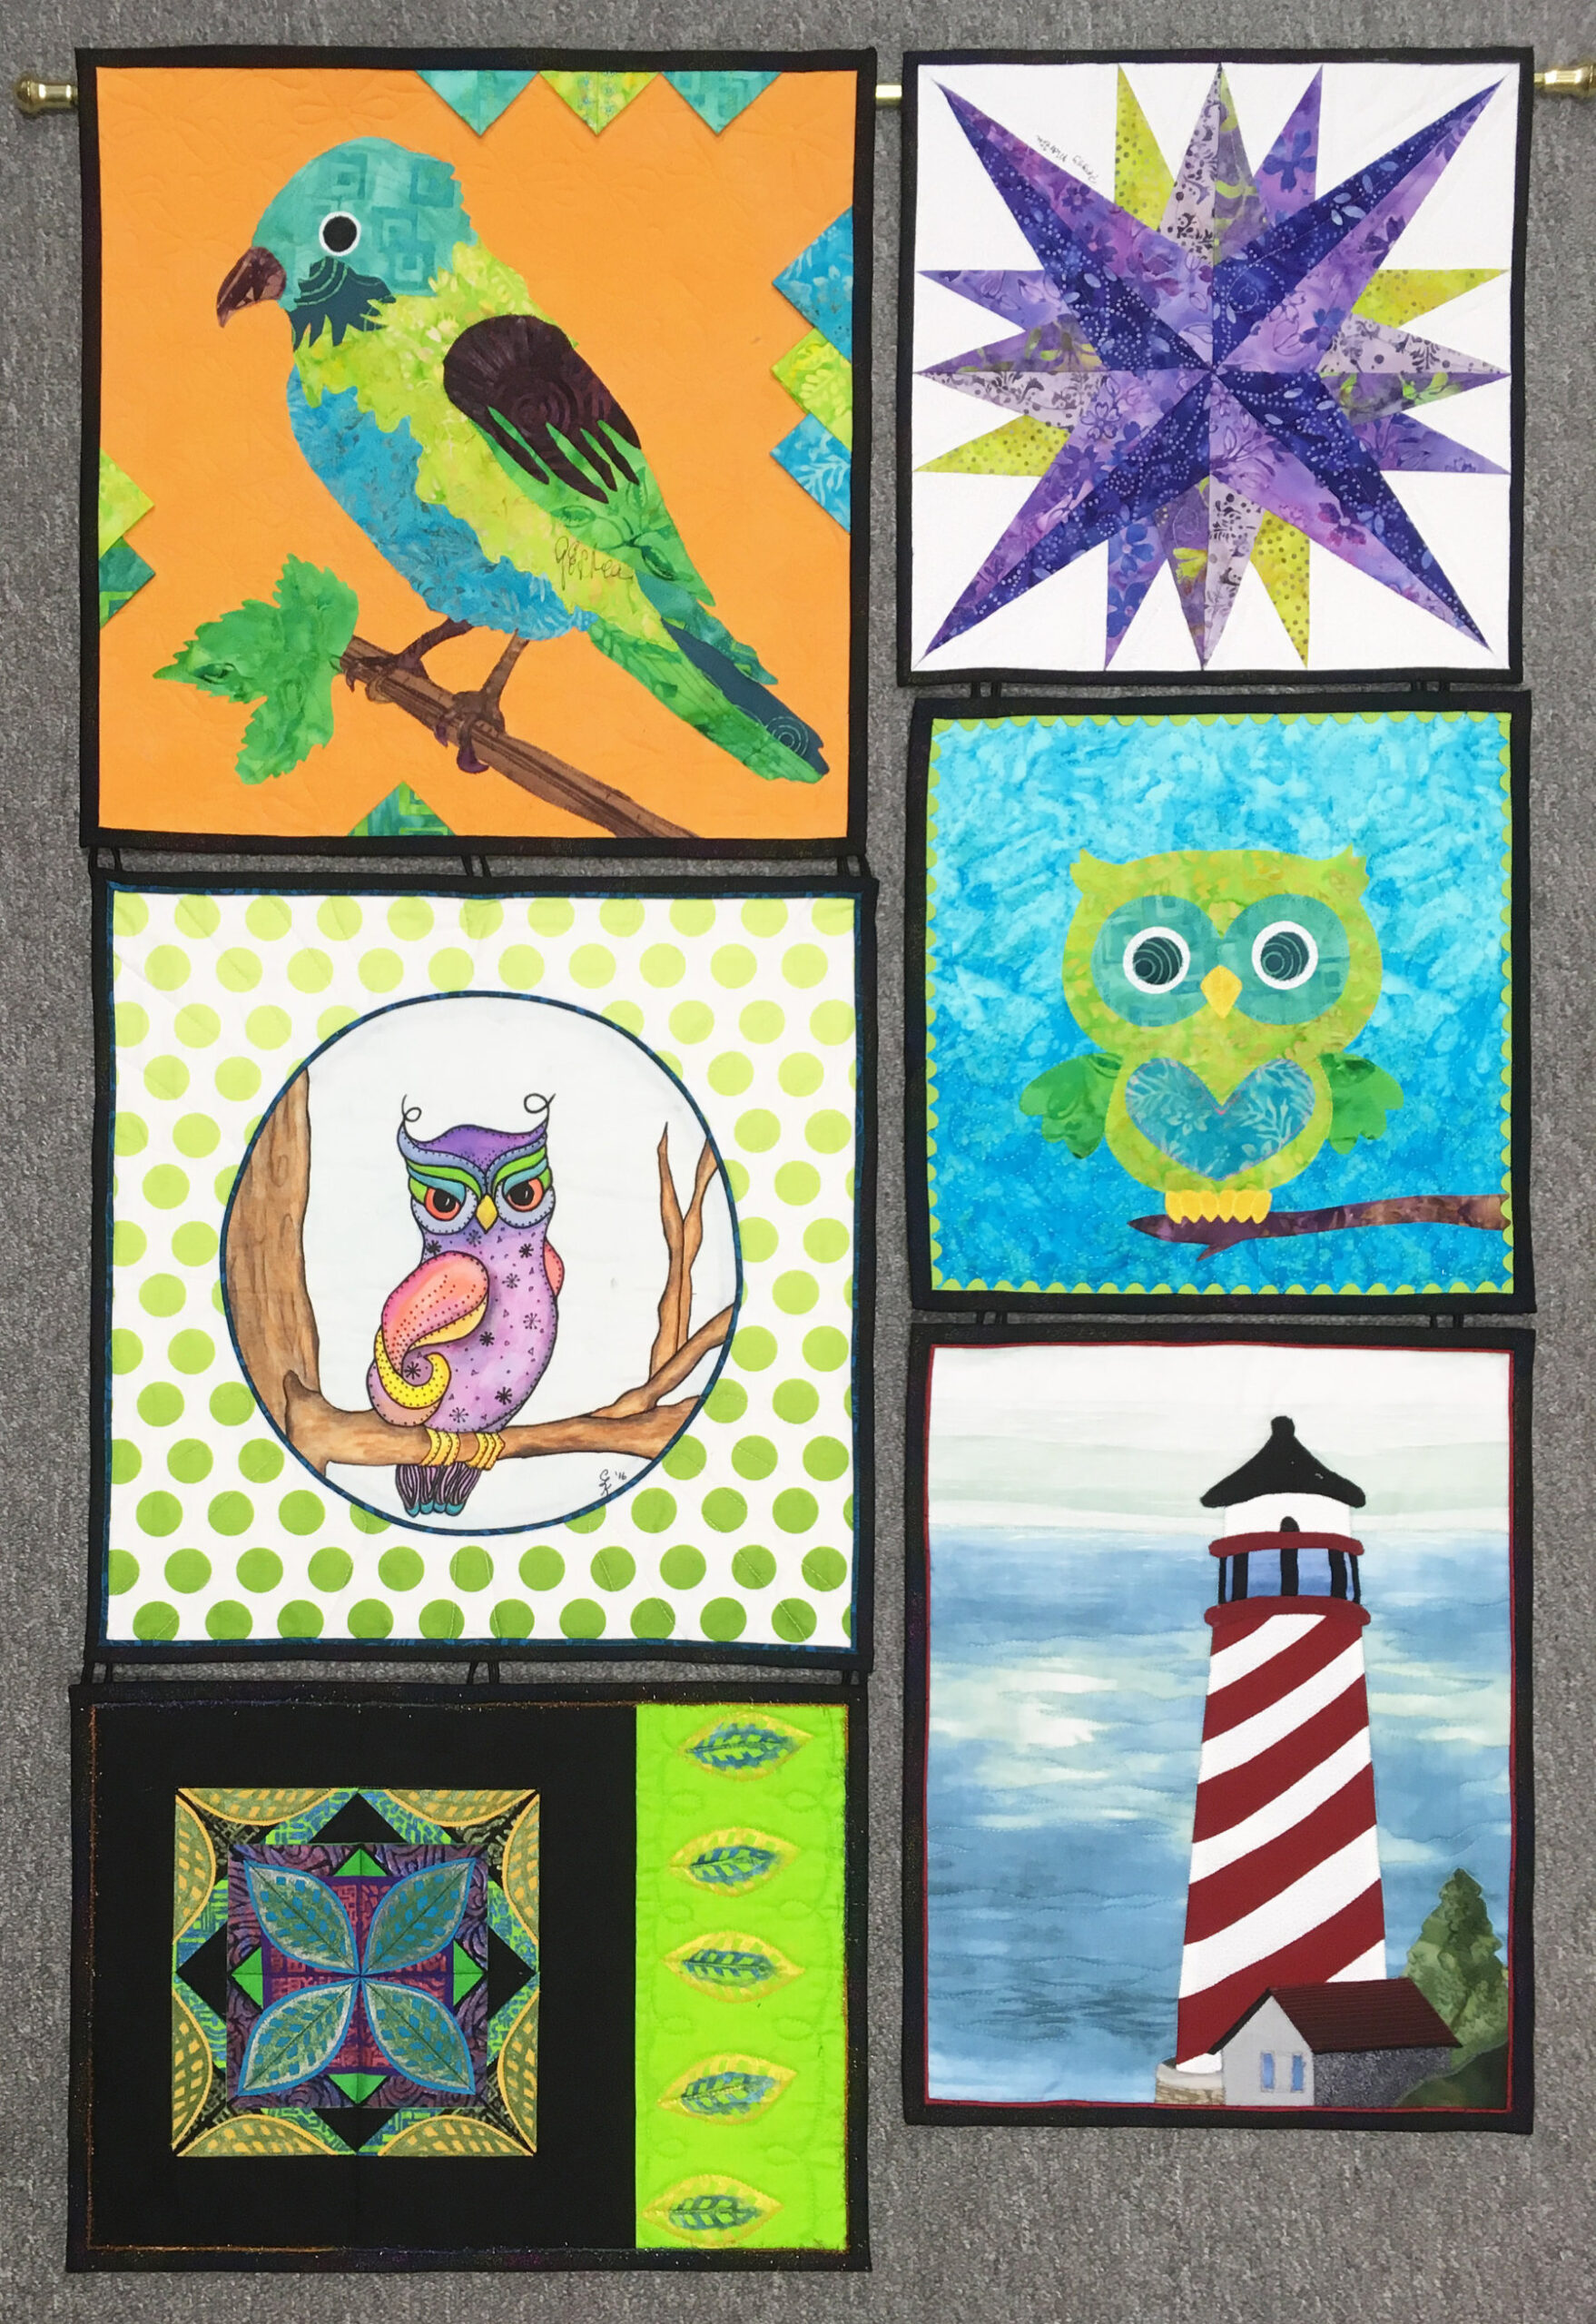
“Posh Gobble” by Lori Migliaccio is covered in fun quilting, and the piecing is great too.
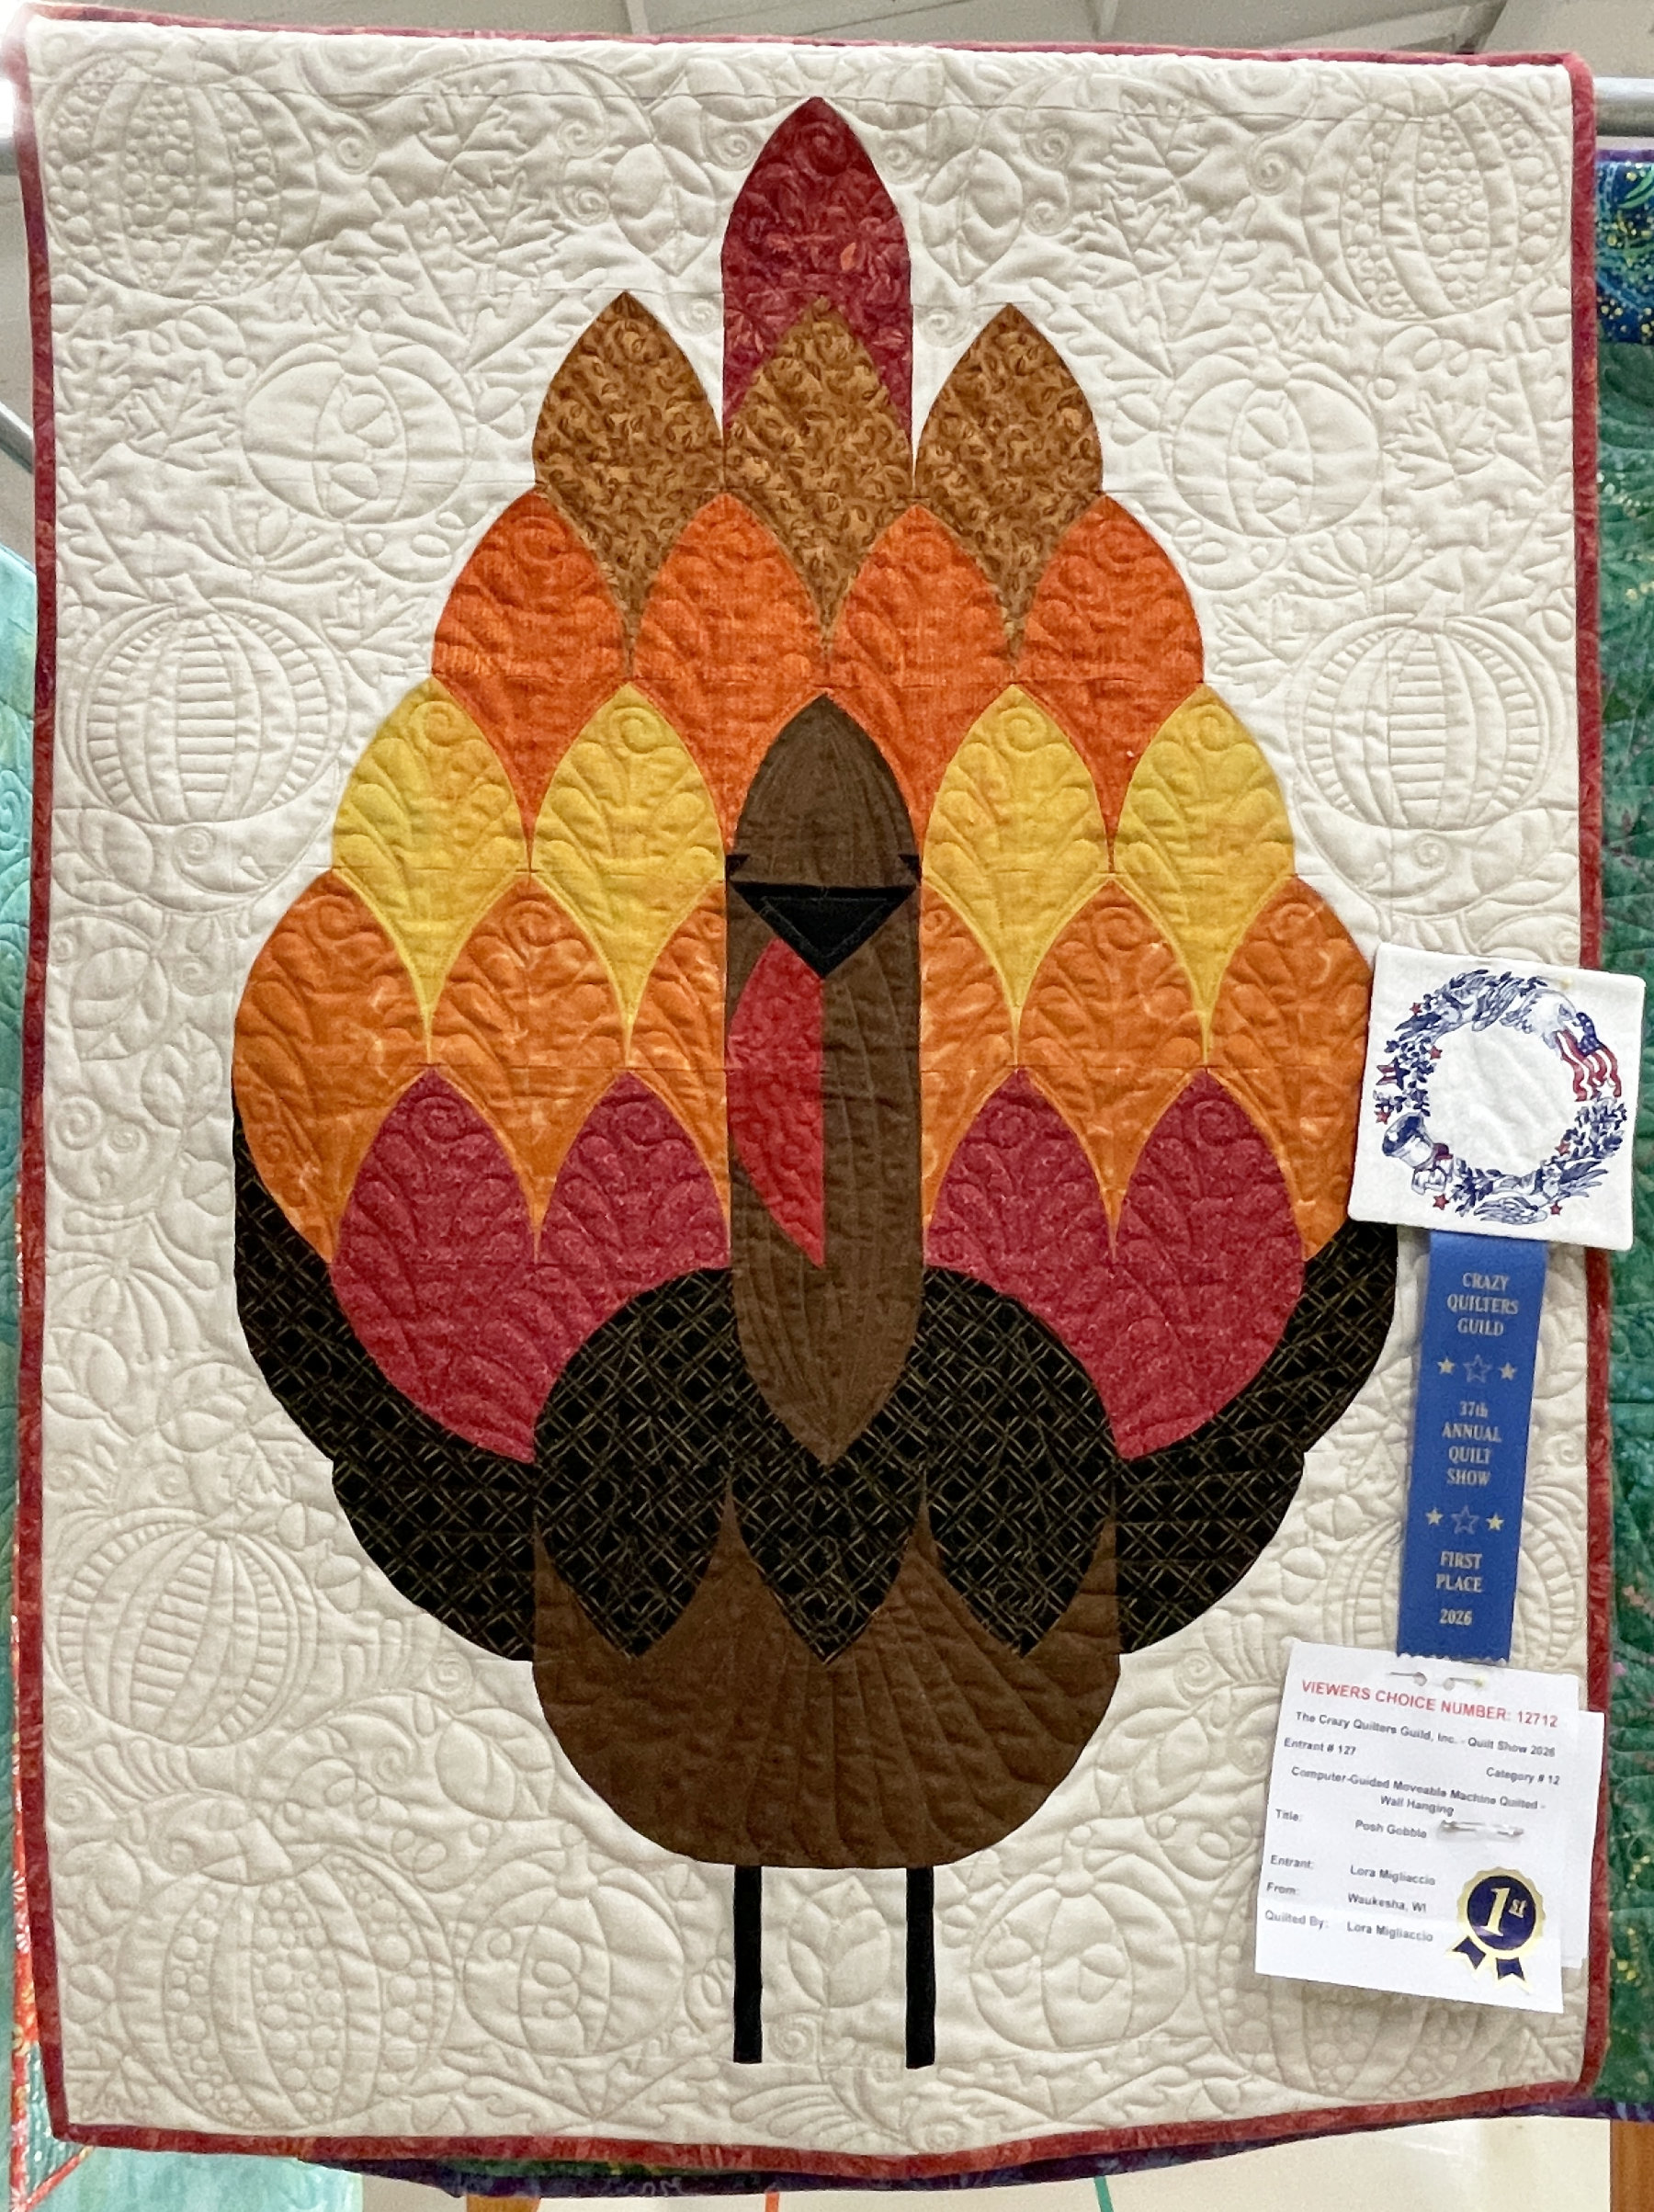
As I was putting this post together I realized that Lori did the quilting on the next two quilts also. All three quilts demonstrate her skill and versatility.
“Sparrows” is Barb Lancelle’s quilt. She wrote on her attached card: “The “Sparrows”‘ pattern called for all the birds to be the same. I made mine with Wisconsin birds instead!”
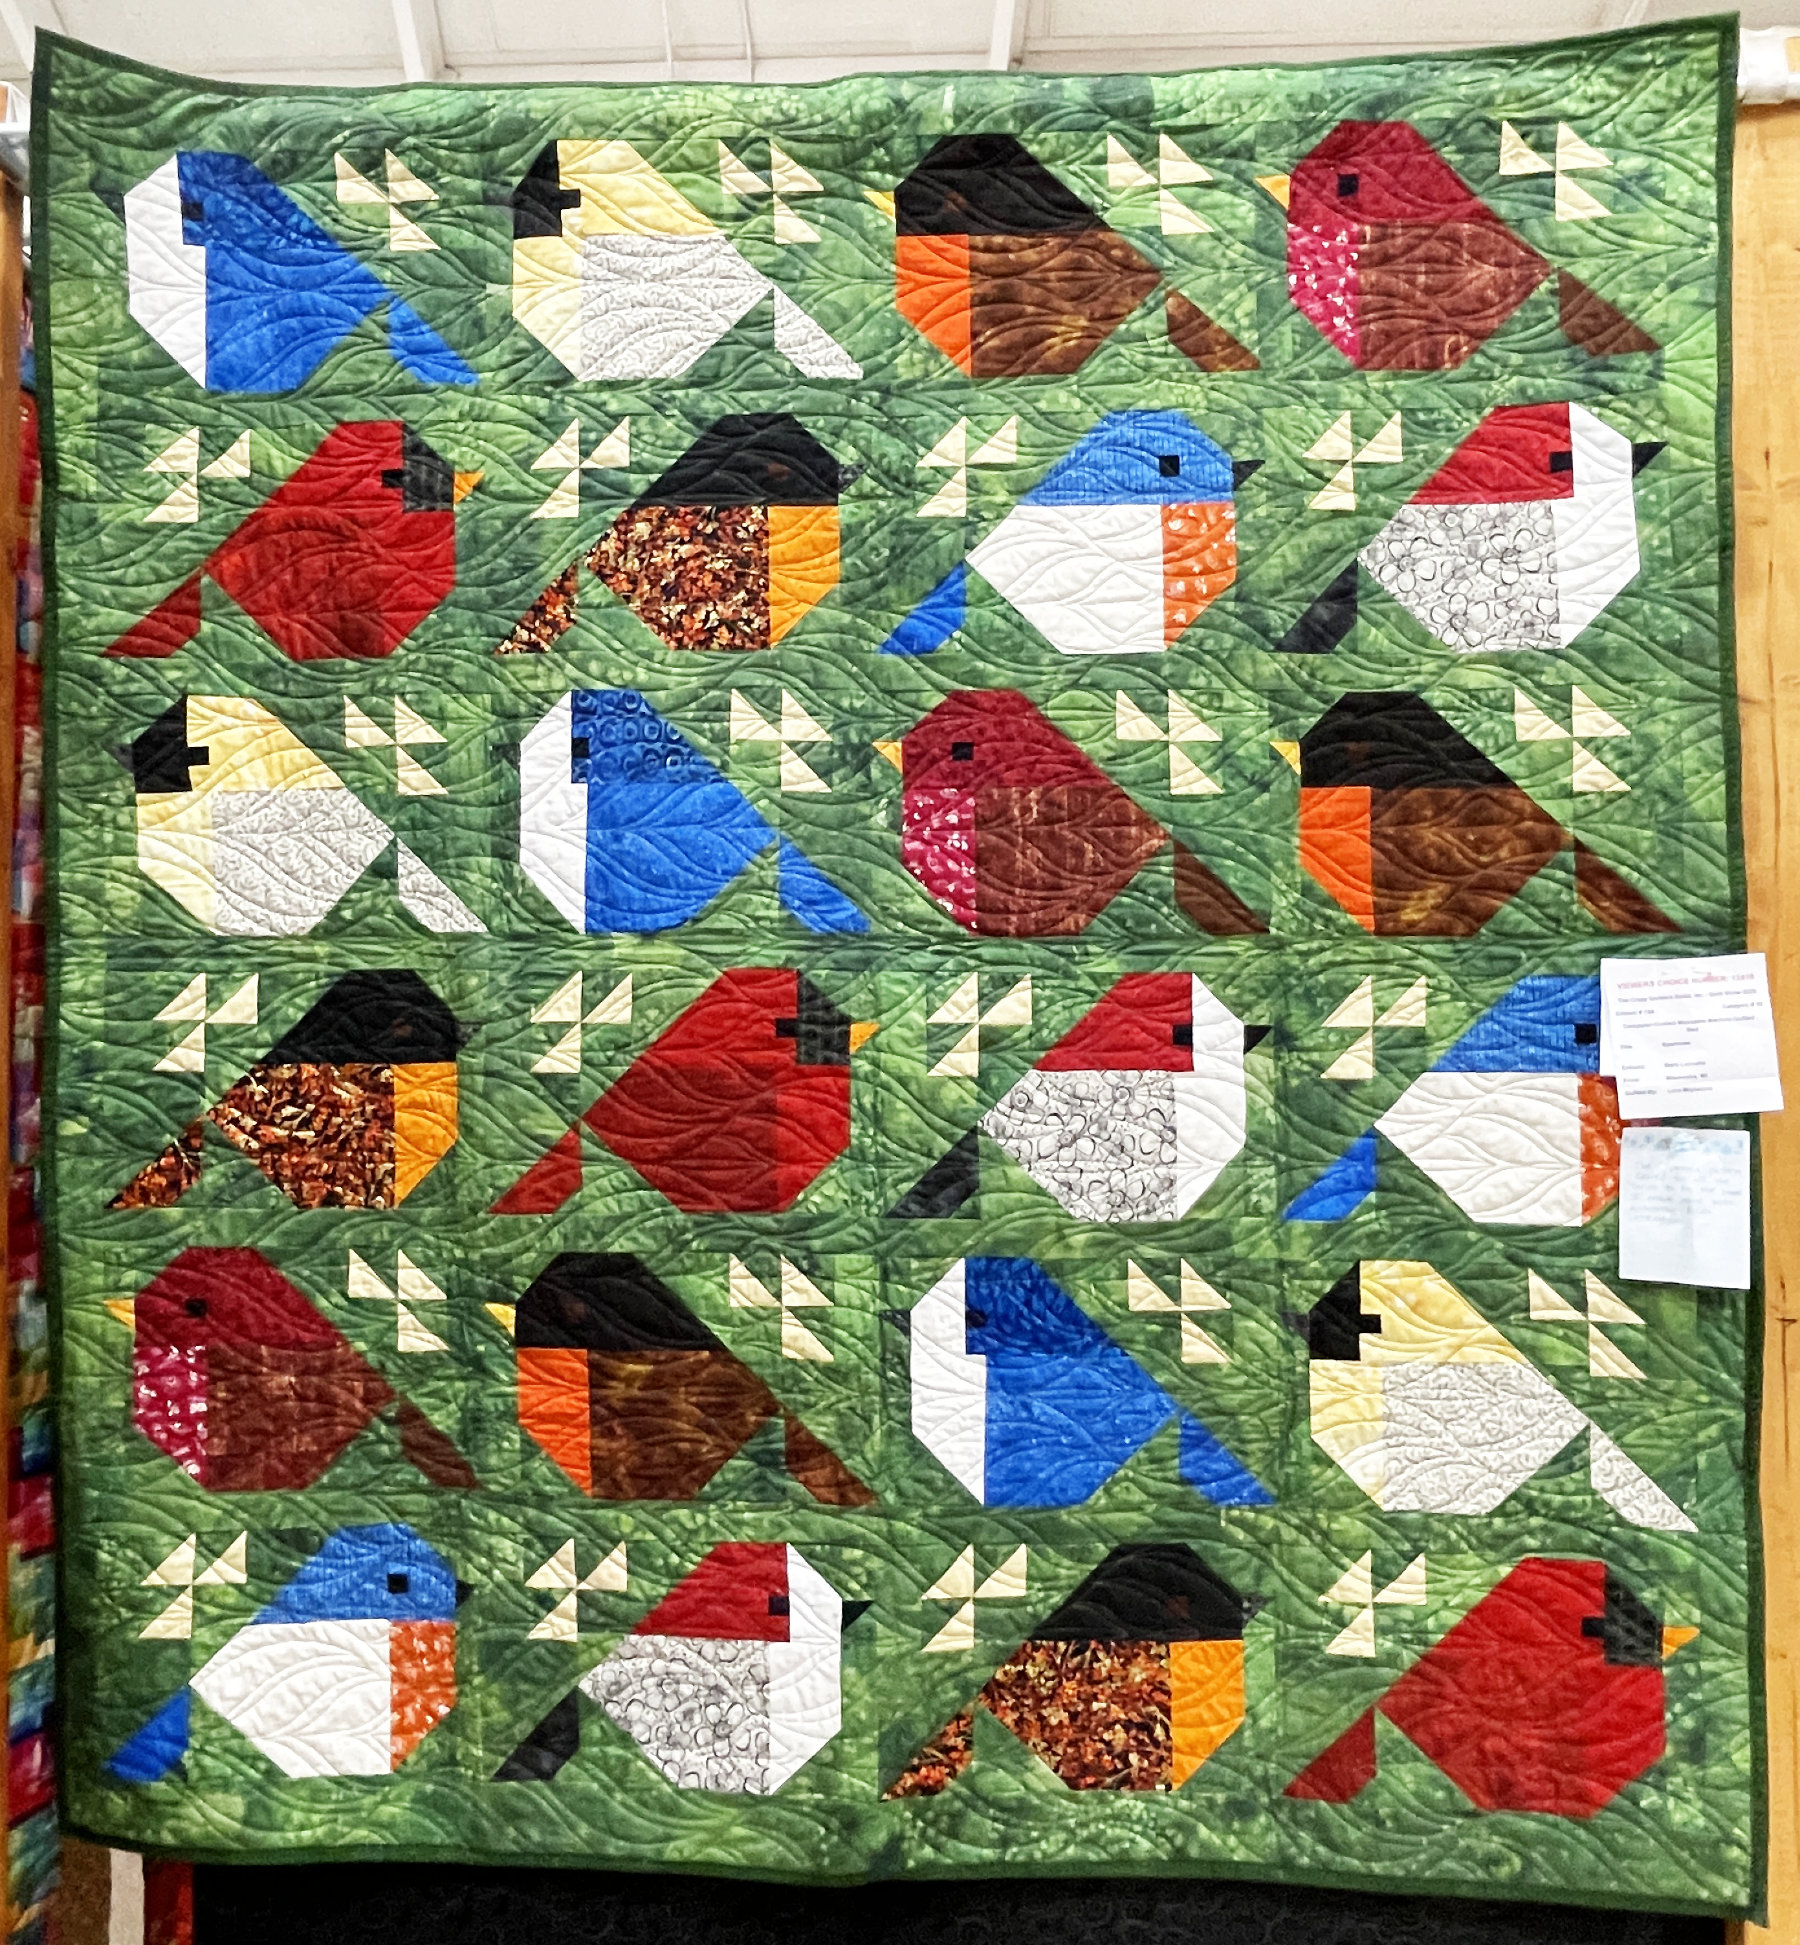
They certainly are cute… and chubby!
“Hope and Harmony” by Juli Meeks got my attention because of the lovely and unusual block. It’s like a clamshell with feathers, and they were appliquéd beautifully. But what amazed me was the way she pieced the binding to match the border, right down to the mitered corners. What wonderful attention to detail. Well done Juli!

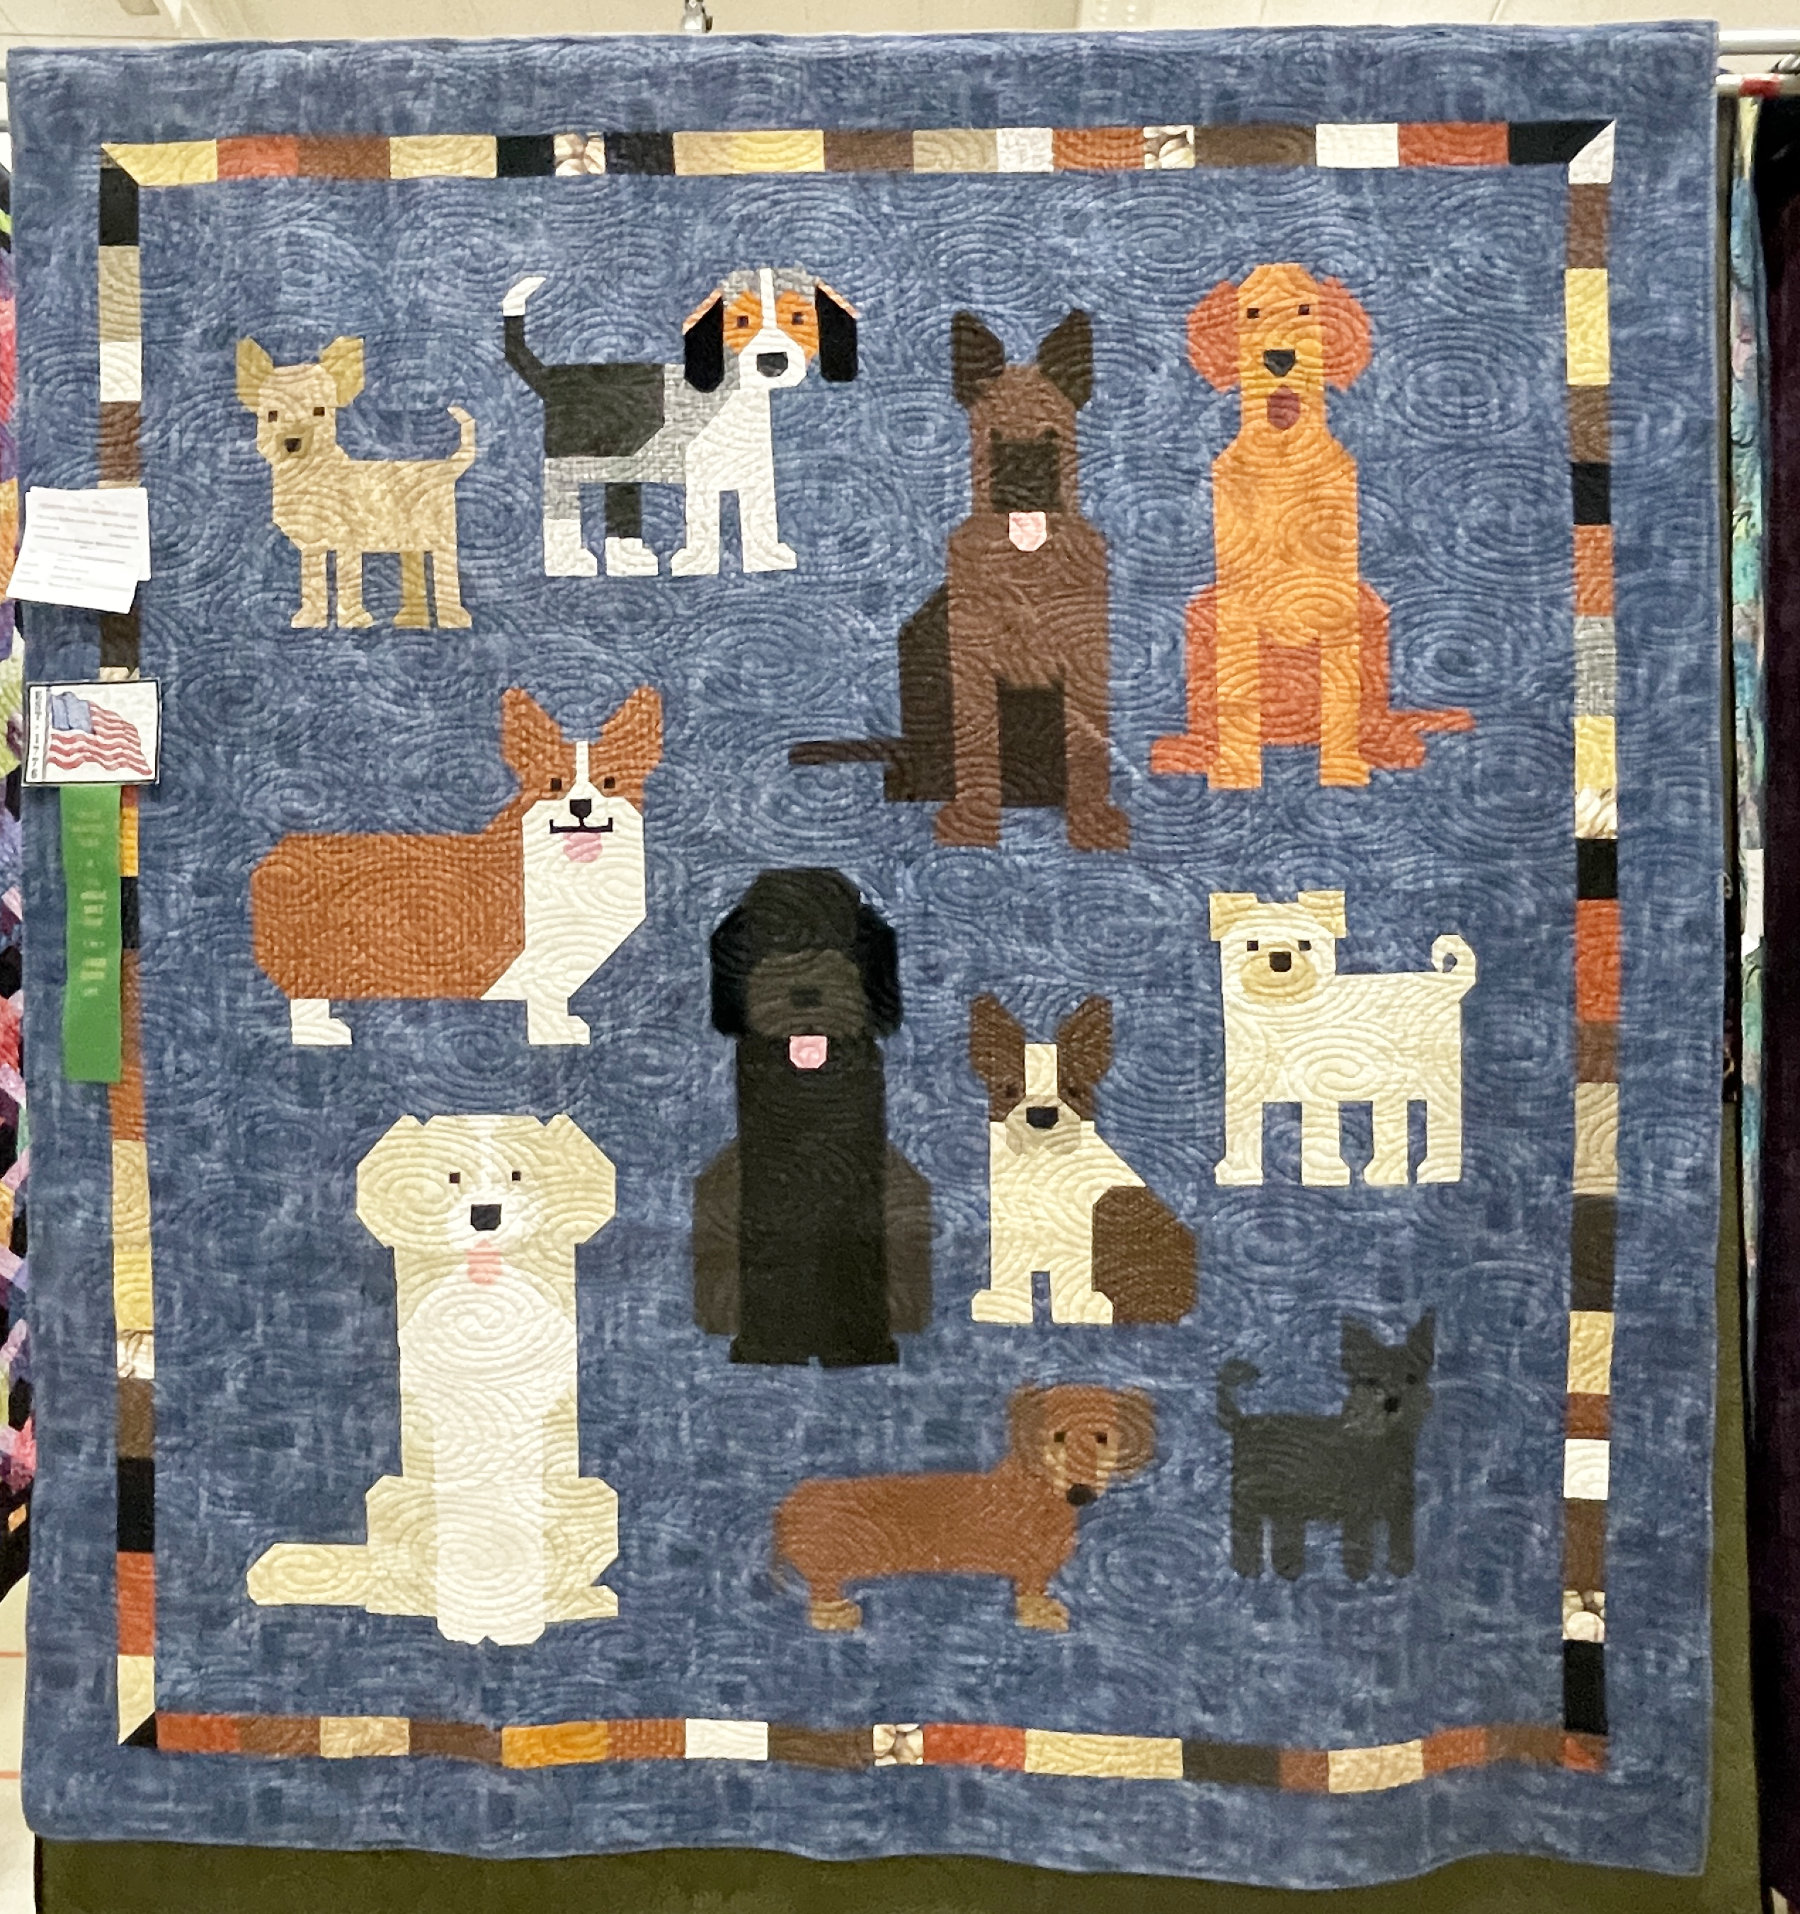
“Dog Family” by Melody Ryddner was made from an Elizabeth Hartman pattern. Her dogs were just so cute I had to take a photo, and the spiral quilting was a great choice. I guess I’m not alone in liking it – “Dog Family” got one of the other “Judges Favorite” ribbons.
Patriotic by Nancy Gruenewald is a wonderful mix of wool and cotton; and appliqué and piecing. Her embroidery is lovely too!

At first “Ombre Geese” by Carie Bronson looks like it has a bit too much background ~ but just imagine how amazing this quilt looks on a bed! Especially with the rounded corners. Modern and marvelous!
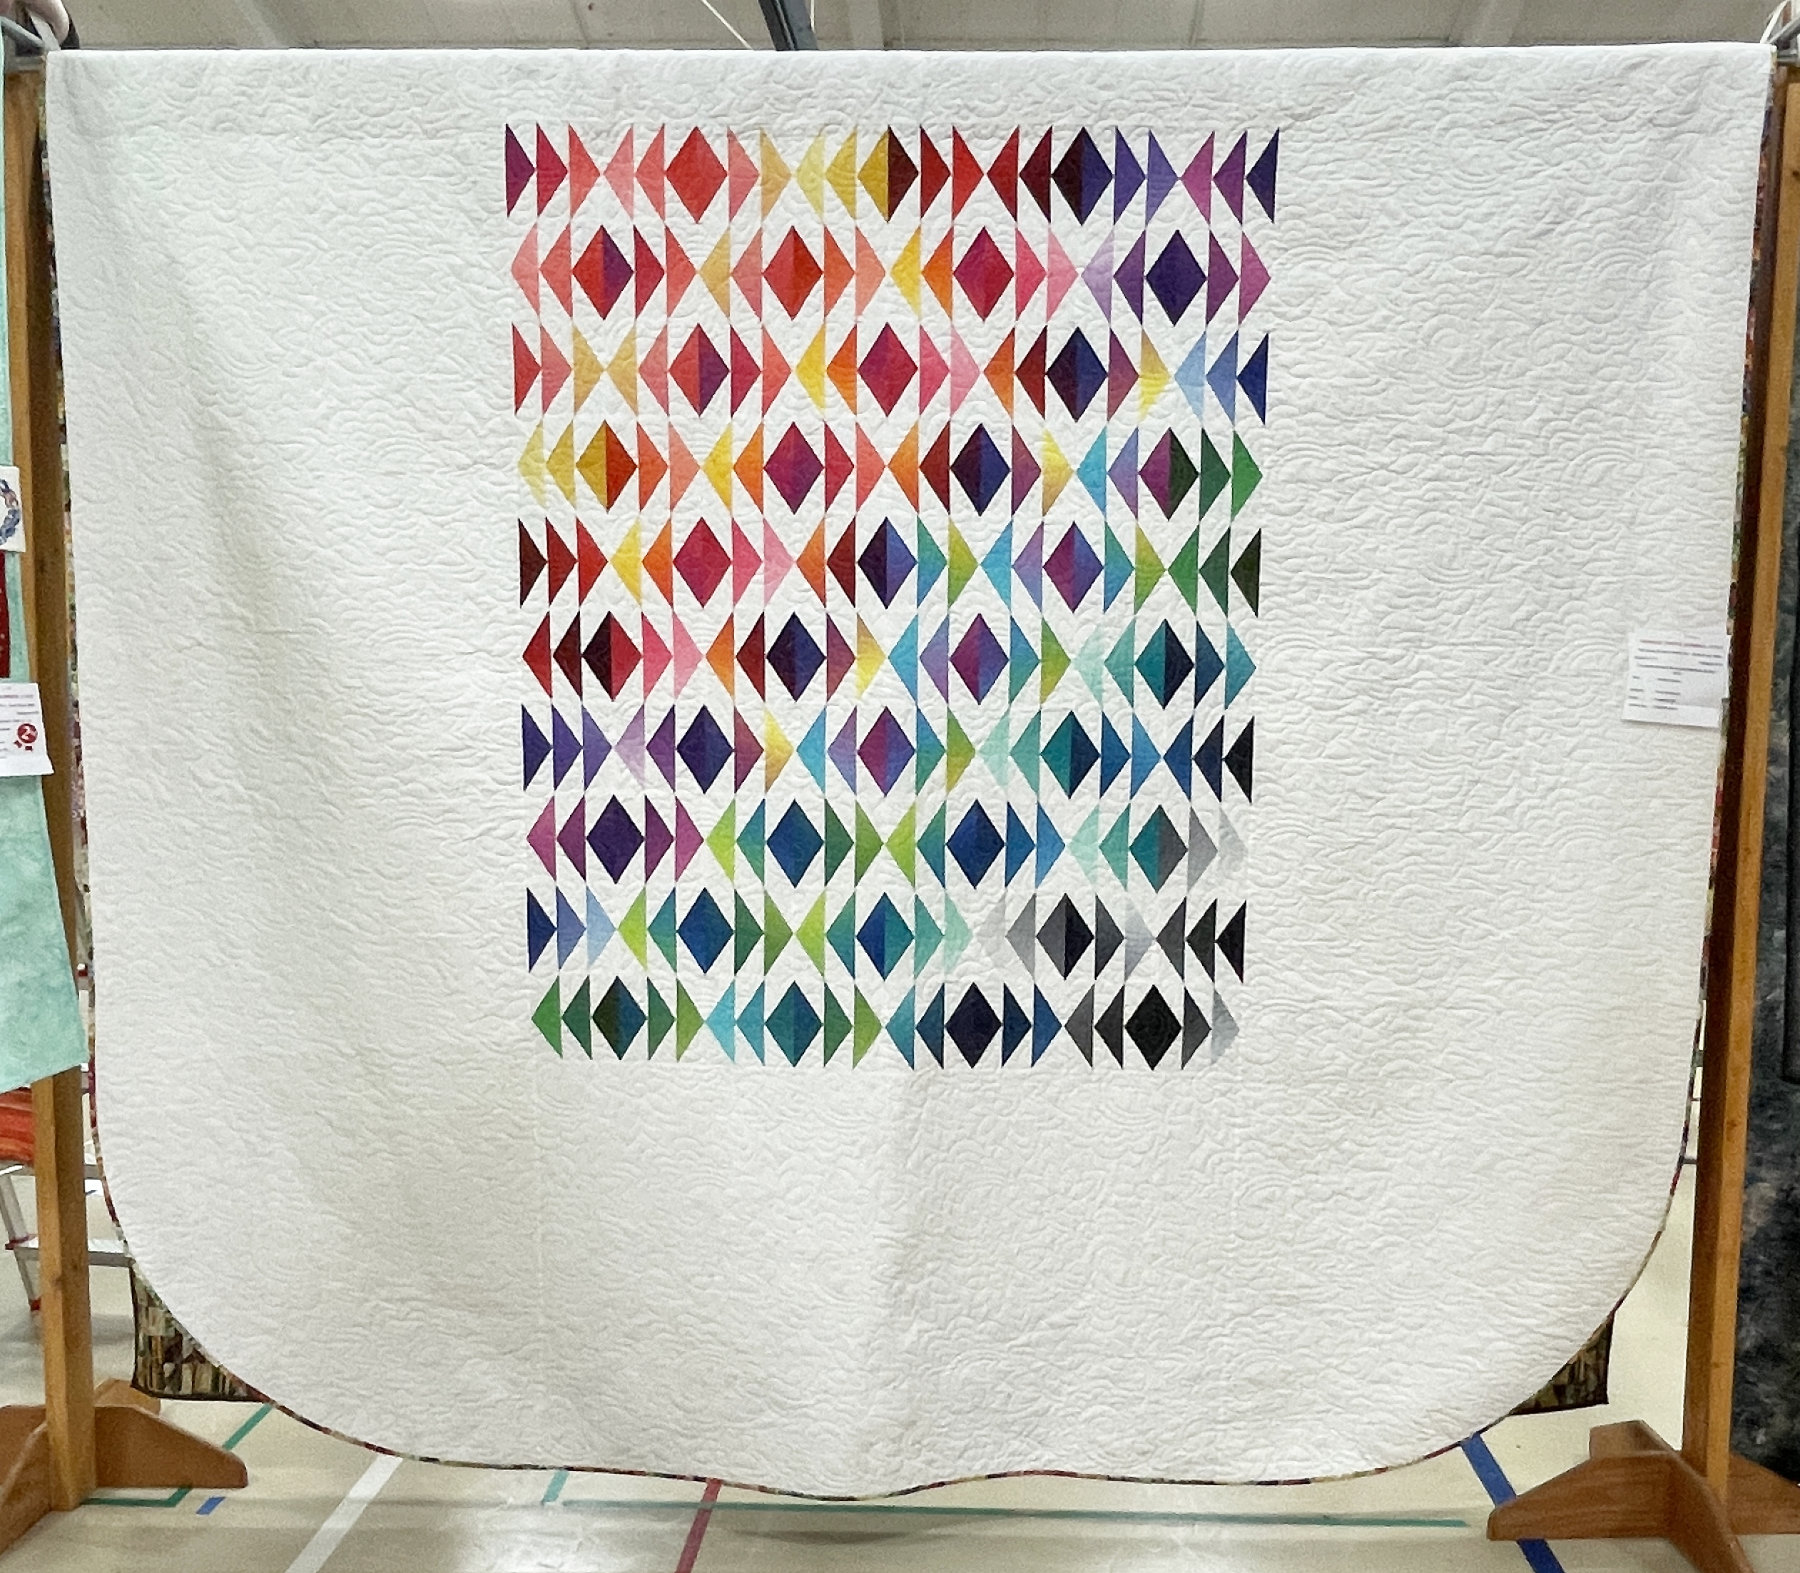
Brooke Furmanek’s “Bargello” is one of the nicest I’ve seen in a while. The pattern and fabrics are all so happy together.
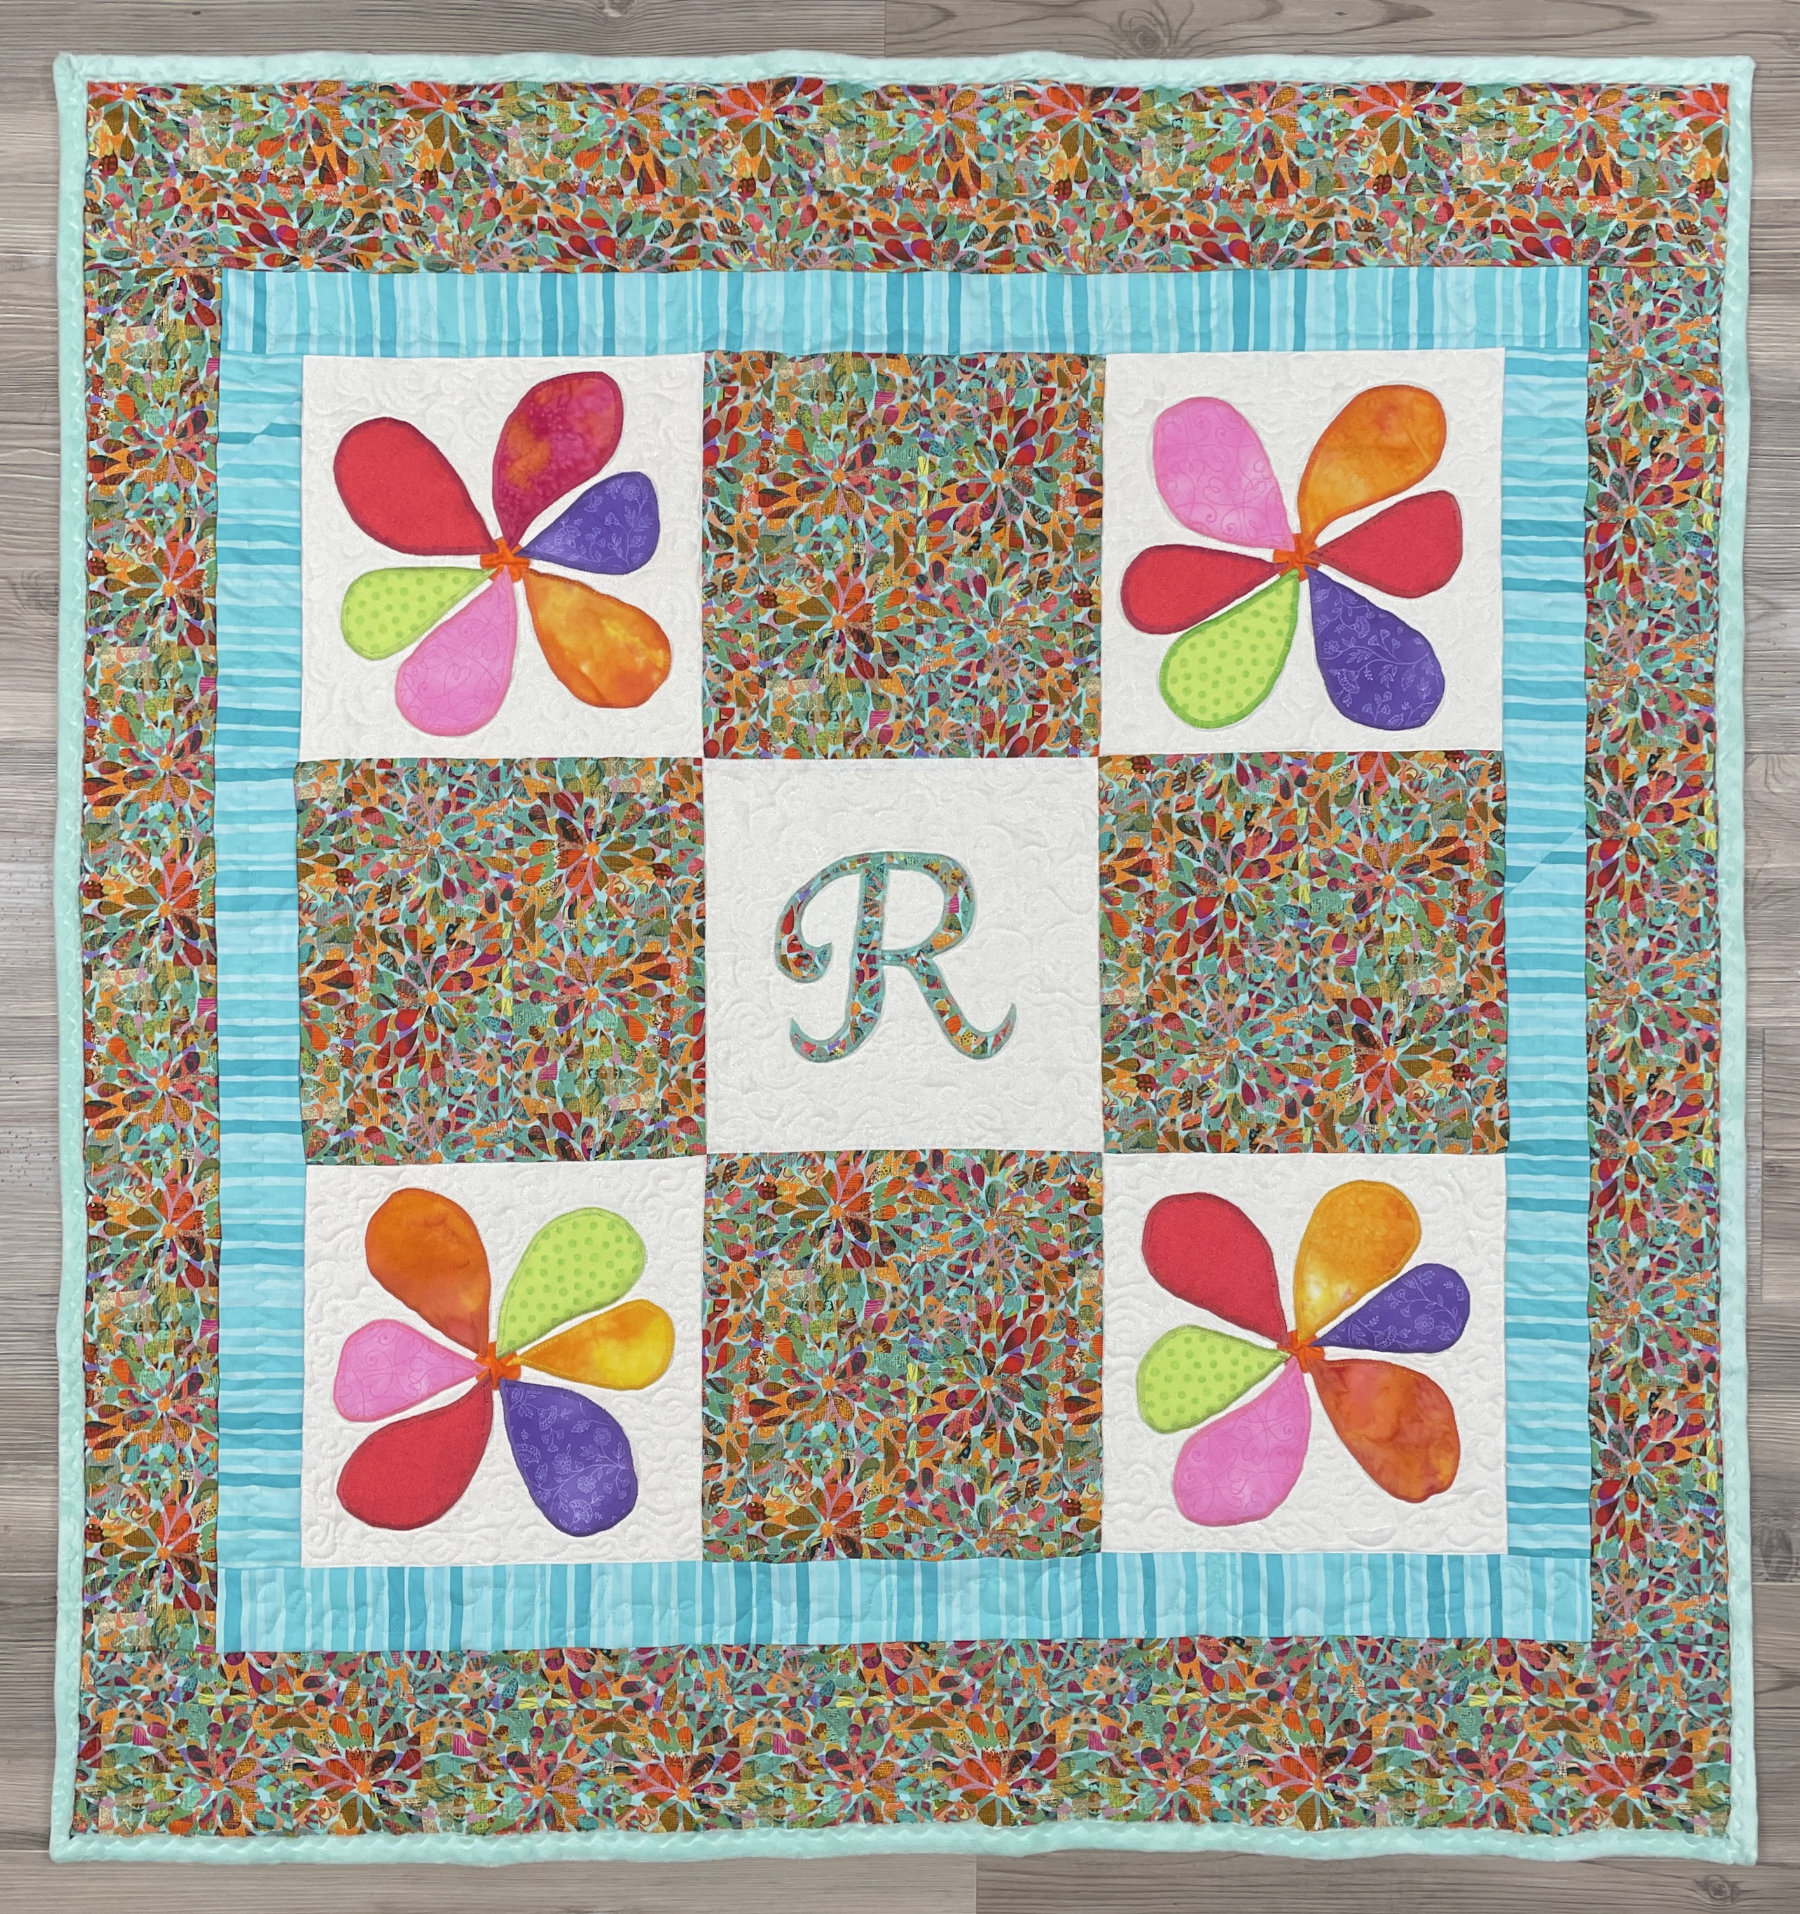
And I’ll conclude my pics from the show with Ivy’s Butterflies. When my daughter was little she called them “butterbugs”, and I love that each pair of wings contains a different pair of blocks. The color palette is a bit unexpected – and lovely.
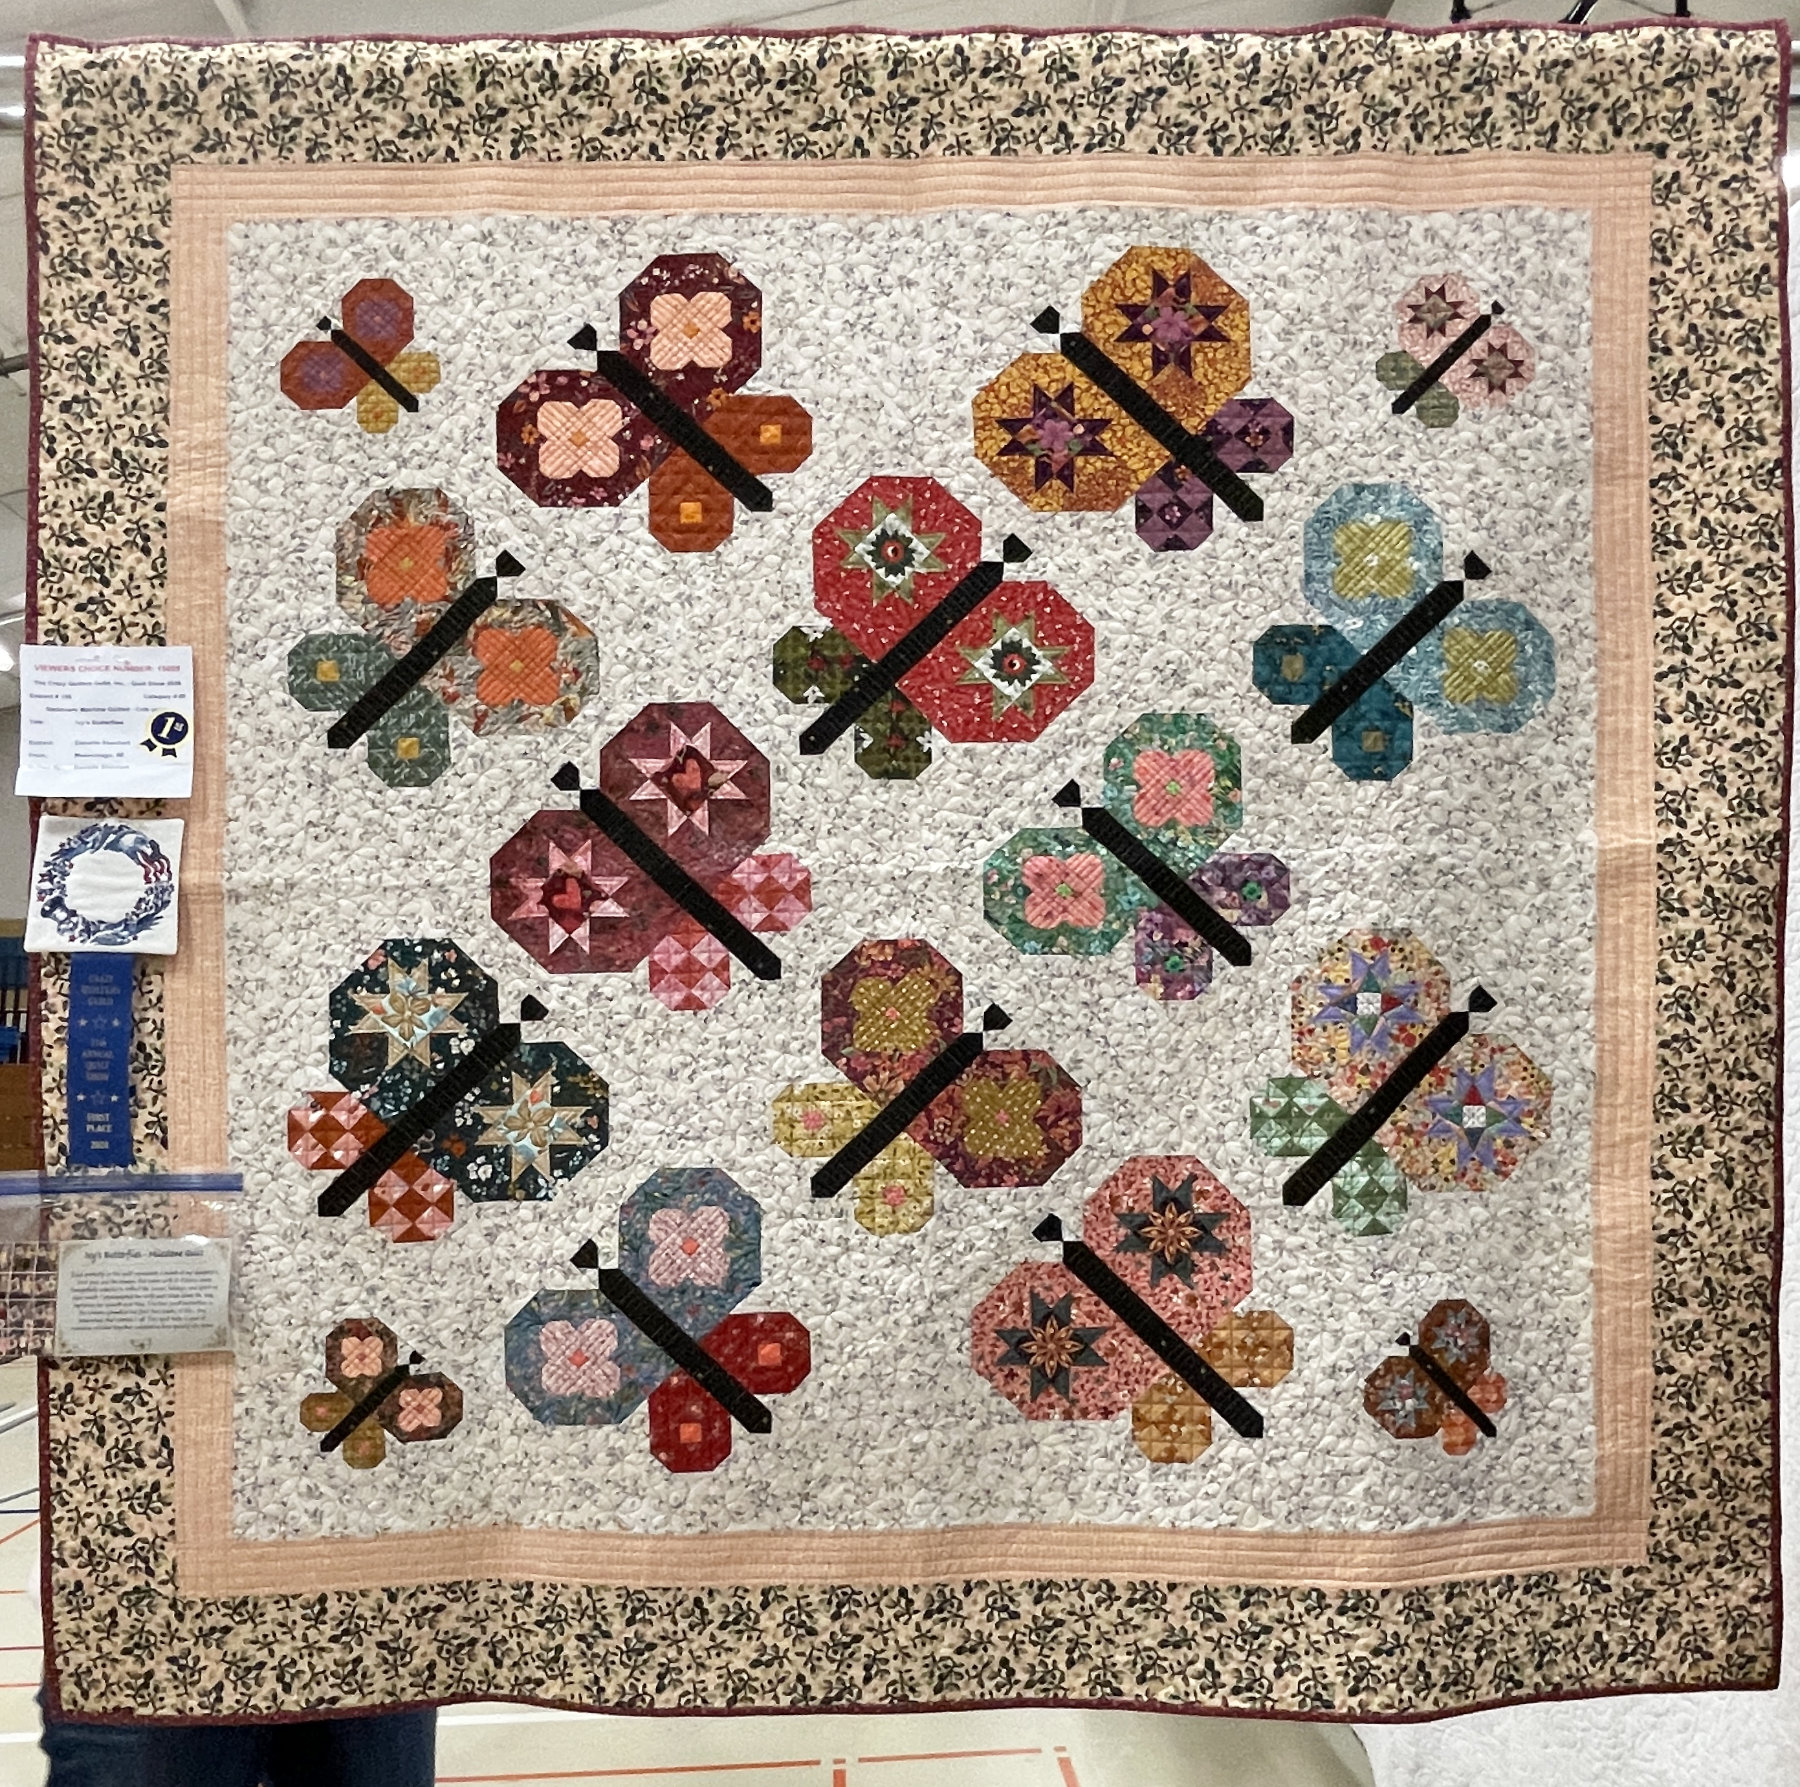
After noticing all of the above, I read the story ~ and I knew I had to share it. What a special memory quilt.
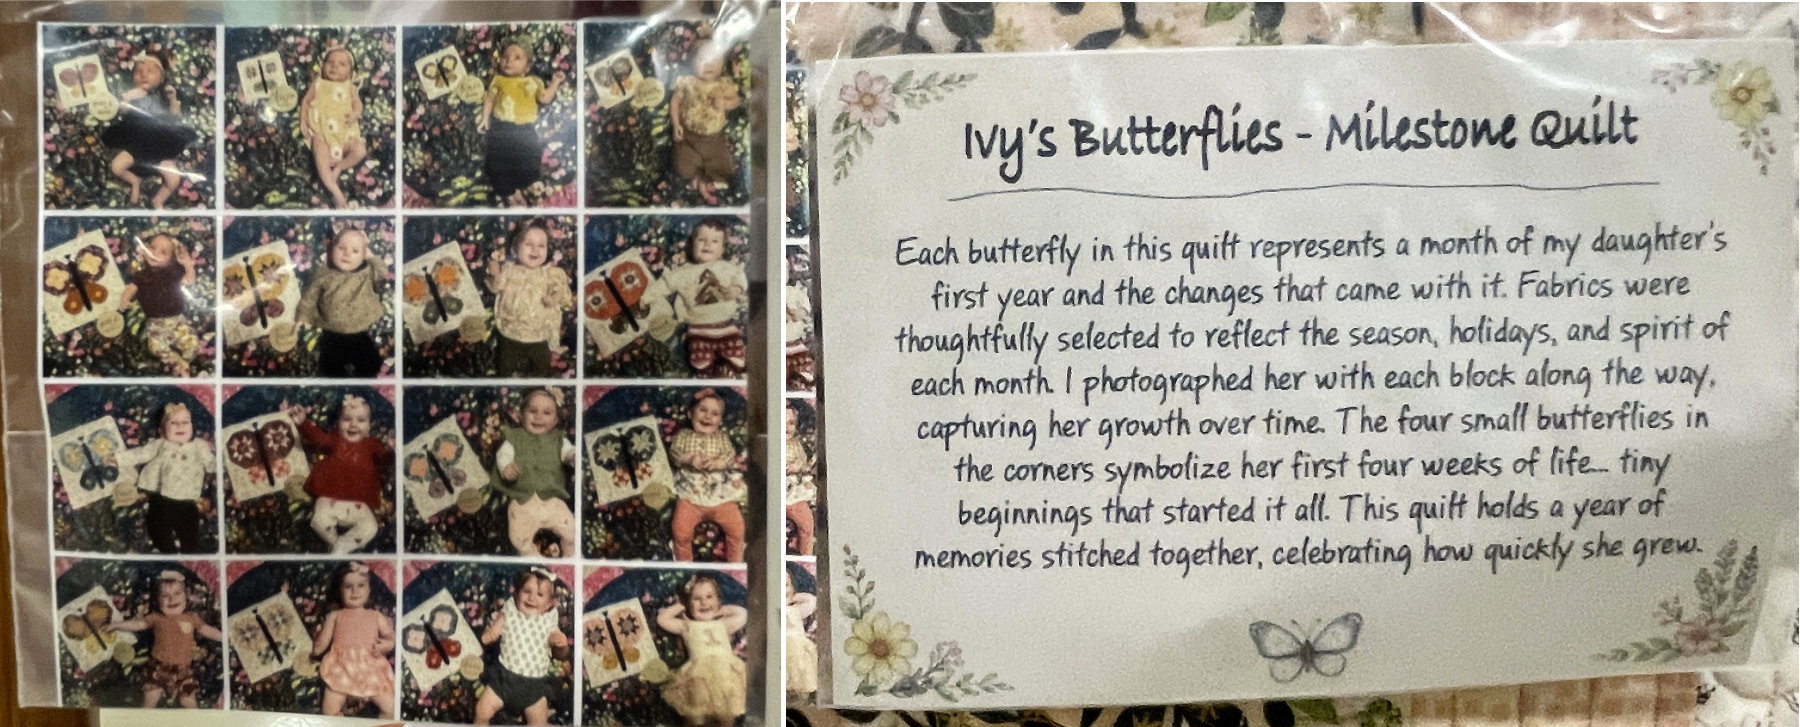
I was disappointed to realize I hadn’t taken a photo of the quilt tag, so I don’t have Ivy’s Mom’s name. I’d love to give her credit. If you’re reading this and know the maker, please share her name in the comments. Thanks!
I’d like to extend a big thank you to everyone at the Crazy Quilter’s guild for once again putting on a great show!
****************
And one more thing…
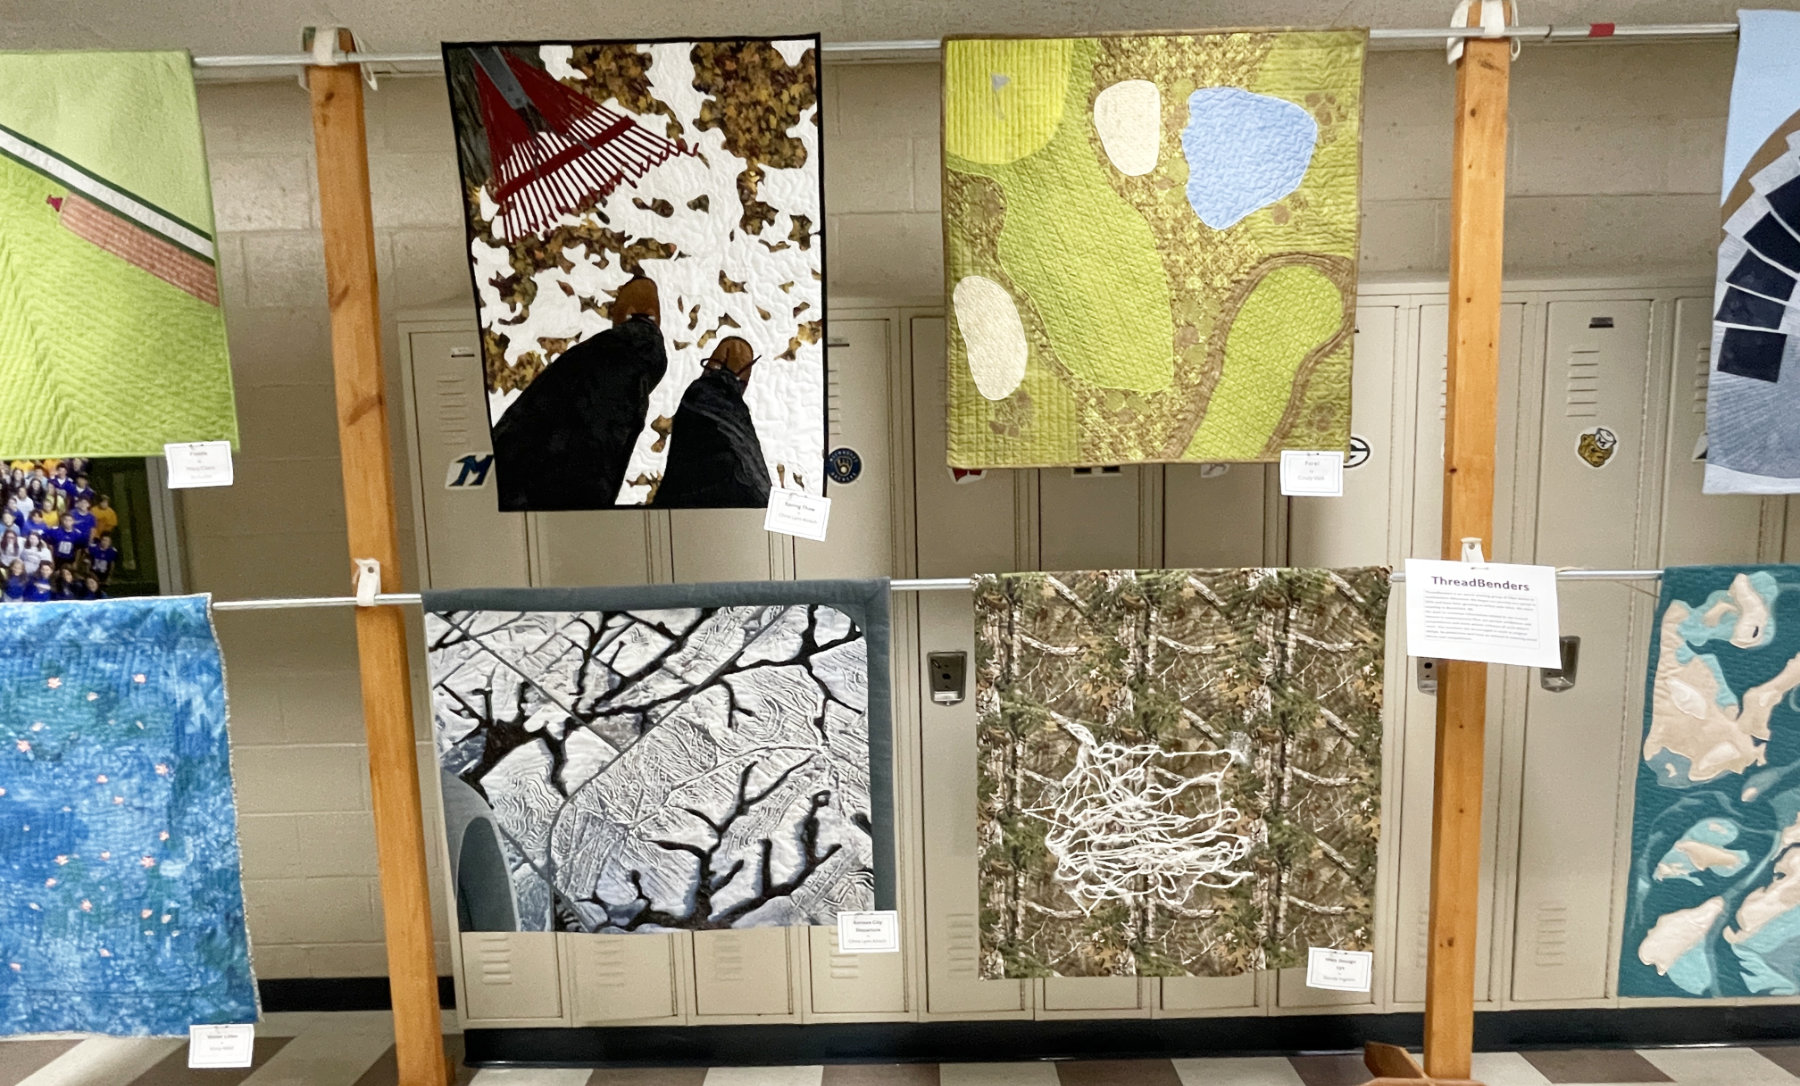
Lori and I just hung the ThreadBender’s “Word” challenge at the Watertown Public Library. Please make plans to stop by if you’re in the area.


We also have a new store in town ~ Madison’s Crafts and Fabrics. Click here for the link to their site!
**************
Wishing you all a blessed Resurrection Sunday!