• Skip to main content
  • Skip to primary sidebar
  • Skip to footer

  • Home
  • About
  • Gallery
  • Classes
  • Trips
  • Books
  • Blog
  • Contact
  • Sign Up For My Blog

Blog

Landscapes in Wool

September 26, 2021 5 Comments

A few weeks after the Top Stitch competition my friend Kathy and I decided to meet up at the Wisconsin Wool and Sheep Festival in Jefferson, WI. Kathy lives in Illinois, so we look for opportunities to get together and enjoy our passion for fiber.

Even though this show is only 15 miles from my home, I’d only been there once before because it’s always held the same weekend as the Great Wisconsin Quilt Show and I was always teaching there. Since the quilt show was virtual this year we realized we could see the show and take a class too! We decided on a 3 hour workshop by Anna Repke, entitled “Mini Wool Felted Landscapes”. Here she is with a few of her class samples.

The feature image at the top of this blog post was taken of Anna’s booth in the show. To visit her website click here.

Her work is incredible! Anna is a great teacher, a sister in Christ, and her workshop was one of the best I’ve taken in a long time (even though wool isn’t always my first choice of fiber). Here are a few more class samples. I think you can see why we were excited to get started.

She brought all the supplies, including an amazing selection of dyed wool roving.

In her initial demonstration we learned how to lay out the design,

Layer it all, get it wet and begin “massaging” it,

Roll the piece up to continue the felting process (and roll, and roll, and roll some more),

and once the background piece was wet felted, we learned how to needle felt details on top of it.

I found her instructions for adding trees particularly interesting.

Then it was time to jump in. I actually enjoyed the felting process: playing with fibers, hot water and soap; and discovering how the wool behaves and shrinks. Here’s my background pre and post wet felting:

Now it was time to needle felt some details onto my background. Years ago my friend Linda did a play day with a number of friends in which we tried needle felting. To see the project I made that day click here!

Having that little bit of experience was helpful, especially since needle felting is a pretty easy process. You simply lay fibers from wool roving in place and “punch” them into the background with a barbed needle (or a felting machine if you’re lucky enough to have a friend who owns one 😊). I added some more “hills and valleys”, but I couldn’t wait to finish it off with “That Tree” I posted about last week (I warned you this was coming)! The windblown tree series now contains one made in wool. I’m thinking this is very early Spring, and I’m pleased with the results for my first try at it.

All of the student quilts were successful ~ and quite interesting!

Kathy and I truly enjoyed it – thanks Anna!

The rest of the show was fantastic and I have to admit I did buy more wool to add to the stash. Can’t wait to jump in and explore wool felting again.

*********************

Fabric Opportunity For Those in Southeastern Wisconsin!

Patty recently sent me this email:

“I have some fabric that I’m trying to find a good home for. Maybe you know someone who would be interested.
Vintage Lace – A box of lace from my mom’s basement. Mostly lace tablecloths and curtains. I don’t think any are handmade. You can tell they were used since some have stains or holes. Great for some kind of project though.
Bag of zippers – Also from my mom’s basement. She never threw anything away. These were salvaged from clothes before the clothes were put to another use.
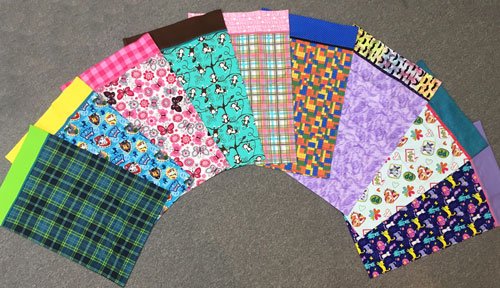
Wool scraps – A bag of washable wool leftovers from projects. Nothing very large. These were originally from wool clothing. They’ve all been washed and dried and didn’t felt.

Cotton quilting fabric scraps – Little leftover pieces. I’d heard you could fill pillowcases with them and donate them to animal shelters but I couldn’t find any in the area that would take them. Have a couple of bags.
I live in Germantown and drive to the Madison area a couple of times a month to babysit for my granddaughters. I’d be happy to drop them off anywhere along my route.
Thanks, Patty”

If you’re interested please contact Patty directly at:

Creating a Lecture for the Great Wisconsin Quilt Show

August 1, 2021 10 Comments

I’ve taught for the Great Wisconsin Quilt Show every year since it began (including when it was called the Madison Quilt Expo), and in 2019 both of my lectures sold out. I hate to admit it but that hadn’t happened for years – and it was quite exciting. I was accepted to present that same lecture again in 2020 – and we all know what happened to the Madison show last year.

For 2021 the Great Wisconsin Quilt Show has decided to go virtual once again. I was invited to send in a proposal to create a virtual lecture with PBS, to be offered during this year’s show. I really miss teaching in person, but in this world we need to be flexible. So I proposed my

lecture again – and it was accepted! Praise the LORD!

I constantly marvel at how many other fields of knowledge I need to grasp in order to simply do what I love – teach quilting. Thus it was time for me to jump into something new again.

PBS gave me the option of creating my own video or having them tape me virtually via Zoom. I went for the second option and was given a date to get together with their team and check the lighting, sound, etc.

I set everything up in my studio and all of the tech experts at that Zoom meeting felt it would work. Two days later I picked an appropriate quilt for the backdrop, got dressed up, and logged into the Zoom meeting… only to discover that my home internet connection wasn’t strong enough for a quality production (everyone was surprised that this didn’t show up previously). Since we live in the country and our internet options are few – it was a quandry. After a lengthy discussion, I realized that I needed to haul everything over to my parent’s condo and try again. A new Zoom was scheduled for 2 hours later, and when I called my mom and dad they responded with an enthusiastic “YES”!

I really transformed their living/dining room!

In “show business” I’m learning you have to make do to make it work, even including the stack of encyclopedias under my computer to get it to the perfect height. I borrowed the big black light, top left, from my daughter-in-law, and it needed to be placed directly in front of me, so here’s the set-up from my perspective:

My parents were pleased to play a part in it all, and during the filming they hid out in their respective dens/computer rooms so as not to make me nervous. That’s the funny part of this story! I have lectured in front of live crowds of over 300 quilters without a single butterfly, but that morning my stomach was doing flips. Once I logged in I confessed this to Tina and she told me they were filming in real time. This meant they would not be stopping and starting, and if I messed up I should just continue as I would for an in-person lecture. This was actually comforting to me… and the cameras started to roll.

They wanted me to begin with a few minutes of my introduction to make sure everything was working right. One minute into it, from down the hallway, I heard my dad sneeze 🤧 . I ignored it and continued for a minute or two longer. When I was done with the test, Tina said it all went well but they couldn’t figure out what the “short, unusual” sound was – they were pretty sure it wasn’t on their end. I confessed it was a sneeze and the team laughed as I went down the hall and closed the door.

After that the actual taping went very well and I was relieved that my nervousness disappeared from then on out. Tina and company said it was all good…

and you can learn all about “Quilt-As-You-Go” this September by signing up for my lecture at the virtual show.

All of the information about the Great Wisconsin Quilt Show, including how to sign up for the show and classes, can be found by clicking here! And the good news is that all of you who do not live in Wisconsin can “come to the show” too!

A Non-virtual Class

April 18, 2021 4 Comments

Last weekend was an exciting, busy time for me. Friday and Saturday were spent at a Christian Women’s retreat in Green Lake, WI. It wasn’t virtual! We actually got together and had a fantastic time of worship and fellowship. I arrived home Saturday evening spiritually refreshed… and exhausted. I fell into bed early so that I could get up Sunday morning and drive to the Wisconsin Museum of Quilts and Fiber Arts to teach my first “in person” class in a year and a half!!! What a blessing!

In 2019 I was asked to donate a class to be auctioned off at the museum’s fundraiser. Lisa purchased my private workshop and invited 3 of her friends (actually her mom, daughter and a friend) to join her for my Seminole Sampler class. Everything was of course postponed last year, but the museum is beginning to schedule classes and we were the first on the list! What a joy!

The quilt museum has a bright and organized space for classes, and the exhibit space is filled with fascinating works of fiber. It’s open with all the appropriate precautions in place. Cedarburg has many lovely shops and eateries also, and I highly recommend a road trip!

The ladies each completed many wonderful Seminole strips and they now have a “tool box” full of border patterns for future quilts.

Thanks to Lisa, Joy, Tiffany and Cary for a delightful day. And a big thank you to Marilynn too – for being there for the museum and to take care of our needs all day.

*****************

In this week’s post I’d also like to share a follow up to the “Labels in the Binding” post from a few weeks ago. Camille finished her sister Ruth’s quilt and sent me these photos:

Quilt front – quilted and bound
Quilt #2 on the back

and here’s the label!

This is a portion of Camille’s email to me that accompanied these photos:

“Hi Chris, Thank you for mentioning my sister Ruth’s quilt and words on the binding project on your recent blog! She was surprised and pleased to see your article… I will definitely do words on the binding again. This was truly a learning experience. I always enjoy your blog topics. Camille”

Thanks Camille, I’m so glad we were able to see the finished quilt. I’m sure Ruth LOVED it!

Merry Christmas 2019

December 22, 2019 13 Comments

As I try to keep focused on the true meaning of this beautiful season, and not get too “wrapped” up in the pre-holiday rush, I treasure the traditions that make this my favorite time of the year (it helps that I actually like winter weather too – I know – I’m weird ?)

This past week my friend Sharon and I “rang and sang” for the Salvation Army – our 17th year!

A fun way to share the joy of the season through Christmas Carols, and to help a worthwhile charity.

Next came our annual cookie baking time. My mom and I have been doing this all my life and we’ve never missed a year.

Over the years Mike, my dad, our kids and grandkids have all joined in. This year great grandpa Bruce and the kids were on the decorating team.

Sommer made each cookie a work of art!

Trey tired out early with the pre-baking decorating, but he liked the frosting part,

Grandchildren are a great blessing! As are parents! I am so grateful my mom and dad are still a big part of my life. Dad is 89 and mom is 85 and they’re going strong. Praise the Lord!

Last Thursday was a bittersweet day for me. After teaching quilting at WCTC for 23 years, they have discontinued the adult enrichment classes and it was my last day. My dear students threw a party with delicious food, thoughtful gifts, lots of hugs and a few tears. This is an amazing group of women and I thank God for each one of them (and the few who couldn’t attend too)!

What made it a bit easier was knowing that I will begin teaching at Sew Much More in Waukesha, beginning in February. Where God closes a door, He opens a window. Thanks Wendy!

The Christmas concert at church was lovely, the presents are wrapped, and the kids are excited. I have so much to be thankful for, and having all of you continue to follow my blog is one of my blessings!

In the words of Tiny Tim: “God bless us everyone!”

3 – D Fiber Art and Spinning Stars

September 29, 2019 2 Comments

The small challenge in our ThreadBenders group this year was called 3-D Boxes with Covers. Here are the rules:

“The box may be any shape and made from any material. It must be no smaller than a 6″ cube and no larger than a 15″ cube. It must be able to stand on a table on it’s own. At least one side has to open and the inside must be visible. Some portion must be quilted (three layers held together with stitching).”

The resulting pieces are a fascinating array of unique containers made by a very talented group of fiber artists. You can see them all at: https://threadbendersblog.wordpress.com.

Making my “box” was an adventure and I’d like to tell you a bit about it.

I had no idea what to do at first, so I decided to go through my UFO bins and find an unfinished project that was yelling for me to do something with it. What surfaced was 4 “Spin Star” blocks made with a wild Jane Sassamann fabric.

I needed to make one additional “Stack and Whack” style block, leaving the bottom of the box available for a piece of the original fabric – so everyone could see what the blocks started from.

The rules stated that the box needed to have a portion that opens to reveal the inside. I decided to have an entire corner of my box open. This presented some interesting logistic problems. Three sides of my cube could be finished as simple squares before putting the box together. That would be the fabric on the bottom of the box, pictured above, and these 2:

The remaining three sides needed to be made as 3/4s of a square, with the last 1/4 finished separately so it could swing open.

To make the sides stiff I used plastic mesh canvas, batting, and Pellon Decor Bond™. I layered each block with the batting and quilted it first. Then I put the rest of the layers together and beaded through everything to hold them all in place. Once each side was complete I sewed it all together by hand.

Three flaps open in a top corner to reveal the inside. I found the box was still a bit wobbly at this time, so I glued in some wooden stabilizers (painted black).

The flaps struck me as boring, so I decided to make them more interesting by adding a portion of one of my favorite Scripture verses to each: “Ask and you shall receive, Seek and you shall find, knock and it shall be opened onto you” Matthew 7:7. It fit well on the three “doors” of my box.

The closure was a bit tricky. I glued flat glass beads onto pins, stuck them into the edge of the flap, then I attached metal rings to clasp them.

The “doors” didn’t lay as smoothly as I had imagined, but it was my first attempt – and I can live with it ?.

I learned a lot along the way and love my new piece of art. Sommer and Trey keep wanting to fill it with toys, but that will have to wait until after our 3D boxes have been exhibited. If you know of a venue that would like to show all of our pieces, please let me know.

****************

Class update!

My Spin Star class has been one of my most popular workshops over the years. In it we make 4 blocks that can be placed in a table runner or wall hanging. And it’s amazing how different they can each be!

I’m scheduled to teach it again at Sew Much More in Waukesha on Friday, October 11th. Click here for all the details!

While you’re there, please check out my “Snow-people Topper” class too. I’ll be teaching it on November 22nd.

The batting in this project is polar fleece, and it peeks through to make the faces.

Quilting really makes me smile!

Stripped pinwheel Topper

January 21, 2018 10 Comments

Last semester I taught a pinwheel table topper class at WCTC.

It was the first time I’d taught this class and I’m always a bit anxious about timing, and the possibility of handout errors. It can be hard to gauge how much students can accomplish in the time allotted. I had them cut their fabric strips ahead of time, and there were no problems with the handout, but I really underestimated how long it would take to sew all the strips together. After lunch everyone still had more strip sewing to do and I was getting nervous.

As some of the students finally began to reach the triangle cutting stage it became obvious that the triangle cutting and sewing was actually fun and it was great to see how the fabrics were coming together. But half the class was still sewing away on their strips and I could sympathize with their frustration. Well… by the end of class Carmen had her top done.

A few more were close to done, but – praise the Lord – everyone had at least 1/4 of the topper cut out and sewn or pinned together. I felt sure they all knew what they needed to get them finished. On the way home I still felt uneasy about the class – I always want it to be a good experience for everyone.

That night I received an email from an address I didn’t recognize that began: “It’s all your fault!!!”. I gulped, but I knew it was not spam because the rest of the message (readable prior to opening) said “I came home and the one we made in class”. That’s all I could see, but I felt I had to read the rest of the email and when I opened it this was the entire statement:

“I came home and the one we made in  class was too large for our table so I shrunk it. Thanks for the technique. Deb”

She made a second, smaller one that same day! And here’s the picture  🙂 :

Wow! What an overachiever. I responded with how impressed I was, and congratulations. When I asked Deb how she did it and if I could include it in my blog she wrote: “Sure. I cut 3-1″ strips. I’m a goof ball who went home and made more. ? Turned out!!  Thanks again!”

This made my evening. I then wrote to the other students and asked them to send me pictures if/when they got their tops done. Here’s what I received back!

Alice

Mary

Jacque

Mary Ann

Jean

Jane

Barb

Great job ladies. I’m so impressed with the results! They’re all lovely and it’s fun to see them in so many different colorways.

Homemade Christmas Gifts – Pillow Cases

December 10, 2017 2 Comments

Many years ago a member of my quilt guild brought in a pattern for pillow cases and invited us to make them as Christmas gifts for members of the military. The response was great. Problem was, the pattern was very simple and all the seams were raw edged on the inside of the case. This bothered me because I knew they would not wear as well with those exposed seams. On the way home I began to noodle on this and, since I don’t own a serger, I had to come up with another option. I harkened back to my days of garment sewing and knew the case itself could be sewn with French Seams. But how to do the seam between the case and the cuff??? An idea came to me and I couldn’t wait to get home and try it. It worked, so I made a new handout to share with my guild and called it the Enclosed Seam Pillow Case.

I shared it at the next meeting and many of us had a great time making pillow cases. The following month one of our members came up to me with a handout she’d printed off the internet. The author was using the same technique I came up with, but was calling it the “hot dog roll” technique. This made me smile. Someone else had come up with the same idea, just a different name! Either way – it works!

In early December this year, one of my Open Lab students asked if I’d do a refresher demo on the cases, because she wanted to make Christmas gifts. It was about time I made my grandkids new ones too – so I did the demo and many students participated:

From left to right, top to bottom: Deb, Judy, Jean, Marilyn, Eileen, Rose, Mary Ann and Louise

Great job ladies!

Here are my instructions for making pillow cases. Many of you probably know how to make them, but you may enjoy some of the additional helpful hints I’m including 🙂 . I’m hoping this post might be just in time for you to make a few for Christmas gifts too.

Enclosed Seam Pillow Cases

Supplies: ¾ yard main fabric, ¼ yard cuff fabric and a 1 ½” accent strip (pressed in half lengthwise). Make sure the main and cuff fabrics are squared up to the right size and not just the way they were cut at the store. Things will just fit better this way.

• Place the main fabric right side up on your work surface, with a cut edge laid out horizontally in front of you.

• Lay the raw edges of the accent strip along this cut edge and pin about every 8″ (flower head pins).

• Lay one long cut edge of the cuff fabric, right sides together with the other raw edges and pin in between the previous pins (ball head pins – I have my reasons for pinning this way and I’ve used different pin heads so you can see the difference).

•  Flip this entire unit over so the cuff is against the work surface, and the wrong side of the main fabric is facing up.

• Roll up the main fabric until you see the cuff peeking through from underneath.

• Bring the remaining cut edge of the cuff fabric up to the other raw edges and re-pin each of the pins through all the layers. Be sure the main fabric doesn’t get caught in this pinning.

• Sew with a 3/8″ seam allowance. If you are using flannel, you can strengthen the seam with an added line of zig-zag stitching in the seam allowance. Be sure to backstitch at both ends to secure.

• Turn this tube right sides out. Press.

• Rotary cut the selvedges off both sides of the unit, making sure the cuts are straight and the angles remain at 90 degrees.

• To make the French Seams: Fold the case, wrong sides together, and pin along the two unfinished sides.

Sew with a ¼” seam allowance. Sewing through the cuff seam can be difficult. I can usually make it through on this seam, going slow and with a bit of tugging from behind (stay tuned for hints to sew it the second time).

Trim off all three corners (don’t forget the one at the end of the cuff).

I like to trim the seam allowance at the cuff seam to 1/8″ at this time.

• Turn the case wrong side out, push out the corners, press and pin.

• Sew these two edges one more time, this time using a 3/8″ seam allowance to enclose all the raw edges, and backstitching at each end. If you can’t sew through the thickness at the cuff seam, leave that area open, and once the rest of the seam is complete, go back and fill in the seam using a zipper foot to avoid the thickness.

• Turn right side out and press. DONE!

My tip for trimming the corner at the cuff (5 pictures back) gets rid of any loose threads peeking out of the seam at the finished cuff edge.

And here are the ones I’ve made for my family this year.

I hadn’t tried flannel before, and I like it!

I love to give homemade gifts to my loved ones! What homemade gifts are you working on? Did you make pillow cases this year? I’d love to see pictures! Please send them to me at .


“Quilting” at Sea

October 15, 2017 1 Comment

Quilters often ask me what makes a cruise a quilting cruise. Well it certainly isn’t that all 2500 people on the ship are making a quilt. But our group (which numbered 43 this trip) had fun with fabric, even if we didn’t do any stitching. The main focus of the trip is for people with a common interest to see wonderful sites, enjoy delicious food, socialize, shop and do some things with fabric too. We try to spend at least 1½ hours each day in class, working around shore excursions, meals, and on-board entertainment.

We began our most recent trip with a “prior to the cruise” project by inviting everyone to participate in a friendship exchange. We asked quilters to find a leaf shape of their choice either in their yard, in a book or on-line. I chose a maple leaf because this year is Canada’s Sesquicentennial,

but participants could pick any leaf they wanted. We had 32 quilters in the exchange, thus each of us chose an Autumn color batik and cut out 32 leaves with paper backed fusible web attached. Only 6 of us wanted them signed, so we asked everyone to do this to six of their leaves while on the ship and then we exchanged them. Here mine are laid out in a wreath.

Beautiful! I’m not sure if this is what they will become. The project option  I came up with prior to the trip was to scatter leaves across a windswept background with tulle shadows to add depth.

The next quilt related portion of our trip took place the first night on board. I shared a new lecture I call “Travel Memory Quilts”. I’m very excited about this new idea the Lord blessed me with. In essence, I distill each trip down to a favorite picture and create a single block to represent it using a variety of techniques. Each block is quilted and bound separately and they are attached to each other with a simple system of my own creation. In this way the “quilt” can be added to or rearranged with very little effort!

I’m working on other memory quilts using this technique and I’m pretty sure this is going to grow into something even more exciting. More information to follow!

During the trip Wendy gave two presentations. One on her method for making “batiked” scarves and another in which we each created a quilt label. Mine will go on my leaf quilt – whenever I get it done  😀 .

The main project on the trip was a fused block of the Bass Harbor Head Lighthouse.

I created the pattern from a picture and made up kits for the 33 travelers who chose to participate. I finished mine as a small wall quilt and added a few of the pins I collected while traveling. Here are pictures of class time aboard the Norwegian Dawn.

Mary and Jane were the first to finish theirs

And everyone got a block made. I can’t wait to see them all together at our post-trip gathering.

We combined traveling and quilting – it doesn’t get much better than that!

  • Page 1
  • Page 2
  • Go to Next Page »

Primary Sidebar

Archives

Recent Posts

  • Fascinating Tidbits
  • More AQS – 2026
  • Paducah 2026
  • Squirrel!
  • Bird Quilts

Recent Comments

  • Julie Vandermause on My Cookbook Quilt
  • Doris Rindfleisch on Fascinating Tidbits
  • Diane on Fascinating Tidbits
  • Jodi Grzeczka on Fascinating Tidbits
  • Linda Schuler on Fascinating Tidbits

Categories

Footer

My Guide

Whatever you do, do your work heartily, as for the Lord rather than for men.

—  Colossians 3:23

Contact Chris!

  • Home
  • About
  • Gallery
  • Classes
  • Trips
  • Books
  • Blog
  • Contact
  • Sign Up For My Blog

Copyright © 2026 · Chris Quilts · Website by Adunate · Privacy Policy