After meeting Claudia in the Finkel building in Paducah (I introduced you to her in last week’s post), I continued down the vendor aisle and met Kari. She owns a shop and custom quilting business in Anna, Ohio (click here to visit her site).

We started talking and as I looked around her shop I came upon a crazy green featherweight. I love featherweights and I love green. It was gorgeous!

I asked her if she had it custom painted and here’s her story (I’m paraphrasing):
Kari found this machine for sale on the internet and fell in love with the color, but she knew she really didn’t need another featherweight, so she passed it by. But she kept thinking about it, and thinking about it, and she even told a good friend about her obsession with the green machine. Her friend told her to just buy it because she obviously wanted it. Kari put it off a while longer and finally decided she had to have it, only to discover it had been sold. She was so disappointed ~ until her friend stopped by and handed it to her 😁. Now that’s a GOOD quilting friend!
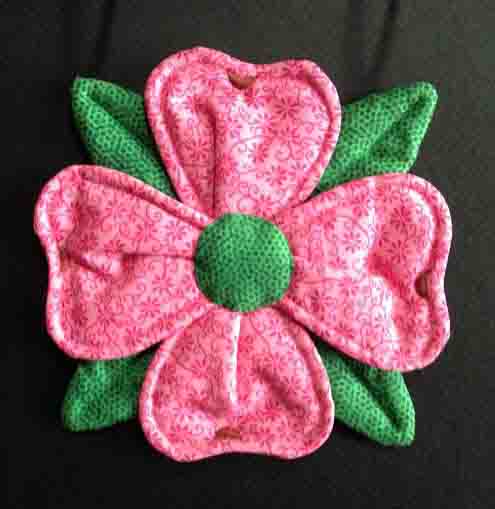
After hearing her story I asked her about the beautiful designs on her featherweight, and she told me her machine had tattoos. They are actually decorative decals that Kari carried in her booth ~ and I knew I had to have them! She had a number of different patterns, but the one she’d chosen was my favorite too. I bought a pack and couldn’t wait to tattoo my own machine. Kari reminded me to check out her van in the back parking lot when I left and it was worth hunting down.

As I began to unpack after our return from Quilt Week, I found the tattoos and dropped everything. They are removable but not reusable, and they went on easily. You may remember I decided to name my machines after my grandmothers, (Mike’s and mine) because my friend Cathy suggested it on our trip to the UP of Michigan. So Aletta was first:

She looked as beautiful as I’d hoped. Then Ardis was next:

Delightful! At this point I could tell that Irma was feeling left out, and she had the largest areas to fill. So it was her turn:

Doesn’t she look just like one of those designer machines? How can a person have this much fun for under $30. But wait, Selma went all the way to Paducah with me. I couldn’t leave her out.

At this point I thought I was done, and I had one small tattoo left. Hmm. I looked across the room and saw my HQ Sweet 16. She didn’t have a name or a designer touch. So I christened her Melvina after the only great-grandmother I’d known, and she got the last pretty piece. It may be small, but whenever I look up at the screen I smile. (I think she may be winking at me)

Now all my girls match!
I didn’t find the decorative decals (tattoos) on Kari’s site, but she recently posted on her Facebook page about them and I’m sure you could get them if you got on her page.
The maker of the tattoos is Urban Elementz and you can click here to find the tattoos on their site.
If you decide to tattoo your machine please send me a photo ~ and the story!