• Skip to main content
  • Skip to primary sidebar
  • Skip to footer

  • Home
  • About
  • Gallery
  • Classes
  • Trips
  • Books
  • Blog
  • Contact
  • Sign Up For My Blog

Blog

Buttons!

September 4, 2022 19 Comments

Quite a while ago Lorraine responded to my post about my thimble collection (click here for that post) with a collection of her own and I just realized I never shared it with you. This is what she sent to me:

“Your thimbles are beautiful and I loved the historical information you included in your post. Although I do not have a thimble collection I do have another sewing related collection: BUTTONS!  I have been collecting buttons for over 50 years. As you will notice in the pictures, if you have a button collection you must also begin collecting jars! These jars are scattered throughout our house, mostly in the guest room and my quilt studio. I have more jars but I thought this would give you an idea of the size of my collection. 

I have over 120,000 buttons. How do I know this?  I am a retired elementary teacher and in order to help my 2nd and 3rd grade students understand the concept of a BIG number I would haul several of these jars to school every year and have my math students count them. After it took 25 kids, five 45-minute periods to count about 100,000 buttons they understood that was a LOT of buttons. But imagine a million buttons! They would have to count 10 times as many jars! 

My love of buttons began when I was a kid and my mom let me play with her coffee can of buttons cut off of clothes before cutting up the fabric to make rag rugs or scrap quilts. When I learned to sew in high school I would rummage through the can and select buttons to sew onto my newly made clothes. After I left home to attend college I realized I had to start my own collection. That was back when you could buy a shoebox full of buttons for $1.00. Now you are lucky to buy a small baby food jar for under $4.00. Recently I only add to my collection when someone is downsizing or emptying the home of a loved one and they bring me the buttons they find stashed away in a closet somewhere.

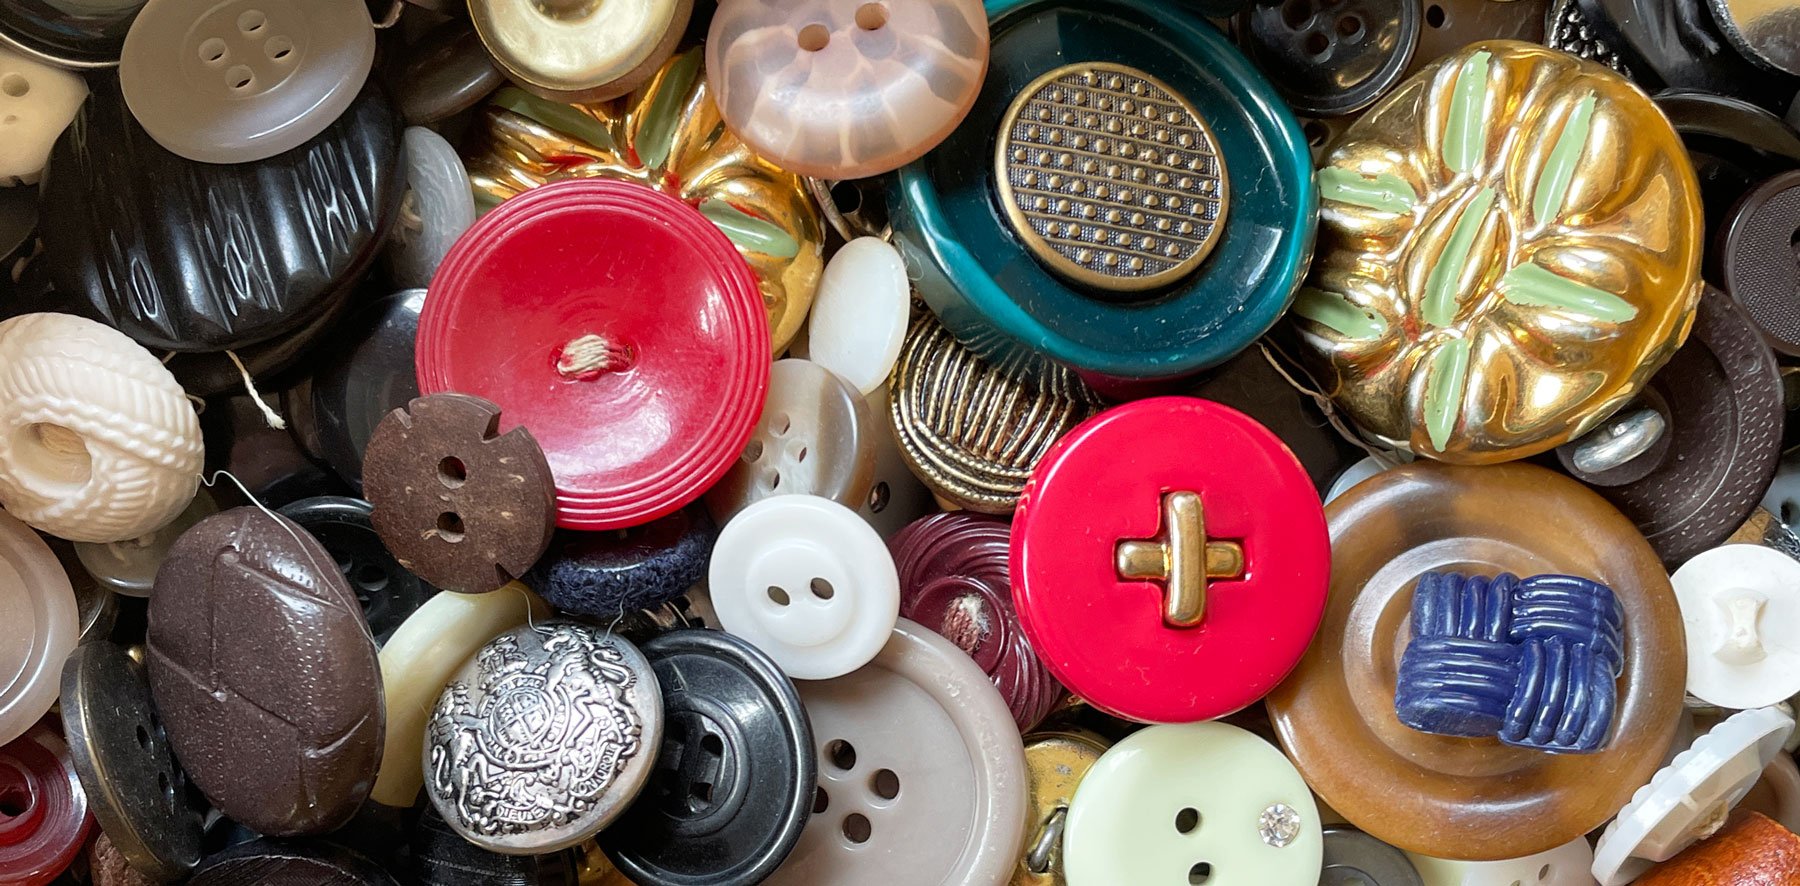
I enjoy going through my newly acquired buttons and have been amazed at the variety of materials used to produce them: horn, bone, walnut shells, coconut shells, rubber, fabric, seashells, glass, celluloid, cork, a variety of metals, vegetable ivory, wood, leather, china and, of course, plastic. They come in a variety of shapes, colors and sizes and some are truly tiny masterpieces.

PS. Sorry I rambled on but once I start talking about buttons (or quilting) I just can’t stop.“ 🤭

I love the PS ~ and I get it! The following photo is of Lorraine’s largest and smallest buttons 😁:

What a fascinating collection and story. I’m so grateful to Lorraine for sharing it!

I too have a button collection, although I never planned on collecting them. It seems whenever a family member or friend downsizes or passes away ~ I get her buttons.

The ones from my grandmother are in the lovely antique covered dish she kept them in.

Years ago my mom and I were going through the things my dad kept after retiring from his dental practice. One of the items was a wooden case with drawers for keeping sample teeth for dentures. I could sort my buttons by color and give each group it’s own drawer. This has worked well for me for years.

I also had a bunch of buttons still on their original cards/packaging and those have found their way into a small wooden box.

and here are a few of my favorites:

As I was going through my collection I thought about a quilt I made with buttons for my second book, Snuggle and Learn Quilts for Kids. It’s called Counting on Buttons and it gave me the opportunity to sew some really cute buttons onto a quilt (they’re attached well – with strong beading thread!)

When I designed this quilt I decided that my grandkids would learn cursive 😊.

I don’t have as many buttons as Loraine, but I do love them!

Do you have a special way to store your buttons? Do you have a favorite you’d like to share?

An Ultimate Ribbon ~ Vintage Travel Posters

August 28, 2022 7 Comments

Last week I posted about the upcoming quilt show in Madison (click here for that post). In a comment to that post Marilyn asked if any of the show will be online for non-local quilt enthusiasts. I wrote to Deanna at Nancy Zieman productions and here is her response:

“This year’s Great Wisconsin Quilt Show will primarily be an in-person event, held Sept. 8-10 at the Alliant Energy Center in Madison. We are planning to record several short videos from the event on Thursday and Saturday, featuring interviews with quilting celebrities, presenters, vendors, and quilt contest award-winners. These live videos will be shared on our Facebook page, YouTube and on the Great Wisconsin Quilt Show website.

In addition to these live updates, the PBS Wisconsin team will record four one-hour educational lectures at the event. We plan to share these presentations via social media in the months following the event.

We will also photograph all of the award-winning quilts in this year’s Quilt Contest exhibit and create an online photo gallery that will be available on the Great Wisconsin Quilt Show website in late Sept.

Additionally, The Great Wisconsin Quilt Show community convenes throughout the year on Facebook and Instagram, celebrating the work of our quilters and participating in online-exclusive challenges. Follow us on social media to be part of the year-round fun!“

Thanks for the information Deanna!

********************

And… speaking of quilt shows… I have some exciting news about a show I recently had a quilt exhibited in!

Over the years I’ve had quite a few quilts in the Ultimate Guild Challenge portion of the AQS Quilt Show when it was held in Nashville, Knoxville, and Grand Rapids ~ praise the Lord! That was when I had the privilege of participating in challenges with the Milwaukee Art Quilters (click here to visit their site). We won many awards together ~ it’s a very talented group!

Six years ago some friends and I started a new fiber art group called the ThreadBenders. We have a lot of members who joined as “newbie” art quilters, and it’s been fun to hold challenges and see what everyone comes up with. ThreadBenders began holding challenges from the start, and have had them accepted into the Ultilmate Guild Challenge competition at AQS each year. This year our “big” challenge ~ Vintage Travel Posters ~ won a red ribbon!!!

To see a close up of each of our Vintage Travel Posters, plus photos of many of our previous challenges, please go to our ThreadBender’s site by clicking here!

AQS posted photos of all the winning quilts in the Grand Rapids Show online. I’m always interested in all of the quilts in a quilt show, ribbon winners and non-ribbon winners alike, and I understand that AQS can’t post the entire show online. So I have to settle for a view of the winners ~ and this show did not disappoint! It was especially fun to see the other Ultimate Guild Challenge quilts. You can see the quilts too by clicking here.

To add icing to the cake, two of our members were at the show and were interviewed by Bonnie Browning.

You can watch that YouTube video with Connie and Cindy by clicking here! The tidbit of information I found particularly interesting in this video was that there were 16 groups of challenge quilts accepted into the competition – so second place is quite a coup. Good work ladies! I’m so grateful to be a part of this inspiring group and I can’t wait to see what we come up with next 😊.

A Card Stock Quilting Tool?

August 14, 2022 6 Comments

My friend Susan shared a great technique with us at a recent ThreadBenders meeting. It’s from a website named Sugaridoo 😁. I had never heard of it before, but I think Irene’s quilts are bright and fun – and she has some very creative ideas.

In the video on Irene’s site I learned a great new way to make a block with an odd triangle

using an intriguing tool made from cardstock (or any cardboard you have on hand)!

It can be used for any odd triangle you find in a pattern or make up in your own designs. Are you intrigued? Would you like to know how it works? Well, to see Irene’s excellent video demonstration click here!

It’s brilliant. I couldn’t wait to try it. And here are my results:

I made my tool, and cut out a square of fabric, and the triangle I wanted to add to it. I laid the triangle in place, right sides up, and aligned the 1/4″ line on the tool with the long edge of the triangle.

I put my fingers on the tool,

then folded back the triangle over the tool. Next I moved my fingers to the open areas on the tool,

so the seam allowance on the triangle was held in place, and the tool could be removed.

Now it was easy to flip the seam allowance out from under the fold I’d made.

and pin it in place.

l sewed the triangle on with a 1/4″ seam allowance.

Flipped, pressed,

And squared up the block.

What a clever idea. I wish I’d thought of it (although I’m not sure my brain could have come up with it 😊).

So many patterns include templates for this type of odd shaped block, but now we know an easier way. Thanks Irene! Please click here to visit her site and see all of her great ideas.

Studio Dreaming

August 7, 2022 9 Comments

We’re making progress on the new home and just a few days ago I woke up and thought “I’m not in someone else’s house wondering when I’ll get to go home… but this is home now”. It only took a month!

There’s still so much to do, but God is providing in wonderful ways. The man from church, who is a finish carpenter in the off hours from his full time job, is such a blessing. Every door in our home needs some sort of repair and he is very skilled at this type of work. Once the doors are done he’ll start on my studio. I’ve been dreaming about it and this past week I began arranging and rearranging all the boxes there in preparation for the closets and shelves. I drafted it all out with graph paper first, then I used tape to mark where I want what on the floor and walls. The closet wall will have a tall area (on the right) for hanging items and my box of long stuff. The rest will be shelves for my bins.

The adjacent wall will be my “corrals”. When I had the studio built on Ceasar Road I originally planned to have an area next to the counter for my movable cutting table. Before the counter went in I realized that the table would inevitably get piled with stuff ~ as all flat surfaces do ~ so I decided to have the counter raised and make a corral to cover the table (far left in this “old studio” photo).

It worked great, and I was very good about folding the table up and putting it away after each use so it never got buried under stuff. The doors to the right of the table in the photo above were another “corral” for my rolling carts of fabric ~ and I will need that space again, so here’s the taped off area in studio #2:

My magic box will be at the end of the closet wall (it’s leaning up behind the design walls on the left).

And I actually can sew now, because I moved many boxes into another room so I have room for me … and John to work!

It’s not pretty, but it is functional. I’m so very blessed.

The first thing I made in my new sewing area was a pillowcase for my new friend, Elliahna. Elliahna is a young woman who attends the teen ministry at my church, and she is a huge blessing to us! Here’s the story:

A few weeks ago I asked her what she was doing this summer. She said she had been working 3 jobs, but she was recently let go from one because she couldn’t give them full time hours. The job was for a painter and she was sad because she loved doing the cutting in portion of painting (something I dread). She said she enjoyed the challenge of painting straight lines, and along edges, without tape. Can you guess where this is leading? I told her we had a house full of rooms that needed painting and asked her if she would be interested in working for us. She was thrilled. Mike was a little concerned about her abilities, but we decided “it’s just paint” and asked Elli to show us what she could do in the powder room. The first day she painted 2 coats ~ in 2 bathrooms ~ and she did an amazing job! She has a wonderful work ethic, and a steady hand.

The next time she came back she painted the master bedroom.

At this point I showed her my studio full of boxes. She was immediately drawn to my fabric carts and asked if I could make her a pillowcase. She said she loved earthtones and chose an ombré fabric for the body of the case.

I can’t wait to give it to her when she comes on Tuesday to paint the den. Please stay tuned for more studio and painting updates.

Erma’s Family Tree

July 31, 2022 6 Comments

A friend from church contacted me and said she was making a family tree and was wondering if I knew of a place she could find fabric with large cardinals printed on it. Erma is one of those wonderful women who organize meals and events at church behind the scenes without wanting any attention placed on herself. She truly does it for the glory of God, and has many amazing gifts. As it turns out sewing and quilting are not among her many gifts 😊. Erma is not a quilter, she doesn’t even have a sewing machine. So she found a queen size sheet and gathered fabric and clothing from thrift stores to use in her family tree. She put most of the “appliqués” on with fabric glue (she didn’t even use the term appliqué), and hand stitched others. The fabrics were definitely not quilter’s cottons. When I first saw it there were only a few leaves on the tree which was perched upon her lovely grass. I was amazed at how much she’d accomplished by just making it up as she went along. I wish I’d taken a photo of it at that point, but I didn’t think to ~ so here’s a photo of it finished:

My first thought was “how is she going to layer and quilt this with her lack of sewing knowledge. The answer was easy ~ she wasn’t! She wanted to simply make it on the sheet and hang it at the family reunion. I decided I would help and encourage in any way I could. She wanted to add cardinals to represent the family members who had passed away. They needed to be 5” tall and I was pretty sure she’d have a hard time finding fabric with cardinals that size ~ so I offered to repliqué them for her. It was just such an honor to be a part of this sweet project.

She cut the leaves from a variety of green garments she found rummaging and wrote the names and birthdates of each family member on their leaf with fabric marker before glueing them in place.

It was completed in time for the reunion. Erma hung it in a prominent place and family members had their photograph taken with the tree (this is not Erma, but a member of the Weakley family).

I didn’t find out the tree had been completed until after the reunion, and that’s when I asked Erma if I could feature it in my blog. Here is her response:

“You are more than welcome to share. With such a large family and so many generations I just thought a visual picture would help the young ones see they are a part of a group. So many people in so many directions but related all because 2 people grew in love.”

Thanks Erma! Your family tree is delightful and I’m sure it was a blessing to many!

Letter Blocks

July 24, 2022 7 Comments

Moving has really cut into my quilting time! I have cleared a path and can actually turn on my sewing machine, but finding the supplies I need for anything is a challenge. Because I knew this would be the case I planned ahead for our current small project in ThreadBenders.

When we exhibit our work at shows and galleries we make signage to go with the exhibit. We always need to have a way to identify our group and Connie came up with a great idea! All of us wanted to participate, so each member chose one of the letters in ThreadBenders out of a bag. Since we have 3 more members than letters, we included 3 “quilters choice” blank blocks. The challenge? To make each letter as a 6″ finished quilt. Any technique, any fabric, any finish. I got “h”.

The week before I packed up my stash, I picked out a metallic/cotton fabric and decided my block would be a whole cloth. I quilted a cursive “h” and spiraled around it. The letter didn’t show up as well as I had hoped, so I colored it in with a green Shiva paintstick. I had just enough time and energy to sew the binding to the front of my small quilt, and decided hand stitching it to the back would have to wait. But how would I find it to finish it in the new house? I placed it under the presser foot on my machine before packing it up!!! (sometimes I amaze myself 🤣)

The night before our July meeting I was able to find a needle and thread ~ and my block was finished in time for the big reveal:

There were 3 members missing that night, so we’re missing the B, r and one quilter’s choice block. I think the ones we have so far are spectacular (the 2 quilters choice are in the upper right)!

There’s so much variety in color, font, technique… I love it all! We will be able to hang them horizontally, vertically, any way we want to fit the space with each exhibit. What a fun idea! Thanks Connie!

********************

Also:

Last week 2 dear quilters sent me photos of optical illusion quilts and I thought you’d like to see them too!

Judy said she was at an art gallery recently and saw this quilt. She’s purchased the pattern and can’t wait to make it:

Then Sandy sent me photos of 2 lovely quilts along with this note:

“Here are two optical illusion quilts I have made from the
same pattern.  The red one is a good sized wall hanging and the aqua one
is a miniaturized version.  There is no top or bottom.  They can be hung
lengthwise or widthwise and look great however.  They seem to change as
you walk past them.”

Fascinating! Thanks ladies!

*******************

And one more thing:

A few weeks ago I posted about using weights to control rulers. The link I included for the video didn’t go directly to the specific video on YouTube. Click here for the direct link!

Optical Illusion Quilt Patterns

July 17, 2022 9 Comments

When Wendy and I led a Sew We Go tour to Italy 10 years ago, it was interesting to note that every time we entered a cathedral the majority of the tourists were looking up and snapping photographs of the arches and windows, but every quilter was looking down and photographing the beautiful floors. Obviously ~ this was for their quilt design possibilities 😊. Here are a few I took in Sienna:

And this one was in the Vatican museum:

Recently AQS spotlighted patterns by Christopher Florence. His patterns have been very popular for quite a few years because he gives great instructions for piecing optical illusions. To order his patterns click here! One of them really grabbed me (this image is from the AQS site):

Do you see the similarity to the previous photo? Even the colors are similar.

When I began making my Modular Memory Quilts (which is the topic of my latest book – click here to order a copy of your own), I looked through all my pictures of the trip to Italy and chose the one of the floor in the Vatican to be my “Italy block”. I put the photo in photoshop and skewed it into a rectangle.

Then I made the block in fabric.

It was a real struggle to draft and stitch. I wish I’d had Christopher’s instructions. But it is a lovely memory of an amazing trip that hangs with my other travel memory blocks:

I wonder if Mr. Florence has ever been to Italy 😁. It would have been a real coincidence if that tile floor had been in the cathedral in Florence – LOL.

Have you made an optical illusion quilt? I’ve made a few and I’d like to share one of my favorites from many years ago. I call it Vanishing Point:

It was inspired by a class with Katie Pasquini Masopust and was made completely from fabrics in my stash. The high value contrast and pieced lines of perspective are what makes it work, and it is actually an 8 pointed quilt ~ the gray background is the wall behind the quilt.

If you’ve made an optical illusion quilt, I’d love to see a photo. Please email them to me at: .

Moving: a Quilter’s Trick

July 10, 2022 9 Comments

Sew, we’re in our new home ~ praise the Lord! We’re exhausted, sore, and a bit overwhelmed. Moving is a lot of work ~ especially if you haven’t done it for 18 years and you have TOO much stuff! But we’re here and we have the rest of our lives to make everything “perfect” (because I’m never moving again 😁!)

Our last move was in 2004 and a quilting friend gave me some advice then that was a huge blessing: “wrap the breakables with fabric instead of newspaper or bubble wrap”. It’s an easier way to move your stash, doesn’t waste packing material, and it’s so pretty each time I open another box and look inside.

Then I fold the fabric and stack it while putting the dishes away. We have boxes and stuff everywhere, with little open space at this time, so the fireplace mantel looked like a good spot to put the stacks until I was ready to move them down to the studio.

And speaking of my studio ~ the old one looks so empty and lonely (after a lot of packing):

I spent so many wonderful hours here, and was very blessed to have such a great space. I have a lovey new space in a walk-out room on the basement level of our new home, but it’s just a big room that the previous owners used as a family room.

It looks a bit different now with all my stuff!!! Note my “magic box”, ready to be mounted to the wall on the left. To read about it in a previous post click here.

I’m very excited ~ a dear man (and talented carpenter) from our church has agreed to make it the studio of my dreams! It may take a while, but as long as I can have my machine up and running during the process, I can be patient. I’m very spoiled and very blessed indeed.

Why, you may ask, did we put ourselves through this? Well, we’re not getting any younger, and the old house had 3 levels with the master bedroom on the top, the living room/kitchen in the middle, and the garage/laundry on the lower level. Mike and I are still fine with stairs, but we decided it would be wise to have a home where all the essentials are on one level. This home fits our needs ~ and it’s closer to town!

My studio will be the exception to the “everything on the main level” rule, and hopefully I’ll be ok with stairs for a long time (some things are worth the effort).

It’s a pretty house and flowers grow beautifully on the east facing front porch (which you can see if you look past the ladders ~ we’re still in the process of moving after all).

I know it will all come together with time, but right now I feel like I need a nap 🤣. Actually there’s no time for that. There are more dishes to unwrap and fabric to fold!

  • « Go to Previous Page
  • Page 1
  • Interim pages omitted …
  • Page 21
  • Page 22
  • Page 23
  • Page 24
  • Page 25
  • Interim pages omitted …
  • Page 77
  • Go to Next Page »

Primary Sidebar

Archives

Recent Posts

  • The Indiana Heritage Quilt Show ~ 2026
  • Bird’s Eye View
  • The Birds
  • Sew Much Creativity
  • A Last Minute Baby Quilt

Recent Comments

  • Kathy Wuhrmann on The Indiana Heritage Quilt Show ~ 2026
  • Doris Ast on The Indiana Heritage Quilt Show ~ 2026
  • judy raddatz on The Indiana Heritage Quilt Show ~ 2026
  • Jeanette Bussard on The Indiana Heritage Quilt Show ~ 2026
  • clkquilt on The Indiana Heritage Quilt Show ~ 2026

Categories

Footer

My Guide

Whatever you do, do your work heartily, as for the Lord rather than for men.

—  Colossians 3:23

Contact Chris!

  • Home
  • About
  • Gallery
  • Classes
  • Trips
  • Books
  • Blog
  • Contact
  • Sign Up For My Blog

Copyright © 2026 · Chris Quilts · Website by Adunate · Privacy Policy