• Skip to main content
  • Skip to primary sidebar
  • Skip to footer

  • Home
  • About
  • Gallery
  • Classes
  • Trips
  • Books
  • Blog
  • Contact
  • Sign Up For My Blog

Blog

Optical Illusion Quilt Patterns

July 17, 2022 9 Comments

When Wendy and I led a Sew We Go tour to Italy 10 years ago, it was interesting to note that every time we entered a cathedral the majority of the tourists were looking up and snapping photographs of the arches and windows, but every quilter was looking down and photographing the beautiful floors. Obviously ~ this was for their quilt design possibilities 😊. Here are a few I took in Sienna:

And this one was in the Vatican museum:

Recently AQS spotlighted patterns by Christopher Florence. His patterns have been very popular for quite a few years because he gives great instructions for piecing optical illusions. To order his patterns click here! One of them really grabbed me (this image is from the AQS site):
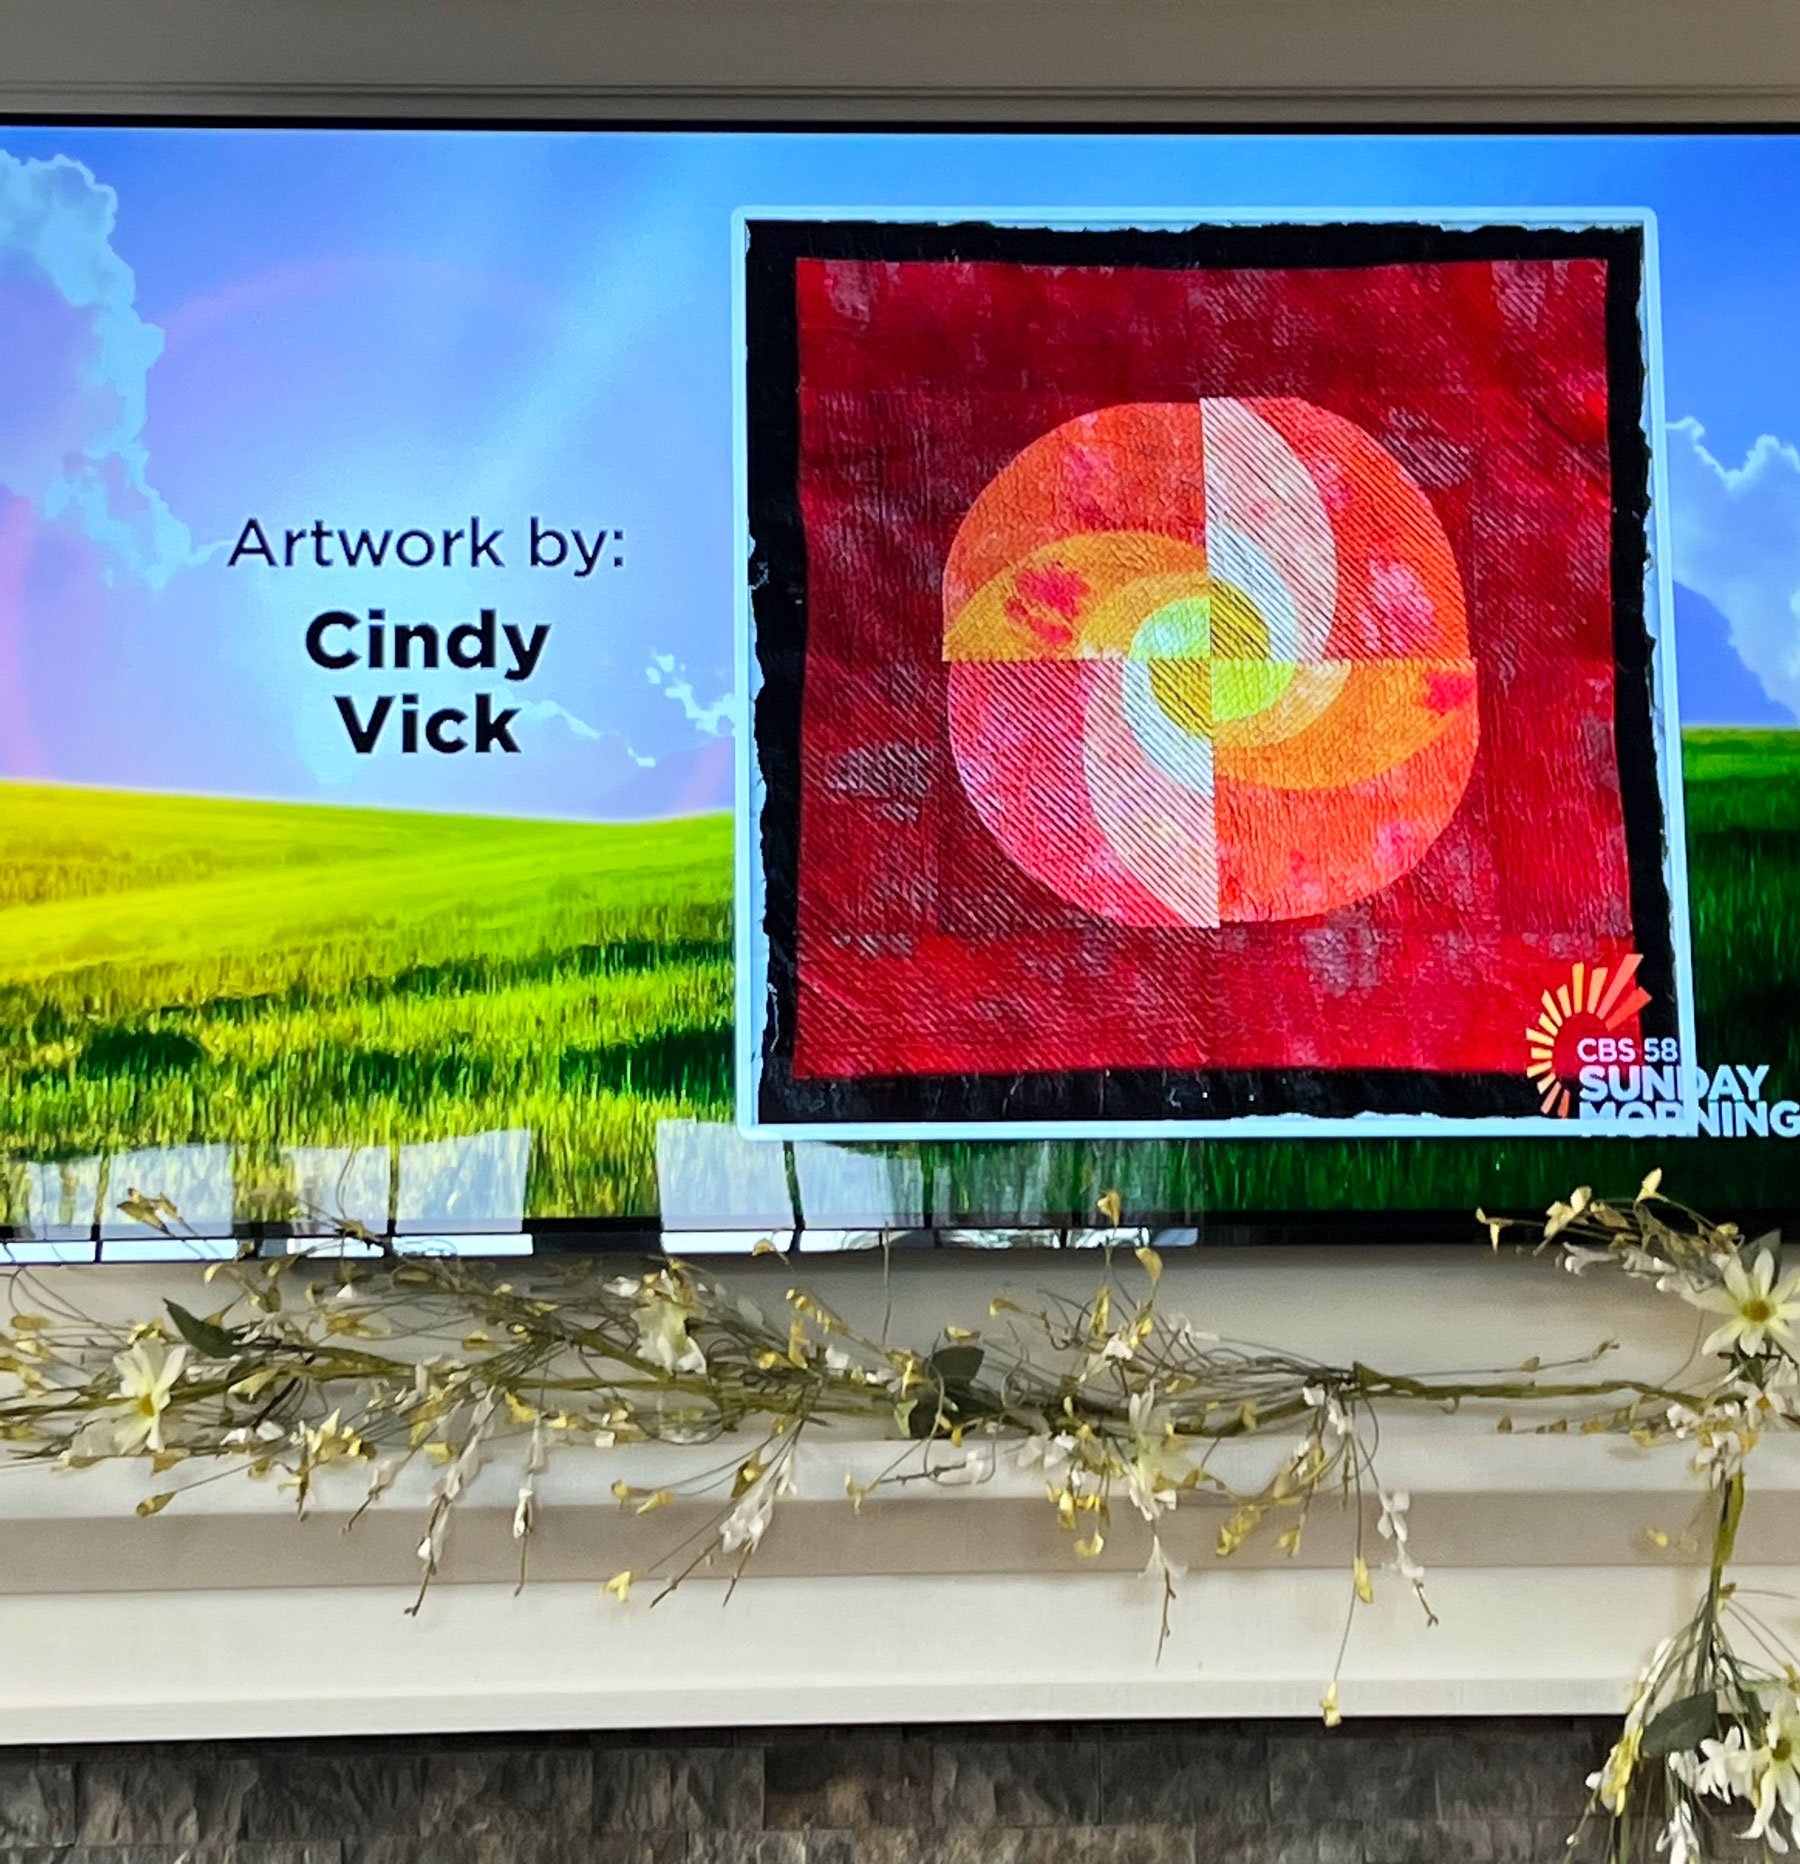
Do you see the similarity to the previous photo? Even the colors are similar.

When I began making my Modular Memory Quilts (which is the topic of my latest book – click here to order a copy of your own), I looked through all my pictures of the trip to Italy and chose the one of the floor in the Vatican to be my “Italy block”. I put the photo in photoshop and skewed it into a rectangle.

Then I made the block in fabric.

It was a real struggle to draft and stitch. I wish I’d had Christopher’s instructions. But it is a lovely memory of an amazing trip that hangs with my other travel memory blocks:

I wonder if Mr. Florence has ever been to Italy 😁. It would have been a real coincidence if that tile floor had been in the cathedral in Florence – LOL.

Have you made an optical illusion quilt? I’ve made a few and I’d like to share one of my favorites from many years ago. I call it Vanishing Point:

It was inspired by a class with Katie Pasquini Masopust and was made completely from fabrics in my stash. The high value contrast and pieced lines of perspective are what makes it work, and it is actually an 8 pointed quilt ~ the gray background is the wall behind the quilt.

If you’ve made an optical illusion quilt, I’d love to see a photo. Please email them to me at: .

Moving: a Quilter’s Trick

July 10, 2022 9 Comments

Sew, we’re in our new home ~ praise the Lord! We’re exhausted, sore, and a bit overwhelmed. Moving is a lot of work ~ especially if you haven’t done it for 18 years and you have TOO much stuff! But we’re here and we have the rest of our lives to make everything “perfect” (because I’m never moving again 😁!)

Our last move was in 2004 and a quilting friend gave me some advice then that was a huge blessing: “wrap the breakables with fabric instead of newspaper or bubble wrap”. It’s an easier way to move your stash, doesn’t waste packing material, and it’s so pretty each time I open another box and look inside.

Then I fold the fabric and stack it while putting the dishes away. We have boxes and stuff everywhere, with little open space at this time, so the fireplace mantel looked like a good spot to put the stacks until I was ready to move them down to the studio.

And speaking of my studio ~ the old one looks so empty and lonely (after a lot of packing):

I spent so many wonderful hours here, and was very blessed to have such a great space. I have a lovey new space in a walk-out room on the basement level of our new home, but it’s just a big room that the previous owners used as a family room.

It looks a bit different now with all my stuff!!! Note my “magic box”, ready to be mounted to the wall on the left. To read about it in a previous post click here.

I’m very excited ~ a dear man (and talented carpenter) from our church has agreed to make it the studio of my dreams! It may take a while, but as long as I can have my machine up and running during the process, I can be patient. I’m very spoiled and very blessed indeed.

Why, you may ask, did we put ourselves through this? Well, we’re not getting any younger, and the old house had 3 levels with the master bedroom on the top, the living room/kitchen in the middle, and the garage/laundry on the lower level. Mike and I are still fine with stairs, but we decided it would be wise to have a home where all the essentials are on one level. This home fits our needs ~ and it’s closer to town!

My studio will be the exception to the “everything on the main level” rule, and hopefully I’ll be ok with stairs for a long time (some things are worth the effort).

It’s a pretty house and flowers grow beautifully on the east facing front porch (which you can see if you look past the ladders ~ we’re still in the process of moving after all).

I know it will all come together with time, but right now I feel like I need a nap 🤣. Actually there’s no time for that. There are more dishes to unwrap and fabric to fold!

Dragonfly Fun

July 3, 2022 7 Comments

Our recent challenge in the Fiberistas was a “do it yourself round robin”. During the pandemic we’d been meeting via Zoom, so it really wasn’t feasible to do a typical round robin border challenge. We decided we could do one if we came up with different border themes each month, BUT we’d work only on our own original blocks. Some of these quilts are now complete and I hope you’ll enjoy reading about my quilt’s border progress.

The Fiberistas have done a lot of hands-on meetings in the past, in which we experiment with different types of fabric manipulation and dying. This is a piece I made in the meeting in which we played with Shiva Paint Sticks™.

I was thinking that I might like to make this challenge quilt a small one. Perhaps the dragonfly in the upper right corner would be a fun center for a wall quilt (who knows what will become of the other motifs on this piece?) So I cut it out on-point and was ready to add my first border ~ which had to include half square triangles. While looking through some of my other meeting technique samples I found a piece of fabric I’d dyed using Sharpie™ markers and alcohol. These 1″ finished triangle blocks bordered the dragonfly nicely.

The next border theme was rather specific, we were to add a double border with 4 patch corners. I decided it would be nice to bring a bit of the green from the dragonfly into the mix.

The next theme was curves. This little guy needed to be put upright again, so adding corners with curves was necessary. I found a lovely black print in my stash that coordinated well without taking away from the center, and black arcs along the edges made a great frame (I added them with my replique techniqué).

Our final group theme was rectangles. My small quilt had gotten quite busy and I didn’t want the next border to take away from the previous work. So I repeated the black print as a wide border with black cornerstones. By stenciling a few more dragonflies in the corner squares

he didn’t seem so lonely. I then couched light green embroidery thread in the seams.

“Quilters Choice” was the last theme. An option was to add one last border of my choice, but I liked it just the way it was, so it was time to quilt it and square it up. Friends of mine were recently talking about a video they watched by Jordan Fabrics where they learned to make rotary cutting easier by putting an actual weight on the ruler to keep it from slipping. I tried it while squaring up this quilt and loved it!

I had Olivia use the weight while she was cutting her fabric too (Olivia was the teenager who’s quilting adventure was shared in a previous post – click here for that post) and it gave her great ruler control. You can find the video and so much more at Jordan Fabric’s website: https://jordanfabrics.com/

Here’s my finished dragonfly quilt, Dragonfly Fun, along with challenge quilts from other Fiberistas!

Lori Schloesser
Kay Christian

Isn’t it interesting how different they are, even though the borders had consistent themes?

A Rainee Quilt

June 26, 2022 7 Comments

While visiting Loose Threads Quilt Shop in Milton, WI I found a pattern that intrigued me. I don’t buy patterns very often, because I like to come up with my own designs, but this pattern really tickled me.

My granddaughter Rainee was approaching her 10th birthday and it was time to make her a new quilt. But what colors and fabrics? A great question to ponder in a great quilt shop. I found a purple fabric with colorful bugs that set the palette,

and my search for purple and lime fabrics began. Isn’t it fun to have a project to buy for?!? Then, while in Paducah, I found a lovely light purple solid for the background and spent my stitching time there making her blocks.

When I got home I laid them out and stitched them together.

I chose a bright green, super soft Minky™ for the back and I didn’t use any batting. Then I took it up to our June quilt retreat ~ a great time with great friends ~

and echo quilted around the shapes. When I got home I decided to “write” my label on Rainee’s quilt with my Sweet 16 in the open spaces.

Did you notice I’m actually using my “scissors holster”? The tweezers are in the perfect spot for removing the Press and Seal™ from the stitches (for a post about using Press and Seal™ to mark your quilts click here).

I had planned to turn the Minky from the back to the front as a binding, like I did on the quilt I made her when she was 3 (for my tutorial on that technique click here).

This time I made a pillowcase to match and got it in the mail to our sweet Rainee in time for her birthday!

I’ll send a photo of her with her quilt when I get one (it’s so hard to have grandchildren so far away 😔).

**************

Also…

Karen emailed me about a charitable project and I’d like to pass it along.

It’s a plea for quilts and blankets to be made for the homeless in our nation that will culminate with an event at the Capitol in December. For all the information go to: https://memorialblanket.org/

********************

And one more thing~ We’re moving!!!

Mike and I decided it was time to downsize a bit and we’ve left our wonderful home in the woods. We’re excited about our new home which is closer to Watertown.

As I’m cleaning out and packing up I’ve come to the conclusion that I really do have too much stuff. What a blessing it will be to get through it all and settle in. Our new address is N9081 River Road, Watertown, WI 53094.

My New Favorite Notion

June 19, 2022 5 Comments

While visiting a vendor booth in Paducah, Cathy and I came upon a small plastic device that I just had to try!

My favorite scissors to have near the machine while sewing is the Fiskar’s Spring Action Scissors… and there’s a story that goes with this photo:

A few years ago I was having some back pain and my doctor recommended I get an exercise ball. He said that sitting on it while doing tasks would help to strengthen the muscles in my back, and using it while sewing would be good. Well, one afternoon while stitching on the ball I bumped the scissors off the edge of the table, they fell point down right into the ball and ~ I ended up on the floor 🤣!

Since then I’ve attempted to use other scissors that can be attached to the machine with zinger cords, etc., and I just miss my Fiskars. This brings me to the Sew Very Smooth booth at the AQS show in Paducah this year. They had a basket full of colorful blocks

and this ad:

I was intrigued. You can click here for a direct link to their site. To watch a YouTube video about the scissors holsters click here. They are made on a 3D printer and after watching the video I had a friend explain to me what a 3D printer does. If you’re in the dark about them click here to watch a 75 second video.

When I returned home from the show I taped my new holsters in a number of spots on my machines (making sure they wouldn’t be in the way when I put the travel case on), to determine where I’d like them the most, and then actually adhered them in the best spots for me. Here’s one on my Bernina,

and my HQ Sweet 16:

I squeeze them just a bit when inserting them in the holder and the spring holds them securely until I reach for them again. I love, love, love them! Cathy does too 😊!

**********************

After last week’s post I had a great time receiving a number of emails about kids and quilts. Lucy sent me photos of her grandkids learning to sew with grandma’s scraps:

Asher is intently stitching a quilt for his panda Bob.

Granddaughter Clara chose fabrics and stitched

a beach scene with sand, water, flowers and sunshine (very creative)!

The next email I received was from Sandra: “Earlier this spring, my granddaughter Sloane asked if I could make her a Barbie blanket, as I had for her American Girl doll. This grandma had an inspiration and decided Sloane, now eight years old, should know her way around a sewing machine. She was game, and did very well. Here is her photo”:

Sloane looks so intent – I’m sure she’ll make a great quilter.

And here’s a quilt made by Shellie’s granddaughter Vivian. She said the center print is a drawing Vivian did in school, printed on fabric as part of school fundraiser.  She picked out the colors and arranged them by herself.

Don’t you just love seeing young people stitching!?!

Rosemary Makes a Quilt

June 12, 2022 4 Comments

My niece Kaitlin is an amazing artist. Her business is entitled: Lyon Road Art – the Intersection of Art and Anatomy. In college she took a combination of fine art and med school courses and earned a graduate degree in Biomedical Visualization. Her story is fascinating and you can read all about it by clicking here! She has found her niche in the art world and specializes in abstract anatomical watercolor and oil paintings. Her work has graced the covers of Radiology today magazine and hangs in hospitals, art galleries, medical clinics and homes throughout the world. Here are just a few of her wonderful pieces:

Blue, Brown and Green Irises
Cross Section of a Heart
Cochlear Implant

I am in awe of her creativity, talent, and compassion for people. I remember her telling me a story years ago of a woman suffering with Crohn’s Disease who wanted to see something beautiful in the midst of her struggles. Kaitlin did a lovely watercolor painting of a colon for her.

I hope you’ll visit her site and explore her fascinating art at: https://www.lyonroadart.com/.

Well, this week’s post is actually about Kaitlin’s daughter Rosemary. Earlier this year Kaitlin called to ask if I’d teach Rosie to quilt. I was thrilled! I’ve been blessed with the opportunity to teach other children in my family how to sew and they’ve each made a doll quilt as their first project. Sommer was the most recent quilter and in the post I wrote about her stitching adventure, I included links to all of the other kid’s stories. If you’d like to read about them please click here!

So Kaitlin and family arrived on a Sunday afternoon. The “men” hung out upstairs and Rosie began by choosing 12 fabric squares from my box of charm squares. I love that she chose florals.

She began to sew them together, but she’s a bit taller than the other kids were when they learned to quilt

and my featherweight on the bench didn’t quite work with her long legs. “Sew” she moved to my Bernina and did great! She learned good hand position and speed control.

The quilt was finished in less than 2 hours. Rosemary and Jill doll were both happy 😃 .

What a joy it is to share a passion with kids ~ especially kids you love ❤️.

Do you have any photographs of children you’ve recently taught to quilt that you’d like to share? Please email them to me at: .

******************

And – I want to share a photograph of a unique thimble Karen sent me after last week’s “Digitabulist” post.

Here’s her comment:

“Just read your latest blog and I too have a small thimble collection. I love your little house with all the cubbieholes to display them!!

The photo attached is a thimble made of bone with an etched rose that I found at a scrimshaw shop in Ephraim, Door County that has since gone out of business.  The owner also had a shop on Mackinac Island that also closed, unfortunately.  I used to love going there every time we traveled to Door County.” 

Lovely. Thanks Karen!

Are You a Digitabulist?

June 5, 2022 11 Comments

I bought a book at the barn sale in Jefferson, WI last year. I blogged about this amazing barn sale at the time and you can click here to read that post. The Spangler sisters have opened the barn again with new merchandise arriving regularly. The address and other information is available in the link above, and the weekends they are open this years are: June 9-12 and 30-July 3, July 14-17 and 28-31; August 11-14 and 25-28; September 9-11, 23-25 and 30-October 2. Time: 9:00 to 5:00 (Sundays only to 4).

So here’s the book!

It’s a fun read. Recently I turned to a page with this heading: “Why Do Thimbles Have Holes?”

There I learned that thimble collectors are called digitabulists. I never knew I was a digitabulist. When I told Mike he said he thought “thimble-inas” would be a better name 🤣!

The dimples in the thimbles are called “knurling”, and the reason for the knurling is to prevent slipping of the needle. I think most of us already knew the purpose, but the name for the dimples was new to me too. This got me to thinking about my small thimble collection which I’ve featured at the top of this post.

Here’s a little bit of history: The oldest thimbles are thought to be over 3000 years old and made from bone. First century thimbles from Roman times were made from bronze, and early European ones were made from bronze or clay. In more recent times they’re not just for finger protection when stitching. Some are decorated to attract collectors, as well as tourists who want to remember a trip to an exciting destination. Along the band of some thimbles, logos, company names and even political parties or candidates have been featured. In fact I read that political thimbles came on the scene way back in 1920.

Thimbles are a fun collectible because they are pretty, often inexpensive, and they don’t take up much space. All of this research got me to look a bit more closely at my small collection. I have a number of simple utilitarian thimbles. A few are plastic, including this one from Paducah, KY:

My parents have traveled the world and occasionally they’d bring me back thimbles. This one is from a trip to London:

Others include a wooden one from their trip to Israel, and a wonderfully detailed beer stein from Germany:

I don’t remember where this cloisonne bird is from, but I think it’s delightful (note the knurling in the heart on the top of his head).

I brought this decorative silk one back from my trip to the Great International Quilt Festival in Tokyo two years ago. It’s pretty, handmade, but not very useful.

I’m sure this next thimble was handed down through the family, but I don’t know who it came from. The interesting part is whoever owned it must have been quite a busy stitcher because the thimble has holes worn through it:

When I know the history of a thimble I usually write it on a piece of paper and tuck it inside. This is the note I placed in this lovely brass thimble I found in my mother-in-law’s jewelry box after she passed. She admitted to never sewing anything, so I don’t know who it belonged to.

Then I have a whole collection of thimbles I actually use!

I can now joyfully admit I am a digitabulist. How about you? Any stories or photographs you’d like to share? If so, please email them to me at: .

*****************

And… I just have to share one closing photo. I am so blessed to have a husband with a great sense of humor. He also is known for never making a quick decision ~ about anything! Last year I bought him a t-shirt that states “Wait a minute ~ let me overthink this” (he still is thinking about whether or not he’ll ever wear it 🤣). So, the other day he did a little demonstration of something his crazy brain came up with and I laughed so hard it hurt. I asked him to allow me to photograph it and he agreed (which I thought was amazing in itself). Here it is. I hope it makes you smile!

Have a wonderful week!

Quilting Up North

May 29, 2022 3 Comments

From the image above some of you Wisconsinites might be able to guess where I was teaching a few weeks ago. Yup! I had a wonderful adventure speaking to a guild in Hayward, WI ~ and staying with my friend Cathy in her log home on the Chippewa Flowage.

She, and her husband Tom, are extremely talented at building and renovating ~ and staying with them was a delight (especially eating REALLY fresh fish for breakfast – thanks Tom!)

The members of the Hayward guild were welcoming, fun and inspiring. My Gone to the Dark Side lecture seemed to go over quite well, and afterwards a group of us went out for lunch. There was a lot of laughter and sharing, and I sat across from a very talented fiber artist, Carol Fure, who invited Cathy and me to see her work in a gallery in a nearby town. So the next day we drove to Webster to visit the Northwest Passage Gallery.

I was surprised to find such a lovely gallery in a small town in northern Wisconsin (silly me). The building is an innovative, multi-use community center and gallery, developed in partnership with the Burnett Area Arts Group, and showcases local artists’ work in many different mediums. The building also features the InaNewLight Gallery. The work of these young people was amazing.

Carol was the fiber artist on display and her unique pieces really intrigued us.

We all went to lunch again and she was so willing to share many of her creative techniques. I think it’s time for Cathy and me to have a play day and experiment with some of the interesting products Carol recommended.

We also visited the River’s Edge Antique and Quilt Loft in Hayward.

It was fun to chat with Gail and hear about her adventures as a quilt shop owner.

There came a moment on this trip where I mentioned to Cathy that I’d lived in Wisconsin all my life, but I’d never seen Lake Superior. She told me it was about an hour’s drive away and there was a great quilt shop in Duluth, MN (just north of the city of Superior, WI along the edge of the lake), that she’d been wanting to visit… Road Trip!

It was a beautiful drive and Hannah Johnson’s quilt shop was well worth the trip!

After spending a bit of time and money there we made it to the shore of Lake Superior:

Stunning! But I must admit, after growing up in Milwaukee ~ it looks a lot like Lake Michigan 😁. Thank you Cathy for making this trip fun and memorable.

I feel so blessed to be able to travel with good friends, to wonderful destinations, and to meet friendly quilters who I consider to be my new friends. God is so good!

And …

Since I started this post with a photo of a log home, I’d like to share a bit of information about another log home – mine. After 18 years of living in our beautiful house in the woods,

we’ve decided it’s time to move closer in to Watertown. So we have a house to sell! If you or someone you know is looking for 20 acres of nature, a log home, and a pond, halfway between Milwaukee and Madison ~ with a gorgeous quilting studio, click here!

And, in case you’re wondering, I have room in our new home to build my new studio. Did I already mention that I’m very, very blessed !?!

  • « Go to Previous Page
  • Page 1
  • Interim pages omitted …
  • Page 23
  • Page 24
  • Page 25
  • Page 26
  • Page 27
  • Interim pages omitted …
  • Page 79
  • Go to Next Page »

Primary Sidebar

Archives

Recent Posts

  • Squirrel Quilts and More
  • Vintage Appliquéd Arrows and More
  • Fascinating Tidbits
  • More AQS – 2026
  • Paducah 2026

Recent Comments

  • TRINDA SUITOR on Chatelaines
  • Jodi Grzeczka on Vintage Appliquéd Arrows and More
  • Sandra R on Vintage Appliquéd Arrows and More
  • Brenda Wathier on Vintage Appliquéd Arrows and More
  • Clarann Zatko on Vintage Appliquéd Arrows and More

Categories

Footer

My Guide

Whatever you do, do your work heartily, as for the Lord rather than for men.

—  Colossians 3:23

Contact Chris!

  • Home
  • About
  • Gallery
  • Classes
  • Trips
  • Books
  • Blog
  • Contact
  • Sign Up For My Blog

Copyright © 2026 · Chris Quilts · Website by Adunate · Privacy Policy