• Skip to main content
  • Skip to primary sidebar
  • Skip to footer

  • Home
  • About
  • Gallery
  • Classes
  • Trips
  • Books
  • Blog
  • Contact
  • Sign Up For My Blog

Blog

Appliqué Animals

July 2, 2017 74 Comments

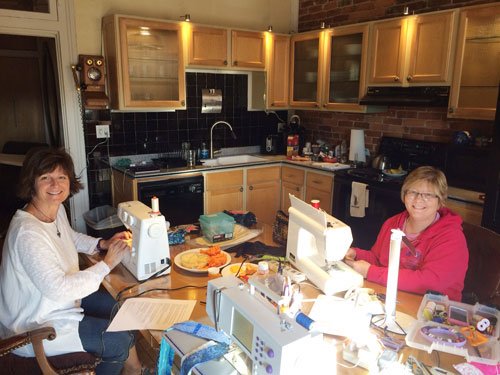
Back in June I took a “raw-edge” appliqué workshop with Barbara Beasley. It was organized by my dear friend, Laura, and we had a great time (thanks Laura!)

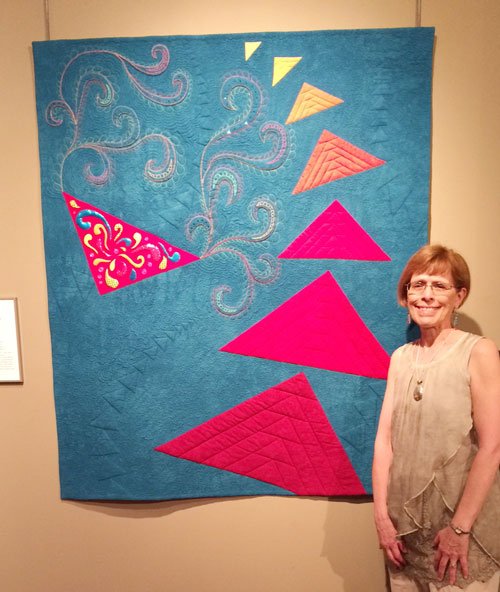
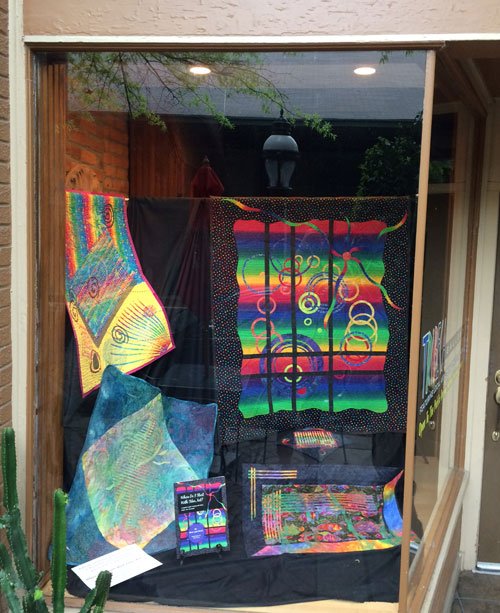
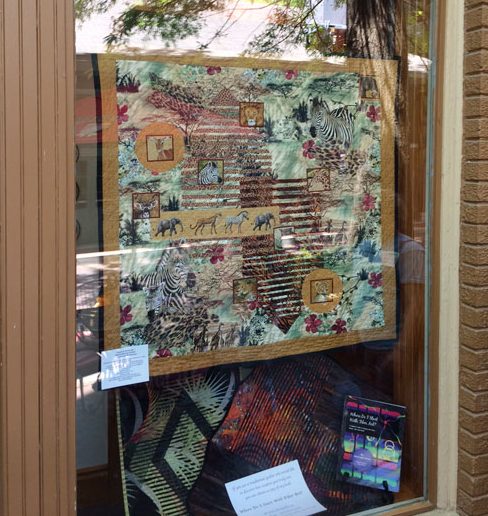
Barbara is an amazing talent!

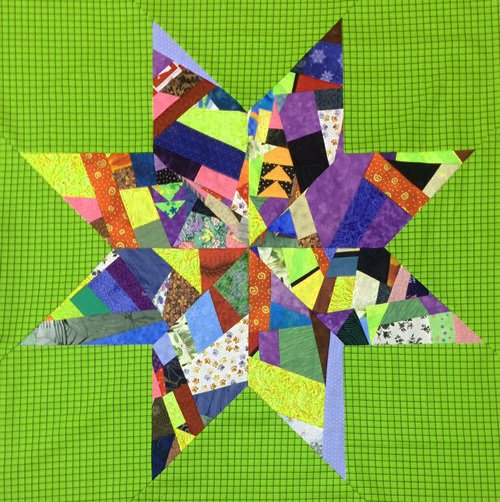
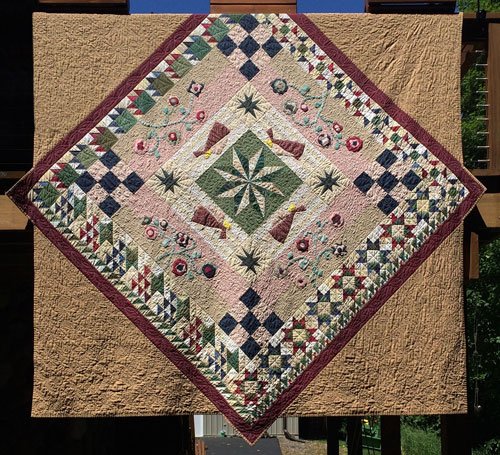
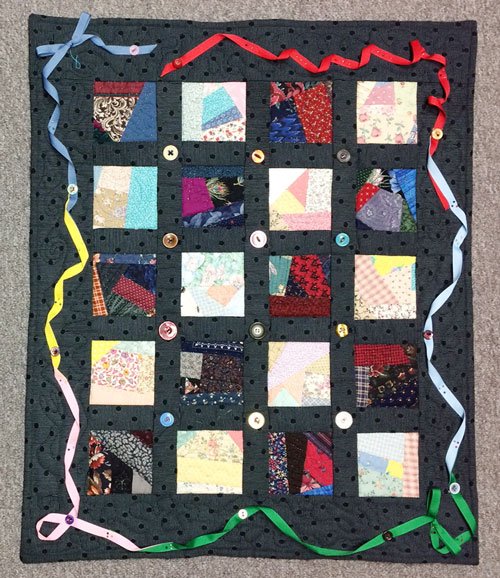
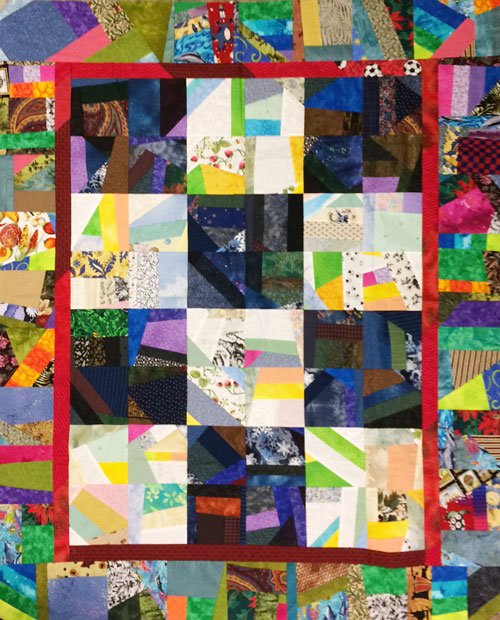
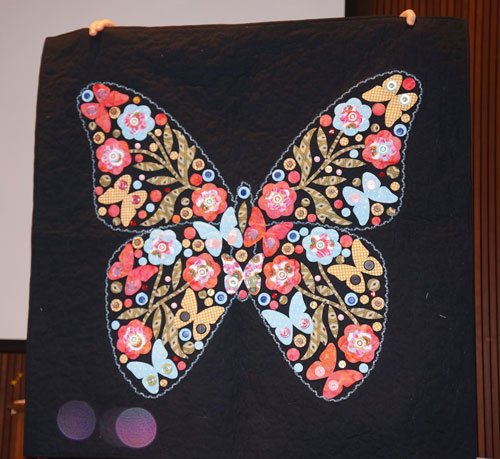
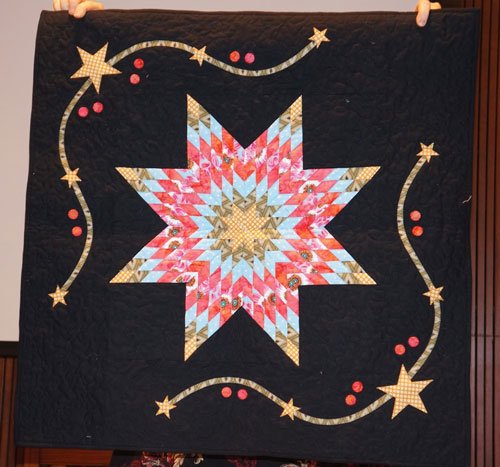
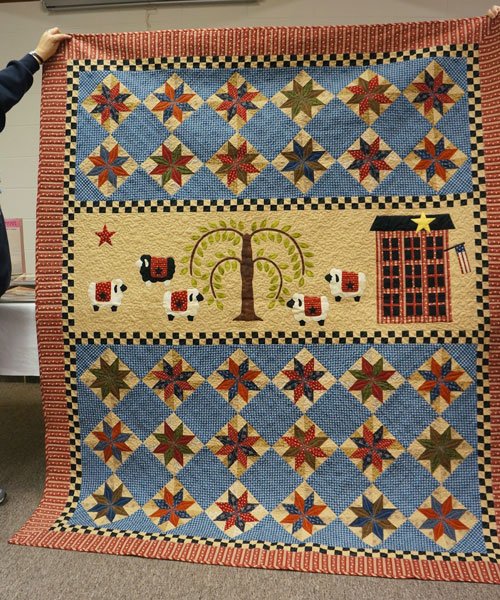
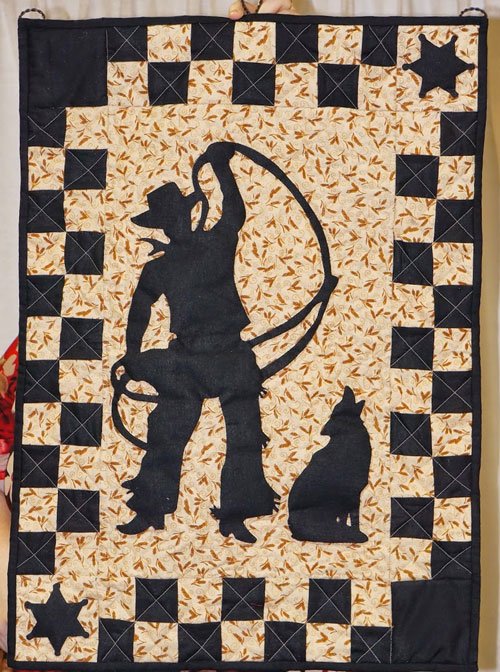
And if you’re not familiar with her name, you will probably recognize her by her work. Here are just two of the many pieces she has posted on her website:  http://www.barbarayatesbeasley.com/. Many of them are for sale!

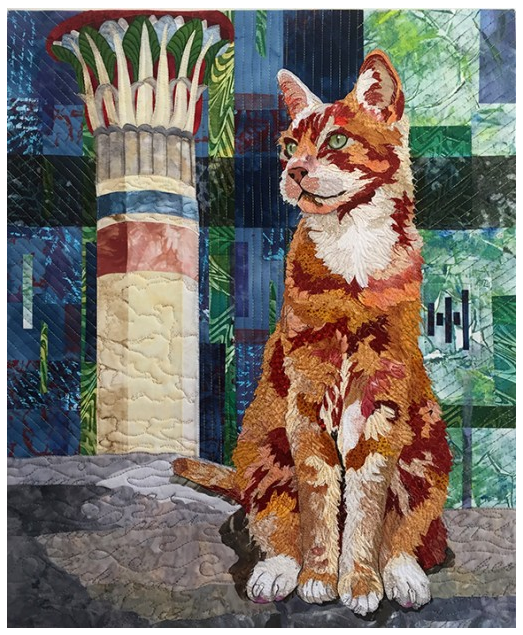
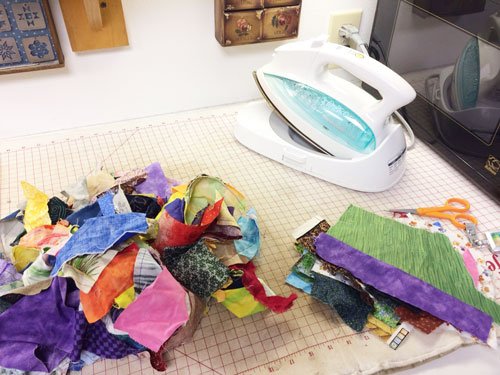
Each student was to bring a picture of either flora or fauna, a photo enlargement, fusible web and a lot of fabric. Her technique was very interesting and the results in just our 6 hour workshop were wonderful!

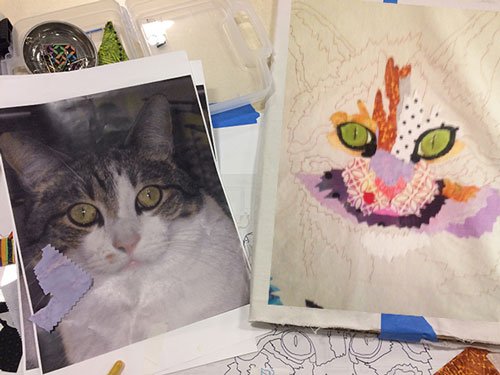
My friend Evelyn (of Quilt Sissies fame 🙂 ), chose to do a special cat. She was amazed at the amount of blue in the picture – for a cat that wasn’t blue.

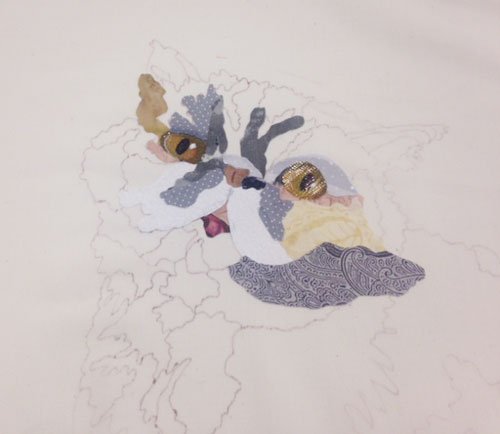
Laura decided to portray her cat in unexpected fabrics.

I can’t wait to see some of these finished!

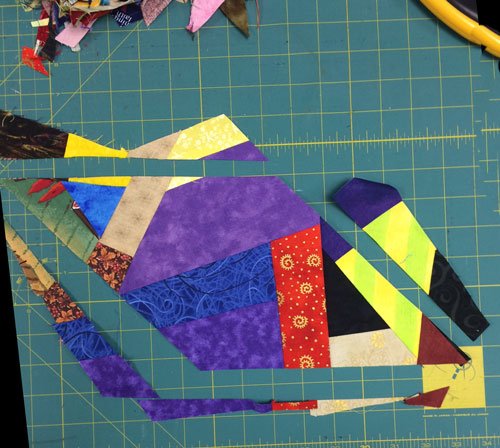
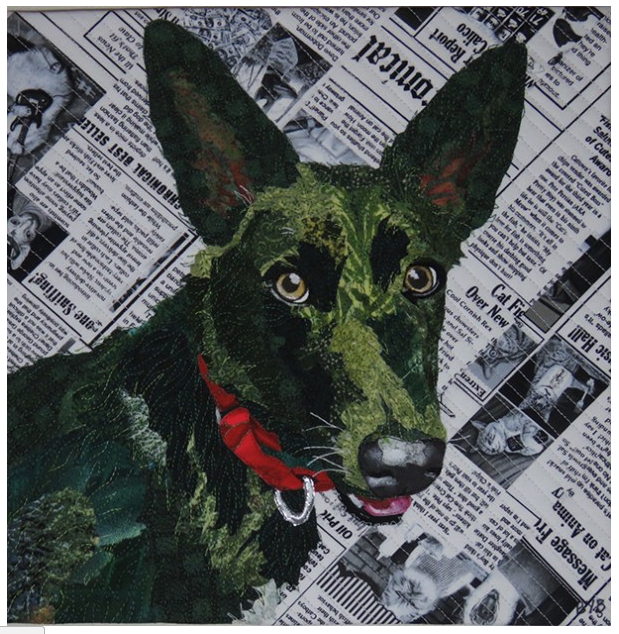
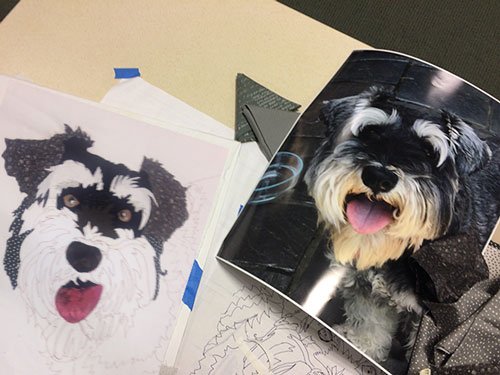
I chose to do our grand-dog, Moseley. He’s a very pretty Australian Shepherd (photo courtesy of my daughter-in-law Betsy).

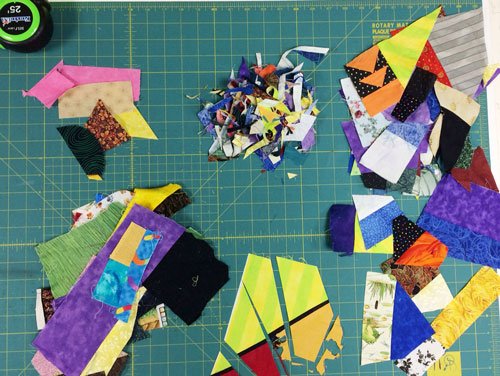
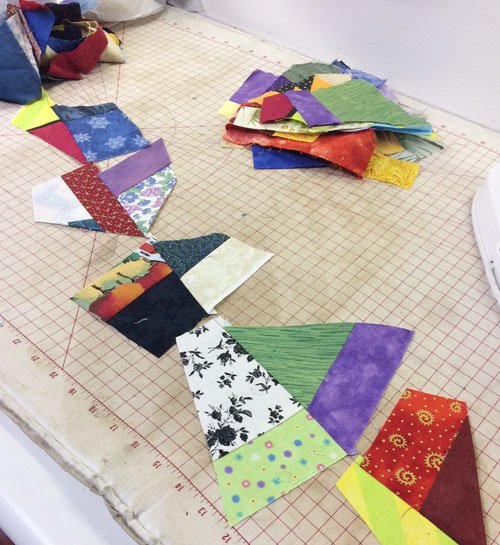
Here’s my “Moseley in progress”
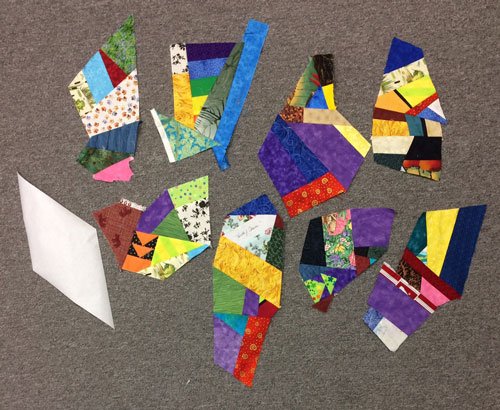
and here’s Moseley!

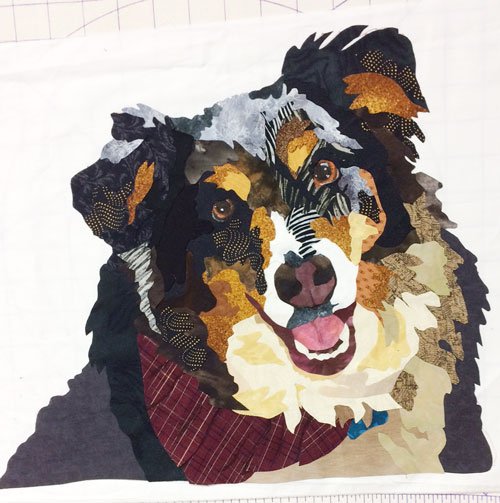
Next I need to find the right background. I cut him out and placed him on a number of different fabrics and I’d like your opinion on which to use, or suggestions for other options.

background 1
background 2
background 3
background 4

Please comment in the box at the bottom of this post to vote for your favorite, or offer other suggestions. If you don’t see a comment box, click on “Appliqué Animals” at the top of this post and scroll back down to the bottom.

I love taking classes and learning new techniques. This was a fun class and a great technique. Here’s a challenge to anyone in that class. If you finish your piece and send me a picture, I’ll be thrilled to post it on my blog!

Schnibblework 3 – Diamond Cutting

June 18, 2017 1 Comment

To make the bright schnibblework star in my previous posts, I used a technique I developed a few years ago for cutting accurate diamonds. I’m quite sure I didn’t post about it then – so I think it’s about time to do so.

Whenever you’re making diamonds that will be sewn together, it’s important the angles and sides are all consistent. While teaching a lone star class I found the “squaring up” of the diamond step to be the most confusing part for students. My answer to this problem? Freezer paper!

To begin, cut a strip of freezer paper the finished width you’d like your diamond to be (mine was 6 1/2″)

Next, cut one end of the strip off at the angle you need by lining the bottom edge of the strip on the correct degree line on the ruler (diamonds can be 45° or 60° – mine is 45°). Please ignore the lines on the cutting mat and look only at the ruler and the freezer paper. I apologize for the optical illusion created by the paper not laying square on the mat.

Then cut the diamond from the strip at your finished measurement once again.

Viola!

Now it’s time to go to the fabric. Piece your schnibblework chunks until they are at least 1/4″ bigger than the freezer paper diamond all the way around.

Iron the freezer paper diamond to the right side of the schnibblework, making sure there is at least 1/4″ of fabric beyond the paper all the way around. Trim 1/4″ from the edge of the freezer paper with a rotary cutter and ruler.

Then peel the paper away.

This sample was cut at 7″ and will finish at 6 1/2″. The reason I cut the paper the finished size and add the seam allowance when cutting the fabric is accuracy. It is difficult to cut along the edge of freezer paper without shaving some of the paper away, and each little shave changes the diamond for the next cut.

Once I had eight of my schnibblework diamonds cut, it was time to pick a background fabric and sew them all together. None of my “safe” fabrics looked good with all those scraps, so I pulled out my wild fabrics and found the perfect option 😀 .

Remember this requires “Y” seams to set in the background squares and triangles.

I’m not sure what should happen next to this star, but I’m looking forward to some scrappy bordering fun! Stay tuned!

Schnibblework 2 – Scrap Piecing

June 11, 2017 2 Comments

As I was taking the winter quilt off the bed this week (and just in time – the 90° days have arrived), I realized it also contained an early piece of Schnibblework. This quilt was made in a “round robin” at a guild I belonged to back in the 90’s – and it ended up King size!

As you probably know, each participant in a round robin puts a block in a bag and then exchanges it within a group, each participant adding a border. This one had 5 exchanges before I got my center block back (and then I turned the large square I received “on-point” to make it fit my King bed). That center block was made from small white, cream and green schnibbles I gleaned from the fish bowl.

This was truly a successful “round robin” quilt and it has been slept under for decades! All the quilts I’ve shared so far show that scraps can be sorted by value or color – or not sorted at all.

So how did I make the Schnibblework for the star in last week’s post?

By sewing together loads of odd shaped leftover scraps without sorting!

It got me to thinking about a book I purchased a few years ago by Victoria Findlay Wolfe called “15 Minutes of Play”. In it she sews her scraps together to make what she calls “made fabric”, and then uses it in her quilts. Great minds think alike. The twist was – I decided to create what I call schnibblework because I can’t stand to waste fabric or leave it lying around in piles. Victoria considers doing this quilting play. What a great attitude!

I adjusted my attitude to match hers and really did have fun making this very bright and colorful star


Last week I alluded to how I did this. This week I’ll explain a bit more. First I grab 2 pieces from my fishbowl,

and sew them together.

chaining more and more until I get bored. Then I go to the ironing surface and press.

After pressing I cut the pieces apart (the pile on the left is pre-pressing and the one on the right is post-pressing).

Next I go to the cutting mat and straighten off all uneven edges (note the pile at center top – these are the shavings I allow myself to throw away!)

I then pick up 2 of these new pieces and repeat the process.

Continuing until the pieces are “big enough” for the shape I want to cut them into (note that some of the chunks below are not quite big enough to be cut into diamonds with the freezer paper template on the left).

Here’s my method “If it’s too small, sew something on. If it’s too big, cut something off”. It’s pretty basic, but it works!

In next week’s post I’ll share my unique technique for cutting diamonds! I think you’ll find it a great one to have in your “quilting toolbox”!

Schnibblework Scrap Quilts

June 4, 2017 12 Comments

This past weekend I taught for a lovely group of quilters in Morris, IL. During our lunch break in the Saturday workshop we got into an interesting discussion about scrap quilts. My definition of a scrap quilt is a quilt made from leftover scraps. Some may argue this point, but buying a lot of different fabrics to make a scrap quilt, when I have so many leftover pieces from previous projects, just seems silly for me.

A few years after I began quilting (we’re talking early 90’s), the frugal part of me was really struggling with all of the leftover strip pieces, chunks and partial blocks that had begun to take over my sewing room. What do you do with them when a project is completed? The pieces aren’t big enough to put back into the stash, but they’re too large to just throw away. I chose to put the small schnibbles into a fish bowl, and I threw the larger ones into a covered bin, but these containers were filling up – and driving me crazy! Something had to be done!

I decided to sort the small schnibbles into lights and darks, and simply piece them together rather willy-nilly. When the chunks were large enough I cut them into 4″ squares and ended up making a small quilt I called Confetti (26″ x 30″).

As you can see, I had a great time embellishing it with machine stitching, buttons, beads and ribbon.  I decided it was fun, but it didn’t make much of a dent in my schnibble pile. So I pulled out the bigger pieces, sorted by value once again, and sewed them into larger squares in my scrappy fashion.

This time I sorted the schnibbles into lights, darks and mediums – sewing them into 6″ squares. Four light squares were then sewn together to make a 12″ light block and the same was done with the darks. I had enough red strips in my scraps to border a checkerboard set of the light and dark blocks, and the outer border was made up of all the 6″ medium squares. This did make a dent in my schnibble pile – as well as a lovely lap quilt 🙂 .

I did more of this type of piecing here and there over the years, but never seemed to be able to keep up with my leftovers. A few years ago my friend Lori, who makes amazing scrap quilts, accepted a large plastic bag full of my scraps. Whew! But since then I’ve filled up my fishbowl once again – and it’s flowed into another glass jar – YIKES!

It was time to do something again. Three weeks ago I started sewing anything to everything (no value sorting this time) and, after about an hour of “chunk making”, I laid the chunks on the floor and attempted to take a picture. Trey plays nicely with toys in the sewing room while I’m quilting, just like Sommer did before she headed off to kindergarten. But when I laid them out he couldn’t resist the temptation to jump into the picture.

and then he gave them the snuggle test. I think he approves.

When the chunks got big enough I cut them into large diamonds. I then sewed the diamonds into a large star and found a fun fabric to use for the background:


Can you say bright? It really makes me smile and I’m thinking it needs to grow into something bigger and even more fun. Stay tuned.

For step-by-steps on how I piece the schnibbles, please join me for next week’s post. The following week I’ll cover “diamond cutting”. There’s a good possibility this could grow into a multi, multi-week series of posts – I have a lot of scraps!

Continuations

May 28, 2017 3 Comments

I had some fascinating responses to last week’s post about quilts in other countries. There was one in particular I want to share – with pictures, but before I do, I have a few items to share related to the post I did about quilting and Star Wars a few weeks ago (click here to read that post).

In that post I shared pictures of my grandson Willy with the “Flillow” I made him from Star Wars fleece. I made his sister a “flillow” too and, since I didn’t want her to feel left out, I asked Hanna to take a selfie with hers. She wears glasses and so do all the animals on the fleece in her flillow.

Hanna’s favorite craft is to make purses, etc. from decorative duct tape. Here’s the wallet she made for me. I use it to keep my coupons organized in my purse. It even has a Velcro™ closure. The theme of the tape seemed appropriate to include here  🙂 .

and then  I had the opportunity to take a picture of a Star Wars top Karen had just finished for her grandson in my Open Lab this week.

All of the large blocks are Star Wars fabrics, and she chose a setting pattern with colorful pinwheels – what fun! Great job Karen!

******************************

Now for the “quilting in other countries” response:

Iris is a very talented quilter whom I’ve met a number of times. I knew she wasn’t a native Wisconsinite by her accent, but was pleasantly surprised when she sent me this message (it’s a bit long, but worth the read):

“I was born in Estonia and moved here after I met my wonderful husband many, many moons ago.

Here is the answer about quilts and Estonia: Estonia is rich in fabric and fiber arts (as I am sure you experienced on your trip) and every woman knows how to knit a sock or stitch a flower. We grew up with – I assume you would describe as – frontier spirit meaning you didn’t go to store to buy stuff but made them yourself. My grandma use to sew all her own dresses, blankets and knit for the whole village. However, there is not an exact tradition of quilting in Estonia (as known in America … as in get fabric – cut apart – sew back together), BUT it is coming and I have even seen some quilt (as we understand in America) shows (online pictures) and know people who practice it.

The reason for not having quilting (as known here in American) tradition is simple. Fabric was expensive and it was used only for things that you really needed like clothing etc. and quilts (except whole cloth or wool quilt) with all the cutting was considered wasteful especially when you needed to dress your whole family on a small salary and required sewing machine that many could not afford. You can however find wool quilts with stitches that didn’t require sewing machine necessarily and used wool, which was way cheaper or even free due to everyone (at least who lived outside city) raising sheep. Hence you have amazing stitched blankets with most beautiful motifs and flowers. They do look like quilts (some are even assembled from blocks) but are not traditional quilts (as we think of quilts here). they are stitched and in some ways they are way more beautiful than quilts here can ever be as with thread/yarn you can paint way more deeper colors for the perfect flowers you are stitching (does  that make sense?) vs fabric appliqué where you are stuck with whatever fabric you.

In Estonia we didn’t learn to knit or sew as in America where you have weird short version of text telling you what to do and only if you speak the “knitting/crochet/etc language” can you translate what it means. In Estonia we learned by charts for everything with universal understanding of what it means (see pic called knitting).

Your answer was wonderful as there is no such thing as traditional quilt blocks (like log cabin) in Estonian quilting (though they are coming, learnt and taught now) and I am not surprised that your friend didn’t find any shops as most shops are dedicated to fiber arts rather than quilting. Hence the only way to really do “Estonian way quilts” would be to copy/interpret flower patterns to fabric appliqué or knitting patterns into pieced quilts (as you suggested). I included a link to a book that is full of such patterns called MUHU TIKAND and can be ordered online (see below) or if you have access to such older magazines like EESTI NAINE (Estonian woman) which always carried such patterns.

https://www.apollo.ee/e-raamat-muhu-tikand.html

A really good resource is also Debroah Kendall (hope I spelled her name right) who has lot of tapestry quilts where one can get ideas for how to quilt flowers. See below link to one of her books.

http://www.connectingthreads.com/books/Euphoria_Tapestry_Quilts__D46402.html

anyway, hope it helps or gives ideas.”

I have seen some of Iris’ original designs so, when I wrote to thank her for her response and ask permission to share her email, I also asked if I could share pictures of her quilts. She was very gracious – and I know you’ll be impressed. The first one is based on Estonian embroidered designs.

This one has a similar feel and coloration.

I love the way she mixes piecing and appliqué.

And her delightful sense of humor is evident in these last two entitled the Cowboy

and Will You Marry Me:

Thank you Iris, for adding great insight into my post and for sharing your wonderful work!


Do They Make Quilts There?

May 21, 2017 2 Comments

This past Friday I received an email from a woman named Krystyna. Here’s what she wrote:

“Hello, I am half Estonian, born in the US and would love to connect to my heritage through quilting. I have been trying to locate a traditional Estonian quilt and hopefully one that isn’t embroidered. My searching brought me to your lovely site and I am wondering if you would have any idea of where I might find a pattern(s) for said traditional quilt(s). Or does this even exist, I can’t imagine that it wouldn’t.”

Krystyna’s request got me to thinking about all of the times Wendy and I have been preparing for one of our Sew We Go adventures, hopeful to find quilt shops and groups in the places we’ll visit, only to find – nothing.

When Wendy and I visited Tallinn, Estonia while cruising the Baltic Sea, we discovered a city with friendly people and a huge love for history, culture and art. It was our favorite port of call on that trip. We even were able to take classes from artists in the art district of the city. To read about it please go to: https://chrisquilts.net/?s=Tallinn. We found “fiber art”, but no quilts.

In composing an answer to Krystyna, I got to thinking about a woman I know who is a missionary in Tallinn. I decided to write to her and her response was not only interesting, but she had suggestions that are applicable to quilters trying to find quilting patterns from other countries. I hope you will enjoy Denise’s response:

“Hi Chris, Wow, what an interesting question. 
As hard as it is to believe, there is no tradition of quilting here. That’s the short answer!

I have been to all the handicraft and agricultural fairs here in
Estonia over the past 12 years and have never even seen a quilt, nor
have I met or heard of any women who do it, and I have looked, believe
me. Perhaps it’s a result of being shut off from the rest of Europe
for centuries, but they use textiles they can grow: flax (linen) and
wool, neither which lend themselves to quilting. The indigenous
handicrafts being actively preserved today are Estonian embroidery,
weaving, felting, knitting and crocheting, and a kind of tatting.
Neighbors just bought angora rabbits to start harvesting their own fur
to make their winter hats, scarves and mittens. She will be hard
pressed trying to connect to Estonian culture through something that
doesn’t exist. That’s the long answer.

My recommendation is to adapt the colors and patterns of Estonian
woven tapestries and interpret them into a quilt, to combine her
passion for quilting with Estonian cultural references. It is very
Estonian to create something “new” and be inventive.

Each region in Estonia is represented in dress by it’s own distinct
colorful pattern of woven woolens, which could be easily adapted to a
quilt pattern of her own design. Most are three to five colors, and in
stripes. A couple of regions vary from that norm, but in all regions
the women make skirts and belts out of “their” local textile, which
they wear on national holidays and for special events. You know
exactly where a group of women is from by the stripe of their skirt.
The following link shows some of those patterns (the first word in
each pattern is the name of the county). There are more, I just can’t
find a repository that shows them all on one page:

https://isetehtu.ee/category/triibukangas-ja-seelikud/

This link shows a gathering of people celebrating in national dress:
http://folkart.ee/en/photo-gallery/airing-of-the-folk-costumespicnic-2016/

Hope this helps. Have a great day! In His Service, Denise”

I loved the idea of taking a traditional handicraft design and making it into a quilting pattern. The links Denise provided were very nice. I also found a few pictures while surfing the web that I think are inspiring. The first two were from: https://fancytigercrafts.com/search?q=Estonia (please visit their site. The pictures and stories were great).


for more great images go to: https://fancytigercrafts.com/search?q=Estonia

The following woven designs could easily be converted into pieced patterns:

And this one would be lovely in appliqué:

I hope you can see the possibilities, no matter what country you’re interested in.

Thanks so much for your question, Krystyna, and for the in-depth response from Denise.

Have you ever made a quilt pattern inspired by a traditional handcraft from another country? I’d love to know more. Please send me pictures at: .

.

Flillows and Star Wars

May 7, 2017 3 Comments

In honor of Star Wars day this past week (May the 4th be with you!), I decided it would be fun to do a Star Wars post. I think I’ve included a little something for everyone. Here goes:

Our son and grandsons are currently into Star Wars. In fact, for Trey’s second birthday a Star Wars theme cake was requested from grandma (I’m better at quilting, but I do enjoy decorating a cake every so often).

bb8 cake

For Willy’s 9th birthday, I decided to pick up some fun Star Wars fleece, sew it into a checkerboard throw, add a pillow pocket and voilá – a Star Wars flillow,

star wars flillow

with his initial on the pocket!

You may be confused – A Flillow??? Where did that come from? Please let me explain:

Years ago I got hooked on making Quillows. You may remember that these were a hot gift item: A lap sized quilt with a pillow pocket centered on the bottom of the quilt back. When open it was a snuggly quilt,

but with a little folding and tucking it became a pillow.

These were wonderful for keeping in the car for emergencies or an impromptu picnic. They were also great for kids to take on a sleepover because, when folded into a pillow, there was room for a pair of pj’s and a toothbrush in the pocket.

Recently I was snuggling under a “no-sew” fleece throw our daughter had gifted us many years ago,

fleece dog throw flillow

and it occurred to me that it could become a Flillow (my own invention: a fleece-quilt-pillow) by adding a pocket to the back!

It worked great! And the Flillow was born. Willy’s was the second one I made.

Now back to Star Wars:

Last year I saw a pattern on the internet for crocheted Star Wars characters. I sent the link to my Mom. She’s amazing at crocheting and reading patterns. Trey got the stormtrooper and Yoda for his birthday and Sommer got Leah and Luke (complete with light saber) for hers.

The kids love them!

So there you have it a post that contains both Star Wars and handcrafts. I hope you enjoyed it.

Do you have a quillow from the past? Do you have a fleece throw just crying to be a flillow? Let me know  🙂 !

*****************

And one last note – to view the winners from Quilt Week in Paducah, including the Viewer’s Choice awards announced after the show ended, go to: http://www.aqsblog.com/aqs-quiltweek-2017-spring-paducah-winners

Inspired and Enthused

April 30, 2017 4 Comments

On the road again – from Paducah back home to Wisconsin. The weather isn’t nearly as nice. Here’s a picture as we cross the “flying geese” bridge heading north.

But oh, what a wonderful trip we had!

We really enjoyed the quilt shop and Amish dry goods stores in Arthur, IL, and we did our best to support them. I found myself saying “pace yourselves” to my new roommates, who were stocking up on a bit of beautiful fabric before we even reached Quilt City, USA! After a delicious lunch at Yoder’s we were back on our way. We made it to our B&B in time to attend the National Quilt Museum reception. It was such a privilege and a joy to see my quilt, Silly Goose, hanging with all the other amazing “Flying Goose” challenge pieces.

I’ll be doing a post on the National Quilt Museum soon, because it is a real treasure for the quilt world.

That night my sweet roommates battled their exhaustion to help hang a display of quilts in the front windows of Tribeca restaurant (one floor below where we stay). The exhibit consisted of a collection of quilts from my book “Where do I Start With Fiber Art”, along with an African themed piece made by my dear friend Laura Krasinski.

The next day we helped to hang the quilts in the AQS show. Inspiration abounded. What fun to see them up close and personal. We then were asked to hang an exhibit of European quilts from the Studio Art Quilt Alliance (SAQA) at the Paducah School of Art an Design. It was a perfect venue for a group of fascinating quilts.

After that we were finally able to set up our kitchen studio  😀 !

The remaining days were filled with great classes, lectures, vendors, food and fun. Laura joined me for my traditional “bubble tea” at Etcetera.

We met up with the Fiberistas and, aside from our second annual mexican dinner together on Saturday night, we had to do the kitschy AQS Paducah backdrop thing for our 2017 picture.

Other than our trip home, the weather was beautiful. We so enjoyed the lower town area, the murals on the flood wall, and all the wonderful quilts.

It was such a total escape from reality and a chance to recharge our batteries – and it was a lot of fun! Looking forward to Quilt Week 2018!

Were you in Paducah this year? Any pictures you’d like to share? Please email them to me at:

  • « Go to Previous Page
  • Page 1
  • Interim pages omitted …
  • Page 47
  • Page 48
  • Page 49
  • Page 50
  • Page 51
  • Interim pages omitted …
  • Page 77
  • Go to Next Page »

Primary Sidebar

Archives

Recent Posts

  • Quilting in Bloomington ~ Part 2
  • The Indiana Heritage Quilt Show ~ 2026
  • Bird’s Eye View
  • The Birds
  • Sew Much Creativity

Recent Comments

  • Laurie Neubauer on Quilting in Bloomington ~ Part 2
  • judy raddatz on Quilting in Bloomington ~ Part 2
  • Kathy Wuhrmann on The Indiana Heritage Quilt Show ~ 2026
  • Doris Ast on The Indiana Heritage Quilt Show ~ 2026
  • judy raddatz on The Indiana Heritage Quilt Show ~ 2026

Categories

Footer

My Guide

Whatever you do, do your work heartily, as for the Lord rather than for men.

—  Colossians 3:23

Contact Chris!

  • Home
  • About
  • Gallery
  • Classes
  • Trips
  • Books
  • Blog
  • Contact
  • Sign Up For My Blog

Copyright © 2026 · Chris Quilts · Website by Adunate · Privacy Policy