• Skip to main content
  • Skip to primary sidebar
  • Skip to footer

  • Home
  • About
  • Gallery
  • Classes
  • Trips
  • Books
  • Blog
  • Contact
  • Sign Up For My Blog

Blog

Homemade Christmas Gifts – Pillow Cases

December 10, 2017 2 Comments

Many years ago a member of my quilt guild brought in a pattern for pillow cases and invited us to make them as Christmas gifts for members of the military. The response was great. Problem was, the pattern was very simple and all the seams were raw edged on the inside of the case. This bothered me because I knew they would not wear as well with those exposed seams. On the way home I began to noodle on this and, since I don’t own a serger, I had to come up with another option. I harkened back to my days of garment sewing and knew the case itself could be sewn with French Seams. But how to do the seam between the case and the cuff??? An idea came to me and I couldn’t wait to get home and try it. It worked, so I made a new handout to share with my guild and called it the Enclosed Seam Pillow Case.

I shared it at the next meeting and many of us had a great time making pillow cases. The following month one of our members came up to me with a handout she’d printed off the internet. The author was using the same technique I came up with, but was calling it the “hot dog roll” technique. This made me smile. Someone else had come up with the same idea, just a different name! Either way – it works!

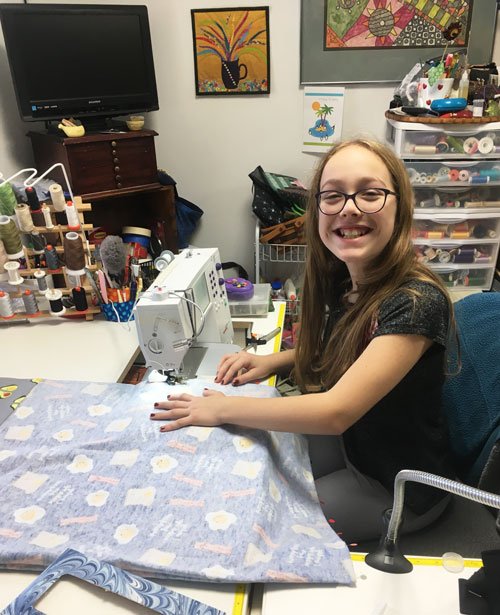
In early December this year, one of my Open Lab students asked if I’d do a refresher demo on the cases, because she wanted to make Christmas gifts. It was about time I made my grandkids new ones too – so I did the demo and many students participated:

From left to right, top to bottom: Deb, Judy, Jean, Marilyn, Eileen, Rose, Mary Ann and Louise

Great job ladies!

Here are my instructions for making pillow cases. Many of you probably know how to make them, but you may enjoy some of the additional helpful hints I’m including 🙂 . I’m hoping this post might be just in time for you to make a few for Christmas gifts too.

Enclosed Seam Pillow Cases

Supplies: ¾ yard main fabric, ¼ yard cuff fabric and a 1 ½” accent strip (pressed in half lengthwise). Make sure the main and cuff fabrics are squared up to the right size and not just the way they were cut at the store. Things will just fit better this way.

• Place the main fabric right side up on your work surface, with a cut edge laid out horizontally in front of you.

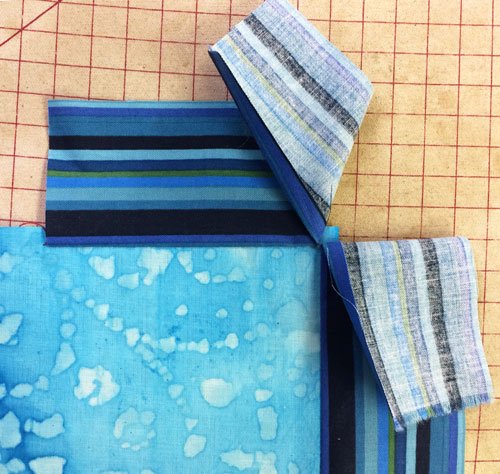
• Lay the raw edges of the accent strip along this cut edge and pin about every 8″ (flower head pins).

• Lay one long cut edge of the cuff fabric, right sides together with the other raw edges and pin in between the previous pins (ball head pins – I have my reasons for pinning this way and I’ve used different pin heads so you can see the difference).

•  Flip this entire unit over so the cuff is against the work surface, and the wrong side of the main fabric is facing up.

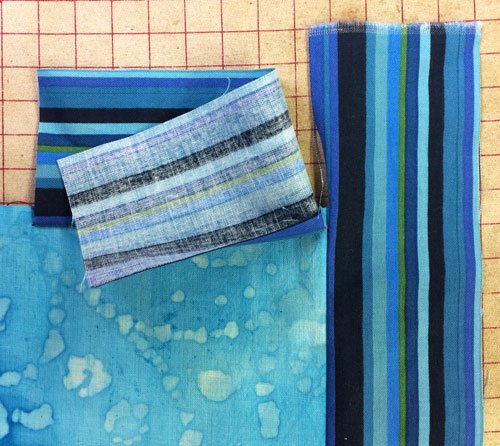
• Roll up the main fabric until you see the cuff peeking through from underneath.

• Bring the remaining cut edge of the cuff fabric up to the other raw edges and re-pin each of the pins through all the layers. Be sure the main fabric doesn’t get caught in this pinning.

• Sew with a 3/8″ seam allowance. If you are using flannel, you can strengthen the seam with an added line of zig-zag stitching in the seam allowance. Be sure to backstitch at both ends to secure.

• Turn this tube right sides out. Press.

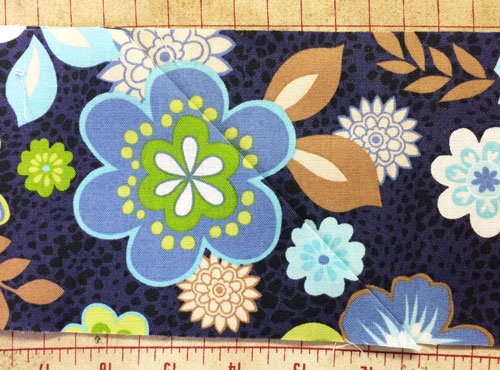
• Rotary cut the selvedges off both sides of the unit, making sure the cuts are straight and the angles remain at 90 degrees.

• To make the French Seams: Fold the case, wrong sides together, and pin along the two unfinished sides.

Sew with a ¼” seam allowance. Sewing through the cuff seam can be difficult. I can usually make it through on this seam, going slow and with a bit of tugging from behind (stay tuned for hints to sew it the second time).

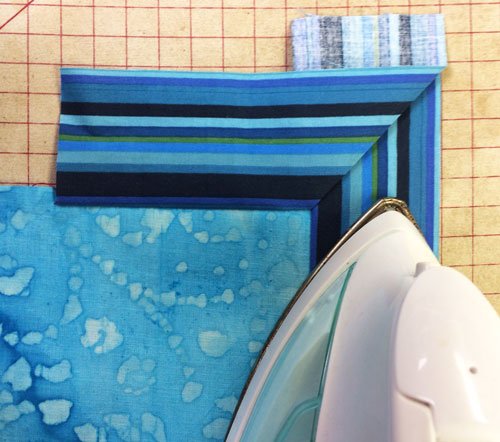
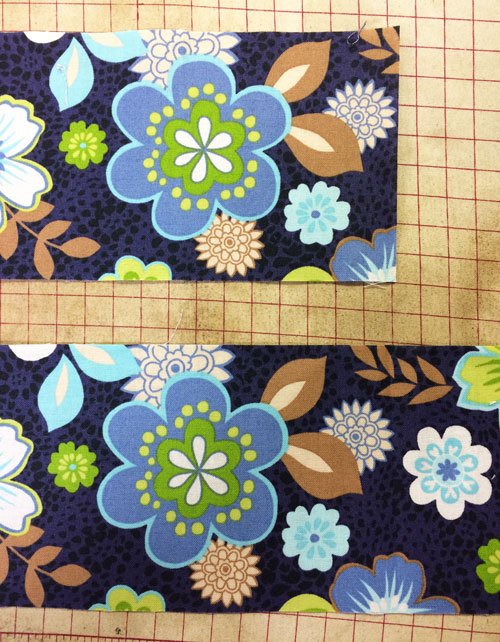
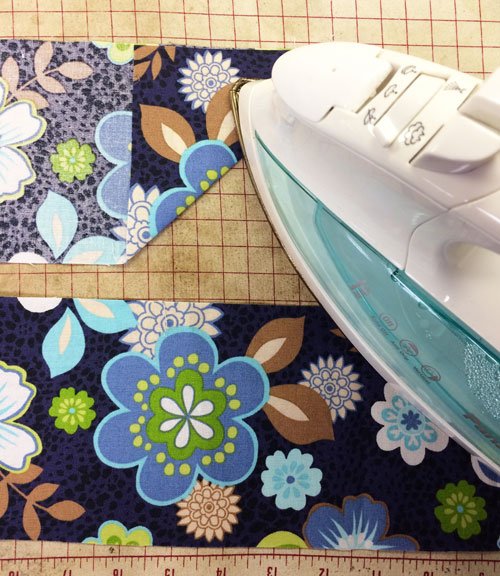
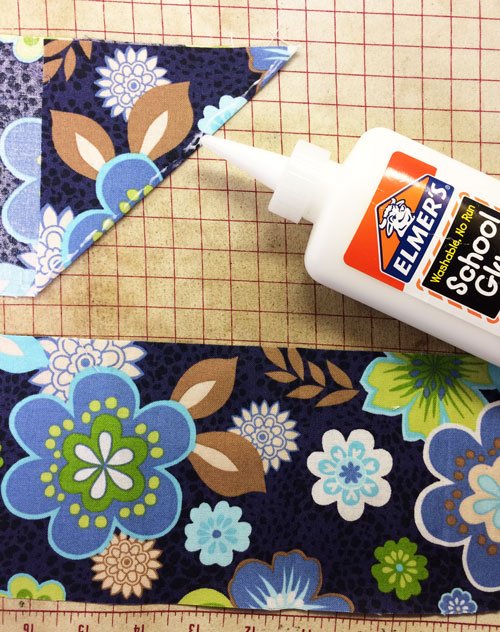
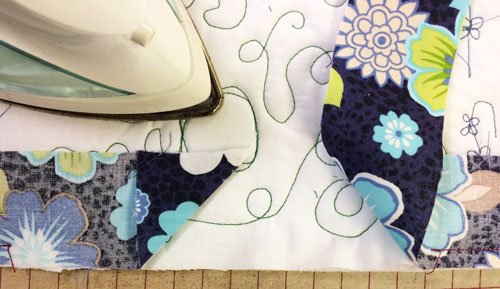
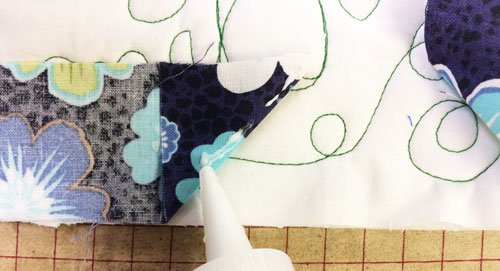
Trim off all three corners (don’t forget the one at the end of the cuff).

I like to trim the seam allowance at the cuff seam to 1/8″ at this time.

• Turn the case wrong side out, push out the corners, press and pin.

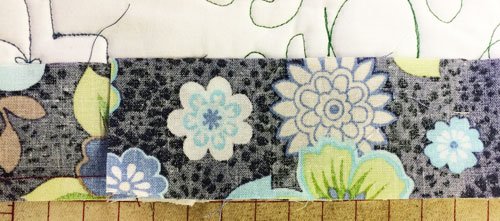
• Sew these two edges one more time, this time using a 3/8″ seam allowance to enclose all the raw edges, and backstitching at each end. If you can’t sew through the thickness at the cuff seam, leave that area open, and once the rest of the seam is complete, go back and fill in the seam using a zipper foot to avoid the thickness.

• Turn right side out and press. DONE!

My tip for trimming the corner at the cuff (5 pictures back) gets rid of any loose threads peeking out of the seam at the finished cuff edge.

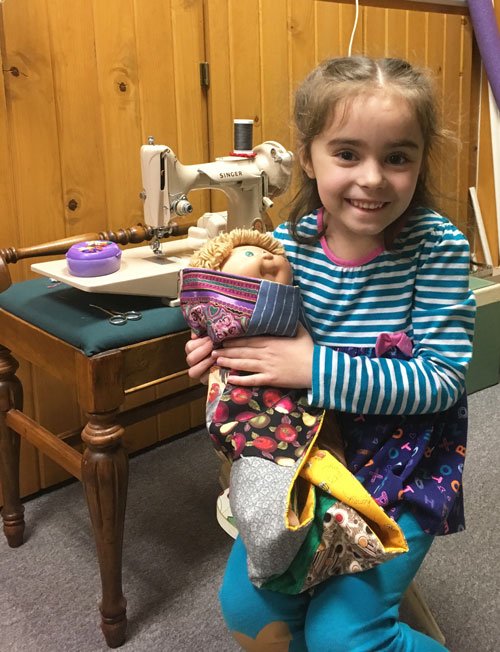
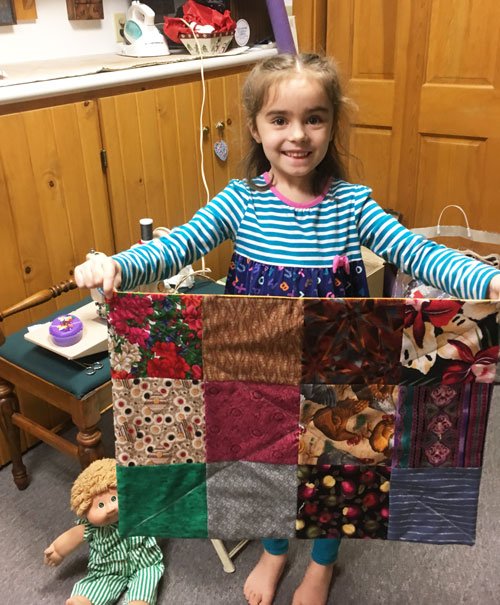
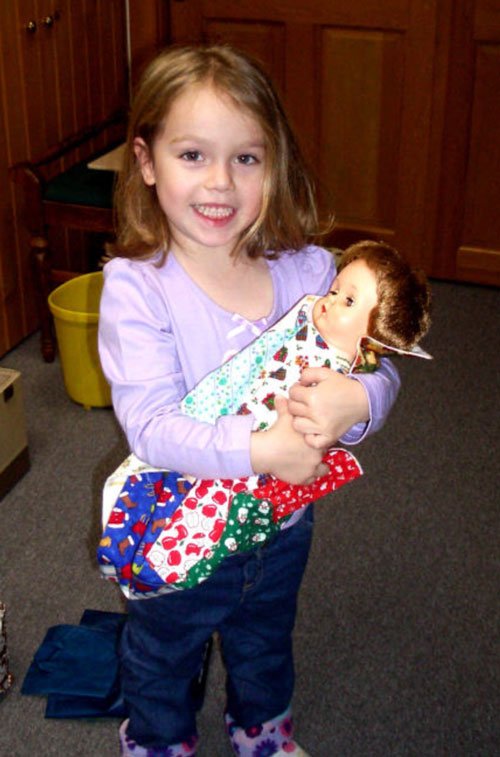
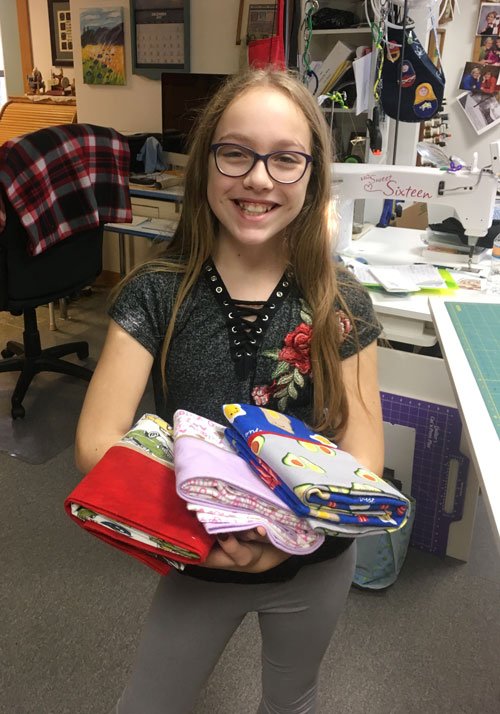
And here are the ones I’ve made for my family this year.

I hadn’t tried flannel before, and I like it!

I love to give homemade gifts to my loved ones! What homemade gifts are you working on? Did you make pillow cases this year? I’d love to see pictures! Please send them to me at .


Fiber Finds and Inspiration

October 22, 2017 3 Comments

Here’s one final post inspired by our recent quilting cruise, this time focusing on the items and information we found that could be used in future projects. Sometimes scenery is my greatest inspiration, and this shot of Montmorency Falls in Quebec is one I’m sure I’ll refer back to. The trees were just beginning to turn color and the rainbow in the mist was lovely (and no, we did not have time to climb the staircase and walk over the bridge 😉 .

We didn’t find any fabric in Quebec City, but aren’t the colors of these peppers at the farmer’s market breathtaking? What a great palatte for a piece of fiber art.

One thing we were surprised to discover while traveling was the absence of quilt shops in the areas we visited in Canada (or at least shops that we could get to in the time we had available). We did however find wool shops! My favorite was the “Bobbin Tree” in Sydney, Cape Breten Island, Nova Scotia. They had yarns, gifts, and loads of wool items and kits. I decided it was time to try my hand at wool penny rugs because they had the circles pre-cut. I began stitching them together on the ship that evening and they are addictive. Now it’s time to decide a pattern for stitching them onto the background.

I also succumbed to a kit for tradtional rug hooking on a piece of burlap sack. I haven’t gotten too far, but it will be a lovely candle mat some day.

Both kits included all the supplies, so I think they were well worth it. And I’m learning some new skills!

A few blocks away we found the “Cape Breton Centre for Craft & Design”. They were having an artsy rug hooking display on the second floor and it was spectacular! Here are just a few of my favorites:

Makes my efforts with the kit I bought look rather meager, but I’m still enthused!

Our next port was Halifax, Nova Scotia. We enjoyed a wonderful bus tour of 3 seaside towns that day and found a wool shop in Lunenburg with a very clever display. Who would have thought to sew pattern pieces together? I had to take a picture!

The next seaport was Mahone Bay. They were having a scarecrow festival and I’ve never seen so many fascinating scarecrows. Here are two of my favorites:

As we drove into town we passed a “Quilt Shop”. We were very excited and quickly started walking towards the shop once we exited the bus. When we got there I posed for a quick picture out front,

and then went in to discover that it was a shop that sold finished quilts! I guess “quilt shop” is a misnomer – we expect to find fabric and supplies in them, not quilts.

When we got to Bar Harbor, Maine, more of the trees were starting to change. When we walked under this one, I couldn’t resist yet another color inspiration picture.

And Bar Harbor had a quilt shop! It was a great one! Quiltanna and I enjoyed it very much!

This final picture is one that may not inspire a quilt, but it makes my mouth water every time I look at it.

The best clam chowder I have ever had. It was at the Sail Loft in Boston. Yum!

I have many wonderful memories from this cruise and the inspiration for future projects makes it even more of a blessing.

*****************************

And I’d like to share one last item:

A Different Type of Quilting Adventure!

This past week Joan contacted me from North Carolina. She attended my lecture when I visited her guild in Hendersonville in 2013 and has been reading my blog ever since (thanks Joan). This is part of what she wrote:

“I am a member of an organization called Friendship Force and members can travel all over the world and the USA and participants stay at the homes of the people in the area they are visiting.  I went to a quilting Journey (that’s what these experiences are called) in Iowa last year and 18 quilters from all over joined together for 9 days as we saw presentations, shopped, talked with other quilters and even made a table runner.  I decided that our area of the Blue Ridge Mountains would be a perfect location for a Quilting Journey and we are calling it Quilting Mountain Style.”

The journey will take place from May 23 to May 31, 2018. She included a link to read all about it: https://friendshipforce.org/journeys/quilting-mountain-style/

I so enjoyed North Carolina and I’m sure this trip will be a great adventure. You’re welcome to contact Joan with any questions. Her email is:  

“Quilting” at Sea

October 15, 2017 1 Comment

Quilters often ask me what makes a cruise a quilting cruise. Well it certainly isn’t that all 2500 people on the ship are making a quilt. But our group (which numbered 43 this trip) had fun with fabric, even if we didn’t do any stitching. The main focus of the trip is for people with a common interest to see wonderful sites, enjoy delicious food, socialize, shop and do some things with fabric too. We try to spend at least 1½ hours each day in class, working around shore excursions, meals, and on-board entertainment.

We began our most recent trip with a “prior to the cruise” project by inviting everyone to participate in a friendship exchange. We asked quilters to find a leaf shape of their choice either in their yard, in a book or on-line. I chose a maple leaf because this year is Canada’s Sesquicentennial,

but participants could pick any leaf they wanted. We had 32 quilters in the exchange, thus each of us chose an Autumn color batik and cut out 32 leaves with paper backed fusible web attached. Only 6 of us wanted them signed, so we asked everyone to do this to six of their leaves while on the ship and then we exchanged them. Here mine are laid out in a wreath.

Beautiful! I’m not sure if this is what they will become. The project option  I came up with prior to the trip was to scatter leaves across a windswept background with tulle shadows to add depth.

The next quilt related portion of our trip took place the first night on board. I shared a new lecture I call “Travel Memory Quilts”. I’m very excited about this new idea the Lord blessed me with. In essence, I distill each trip down to a favorite picture and create a single block to represent it using a variety of techniques. Each block is quilted and bound separately and they are attached to each other with a simple system of my own creation. In this way the “quilt” can be added to or rearranged with very little effort!

I’m working on other memory quilts using this technique and I’m pretty sure this is going to grow into something even more exciting. More information to follow!

During the trip Wendy gave two presentations. One on her method for making “batiked” scarves and another in which we each created a quilt label. Mine will go on my leaf quilt – whenever I get it done  😀 .

The main project on the trip was a fused block of the Bass Harbor Head Lighthouse.

I created the pattern from a picture and made up kits for the 33 travelers who chose to participate. I finished mine as a small wall quilt and added a few of the pins I collected while traveling. Here are pictures of class time aboard the Norwegian Dawn.

Mary and Jane were the first to finish theirs

And everyone got a block made. I can’t wait to see them all together at our post-trip gathering.

We combined traveling and quilting – it doesn’t get much better than that!

Quilters on the St. Lawrence River

October 8, 2017 2 Comments

I just returned from our “Sew We Go – Quebec to Boston” quilting cruise. Wendy and I accompanied a group of 43 quilters, husbands, and traveling companions on a wonderful adventure during Canada’s sesquicentennial year!

It was a delightful group.

One of the greatest blessings of leading our Sew We Go adventures is traveling with happy people who share an interest in travel and quilting. In today’s post I’d like to share some pictures of just a few of our group enjoying themselves.

Like Alice and Karen in front of the St. Lawrence river on our first stop during the bus tour of Quebec City:

Or Jerry and Joyce near the hotel Le Chateau Frontenac, inside the walls of Old Quebec:

In this picture Jim, Mary Ann, Jacque, Will and I are enjoying the beauty of Montmorency Falls:

We also loved the company of Ritarose and Heidi in the atrium of the luxurious Norwegian Dawn:

Myrt, Evelyn and Ron soaked in the beautiful weather on the shores of Mahone Bay, Nova Scotia:

and Mary and Jane were pleased to be the first to complete fusing together our onboard lighthouse project:

Everything went well because of our spectacular travel planner, Kristi, of Journeys and Gatherings (PS Happy Birthday Kristi!)

And then there was the food! I’m quite sure Ritarose and Lynn were feeling the joy while indulging in canollis from Modern Pastry in Boston:

Plus the fun of riding the water taxi in Boston Harbor with Linda and Alice.

I think it is obvious we were all having a fantastic time.

Please visit my blog during the coming weeks for posts on the inspiration and quilt related experiences we had along the way.

Wind Blown Compasses

September 24, 2017 2 Comments

Have you ever entered a quilt into a contest in which it traveled for a period of time?

In 2015 I entered the Madison Quilt Expo’s “Fall Leaves” quilt challenge. Part of the entry agreement was the quilt would travel with the exhibit for two years. That’s a long time!

My quilt “Which Way Does the Wind Blow” arrived back on my doorstep this past week. What a joy to have it back and hang it up for Autumn!

This was the card that traveled with it.

The quilt got it’s name because I challenged myself to draft some of the leaves as oddly shaped mariner’s compasses using my “Compass Capers” technique (you can purchase a copy of my book at: http://www.chrisquilts.net/books/). Piecing the leaves was not difficult, but finishing the leafy edge took a bit of perseverance.

I lined the back of each leaf and stitched them to the quilt on the leaf veins (compass seams) resulting in a 3D effect. I liked the image of the windblown tree so much, I made a second quilt entitled “Autumn Dusk”.

This time the interesting effect was achieved by using an orange/black Pointillism fabric for the sky and water. This may not be the last time I make a quilt with this tree – perhaps there’ll be a series. Stay tuned :-).

Have you had a quilt travel? Please comment to this post and let us know!

Go Team!

September 17, 2017 1 Comment

Even if you’re not a Packers fan, I’m sure you’ll get a smile out of the following story. Marilyn brought this wonderful t-shirt quilt to show and tell in my Open Lab last semester.It was beautifully made, but I decided to save this post until football season began, to make it more timely. The time has come and I’m pleased to share it. I asked Marilyn to write something about her quilt for the blog and here’s what she sent me:

“For My Husband? Absolutely Not!
My Lambeau Leap Quilt is only for those who love green and gold – that excludes my husband. However, my daughters, my granddaughters and a few of my sisters are big Packer fans and come to watch the game and snuggle under the quilt for good luck. This is dedicated to them. All of them had a hand in it. We all collected Packer t-shirts from our local Goodwill, which in turn helped others. So this is definitely a feel good blanket that gives us a warm feeling literally and figuratively.”

Marilyn did a wonderful job! When she showed it in class she told us all about collecting the t-shirts. Then I made the mistake of asking if she made it for her husband. She responded with the quilt’s title: “For My Husband? Absolutely Not! Followed by “he’s a Cowboys fan”! We all laughed at that one :-).

Have you made a fun quilt for your favorite team? Please send me a picture – I’d love to see it!

Looks like it’s going to be a good season. Go Pack!


Madison Quilt Expo – 2017

September 10, 2017 6 Comments

This year’s Quilt Expo did not disappoint. The crowds were even bigger than last year! The quilts were spectacular! The vendors well stocked and oh, so tempting! What a great show!

I especially love immersing myself in the competition quilts. I enjoyed them all, and here are a few I found particularly captivating:

A Glimpse Through the Cattails by Julia Graber of Brooksville, MS
Rainbow Hosta Queen by Grace Kragness of Oak Creek, WI
The Engagement Photo by Nancy Carney of Verona, WI
Remembering Roatan by Pamela Kuck of Shawano, WI

When I wasn’t on the show floor admiring the quilts, I was sharing my passion for quilting in lectures and workshops. I’ve been invited to teach at the show every year since it began, praise the Lord! And the teaching kept me very busy this year (so busy I tended to forget to take pictures). Each morning at 8:30 I presented my lecture “Friendship Quilts – Then and Now”. The antique quilts and their stories were very well received and I hope the patterns I shared, along with the contemporary signature quilts themselves, inspired quite a few of those present to plan for a future autograph quilt of their own.

On Thursday and Saturday I taught 3 hour workshops on Beginning Fiber Art (formerly named Parallelisms). It’s such a joy to encourage quilters who haven’t done much artsy style quilting to give it a try. I just hope the students had as much fun as I did :-).


On Friday I shared my Seminole Sampler workshop to a full house. The students enjoyed the fact that the kit provided all the fabric strips cut and ready to sew.

A highlight of the class was having Delores show us the skirts and apron she had purchased from the Seminole Indians for her daughters.

She was kind enough to let me pose with the apron. Isn’t is lovely?

On Thursday night my roommate Laura and I were invited down the hall for a Tyvek™ painting/burning party.

Linda provided all the supplies and showed us how to make leaves with this fun technique.

Not bad for a first effort, and it was a lot of fun. Thanks Linda!

Spending time surrounded by quilts and quilting friends – it doesn’t get any better than this!

*****************************

And one more quick note for those of you in Southeastern Wisconsin. My friend Jodi told me about a “Quilter and Crafter Bonanza Sale” being held this weekend between Williams Bay and Elkhorn. Here’s the flyer she gave me:

Maybe I’ll see you there!

Seminole Piecing – Part 3

August 27, 2017 7 Comments

Last week I shared a picture of 3 Seminole Indian dolls Tomi Fay Forbes brought to my Seminole workshop.

Just look at the lovely piecing in the skirts!

I asked Tomi to please share their story and she replied that she would do some research and send me what she found. Her research began: “When I was a little girl in the early 1960s my grandmother bought me three Seminole Indian dolls, each one outfitted in the dress of the Seminole Indians.” (pictured above)

Tomi continued with a 7 page research article, including sources, and it is well written and fascinating (if you would be interested in reading Tomi’s essay, please let me know and I’ll send it to you via email – I’m unable to post it in the blog). She tells of the history of the Seminole Indians and how the women began making patchwork and dolls, which they would trade for other goods. Here is an excerpt telling about the dolls:

“Foraging in the forests, the women collected palmetto fronds. The Seminole women were familiar with the traits of palmetto because they used palmetto and cypress to build their homes, called chickees. One palmetto plant provided enough material for about five dolls. The Seminole woman shaped the palmetto into a doll’s body, stuffing the body with more palmetto. She cut a round of cardboard and inserted it at the base of the body to give the doll a sturdy footing so it would not tip over. She then sewed a rough seam in the palmetto to retain the stuffing. She shaped the head and used thread to embroider eyes.

One would assume that the protruding ridge on the top of the doll’s head, covered with black cloth, represents a hat. It looks very much like a bonnet one would expect to see on an Amish doll. Not so. In the nineteenth century, the Seminole women pulled their hair back into a simple bun. With the acquisition of hair nets and hair pins from the traders, the buns grew in size and complexity. By the 1920s the Seminole women were combing their hair forward over their face, placing a roll of soft cloth across their hairline over their forehead, and combing their hair smoothly over the roll.

During the next two decades, the women competed as they developed complex hairdos held in place over rolls of fabric or hair boards.


Seminole doll-makers reflected their hair traditions by placing a piece of shaped cardboard over the crown of the doll’s head and covering it with black cloth. Today many Seminole dolls have braids rather than the black fabric head covering.

The Seminole woman then dressed the doll in the traditional cape and skirt. The clothing of the smaller six-inch dolls are decorated with rows of colorful rickrack. The larger 9.5 inch dolls will often have a tiny, intricate pieced pattern inserted in the skirt. Hence the name Seminole patchwork.

Finally, the seamstress gave the doll beaded earrings and tied rows of beads around its neck. Historically, the Seminole women proudly wore as many necklaces of genuine glass beads as they owned. A stack of multiple necklaces could fill the entire neck. Today we would find these necklaces heavy and cumbersome to wear. We would wonder if the women’s necks ached all the time.”

Tomi then included information about her grandfather and his history living in that portion of Florida. I am so grateful to have “the whole story”, but the icing on the cake was that Tomi told me of a doll available on Ebay! I wasted no time in making her my own!

Thank you so much Tomi!

I will be teaching this workshop at the Madison Quilt Expo next month – and the class is full!  If you’d like to learn how to do Seminole style piecing, and if you think my class on Seminole Piecing would be of interest to your quilt guild, please share my website, http://www.chrisquilts.net/classes/ with the program committee at your guild. Thanks!

  • « Go to Previous Page
  • Page 1
  • Interim pages omitted …
  • Page 48
  • Page 49
  • Page 50
  • Page 51
  • Page 52
  • Interim pages omitted …
  • Page 80
  • Go to Next Page »

Primary Sidebar

Archives

Recent Posts

  • Quilting Fun in Iron River
  • A Wonderful Return to the U.P.
  • A Gray Quilt
  • Buttons and Fasteners
  • Anticipating the Show

Recent Comments

  • Doris Ast on Quilting Fun in Iron River
  • JANET NOCERINI on Quilting Fun in Iron River
  • judy raddatz on Quilting Fun in Iron River
  • Cathy Borneman on A Wonderful Return to the U.P.
  • Kathy Downie on A Wonderful Return to the U.P.

Categories

Footer

My Guide

Whatever you do, do your work heartily, as for the Lord rather than for men.

—  Colossians 3:23

Contact Chris!

  • Home
  • About
  • Gallery
  • Classes
  • Trips
  • Books
  • Blog
  • Contact
  • Sign Up For My Blog

Copyright © 2026 · Chris Quilts · Website by Adunate · Privacy Policy