• Skip to main content
  • Skip to primary sidebar
  • Skip to footer

  • Home
  • About
  • Gallery
  • Classes
  • Trips
  • Books
  • Blog
  • Contact
  • Sign Up For My Blog

Blog

Appliquéing a Circle with Corded Piping

June 7, 2020 6 Comments

For quite a while now I’ve been telling the students in my Mariner’s Compass workshops that I would do a blog tutorial on a fun technique for using corded piping to attach circles to a background. Once I made my 60 degree compasses – I knew it was time!

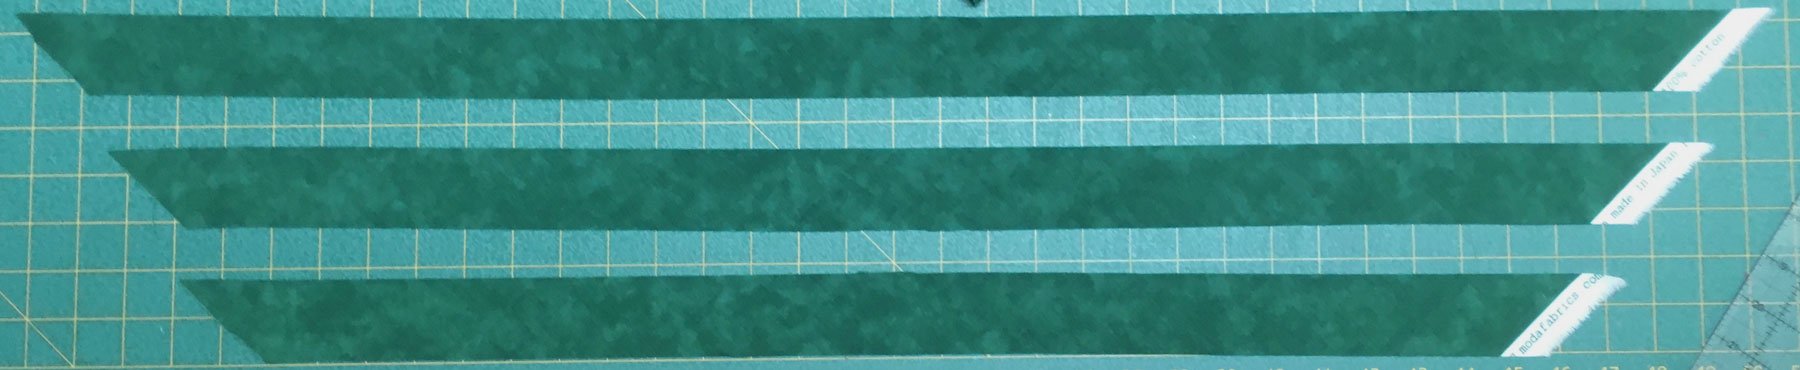
To begin you’ll need 1 1/4″ bias strips – last week’s post should be helpful concerning this – click here if you’d like to access it again.

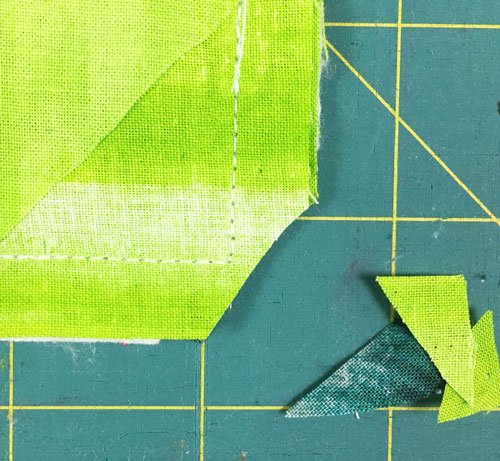
You’ll also need cording to fill the piping. Cordings like this are sold at your local craft store in a variety of sizes. People also use yarn, drapery gimp, perle cotton, etc.. It all depends on the size you want your corded piping to be. For this project I used rayon rattail because I had a bunch leftover from a previous art quilt challenge and it was just the right size (it’s being red, like the cording I was making, was a happy coincidence).

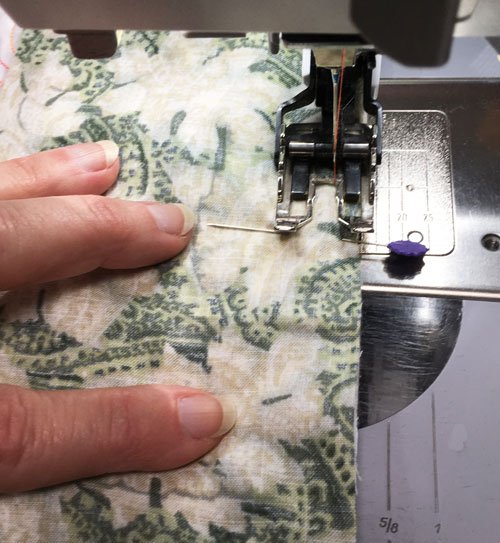
Corded piping can be made using a piping or zipper foot for your machine. I find that the zipper foot can be a bit squirrely, and many machines don’t come with a piping foot. For this project I grabbed the buttonhole foot that came with my old Bernina (foot #3). It worked like a charm.

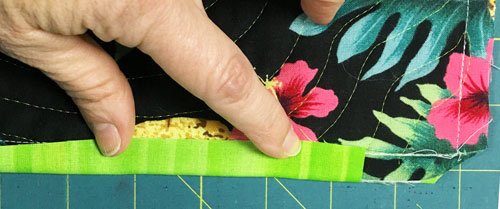
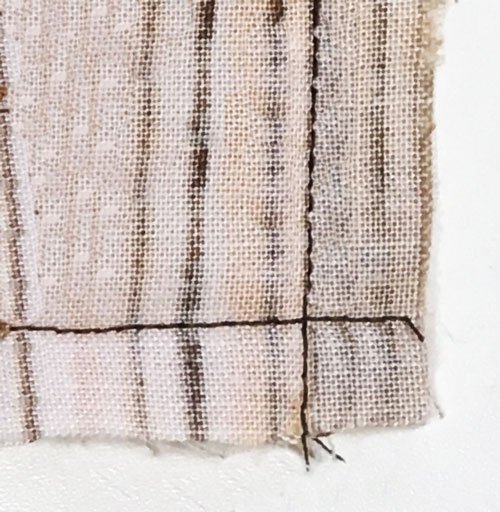
My cording was just the right size to fit into the groove on the left. I folded the bias strip in half and inserted the cording into the crease. Then I placed it under my machine and adjusted my needle to stitch snuggly against the cording.

With the needle down I ran my thumbnail along the cording to make a nice crease (a great tip I learned from Ricky Timms), And gently continued to crease the fabric as I sewed:

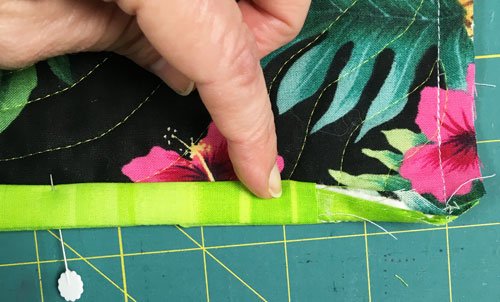
Once I had made enough corded piping for my needs, it was time to trim. I absolutely love Susan Cleveland’s “Grooving Piping Trimming Tool”. It will trim a 1/4″ or 1/2″ seam allowance almost effortlessly.

The corded portion fits into the groove on the bottom of the tool, the excess fabric is trimmed with a rotary cutter, then the strip is simply pulled under the tool to trim the next portion – quick and easy!

Since I had six circles to pipe, I need a lot of piping:

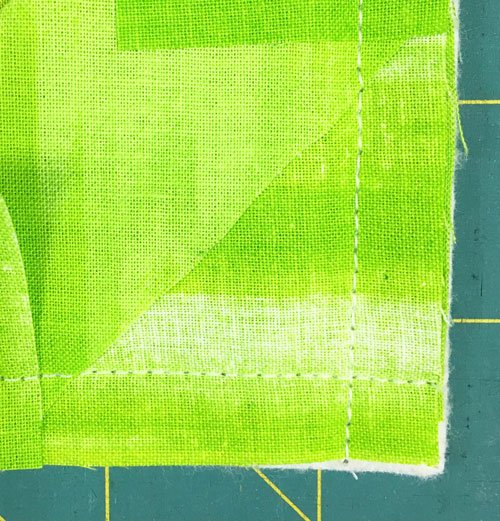
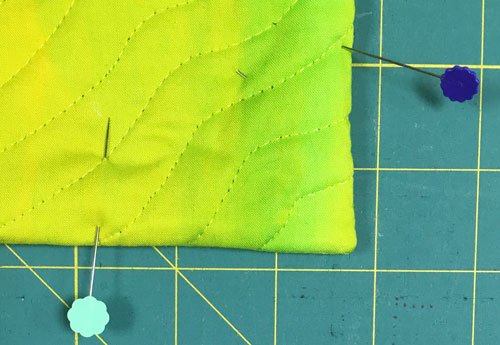
When the piecing of my compasses was complete, I trimmed the seam allowance around the outer edge to 1/4″:

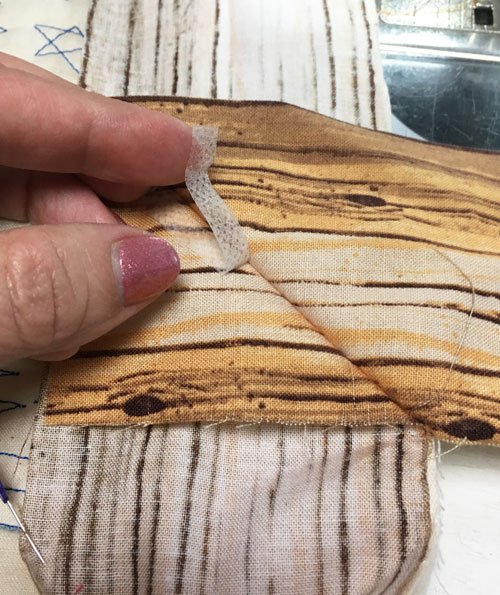
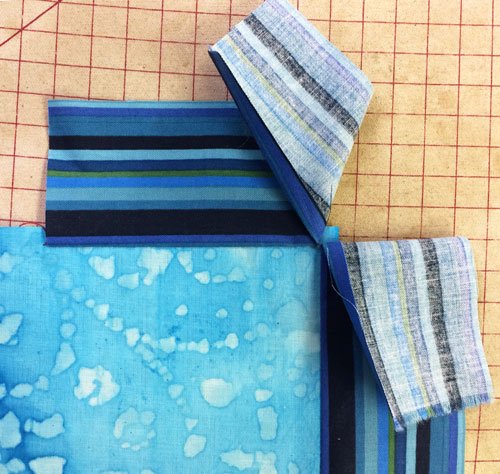
I removed the first 1 1/2″ of stitching on the corded piping and placed it, raw edges even, along the right side of the compass. I made sure my beginning/ending join wouldn’t be on top of a seam. I began stitching 1 1/2″ from the end of the piping, leaving the end free for the joining step, and sewed it on with the same foot to keep everything in place. You’ll be sewing on top of the previous stitching.

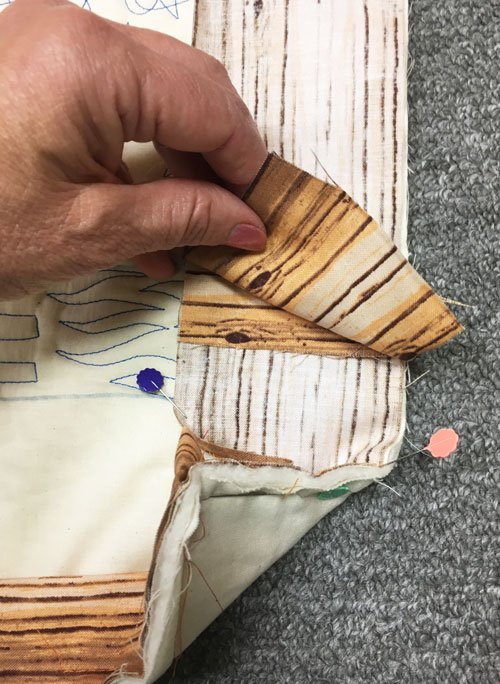
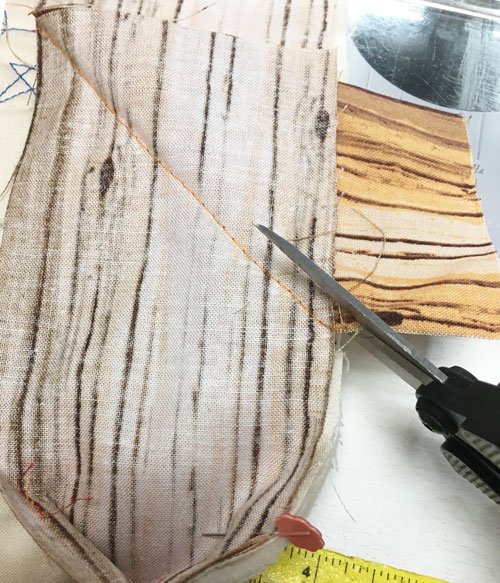
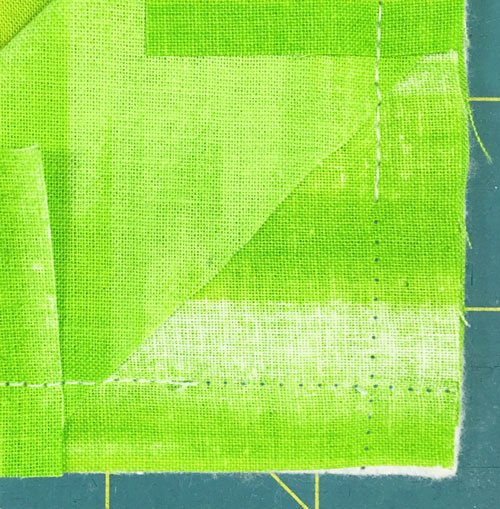
When I reached the start, I stopped stitching 2″ from the beginning stitches, cut the piping 1″ past the end of the beginning tail, and removed 1 1/2″ of the corded piping stitching to expose the cording, as I did with the beginning tail.

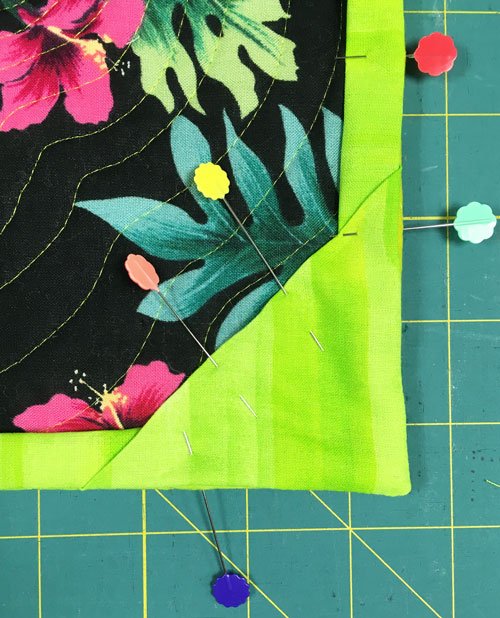
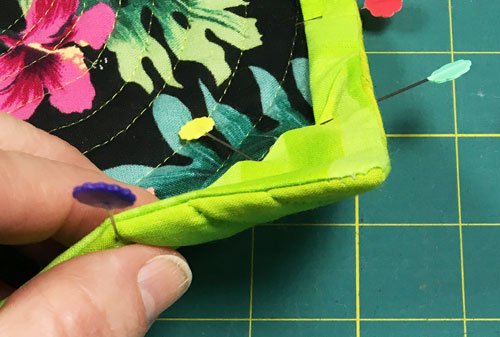
Next I laid both ends in place so I could trim the cording ends to butt up with one another (be careful not to snip the fabric when you do this – ask me how I know ?).

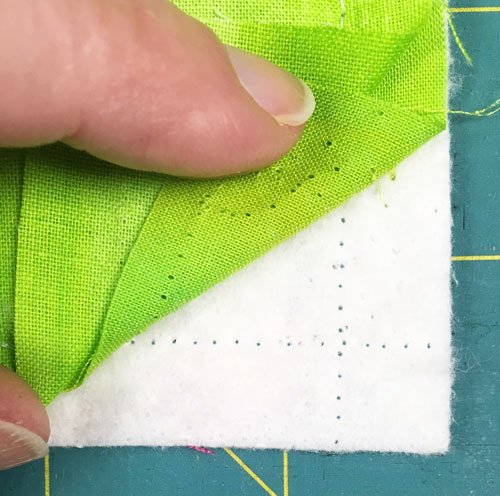
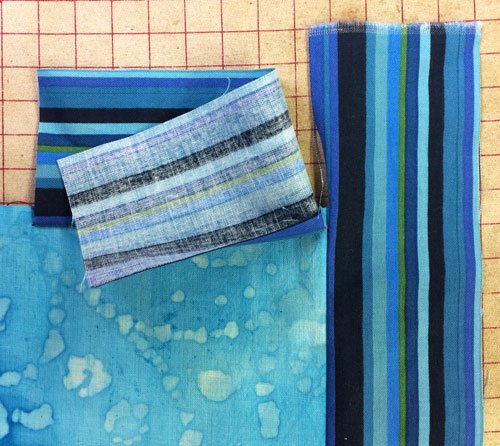
Fold in a 1/4″ hem on the beginning tail.

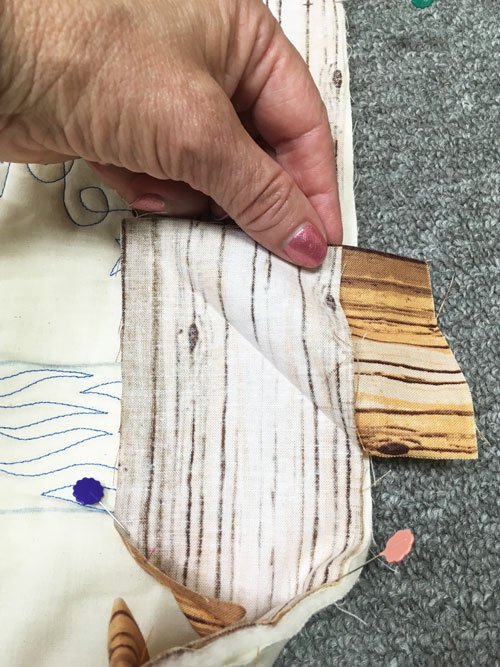
Lay the bias strip against the circle, place the ending bias strip evenly on top of it, and allow the cording ends to meet (butt).

Fold the strips in place and pin.

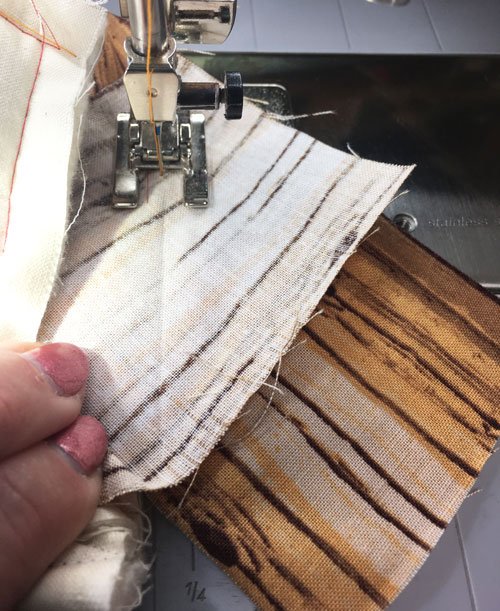
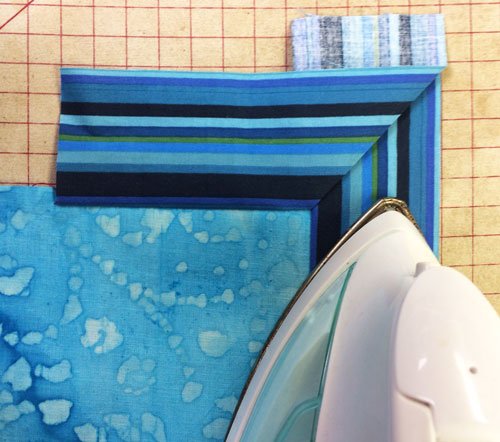
Finish stitching the piping to the circle.

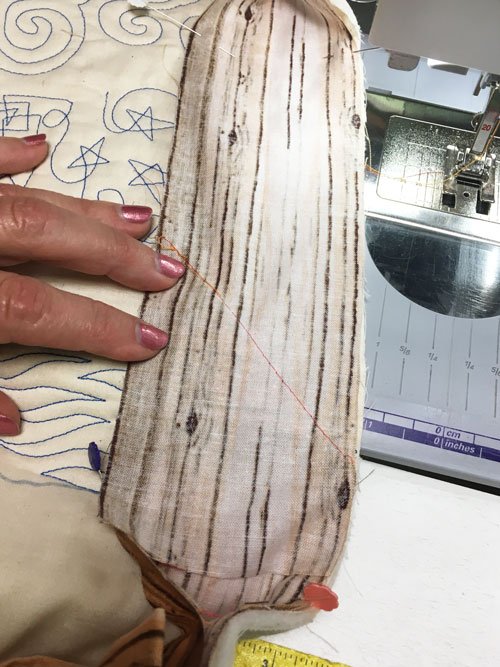
Fold the seam allowance to the back of the circle so the corded portion sits at the outer edge.

Pin the circle onto a background fabric and stitch in the ditch between the circle and the piping to attach it. I used the same foot for this step too.
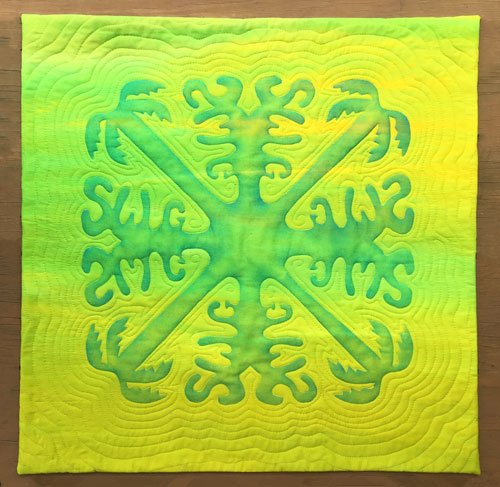
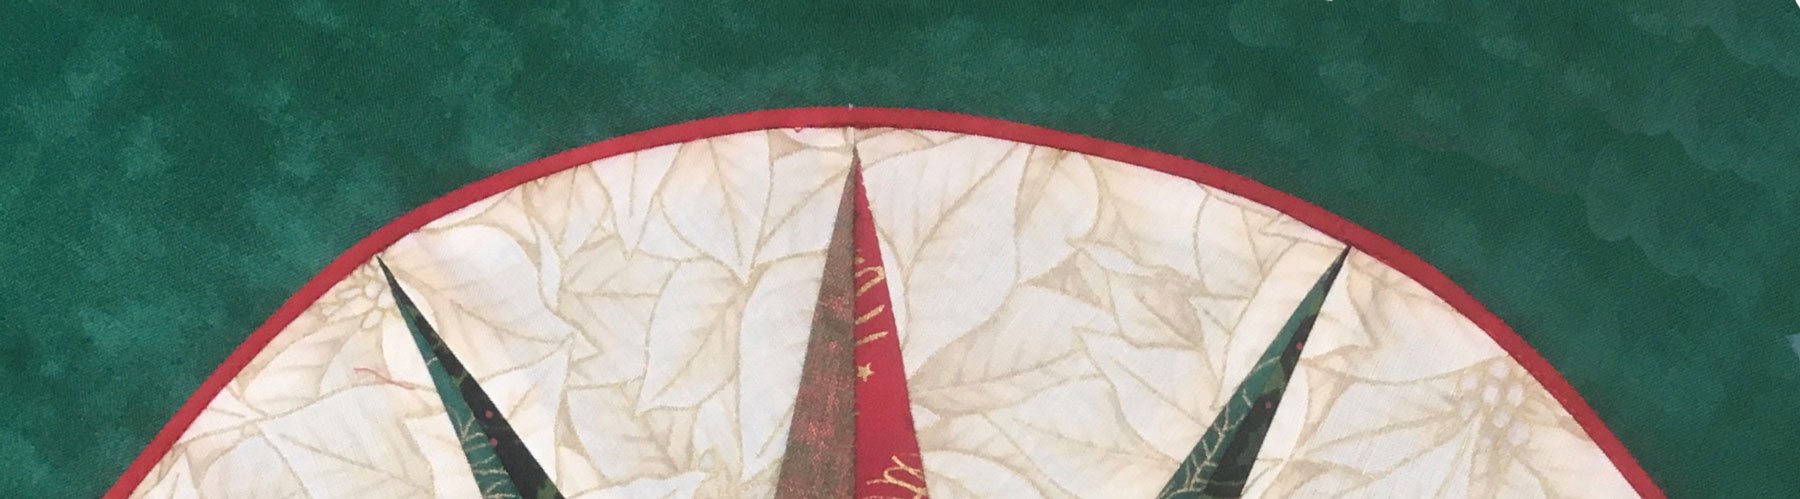
And it’s done!

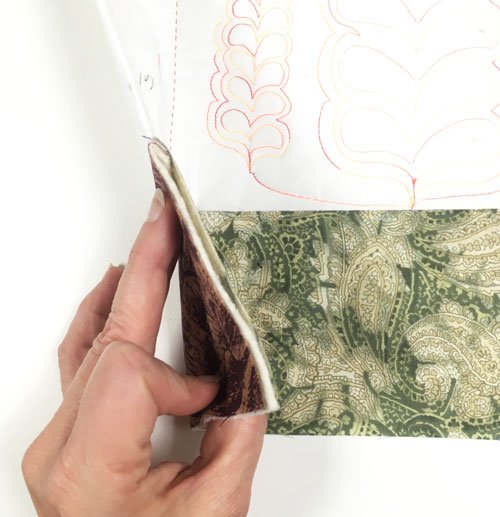
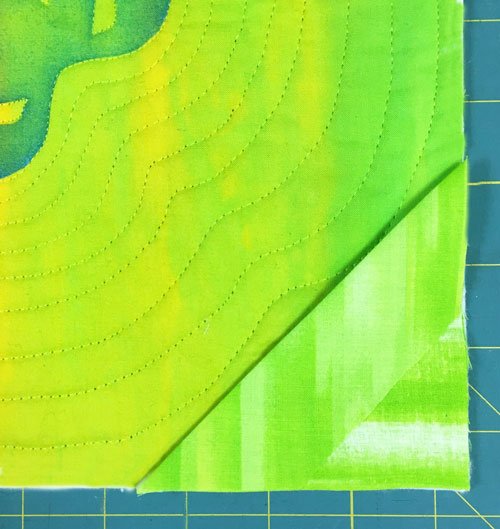
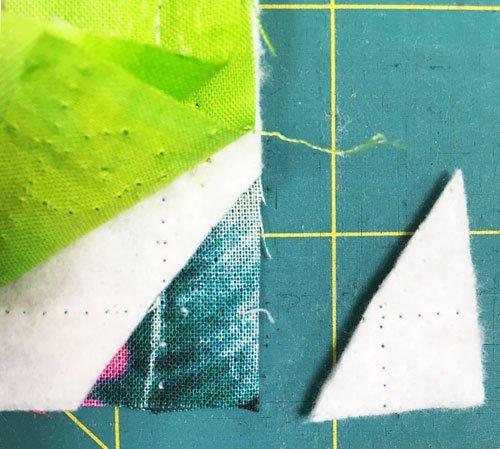
At this point I cut away the background fabric from behind, 1/4″ from the stitching to expose the paper pieced pattern, and removed all the paper.

There are so many great advantages to this technique: no hand-stitching needed, it works with any circle or other gently curving shape, and it adds a spectacular effect!

Next week I’ll share how I put the wedges together and finished the project!

Cutting Bias Strips

May 31, 2020 5 Comments

Last week I did a “show and tell” about my new Compass Star tree skirt. Both the piping that attaches the stars to the background, and the binding we’re made with bias strips. I have a favorite way to cut bias strips and I can’t believe I haven’t shared it before.

When I learned to sew, way back in the 70’s, the common way to make a long strip of bias was to cut a rectangle of fabric, mark parallel lines the width of the desired strips, sew the short ends together, offsetting the marked lines by one, and then hand-cut on the line all the way around.

It made a lot of bias, but sections of the length had oodles of seams, some quite close together. I never cared for that. So here’s my technique:

Open the yardage on the work surface, with the selvedges top and bottom . Lay the 45° line of a long ruler parallel to the selvedge at the bottom,

and with the long edge of the ruler in a place that will allow a nice long length of bias.

As you can see my ruler wasn’t long enough to complete the strip, but it was quite simple to cut half way up and then slide the ruler to cut the remainder.

I set aside the lower triangle, and folded the bottom selvedge edge towards the upper left:

until the freshly cut edge lies on top of itself:

Then I determined my strip width and aligned that line of my ruler with the cut edge, being sure to cut perpendicular to the fold at the bottom (my strips will be cut at 1 3/4″),

Cut as many strips as needed in this way.

Here they are unfolded. You’ll notice that the ends are all at 45 degrees when using this technique.

To join the strips: place one, right side up on the work surface, and position the second strip, right sides together and perpendicular as in the photo (I think of it as a right angle “7”), overlapping to form 1/4″ dog ears.

Stitch from the corner of one dog ear to the same spot on the other end.

Then press flat.

I like to chain stitch all the diagonal seams until the strips are all connected.

That’s all there is to it. In next week’s post I’ll demonstrate how to make corded piping from bias strips and use it to “appliqué” my compass stars to the background.

Adding Borders – Quilt as You Go!

December 2, 2018 8 Comments

Last week I shared a technique for bordering a block quilt-as-you-go, but have you ever finished the quilting  on a project and realized it would look nicer with one more border? or maybe it needs to be just a little bigger? I’ve had this happen a number of times and, before I bound the outside edge, I did something about it! This also works for quilts that have been constructed “quilt-as-you-go” fashion and need borders, and it works on any quilt – small or large. It’s as simple as:

1. Measure the top and bottom edges of the quilt, decide the border width, and make two border strips this width and length from each of: (a) the border fabric for the front of the quilt, (b) the backing fabric and (c) batting. (Please be aware I’m using a sample quilt sandwich as my “quilt” for this demo – I was practicing feathers  🙂 )

2. Choose 1 set of borders and lay the border fabric (a), right sides together, and even with the top edge of the front of the quilt.

3. Pin this strip in place and flip the quilt over to the back. Lay the back border strip (b) even with the same edge of the quilt, right sides together.

4. Lay the batting strip (c) on top of this back border strip.

5. Add more pins along the edge through all the layers

and sew through all six layers with a ¼” seam allowance (a walking foot is very helpful).

6. Fold all the border strips away from the quilt, and on top of each other to make a flat border:

Here’s a side view:

7. Press this new quilted border along the edge, pin if desired, and repeat for the bottom of the quilt.

8. Measure the sides of the quilt and repeat from step 1 above to add the side borders.

The borders may now be quilted (if needed) and the binding attached. I like to quilt a straight line ½” from the border seam all the way around. This encases the seam allowance and it’s thickness adds a nice fill to this narrow quilted area.

I hope this was helpful and easy to understand. It is a very do-able technique :-).

**********************************

Continuing Stories:

A few weeks ago I shared the story of a shirt and tie quilt made by my friend Jean. She recently wrote to tell me she made a label for the quilt using a pattern for an origami Hawaiian shirt ornament she’d made as Christmas gifts in 2014. I was a lucky recipient of one of those ornaments:

And here’s the label (name removed to protect privacy):

Adding the “dry clean only” advice on the label was a great idea too. She also said she tucked some leftover tie fabric in a few of the border pockets.

I was so glad she included these pictures. Thanks again Jean!

Also, in response to Debbie’s quilt for little Grace, Beth emailed me this: “I saw your picture of the memory quilt with the clothes. I thought I would share the quilts I made for my great niece and great nephew with their onesies!”

So many great ideas – thanks Beth!

Finishing a Small Quilt – “Quilt-as You-Go”

November 25, 2018 3 Comments

Looking for a quick way to finish a small quilt – borders and all?

I have a small block I want to border, finish and hang on the wall (this would work great for placemats and table runners too). Rather than adding the borders and then layering and quilting the traditional way, I decided to cut the backing and batting a little larger than the size of the finished quilt.

*Then I layered them on the work surface: backing, wrong side up, then batting.

*Next I centered my block on top and pinned it in place.

*I cut border strips for the sides at the appropriate size, layered them right-sides-together with the block and sewed them on with a ¼” seam allowance, pressing the border over the batt after stitching.

These seams will act as quilting lines.

I then measured, cut, and stitched the top and bottom borders on in the same fashion.

I began with larger pieces of backing/batting then my first border required, because these were leftovers from a previous project. I could now add another border if I want, since the extra backing/batting is already there, or I can square this up and bind as usual.

I’m thinking one border is enough – gotta go – time to bind!


No-End Binding – Improved Yet Again!

August 5, 2018 8 Comments

In February I shared a number of posts on some great uses for School Glue while quilting. I was very excited with how it worked for finishing the ends of my quilt bindings (click here to read that post), but I’ve found another tip that makes it even easier!

When sewing my binding ends together the lazy girl in me hated to stop when I was almost done to heat up the iron and press the glue dry. What to do?

Head to the store for another must have notion – “Wash Away Wonder Tape™”!

Once you have the tape the hard work is over. Prepare to be amazed  🙂 .

This works for single or double (French) binding (my example is done with a double binding). Sew your binding to the quilt, Beginning about 8″ from the end of the beginning tail, leaving at least 12″ open between the stitching of the tails, and leaving 8″ of ending tail open too – with a good overlap.

Because I made a double binding, I need to lay it open against the quilt to connect the ends. This works best if I pin the tails flat against the quilt (the corners of the quilt may “cup” up to allow for the opening of the tails).

Fold the end of one tail at 45° and finger press.

Cut a length of tape just a bit shorter than the angled edge, and affix the tape, paper side up.

Remove the release paper,

and lay the other tail smoothly in place, rubbing over the tape to secure it to both tails.

Pull the ends back to reveal the crease,

Carefully take it to the sewing machine and stitch in the crease.

Lay the binding flat against the quilt to be sure it fits.

Because the tape is wash away, you can skip this next step, but I liked the idea of pulling apart the end tails before you trim them and peeling away the tape. Now it’s gone and I don’t need to worry about washing it away.

Trim the tails 1/4″ from the seam.

Remove the pins, lay the folded binding back against the quilt, and stitch in place. Viola!

I still love the School Glue for matching fabrics and mitering borders, but I think this is the quickest and easiest way to finish the ends when binding. I’ve done it many times already and I think it’s pretty close to foolproof. Please give it a try and let me know what you think.

*************************************

And one more note. In last week’s post I shared Anne’s email address for instructions on her Serendipity Star. The address was incorrect. I have corrected it in that post, but I wanted to share the correct one here also: .

Thanks again Anne – for your generosity!

Facing a Quilt and With Great Corners!

March 11, 2018 7 Comments

I think you’re going to love my technique for FACING A QUILT, but first let me tell you about the sample quilt I’ll be demonstrating on  😀 !

When Wendy and I lead quilting tours we come up with projects that can be created onboard the ship, and we like to include creative techniques. As I was contemplating what we could do to make a traditional Hawaiian appliqué style project that was fun and inventive, the Lord dropped this idea into my head! I’m so excited!

Each participant (the projects are always optional) will make their own unique pattern from their initials, and then “stencil” the pattern onto fabric using Shiva Paintstiks™. Here’s my first “Cruise Hawaii” quilt, using the initials for “Sew We Go” and palm trees:

Do you see the “SWG”s? I echo quilted this 25” wall quilt by machine and faced the edge.

Our Hawaiian cruise adventure will take place in January 2019. That may sound like a long way off, but this sailing on NCL’s American Pride will sell out.  We need to release cabins back to Norwegian if they are not spoken for soon so if you’ve been contemplating joining us, please let us know. Simply click here for a printable version of the cruise flyer!”

And now – on with this week’s post:

In my last post I shared a simple technique for finishing a quilt without the need for a traditional binding. There is another option for a “binding-less” finish and it’s called a facing. I’ve seen many faced quilts while judging quilt shows and, as with the turned quilts we talked about last week, the corners are always the problem area. They tend to be lumpy, and they’re often messy looking along the edge and the back.

BUT THEY DON’T NEED TO BE!

This really isn’t any harder than attaching a binding:

• Begin by squaring up your quilted quilt 1″ longer in each direction than you’d like it to finish, because the facing requires a 1/2″ turn under allowance all the way around (a binding fits over the cut edge of the quilt and thus no length is lost, but a facing does require this extra inch, so remember to allow for it).

•  Choose a facing fabric that is similar in color and value to the fabric along the outer edge of your quilt.  Measure the width and length of your squared quilt. Substract 4” from each measurement and cut (2) 1 ½” strips at both measurements (ie. a quilt measuring 30” x 40” would need 2 strips cut 26” and 2 strips cut 36”). Cut (4) 5″ squares also.

• Press the 5” squares in half diagonally, right side out. Trim about 1” from one corner as in the picture below.

• Place a folded square against the right side of the quilt, in one corner, raw edges even, with the trimmed corner facing up.

• Place all 4 corners on in this manner. Then place the long strips, right sides together with the quilt, along all 4 edges, and pin in place. The strips will overlap the corners.

• Using a 1/2″ seam allowance, stitch all 4 sides of the quilt, going off the edge on each end instead of pivoting at the corners (this portion is a repeat of last week’s instructions).

• Using a seam ripper, remove the last 1″ of stitches in both directions (if there is quilting in the seam allowance, that will need to be picked out too).


•Pull back the square and the quilt top from the batting in the corner, exposing the previous stitching holes.

• Trim the batting corner off just inside the crossed stitches. Make sure you trim the batting only!


• Put the layers back in place and repeat for all 4 corners. Re-stitch the corners, pivoting this time. Trim.

• Turn the quilt over to the back and pull all the side strips out along the edges.

• Beginning at the end of one strip, wrap the strip to the back tightly around the outer edge of the quilt.

• Then fold the facing to the back of the quilt leaving the seam at the quilts edge. Pin and continue along the entire length.

• Repeat for all four sides.

• Turn the corner pieces to the back of the quilt. Push out the corners so they lay flat and sharp. Pin in place.

view from the back

view from the edge

view from the front

• Hand-stitch the facing to the back of the quilt.

This technique isn’t for every quilt, but it’s a good one to have in your toolbox when you need it  😀 !

And here’s a quick peek at two other Hawaiian quilts I’ve made. The first includes pineapples and my initials (CLK):

And this one is a small hibiscus flower quilt – just because it’s pretty (no initials or repeated designs):

They’re like potato chips – I can’t stop making them!

And I discovered an added plus – it’s quite simple to use one of the corners on the back of the quilt as a label!

I apologize for this post being a bit lengthy, but I’m hoping you found it interesting and worthwhile.

“Binding-less” Flat Corners

March 4, 2018 4 Comments

Currently it is very “trendy” to hang art on the wall without a frame. My daughter-in-law is a talented artist and often hangs her canvases in this manor:

This has become popular with fiber artists too. It is very “in” to hang wall quilts without borders or bindings.  I’ve made a number of wall quilts that I just didn’t think would look great with a binding.

I call this quilt “Interchange” and it is an example of one of my faced quilts. It was made for a challenge entitled “Colorwheel Opposites”. I chose pinks and greens and quilted it with “wheels”.

I love the visual “feeling” that the squares are about to tumble past the outer edge.

“The Narrow Gate” is another one of my faced quilts. It was made for a different challenge, this one entitled “Portals”, and it’s one of my spiritual journey quilts. The tree depicts the cross, and the portal is a sliver of the heaven we are promised when we are saved by Jesus. The leaves are 3-D and are printed with Scripture verses which tell about this amazing gift. Once again, I thought a binding would be too confining.

So, how does one get this look without a lot of effort? Well, I have two favorite techniques for accomplishing this quite easily. I’ll share the easiest in this week’s post and my favorite way next week.

The simple way is to “turn” small quilts (envelope style: layer batt, top and back; sew all the way around and leave an opening to turn right sides out) instead of binding them.

My least favorite part of turning a quilt is having an unsightly hand-stitched area along the quilt edge where it was turned. In a previous post I shared my favorite technique for eliminating that problem (click here for that post and scroll down about half way through the post for the turning trick).

My second frustration when turning a quilt is lumps at the corners. No matter how much I trim the batt and fabrics, there is always a lump… and worse – I sometimes trim it so close my turning tool pushes through the corner! UGH!

Well – I have a solution for that problem too. Here goes:

• Stitch all the way around the quilt, using a 1/4″ seam allowance, but don’t  pivot at the corners. Instead, stitch off the ends of each edge as in the picture, yielding crossed seams at the corners:

• Choose a corner and “unstitch” the last inch in both directions. You’ll be able to see the holes where the stitches were when you pull back the fabric:

• Pull the backing fabric out of the way too, and angle cut the batting away just inside the intersection:

• Lay everything back in place and resew the seam, pivoting at the corner this time.

• Trim the corners as usual for turning.

• Repeat for the remaining corners.

• Turn the quilt, right side out, and enjoy the “lumpless” results!

Do you turn your quilts? Do you have problems with lumps? If so, I hope you’ll give this a try, and I’d love to hear your thoughts about the technique.

Please return next week for step-by-step facing instructions. I think you’ll find it quite interesting!

Glue Basting to Miter a Border

February 11, 2018 2 Comments

Before I get to my topic of the week, I’d like to share a few helpful hints for using a blog such as mine. Some posts (like this one) contain instructions for techniques you may want to save. There are a number of ways to do this:

• When you click on the link to open my blog the first thing you’ll see is my most recent post and, if you scroll down  through it, you’ll find my previous posts. Because I put a lot of pictures in my posts, my site may load slowly on your computer or other device. That’s why I always send you a link to just my most recent post also.

• If you are on my full site and want to open just one of my posts, simply click on the title of that particular post:

The post title is in the red circle.

• When you’re in the page that contains only one post, the title will turn black as in the example below. You can “bookmark” that post to save it for future reference. On my computer I can add a bookmark by clicking on the star in the upper right, typing in a name for it and clicking on “done”. This process may be different on your computer, but it should be similar.

Once again – look for the red circle above :-).

• If you’d rather print that post and save a hard copy of the information, click on “print me” under the post title (and be sure you’re connected to a printer):

I hope this was helpful. Now for my topic of the week:

******************************

I’ve recently been using Elmer’s School Glue™ to match fabric patterns when sewing strips together. This week we’ll use the same glue technique to miter a border.

• Sew the border strips onto 2 adjacent sides of the quilt top, using a 1/4″ seam allowance, and backstitching 1/4″ from the corner on each strip:

• Lay the vertical strip flat against the ironing surface:

• Fold the end of the horizontal strip under at a 45 degree angle, forming a miter.  If your fabric happens to be a stripe – the miter will be much easier to see  :-). Press:

• Pull this newly pressed crease back

• and squeeze a thin line of glue along the edge of the crease:

• Lay the glued crease back in place on the vertical strip and press again to dry the glue:

• Once the glue is dry, fold the quilt top in half diagonally to expose the glued crease and stitch in the crease. Trim off the excess strips,  1/4″ from the stitching, and you’re done.

*************************

And one last thing!

Last week I shared information about the Sun Prairie Quilt Show. There will be two other shows in the Southeast Wisconsin area that same weekend:

West Suburban Quilters Guild will be holding their show at the Waukesha Expo Center. For more info go to: http://wsqg.net/quilt-show/

The Crazy Quilters in Mukwonago will also be holding their annual quilt show at the Mukwonago Middle School. For more info go to: http://www.mukwonagocrazyquilters.com/annual-show/

  • « Go to Previous Page
  • Page 1
  • Page 2
  • Page 3
  • Page 4
  • Page 5
  • Go to Next Page »

Primary Sidebar

Archives

Recent Posts

  • Spring Thaw
  • Quilting in Bloomington ~ Part 2
  • The Indiana Heritage Quilt Show ~ 2026
  • Bird’s Eye View
  • The Birds

Recent Comments

  • marlene on Spring Thaw
  • clkquilt on Spring Thaw
  • Mary Alice Hart on Spring Thaw
  • clkquilt on Spring Thaw
  • judy raddatz on Spring Thaw

Categories

Footer

My Guide

Whatever you do, do your work heartily, as for the Lord rather than for men.

—  Colossians 3:23

Contact Chris!

  • Home
  • About
  • Gallery
  • Classes
  • Trips
  • Books
  • Blog
  • Contact
  • Sign Up For My Blog

Copyright © 2026 · Chris Quilts · Website by Adunate · Privacy Policy