• Skip to main content
  • Skip to primary sidebar
  • Skip to footer

  • Home
  • About
  • Gallery
  • Classes
  • Trips
  • Books
  • Blog
  • Contact
  • Sign Up For My Blog

Blog

School Glue – a Quilter’s New Best Friend

February 4, 2018 4 Comments

Last week I shared how to match striped fabric strips, using “Elmer’s School Glue”™, with a straight seam. This time I’ll demo matching with a bias/mitered seam. Its the same basic maneuver – glue basting, plus a pressing tip for creating the miter:

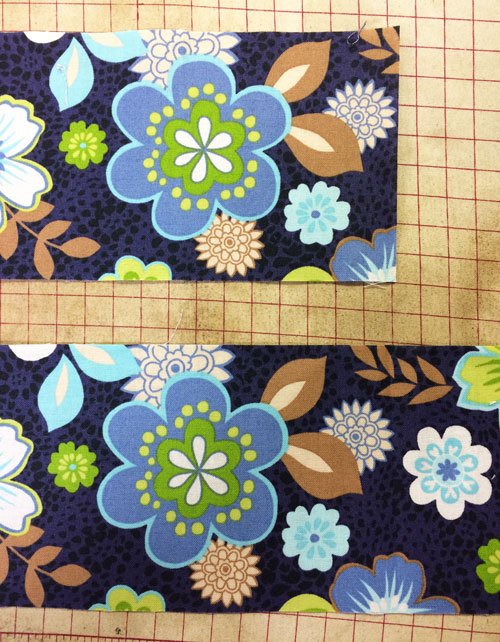
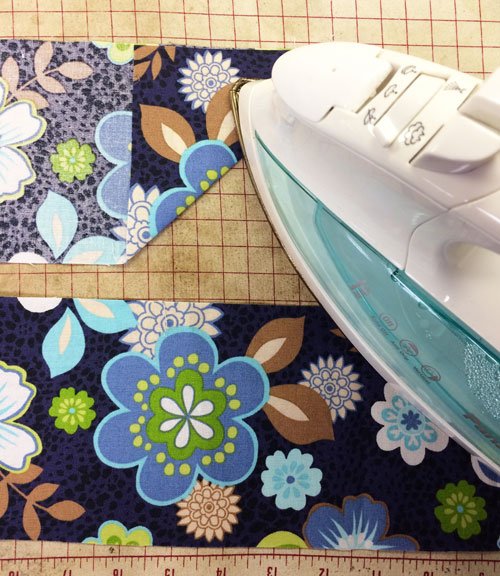
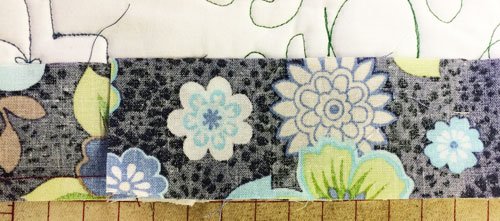
• Begin with 2 strips you want to sew together end-to-end, and find a matching pattern on both.

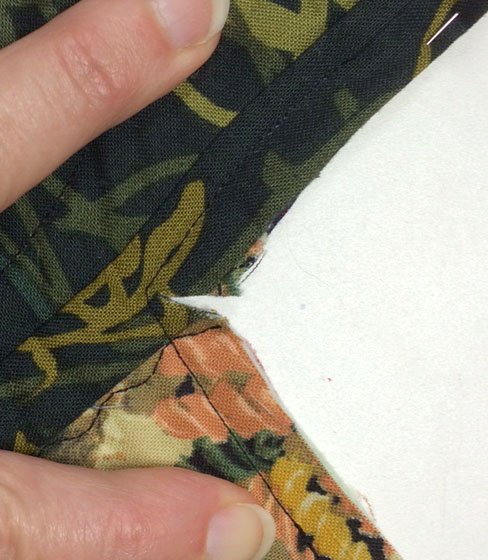
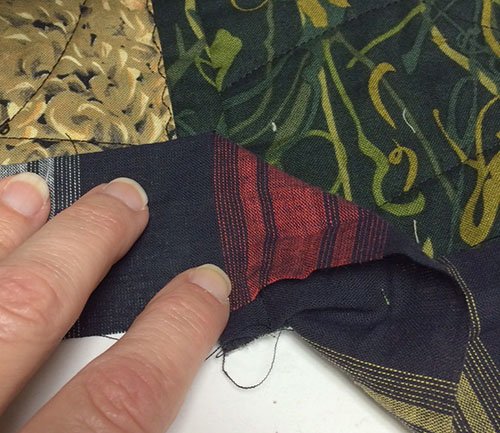
• Turn over one strip and fold back the corner of the end. Press.

• Run a thin line of glue along the pressed crease.

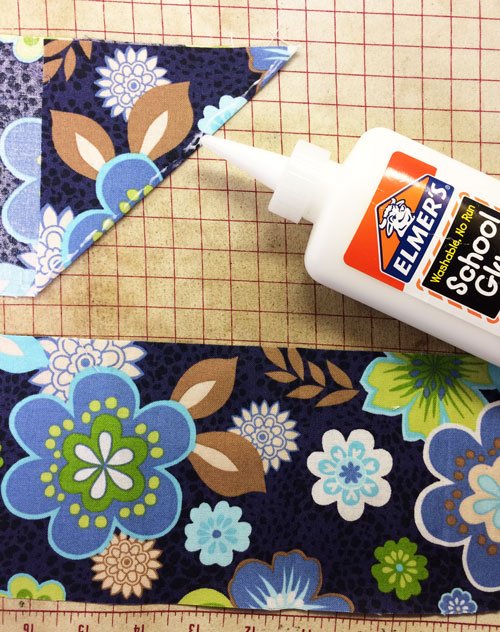
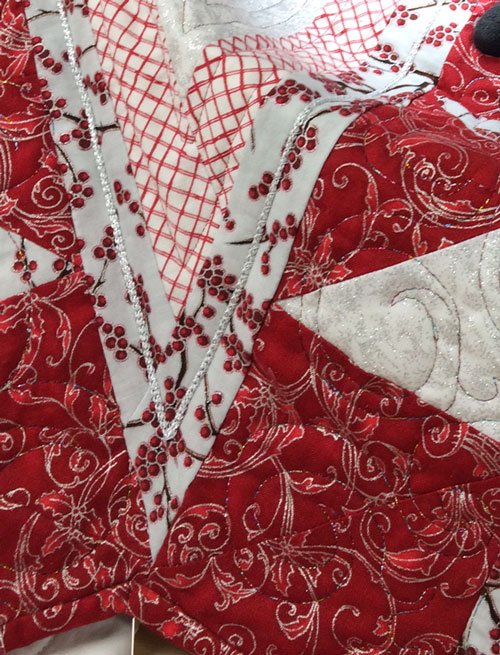
• Lay the “pressed/glued” strip on top of the second strip, glue side down, and carefully match the pattern. Iron in place to dry the glue.

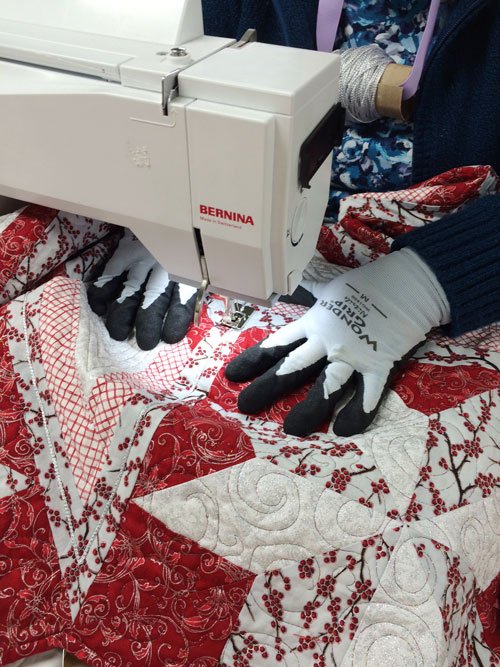
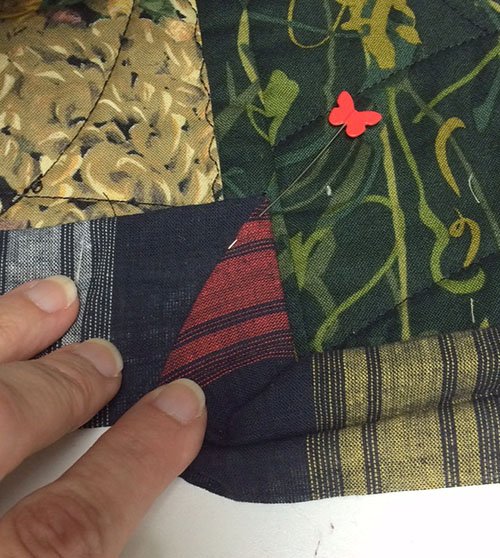
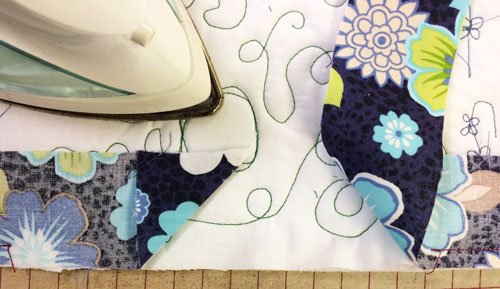
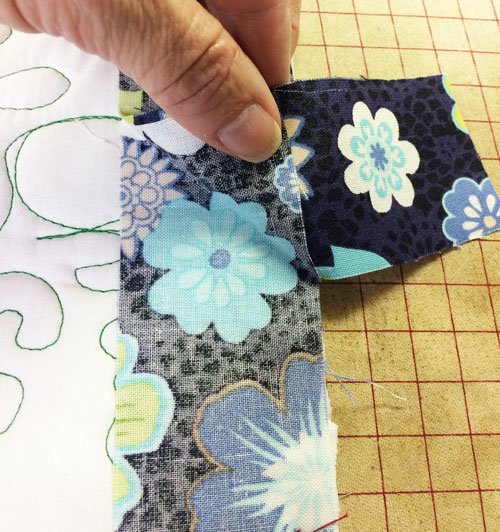
• Then fold the strip you just added on the right, down to expose the inside of the crease and stitch in the crease.

The great thing about using the glue is – if it doesn’t match exactly, even after pressing, simply pull it apart and glue again!

And …

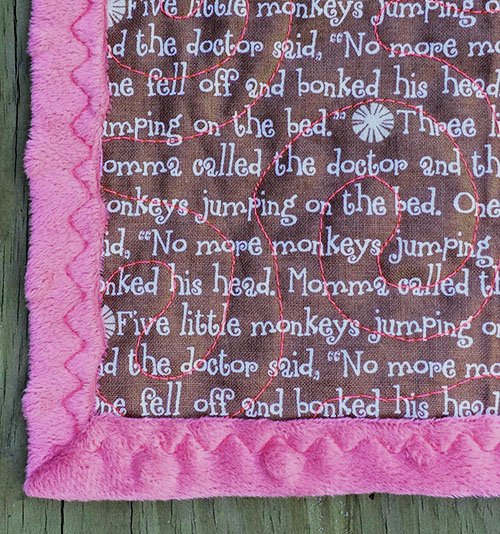
The above technique works great for finishing a “no-end” binding!

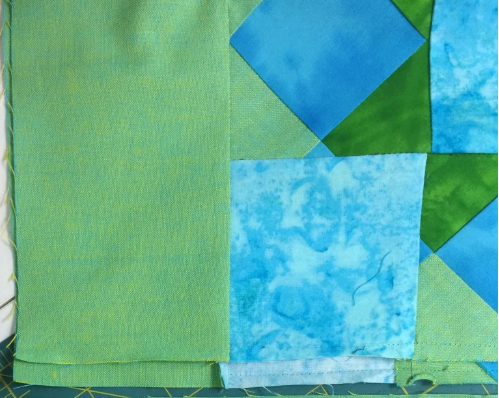
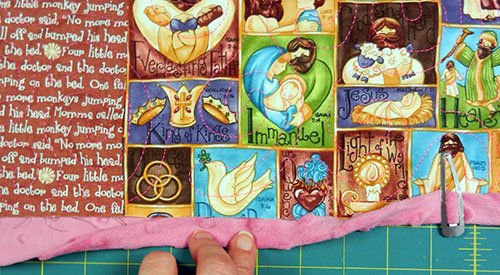
• Sew your binding to the quilt, leaving about 8″ open between the beginning and ending tails.

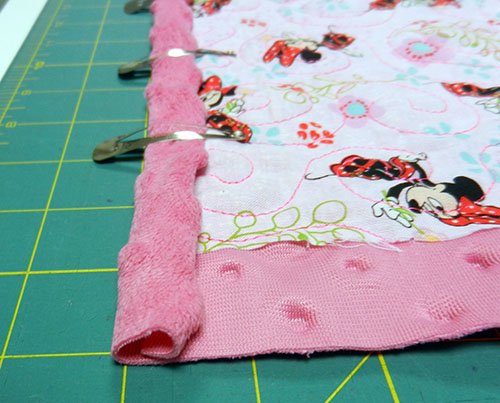
• Fold back the end of the tail on the left at a 45 degree angle and press.

• Run a thin line of glue along this crease.

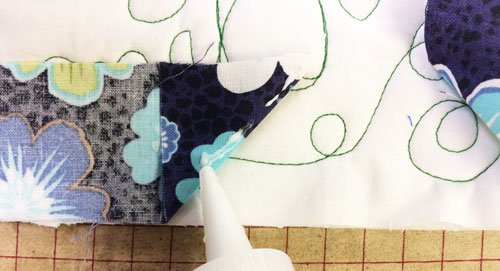
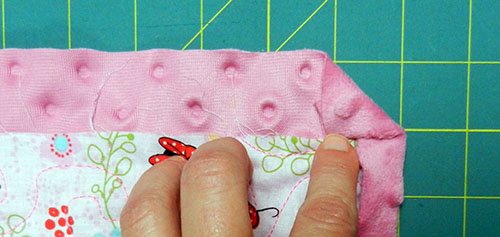
• Place the tail on the right back evenly on top of the glued crease. Press to dry the glue.

• When the glue is dry, pick up the strip tails, open them to reveal the inside of the crease and stitch in the crease.

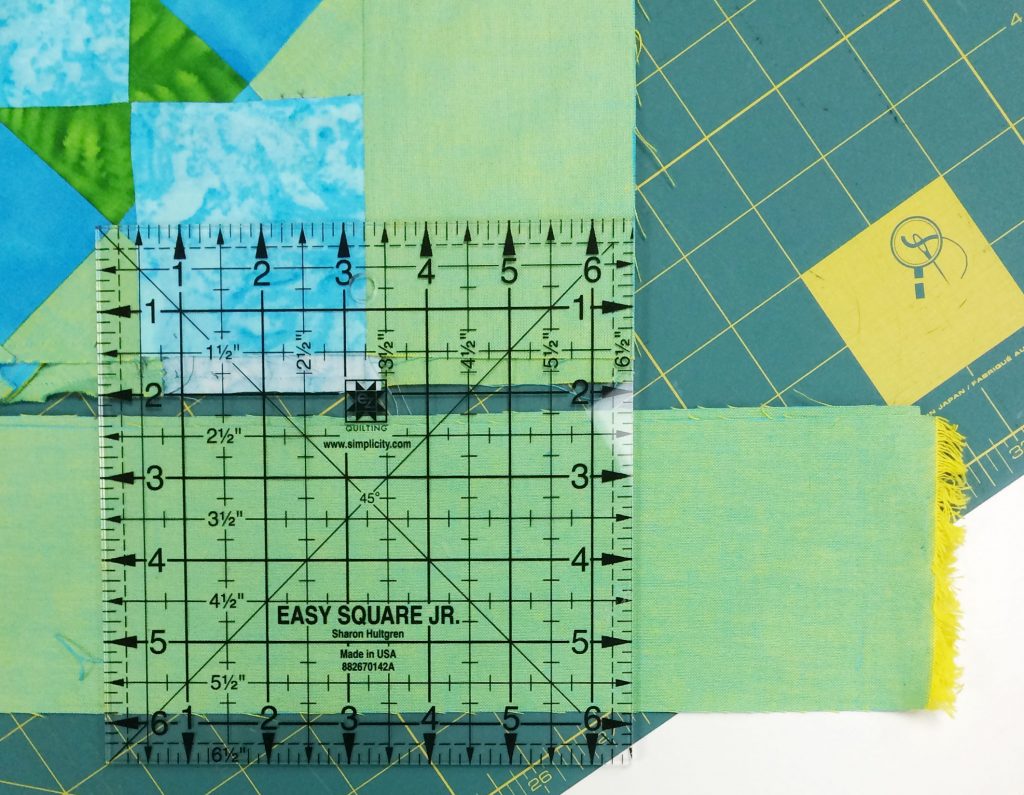
Trim the excess tails 1/4″ from the seam and continue sewing the binding to the quilt.

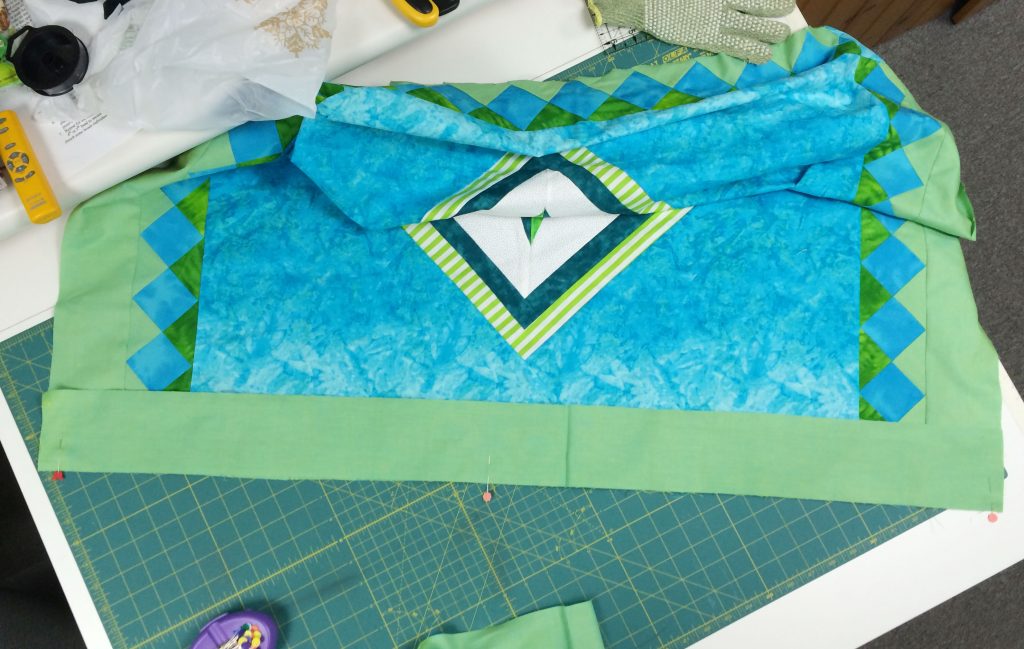
If you prefer to use a double or “French” binding, simply leave yourself a wider opening between the beginning and ending stitches (perhaps 12″), open the strips flat, and connect them as above, folding the strip back in half after it is stitched, and sewing it to the quilt.

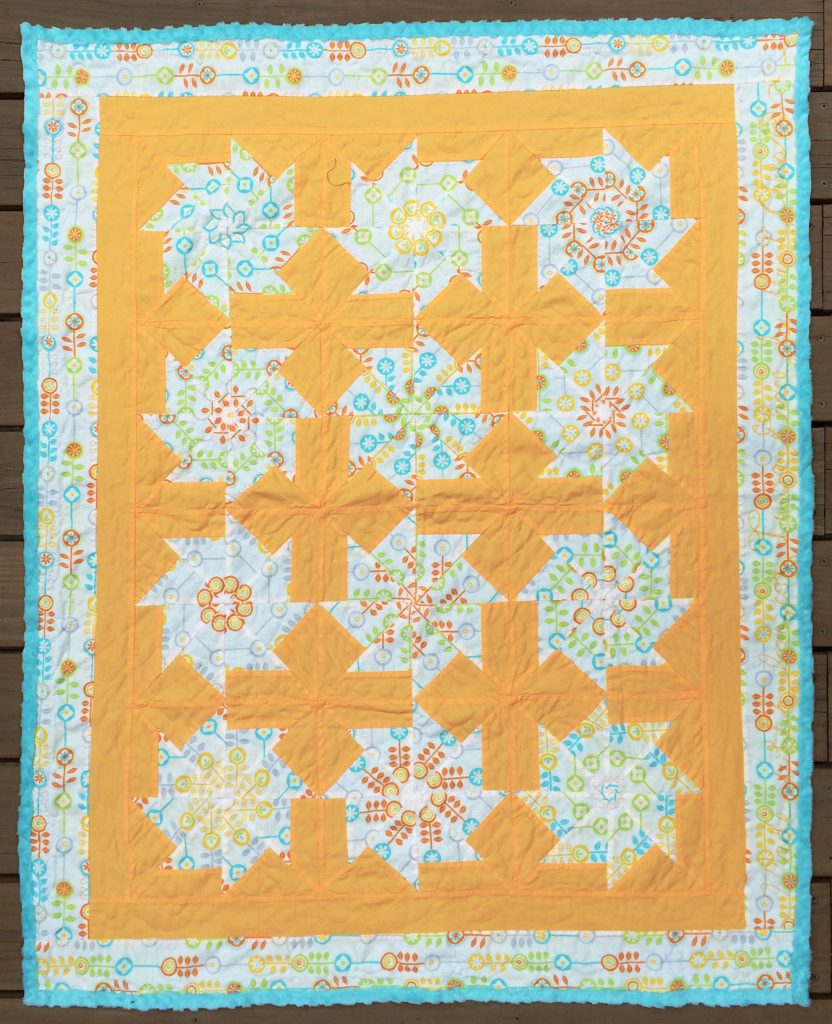
I do hope you’ll try this technique. I’ve found it extremely quick and accurate!

An FYI for local quilters –

The Sun Prairie Quilt Show is fast approaching. To enter a quilt in the competition and/or read all about the show click here!

A Great Binding Tip!

January 22, 2017 8 Comments

A number of years ago my friend Jean  showed our Open Lab class a clever way to control binding while attaching it to a quilt (to read a previous post about some lovely placemats Jean made, click here!). I thought I had posted about it, but can’t seem to find that post (after 6 years of blogging I’ve covered a lot of topics!)

The concept is quite simple and it requires 2 easily obtained supplies: an empty toilet paper roll and a piece of ribbon. After making enough binding to go around her quilt, Jean rolls it onto the toilet paper roll, threads the roll onto a length of ribbon, ties the ribbon around her neck, and stitches the binding to her quilt. The binding feeds evenly off the roll in an extremely organized fashion. Brilliant!

Fast forward to this past Christmas. Connie, another Open Lab friend, was making tree skirts (I posted about them in December – click here for that post). She chose to couch silver cording onto one of the tree skirts (for couching instructions click here). Jean just happened to have one of her special rolls with her and it made the couching oh so much easier:

Connie added the cording with Jean’s binding roller.

couching roll

Here’s a close up of the couching. It really added some extra zip to the tree skirt!

Thanks Jean, and Connie 🙂 !

I don’t know why I haven’t tried this yet, but I know what I’ll be doing with my next empty toilet paper roll.

Let me know if you try this. A picture of your project would be fun too!

Quilts and Staples?

December 11, 2016 2 Comments

It’s beginning to look a lot like Christmas in our woods. Last week we got a few inches of snow, so I headed out to take some pictures. This was my favorite:

Yesterday we brought the canoe into the barn just in time for more snow. The pond is now frozen over, the birds are loving our feeder, and it looks like we’ve had about 6″ more so far.  I think it’s beautiful!

This week’s post has nothing to do with snow, but I hope you enjoy it!

You may remember a post I did last Spring about rust dyeing (click here to read that post). My friend Ida created a couple of pieces of rust-dyed fabric when our group experimented with the technique. Well – she decided to do something with a piece of that fabric. She added a Seminole border in wonderful matching fabrics.

idas-rust-quilt

Our group had discussed the difficulty of quilting rust dyed fabric. The rust leaves enough metal in the fabric to make some areas impenetrable to a needle, thus making the quilting step a frustrating experience. Ida surmounted that problem by “tying/tacking” her quilt with brass staples!

idas-staples1 rust dyeing

Ingenious! And just when you think there’s nothing new under the sun. Leave it to my very creative friend Ida – to come up with the perfect solution.

Stapling your quilt… it might become the new, “in” way to quilt!

************************

An Exciting Update for quilters in and out of Wisconsin!

This past week I received good news about the Treasured Quilts of Wisconsin video on pbs. The entire show is now available on-line. So, even my out of State viewers can access it! Here’s the link!

http://video.wpt.org/video/2365906809/

Watch now: WPT Presents | Treasured Quilts of Wisconsin | WPT Video
video.wpt.org
Join host Nancy Zieman for this special featuring interviews, stories and quilts.

Fitting Quilt Borders – Mathlessly

August 7, 2016 3 Comments

Seminole quilt border

The generally accepted rule for getting borders to fit on your quilt is to square up the top, and then measure the length of two opposite sides and across the center of the quilt top. In a perfect world these 3 numbers should be the same, but only God is perfect, and most of us know that these numbers seldom match. If they’re way off I do some re-stitching. If they’re within a 1/2″, I split the difference and cut the border strips at this size – easing them to fit.

On smaller pieces I’ve discovered an easier way. It may sound like cheating, but it works for me – if the sides are close to the same length (1/2″ or less difference – I might try up to a 3/4″ difference, but more than that would be pushing it). Here are the step-by-steps:

  1. Fold the quilt top in half and lay it on a table, with the edges you’re adding the borders to closest to you. I’ve left a 1/2″ underlap in the picture so you can see that both sides are aligned together. I then smooth these edges out so they are evenly on top of each other (trust me, even though the entire length isn’t in the picture, it is even on the right side too). If they aren’t exactly the same size I: place the corners on top of each other, hold them between a forefinger and a thumb on each side, and tug gently, placing it back on the table.mathless borders1
  2. Make 2 border strips at least 1″ longer than the side of the quilt, and square off the ends on the left. Place these border strips on top of each other, and aligned with the left edge of the quilt top.mathless borders
  3. On the opposite end of the strips, rotary cut the borders even with the right edge of the quilt top. You now have two strips that are the same length as the quilt top.mathless bordersmathless borders
  4. Now it’s time to sew on one of the border strips. This is one time I do pin the pieces together! Place a border strip, right-sides-together with the edge of one side of the quilt top, and pin it even with the left end (red pin head). Pin the right end even also (pink pin head).
  5. Grasp both ends, holding the quilt top and strip between finger and thumb, and gently tug until the strip lays flat (as directed in step 1). Place a pin in the center (middle pink pin), mathless borders
  6. This is the trick to make sure the strips fit: Use the grasp, tug and pin method from step 5 to place a new pin between a center and end pin. Repeat this process of pinning in the center of every pair of pins until the strip is securely pinned to the quilt top.
  7. Sew in place, and repeat for the opposite side. Attach the remaining sides in the same manner. (I just realized that I took these pictures while attaching the second set of green border strips, but you get the idea).

Give it a try, and let me know what you think!

And if you like the Seminole piecing in this border – stay tuned – I’m planning to do a blog topic on it soon!

********************

And now – a photo finish! Connie took my Spin Star class a few years ago and used my piecing technique to make purple blocks for her granddaughter (click here for more information on my Spin Star technique). Then she did something spectacular!

Connies Spin Star quiltShe brought this quilt to class last week and I knew you’d want to see it! What I love is the way she alternated the spin stars with bears paw blocks, but to make them fit and work together, she added the outer, “claw border” from the bears paw block around each spin star. Wow! What a clever idea! Great job Connie!

Another Spin Star

July 24, 2016 3 Comments

You may remember a post I wrote last January. I was hosting a “Tie Dye” baby shower for my niece Brianne. Well, Tessa Grace made her arrival later that month, and I needed to make her a quilt! I decided I was in the mood to make another “Spin Star” (my version of a fussy-cut quilt – click here for more on my technique), and I found a bright and pretty print fabric that was just right. I cut my identical repeats from the fabric, and stitched together 12 unique stars on a yummy butterscotch color background.

Tessa-quilt-web

When it came to the quilting, I wasn’t sure what would work best in the open areas. I decided to cover one with Glad Press n Seal™, and audition a variety of designs using washable markers, erasing and redrawing until I found the pattern I liked. Then I just quilted through the Press n Seal™ and tore it away.

marking quilts with Glad Press n Seal

I found a beautiful turquoise blue “Minky” fabric for the backing and turned it to the front, to give it a soft outer edge. For instructions on this technique, click here!

Tessa-back-web

The Minky had a lovely texture, and the free motion quilting made it even more fun.

Tessa-quilt-back-detail

Here are Scott, Brianne and Tessa with the quilt.

Tessa-and-quilt

It took me a few extra months to complete the quilt, but I don’t think Tessa minded the wait. What a blessing to give a gift of hand-made love. I hope she enjoys it!

*****************

And just a little FYI 🙂 ! _QE2016_I'mTeaching_225x225Click here for all the information!

Faux Piped Binding

November 29, 2015 2 Comments

faux piping

I recently learned a very easy way to get the look of a piped binding, with a lot less effort than the traditional method (it’s the little sliver of blue, next to the binding in the quilt above). The best part is that it is all done by machine – no hand finishing! I’m posting it for my friend Laura, who hasn’t seen it yet, and for any of you who are in the same boat 🙂 .  Here it is in 5 easy steps.

  1. Cut binding strips 1 3/8″ wide (one and three eighths -sorry, the blog font looks wierd in odd fractions). Cut enough to go around the entire quilt and piece together, end to end. Cut piping strips 1 5/8″ wide (one and five eighths), and piece together as you did with the binding strips. It seems a little wierd that the piping strip is wider than the binding strip, but trust me – it works!
  2. Sew the binding strip (black) to the piping strip(blue), with a ¼” seam allowance.faux piping
  3. Press the seam towards the binding strip,faux piping then press the strip in half, wrong sides together.faux piping
  4. Align the raw edges of this binding unit with the outer edge of the quilt, on the back of the quilt, piping side up, and attach with a 1/4″ seam allowance.
  5. Turn the binding to the front of the quilt and pin or clip in place, mitering the corners. Stitch in the ditch between the binding and the piping, in a color thread to match the piping.faux pipingVoila! A great look with only a little extra effort. Please let me know if you use this technique – and what you think!

A Lunch Bunch Quilt – Part 3

September 20, 2015 1 Comment

Binding an Inside Corner

Every so often a quilt comes along that has an odd outer edge – the question is “how do you bind it?” This was a problem I had to overcome in the Lunch Bunch quilt I’ve been sharing with you. Because the quilt was done “quilt as you go” style, in columns, I ended up with an interesting bottom edge.

in corner 1 - whole edge

All the corners are right angles. The “outside” corners are easy – they miter like the corners on a square or rectangular quilt. The “inside” corners are a bit trickier, but not too bad if you know the “tricks”.

1. Begin by stay-stitching, inside the seam line, about 2″ from both sides of the inside corner “pivot point”.

in corner 2 stay stitch

2. Clip to the stay-stitching “pivot point”, stopping a few threads from the stitching.

in corner 3 clip 3. Attach the binding down one side of the inside corner, stopping with the needle down at the binding “pivot point”.

in corner 4 sew side 1

4. Leave the needle down, lift the presser foot, and pull the quilt straight (the clip will allow you to do this). Lay the binding strip even with this new edge and continue stitching the binding to the quilt.

in corner 5 sew side 2

5. The binding will be standing up on this corner.

in corner 6 miter 1

To create the miter on this first side, fold one side flat, as in the picture:

in corner - miter 2

Then fold the other side until a 45° miter is formed.

in corner 9 - miter 4

Pin or stitch this side of the miter to secure.

6.  Turn to the other side and fold this new miter – fiddling until it looks good. Repeat to pin all inside corners and then stitch the binding to this side of the quilt, using your preferred method.

in corner 99 - frontIt really is quite simple and the effect is worth the effort!

And now (drum roll please!) Here is the finished Lunch Bunch Quilt!

Scrappy Log Cabin Quilt

Almost 20 years in the making – and finished! It was even juried in to be featured at the in the Fine Furnishing Show held this weekend in Wauwatosa, WI. It was hung in the entry to the show and I was very pleased – praise the Lord!

Lunch Bunch quilt at FF show

So, are you considering sending me a picture of your blocks? I hope so!


Turned Binding

July 5, 2015 4 Comments

Our youngest granddaughter, Rainee, lives in Washington State, and she just turned 3. I decided she needed a new snuggly quilt (with only a short amount of time to make it). I asked Sommer to help me pick out “I Spy” type fabrics once again. This time I cut 9″ squares and pieced them together. I also thought it would be fun to Repliqué her initial in one of the blocks using the technique from my Snuggle & Learn book.

turned back to front binding

A number of friends have been backing their kid’s quilts with Minky fleece recently, and it sounded like the perfect choice. Sommer loved it’s softness! I also wanted to turn the back to the front for a soft edge, as opposed to a traditional binding. While backing and finishing the quilt, it hit me that this would be a good topic of the week, so here are some of the things that worked for me.

*  When laying out the Minky backing, I smoothed it on the work surface, but didn’t stretch it at all. In the past I’ve had pucker problems if I stretched it (even a little).

* I made sure the backing was at least 3″ larger than the quilt top, and I chose not to use any batting.

*I smoothed the top onto the wrong side of the backing and safety pinned it well. Then I free motion quilted it (this also helped to not stretch anything) – in my favorite spiral pattern.

turned back to front binding

* Once the quilting was complete, I trimmed the backing 1 ¼” away from the edge all the way around.

turned back to front binding

*Then the fun of turning began. Step 1. Begin on a long edge and fold the raw edge of the backing up to meet the raw edge of the quilt top. Then bring the fold up to the top and clip or pin.

turned back to front binding

2. Do this all the way off the next edge.

turned back to front binding

3. Bring the folded outside edge up to the raw edge of the quilt top, gift wrap style, creating a miter.

turned back to front binding

4. Fold the new raw edge of the backing to the raw edge of the quilt.

turned back to front binding

5. Then bring the folded outside edge up to the top and clip or pin.

turned back to front binding

6. Continue all the way around and then machine stitch in place with a decorative stitch.

TB miter stitched

Voila – a quilt with a snuggly soft back and edge!

turned back to front binding

The day Sommer helped me pick the fabrics for her cousin Rainee’s quilt, she noticed my fish bowl full of scraps. She hadn’t played with it for months and asked if I could bring it down off the shelf.

fishbowl

I’ve posted pictures previously of various grandkids playing with the scraps, and she had so much fun I had to post a few more! She had a blast pulling and throwing.

sommer scraps 6-15bWhen she tired of plopping them on her head, she took aim at me.

Sommer scraps 6-15c

Then she laid on the floor and did a bit of scrap swimming.

Swimming in fabric scraps

She’s big enough now to do a good job of picking up afterwards – so it’s fun for both of us!

  • « Go to Previous Page
  • Page 1
  • Page 2
  • Page 3
  • Page 4
  • Page 5
  • Go to Next Page »

Primary Sidebar

Archives

Recent Posts

  • Spring Thaw
  • Quilting in Bloomington ~ Part 2
  • The Indiana Heritage Quilt Show ~ 2026
  • Bird’s Eye View
  • The Birds

Recent Comments

  • marlene on Spring Thaw
  • clkquilt on Spring Thaw
  • Mary Alice Hart on Spring Thaw
  • clkquilt on Spring Thaw
  • judy raddatz on Spring Thaw

Categories

Footer

My Guide

Whatever you do, do your work heartily, as for the Lord rather than for men.

—  Colossians 3:23

Contact Chris!

  • Home
  • About
  • Gallery
  • Classes
  • Trips
  • Books
  • Blog
  • Contact
  • Sign Up For My Blog

Copyright © 2026 · Chris Quilts · Website by Adunate · Privacy Policy