Have you ever finished a quilt, binding and all, only to realize later that it’s not big enough to make you happy?!?
In 2020 I made a new quilt for our king sized bed (click here to read a post about quilting this quilt). It fit great ~ with the bed skirt completing the look.

Then we got a new “Sleep Number” bed that couldn’t have a bed skirt because it had a divided mattress. The beige base looked ok, but if I didn’t tuck the sheets up they hung down and it was obvious the quilt was just a little too small. The good news was our bedroom was upstairs and I didn’t have to look at it very often. Then we moved and our bedroom is now right next to the living room.

Can you see the sheet hanging below the quilt on the left? Grr! I also really didn’t like the hard plastic showing everywhere else (as on the right corner). Grr again!
So last week I decided it was time to add a border to a finished quilt. I’ve done a tutorial on this technique before, but I thought it might be worth repeating. The first step was to remove the old binding and, since I had stitched it down with a machine serpentine stitch instead of hand appliqué, it took me two nights.


Once the binding was off ~ I had the new borders sewn on in a day. Ripping is certainly less fun and more time consuming than sewing 😊.
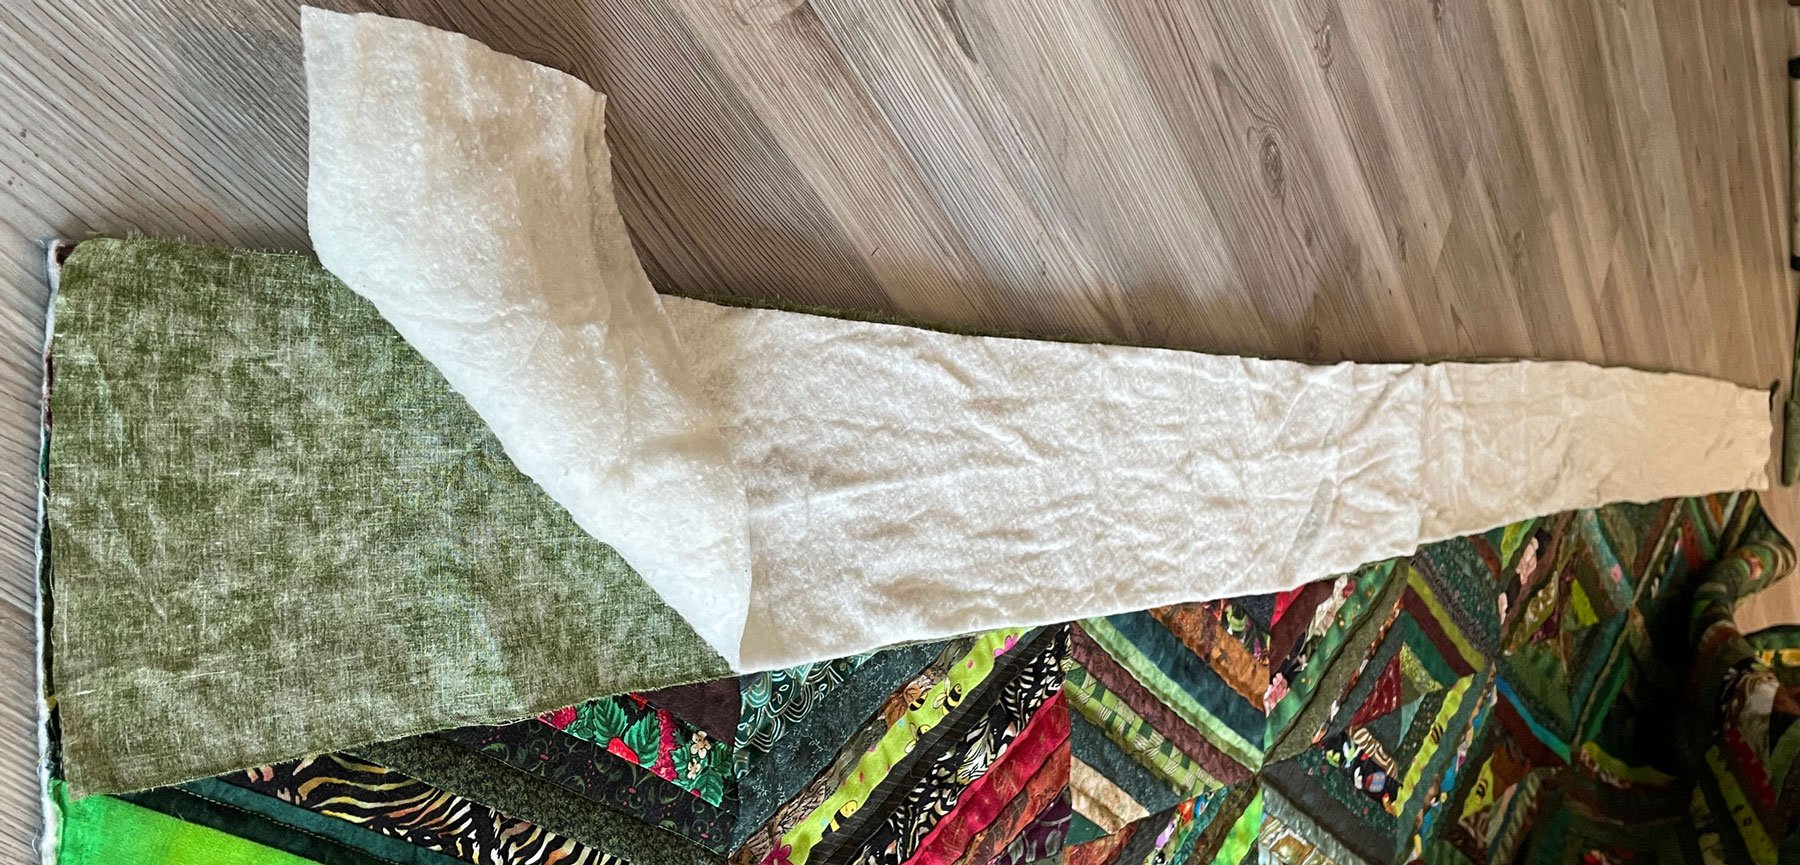
To add the borders I cut new 5 1/2″ strips for the front, back, and from batting too.

I layered a front border strip, right sides together, along an edge of the quilt center, then a strip of batting, and pinned it in place.

Then I flipped it over and pinned the back border strip along the entire edge also. I sewed the borders on through all the layers; folded everything away from the quilt center, pressed, secured them flat; and added the next border until all the border strips were attached.

This new border was wide enough to require quilting, so I echoed the diamond quilting lines from the rest of the quilt, using rulers and my mid-arm.

I then needed to square everything up before attaching a binding. The old binding wasn’t long enough and I didn’t have any more of that fabric to add the extra length, so I cut new binding and added it all the way around. I secured it with a serpentine stitch once again ~ and I plan to never rip it off 😊.

Every time I look in the bedroom I am assured that it was worth it!

We usually think of a quilt as being finished when the binding is on, but sometimes it isn’t truly finished for quite a while after that!