• Skip to main content
  • Skip to primary sidebar
  • Skip to footer

  • Home
  • About
  • Gallery
  • Classes
  • Trips
  • Books
  • Blog
  • Contact
  • Sign Up For My Blog

Blog

A Yooper Quilt Show

November 27, 2022 6 Comments

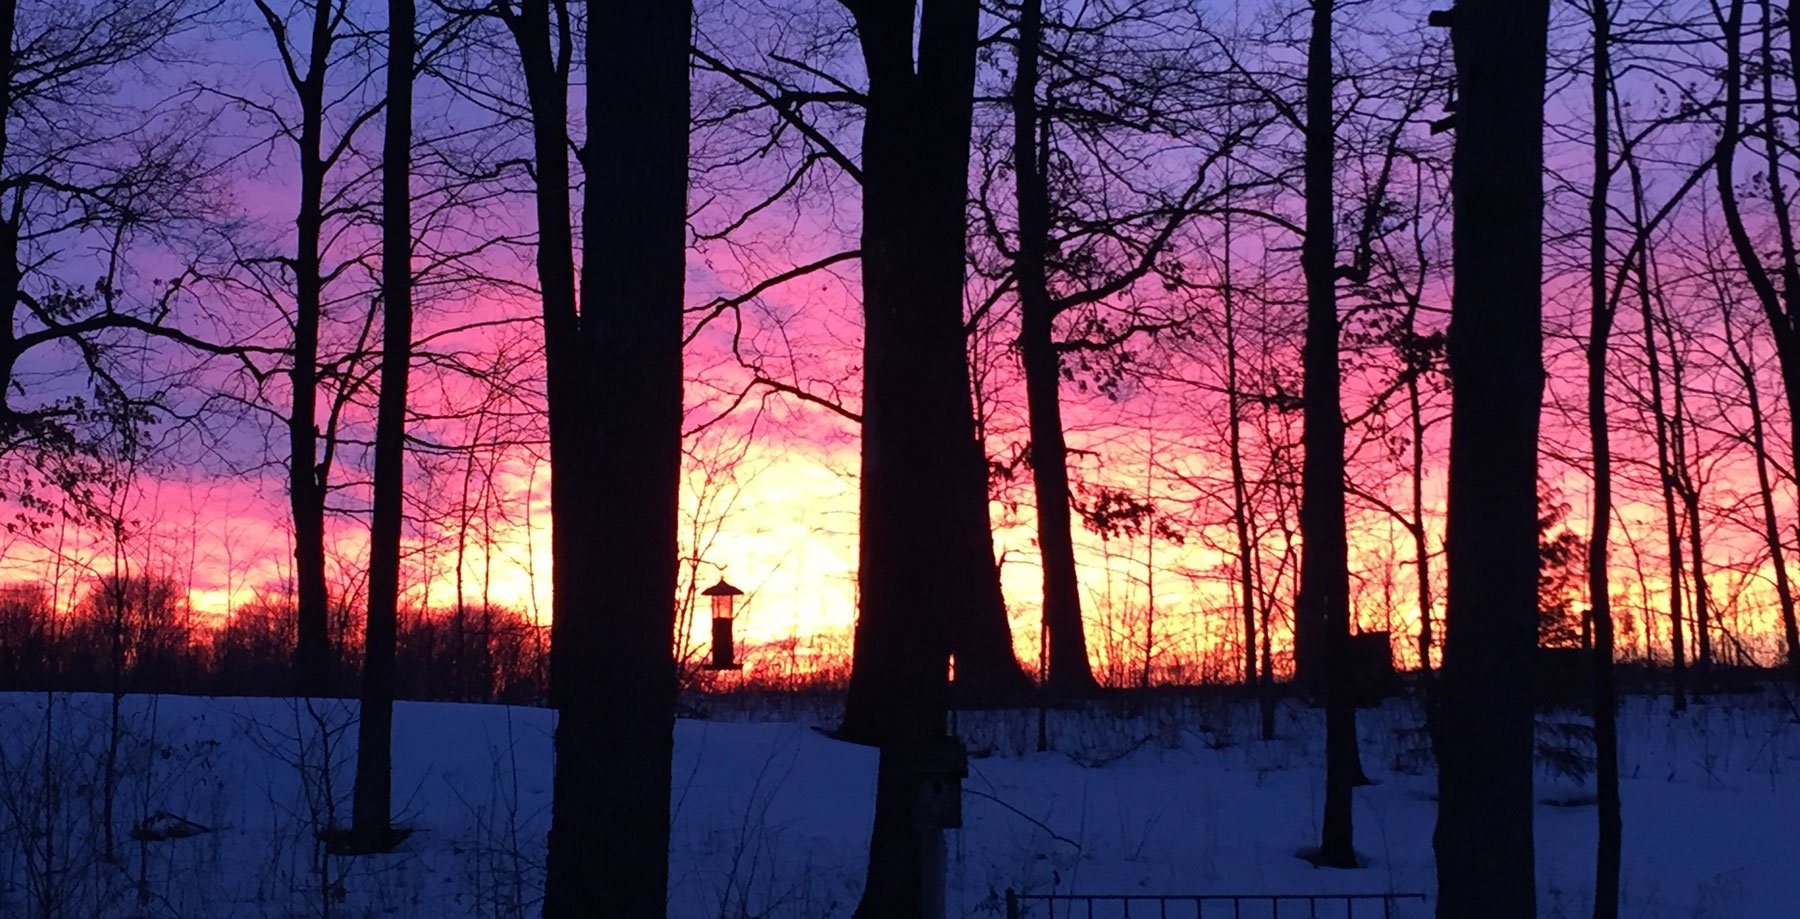
Our ThreadBenders group recently had a great opportunity to exhibit some of our quilts in a lovely show in Marquette, MI. My friend Cathy’s sister lives in the Upper Peninsula, and that’s how Cathy found out about the show. She did the legwork to get our quilts entered and delivered way up north for the show this past weekend. Then she invited me along to see the quilts and bring them home afterwards. It was a bit snowy, windy and cold, but the sun was shining and the scenery was beautiful. I especially enjoyed this sunset from our motel room window.

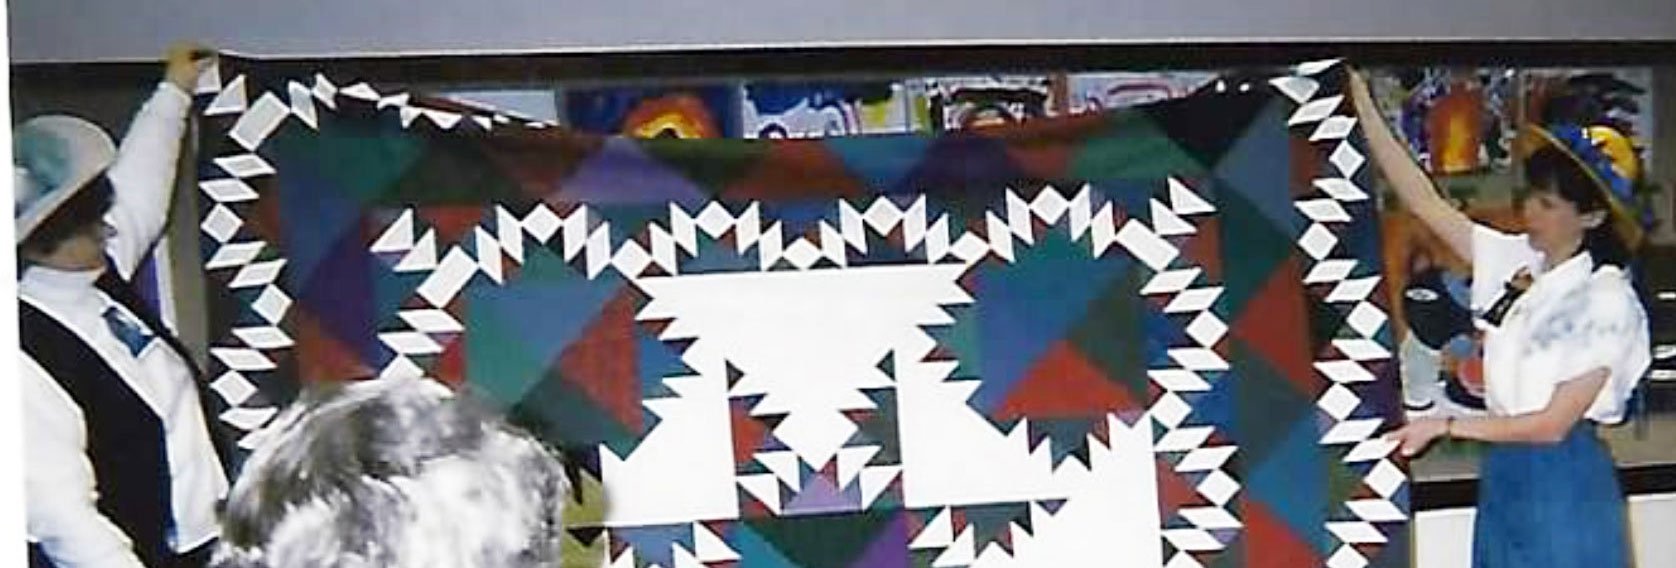
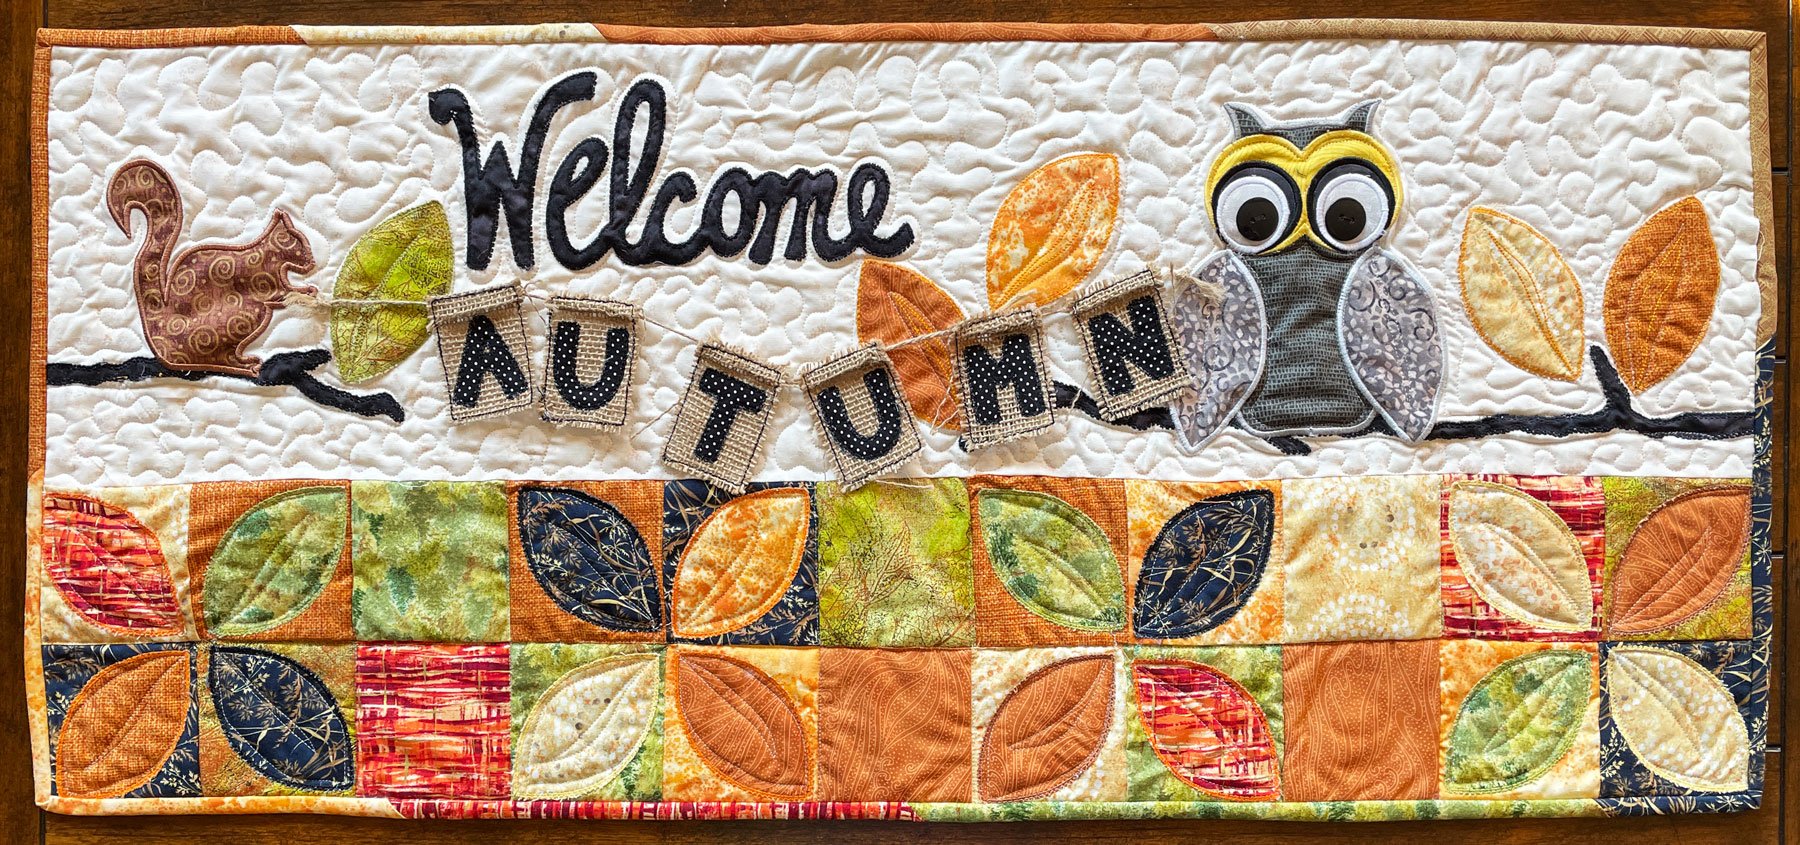
Each member was welcome to enter a number of their quilts and encouraged to choose some from our recent challenges. The show’s staff did a great job of keeping our quilts together as exhibits. This was the first time we were able to use our ThreadBenders banner – with all the blocks in place (click here to read a post about it).

And our quilts got a lot of interest.

As with other shows ~ I’d love to show you all of the quilts, but I only have room for a few of my personal favorites. I hope you’ll enjoy them 😊.

A Place in Our Hearts by Christine Jenkins

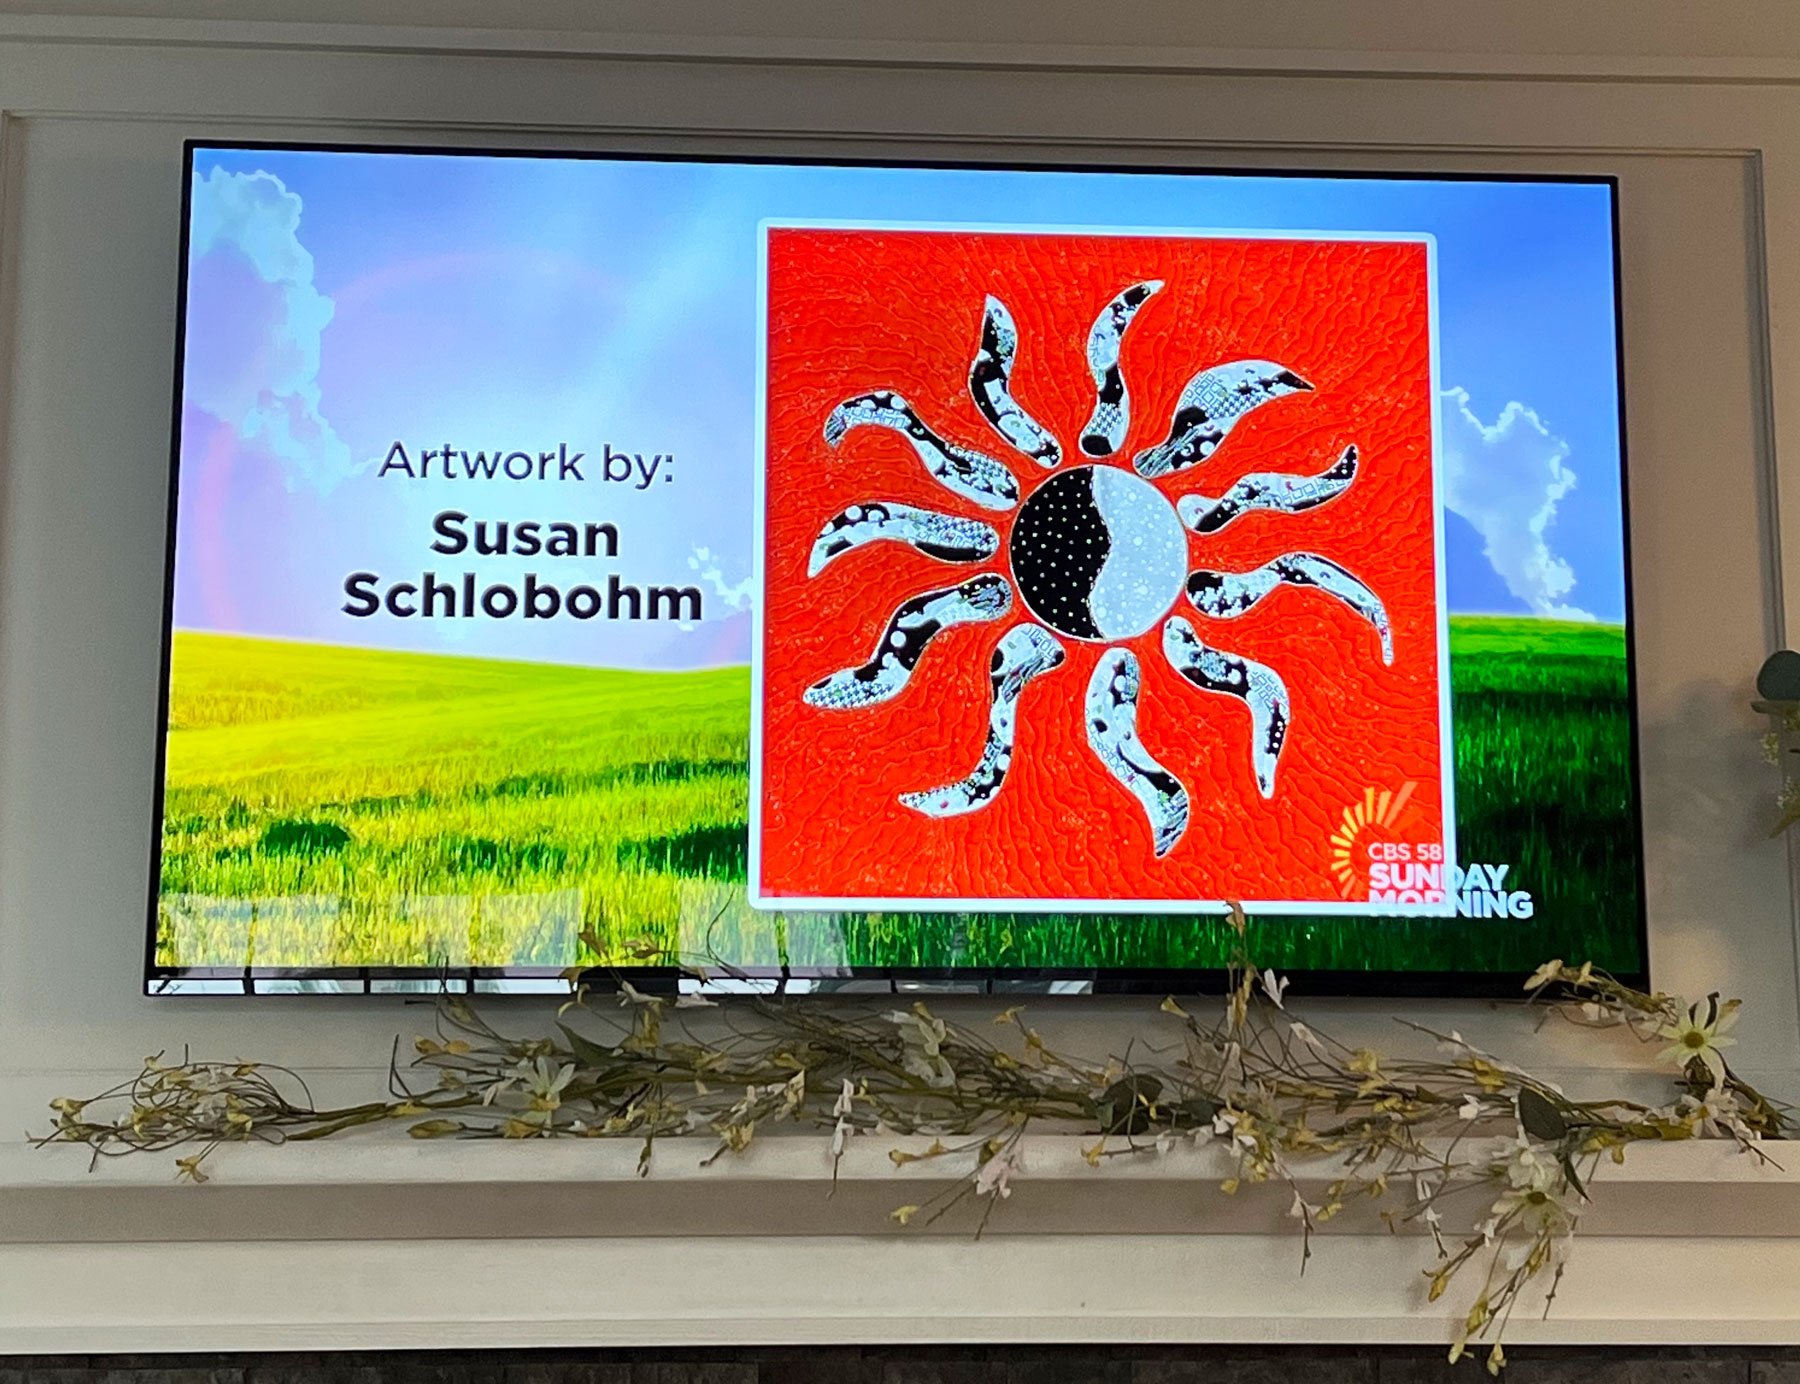
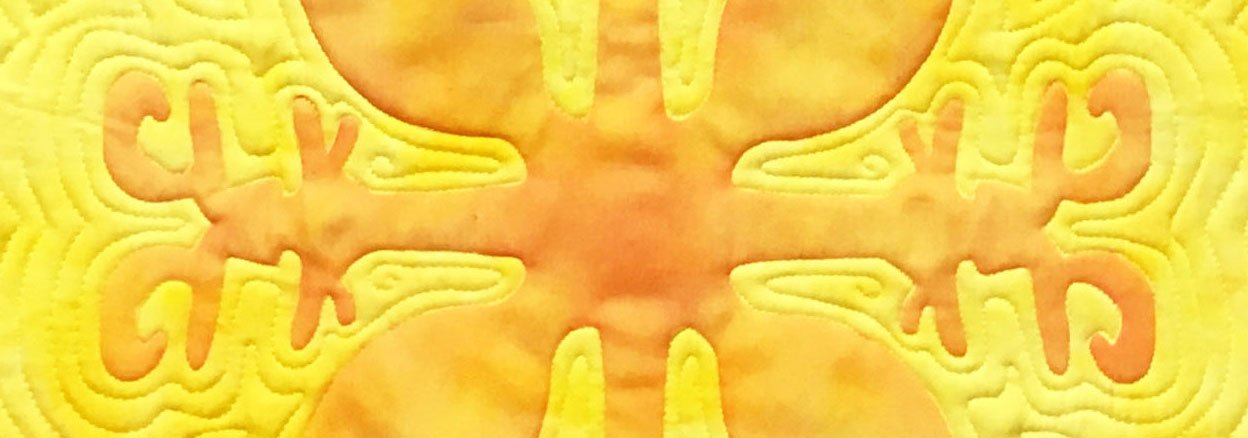
Flower Power Galaxy by Karen Dill was made using raw-edged reverse applique. I’m intrigued!

African Nightmare by Carol Mihalko. Carol said it was a nightmare because it took her a year to complete.

The next quilt is also by Carol and is entitled Yooper Row by Row. The rows are of sites in the upper peninsula and, if you’re not from the area you may not know that Yooper is a term for the UP.

There were quite a few quilts made using gradation/ombre fabrics, and I couldn’t resist sharing a few:

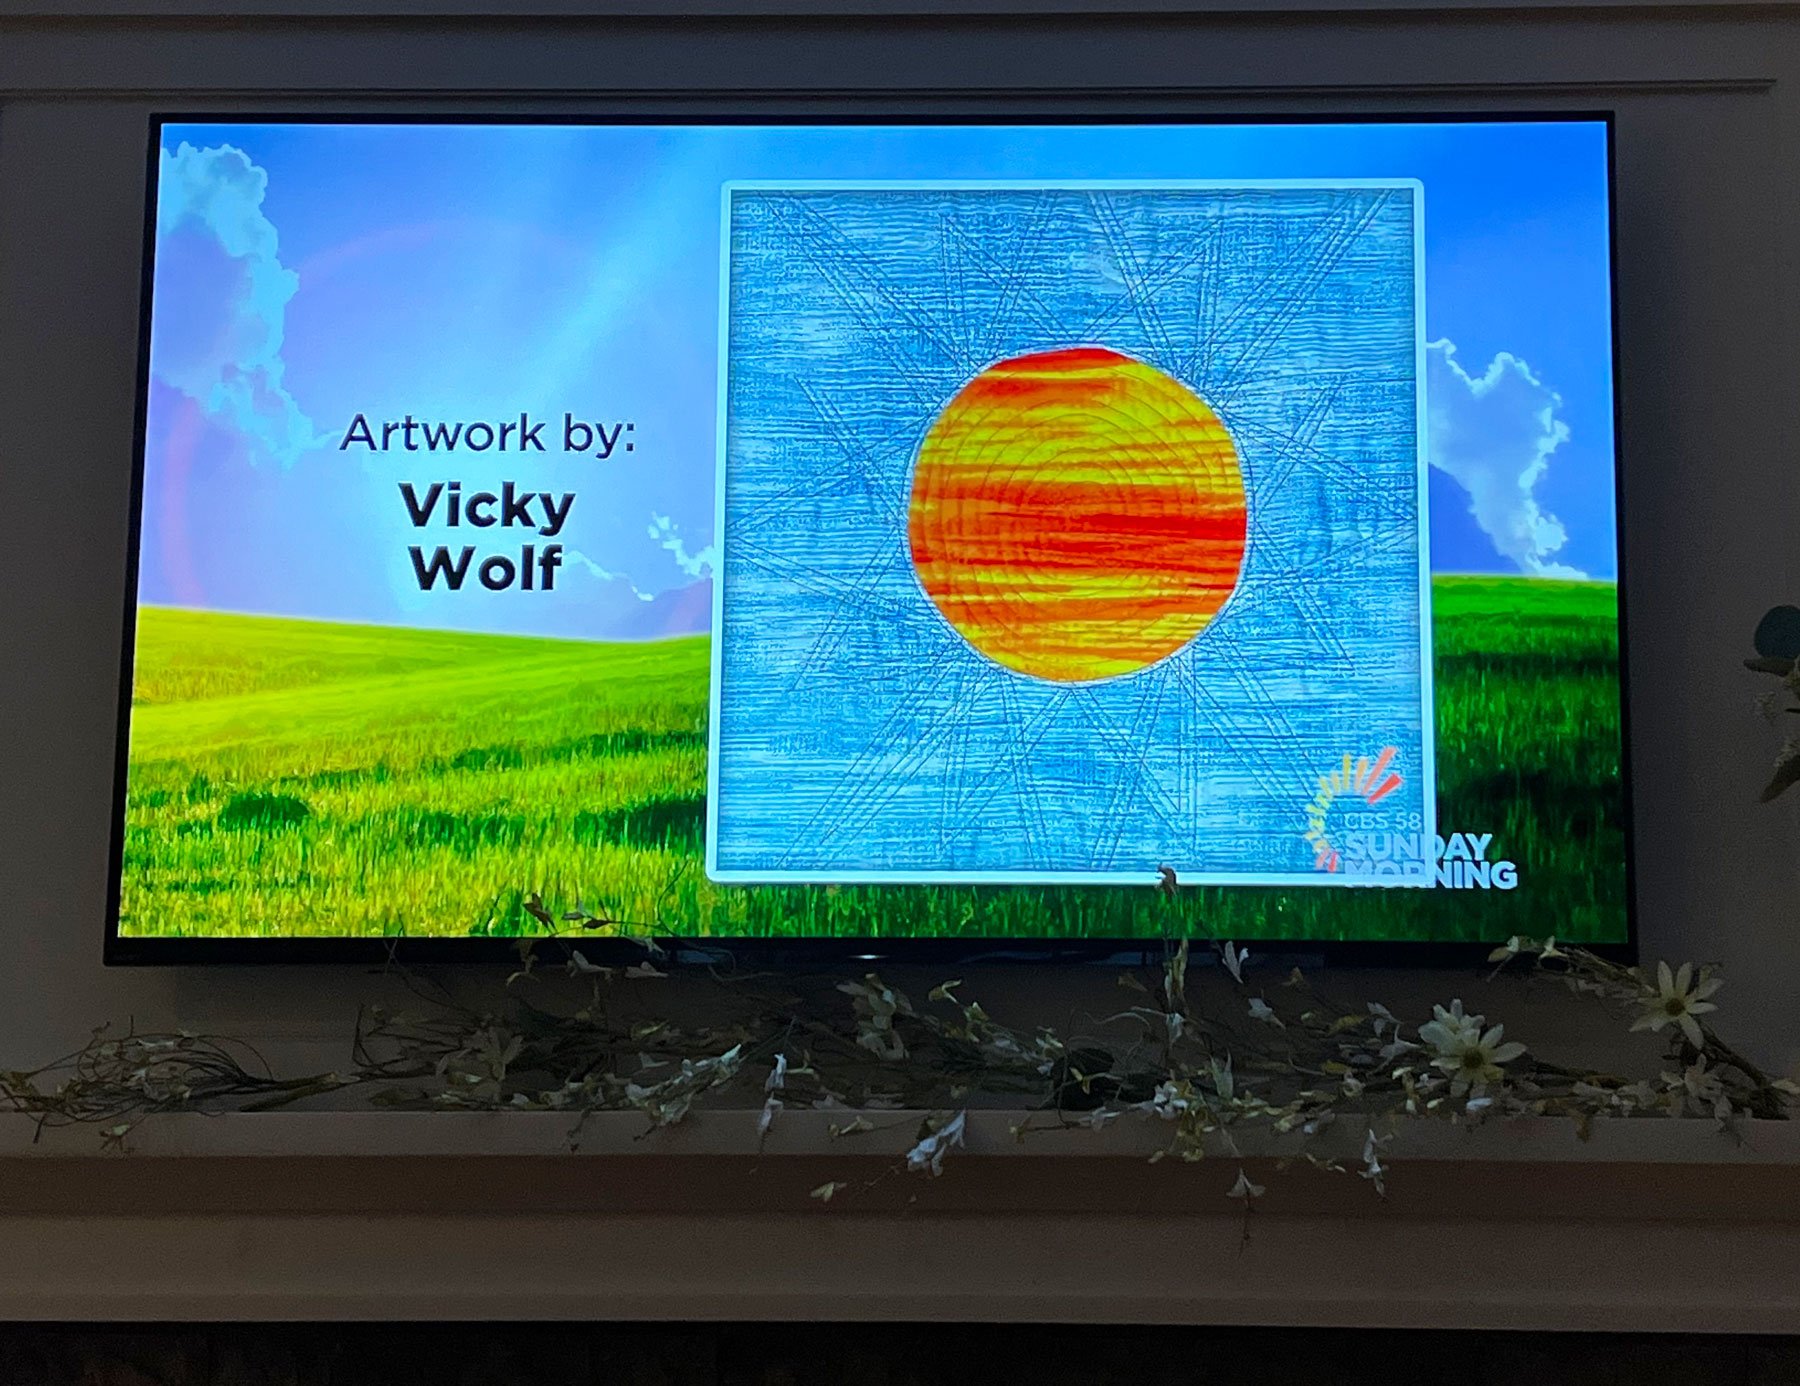
Aurora by Carol Bowling

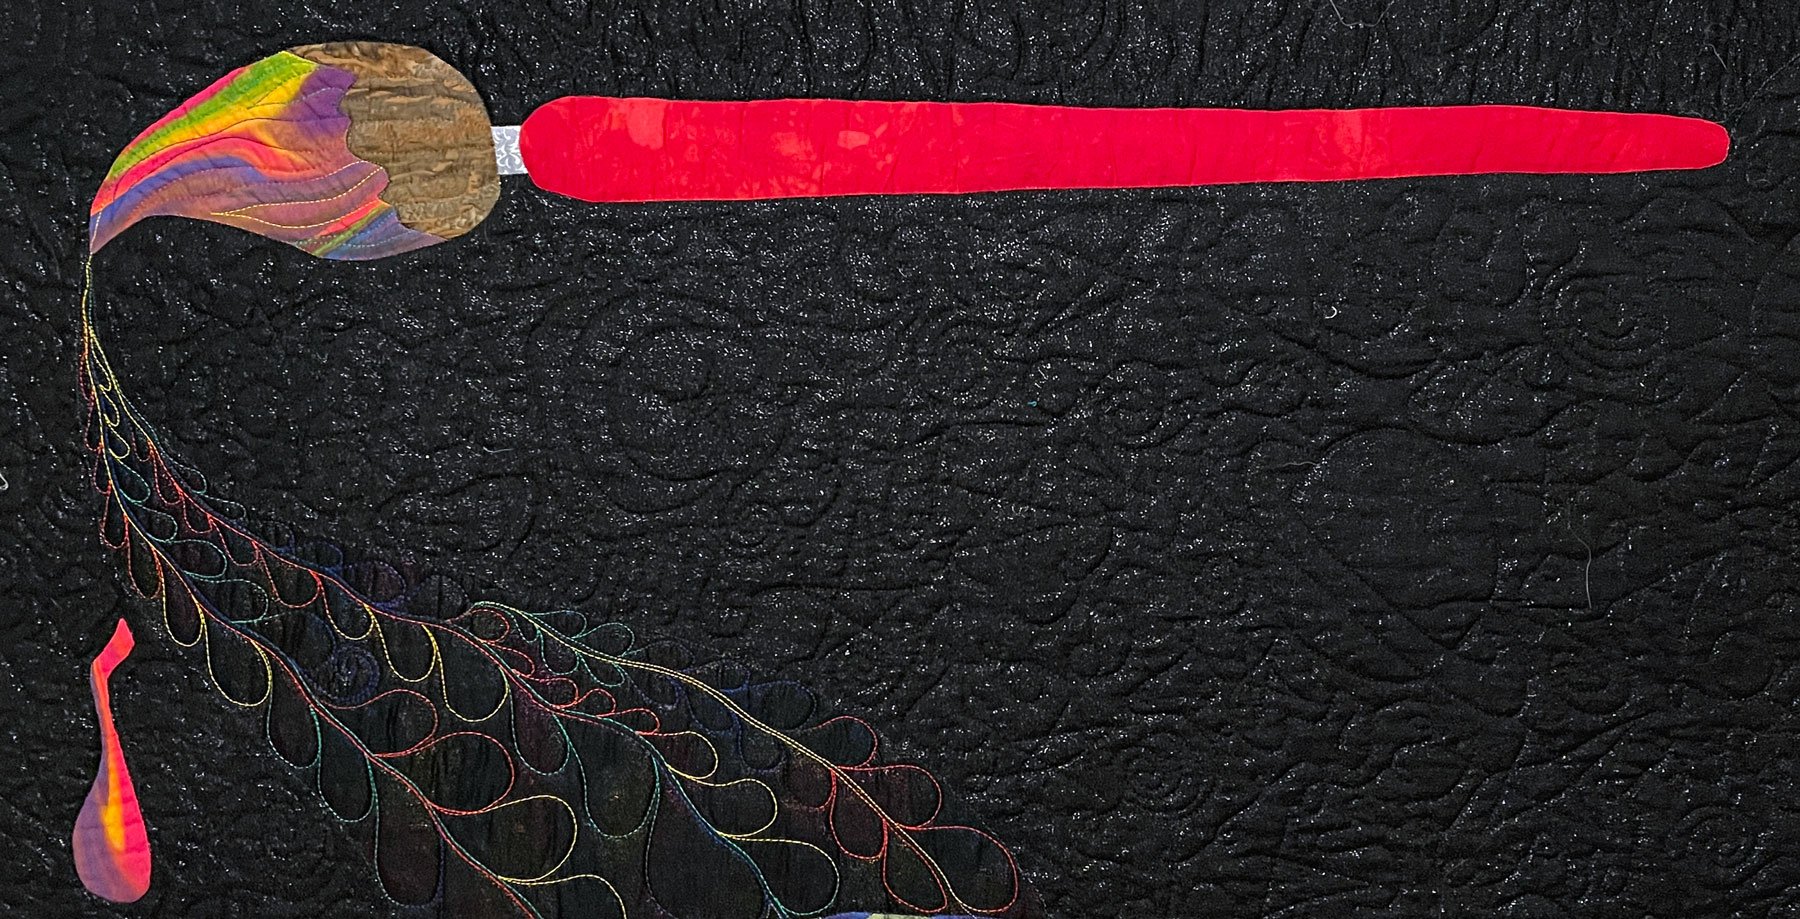
Good Vibrations by Cynthia Yackel

This next one was made for a challenge to put words on quilts, and Karen chose some of my favorites from the book of Galatians.

Fruits of the Spirit by Karen Maki

My Girl by MaryJo Busch is a favorite of mine. MaryJo is a ThreadBender, and talented long-arm quilter, who made this quilt for a challenge in a different guild. She recreated a piece of art hanging in a local hair salon using Shiva Paintsticks ~ in the style of Degas. Lovely!

The vendors were also great. My favorite was Rae Warner.

Rae is a retired art teacher who creates the most fascinating dolls. Their faces are drawn with colored pencils and each one was a delight. Esmerelda just had to come home with me.

I began this post with a the view from our motel room. Here are a few photos of the inside:

Yup ~ Cathy and I brought our featherweights and spent the evenings stitching away 😁. We’d purchased kits for Santa wreaths on a previous adventure and it seemed like the perfect time to get ’em done.

It was a great motel room and it even had a wheeled table that was just right for our machines.

Thanks to Barb and Lynn, and all the members of the guild, for making our quilts look great!

Stay tuned for finished photos of our Christmas wreaths, and a lesson I learned about featherweights!

Hello Sunshine

November 20, 2022 5 Comments

One of the small challenges our ThreadBenders group held last year was to make a sun quilt. That was it. No other rules, but the reason Vicki came up with this challenge idea was because she watches CBS Sunday Morning and they post artwork featuring suns. She told us the artists never know if or when their sun might appear. Once our quilts were made she entered them all at our local CBS affiliate. To see all of the quilts our group created click here.

Last June a non-quilting friend of mine said she saw my name on tv. I looked confused and her response was “your name was there, and a picture of a quilt with a sun, but I think part of it was missing”. I showed her the quilt and told her the design was meant to be a quarter of the sun shining down from the upper left corner (like when we would draw landscapes as children). We laughed. I was sorry I missed seeing it.

Over the next few months Vicki saw many of our quilts appear on tv and tried to photograph them (which I thought was quite a fete since they’re on the screen for mere seconds). Then, last week she sent me this:

My quilt was repeated! Woo Hoo! I was so grateful she sent me this photo, since I’m never around to watch tv on Sunday morning. Actually, since we’ve moved to our new home we haven’t even pursued getting tv service. Mike and I just aren’t tv watchers. We had an antenna at our previous home, and can’t find anyone to put one up here. So we read in the evenings and this house has kept us plenty busy the rest of the time.

I’m so pleased Vicki took the photos of our quilts. Here are the others she’s spotted so far:

I was impressed that she got photos of so many, but then she confessed that she tapes the show and can pause to snap the pics 🤣 .

Vicki suggests other artists make and send in their rendering of a sun, in any medium. You never know when you’ll have your 15 seconds of fame!

************

Also…

Lenora emailed me a question about last week’s post:

“I am quite taken with the quilt in the picture of Valeria’s show and tell 2018.  Would you know the name of it?”

I didn’t, but I’m hoping one of you might”.

Here’s the photo:

Please reply in the comments if you have any information about this pattern. Thanks!

In Memory of Valeria

November 13, 2022 15 Comments

Last month I presented my Compass Capers lecture to a Modern quilt guild just north of Milwaukee. It’s a delightful group and I had a lovely time. One of the quilts I bring to show in the talk was a gift to me from a different quilt guild I belonged to many years ago ~ Common Threads. I was President of that group for 2 years and when I stepped down I had the wonderful surprise of being given a quilt from the guild. It has a Mariner’s Compass at the center which is surrounded by autographed rail fence blocks.

The making of the quilt was supervised by a friend named Valeria Peterson, with help from Pat Smith. Valeria made the center compass, hand-quilted the entire lap sized quilt and added the prairie point border.

I was not only surprised, and appreciative, but overwhelmed by the beauty and workmanship of this wonderful quilt! It was a joy to read the names and messages from all my guild friends.

It goes without saying that Valeria was a talented quilter. She had some physical struggles and suffered with pain a lot of the time, but that didn’t stop her from being an amazingly generous person. She also had a passion for animals and veterans, and donated quilts, supplies and money to be a blessing to many. I’ve always felt honored to have a quilt made by her and I snuggle under it often.

Well, after my talk to the Modern guild I received a lovely note from their President that included this message:

“There was no time to share a Valeria story with you.  I was so touched to see one of her projects at the meeting.  She was also a member of our Guild AND a frequent and generous donor to our charitable project, Quilts of Thanks.

  She would routinely stop at Material Matters and hand in a check for $1,000 to purchase fabrics for Veteran’s quilts.  I was blessed to longarm quilt the very last quilt purchased with those funds right after she died,  and which included some blocks she had made just before her death. Fast forward a couple of months, and a lady posted in Nextdoor Thiensville that her son, a Navy LT.  was coming home on leave after many months serving on a submarine.  She had recently moved to Thiensville, from another suburb, but had no family in the area to welcome her son home. The community rallied around her and her son, and there were probably 75 people with balloons, streamers, signs…and me, with a patriotic quilt….the one I just described. Instead of putting my name on the quilt label as a maker, I chose to put Valeria’s name on that label.  We presented the quilt to the son, and as they were looking it over, the Mom, who is a Nurse Practitioner, gasped.   

She was Valeria’s nurse practitioner, and had taken care of her in the last weeks and moments of her life. And that, I would say, was Divine Intervention.  Valeria’s gift, to a woman who meant so much to her,  after her death. So that is my Valeria story!   Hugs, Joan”

I wrote her back and asked if she could provide me with more information for a possible blog post and if she had any photos of Valeria. she responded with these photos and a portion of the news article:

 “Lt. Sean Condon US Navy received a Quilt of Thanks this afternoon at a community celebration welcoming him home from deployment. It was awesome to see so many members of the community turn out!”  
Assistance in piecing additional blocks was from Suzanne Grohe and Joan Cain. Quilting by Joan Cain. Pieced blocks and fabric from Valeria Petersen. ” 

in closing Joan wrote:

“We always say that the quilts pick their recipients….there are a lot of stories, and if you didn’t have faith before you started…you do after you’ve been a part of it all! Joan“

This is a wonderful story and tribute to Valeria and I felt you’d want to read about her too. The problem was – Valeria was a very humble person and didn’t like to have her photograph taken. But the story continues. A few weeks ago I taught for the Common Threads quilt guild and asked if anyone had a photo or story they’d be willing to share. Laurie was kind enough to go through their photo archives and get me permission to copy a few of the pics. I loved this one from when we were on the guild board together. Valeria is the tall one in the middle, Pat Smith is far left and I’m far right.

And here’s their copy of my quilt:

This next one is of Valeria during guild show and tell in 2018:

And with one of her dog quilts:

I am so grateful to say that I was a friend of this wonderful woman, and happy to share a small bit of her story with you. If anyone has any Valeria stories they’d like to share, please include them in a comment to this post.

****************

Also ~ After reading my stained glass side lights post (click here to read about it), a few friends sent me photos of stained glass quilts they’d made. Kay sent me her Sunflower:

Laurie said she made her landscape in a class with Wendy Kleman who had them use grosgrain ribbon as the leading:

Lovely quilts! Thanks ladies!

Color Gradations

November 6, 2022 4 Comments

This past September while at the Great Wisconsin Quilt show, I had some time to visit the vendors. I was especially intrigued by all the gradation fabrics I found there since I presented 3 lectures on the topic.

I was fascinated by this table topper hanging in one of the booths. It was made out of circles from a gradation fabric (it was orange, so I was immediately drawn in).

The owner of the booth told me it was a Cheryl Phillips pattern, but they didn’t have it available. Hmm, that name sounded familiar. So I did a search and found Cheryl’s site (click here to visit for yourself).

And on the site I found her Bonus Blossom pattern which was used to create the pretty topper.

So why did her name sound familiar? As I scrolled through her site I realized the “Phoenix” quilt I helped Renee put together a few years ago was Cheryl’s pattern. Here’s Renee’s quilt top and you can click here to read the story. I think Cheryl Phillips loves gradations as much as I do!

I recently shared my Gradation lecture and workshop with a guild in Eagle River, WI. The Cranberry Quilters are a delightful group, and we had so much fun playing with gradation fabrics that I couldn’t resist pulling out one of mine, while unpacking after the trip, and planning a Bonus Blossom topper for myself.

I took the fabric along on retreat the following week and cut 6 red/orange circles from one stripe, and 6 purple/blue/green circles from another. I sewed 1 circle of each, right sides together with a circle of thin batting, turned it right side out and repeated to make 6 turned circles. Then I used a faux cathedral window technique to sew the circles together. Here’s the back of my topper.

Once all my circles were connected I realized that I wasn’t consistent when I lined up the front and back fabrics. Do you see the problem? Here’s the front:

I think it’s really pretty, but it’s not consistent. I kept the greens along the outside edge on the front, while half the back circles have the orange on the outer edge and the other half ~ the dark red. It may not be consistent, but I’m choosing love my very original design. I’m certainly not going to take all those circles apart! The batting caused a bit of puckering on the front, but I’m choosing to think it adds to the blossom effect 🤣. I do love the way the hot colored gradation plays with the cool one. I’m not sure if I’ll use it as a table topper or hang it on the wall. Hmm.

A few days after I arrived home from retreat the grandkids came over. Mike came in from outside and told us we had to come out and see a tree in our yard. Amazing colors! The kids wanted to jump right in. It looks like a gradation tree to me!

Two days later the leaves were all on the ground. Glad we captured this colorful moment.

Sidelights on a Sink?

October 30, 2022 9 Comments

We’re making progress on our “new” home. The roof has been replaced and we have money down on the exterior siding which should be done in November. Our carpenter friend, John, has repaired almost every door and threshold in the house, and now he’s working on my studio!!! Hooray! I’ll be posting an update on that story soon.

One of the problems John helped us with was in the upstairs bathroom. There was a 4″ gap on both sides of the vanity ~ and the previous owner didn’t finish the floor and wall at the back of the openings. It was ugly. So John made “boxes” to fill the void and I painted them.

It looked much better, but it need a little something more. Being an interior bathroom there were no windows, so an opening had been made to the foyer below, and a stained glass window was put in place to give the small room some light. It’s actually quite lovely and it can be tipped open for ventilation.

This gave me an idea. Perhaps our vanity needed stained glass sidelights. So I measured the space, did a few sketches,

and traced my chosen design onto fusible interfacing. Then I cut fabric pieces and fused them in place on the interfacing.

If you’ve never used Clover Fusible Quick Bias™, or you haven’t played with it in a while, I highly recommend it. I’m grateful that I have a few spools in a variety of colors on hand (and that I found the box that currently contains them). For this project I chose the traditional black “leading”. I cut the pieces and ironed them in place one at a time, being careful to hide the ends under crossing strips.

Since my sidelights would be laying on a flat surface I decided not to use batting. So I layered them with a backing fabric and quilted everything by topstitching the edges of all the bias strips with black thread. They were finished with a 1/4″ wide black binding,

And set in place.

They really do draw everything together!

And I made them completely out of my stash. That’s why we need a stash 😊!

I’ve used Quick Bias in a number of projects and thought I’d share just a few more:

Do you have any stained glass quilts you’d like to share? Please email me photos at: .

********************

Also, I have a few more initial signatures to share that were inspired by a recent post (click here for that post). Tomi Fay wrote that she likes to just use her initials in lower case:

“My initials – TFF, are very boxy so not open to flourish. I do not like handwriting my capital letters. I write my name by printing the T, F, and F and then writing the rest of the name. So years ago when I had a job where I had to initial items I read, I decided to just write my initials in lower-case script. I never thought of putting these on a quilt!” 

Donna is a part of ThreadBenders and sent me her doodle page:

“I’ve been doodling with this since your suggestion at our meeting. Attached are some of my doodles. I think I’ve settled on the large B with D in top section, M in bottom section…all surrounded by a large Q. I’ll try to have a sample by Wednesday for our meeting.”

I really enjoy seeing what quilters come up with 😊!

Bibathon!

October 23, 2022 14 Comments

I think one of my favorite requirements for quilty friends is a sense of silliness. The group that I go on retreat with certainly fits that criteria. At our Spring retreat April showed us a pair of old, dirty bib overalls her husband got at a rummage sale. He wanted to stuff them to make a Halloween scarecrow, but she wanted to wash them, patch the holes with doilies, and wear them. We were all encouraging her and then the conversation morphed into a challenge ~ where we would each buy a pair of bib overalls and embellish them. Cathy suggested we call it the Bib-a-thon, and the big reveal was planned for our October retreat!

We gathered together this past Thursday for our Autumn retreat at Cattail,

set up our machines and began to stitch, and talk, and giggle.

On Friday Ruth, a first timer, arrived and was welcomed into the group. From the start it was pretty obvious she wasn’t wearing bibs, since she didn’t even know about the challenge, and then one of the group started teasing that she was wearing invisibibs 😄.

Friday lunch is always spent at Fitz’s restaurant on Lake Wisconsin, and we were hoping our usual waitress would be there to pick the best bibs. But sometimes plans don’t turn out the way we intend. Shortly before we were to leave for lunch Cathy injured her leg and got a free trip to the urgent care. She’s doing fine and we made it to Fitz’s for dinner.

We asked our wonderful waitress Pam to pick her favorite and…she picked Ruth’s invisabibs 🤣.

We held a secret viewer’s choice vote amongst ourselves and Sandy was the winner of that! Her appliqués are amazing.

Here’s the fashion show of the rest of us:

I’m pretty sure there was more talking and eating accomplished than sewing, but a good time was had by all. Now where am I going to wear those bibs???

Unique Signatures

October 16, 2022 6 Comments

In last week’s post I asked the kids to sign the artwork they painted on our garden shed. I was surprised that they both decided to use only their initials (click here to read that post).

Over the years I’ve also signed things with my initials and I’ve done some other fun things with them too. When Wendy and I led our Hawaiian cruise, we came up with a project using our initials in our own version of Hawaiian appliqué (to read that post click here).

The green quilt includes the initials for our travel name: Sew We Go ~ SWG ~ in the design. The yellow one has my own initials ~ CLK.

A long time ago I came up with a quick signature using my initials. I like to utilize it when signing small or artsy quilts. When I wrote “Where Do I Start With Fiber Art” I decided it would be fun to autograph the books with my personal “brand” 😊.

Recently my friend, Lori Jean Schloesser, signed the back of one of her art quilts with her version of her initial autograph, along with the year.

She embroidered it ~ and everyone in our art guild was intrigued. So we decided to play around with our initials during our meeting. I thought you’d enjoy seeing some of the trials:

Connie sent me a photo of her 2 favorites ~

Lori mentioned that we didn’t need to include our middle initial, and it didn’t really matter which one came first or was bigger. It’s the artist’s choice and there’s no right or wrong. We can even choose to come up with a new design down the road 😊.

Kay’s initials are KAC, and here is her trial page:

I like the ones where the A fits into the bottom of the K. But it’s not up to me, and Kay wasn’t sure which one was “the one” by the end of the meeting.

Barb’s initials are BAG, and here’s her trial page ~

I tend to prefer the ones where the small g fits into the bottom of the capital B. It will be fun to see which one she’ll choose.

Lori also mentioned finishing the initials by placing them in a circle, square or other shape; or even reversing a letter. Hmm. So many fun ideas that I decided to play a little more in a drawing program on my computer:

I’m still kind of partial to my original design, but it was fun to do a little doodling.

So, do you have an “initial signature”? If not, I highly recommend doodling around and seeing what you come up with. If you come up with your own unique brand, please feel free to share it by sending me a photo at: .

Color My World – or at Least My Garden Shed

October 9, 2022 16 Comments

Every so often I have a blog post idea that isn’t really about quilting, but it’s so much fun I have to find a way to give it a quilty spin. So, here’s the quilting part 😁:

Way back in 2004 the Milwaukee Art Quilters had a challenge entitled Name That Tune. Now I attended high school in the 70s, and my favorite slow dance song way back then was Color My World by Chicago. I immediately came up with a fun way to make that into a quilt, paintbrush, paint and all:

The problem was that the long narrow size requirements left a lot of open space. How was I going to fill the bottom expanse? Well, if I put God’s hands there in the stars the quilt could be subtitled He’s Got the Whole World in His Hands ~ a second tune to name! This presented another problem. I can’t draw hands. So I had my teenage son, Brad, pose for me,

and those hands were quilted in with silver thread:

It ended up being a really fun group of quilts and you can click here to visit the Name that Tune page of the Milwaukee Art Quilters site.

Are you ready for the segue???

A few weeks ago, as the grandkids (Brad’s kids) and I drove down Main Street in Watertown, I pointed out the new mural that was being painted on the side of the florist shop. Sommer replied “I wish someone would let me paint flowers on a building”.

Fast forward to last week. We have an old garden shed in our yard and Mike decided it was time to clean it out, patch the holes and paint it.

He asked me what color I wanted it painted. I bet you can see where this is going. It took a few minutes for that moment in the car to come back to me, and then I realized Mike had to paint it sky blue ~ and we could give Sommer her wish.

Once he had it done I called the kids, and yesterday they came over in their paint clothes. Trey (7) was as excited as Sommer (10). My only request was BIG flowers, otherwise they could do whatever they wanted. Sommer chose the front:

and Trey the left side.

Great grandpa and Great grandma stopped by to supervise.

And Mike took a break from his yard work to take a few photos and tickle Trey.

Once Trey got back to painting, it didn’t take long for the garden to grow,

And the artists to sign their work. Trey decided on big initials

While Sommer did a small initialing near each flower:

Then they went inside the shed to play and make faces at the grown ups. I couldn’t resist a window shot and, while going through the photos that night, I was surprised to see me and Mike in the window too!

A good time was had by all!

It was a cool, but sunny Autumn afternoon, and one I’ll remember for a very long time! These kids really do add color to my world!

  • « Go to Previous Page
  • Page 1
  • Interim pages omitted …
  • Page 21
  • Page 22
  • Page 23
  • Page 24
  • Page 25
  • Interim pages omitted …
  • Page 41
  • Go to Next Page »

Primary Sidebar

Archives

Recent Posts

  • London ~ and More
  • Designed For a Purpose
  • Squirrel Quilts and More
  • Vintage Appliquéd Arrows and More
  • Fascinating Tidbits

Recent Comments

  • Karen Ann Moore on London ~ and More
  • Cheryl McLean on London ~ and More
  • Sue Halpern on London ~ and More
  • judy raddatz on London ~ and More
  • Joanne Corrigan on London ~ and More

Categories

Footer

My Guide

Whatever you do, do your work heartily, as for the Lord rather than for men.

—  Colossians 3:23

Contact Chris!

  • Home
  • About
  • Gallery
  • Classes
  • Trips
  • Books
  • Blog
  • Contact
  • Sign Up For My Blog

Copyright © 2026 · Chris Quilts · Website by Adunate · Privacy Policy