• Skip to main content
  • Skip to primary sidebar
  • Skip to footer

  • Home
  • About
  • Gallery
  • Classes
  • Trips
  • Books
  • Blog
  • Contact
  • Sign Up For My Blog

Blog

Pocket Hearts

January 9, 2022 4 Comments

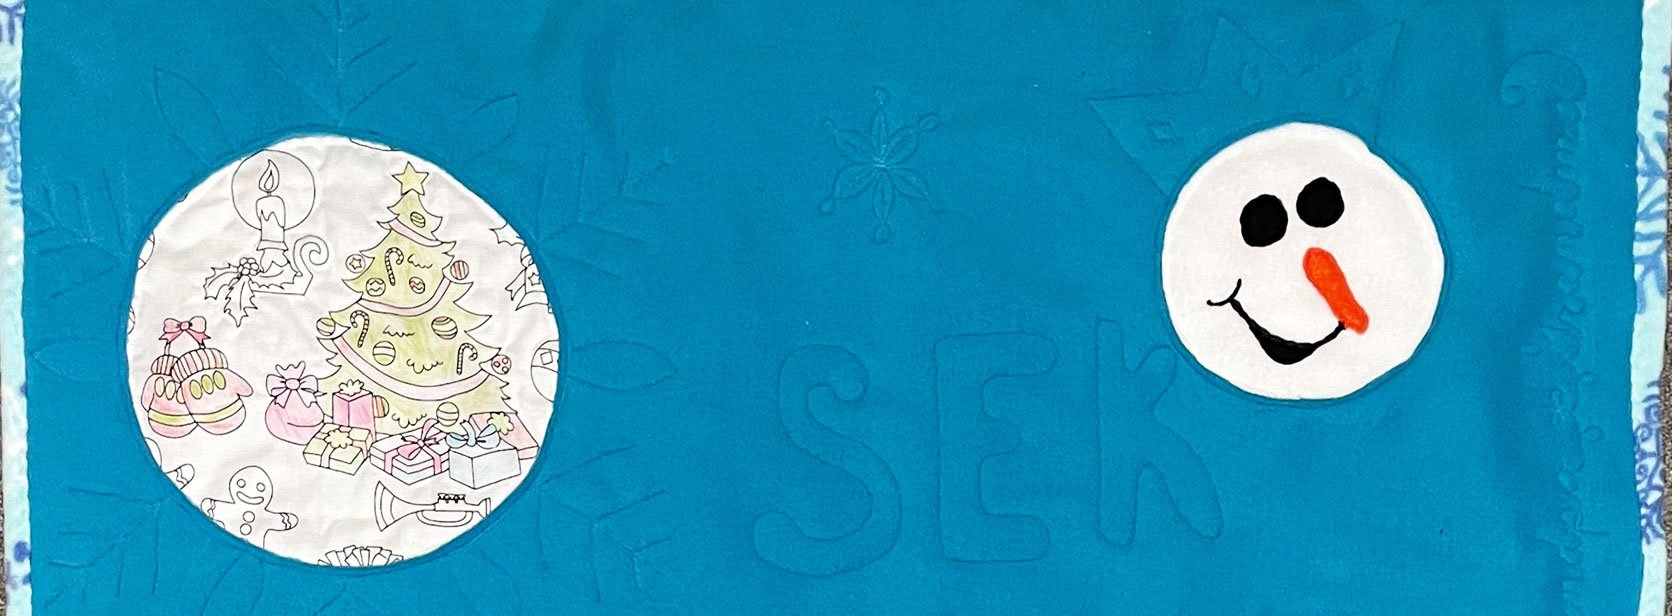
It may be a little late for a tutorial on Christmas ornaments, but I prefer to think of it as being really early for Christmas 2022! A number of people asked me to share instructions for making the pocket ornaments in last week’s post and, since this pattern can be made in other sizes and other fabrics ~ I’m hoping it will be of interest to many of you.

To begin you’ll need to make the heart pattern. Choose the size of your pocket (the photo square on the ornament) and the heart. The hearts on the left and right in the image at the top of this post are larger and were made to hang on the wall (the center heart is actually an ornament without a photo on the pocket – enlarged to look good with the other photos). Choose the square size first and draw it, on-point, in the center of a piece of paper. The square on the bigger hearts measure 6 1/2″ (6″ finished), while the ornament square measures 3″ (2 1/2″ finished).

Fold the paper in half diagonally through the square.

Now think back to your childhood when you cut a heart from a folded piece of paper – and do it 😁. Actually I drew mine on first to be sure the top “V” on the heart was about 1/2″ from the square.

Once I liked my heart I did cut it out with the paper folded so the heart was symmetrical.

This heart pattern includes seam allowance. Trace around it on the back of the heart fabric and cut out one heart. Set it aside.

Next you’ll need to make your square. For the larger heart, piece or appliqué whatever 6″ finished block you like.

For the ornament, a 3″ square photo (2 1/2″ finished) is needed, but the trick is it must be “on-point”. I think this may be the hardest part for many quilters. Let me explain. This image of Koda will look great on an ornament, but it’s oriented portrait fashion, which isn’t wide enough to cut out on point:

If I crop it as a “square on point” I will either lose the tips of his ears

or, if I make the image smaller, there will be empty corners.

Because I’m able to use Photoshop™ I can rotate the image 45 degrees, fill in the corners with solid black (or any color) and print it on prepared photo fabric ~ ready to go.

If you don’t have a photo editing program, you can print the image portrait orientation, with a wide margin of the purchased photo fabric all the way around and then cut out the square, on-point, with the photo fabric filling in the corners. If you’d prefer the corners to be a different color from the blank photo fabric, you can piece a fabric of your choice in the corners to get the look I have where the black ink is.

Once the 3″ fabric square is printed, layer it, right sides together, with a 3″ square of backing fabric, and sew along the top 2 sides with a 1/4″ seam allowance. Trim and turn right side out. Press using a press cloth to protect the transferred photo.

Pin the pocket in place on the right side of the fabric heart.

Place this piece, right sides together, with a piece of backing fabric, pin and sew with a 1/4″ seam allowance ~ all the way around.

Cut out around the heart, clipping the top inside corner and trimming off the bottom point. I like to scallop cut the curves to reduce bulk. Then I cut a slit to turn the heart through down towards the bottom point, making sure this cut is in the heart that was originally pinned to the photo pocket (otherwise the slit will be on the back of the ornament ~ something we want to avoid).

Turn the heart right side out. The turning slot will be inside the pocket and no one will ever notice. It doesn’t even need to be stitched closed!

Fiddle with the curved edges until they look good,

and press. Then stitch the top point of the pocket to the heart and add a ribbon loop with a button.

That’s all there is to it!

*******************

And one more thing!

Last week MaryAnn commented that she couldn’t find fabric crayons any longer. Jackie responded that she uses Crayola crayons and I’ve found them to work too. Her directions were great.

The crayons I had the kids use were a set I purchased in a Kathy McNeil class in Paducah a few years ago. She loved them, and I’m glad I bought some from her. They sharpen beautifully and the color is bright. Be sure to heat set them with an iron after coloring.

I found them on Kathy’s site: https://www.kathymcneilquilts.com/shop/Fabric-Paint-Crayons-Art-Media-Supplies.htm and Amazon too.

Snowman Snuggles

January 2, 2022 8 Comments

Since I’m on the topic of snuggles (as in last week’s post), there are two more I’d like to share. A few weeks before Christmas Sommer and Trey came over to help us decorate the Christmas tree. Once decorated we had some hot cocoa, and it just felt like craft time. I’d purchased a yard of “to be colored in” fabric at a guild rummage sale. So I got out the fabric crayons and pencils and they had a blast.

There wasn’t enough time to color it all in.

I decided to cut out portions of their artwork and make snuggles for the kids. The problem was there weren’t enough colored in portions. As I noodled on it I decided the kids would like fleece snuggles the best and went on a shopping trip. I chose snowflakes for the back and a plain blue front for Sommer. Trey got red for the front and a fun “abominable” print for the back.

I cut their colored portions into squares and placed them right sides against the back of the solid fleece. There was a lot of open space to fill. As I continued to think about it an old project came to mind. Snowpeople faces! (click here for a link to that post).

It would be fun to make snowpeople faces all over their quilts and finish the colored pieces as circles too – sort of like snowballs. I drew circles on the back of the fleece and fabric squares, which were pinned on the background fleece, and stitched them in place with the right color thread in the bobbin.

When I turned to the front and trimmed the fleece away I was pleased (sorry for the change in color – I never know when I’ll feel the urge to snap a photo 😊):

Because fleece doesn’t fray or ravel, there was no need to finish the edge – what a blessing!

Once all the circles were stitched and removed it was time to make faces! I started a pair of eyes by drawing them on Glad Press and Seal™, placing the sticky side against the right side of black fleece, and stitching them in place on the face, along the lines.

I then pulled the Press and Seal™ off of the black fleece and trimmed near the stitching.

I marked quilting designs this way too.

I’ve used Press and Seal™ to mark lines before and it peels off of cotton fabric well, but I discovered it almost welds itself to fleece and was a bit difficult to remove. So after struggling to remove the plastic for a while, I tried using a sliver of soap to mark eyes, carrot noses, and quilting designs.

Marking this way worked and it was far easier to remove the soap ~ with just a little water 😁.

After quilting fun head and neckwear onto all the snowpeople, I filled the voids with the kids initials, a message from grandma, and my “label”. The back was turned to the front on each snuggle to make a binding.

Due to a variety of people getting colds, etc., we haven’t held our family gift exchange yet. I’m looking forward to having the kids open their snuggles. They’re a bit wonky and silly, but I think they’ll be a hit!

And… I’d like to share one more story before the Christmas season is over for this year 😁:

As we were decorating the tree the kids noticed an ornament I’d made from a photo of Hanna and Will when they were small.

I told them I’d made photo heart ornaments of their Dad too ~ and the hunt was on. They found Brad and Heather.

To make these ornaments I resized a “pocket heart” project I’d learned about in a quilting class years ago. I photo transferred the images I liked onto fabric for the “pockets” which finished 2 1/2″.

It was time to revisit that project and we now have all the kids and grandkids on the tree!

And Koda too!

I love ornaments that hold memories. How about you?

A Snuggle Switcheroo

December 26, 2021 6 Comments

After last week’s Christmas post my friend Eleanor sent me a photograph of the nativity she purchased while studying for her master’s degree in Paris many years ago. I couldn’t resist placing it at the top of this post. She emailed “The villager I love the most is the woman carrying a cradle (she’s got it on her head!)”

My response: “Fascinating. I especially love that some of the people surrounding the Lord have their hands raised in praise :-). The common and poor, the old and the young, as well as the wealthy, all came to worship the Lord and bring their gifts.”

To read a post I wrote about my dear friend Eleanor click here. Thanks for sharing this sweet scene with us Eleanor!

*******************

And now on to the “Snuggle Switcharoo” 😊

I’d originally planned to gift my red, white and silver quilt to my parents. We haven’t exchanged gifts with them for years. Instead we spend time together going to plays or concerts – or just out to dinner. But this year I felt the need to make them a “snuggle” (it’s what my grandkids call lap quilts). This year I’d also planned to make a snuggle for Mike. He and I don’t usually exchange gifts either because the Lord has blessed us so richly, and we have more than enough. But I’d made two winter quilt tops last year and wanted to get them quilted, finished and enjoyed.

I got the binding on the above quilt and then dove right into quilting this lovely bordered “flannel panel” I’d purchased in Lodi, WI while on a retreat.

I layered it with a thick, cuddly fleece and began to quilt. The frustration was that, as I quilted it, every dog hair in the house that wasn’t attached to Koda came flying through the air and crash landed on the black flannel under the needle of my machine (ok, maybe I exaggerate a bit 😊). Mike and Koda are just about inseparable, but Mike is also fastidious and spends a lot of time using a lint roller on his clothes. I was sure a flannel quilt that attracts dog hair would not be a great gift for him.

What to do??? I continued to quilt it, but I lost some of my enthusiasm. Then I realized that no one knew my plan except me. So I finished the flannel quilt by echoing the motifs in the center,

and adding holly leaves in the red.

And the plan??? I decided to do a switcheroo and give the flannel snuggle to Dad and Mom – since they don’t have a dog 😁.

It was such a joy to give Mike his snowflake snuggle on Christmas morning.

And Mom and Dad loved their’s (even though I forgot to snap a photo). They wanted to hang it on a wall – but I tried to talk them into snuggling with it. We’ll see 😊!

Have a wonderful last week of 2021!

Tis the Season

December 19, 2021 18 Comments

Christmas is a week away and I’m enjoying the process of preparing our hearts and home for this wonderful holiday! I’d like to share some of my favorite decorations and traditions in this week’s post.

We’ll start with something new. My mom is a crochet master! I’ve posted before about the Star Wars figures she’s made for each of her great grandchildren (click here for that post). This year she decided to make each of her children, grandchildren, and great grandchildren, a snowman ornament, and I’ve featured some of them at the top of this post. Mom stitched each person’s initials on their hats or scarves, and signed their snowball bottoms with her own initials 😊.

What treasures!

I have many treasured Christmas decorations and I’m sure you do too. A few years ago Mike and I found this ornament wreath at an antique mall in Columbus, WI.

It contains many vintage ornaments and they’re so beautifully arranged! There was a tag attached that stated that if an ornament ever breaks: “pull out the pieces with a tweezers and glue in another one”. Looking at it brings me joy and I love the history and variety of the ornaments.

One of our most prominent decorations is the nativity because it helps Mike and I stay focused on the true reason for the season.

A few years ago friends of mine gifted me a vintage book:

It is lovely inside and out.

And it compliments our Christmas scene so well.

I’m not one to go in for new trendy decorations. I prefer the pieces that have memories – like all the ornaments we’ve collected in our 45 years of marriage. What fun it was to decorate our very tall tree with Sommer and Trey!

Then there’s the sled Mike spent hours of snowy fun with as a child:

My great Aunt Hazel painted this sled years ago and it has found a home on our mantle with the teddy bear Mike’s Mom had made from her old fur coat (I found the rocking horse at a thrift store for $5 😊).

And of course there’s our traditional cookie baking day with 4 generations. Hanna and Will joined in the baking fun too – all the way from Vancouver, WA!

My friends, Sharon and Margaret, will be joining me for ringing and singing for the Salvation Army this week. And then there are all the wonderful Christmas concerts we’ve attended through our church and school this season!

The tree skirt I made last year is finally under our tree and we are spending a lot of time praising the Lord for all of our blessings. A very merry Christmas from me and Mike!

Quilting Snowball Blocks

December 12, 2021 6 Comments

As I look out my window at the falling snow, I’m happy to share more of the story from my previous post about: A Red, White and Silver Christmas Quilt.

It seemed obvious to me that the snowball blocks should be quilted with snowflakes and, since no two snowflakes are alike, I did a search of free clipart and printed out 15 different ones at 6″ each.

I then scanned them into my Scan and Cut™ (click here for a previous post about this great machine), put freezer paper on the sticky mat, and was very discouraged. The flakes were so detailed, and the freezer paper wasn’t sticking very well to the mat… and I ended up with a mess that I crumbled up in frustration before realizing I should snap a photo:

I decided to tape the freezer paper around the edges for my second attempt (note masking tape), and remove all the detail lines inside each snowflake:

This worked much better!

I could now cut these templates apart and lay them in place on the quilt sandwich. Once I liked the layout I ironed the shiny side of the freezer paper, one flake at a time, in place and quilted the along the inside edge.

But first I needed to decide which machine to quilt it with. I’d layered this quilt with a very thick minky fleece and no batting. I’d done this with my birthday block quilt and had some problems with the backing “fuzz” pulling through to the front, as well as puckering. So I made a sample sandwich, put a new titanium needle in my Bernina, and did some free motion stitching.

The top thread looped in a few places and the “fuzz” bearded through from the back 😕. Then I put a new needle in my HQ Sweet 16 and had better results. Still a little bearding, but the decision was made.

This worked well!

What I became very aware of is that I’m not great at free motion quilting smoothly along the edge of paper. The snowflakes God creates are beautiful!

Photo by Alexey Kljatov

I think mine reflect the look of snowflakes beginning to melt 🤣!

I’m still having fun doing it and I plan to gift it to someone who thinks everything I do is wonderful – so I’m sure they won’t even notice my less than perfect flakes! Now to go stitch more snowflakes! I’ll share a photo of my quilt when it’s complete.

A Red, White and Silver Christmas Quilt

November 28, 2021 4 Comments

Last year I pieced 2 Christmas quilts that never got quilted. Last week I decided it was time to layer them and now they’re waiting to be finished as gifts. One was made from a lovely Christmas panel I purchased in Denmark, while on our Baltic Sea cruise.

I cut the squares apart (they were amazingly square for a panel – so often the whole thing is wonky!)

I decided to alternate them with snowball blocks and found a matching red and a pretty silver fabric in my stash!

Over the years I’ve used the “slap back triangles” method of adding corners to larger squares, but I often found this technique to be less than accurate. By using one of my favorite tools – Elmers School Glue™ – I’m getting great results! Here’s the scoop:

I cut the red fabric into squares the same size as the panel squares (9 1/2″), and the silver into smaller squares 1/3rd the finished size of the block plus seam allowance (9″ divided by 3 = 3″, + 1/2″ sa = 3 1/2″). I pressed the smaller squares into triangles:

Next I ran a thin line of glue along the fold on each triangle:

They were placed, glue side down on the 4 corners of the background square, and ironed in place to dry the glue. They fit perfectly!

Each triangle was sewn in place by stitching in the crease.

Since we’re in the season of being thankful for what we have, and not wanting to waste anything, I decided to sew a second seam 3/8″ from the first one:

Once all 4 corners were stitched it was easy to cut between the sewn lines to get 4 bonus blocks:

Once the snowball blocks were finished I alternated them with the panel blocks to make the quilt top. I didn’t have enough bonus blocks to border the top, so I improvised and added corner border sections to the top right and lower left (the squares are just laid in place in this photo).

I’ve decided to share the rest of the story when I get the quilt done, so I’d like to finish this post with some Thanksgiving thoughts.

Over the years we’ve hosted Thanksgiving dinner many times. Some years we’ve had up to 27 guests attend, but this year we shared the holiday with just my parents and my brother and sister-in-law, Kurt and Mary Sue. Mary Sue mentioned that the last time just the 6 of us had Thanksgiving dinner together was probably before we had kids! But now our kids all needed to spend time with their in-laws, leaving the six of us to have a lovely evening together.

Family is a wonderful blessing! And I’m so very grateful for mine. I’m thankful for my church family also, and many more material blessings than I can count. I’m also grateful for quilting ~ and each one of you. But my dearest joy is knowing Jesus as my Savior ~ and I’m so glad we’re entering the season that celebrates His birth!

Quilting With My Friend Lori

October 31, 2021 3 Comments

As I was looking at the Autumn quilt I have hanging in our living room (click here to learn more about this quilt),

I was reminded of the fun of having it hang in Paducah. Then I got an email from my friend Lori with a link to her current online tutorial, and many memories came flooding back.

I met Lori years ago when I spoke to her quilt guild, but we really got to know each other the year we both had an Oak Leaf and Reel quilt accepted into the New Quilts From an Old Favorite contest at the National Quilt Museum in Paducah. Lori is third from the right:

And here’s her fun quilt:

She is a talented quilter, teacher, author and dear sister in Christ – with a great website: Quilting With Lori. Like me, she’s a teacher at heart and loves to share tips, techniques and step-by-step tutorials.

While watching a recent video of hers on how to “web” a quilt, I thought “what a great technique to share!” But I knew I couldn’t have done the instructions any better, so I thought it would be a great idea to link to the tutorial on her site ~ click here .

Many of you may already use this great technique. I’ve found it saves me some ripping as it keeps everything in the proper order and I’ve not only used it for blocks, but for entire quilts. However I never thought to call it “webbing a quilt”. How very clever!

Lori has books, patterns and templates available for sale, and I think you will be amazed at how much she shares for free. Her site is a wealth of information for quilters. She also speaks and teaches for guilds, virtually and live. Click here to reach her homepage. I know you’ll enjoy getting to know Lori 😊!

Josiah’s Quilt

October 3, 2021 15 Comments

My brother and sister-in-law’s kids have been very busy giving them grandchildren lately 😊. You may remember that I made my nephew Kevin’s daughter, Roan Mary, a “spider” quilt a few months ago (click here for that post). Well, Kevin’s sister Brianne just had baby #3. Josiah Thomas was born in August and joined his sisters Tessa and Gabby.

While on my last quilt retreat I started a quilt, with him in mind, and got the top done.

I found out his room has a woodland creature theme, so I wanted to add some friends into the quilting. I searched the internet for copyright free woodland critters, enlarged them, and printed them out so I could trace them onto Glad Press n Seal™. Then I was able to stick them in place on the quilt sandwich (moving the pins to the top so they wouldn’t be in the way):

I stitched through the traced patterns,

Removed the plastic with a tweezers,

and was pleased with the results:

I also did some free-motion straight line quilting through the colorful squares using rulerwork:

His initials and some fun woodland foliage were then added. I labeled the quilt at the bottom in quilted words: “Jesus love you – and we do too, Uncle Mike and Aunt Chris”.

Josiah’s quilt is now finished and ready to wrap him in. Can’t wait to meet him!

*************************

And one more thing! I’d like to caption this addition “it’s never too late to finish something beautiful”!

This past week I received an email message from Kate:

“Hi Chris,
Many years ago I took your class on how to draft a Mariners Compass.
It was with the Scrappers Quilt Guild in Williams Bay, WI
I finally finished it.
I enjoy your blogs, thank you for sharing.
“

Great job Kate! You’re very welcome.

I hope Kate’s an inspiration to many of you. Remember, those UFOs in the closet are not “unfinished objects” but “ultimately fabulous opportunities”!

  • « Go to Previous Page
  • Page 1
  • Interim pages omitted …
  • Page 26
  • Page 27
  • Page 28
  • Page 29
  • Page 30
  • Interim pages omitted …
  • Page 41
  • Go to Next Page »

Primary Sidebar

Archives

Recent Posts

  • London ~ and More
  • Designed For a Purpose
  • Squirrel Quilts and More
  • Vintage Appliquéd Arrows and More
  • Fascinating Tidbits

Recent Comments

  • Karen Ann Moore on London ~ and More
  • Cheryl McLean on London ~ and More
  • Sue Halpern on London ~ and More
  • judy raddatz on London ~ and More
  • Joanne Corrigan on London ~ and More

Categories

Footer

My Guide

Whatever you do, do your work heartily, as for the Lord rather than for men.

—  Colossians 3:23

Contact Chris!

  • Home
  • About
  • Gallery
  • Classes
  • Trips
  • Books
  • Blog
  • Contact
  • Sign Up For My Blog

Copyright © 2026 · Chris Quilts · Website by Adunate · Privacy Policy