• Skip to main content
  • Skip to primary sidebar
  • Skip to footer

  • Home
  • About
  • Gallery
  • Classes
  • Trips
  • Books
  • Blog
  • Contact
  • Sign Up For My Blog

Blog

A Delightful New Friendship

September 30, 2018 2 Comments

A memorable meeting took place for me at Expo this year. I hope you’ll enjoy reading about it. The story begins about 2 years ago. My friend Lisa asked me if I was on Lori Kennedy’s blog “The Inbox Jaunt”. I said “no” and she recommended I check it out. I did and I was very impressed.

Lori has a truly amazing blog. She posts daily (and I thought posting weekly was impressive 🙂 ). Her writing is well done and her photography is beautiful. Lori’s specialty is designing quilting motifs that can be broken into simple units so “normal” quilters can do them. I liked her work so much that when I read she was doing a lecture at the 2017 Madison Expo, I signed up right away.

I enjoyed her lecture and found her to be an engaging speaker. When taking lectures and workshops I like to watch for teaching techniques and styles that I can implement to improve my classes. I took many notes in her lecture.

When the talk was over she was mobbed by the crowd and, since I didn’t have any specific questions or comments, I moved on without actually meeting her.

Fast forward to this past Expo. The organizers hold a teacher “meet and greet” on Thursday after the show. It’s a delightful way to catch up with friends and get to know the other teachers. As I walked in I noticed Lori was there. We made eye contact, but she was chatting with a group, so I moved on. A short while later she came up to me and asked “you’re Chris Kirsch aren’t you?” I smiled and she told me that she, her mom, and her sisters, had been in a lecture I presented at a retreat in northwestern Illinois many (20 ?) years ago. She said my lecture had inspired her – WOW! To think that someone who’s work I admire was in some way inspired by me was such a blessing.

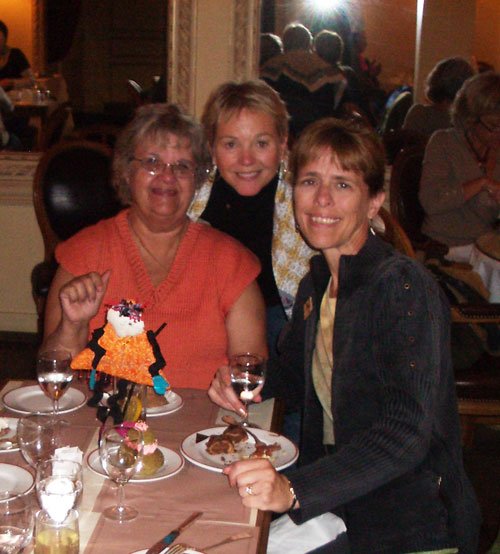
We had a lovely conversation and I even got to meet one of her daughters, Faye. The last day of the show I sought her out to ask if I could include her in an upcoming blog post – and to have my picture taken with her.
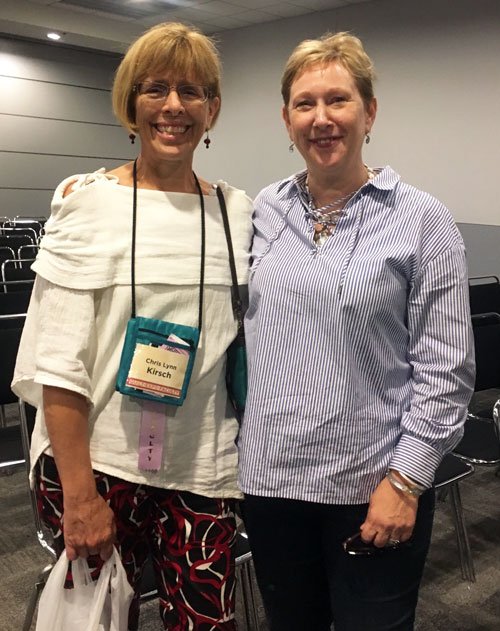
She said “yes” 😀 !

Lori is the author of a number of books and she writes articles for American Quilter magazine. I’m a fan, and I know you’ll enjoy her blog: http://theinboxjaunt.com/.

We never know whom we might influence in our life. I am so pleased to now know Lori as a friend!

Do you have a story about a teacher or quilter who has encouraged or influenced you in your quilting journey?

Piped Circles Made Simple

September 2, 2018 3 Comments

A few years ago I put together a lecture entitled “Going Round and Round”. In it I shared many ways to add circles and curves to quilts. One of the methods used a flange, piping, or rick-rack, to attach curved edges to a background by machine. I knew it would work for circles too, but hadn’t done it. Since then, when I teach my Mariner’s Compass class, I tell the students the compasses can be attached using piping, and this would be a blog topic soon. The time has come! And this will work for any circle – not just compasses  🙂 .

Here is a compass made by my friend Ida Porzky. She made me a number of different shaped compasses to use as samples when I wrote Compass Capers.

For this tutorial I’m using pre-packaged corded piping, but homemade would work just as well.

Whatever piping you use, measure the distance from the long raw edge of the piping to the stitches holding the cording in place. It should be about ¼”. Trim the seam allowance around the circle to this measurement:

On the right side of the circle, place the piping along the curved outer edge, with all raw edges even. Using a cording foot or a zipper foot on your machine, stitch on top of the stitches on the piping, all the way around, leaving about a 3″ space to connect the tails:

To connect the ends of the piping, remove an inch or two of the piping stitches to expose the cording. Overlap the cording ends:

Cut through both, and butt them together:

Pull the piping fabric back over the cording, trim the excess, turn under a ¼” hem on the outer piece, and wrap the fabric back around the cording. Pin in place:

Sew the remainder of the piping to the circle. Fold the raw edges to the back, rolling the corded portion to the outer edge (I drew the stitches in in white so you could see them):

Place the piped circle on the background fabric, with the cording around the outer edge. Pin in place:

Stitch in the ditch all the way around, in a color thread to match the piping fabric.

And you’re done!

No hand sewing and everyone will wonder how you got that skinny bit of piping in there so perfectly  😀 ! Please give it a try and let me know what you think!

Thank you Ida for making your wonderful compass. I hope you like the background fabric I chose.

And by the way, I’ve added my Circle lecture to my list of offerings on my website: https://www.chrisquilts.net/classes/. If your guild is looking for a speaker, I’d be thrilled to make a visit! And, if you’d like to learn to make an off-center mariner’s compass, you can purchase my book at: https://www.chrisquilts.net/books/.


A Cut Above

August 26, 2018 8 Comments

Yesterday I bought myself a new pair of scissors. It isn’t because I don’t own any  😀 !

I have paper scissors, kitchen sheers, tiny appliqué scissors, pinking sheers… you name it, I probably own it!

I have my first pair of Ginghers that I still keep in their original box, and use on special occasions. Like when I needed an artsy self-portrait for our Threadbender’s blog (Click here to meet the members of this very creative group!)

A little corny, but I bet it made you smile!

I have serrated scissors that are great for trimming layers without shifting (I tried to get a pic of the serrated edge in the close up to the right).

I have duck-billed appliqué scissors that protect the fabric under the blade.

And I was even given a pair of scissors made to cut batting.

But the ones I use the most, and are by far my favorites, are my Fiskars™  “micro tip, easy-action” scissors.

They have been used A LOT!!! They have a spring feature that causes them to open automatically after you make a cut, which is really easy on the hands. The slide lock broke within the first year, so they are always open, but I don’t mind, because they are oh-so sharp. Or at least they were  😥

So it was time to treat myself to a new pair!

I can’t wait to tear them open. I will be saving them for close trim work – like when I do my Repliqué technique. But the old ones are dear friends and will live next to my machine for cutting threads and other simple tasks.

And one last thing – actually a warning:

Don’t use them while sitting on an exercise ball. I used to sew on one because it was good for my balance, but I had the misfortune of bumping my favorite scissors off the table and – you guessed it – that very sharp point punctured the ball and I ended up on the floor – LOL!

What scissors are your favorites! Please respond and tell us why!

*******************

And one more thing! I received an email from the National Quilters Circle website. You can learn all about them on their website: https://www.nationalquilterscircle.com/ . Their email said that I had been nominated for their “Best Overall Quilting Blog Award”.

I’m surprised and honored. They said in their email to me that I could share this info on my blog to continue to be nominated. If you like my blog, and are interested in participating, please go to: https://go.nationalquilterscircle.com/b13184/. Thanks!

No-End Binding – Improved Yet Again!

August 5, 2018 8 Comments

In February I shared a number of posts on some great uses for School Glue while quilting. I was very excited with how it worked for finishing the ends of my quilt bindings (click here to read that post), but I’ve found another tip that makes it even easier!

When sewing my binding ends together the lazy girl in me hated to stop when I was almost done to heat up the iron and press the glue dry. What to do?

Head to the store for another must have notion – “Wash Away Wonder Tape™”!

Once you have the tape the hard work is over. Prepare to be amazed  🙂 .

This works for single or double (French) binding (my example is done with a double binding). Sew your binding to the quilt, Beginning about 8″ from the end of the beginning tail, leaving at least 12″ open between the stitching of the tails, and leaving 8″ of ending tail open too – with a good overlap.

Because I made a double binding, I need to lay it open against the quilt to connect the ends. This works best if I pin the tails flat against the quilt (the corners of the quilt may “cup” up to allow for the opening of the tails).

Fold the end of one tail at 45° and finger press.

Cut a length of tape just a bit shorter than the angled edge, and affix the tape, paper side up.

Remove the release paper,

and lay the other tail smoothly in place, rubbing over the tape to secure it to both tails.

Pull the ends back to reveal the crease,

Carefully take it to the sewing machine and stitch in the crease.

Lay the binding flat against the quilt to be sure it fits.

Because the tape is wash away, you can skip this next step, but I liked the idea of pulling apart the end tails before you trim them and peeling away the tape. Now it’s gone and I don’t need to worry about washing it away.

Trim the tails 1/4″ from the seam.

Remove the pins, lay the folded binding back against the quilt, and stitch in place. Viola!

I still love the School Glue for matching fabrics and mitering borders, but I think this is the quickest and easiest way to finish the ends when binding. I’ve done it many times already and I think it’s pretty close to foolproof. Please give it a try and let me know what you think.

*************************************

And one more note. In last week’s post I shared Anne’s email address for instructions on her Serendipity Star. The address was incorrect. I have corrected it in that post, but I wanted to share the correct one here also: .

Thanks again Anne – for your generosity!

Eleanor’s Story

July 15, 2018 6 Comments

Over the years Wendy and I have had many wonderful repeat travelers with us on our Sew We Go adventures. One of the most enjoyable “characters” we’ve had join us is a dear woman named Eleanor. Eleanor lives in Illinois and heard about our Mississippi riverboat cruise when I spoke to her quilt guild. She and her friend Claire decided to join us, way back in the Spring of 2001, and we had a marvelous time (Eleanor is third from the left, I’ll let you figure out where Wendy and I are 🙂 ).
Our next cruise was to Alaska and Eleanor was one of the first to sign up (in this picture she’s just below me – top left).
We followed that trip with a European riverboat cruise on the blue Danube. We floated from Germany, through Austria and completed our trip in Hungary. It was delightful – and Eleanor was right there with us (to the left of Wendy in the first row).
Next we were off to Holland during tulip time. I love this picture of “quilting” time in the lounge with Wendy explaining to Eleanor the next step in our project. This is followed by Eleanor and her roommate Mary in Keukenhof Gardens.
I must admit, my most memorable times with her were on our riverboat cruise through France on the Rhone and Soane rivers. Eleanor had been a teacher in Paris in her youth and she was the most amazing tour guide for us during our post-cruise extension. She led us from Notre Dam Cathedral on a lovely walk along the Seine (stopping for a photo shoot), that culminated in a delicious lunch at Christines!
These photos include Eleanor’s dear friend and roommate Susan. She plays an important part in the rest of the story!
A few years after this trip I got word that Eleanor was in poor health and was living in a care facility. We really missed her on our subsequent adventures.
Fast forward to just a few weeks ago. To my surprise, and extreme delight, I got an email from Eleanor and this is what she said:
“Dear Chris, Until April I had not quilted for three years! Here’s why:  I had a fall which caused a concussion, misdiagnosed as being caused by a seizure. The medication caused all kinds of side effects which I won’t go into. But the turn around came when Susan, (you may remember her from the Rhone trip) made a brilliant remark. I had changed doctors, the side effects had disappeared, but the nursing home did not want to let me return to my apartment. (I used a wheelchair and had a caregiver).
Susan said, “Let’s go to Paris!” Doctor gave the OK and with Sylvia (my caregiver) and Susan’s generosity, off we went.
So where is quilting?  Well, when we got back to Lake Forest, the care facility was willing to let me return to my apartment. Sylvia and I were unpacking fabrics and discovered two that I had purchased years ago. “My grandson would love this; he’s into creepy crawlies.” I thought. Only problem: my wheelchair was too wide to fit into the console of the sewing machine. A former student knew of a place where I could buy a wheelchair narrow enough. I didn’t want to cut the fabric up too much and Sylvia wanted to be a part of things so I kept it simple. Only quilting done: freehand stars done in glow in the dark thread on the “dark” side
and outlining the stars on the daytime side.
She also included this wonderful photograph of herself and Sylvia.
What a blessing! I emailed her right back to ask if I could tell all of you about her in a blog post. Her response?
“Dear Chris , I am delighted to hear from you! (Although your blogs WERE the communication that kept me going when I was too weak to turn over in bed). You are welcome to share my story.”
And that’s what I’m doing.
Dear Eleanor, I’m thrilled to see you feeling well and back to quilting. I’m humbled and pleased to hear that you enjoyed my blog posts throughout your difficult journey.
Thank you so much for one more trip – the one down memory lane!
************************

A Tribute to Pat

As I’m writing this post my heart is aching over the loss of a dear quilting friend, Pat Gilane. She and Bob are at the foot of the staircase in the Alaskan group picture above (Pat’s the one in the pretty red floral dress  🙂 ).

Pat had struggled with pulmonary fibrosis for years. She was a true example of grace in suffering, and a joy to so many. She knew Jesus as her Savior and is breathing easy in His presence at last. I’m praying for Bob and their family as they move forward without this sweet lady. She will be missed.

Burning Fabric

July 8, 2018 7 Comments

Why would anyone want to burn fabric?

Perhaps a better question is: have you ever wondered if a fabric you want to use in a quilt is 100% cotton? There is an easy test to check. Many of you may already know this, but I’m hoping some of you will find this helpful.

Recently I was cleaning out the cupboard where I keep my quilt backing pieces and non-cotton fabrics. I found a piece of black and white polka dot fabric and wondered why it wasn’t in with the rest of my stash.

Perhaps it was a polyester blend. Nothing on the selvedge showed fiber content, so I grabbed a book of matches, cut off a corner of the yardage, and went outside.

I lit the pointy end with a match and watched it burn. I waited for it to cool, then I picked it up and when I rubbed it between my fingers, the residue was a soft ash.

This is the case for natural fibers such as cotton, rayon, linen, silk, etc.

For the sake of comparison I cut a triangle from a fabric I knew was a polyester.

The results? It melted.

You can see the light reflecting in the “plastic-like” burned semi-circle on the fabric, and the small black piece was stuck to the cement. Man made fabrics like polyester and nylon melt rather than ash.

The next day I pulled out some beautiful scraps I wanted to use in my next challenge quilt.

They were given to me by a woman I stayed with when I taught for a quilt guild in Eau Claire, WI. She told me there was a men’s necktie factory nearby and they sold their scraps by the pound. She then gifted me with a bag full.

Before I attempted to make them into appliqué shapes, I thought I’d better check to see if they were silk or polyester, because ties can be made from either. I’m happy to say they all passed the burn test and are silk:

The interesting thing was the ash was not as soft as the cotton fabric and it had a bit of a gritty feel when I rubbed it between my fingers. I guess I’ve never burned silk before because I was a little surprised by this.

Do any of you use this test for your fabrics? Any other thoughts you’d like to share  🙂 ?

Photo Inspiration: Door

July 1, 2018 4 Comments

I belong to a group of fiber artists called ThreadBenders. ThreadBenders is a relatively new group, and we have some delightful and very enthusiastic artists. We recently completed our first “big” guild challenge and 13 of our 16 members participated. I was very impressed with the results!

The challenge was named “Photo Inspiration: Door”. The picture we chose to inspire our quilts was taken by a friend of one of our members in St. Thomas, VI.

You can read the rules and see all of the quilts at: https://threadbendersblog.wordpress.com/

About 5 years ago I took a 10 week class at WCTC about Adobe Photoshop™. It was a great class and I think I’ve forgotten more than I remember because Photoshop™ can do so much. But the things that have stuck with me have been incredibly helpful. One aspect of the program I was particularly interested in was called “transform”. You can do the most amazing things with your pictures by using commands like “skew”, “warp”, “distort”, etc..


Fascinating, but weird. And after making all of these weird variations, what do you do with them?

Well, I chose the last one and made a quilt.

“Stretch, Warp, Abstract” has a very odd outer edge and the portion that stretches across the main body of the quilt was actually made as a separate quilt, and attached after both were quilted. This quilt forced me to come up with new techniques and try a lot of different ones I already had in my bag of tricks. That’s what I love about challenges, and that’s why I take classes and read magazines – to learn new techniques.

I loved making this quilt (well I loved it most of the time  😉 ). It could easily be the most unusual quilt I’ve ever made. I was impressed with the variety and imagination of all the challenge quilts, and I hope you will visit our site to see them: https://threadbendersblog.wordpress.com/

And here’s the icing on the cake. We chose 8 of the quilts to enter in the “Ultimate Guild Challenge” competition held at the AQS show in Grand Rapids, MI and they were accepted! They’ll be traveling to Grand Rapids for the show in August! We’re all very excited!

Once they return, we’ll be looking for venues to display them. If you know of a quilt show, shop, art museum, etc. that would be interested, please let us know by emailing me at .

A Quilted Flag

June 24, 2018 7 Comments

I have been traveling a lot lately. I recently spent 3 days with the Shawnee Quilters in Carbondale, IL, teaching both Repliqué and Beginning Fiber Art. The students were delightful and, since I did a lecture for their guild meeting on the third day of my visit, they were able to bring their workshop projects for show & tell.

Great job ladies!!! Thanks for a lovely time!

********************

In May I had the wonderful opportunity to spend a week in New York City with my cousins. Deb, Cindy and I had a spectacular time touring the Big Apple, taking in two Broadway shows, and indulging in delicious meals – all interspersed with lots of giggles. We had an amazing view from our hotel room – 35 floors above Times Square.

We did a 2 ½ hour guided bike tour through Central Park with Tony,

and walked or took the subway all over Manhattan. We even walked across the Brooklyn Bridge!

Cindy, Deb and I enjoyed our ferry ride with a tour of Ellis Island and the Statue of Liberty.

Our guide Zach made it especially fun.

He did a great job of sharing a lot of history and fascinating information about these two amazing places, plus he spiced it up with his “Zach facts” 😀 ! They weren’t necessarily true, but they kept us smiling (note his flag in the picture above). Here he is next to an actual size replica of the Statue’s foot in the pedestal museum beneath Lady Liberty.

During the rest stop on the tour I showed Zach pictures of my “How Beautiful – Liberty” quilt (click here to see a post about that quilt).

This got me to talking about the tours I’ve led and how Wendy and I have a mascot who often finds herself atop flags so we can keep track of our guides, like when Rudy and Quiltina led us through Siena, Italy.

Zach jokingly mentioned he’d love a personal flag that announced his “Zach Facts”, and when I got home I decided it would be fun to make him one to wave along with his orange “company” flag. He emailed me the “head shot” he wanted me to use, I transferred it to white fabric – along with the words, added the Statue fabric to the back and did a bit of fun quilting. Here are the results – front and back:

And this was his response via email:

“Hey Chris, I just received your quilt and card in the mail today and I want you to know how honored I am. It really made my day. Even the back side of it is beautiful. Loved the card as well. Can’t wait to proudly wave that flag. I am truly thankful.”

That made it so worthwhile. Isn’t it interesting how quilters can find a way to bring quilting into all aspects of life (LOL)?

  • « Go to Previous Page
  • Page 1
  • Interim pages omitted …
  • Page 42
  • Page 43
  • Page 44
  • Page 45
  • Page 46
  • Interim pages omitted …
  • Page 77
  • Go to Next Page »

Primary Sidebar

Archives

Recent Posts

  • Quilting in Bloomington ~ Part 2
  • The Indiana Heritage Quilt Show ~ 2026
  • Bird’s Eye View
  • The Birds
  • Sew Much Creativity

Recent Comments

  • judy raddatz on Quilting in Bloomington ~ Part 2
  • Kathy Wuhrmann on The Indiana Heritage Quilt Show ~ 2026
  • Doris Ast on The Indiana Heritage Quilt Show ~ 2026
  • judy raddatz on The Indiana Heritage Quilt Show ~ 2026
  • Jeanette Bussard on The Indiana Heritage Quilt Show ~ 2026

Categories

Footer

My Guide

Whatever you do, do your work heartily, as for the Lord rather than for men.

—  Colossians 3:23

Contact Chris!

  • Home
  • About
  • Gallery
  • Classes
  • Trips
  • Books
  • Blog
  • Contact
  • Sign Up For My Blog

Copyright © 2026 · Chris Quilts · Website by Adunate · Privacy Policy