• Skip to main content
  • Skip to primary sidebar
  • Skip to footer

  • Home
  • About
  • Gallery
  • Classes
  • Trips
  • Books
  • Blog
  • Contact
  • Sign Up For My Blog

Blog

Comfortable Quilting Tips

October 30, 2016 6 Comments

This past week our son had a few well deserved days off of work – which meant grandpa and I had some time off from child care. Mike decided to make good use of the time, and beautiful weather, making fuel for our wood-burner.

lumberjack-mike-2016

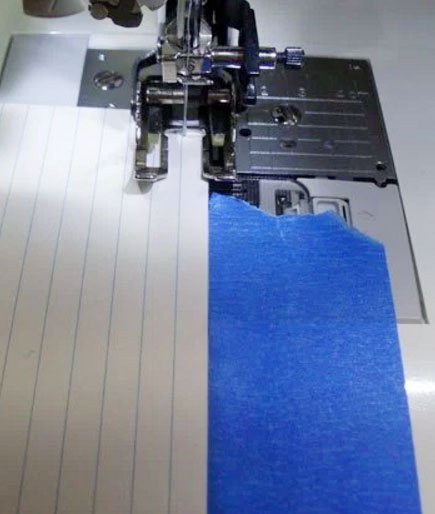
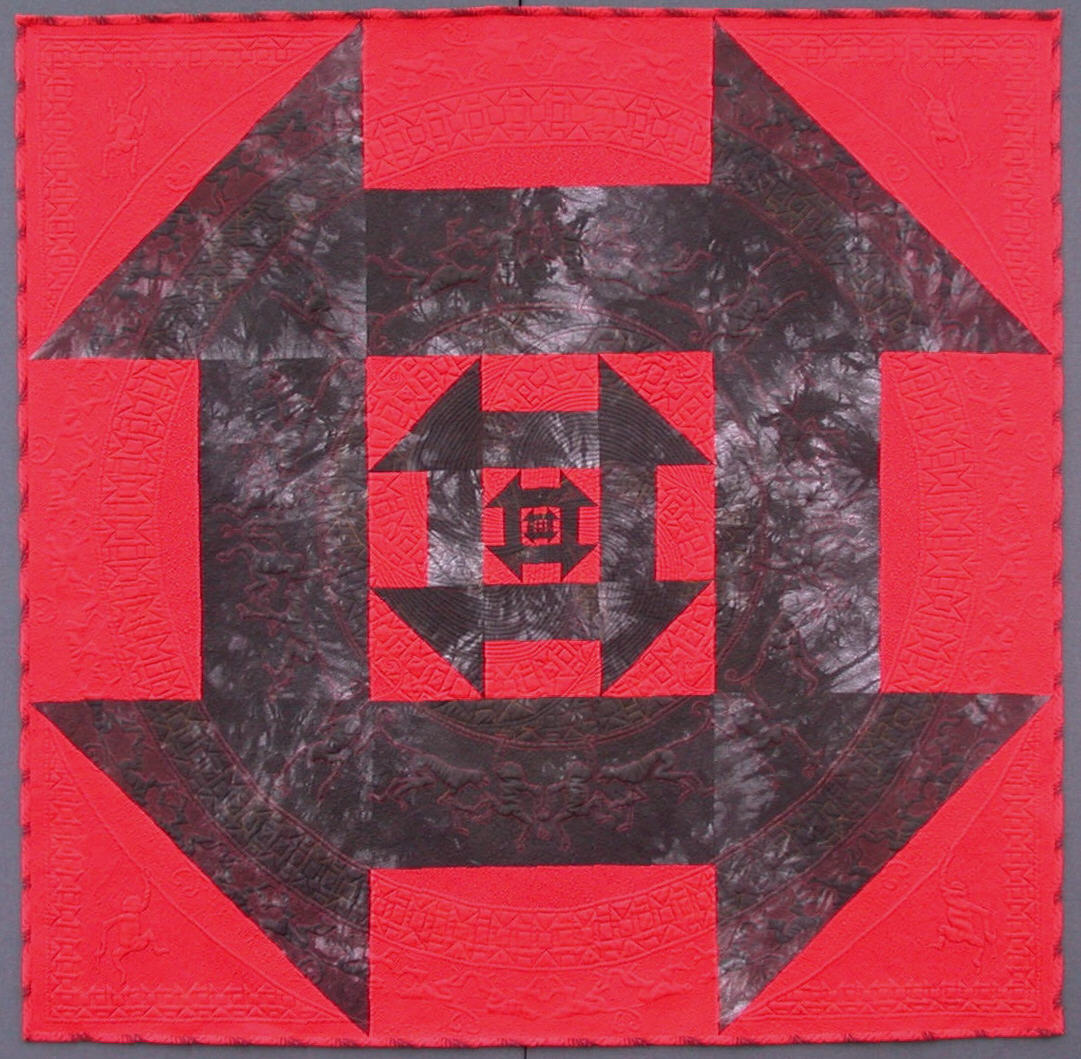
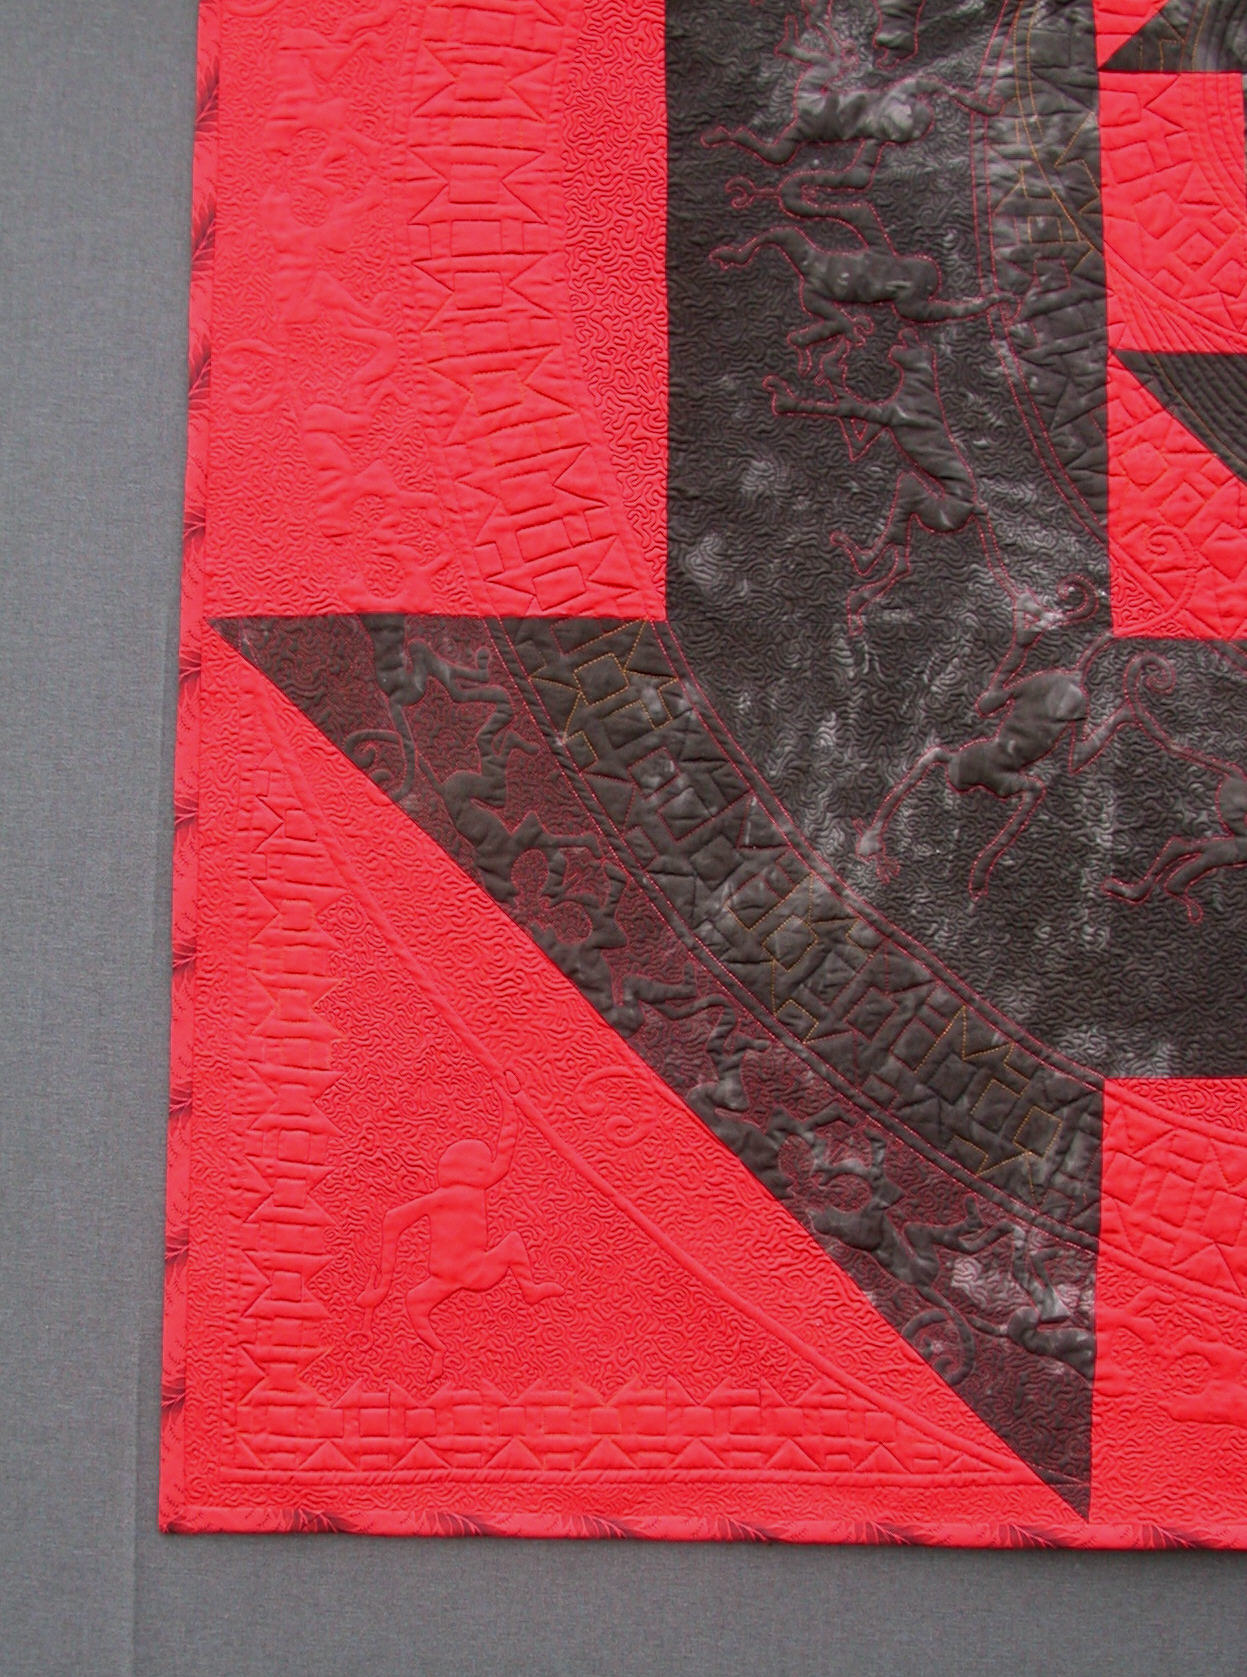
And I was able to finish my current competition quilt! The deadline is this week, so the timing was perfect! I had previously machine quilted about 1/3 of the project, and the time had come to do the free-motion background fillers. I placed the quilt under my HQ Sweet 16 and hooked it up to my “Quilt Float” system (for details on the Quilt Float, click here and then here). That’s my #1 suggestion for making quilting more comfortable!

comfortable-quilt-float

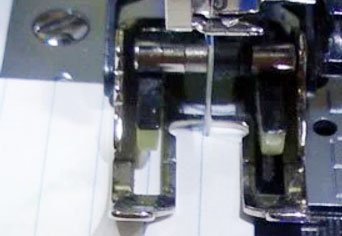
The clamps hold the bulk of my quilt and carry the weight, so everything moves easily under the needle. This works for domestic sewing machines as well as mid-arms, and it makes the entire process so much less strenuous!

You may have noticed the magnifier arched in front of the machine. It is one of my favorite new tools and my #2 recommendation for making quilting more comfortable. It has a “goose-neck” arm attached to a heavy duty clamp for easy positioning, and it increases my visibility so much now that my eyes are over 60  :-). I purchased mine in Paducah a few years ago, but I did find it on-line at jabetc.com

comfortable-quilt-mag2

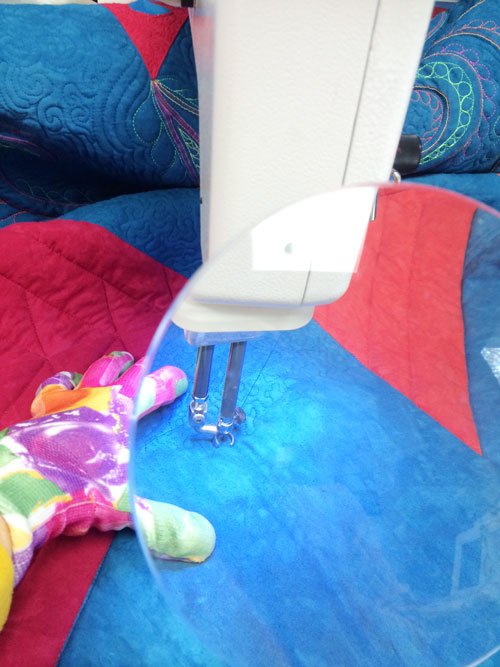
Don’t you just love my quilting gloves? I got them in the gift shop at the International Rose Gardens in Portland, Oregon last year when Wendy and I took a group of quilters to the Sisters Quilt Show (click here for information on our next adventure). Quilting gloves make moving the quilt so much easier, and are #3 on my list of recommendations for making quilting more comfortable.

So, I began to quilt, but I still couldn’t seem to get comfortable. I tried adjusting my chair height (elbows should be even with the table top), but that didn’t help. I scooted the foot pedal around, but that too wasn’t working. What was wrong??? I finally stopped long enough to analyze the situation and realized the chair was cutting into the back of my legs. I’m not sure why I hadn’t had this problem before (could it have something to do with that age thing again?), but it was bugging me now – and I needed to do something about it – fast!

It occurred to me that I needed to raise my feet off the floor. I found a sturdy, 3″ tall cardboard box in the attic and it did the trick! It was especially nice to have both of my feet on the platform. I felt much more balanced and a whole lot more comfortable. Thus, “raising the floor” is tip #4.

comfortable-quilting

You might have noticed there are small blocks of wood under the feet of my sewing machine table. This is my husband’s method for protecting the carpet, and it did raise the table about 1″, exacerbating my problem. Since I’m 5′ 6″ tall and this worked for me, I bet “raising the floor” could really be helpful for quilters with shorter legs.

Do you have any additional quilting comfort ideas to share?

**********************************

Last week Marla responded to my post about Slow Stitching with a picture. This is what she said:

“I love this slow stitching movement.  I started slowing down the process almost a year ago.  Sometimes life gets in the way of our quilting, and we become frustrated by not producing all the quilts we’ve designed in our minds.  I have started doing more handwork and improvisational piecing with minimal planning.  It’s very satisfying and quite beautiful.  I’ve attached a piece of embroidery on felted wool, all improvisational except for the leaf shape.”

Marla Morris-Kennedy slow stitching

It’s lovely, Marla. Thanks for sharing.

I’m hoping to try my hand at “slow stitching”, but it may need to wait until I’m past my “fast chasing after grandchildren” phase of life.

A Consistent Seam Allowance

October 16, 2016 Leave a Comment

turkey-blog

Happy Autumn! As I was about to post to this week’s blog, Mike hollered for me to come quickly to the kitchen window. This is what I saw – a large Tom turkey and 9 hens running through the leaves. I must admit – this has nothing to do with the topic of the week, but it’s Autumn, so I couldn’t resist! Now on to the topic at hand  🙂 !

I often have students who struggle with keeping their 1/4″ seam allowance consistent, or their blocks always end up too small, or they are using 2 different sewing machines on the same project and the distance between the needle and the edge of the foot differs between the machines. If your seam allowance isn’t accurate or consistent, your frustration level can really skyrocket.

I have a trick to help with all of these issues. I don’t remember where I learned it, but I’ve used it for years and shared it with many quilters.

To begin with, I prefer to sew with a scant 1/4″ seam allowance, because I like to press my seams to the side and this always takes up an extra thread or two, thus shrinking the blocks. By using the scant 1/4″, my blocks remain the correct size. So… here’s the trick:

  • Take an index card, marked with 1/4″ lines, and cut off the bottom of the card on the lowest blue line.
  • Place the card under the needle of the machine and lower the needle by hand so that it pierces the card just to the right of the next blue line. When the needle is at the lowest level, it should be “kissing” the line.
  • sa-index-card-hole-1Place masking/painters tape along the right side of the card, making sure you don’t cover the feed dogs.sa-index-card-tape
  • If you struggle with keeping your seam allowance consistent, it’s helpful to stack a number of layers of tape on top of one another, to make a thicker edge to run the fabric along (sort of like the bumpers in bumper bowling  🙂 ). I’ve really appreciated knowing this technique when teaching children to quilt.
  • Remove the card and piece to your heart’s content.
  • Keep this card. sa-index-card-holeIf/when the need arises to sew on a different machine, put the needle down in the hole on the card, tape along the right side, and be assured you will be stitching with the same seam allowance on both machines!

This can be especially helpful when a group of quilters is working on the same quilt, for charity or competition purposes. If one person tapes each machine using the same card (or if the card is passed around), everyone will be making blocks the same size!

***********************

Birthday Block Update

Thanks again to everyone who gifted me with a 4-patch birthday block. So far I have 42 beautiful squares! This was Wendy’s comment to last week’s post (click here to read that post):

“Anyone is welcome to send a four patch to Chris. I am sure she would love to have a block from any of her blog friends!”

I will gladly keep you posted on what these blocks will become – as soon as I figure it out!

Birthday Quilt Block Surprise

October 9, 2016 4 Comments

This past week I celebrated a rather “landmark” birthday. I was overjoyed to discover the thoughtful, and sneaky, plan of my dear friend and co-travel leader, Wendy Rieves. She invited quilting friends to send me black and white 4-patch signature blocks (she sent me a copy of this after the fact).

60-birthday-surprise

Woo Hoo! Sommer and I have had a lot of fun getting the mail each day!

sommer-mailbox-2

You may remember I recently posted about a new lecture I’m putting together called “Friendship Quilts: Then and Now” (click here for that post). How clever of Wendy to think of combining that idea with birthday blocks. It was so thoughtful of her to organize this, and I especially appreciated her requesting a favorite prayer, Scripture or note of encouragement to be written on each block.

This past Thursday my Open Lab class held a lovely surprise birthday party, complete with cupcakes, singing, and more blocks. What a blessing! Then, last night, my dear husband threw me a lovely surprise party – family, friends, food, fun and another block!birthday-blocks

I have received this beautiful pile of blocks so far – and Wendy was kind enough to suggest the “block party” last all month! It is a joy to read each one and think about the dear quilter/friend who took the time to make it for me. I can’t wait to see the friendship quilt they will become.

I want to send a BIG THANK YOU to everyone who sent a block and made this birthday a very special one for me. And my BIGGEST THANK YOU to Wendy. We’ve had so many wonderful times together and I look forward to many more. I thank the Lord for you!

Just a reminder!

norwegian-dawn

Wendy and I will be taking a group of quilters on a cruise from Quebec to Boston in September of next year aboard the Norwegian Dawn! We’ll not only explore these 2 beautiful cities, but we have stops in Bar Harbor, Maine; Halifax, Nova Scotia; and the Bay of Fundy. We’re planning many special events and projects to thrill quilters of every level, plus – non-quilters are also welcome!

quilt cruise Quebec Boston

The sign up is going great! We still have a few cabins available. To read all about it click here!

PS We have a few travelers who are looking for a roommate. If you are interested please contact Kristi at (262)786-6763  or

Anything Goes Round Robin ~ Puzzling Spumoni!

September 25, 2016 5 Comments

Over the years I’ve participated in many Round Robin exchanges in the guilds I’ve belonged to: “Add a Border”, “Row by Row”, and “Around the Square”, just to name a few. Probably the most unique one was held by the Milwaukee Art Quilters and it was called “Anything Goes”. I did a post about it way back in 2010, but I’ll be participating in a new Anything Goes challenge in a new Fiber Arts guild (more info to come 😉  ), and thought it was a good time to revisit this fun idea.

So, here are the rules: there are none! Each participant chooses a block, a hunk of fabric, a small failed project, a piece of fabric they’ve dyed or painted – anything goes. This item is placed in a paper bag with some symbol recognizable only to the owner (the owner is not revealed until the end of the rounds), and they are all thrown in a pile on the floor. Everyone picks a new bag, opens it, and pictures are taken for future reference. This works best if there are 4 or 5 in each group, so if you have more participants, divide into groups first.

Oh – I forgot to mention, there is one rule – you can’t be upset by what you get back  😀 !

I began with 3 large, hexagon log cabin blocks from a failed 1995 workshop where the teacher discovered half way through that the blocks wouldn’t fit together and the class ended.

Puzzling Spumoni 1

The fabrics were dated, and I had no idea what else to do with the blocks, so in the bag they went. The first person chopped up two of the blocks and sewed them back together into long strips (the next few pictures were made using Photoshop, because back then we didn’t take step-by-step pictures – they may not be perfect, but you get the idea).

Puzzling-spumoni-2

The second person thread painted a peacock feather on a new piece of fabric, and bordered it with the pieced unit strip.

Puzzling-spumoni-3

The third didn’t like it at all, so she chopped everything up again and added a bunch of stuff from her scrap bag. She then cut this new “fabric” into jigsaw puzzle shaped pieces and pinned them onto a piece of black fabric.

Puzzling-Spumoni-4-jigsaw

The fourth artist said she was at a loss for the first 29 days of the month. The last day she stared at it, and was so frustrated, she went out for ice cream. When she returned, she was inspired. She removed a few of the pieces and put a cherry on top!

Puzzling-Spumoni-5-with-cherry

This is how it was returned to me, so I put it in a dish and added the spoon.

Puzzling-Spumoni-entire-web

The handle of the spoon sticks off the quilt and is supported by a dowel in a sleeve. The shape of the dish is the shape of the lower half of the quilt. I was very pleased and named it “Puzzling Spumoni”! All but one of the other pieces in the challenge turned out great. We each tried new techniques and grew as artists while having fun.

I highly recommend trying an Anything Goes challenge with your friends.

If you’d like to get in on the Anything Goes challenge I’m participating in, our new Milwaukee area fiber art group is called Thread Benders and we will be meeting the third Wednesday in September in Brookfield. Email me for more information!

Valances and Arm Rest Covers

September 18, 2016 Leave a Comment

Occasionally I get an idea for some quilted item I need and, before I begin creating from scratch, I open my bins of UFO’s (remember, this stands for ultimately fabulous opportunities!) and see if anything fits the bill. A few years ago one of my UFO’s became the valance in our bedroom. I never got around to making it a blog topic, but now I’m working with another UFO that is becoming armrest covers. With two such items – it just had to become a blog topic. We’ll begin with the valence!

We re-carpeted our bedroom in blue and I found drapes to match, but the whole look needed a little zip. In my UFO bin I found a bag full of plaid, 3-D bow tie blocks. If you’ve never made them, click here for a great tutorial! I had enough for the valance and, since the blocks were already made, it went together quickly!

bow tie window valence

You may have noticed our unique tie backs. I saw this on Pinterest™, and after a short walk in the woods, Mike was well into making my wish come true  😀 !

log home curtain tie backs

The second repurposing of a UFO happened because my parents have birthdays in July. My brother and I were very blessed to have parents who raised us with a cottage on Lake Sinissippi. It is a wonderful place of fun and happy memories for all of us.

pontoon

Well, Dad and Mom’s chairs in the living room at the cottage were showing some wear. So, I pulled out the UFO bins and found a bag of blocks I’d made in a Scott Murkin class in Paducah last year.

quilted armrest covers

I laid them out in a pleasing pattern

armrest-and-valance-1

and sewed them together, bordering them to the appropriate size.

armrest-and-valance

Then the ends were sewn on and they were ready to gift!

quilted arm rest covers

This isn’ the first time I’ve posted about repurposing a UFO. In 2013 I made one into a cover for my Kitchenaid Mix Master. Click here to read that post. I did one other post in 2010 filled with ideas for completing UFO’s. You can read that one here.

Have you ever repurposed a UFO? Do you have a great idea for finishing them? Care to share a picture?

***********************

QUILTERS SALE

Due to life situations, family and friends of a dear friend of mine are holding a sale of her quilting fabric and supplies. Here are the details:
When: October 1-2; Saturday from 9:30 to 3:45 and Sunday from noon to 3:45
Where: The Whitefish Bay Library; 5420 North Marlborough Drive, Whitefish Bay, WI
What will be available: A lot of hand dyed cottons (Lunn & Mrowka, Melody Johnson & Laura Wasilowski, etc), commercial cotton’s (Hoffman woodblock prints, batiks, Alexander Henry, Nancy Crow, etc.), hand dyed silks, novelty fabrics, beads, embellishments, etc.

Madison Quilt Expo 2016

September 11, 2016 8 Comments

expo-2016

I think I say this every year, but the Madison Quilt Expo this past weekend was the best yet! There was something for everyone and it was all very well done. Thanks to everyone at Nancy’s Notions and Wisconsin Public Television for making this great event a reality.

I had the blessed opportunity to share my Border Boutique lecture each afternoon to the largest crowds I’ve ever had at Expo. I didn’t teach a hands on workshop this year, which gave me much more time to enjoy the show. And enjoy it – I did!

If you want to see loads of great pictures of the quilts, vendors and events from the show, you can go to the Quilt Expo Facebook page at:  https://www.facebook.com/search/top/?q=quilt%20expo.

I always like to share things from the show that you may not see on other sites, such as me getting a hug from Bucky,

bucky-and-me

when the UW marching band made a surprise visit! You never know what you’ll see at Expo!

uw-band

While looking at the quilts I ran into May. A while back she learned my drafting technique for the Mariner’s Compass and, while spending time with her grandchildren, decided to make a necklace using Shrinky Dinks™. I love it! It may have to be my next grandma/Sommer project.

mays-mariners-shrinky-dink-necklace

There was a special exhibit of quilts that I found particularly interesting. It was a group of quilts from a challenge held by my friend Kim Lapacek. I did a blog post about her passion for quilting last year (click here to read that post). Here’s the challenge info:

prism-quilts

This large and exciting exhibit filled a long hallway at Expo, and were arranged in spectral order. I noticed that one of the monthly inspiration blocks was the Monkey Wrench. You may remember a “New Quilt From an Old Favorite” Monkey Wrench quilt I made with my friend, Sharon Rotz, a few years back.

Quilt - Two Friends Monkeying Around

It measures 60″ square, and contains telescoping monkey wrench blocks, quilted with more block outlines and trapunto monkeys chasing each other around with wrenches (you’ll have to look closely to find them).

monkeywrench2

Well, a few of the challenge monkey wrench quilts had similarities to ours and they made me smile:

monkey-wrench5 monkey-wrench4 monkey-wrench3 monkey-wrench2 monkey-wrench1

Delightful!

It was great to reconnect and spend time with many friends. Thanks especially to my dear friend, fellow teacher, and roommate, Laura Krasinski. She always makes everything extra fun.

laura-and-chris

And I’d like to close this post with a picture of the Viewer’s Choice award winner from this year’s show:”He Who Guides Me” by Mary Buvia of Carmel, Indiana. "He Who Guides Me" by Mary Buvia

It was inspired by a picture her husband painted. Awesome!

Friendship Quilts

September 4, 2016 1 Comment

As I said last week, I’m very excited about the new guild lecture I’m putting together. The idea began to form a few weeks ago when I was looking at the quilted tote my grandchildren use to transport library books.

French-Friendship-Tote
France autograph tote – front and back

It’s made from friendship blocks exchanged while on our Sew We Go riverboat cruise through France in 2008. It got me to thinking about all the wonderful friendship/autograph/signature quilts I’ve made or been given over the years. Like this one that was given to me by Common Threads quilt guild in thanks for my years as president (thanks Valeria!)

autograph quilt Common Threads

And then… what about that old top I made after collecting signature blocks at a family reunion in 1993? It was at the bottom of a UFO bin, along with a group picture from the party, already printed on muslin. It only needed a border to complete the top. I added one with Seminole piecing and it’s ready for quilting!

Lohse reunion 1993 quilt top-border 2016

Everyone who attended the reunion (including the kids) signed their block and many also drew or wrote something important to them on it.

This led to pondering about “that” vintage autograph quilt top I purchased a few years back. I pulled it out and enjoyed looking over all the signatures and wondering about it’s history. Who was Grandma Chapman? What’s the name of this lovely pattern?

Star-Bouquet-vintage-signature-quilt

I looked more closely to find other interesting signatures. Than I did some research to discover the pattern is called “star bouquet”. What fun!

Well, from there it was a short hop to checking out Buckboard Quilt’s website for signature quilts. I wasn’t disappointed! Judy makes every effort to get the story when she acquires a quilt, and she had some great stories!

Like one that has a block signed: mother 82, and the pattern is called Little Britches, or this one in which Judy included a copy of the obituary of the man in who’s estate the quilt was found.

gmas-favorite-or-double-fan

I’m having such a good time gathering the quilts and their stories. It’s requiring some detective work – which I’m enjoying immensely.

In the talk I’ll share old and new quilts, their stories, plus handouts with patterns for great autograph blocks to use in your next friendship quilt.

If you’d like to see more quilts and hear the stories, I’d love to visit your guild and share them all! Please direct the program people in your guild to this blog, and have them contact me! Thanks!!!

Tutus and Soleless Sandals

August 21, 2016 1 Comment

Last week Sheila made an inspiring comment on my blog. I thought many of you would find it interesting, so here it is:

“Thanks for your weekly hints.  I’ve found them very helpful. Just finished laying out fabric for a number of mug rugs.  Great idea for friends instead of Xmas cards.  Will make a bunch now.  Then first week in Dec. we will deliver them.  Will take my grandfather’s string of brass bells his horses wore during the Christmas season and ring at the houses where we deliver mug rugs.”  

Thanks Sheila, for the great idea! Now on to this week’s blog post. It isn’t really about quilts, but includes ribbons, tulle, and beads. I hope you enjoy it!

*********************

This Summer, Sommer and I have had fun doing crafts. Both of the projects I’m sharing here were made with items quilters probably have on hand, or could easily find at a local craft store, and they were simple enough for a 4 year old (with help 😉 ).

The first was a tulle tutu.

tutu-done

You’ll need a piece of 1″ ribbon long enough to tie around a little girls waist with a big bow (set this piece aside); a roll of 6″ wide tulle in a pretty color, and a roll of 1″ wide ribbon to compliment the tulle in the skirt.

  • Measure the length you’d like the tutu and double that number. Cut 12 pieces each, of the tulle and the skirt ribbon, at that length.tulle tutu
  • Clamp the waist ribbon to a table at each end, or tie around chairs.
  • Fold a length of tulle in half and place around the child’s wrist.tulle tutu
  • Pull the tails under the ribbon and have the child grab them above the ribbon.tulle tutu
  • Now have the child simply pull the ends through the loop to make a “knot”.tulle tutu
  • Repeat for all the tulle and ribbon pieces, alternating as you go.

    tutu proud
    too-too proud!

*******************

The next week Sommer’s little brother, Trey, pulled something out of one of my drawers. It was a trip down memory lane, as my grandmother made these “soleless sandals” for me when I was in High School.

soleless-sandals-gma

The second pair he grabbed came from the Sew We Go adventure Wendy and I made to Alaska. As we were preparing for our cruise of the Inside Passage, Wendy’s sister Heidi offered to share a beading project. We were thrilled, and it ended up being another version of this fun foot jewelry.

A-cruise 025

My grandmother’s were crocheted, but Heidi’s were made with strung beads. She was kind enough to bring all the supplies and a bunch of us had a great time making them.

I put them on and Sommer wanted a pair of her own. So I found some elastic thread and beads in my studio and she was off. She preferred working on the floor and spread out all the supplies. Then she began to put the beads onto the threaded needle:

kids foot jewelry

kids foot jewelry

Just watching her technique makes by back hurt, but she was content and finished her first one:

kids foot jewelry

Then, 4 beads into the second one, she pricked her finger. No blood, but the tears flowed freely and her “drama queen” side kicked into gear. She wanted me to finish it, but I remember my mom making sure I finished a project myself, to learn perseverance. So we put it aside, and the next day, with a little bit of encouraging, she jumped back on the horse – and here are the results:

Soleless sandals for Grandma and Sommer

There are many Youtube videos with lessons for “how to make foot jewelry, or toe thongs”. Here are just a few:  https://www.youtube.com/watch?v=GHurNgGTyiQ , https://www.youtube.com/watch?v=FS98Z_8go0c

Please let me know if you make any for yourself, or share them with a child. I’d love to see pictures!

  • « Go to Previous Page
  • Page 1
  • Interim pages omitted …
  • Page 50
  • Page 51
  • Page 52
  • Page 53
  • Page 54
  • Interim pages omitted …
  • Page 77
  • Go to Next Page »

Primary Sidebar

Archives

Recent Posts

  • Quilting in Bloomington ~ Part 2
  • The Indiana Heritage Quilt Show ~ 2026
  • Bird’s Eye View
  • The Birds
  • Sew Much Creativity

Recent Comments

  • Laurie Neubauer on Quilting in Bloomington ~ Part 2
  • judy raddatz on Quilting in Bloomington ~ Part 2
  • Kathy Wuhrmann on The Indiana Heritage Quilt Show ~ 2026
  • Doris Ast on The Indiana Heritage Quilt Show ~ 2026
  • judy raddatz on The Indiana Heritage Quilt Show ~ 2026

Categories

Footer

My Guide

Whatever you do, do your work heartily, as for the Lord rather than for men.

—  Colossians 3:23

Contact Chris!

  • Home
  • About
  • Gallery
  • Classes
  • Trips
  • Books
  • Blog
  • Contact
  • Sign Up For My Blog

Copyright © 2026 · Chris Quilts · Website by Adunate · Privacy Policy