• Skip to main content
  • Skip to primary sidebar
  • Skip to footer

  • Home
  • About
  • Gallery
  • Classes
  • Trips
  • Books
  • Blog
  • Contact
  • Sign Up For My Blog

Blog

Art Deco Wins at AQS

August 14, 2016 3 Comments

I hope this isn’t too obnoxious, but AQS sent it to me – and I’m passing it along 😀 !
Art Deco winner

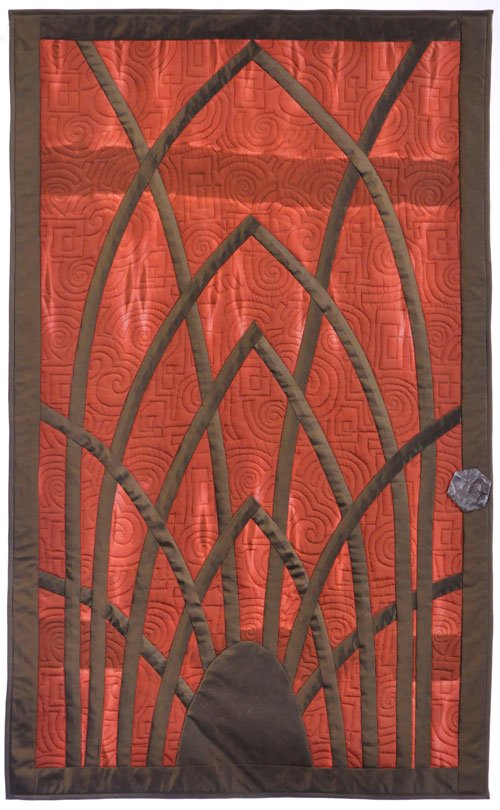
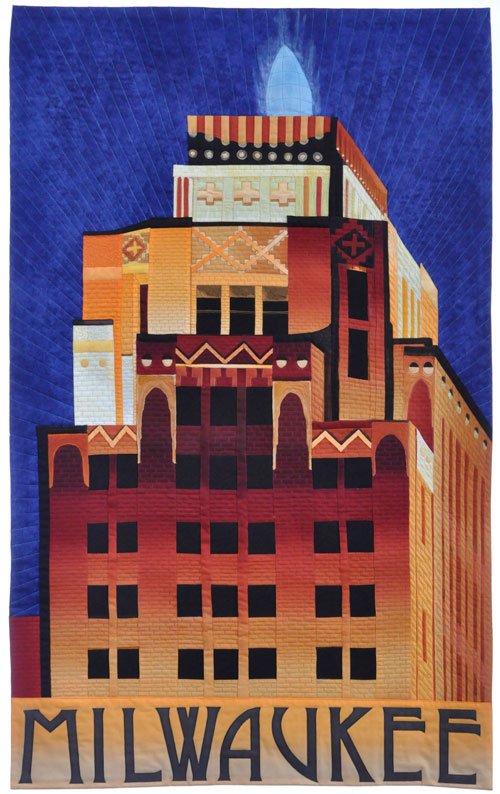
You may remember a quilt I posted about a few months back, made with Spandex, and named Forty Wonderful Years (click here and here for both of the posts about that quilt). It was made for a Milwaukee Art Quilter’s challenge called “Art Deco”. Eight fiber artists made quilts to fit that theme and we entered them in the American Quilters Society show in Grand Rapids. The show was this past weekend and we took second place!

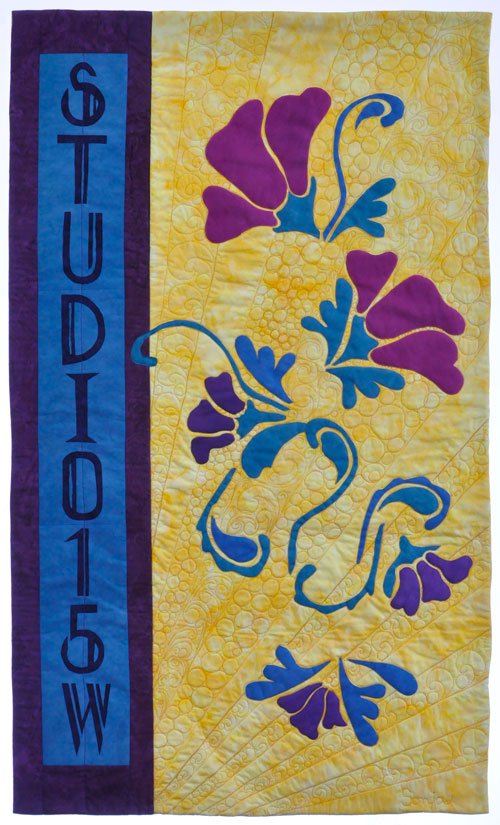
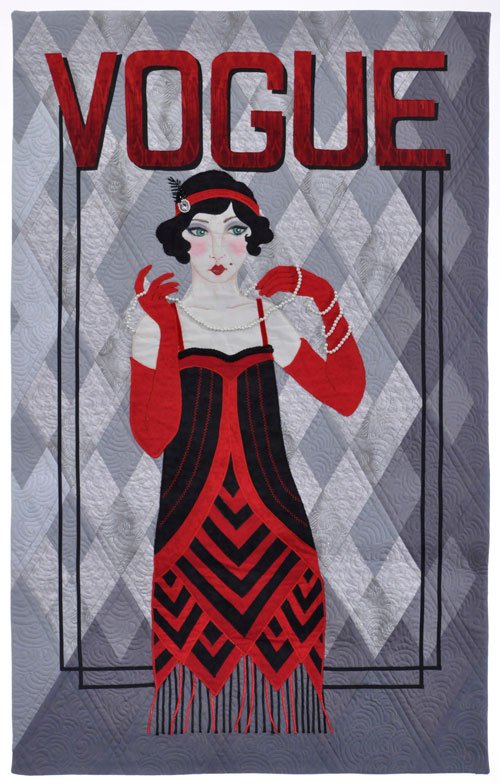
I thought you might like to see the rest of the winning quilts:

You Decide 2016 by Judy Valentino


ADD---Art-Deco-Door-Kathy-Downie-web
ADD – Art Deco Door by Kathy Downie


Le-Dame-Moderne-Kathleen-Sweeney-web
Le Dame Moderne by Kathleen Irons Sweeney


Miami-Moon-Linda-Fleschner-web
Miami Moon by Linda Fleschner


Milwaukee's-Night-Light-Kathleen-Hughes-web
Milwaukee’s Night Light by Kathleen Hughes


Studio-15W-Sonja-Pavlik-web
Studio 15W by Sonja Pavlik


Vogue-Diana-Dunaway-web
Vogue by Diana Dunaway


quilting with spandex
Forty Wonderful Years by Chris Lynn Kirsch

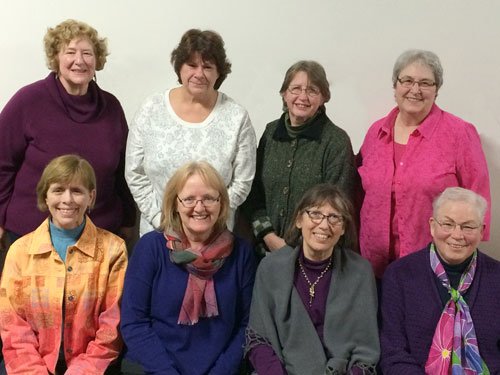
I’m honored to be a part of this winning group!

MilwaukeeArtQuilters-Art-Deco8-web

********************

And I’d like to close with a wonderful tip/tutorial from the AQS blog – On-Point! In it they describe a great way to keep organized during a project, using sticky notes.

AQS sticky tip

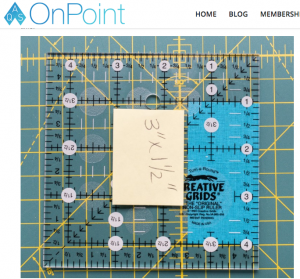
It’s a worthwhile read and you can see the whole post at:  http://www.quiltviews.com/quilters-best-friend-sticky-advice! Then sign up for their blog to receive all of their great tips.

Enjoy!

Fitting Quilt Borders – Mathlessly

August 7, 2016 3 Comments

Seminole quilt border

The generally accepted rule for getting borders to fit on your quilt is to square up the top, and then measure the length of two opposite sides and across the center of the quilt top. In a perfect world these 3 numbers should be the same, but only God is perfect, and most of us know that these numbers seldom match. If they’re way off I do some re-stitching. If they’re within a 1/2″, I split the difference and cut the border strips at this size – easing them to fit.

On smaller pieces I’ve discovered an easier way. It may sound like cheating, but it works for me – if the sides are close to the same length (1/2″ or less difference – I might try up to a 3/4″ difference, but more than that would be pushing it). Here are the step-by-steps:

  1. Fold the quilt top in half and lay it on a table, with the edges you’re adding the borders to closest to you. I’ve left a 1/2″ underlap in the picture so you can see that both sides are aligned together. I then smooth these edges out so they are evenly on top of each other (trust me, even though the entire length isn’t in the picture, it is even on the right side too). If they aren’t exactly the same size I: place the corners on top of each other, hold them between a forefinger and a thumb on each side, and tug gently, placing it back on the table.mathless borders1
  2. Make 2 border strips at least 1″ longer than the side of the quilt, and square off the ends on the left. Place these border strips on top of each other, and aligned with the left edge of the quilt top.mathless borders
  3. On the opposite end of the strips, rotary cut the borders even with the right edge of the quilt top. You now have two strips that are the same length as the quilt top.mathless bordersmathless borders
  4. Now it’s time to sew on one of the border strips. This is one time I do pin the pieces together! Place a border strip, right-sides-together with the edge of one side of the quilt top, and pin it even with the left end (red pin head). Pin the right end even also (pink pin head).
  5. Grasp both ends, holding the quilt top and strip between finger and thumb, and gently tug until the strip lays flat (as directed in step 1). Place a pin in the center (middle pink pin), mathless borders
  6. This is the trick to make sure the strips fit: Use the grasp, tug and pin method from step 5 to place a new pin between a center and end pin. Repeat this process of pinning in the center of every pair of pins until the strip is securely pinned to the quilt top.
  7. Sew in place, and repeat for the opposite side. Attach the remaining sides in the same manner. (I just realized that I took these pictures while attaching the second set of green border strips, but you get the idea).

Give it a try, and let me know what you think!

And if you like the Seminole piecing in this border – stay tuned – I’m planning to do a blog topic on it soon!

********************

And now – a photo finish! Connie took my Spin Star class a few years ago and used my piecing technique to make purple blocks for her granddaughter (click here for more information on my Spin Star technique). Then she did something spectacular!

Connies Spin Star quiltShe brought this quilt to class last week and I knew you’d want to see it! What I love is the way she alternated the spin stars with bears paw blocks, but to make them fit and work together, she added the outer, “claw border” from the bears paw block around each spin star. Wow! What a clever idea! Great job Connie!

The Wool Chicken… and the Rest of the Story!

July 31, 2016 3 Comments

wool chicken

Last weekend Mike and I decided to run away. We stayed at the Inn on Hillwind, a lovely Bed & Breakfast near Plymouth, WI.

Inn on Hillwind

It was charming, relaxing, and the breakfasts – superb! I enjoyed walking through the gardens each morning, as did this friendly kitty.

wool---kitty-garden

Plymouth has a wonderful Main Street for wandering. One of the shops we stopped into was called Fibbermcgee’s.

Fibbermcgees

As we entered we were greeted by another kitty. This one was made of wool!

wool-cat

At each turn another fascinating, original wool creation greeted us. From critters to flowers, they were each unique and wonderful:

wool-frog wool-flowers wool-flowers-bird-bee wool critters and flowers

In the last room the previously pictured chicken clucked my name. I looked at the tag and discovered all of these wonderful hooked wool pieces were made by someone I knew!!! Joanne Zahorik traveled with Wendy and I to Ireland in 2010! She told us upfront she was not a quilter, but she traveled with a friend who was. She was a delightful addition to our trip, and even gave me a wool pumpkin pin (it was an Autumn tour of Ireland). What a small world! I contacted Joanne and she was happy to have me share her work, and spoke very highly of Sue, the owner of Fibbermcgee’s.

My new chicken friend (complete with hog scraper “feet”) is enjoying keeping company with the rest of my collection:

wool-chick-and-more

Thanks Joanne!

****************
Quilt Expo Volunteer poster

Another Spin Star

July 24, 2016 3 Comments

You may remember a post I wrote last January. I was hosting a “Tie Dye” baby shower for my niece Brianne. Well, Tessa Grace made her arrival later that month, and I needed to make her a quilt! I decided I was in the mood to make another “Spin Star” (my version of a fussy-cut quilt – click here for more on my technique), and I found a bright and pretty print fabric that was just right. I cut my identical repeats from the fabric, and stitched together 12 unique stars on a yummy butterscotch color background.

Tessa-quilt-web

When it came to the quilting, I wasn’t sure what would work best in the open areas. I decided to cover one with Glad Press n Seal™, and audition a variety of designs using washable markers, erasing and redrawing until I found the pattern I liked. Then I just quilted through the Press n Seal™ and tore it away.

marking quilts with Glad Press n Seal

I found a beautiful turquoise blue “Minky” fabric for the backing and turned it to the front, to give it a soft outer edge. For instructions on this technique, click here!

Tessa-back-web

The Minky had a lovely texture, and the free motion quilting made it even more fun.

Tessa-quilt-back-detail

Here are Scott, Brianne and Tessa with the quilt.

Tessa-and-quilt

It took me a few extra months to complete the quilt, but I don’t think Tessa minded the wait. What a blessing to give a gift of hand-made love. I hope she enjoys it!

*****************

And just a little FYI 🙂 ! _QE2016_I'mTeaching_225x225Click here for all the information!

Rust Dyeing for Novices

July 10, 2016 5 Comments

You may remember that I awarded my judges choice ribbon at the Evergreen Quilt Show to Kim Frisk’s quilt – “Wherever the Wind Blows”, which was made with rust dyed fabric (click here to read about it!).

tea-dye-map-quilt-Kim-Frisk

I mentioned that I wanted to give rust dyeing a try – and I did! I watched a few Youtube videos, hunted for some rusty stuff, gathered up the supplies – and found it to be easy and fun. I’ve never been into fabric creating – I’d rather buy from others who are good at it, but I enjoyed this so much – I did it twice!

The first effort yielded 4 fat quarters of rust dyed fabric. The two in the center were done with steel wool. The one on the left had nails and screws scattered across it, and the piece on the right was twisted and wrapped around a rusty horseshoe:

rust dyed fabric

Would you like to try it? If not, scroll down to see the other pieces. If so, read on 🙂 !

You’ll need fabric, vinegar, rusty stuff (or steel wool, which worked great and started out “not rusty”), rubber gloves, plastic bags, water and salt. Here’s the basics (google “rust dyeing” for more specific instructions):

  1. Soak fabric in vinegar and wring out.
  2. Tear open a large plastic bag and lay the fabric on it (manipulate if you like).
  3. Put on gloves and arrange rusty items on top. If using steel wool – pull apart and spread across the fabric, then put vinegar in a spray bottle and spray away.
  4. Cover with more plastic, or another piece of fabric, and then more plastic. It should be wrapped in plastic to keep the warmth in, but loosely enough to allow air to get in and cause the rust to form.
  5. Leave in a warm place for at least 12 hours (it was recommended not more than 72 – I got great results in 24)
  6. When done, fill a 5 gallon pail with 4 gallons of water and dissolve 1/2 cup of salt in the water. Rinse items in the salt bath and then rinse with more water.
  7. Hang out to dry, iron and enjoy!

The steel wool pieces in the picture above were made like a plastic/fabric/steel wool/fabric/plastic sandwich, that then rolled up jelly roll style. After my first attempt, I read that putting bags of rice/beans on top of the plastic will help hold things closer to the rust.

A few days later the Fiberistas met at my home to join in the fun. We gathered our buckets of rusty stuff and headed to Mike’s shed (wish I’d remembered to take pictures  😥 ). This time I decided to put a piece of plastic in the bottom of a bin. I layered these pieces, with rusty stuff between, on top of each other, and covered the pile with plastic and weight bags (the rusty stuff used is listed beneath each photo):

rusty-nails,washers,star,chain, steel-wool
Nails, washers, a star, steel wool in patches, and a heavy chain that gave the look of a tire tread!


rusty-metal-sheet,-nails
Pieces of rusty sheet metal and nails.


rust dyed fabric
A doily given to me by Barb. This one was at the bottom of the pile!

I did one additional piece that night, using a chunk of rusty chicken wire. I started with a yard of fabric and folded it in half with the chicken wire in between. This was weighted down with a bag of top soil (remember – we were in the barn  🙂 ).

rust-chicken-wire

I think it’s my favorite. Wouldn’t it make a great honey bee quilt?

Have you done any rust dyeing? Please send pictures of any exciting pieces you’ve made. I’ll share pictures of the other pieces made that night in a future post.

Sixteen Square Feet

June 26, 2016 5 Comments

A few weeks ago I had the wonderful opportunity to judge the Everygreen Quilt Show in Ashwabenon, WI. They put on a terrific show – with over 300 quilts! We had a great team of judges, and the judging coordinator, Lindi, is very well organized, and a delight to work with.

Evergreen-judges

In fact – everyone at the show was great!

One of the categories I was asked to judge was the guild challenge. This year is was “Sixteen” for the year 2016, and each person had a challenge fabric that needed to be visible in the quilt. The ingenuity and talent of the participants was amazing. They were all such fun to view. But I just had to share the first place quilt. It is called “Sixteen Square Feet”!

Sixteen Square Feet quilt

and here’s Carol’s description:

sixteen square feet quilt

Not only does Carol have a delightful sense of humor, but she has the skills to put her thoughts into fabric in an amazing and technically successful way. From the cuffed/creased pants with loafers, to the satin “polish” on the flip-flop wearer – her attention to detail blew me away!

sixteen square feet quilt

Thanks for letting me share your quilt Carol!

The other fun story from the show concerned the Best of Show winner. At the end of the day of judging, we put our heads together and give the “big” awards: creativity, best workmanship, judges choice and best of show. Then, and only then, do we get dinner 😉 . Lindi took us to a restaurant for a delicious meal. This is where we met Sheri, our lovely hostess for the night. Sheri graciously offered her home to Margaret, Carol and me, and took very good care of us. The next morning we all returned to the show for our judge’s tour and Lindi informed me that she hadn’t realized the night before, but Sherri’s quilt had won Best of Show! What fun it was to find her and give her the good news!

Best-of-Show---Sheri

Sheri is a very talented long-arm quilter and she does quilting for hire 🙂 .

I’d like to close this post with the quilt I awarded my “Judges Favorite” ribbon. Kim Frisk made this lovely work of fiber art, called “Wherever the Wind Blows”, from rust dyed fabric she’d created using steel wool. She said the fabric reminded her of a map, and that was her inspiration. The appliquéd ships and pieced mariner’s compass came together in a beautifully balanced and intriguing work.

tea-dye-map-quilt-Kim-Frisk

Kim’s quilt won the show’s creativity award also. I can’t wait to try rust dyeing myself!

It was a great show! Thanks to Lindi and all of the Evergreen Quilters for allowing me to be a part of it!

Buildings, Strawberries, and Couching

June 18, 2016 5 Comments

I’ve written before about the Wisconsin Museum of Quilts and Fiber Arts in Cedarburg, WI, and that’s where the second completed UFO I spoke of last week is right now.

WMQFA had it’s beginnings in the Wisconsin Quilt History Project – documenting quilts in Wisconsin. Then a farm was acquired and the fundraising was begun to turn an old barn into a museum! Before the barn was renovated, I was at a fund raising event there, and took pictures of some of the buildings. While on a teaching trip to Alaska (click here to read that post), I stayed with quilting friends and had time to Repliqué two of the “building” blocks.

Each Spring Cedarburg has a Strawberry Festival, and each year the WMQFA has a strawberry challenge. When I got the entry form for this year’s Strawberry challenge, I knew the time to finish those blocks had arrived. I completed the third “building” block, added patches from a “fruit” fabric, bordered, quilted and bound it all in time to drop it off at the Museum – 4 hours before the deadline.

Strawberries-and-Buildings-web

Sew, what does this have to do with couching? Well, when I’d completed the quilt top, the black fabric was overwhelming.

couching yarn on quilts

I didn’t have much time to come up with a fix, so I did a bit of quick noodling, and decided to couch red yarn inside the black border. This is a “go to” technique I’ve used before and it’s a goodie.

To begin, I thread the machine with a color thread to match the yarn, and set it for a zig-zag stitch wide enough to cover the yarn. I leave a 3″ tail of yarn at a corner, lay the yarn in the ditch of the border seam, make one stitch in the yarn at the corner to anchor it, and zig-zag it in place – pivoting at the corners.

couching yarn on quilts

Strawberries, Buildings and Fiber Art

When I reach the end, I thread the yarn tails into a large needle and bury them in between the quilt layers. I had a great time quilting the border with words. Then I needed a name. When nothing clever came to mind, I asked Sommer who said, in matter of fact 4 year old fashion, “Buildings and Strawberries”.

My friend Sonja created a fascinating piece of fiber art for the contest also.

Sonja's-strawberries

My quilt, Sonja’s, and all of the entries, will be on display at the museum in Cedarburg the weekend of Strawberry Festival – June 25 and 26! Please let me know if you see it there 🙂 !


I Love Winter!

June 11, 2016 2 Comments

In the past few weeks I’ve finished two UFO’s – talk about feeling virtuous  😀 ! As I’m writing this blog post, temperatures in Wisconsin are in the high 80’s! It is an odd, but appropriate time to share this quilt and it’s story:

In 2013 the special projects committee at Patched Lives (the traditional quilt guild I belong to) came up with a fun idea for a “round robin” type of challenge.  Here are the rules:

Around the Square Challenge – groups are made up of 6 or 7 participants. A list is made of the members of each group so the projects can be passed around in order.

1. Each participant picks a theme for their project (examples could be: Noah’s ark, snow people, up north, a day at the beach, etc.).

2.  Draw a 4″ grid  8 x 10 on a piece of flat quilt batt – orientation is your choice. 4″ is the finished size of all the squares in the quilt, so pieces will need to have seam allowance added.

3.  Create a block in the chosen theme to cover a 16″ x 16″ square or a 12″ x 20″ rectangle (plus seam allowances). Safety pin in place somewhere on the grid. Once begun, this block may not be moved.

4.  Place in a traveling container along with any fabric or embellishments that can be used in the quilt. A “travel journal” and/or ready-to-sign label may be included also.

5. Projects are passed to the next quilter on the list and they are to make blocks to cover 12 squares on the grid. This could include an 8″ finished block, two 4″ x 8″ blocks, and four 4″ blocks, or other combinations, but no additional block can be as large as the original. These blocks are safety pinned over squares in the grid and may not be moved.

6. The projects are passed until all participants have worked on each one. The traveling containers are then returned to their originators who will add blocks to fill any open squares, and finish the quilt. They may move the blocks around on the grid if desired.

My theme was “I Love Winter” (I really do – when its cold outside I can stay inside and quilt guilt free!). Here’s my main block:

I love winter quilt

I received a delightful variety of blocks back, with some empty squares. I had fun rearranging them and filling in the spaces. Most of my additions ended up being a light blue, tone-on-tone fabric that gave it all a checkerboard effect. I then added borders, and layered it all with a sweet snowman fabric on the back:

i love winter quilt

The quilt needed a lot of “in-the-ditch” quilting. This is my least favorite way to quilt, but a few of my friends had mentioned using an “in-the-ditch” foot on my sewing machine. It turns out I had just the foot, and it helped. It isn’t perfect, but I was pleasantly surprised by how well it worked.

The rest of the quilting was done free motion and that was much more fun. Binding was added and now it’s done – in plenty of time for winter!

I love winter quilt

Here’s the label that traveled with the project, and is signed by all the talented quilters who made it such a wonderful quilt.

I love winter quilt

Maryjane was kind enough to bring hers to the last guild meeting, and let me take a picture. Her theme was angels – and it is lovely:

Mary-Jane's-challenge

Thanks ladies! I love winter, and I love my winter quilt! Admit it – how many of you out there love winter too?

Stay tuned, next week you’ll get a peek at my other recently finished UFO!

  • « Go to Previous Page
  • Page 1
  • Interim pages omitted …
  • Page 51
  • Page 52
  • Page 53
  • Page 54
  • Page 55
  • Interim pages omitted …
  • Page 77
  • Go to Next Page »

Primary Sidebar

Archives

Recent Posts

  • Quilting in Bloomington ~ Part 2
  • The Indiana Heritage Quilt Show ~ 2026
  • Bird’s Eye View
  • The Birds
  • Sew Much Creativity

Recent Comments

  • Laurie Neubauer on Quilting in Bloomington ~ Part 2
  • judy raddatz on Quilting in Bloomington ~ Part 2
  • Kathy Wuhrmann on The Indiana Heritage Quilt Show ~ 2026
  • Doris Ast on The Indiana Heritage Quilt Show ~ 2026
  • judy raddatz on The Indiana Heritage Quilt Show ~ 2026

Categories

Footer

My Guide

Whatever you do, do your work heartily, as for the Lord rather than for men.

—  Colossians 3:23

Contact Chris!

  • Home
  • About
  • Gallery
  • Classes
  • Trips
  • Books
  • Blog
  • Contact
  • Sign Up For My Blog

Copyright © 2026 · Chris Quilts · Website by Adunate · Privacy Policy