• Skip to main content
  • Skip to primary sidebar
  • Skip to footer

  • Home
  • About
  • Gallery
  • Classes
  • Trips
  • Books
  • Blog
  • Contact
  • Sign Up For My Blog

Blog

Sisters – From a Number of Angles

February 1, 2015 3 Comments

Just a couple of quick notes about last week’s post. Thanks to those who commented and suggested checking with your machine technician before using monofilament thread – good advice. Also, I recently spent some quality time on Diane Gaudynski’s blog and I highly recommend it: http://www.dianegaudynski.blogspot.com/. Her website is:  http://www.dianegaudynski.net/.

seven sisters in sisters

Sisters

If you’ve been reading my blog for a while, you may remember the Saga of the Quiltsissies. It was really quite silly, but the feedback was great. This is how the story began (and this is leading to something):

“Once upon a time there were 2 quilters, named Chris and Wendy, who liked to take others on quilting adventures in Europe. Prior to a trip to France in 2008 they talked about creating a traveling companion named Quiltina. She was based on a cardboard cut out called Flat Stanley who travels with school children and helps them to journal their trips. Wendy made the first Quiltina and then created her sister Quiltanna for Chris. These Quiltsissies joined the quilting cruise in France. They brought along a third sister, Quiltilly.

Screen Shot 2015-01-28 at 8.08.06 PM

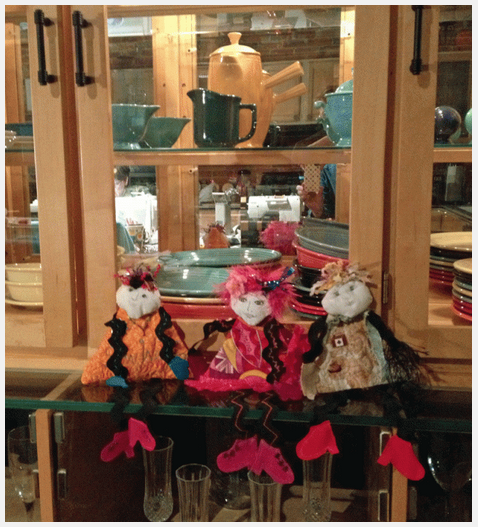
While on the cruise a contest was held and the winner, Evelyn, was awarded Quiltilly as her prize.”

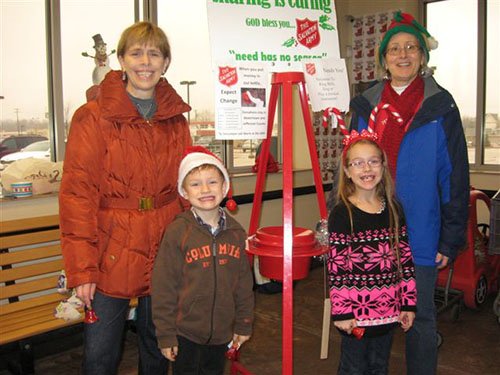
As the story continues, Evelyn and her sister Hazel (who has Quiltzilla) stayed with us during quilt week in Paducah a few years ago, and she brought Quiltilly along, but Quiltilly was showing signs of neglect. On top of that, Evelyn left her behind. So Wendy and I naturally held her for ransom.

Screen Shot 2015-01-28 at 8.07.51 PM

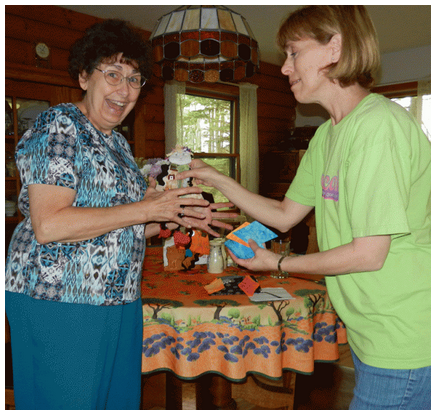
After quite a bit of excitement, Evelyn did pay the ransom in jewels – batik diamonds!

Screen Shot 2015-01-28 at 8.09.46 PM

(To read the whole adventure go to: https://chrisquilts.net/?p=3448 and https://chrisquilts.net/?p=3467 and https://chrisquilts.net/?p=3497 and https://chrisquilts.net/?p=3515  )

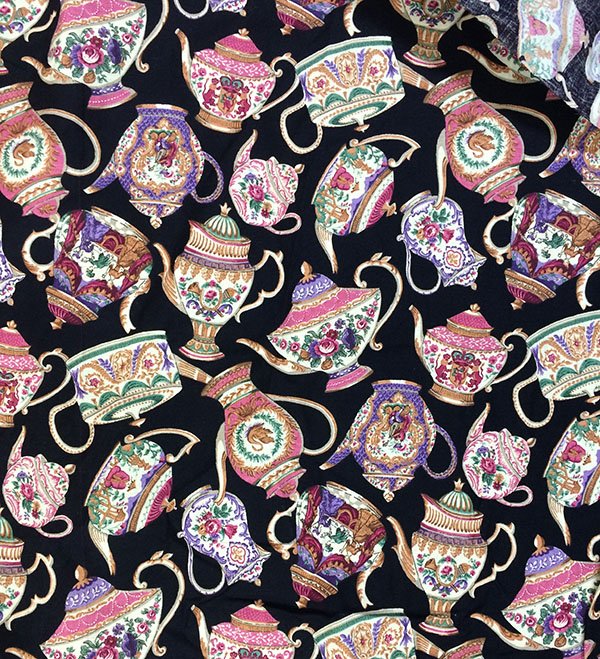
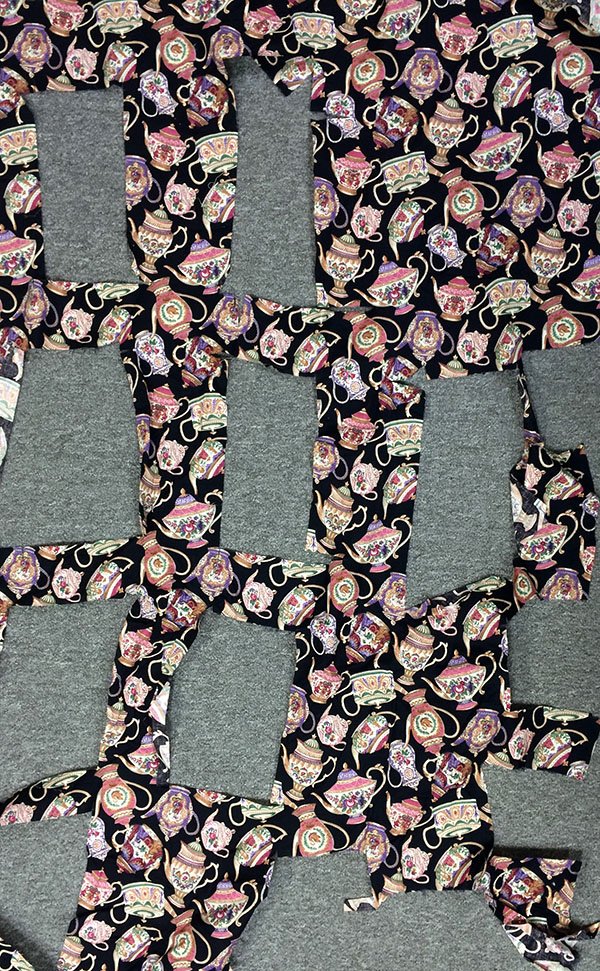
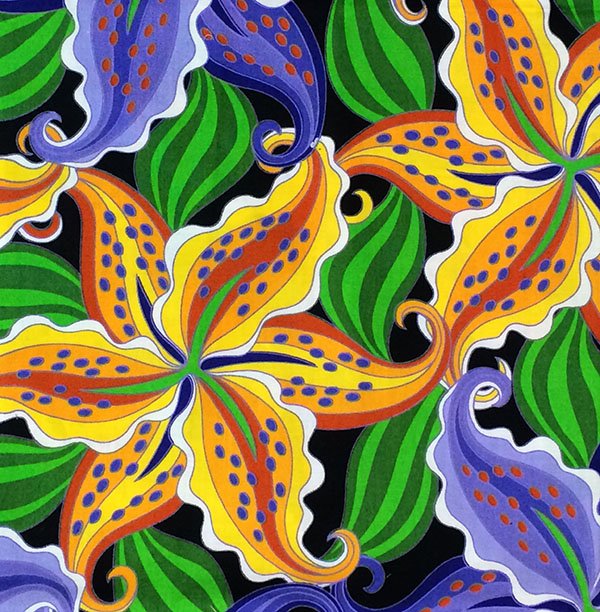
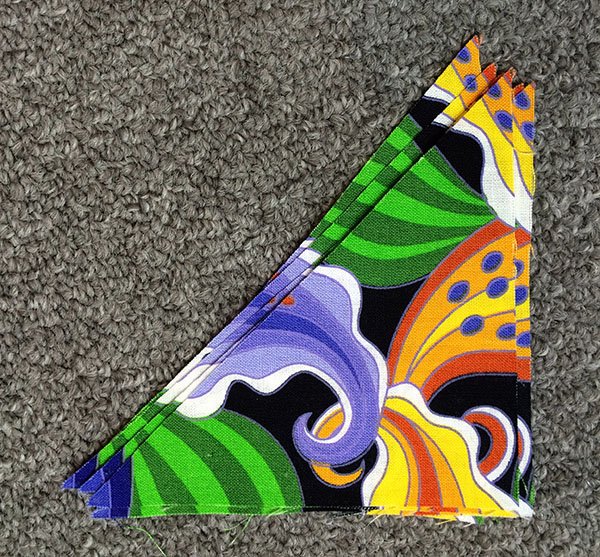
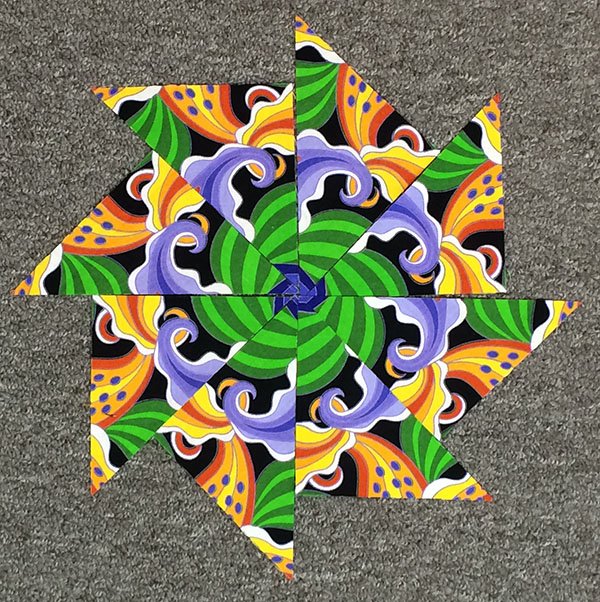
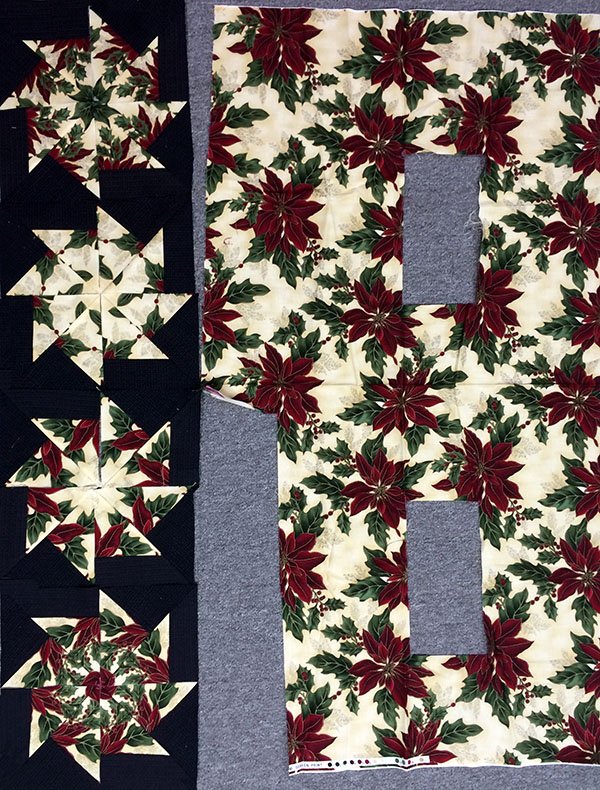
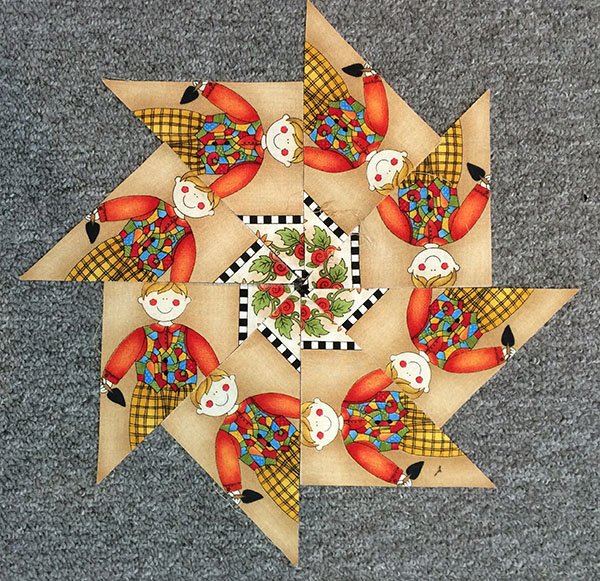
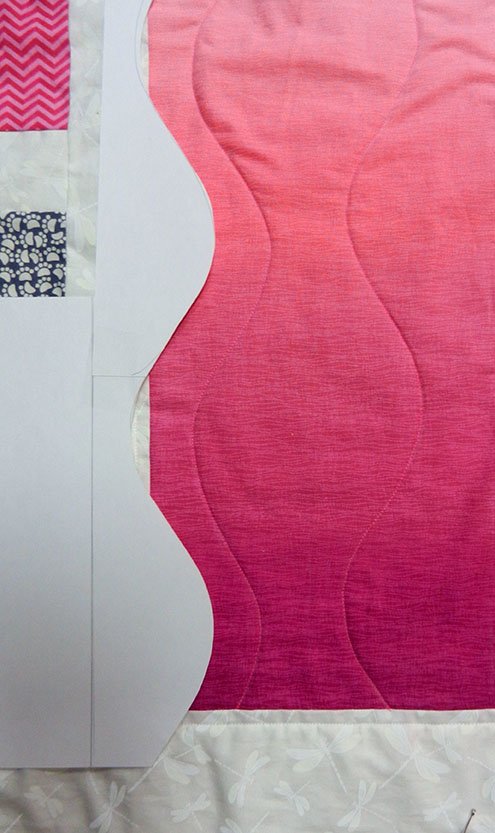
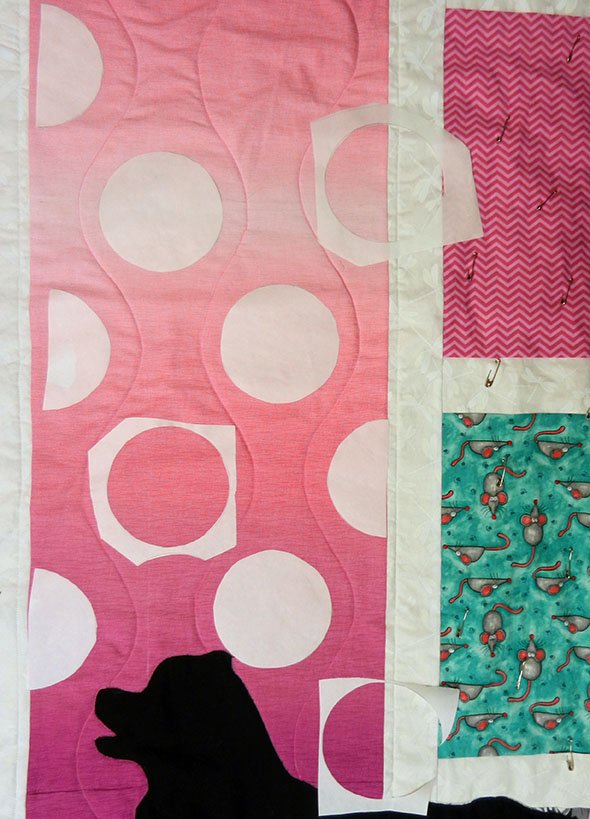
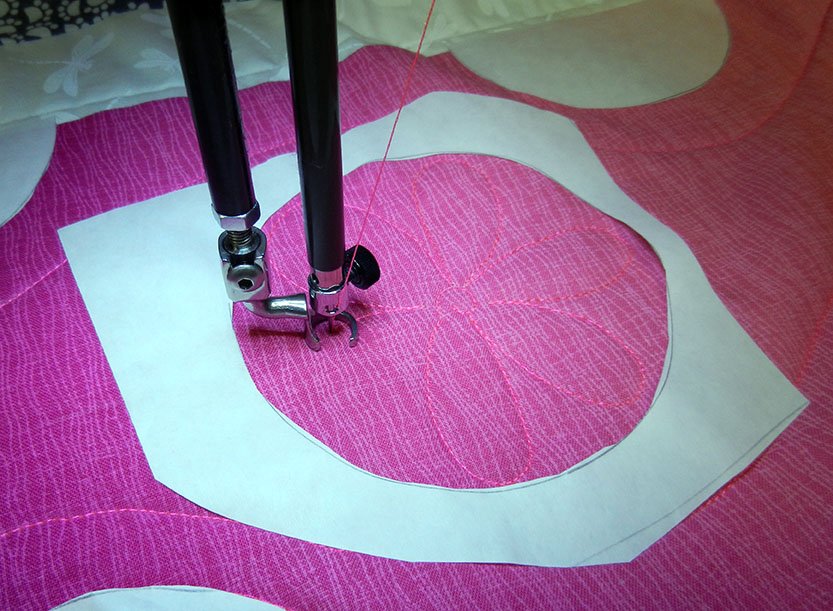
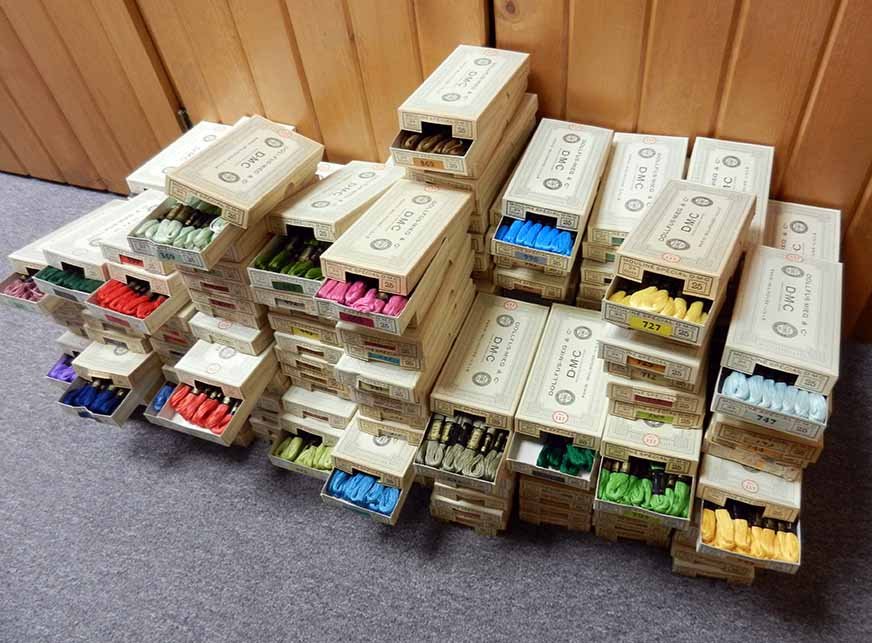
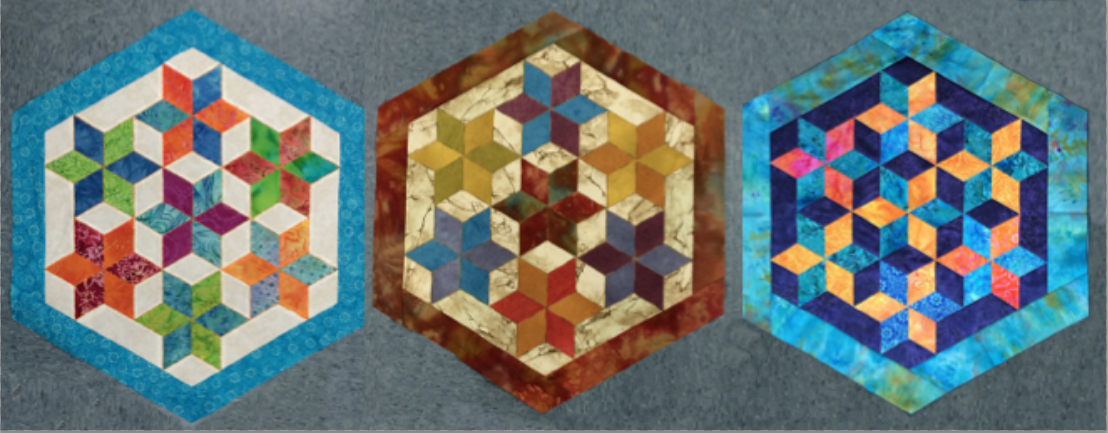
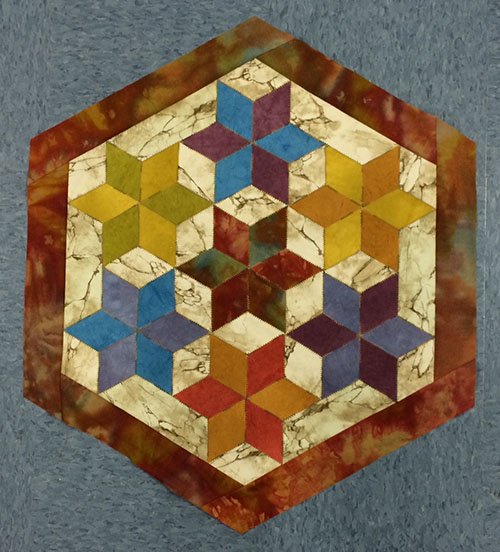
Years have passed and Wendy and I are currently planning our next Sew We Go Adventure to the Sisters Oregon Quilt Show this July! For our trip project we’ve chosen the Seven Sisters block, and it uses diamonds! The ransom diamonds have been waiting for such a time as this, and we’ve been having a wonderful time putting it all together – in hand and machine piecing options. Here are the three samples we’ve created already (they’re table topper sized and addictive – like eating potato chips):

7 sisters 1 7 sisters 2

7 sisters 3

All of the quilters who join us on the trip (Evelyn and Hazel are already on the list!) will have the opportunity to make their own Seven Sisters quilt during our travels. We’ll also have a pre-trip get together in which travelers can make their very own Quiltsissie!

Here’s the good news:

WE STILL HAVE A FEW SPACES AVAILABLE!

Our adventure begins and ends in Portland, OR – how you get there is up to you (although our travel planner would be happy to help you with those details). Thus, it doesn’t matter where you live – you can be a part of the fun!

So if you’d like to join us there’s still time! You can even bring your sister!

For all the details go to: chrisquilts.net/trip

then call Kristi at: (262)786-6763

And I couldn’t resist this parting picture:

seven sisters pillowcase
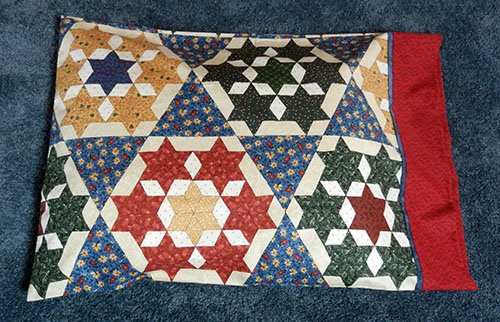
While shopping in a local quilt shop – Tea and Textiles in Jefferson – I found this wonderful “cheater cloth” of the Seven Sisters block. I just had to make a pillowcase for Wendy to take on the trip. I think I’ll make one for myself also. Too much fun!!!

Hanna’s Patchwork

January 18, 2015 2 Comments

You may remember when Hanna and Willy were here for Christmas, Willy finally got his turn to sew and he made a doll sized quilt for his stuffed animal (to read that post click here). While he was sewing, Hanna was planning her next quilt (that’s my girl!).

She’s definitely interested in quilting and during their visit she accompanied me to a guild meeting, and ran my computer slide show while I presented a lecture for Common Threads quilt guild.

lecture with HannaOne afternoon, at the beginning of their visit, we took my fishbowl of scraps off the shelf and the kids had a blast causing it to “rain scraps” in my studio (I’m one of the kids  😀 ).

h studio fun4

But in the next picture I realized that examining the scraps was more fun than throwing them for Hanna (Willy’s moving so fast, he’s just a blur behind Sommer).

h studio fun 3 wheres Willy

She touched, chose, arranged, and chose some more while Willy was quilting, and when he was done she asked if she could have a turn. She laid her chosen scraps in an arrangement that pleased her and then started sewing. It was a crazy quilt sort of way to do it and every so often I would rotary cut the edges straight so she could continue. She made a number of “chunks” from her favorite scraps.

Hannas patchwork 1

But time wasn’t on her side and all too soon, it was time to return to Washington. I told her we could put her pieces in a special place and she could work on it again on her next visit. She said she had a better idea – I could finish it for her!

On the long plane ride back from taking the kids home, I came up with a plan. Last year grandpa and I bought the kids Kindles for Christmas. They brought them on this trip, wrapped in a kitchen towel. Hanna’s birthday is on January 21st, and I decided a quilted Kindle sleeve would be the perfect place to use her pieces. I made an outside rectangle from the majority of the pieces, and the inside was made up of leftover flannel from the bed quilt I’d previously made her, with more of her pieced units in the “flap”.

Hannas patchwork 2The layers were quilted, then it was folded and stitched into a sleeve.

kindle holder inside

Lastly, a button and loop for were added for closing it up.

kindle holder It’s ready and in the mail to Hanna for her 9th birthday!

kindle cover finishedWilly’s birthday is in March. I’d better get going on a sleeve for his kindle too!

A Yo Yo follow up!

After last week’s post Eleanor sent me this picture:

Eleanor yo yo flowersHer guild made yo yo flowers for the centerpieces at a quilting luncheon (thanks for the picture, Eleanor).  This reminded me of a post I did a few years ago about fabric flowers and I thought I’d share that link, just in case you’re interested:  https://chrisquilts.net/?p=2933

Yo – Yo’s

January 11, 2015 3 Comments

Mike and I were out antiquing recently and I found an absolute treasure! We do a lot more looking than buying (our home is getting full), but occasionally I just can’t say “no”. Here’s the story:

Fabric Yo Yo’s have always been popular with quilters. In my collection I have 2 antique coverlets (they’re not called quilts because they do not have the traditional “3 layers, held together with stitches”). This first one is put together with “squares” framed with a purple “sashing”.

Antique Yo Yo coverlet

I love this piece. The placement of the yo yo’s is rather unique and the “grape” clusters look wonderful hanging down the sides of a bed.

The other one is quite different. I was looking for a vintage quilt with a dog on it for one of my lectures and this one barked right out at me:

YoYoDog

What makes it unique is that the yo yo’s are attached to a muslin back with tufts of wool yarn. The doggie is stuffed and has 3-D ears. They just don’t make em like this any more  😀 !

Clover came out with wonderful yo yo makers a few years ago and there was a big surge in popularity at that time. On our Sew We Go project, when we cruised through France, we used the yo yo maker to create a cluster of grapes on a quilter’s arm chair caddy.

yo yo armchair caddy grapes

It was Wendy’s idea … and very clever!

About ten years ago I adopted this clown from an antique store in Beaver Dam, Wisconsin. His body is all yo yo’s and I just couldn’t resist him. He’s been sitting on a shelf ever since.

yo yo boy

This brings me up to my latest find. A yo yo girl!

yo yo girl

Isn’t she delightful? I think all of her yo yo’s are made from men’s silk neckties, and where the clown has pom pom hands and feet – she has bells. I just knew they were perfect for each other!

yo yo couple

They now share a shelf in “Sommer’s room”, and they’re a sweet couple of yo-yo’s!

Do you have any unusual yo yo items? Please send me pictures – I’d love to share them.

And just a quick reminder – the Floss Frenzy challenge is due February 28th. Here in Wisconsin, we are enjoying the perfect weather for sitting and stitching under a cozy lap sized quilt! So you have over a month to do just that and send me a picture. Remember – there will be a blog quilt show of these pictures – with prizes!!!


Spinning Stars

January 4, 2015 5 Comments

Fussy cutting motifs from fabric is a technique that has been around for generations. It was made incredibly popular about 20 years ago by Bethany Reynolds (click here for her website). At that time I was intrigued by Bethany’s quilts and started playing with my own style of cutting identical triangles from large print fabric. To begin, I chose a teapot fabric with a lot of thin lines and curves.

ss teapot fabric

I found a traditional star block I liked, and devised a fun way to piece it.

ss teapot top

Isn’t the variety of stars amazing? And the fun part is, if I had cut the triangles just an inch away from where I did, every star would be different from these. I must admit, it’s addicting. I showed this quilt to friends and students, and my Spin Star class was born. It has been extremely popular over the years and I think the appeal lies in the fact that each star is a surprise! The down side is that it makes “swiss cheese” out of your fabric:

ss teapot holes

My stars begin as four stacks with 8 identical triangles in each. Here’s a portion of a Jane Sassamann fabric that worked great, and just one triangle stack:

ss sas fabric

ss sas triangles

This one stack of triangles can be put together 2 different ways – with the top right point at center:

ss sas star2

or with the lower left point there:

ss sas star

Here they are together so you can see how much variety there is in just one stack of triangles.

ss star compare

I think it’s time I sew those stars together!

These are the blocks I made from a Christmas poinsettia fabric:

ss poinsettia

Did I mention this is addictive?

During one class I decided to make stars from a fabric printed with adorable children.

ss kid fabric

These blocks have never been stitched together because, even though the star is pretty, it bothers me to see cut up kids swirling around:

ss kid star

If this type of play is of interest to you, I’ll be teaching my Spin Star class at WCTC on Saturday, January 17th, and we need 3 more students to sign up for the class to run. Please consider joining us! The deadline is this Wednesday.

Have you had fun with fussy cutting? Please send pictures. Oh, and those of you who have taken this class – I’d love to get photos of your star creations. Perhaps it would be fun to do a virtual quilt show on a future blog. Send pictures to me at:

Merry Christmas and Quilts

December 21, 2014 5 Comments

This week has been an exceptional blessing for me. I flew out to Washington on the 13th to bring my oldest grandkids back to Wisconsin for a Christmas visit. Hanna (8) and Willy (6) are a joy to be with and we are having so much fun! Just before they arrived I finished Sommer’s quilt – and it’s wrapped and ready for her. This is the front:

Sommer's modern quiltAfter last week’s post, I chose to quilt the rest of it with different sized circles and spiraled around all of them. Then I “wrote” her a special message in the borders. Here’s the back (the “I Spy” side):

I Spy quilt backCan’t wait to see her response.

Once Hanna and Willy arrived, Willy reminded me that it was his turn to make a quilt. He was definitely wigglier than his sister, and grandma had to pay close attention to where his fingers were when sewing, but he picked out all the fabrics himself and stitched every stitch. Boy – was he pleased, and grandma was too!

Willy's quiltHe wanted to show the back too!

quiltmaker Willy back blog

Hanna and Willy helped Sharon and I “Ring and Sing” for the Salvation Army this year. We made a lot of people smile.

ringing and singing 2014 blog

We’ve been reading the Christmas story with the kids every night – and Willy is quick to shout “Happy Birthday Jesus”. This is the real reason for the season. Knowing that our Savior lives and is preparing a place for us in heaven is the greatest gift of all!

Today (Sunday) is the day we celebrate Christmas with all the Wisconsin relatives and tomorrow I take the kids back to spend Christmas with their family in Washington. What a blessing (and a very busy time!)

Wishing you a blessed Christmas, from my family to yours!

Kirsch Christmas 2014 blog


Quilting a Sommer Quilt

December 14, 2014 2 Comments

As most of you know, Mike and I watch our granddaughter, Sommer, full time. She is a joy, and next year we’ll be doubly blessed because daddy and mommy are expecting her baby brother in February. During breakfast a few weeks ago, I asked her what we should name her baby brother and she responded “Minnie Mouse sticker”. We smile a lot around here  🙂 !

Sommer will be moving into a big girl bed after Christmas, so grandma Chris needed to make her a quilt – of course. Her bedroom colors are pink, gray, black, white and teal – and the decor is very modern. A “modern” quilt would be ideal, but Sommer really loved the I Spy quilts she helped me make for her cousins. What to do? Back the modern quilt with an I Spy quilt!

Once both sides were finished, the sandwich was layered and it was time to quilt. The modern side has one wide, vertical band of a pink gradation fabric, and 6 different, wide, horizontal bands. I quilted around each of these areas with a walking foot first, and then the fun began. I made a curved template from card-stock to mark lines in the vertical band.

curvy template

I originally thought I would keep the curves lined up, but after a bit of experimenting, an hourglass shape seemed best. I marked the lines with a sliver of soap and continued to use the walking foot:

marking curvy quilting lines

This design simply hollered for circles to be added. I cut a bunch out of freezer paper, keeping the circles and the holes they were cut from, and ironed them to the quilt top.

freezer paper templates

I free motion quilted around the outside of the paper circles, and filled the empty holes with posies.

quilted flowers fill the freezer paper holes

And here’s the quilted vertical band:

vertical quilting full

You may have noticed that I personalized the simple “modern quilt” pattern. The owl is from a canvas Sommer’s Mommy painted for her room.

Sommers owl

and her doggies, Nirshey and Mosely, just had to be a part of the fun!

Next, I’m quilting around a variety of freezer paper circles and filling in around them with spiral designs. Stay tuned for a photo of the finished quilt.


Virtual Quilt Show – A Danish/American Challenge

November 23, 2014 1 Comment

Often I share things in my blog posts that pertain to places and events in southeastern, Wisconsin. I’m well aware that many of you live in other States. While putting together this week’s post about our Baltic cruise challenge, it occurred to me to mention that both of our upcoming Sew We Go adventures are currently priced without airfare. Our travel planner, Kristi, will work with each traveler to find them the best airfare possible and… since we’re not doing a “group flight”, she can help you arrange for flights from wherever you live!!!

(click here for Sisters, Oregon, July 8-13, or here for Europe October 9-19).

And now the quilts!

While on our wonderful cruise of the Baltic Sea, Wendy and I passed out “fat eighths” of a lovely blue/green batik, and asked our travelers, as well as the quilters we met at Kirstin’s Quilt in Roskilde, Denmark, to make something with it.

These were the “rules”:

Danish - American Quilt Challenge

And these were the fabrics:

Danish American Challenge fabric

The shop owner in Roskilde, our hostess Kirsten, designed a placemat pattern for our group – and even translated it into English for us. It was a very thoughtful gift:

Kirsten's pattern


Thanks to everyone who participated.

Here is our Virtual Quilt Show!


Mary Beth Weeks SWG placemats
by Mary Beth Weeks – “Attached is the project I made using the fabric you passed out to us on our (great!) Baltic cruise in May. I also included a very similar piece of fabric that I already had. I’m sure you recognize the place mat pattern as the one Kirsten gave us. I had only enough fabric to make two sets but my husband and I are using them now and enjoy the bright spots on our table.”
by Louise Sundquist - "I made four placemats using the challenge fabric and three other fabrics I purchased in Kirsten's shop."
by Louise Sundquist – “I made four placemats using Kirsten’s pattern, the challenge fabric, and three other fabrics I purchased in Kirsten’s shop.”
Ilse Jessen-Denmark
by Ilse Jessen – “I have always wanted to try this block. Now I had a chance to do it. Looking forward to seeing the other quilting items.”
by Eileen Diercks - "From the Danish/American challenge fabric I made a zippered pouch for my Kindle and its charging cord.   I used some of the “fancy” stitches on my machine, using a variegated green, blue and yellow thread which I had on hand, for the quilting.  For the lining I used a lime green batik fabric which I had in my stash, and the green zipper was also from my sewing supplies.  So it did not cost me anything extra for this handy pouch. Thanks for the challenge."
by Eileen Diercks – “From the Danish/American challenge fabric I made a zippered pouch for my Kindle and its charging cord. I used some of the “fancy” stitches on my machine, using a variegated green, blue and yellow thread which I had on hand, for the quilting. For the lining I used a lime green batik fabric which I had in my stash, and the green zipper was also from my sewing supplies. So it did not cost me anything extra for this handy pouch. Thanks for the challenge.”

Rostock, Germany

Nancy Hansen challenge piece
by Nancy Hansen – “The first photo is a border detail at Rostock Cathedral. The second is my attempt to replicate it.”
Margie Abbott Umbrellas
by Margie Abbott – “I just finished my challenge quilt. It is 46″x55”. It’s called “Dancing Umbrella” and was designed by Edyta Sitar. I used a brown batik in all but four of the blocks, where I used the blue challenge fabric to showcase the blue fabric. I enjoyed participating in this challenge and am anxious to see all the other entrants’ works of art.”
by Christina Yun - "Attached is a picture of my fabric challenge.  I used the challenge fabric for the top and the bottom of my smock cushion.  And, the remainder of the fabric I used as a ribbon for the doll's hair.  I had a lot of fun doing this challenge."
by Christina Yun – “Attached is a picture of my fabric challenge. I used the challenge fabric for the top and the bottom of my smock cushion. And, the remainder of the fabric I used as a ribbon for the doll’s hair. I had a lot of fun doing this challenge.”
by Karen Moore - A photo/Map memory quilt (note the addition of the pins she collected along the way)
by Karen Moore – A photo/map memory quilt (note the addition of the pins she collected along the way)
by Pam Merklein - "I used the fabric you gave us for the top portion of my “Oak Park Bag” and for the tabs and loop. The button was purchased in Tallinn, Estonia. I had a charm pack at home that provided the squares and the balance of the fabric was left from a senior HS gift quilt for my grandson. I look forward to using it and being reminded of our wonderful trip."
by Pam Merklein – “I used the fabric you gave us for the top portion of my “Oak Park Bag” and for the tabs and loop. The button was purchased in Tallinn, Estonia. I had a charm pack at home that provided the squares and the balance of the fabric was left from a senior HS gift quilt for my grandson. I look forward to using it and being reminded of our wonderful trip.”
Had a lot of fun making this table topper.   Have fond memories of the cruise. Thanks,  Jan Arndt
by Jan Arndt – “Had a lot of fun making this table topper. Have fond memories of the cruise.”
by Lisa Giesfeldt - Lisa made this small purse and said she "even used the ribbon that was wrapped around the fabric.  It's my zipper pull. The color worked with my batik choices."
by Lisa Giesfeldt – Lisa made this purse and said she “even used the ribbon that was wrapped around the fabric. It’s my zipper pull. The color worked with my batik choices.”
by Chris Kirsch - "I also made a tote. The fabric was mixed with many others is a tote pattern designed by a mutual friend, Kathy Frye. I used Wendy’s faux batik method to create the words “Sew We Go” for the front pocket of the bag."
by Chris Kirsch – “I also made a tote. The fabric was mixed with many others in a tote pattern designed by a mutual friend, Kathy Frye. I used Wendy’s faux batik method to create the words “Sew We Go” for the front pocket of the bag.”
"I also used the batik technique to put our logo on the pocket on the back of the bag. Kathy’s pattern is meant for a travel bag and this pocket has Velcro at the bottom, so the bag can be placed over the handle of a wheeled suitcase!"
“I used the batik technique once again, to put our logo on the pocket on the back of the bag. Kathy’s pattern is meant for a travel bag and this pocket has Velcro at the bottom, so the bag can be placed over the handle of a wheeled suitcase!”

And one more “non-challenge” picture! While in Helsinki we were treated to a visit to Marimekko Fabric. Nancy Hansen found a beautiful polished cotton and made it into a lovely jacket. She wore it to Patched Lives Quilt Guild this past month and it was stunning. She was kind enough to pose for a picture:

Nancy Hansen's jacketThanks Nancy!


Floss Update

October 12, 2014 4 Comments

Vintage Embroidery Floss

Some time has passed since I shared the story of my good fortune at having received a box filled with DMC embroidery floss (if you don’t remember that story, you can read about it by clicking here). I so enjoyed reading all the comments made to that post. Since then, I’ve had many people ask me if I’ve decided what to do with it all. There were many comments recommending I give it to charitable organizations, and I’m definitely planning on doing some donating.

One of the most popular suggestions was to give a packet of floss to volunteers who like to embroider, and have them make blocks to be put into a thank you quilt for Rowland and Carol (the owners of the B&B who gave the floss to me). I think that’s a wonderful idea, and I’m searching out block patterns to share, along with the floss – eventually. I will fine tune these ideas and let you in on my plans in a future post. But I have enough floss to do a number of things and this week I’ve decided to present a Floss Frenzy Challenge !!!

In the comments to the Floss Frenzy post, Jan M. shared this quote – “From one fine thread a work of art is born”. With that in mind – here’s the challenge (with a tiny bit of pre-story  😀 ):

Last Spring I completed a project using embroidery floss (prior to acquiring the big box). I used the “Big Stitch” on a jacket, which I wear in my newest lecture: Gone to the Dark Side (for a post on the Big Stitch technique click here and for information about my “Dark Side” lecture, please click here)

quilted art jacket

quilted art jacket

I began thinking of many other things quilters could do with floss:

* Make “redwork” (or “bluework”, or “yellowwork”, or whatever color you like) blocks and stitch them into a quilt.

* Tie a quilt with the floss.

* Embellish a tote by couching the floss onto it.

* Quilt a table runner using the “Big Stitch”.

* Find some quilterly thing to do with counted cross-stitch.

* Use the floss as a closure on a quilted cover for your e-reader.

I’m sure there are many, many more. So here are the “rules”:

Floss Frenzy Challenge

The challenge will happen via the United States Post Office, and the internet.

If you would like to participate:

1.  Email me your snail mail address (for your own privacy, please don’t put it in a comment to this post). My email is: .

2.  I will then mail you 3 skeins of floss. If you want it to be a real challenge, I will randomly choose the colors. Or… you may give me a suggestion of which colors you prefer. My goal is to have many people participate.

Embroidery floss challenge
The Packer’s win today may have influenced the colors of floss chosen for this picture 🙂

3.  Make something with it! Anything you choose! No size requirements! No real rules at all 🙂 ! Make something you can use, or try a technique you’ve been wanting to play with, or make your dear Mother-in-law a candle mat for Christmas. It’s up to you.

4.  Email me a picture of your project by February 28, 2015! That should give you plenty of time and something to do on cold winter nights (if you live somewhere with cold winter nights).

5.  I will put these pictures into a virtual quilt show on a page on my blog for all to enjoy!

And there will be prizes!

I’m hoping to get good participation, so please email me today!


  • « Go to Previous Page
  • Page 1
  • Interim pages omitted …
  • Page 57
  • Page 58
  • Page 59
  • Page 60
  • Page 61
  • Interim pages omitted …
  • Page 77
  • Go to Next Page »

Primary Sidebar

Archives

Recent Posts

  • Quilting in Bloomington ~ Part 2
  • The Indiana Heritage Quilt Show ~ 2026
  • Bird’s Eye View
  • The Birds
  • Sew Much Creativity

Recent Comments

  • Tearle D Dwiggins on Quilting in Bloomington ~ Part 2
  • Laurie Neubauer on Quilting in Bloomington ~ Part 2
  • judy raddatz on Quilting in Bloomington ~ Part 2
  • Kathy Wuhrmann on The Indiana Heritage Quilt Show ~ 2026
  • Doris Ast on The Indiana Heritage Quilt Show ~ 2026

Categories

Footer

My Guide

Whatever you do, do your work heartily, as for the Lord rather than for men.

—  Colossians 3:23

Contact Chris!

  • Home
  • About
  • Gallery
  • Classes
  • Trips
  • Books
  • Blog
  • Contact
  • Sign Up For My Blog

Copyright © 2026 · Chris Quilts · Website by Adunate · Privacy Policy