• Skip to main content
  • Skip to primary sidebar
  • Skip to footer

  • Home
  • About
  • Gallery
  • Classes
  • Trips
  • Books
  • Blog
  • Contact
  • Sign Up For My Blog

Blog

Dangles that Tangle

April 13, 2014 4 Comments

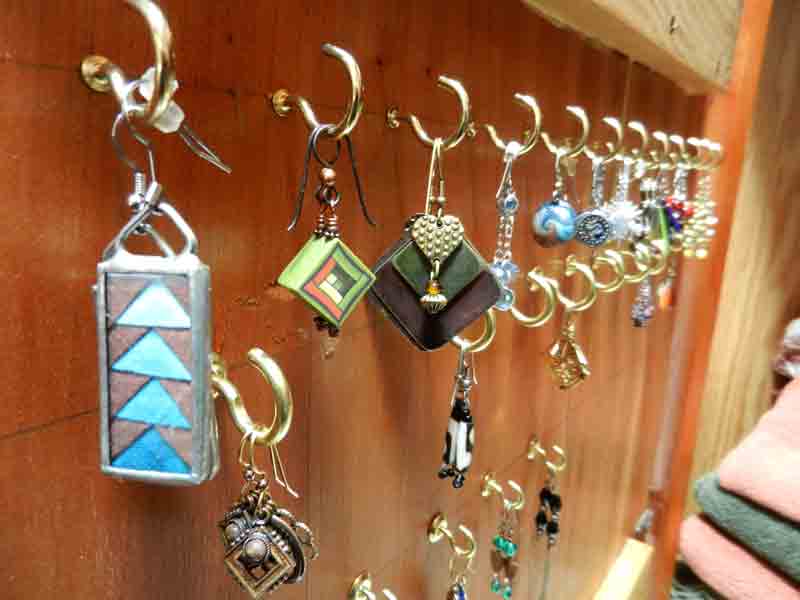
It seems every so often I just have to share a post about jewelry. I came up with a unique way to store dangly earrings and I hope you find this helpful (or at least interesting). I enjoy wearing artsy earrings, but there’s a problem:  most artsy earrings dangle and when stored – dangles tangle!

While untangling one morning I got to thinking that the inside of the vanity door beneath my sink could be put to use. I went out and bought a couple packs of cup hooks and then smiled sweetly at Mike. He fell for it and headed to the shed to get his drill. About 10 minutes later my problem was solved!

hanging dangly earrings
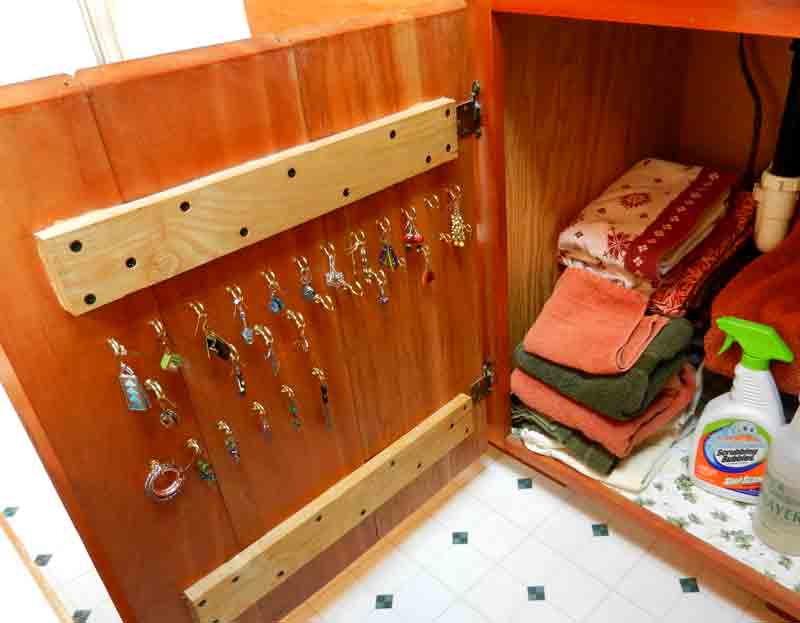
It works great! They’re right where I want them when I’m getting ready and they’re not at all in the way!

dangles-2The best part is, there’s plenty of room for more cup hooks :-)!

Do you have any clever ways you store your jewelry?

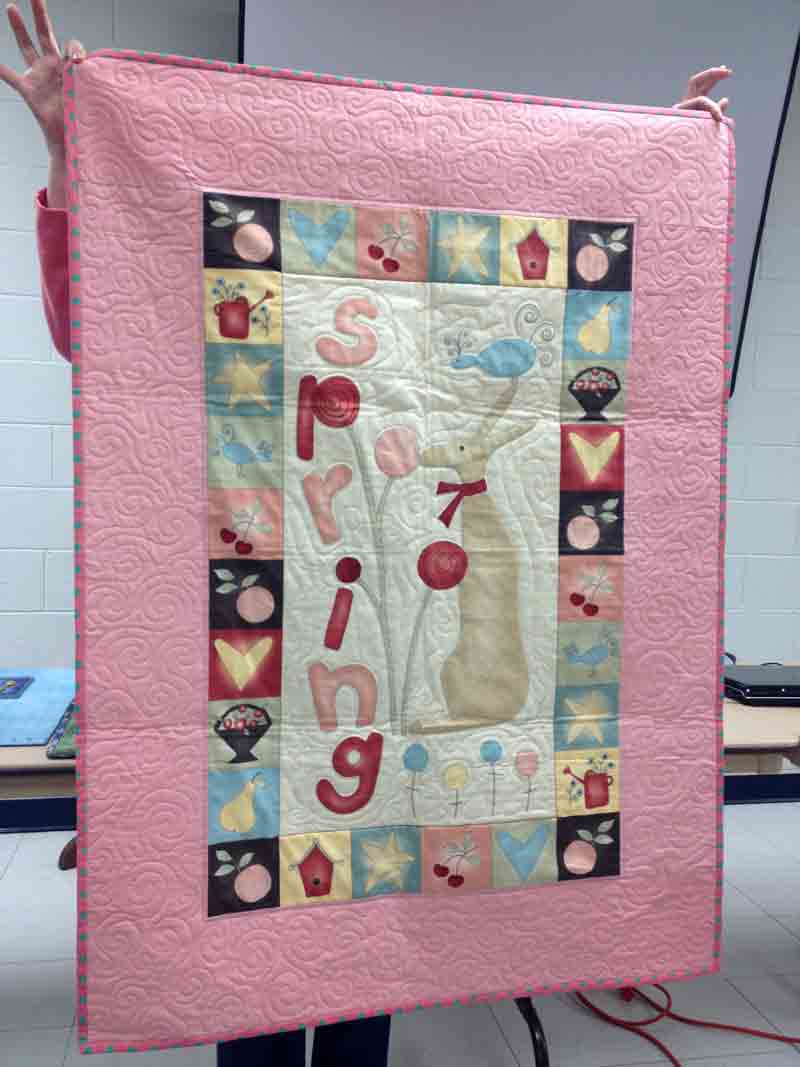
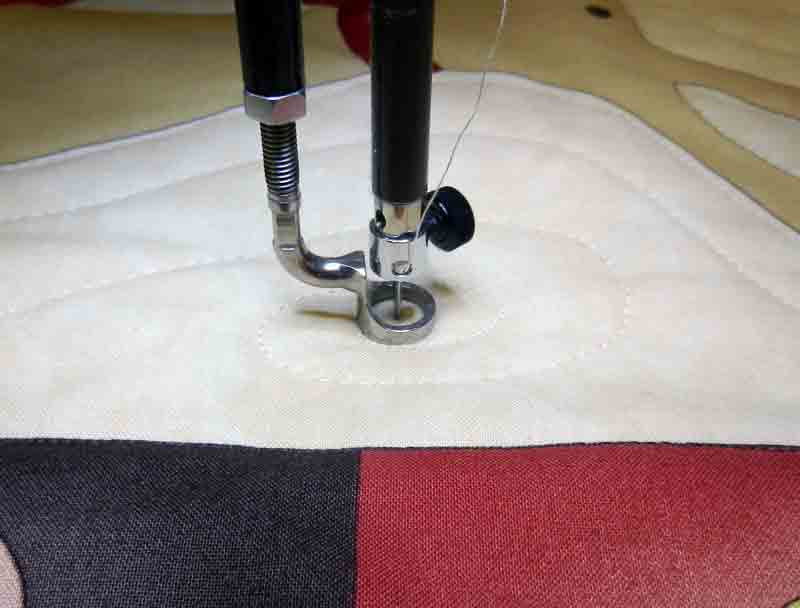
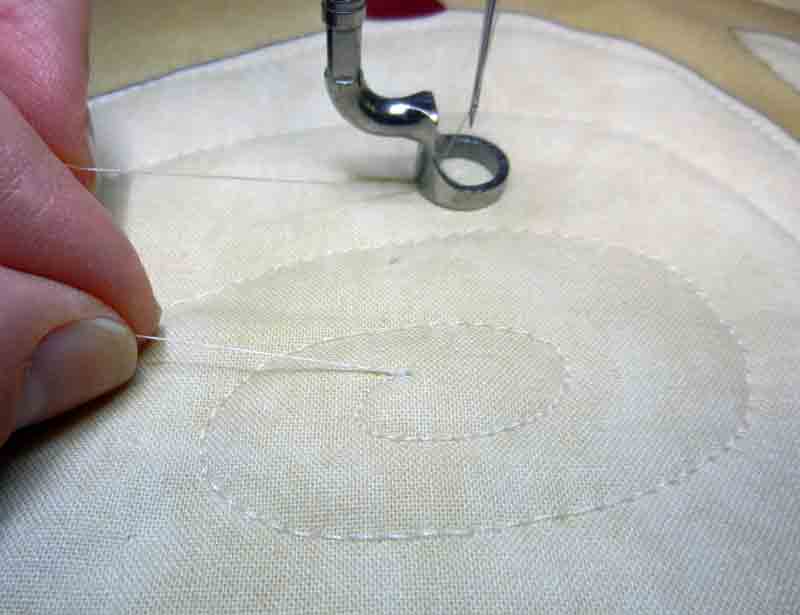
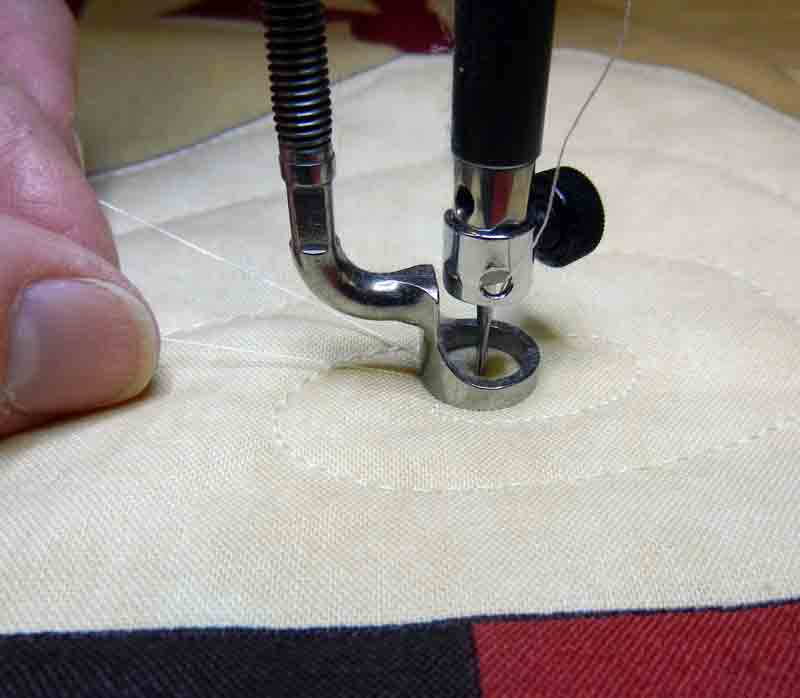
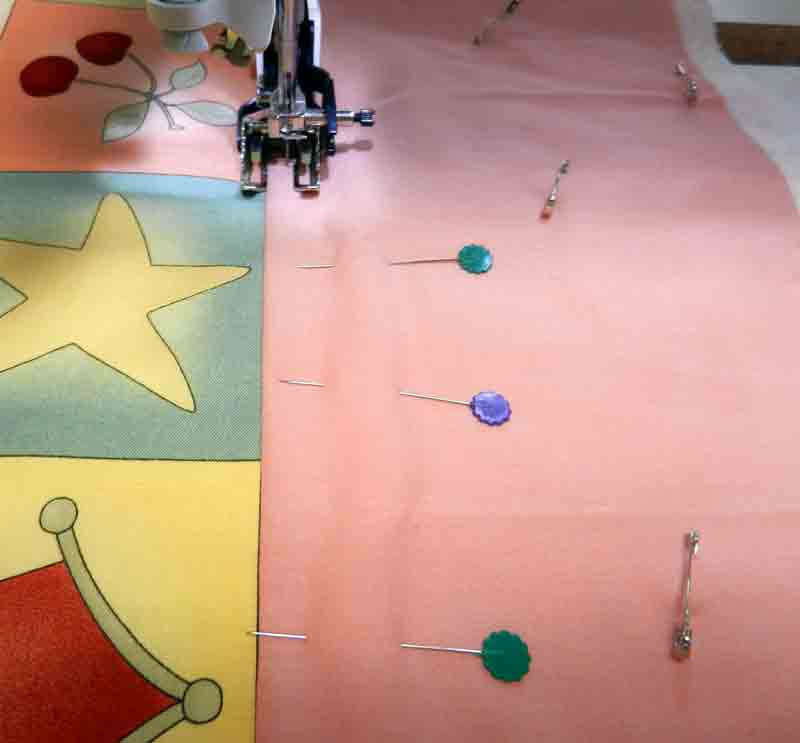
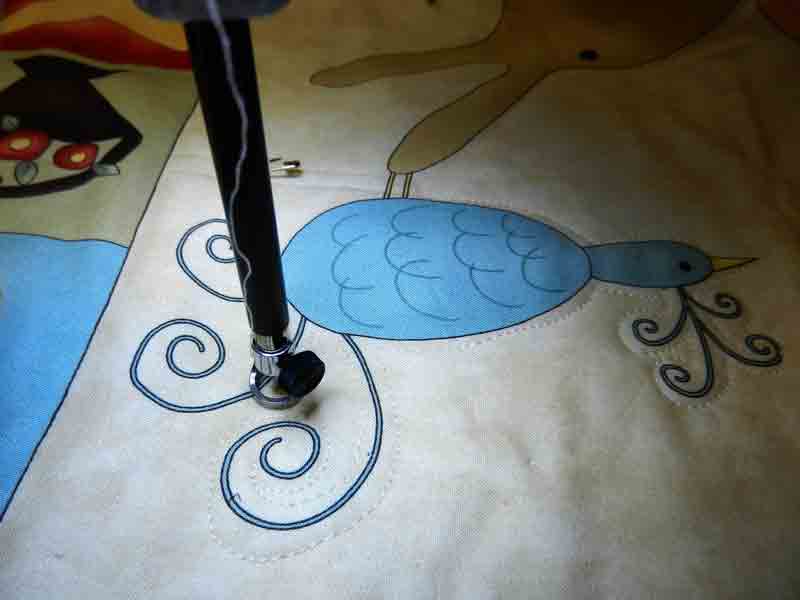
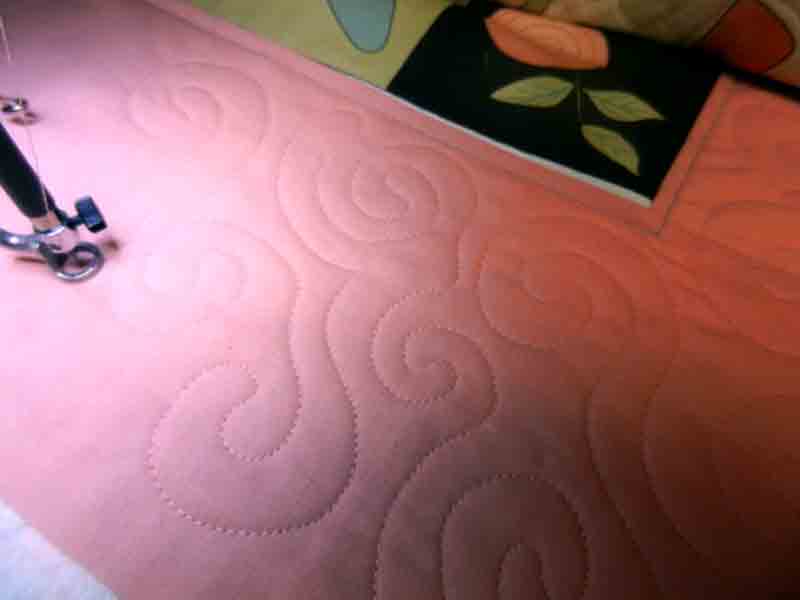
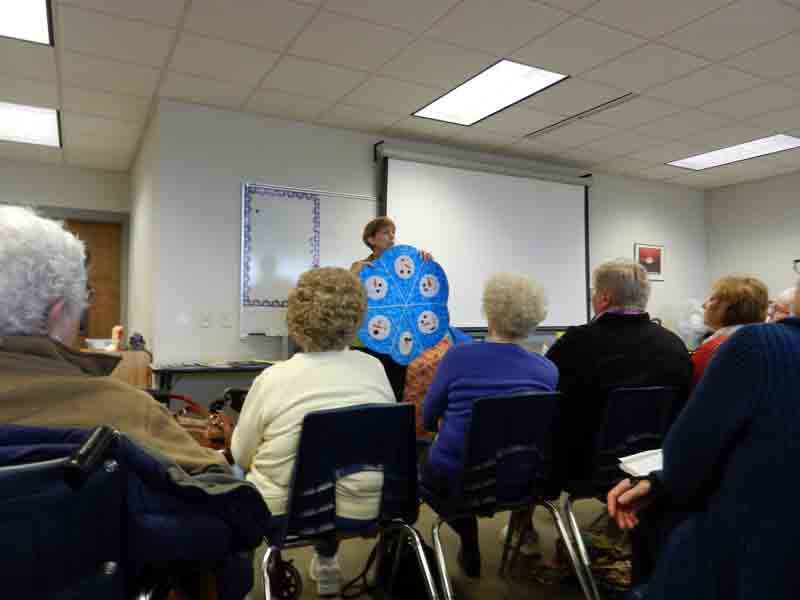
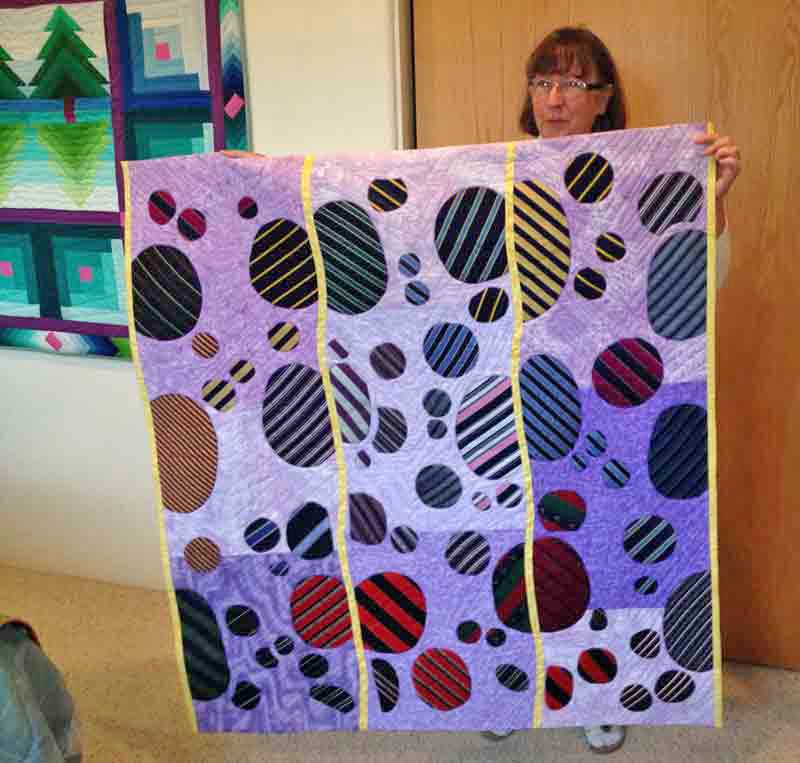
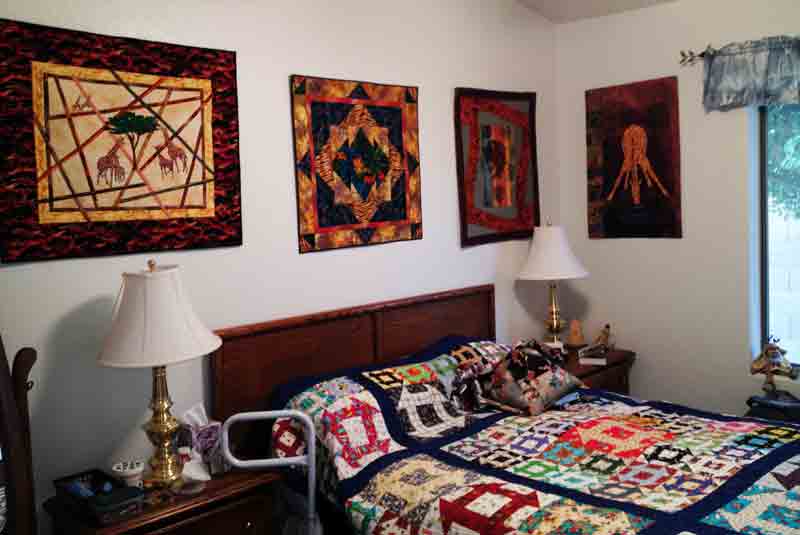
Oh, here’s one more quick pic – the charity quilt I was having free motion fun with in the last few posts!

charity-quilt


Snipping Bobbin Threads on Top

April 6, 2014 9 Comments

Have you ever been quilting a large quilt on your domestic machine and needed to cut the bobbin thread? Climbing beneath the mass of quilt can be a miserable act of contortionism. Here’s a simple way to cut the bottom thread from the top!

1. Sew a number of tiny stitches close together and stop:

cutting bobbin threads on top2. Raise the needle, and pull the quilt away so you can grab the top thread:

free-motion-fun-snip23. While holding that thread, place the needle back in the same hole (close is good enough):

free-motion-fun-snip34. Raise the needle again, then tug on the thread you’re holding. You may need to grab the thread above the eye of the needle with your other hand and tug on both threads. The bobbin thread should pull to the top:

cutting the bobbin thread on top5. Pull the quilt away from under the needle while holding onto the threads. Continue to tug on the threads until about a 1″ loop of bobbin thread comes to the top.

free-motion-fun-snip56. Cut all 3 threads that are coming out of the hole (the top thread and both ends of the bobbin loop.

free-motion-fun-snip67. The top thread will now be cut even with the quilt top, and the bobbin thread is now severed, with no tail on the back. Here’s a picture of the loop of bobbin thread cut off:

free-motion-fun-snip7It really works! Try it, you’ll like it!

This week I’d like to share a second topic. I hope you’ll enjoy:

Quilting With Kids Revisited

This past week, my nephew’s 7 year old daughter, Lily, came for an overnight visit because she wanted to learn to quilt. She had seen the quilts her cousin Hanna had made and wanted to make a quilt too (click here to read about my granddaughter, Hanna’s, quilting adventures).

Right after a breakfast of Uncle Mike’s waffles, we had to head to the studio (she didn’t even want to change out of her jammies). Lily is very bright … but she’s always moving, so I thought this might be a bit of a challenge (here’s a typical shot of her :-)):

Lily-moving

She did great! I had her pick out 12 charm squares from my box of 6″ squares, in order to make a doll quilt. She arranged them in a 3 x 4 set and the sewing began. She listened well and was very careful.

kids quilting

Once the top was pieced, she chose a piece of flannel for the back, layered it with batting, pinned all around, and sewed – leaving an opening for turning.

kids quilting

She then poked out the corners.

Lily-3

And quilted 1/2″ away from the outer edge and with an “X” through the middle. She sewed every stitch herself!

kids quiltingThen she wrapped a dolly in it and said “can we make another one?”

Lily-with-dollBy this time Aunt Chris decided we all needed to take a walk in the woods :-)! It’s so much fun to share your passion with the younger generation!


Free Motion Fun

March 30, 2014 Leave a Comment

I recently completed a challenge quilt I’d been working on since the beginning of the year and it was time to do something easy. Months ago I’d picked up a kit to make a charity kid’s quilt while at my quilt guild – Patched Lives. This is a very generous guild and I’m proud to be a part of it. Our wonderful charity quilt committee recently wrote in the newsletter that since they began working on the committee, the guild has donated 207 quilts! The fabric in the kits is donated, and the kit I picked up was especially cute. It contained a pre-printed panel, borders and backing. This proved to be the perfect simple project for my mood. I added the borders and safety pinned the layers together. As I began to think about the quilting, I thought it might be fun to share my process on the blog.

First, I like to do a bit of machine guided quilting to hold things together. Since I hate to stitch in the ditch, I chose to quilt 1/4″ from the seam using the walking foot and my “3 pin technique“. When quilting long straight lines it’s not uncommon to have the top layer shift a bit by the end of the line, resulting in puckers, even with a walking foot. To prevent this I sink the needle into the quilt at the beginning of the line, then place 3 straight pins, about 1 1/2” apart, in front of the needle.

walking foot quiltingI pull the pins out as I sew up to them, and when I reach the third pin, I re-pin once again. It may seem a bit tedious, but I get great results!

Next, it was time to free motion quilt. I moved to my Sweet 16 and positioned the quilt in my Quilt Float. When I was teaching Beyond Meandering at the FVTC Quilt Expo recently, I explained the quilt float to the students and told them I’d put a photo on the blog. Here it is:

free motion quilting made easy

If you’d like to know how to make your own (and it works great with a domestic machine too!), just click here.

I recently received a delightful email from Sheila about the Quilt Float. She gave me permission to share it here:

“A little late for starting to use a Christmas present.  A busy schedule and a knee replacement didn’t help me start using my Christmas gift from my husband.  I had shared with  him the description in one of your blogs showing a plan for hanging a quilt sandwich in a way that made the quilting easier to do on my “regular”  Viking machine (floating with the poles and clamps).  So he purchased the needed supplies for the project as my Christmas gift.  Was I ever surprised that he remembered my sharing your blog with him so long ago.
Today we set up the equipment and I started quilting a sandwich that I plan to give to his grand-nephew and bride at their June wedding.   I had a wonderful afternoon with the floating process.  The system made it so much easier to move the quilt sandwich through my machine.”

When I asked Sheila if I could quote her she said “I hope others enjoy the system like I do”.  Thanks so much Sheila, I’m really glad it’s worked so well for you!

As I had stated previously, the kit was made up of a panel, so how should I quilt it? Well, if I stitch on the lines of the design, I will need to stay on the lines – ugh! It would be much more fun to stitch 1/8″ away (or there abouts – notice how I used thread to match the background so it wasn’t obvious if my 1/8″ wasn’t consistant?).

free motion funIt was fun, and I had the center quilted in no time. Then I got to the plain, peach borders and, without much thought, decided to “spiral”. This is my “default”, because I love to “spiral”. I put in a matching thread and got the machine humming. After a while, Mike walked by and I stopped and said “have I thanked you recently for buying me this wonderful machine?” (that was a story from last year  called “Sweet 16” – click here to read about it :-))

He walked over, looked at my quilting and said: “how do you keep the spacing between your lines of stitching so even?”

free motion fun

I jumped up and gave him a big kiss! Sometimes he says just the right thing. And the answer is… practice! And aren’t charity quilts the perfect place to get that practicing done?

I have one more trick that came in handy on this quilt, but this has gone a bit long, so I think I’ll save it for next week. Stay tuned for a slick way to cut your bobbin thread from the top!

And just one more thing! I continue to be very busy traveling and teaching. I had the privilege of judging the Evergreen Quilters Show in Green Bay, WI this weekend. It’s a wonderful guild and the show was great. I’d like to share a picture of the Best of Show award winner, Toni Bergeon, and her quilt: “Reverie”. It was spectacular!

Green-Bay-winner

On the Road Again… and Again… and Again!

March 16, 2014 2 Comments

In the past 8 days I’ve taught in 3 states and packed and unpacked suitcases 3 times! I’ve met so many wonderful quilters and my quilts have enjoyed getting out and being seen. I’m so blessed to be able to do what I love and have the energy to do it :-)!

In Princeton, IL I presented my lecture: “Journey With a Compass” and the following day they chose the Mariner’s Compass workshop. We found a large, oval platter in the church kitchen where the workshop was held and these 4 talented quilters really made great progress towards getting them done.

Mariner's Compass class Kate did it all with her hand in a cast (I was impressed)!

Mariner's Compass class

From there I stopped home for a day to regroup and then traveled to Iowa City for a Threads Untangled lecture and a Parallelisms workshop. What a friendly and fun group. The fiber art created in class was delightful, but I was remiss and totally forgot to take a few pictures :-(.

I then returned home for 2 days to pack up for the Fox Valley Technical College – Sewing and Quilting Expo in Oshkosh, WI. I taught an all day Free Motion workshop on Friday, and on Saturday I did 5 lectures in 8 hours – Whew!

quilt lectures

The toughest part was packing 7 bags and loading them in the car. I’m so glad I have an SUV that can hold it all.

FVTC-Expo-packing

FVTC-Expo-packing-inside

The students were interested, and interesting, and there was so much information to share and many beautiful quilts to see. It really was great fun, and I slept very well last night :-).

One of the interesting things I learned was in the evening lecture with Karen Kay Buckley. She highly recommends serrated scissors for cutting out fabric. They enable you to cut through many layers without having things slip around. She has them available on her website:  http://www.karenkaybuckley.com/store.php?cat=5. Her quilts are wonderful (you’ve probably seen them on the cover of a magazine or two), so do spend a little extra time checking out the gallery section of her site.

Thanks to everyone who made this past week so enjoyable!

Did you attend the Expo? Did you learn anything you’d like to share?


Margit and her Quilts

March 2, 2014 1 Comment

I met Margit Kagerer the first time I visited Evelyn in Arizona. Margit is a member of the Maverick’s Art Quilt Guild and I’m delighted to call her my friend. On my recent visit she was kind enough to invite a group of us to her beautiful home. We were treated to breathtaking views from every window

m-scene

as well as a “gallery tour” of her art and home. I thought you would enjoy seeing some of her inspiring work.

m-gallery-3

m-gallery-fireplace

Don’t you love the way the quilt fits the architectural detail of the fireplace?

m-gallerykit

What a whimsical and clever tumbling block display!

Margit has won many awards for her quilts and she shared her collection of miniatures with us.

m-minis

I was impressed with all of her work, but I was particularly intrigued with her current creative use of men’s neckties. I guarantee you haven’t seen tie quilts like these before :-)!

necktie quilts

m-ties2

necktie quilts by Margit Kagerer

She even creates small landscapes completely from the ties!

necktie quilts by Margit Kagerer

m-ties-landscape

For a virtual tour of more of Margit’s work, go to:  http://www.arizonaquiltershalloffame.org/index.php?option=com_content&task=view&id=48

Thank you Margit, for a lovely visit and for your kind permission to share your work on my blog!

Has anyone else done something unique with neckties???

Quilts and Sunshine

February 9, 2014 3 Comments

This week I’m very pleased to be writing from sunny Arizona. In January, 2012, I had the wonderful opportunity to visit my friend Evelyn in Mesa, meet many delightful quilters, and do a number of lectures and classes. It was a great time and you can read all about it at: https://chrisquilts.net/?p=2162. You may remember that Evelyn stored her unfinished quilts (UFO’s ) in the master bathtub!

UFO bathtubDo you see the orange/black/yellow piece? Well, back in 2012, I pulled it out and discovered it was a “circle of illusion” ring Evelyn made in a class with Andi Perejda. I loved it and told her she needed to do something with it. She said “ok” and handed it to me, saying “your turn”. The challenge was on. I took it home to Wisconsin and chose to piece a mini Mariner’s Compass for the center. Next I appliquéd the whole thing onto a brown batik and shipped it back to Arizona. Evelyn added a “dragon’s tail” of flying geese. We both participated in the quilting and decided to enter it in the first AQS Quilt Week Phoenix. As soon as Evelyn was notified of it’s acceptance she invited me back to AZ! What a great place to be, especially this winter!

our quilt at AQS Phoenix

It was a joy to stand together in front of our quilt and a lovely opportunity for the Quilt Sissies to have a reunion (If you missed the saga of the Quilt Sissies, it all began with this post: https://chrisquilts.net/?p=3448 ).

E,C-and-sissies-AQS

They joined us for frosty Coke’s on the sunny patio (much more enjoyable than the frosty stuff back home)!

frosty-coke

And Joan D. is here from Wisconsin too, to add to the fun!

J,C-sissies-patio

Every room of Evelyn’s home is actually a gallery of her beautiful fiber art. I thought you might enjoy a bit of a tour. This is her living room:

Evelyn's quilt galleryThe dining room/class room:

e-gallery7

And even the bedrooms:

e-gallery6

e-gallery5 e-gallery4

Here’s the artist in her office:

Evelyn's quilt galleryIt’s a real treat to stay in Evelyn’s lovely home and to spend time with her family and friends! I’ll close with a picture of a clever storage idea from her studio. She’s created a pressing/cutting station at chair level by placing a long, fabric covered board across a large number of stacking drawer units.

E-studio-counterIt’s really quite convenient, and I know because I’ve spent a little time stitching here (when I can pull myself away from the patio 🙂 )

I hope you’re staying warm, wherever you are!

PS I have to add a little aside, because it made me laugh out loud. Last winter my husband was in the Caribbean on business while I sat home during an ice storm. He sent me a picture of a cold drink on a patio, overlooking the ocean, with the caption: “we’re having icy issues here too”. I didn’t find it all that funny. So yesterday I sent him the photo of the frosty Coke with the Quilt Sissies above, with the caption: “We’re having problems with frost”. His response -“They can’t reach their frosty drink. You all should be reported for cruelty to stupid quilted figures”. I just had to laugh!

The Dark Side of Sewing

February 2, 2014 7 Comments

While teaching at a recent Sewing and Quilting Expo, I had a very interesting conversation with a trio of women. These dear ladies were staying in the same motel as I was and at breakfast they were analyzing the jacket of the commentator on tv. I, of course, couldn’t resist getting in on the conversation, which led to my asking them if they were there to attend the Expo. They answered yes and told me they were garment sewers. They then asked me and I told them  I had a background in garments, but that I currently focused on quilting. They knowingly looked at one another and one said in a low voice: “she’s gone to the dark side”. I laughed. Quilting? The dark side of the sewing world??? What made garment construction so light??? Have you heard this expression before?

I thought about that conversation many times during the Expo, and on the ride home I began thinking about the portion of my life in which I made garments. I began sewing when I was 7. My mother taught me to make a sleeveless dress (which I, alas, no longer have). I liked sewing right away and began taking Home Ec as soon as I entered Middle School (Junior High was the correct term at that time :-). During High School I made many of my own clothes and continued my sewing education all the way through a tailoring class my Senior year. I loved to sew! I’ve made clothes for many members of my family over the years.

DS-Chris-pattern-layout

When I got home from the Expo, I began digging through closets and drawers, and discovered that my pack-rat tendencies may finally prove to be a good thing!

Nautical themed fabric bell bottoms? Got it! Green fringed poncho? It’s there!

Halter Dress? But of course (it was the 70’s)! Oh – and I made Mike’s sport coat and vest too. Matching plaids was an adventure!

DS Mike-plaid-and-me-halter

Purple and yellow plaid wool blazer? Who wouldn’t hang onto that? (sorry the photo is B&W)

DS-my-plaid-jacket-bandw

Puzzle Costumes? (kind of scary, isn’t it?).

puzzle costumes

A quick tour of closets and the attic yielded the inspiration for a new lecture: “Gone to the Dark Side”. I began pairing up these interesting (and often “laugh out loud”) garments with quilts, and have been having a very entertaining trip down memory lane.

I not only have old clothes and quilt stories to share in the talk, but I’m putting together a slide show of “vintage” pics showcasing myself and various family members actually wearing these garments long ago (you only got a sampling here). I’m also including quite a few modern quilted garments that combine both these old and new skills. If you’re a child of the 70’s, a past garment sewer, or you just want an evening of chuckles and entertainment, I think you may find this new lecture interesting. I would be so grateful to have you share my website: https://www.chrisquilts.net/classes/ with the Program Chairpersons in your guild. My email is: . Or better yet, please send them to my blog!

Merry Christmas 2013!

December 22, 2013 5 Comments

Christmas joy

Recently I’ve been contemplating how wonderful it is to be able to end each year with the “joy” that is Christmas! No matter what is going on in our lives, we can focus on the birth of our Savior and what He did for us.

Then I began thinking about the little blessings I’ve enjoyed this Christmas season already. When we had our first snow, Sommer and I tried to build a snowman. There wasn’t much snow and she didn’t want to wear her mittens or touch the unusual white stuff, but once I had put the little snowman head on the body, she couldn’t resist picking it up! I call this picture: “Grandma, snow is cold!”

snow is coldThis past week my friend Sharon and I kept our 10 year tradition alive and “rang and sang” for the Salvation Army. It is one of my favorite Christmas activities. The ringing is fun, but the singing makes it pure joy (even if we’re not always on key). This article was in the Watertown paper last year .

Christmas-2013

Sharon and I looked pretty much the same this year, so I thought our silliness in this picture might bring a smile to your face. I recently read a blog post entitled: “10 Things Salvation Army Bell Ringers Want You to Know”. Please click on the title to read it – I’m sure you’ll find it interesting.

Another favorite tradition of mine is baking cookies with my mom. We’ve done it together every year since I was old enough to help. The men hang out in the living room and offer to be the taste testers. Over the years the kids have actively helped when they were around. This year Mike was out of town, but Dad, Mom, Brad and Sommer all were here. Here’s my mom making Spritz cookies (a family tradition) with the “new” old cookie press I found on eBay to replace my grandmother’s (which broke), along with Dad, who’s taking the taste testing part seriously.

cookie-deco1

And this one is of Sommer doing a bit of decorating. She got more on the tray than the cookies, until daddy tossed a candy decoration in his mouth. Then she got most in her tummy!

cookie-deco2

There’s one more blessing I’ve really been contemplating. Quilting certainly brings me a great amount of joy. What a blessing to be able to do what I love. Teaching is another happy part of my life. Each of you who take my classes or read my blog posts are a huge encouragement to me and I’d like to take this time to send you a great big THANK YOU!

From my family to yours – MERRY CHRISTMAS!

Christmas-2013-gma-som


  • « Go to Previous Page
  • Page 1
  • Interim pages omitted …
  • Page 60
  • Page 61
  • Page 62
  • Page 63
  • Page 64
  • Interim pages omitted …
  • Page 77
  • Go to Next Page »

Primary Sidebar

Archives

Recent Posts

  • Quilting in Bloomington ~ Part 2
  • The Indiana Heritage Quilt Show ~ 2026
  • Bird’s Eye View
  • The Birds
  • Sew Much Creativity

Recent Comments

  • Tearle D Dwiggins on Quilting in Bloomington ~ Part 2
  • Laurie Neubauer on Quilting in Bloomington ~ Part 2
  • judy raddatz on Quilting in Bloomington ~ Part 2
  • Kathy Wuhrmann on The Indiana Heritage Quilt Show ~ 2026
  • Doris Ast on The Indiana Heritage Quilt Show ~ 2026

Categories

Footer

My Guide

Whatever you do, do your work heartily, as for the Lord rather than for men.

—  Colossians 3:23

Contact Chris!

  • Home
  • About
  • Gallery
  • Classes
  • Trips
  • Books
  • Blog
  • Contact
  • Sign Up For My Blog

Copyright © 2026 · Chris Quilts · Website by Adunate · Privacy Policy