• Skip to main content
  • Skip to primary sidebar
  • Skip to footer

  • Home
  • About
  • Gallery
  • Classes
  • Trips
  • Books
  • Blog
  • Contact
  • Sign Up For My Blog

Blog

Where Do I Start With Fiber Art?

September 28, 2013 4 Comments

I’m very pleased to announce that my new book is in print!!!

Where-Do-I-Start-With-Fiber-Art

Thanks to everyone who commented on the cover choices. I had over 80 responses to my request for opinions and the vote was overwhelming for the above cover (only 14 for the the otter, which did make it on the title page).

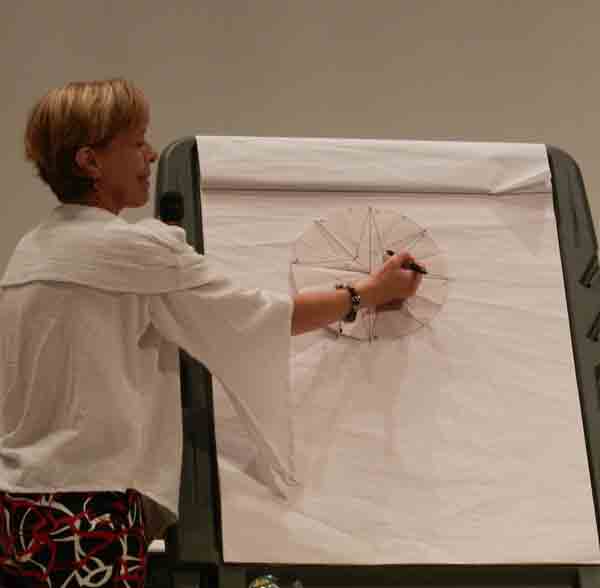
This book is based on my “Parallelisms – Beginning Fiber Art” class. Many students have asked that it be made into a book some day – and some day is now. It is written for traditional quilters who think they’d like to try making an art quilt, but don’t know where to begin (or even if they can :-)). I’ve included loads of pictures, and simple, step-by-step lessons for fusing a variety of strips and shapes as well as instructions for working with sheers and some of my favorite beading techniques. Many people have asked how I bead my “Crossings” quilts together – and that’s one of the techniques included (for info about my “Crossings” series please go to this previous blog post: https://chrisquilts.net/?p=3168 , and scroll down to #7).

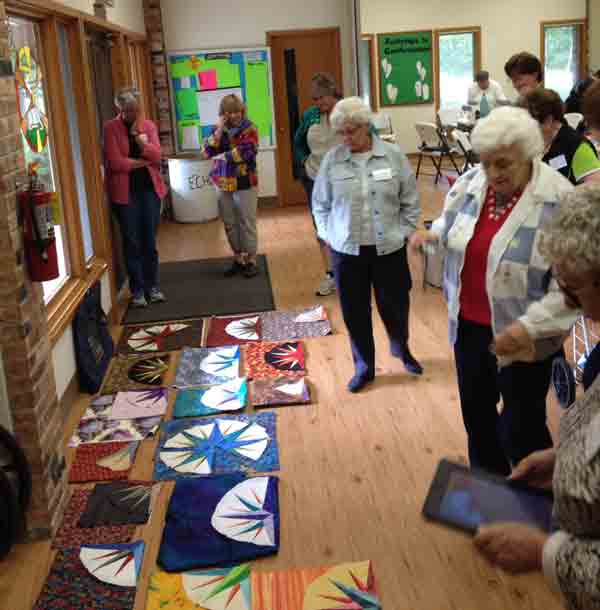
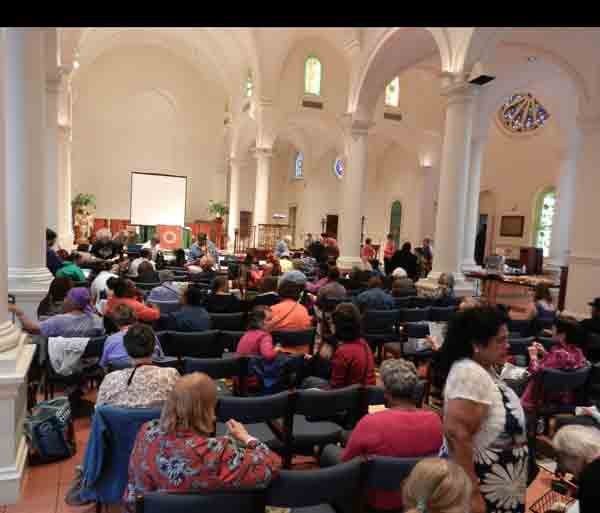
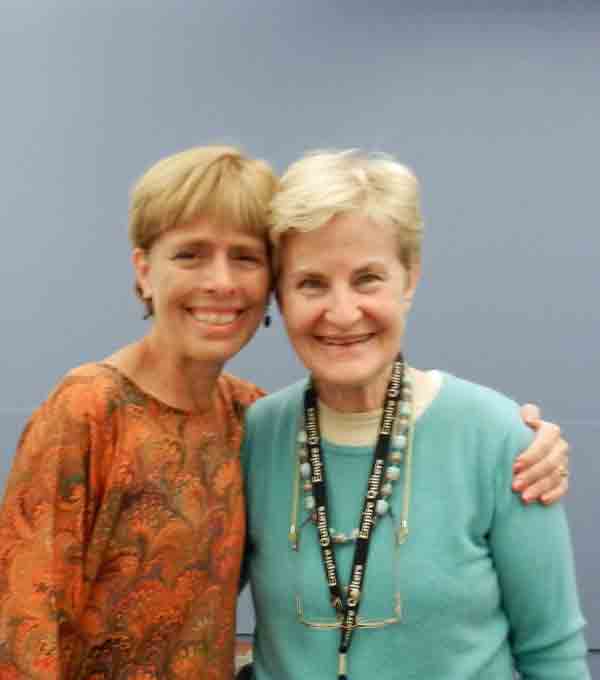
Peg O’Donnell took my Parallelisms workshop at the Madison Quilt Expo this month and she gave me permission to post a comment she emailed to me about the class:

“I LOVE the new book.  Very helpful and inspirational information for the beginner. Plenty of clear to understand information to get anyone excited about trying fiber art.  You prove you are only limited by your imagination. I really enjoyed your class last Thursday.”

Thanks so much, Peg!

Sommer found the cover intriguing!

Fiber Art - Sommer PSclosed

And she seemed to like all the helpful pictures :-)!

Fiber Art - SommerPS

So, if you’d like to have your very own copy you may click here to get to the “books” page of my blog; then click on the “add to cart” button at the bottom of the book description, and you’ll be taken to a site that’s administered by PayPal. You do not need to have a PayPal account to purchase a book through this site. You can safely and securely purchase the book using a credit card or you can use a PayPal account if you have one.

If you’re not comfortable ordering on line, I’d be happy to have you send a check made out to me, for $22 to: Chris Kirsch, N7568 Ceasar Road,  Watertown, WI 53094. I will put a signed copy in the mail as soon as I hear from you.


Interwoven Globe

September 22, 2013 1 Comment

ny-maggi-and-me

I began this past week with my last day in New York and a visit to the Metropolitan Museum of Art. Maggi and I “met at the Met” and toured the opening day of an amazing exhibit. “Interwoven Globe” -a 300 Year Survey of Textiles at the Met – features a fascinating collection of vintage textiles from around the world (click on the exhibit title to be taken to the New York Times review).

NY-met

I took a number of photos of the entrance to the Met for this blog. When going through them, the gentleman with the sandwich board duct taped to his shirt, caught my eye and, upon zooming in, I was able to read what his sign says: “Hi friend, I’m looking for a wealthy lady to be my wife. My name is Robert – single – never married – “. It made me laugh out loud (hope no one is disappointed that I couldn’t quite read his phone number or email address :-)).

After pouring over and enjoying the amazing examples of embroidery and needlework, Maggi and I had a lovely lunch. Then I decided to walk home – from 86th Street to 26th Street – through Central Park, Times Square and the Garment District. It was a great way to see New York and do a bit of people watching. What a memorable trip! Thanks to Maggi and the Empire Quilters for showing me such a good time.

I arrived home on Tuesday afternoon, and pulled the quilts out of the suitcase, but I didn’t have to put them away because I was off to Janesville, WI to do a Mariner’s Compass workshop on Saturday. Another delightful group of quilters and some beautiful compasses in the works:

mariner's compass class

As we near the end of a compass workshop I enjoy lining up everyone’s “work in progress” – so we can all ooh and aah!

jacket-DWW

Today I had the joy of driving to the library in McHenry, IL to present my “Tradition With a Twist” lecture. This lecture contains vintage, traditional quilts along with my modern, innovative variations. I’ve even created a jacket from some leftover, antique double wedding ring arcs to wear during the presentation. Fun, fun, fun!

This is proving to be a very “quilty” month and I’m loving all the places I’m seeing and quilters I’m meeting. September does seem to be the kick off month for quilting events and the beginning of the year for many guilds. What have you been up to, quiltwise, this month???

Quiltina-miffedPS Quiltina insisted I confess my neglect. While in New York, Wendy texted me to ask how Quiltina and I were enjoying ourselves. It was then I realized I hadn’t brought her along. If that wasn’t bad enough, I unintentionally left her hanging around the studio while traveling this weekend too! As I was piling the quilts up after today’s lecture (to be put back in my magic quilt storage box :-)), she jumped atop the pile, with her hands on her hips and made me promise to take her to Des Moines in October. I’m ashamed of myself for forgetting her and will keep you posted about our next adventure.


New York, NY

September 15, 2013 4 Comments

This week’s post is filled with more travel fun! Last week I was teaching in Pella, IA and Madison, WI and this week I’m writing to you from Manhattan! Thanks to my dear friend, Maggi, who moved from Wisconsin to New York, I was invited to share my Mariner’s Compass techniques with the Empire Quilters!

I flew in on Friday morning and took a taxi to my hotel in Chelsea only to discover that my room wasn’t quite ready. It was a beautiful, sunny morning, so I headed to the High Line. My friend, Chiyoko, had recommended it and it was only a few blocks away. It’s an old elevated rail line that has been converted into a garden walkway with trees and plants (growing amongst the rails),

ny-highline-trees

interesting art,

ny-highline-mural

and fascinating views (like this one of the Statue of Liberty).

ny-highline-liberty

From there I walked to the City Quilter – a wonderful quilt shop a block from the hotel! And I just had to buy a few yards of New York fabric :-):

City Quilter

After lunch at a typical New York deli, I found my way to FIT – the Fashion Institute of Technology. In their beautiful gallery space they had an exhibit called Retro Spective. It included fashions from many different decades and “explored fashion’s relationships with it’s own history”. Being that I’m also I garment sewer, I found it fascinating.

ny-fit

By then my room was ready – on the 24th floor – and this was the veiw:

ny-day-view

What a blessing, and I’d only been here a few hours! Once I got situated I hopped on a subway and headed “uptown” to visit with Maggi. We had a great time of tea and conversation.

The next morning I rolled my bag of quilts about 4 blocks to a lovely old church where the guild meeting was being held. The quilters began arriving as I prepared my quilts.

Empire QuiltersWhat a lovely group! I shared my Mariner’s Compass quilts along with their stories and even did my “I can draft a compass in under 5 minutes” demonstration.

drafting a mariner's compass

ny-mary-butler

Today was a Mariner’s Compass workshop. Another fun day with wonderful quilters. The group shot from class was too fuzzy to post :-(, but I do have a picture of my new friend Mary. We have gotten to know each other over 3 delicious dinners and she has graciously shown me around the city. Thanks Mary!

I gave myself an extra day here and have some wonderful plans for tomorrow, but that will have to wait for next week’s post. I do however have one more thing I’d like to share. If you’re interested in taking my “Mariner’s Compass” class, or the free motion quilting class I call “Beyond Meandering”, I will be offering both next month at the AQS quilt show in Des Moines, IA (another great travel adventure to look forward to :-)).

AQS Des Moines

It promises to be a delightful show and you can get all the information, as well as register on their site at: http://aqsshows.com/AQSDesMoines/.

I’d like to close with one last New York picture – the view out my window right now! The Empire State Building is lit up so beautifully at night!

New York at nightPraise the Lord!

Wool Batt and Border Quilting

August 31, 2013 7 Comments

In our last episode :-):Brianne Scott

Brianne and Scott were married, the wedding quilt was given as a gift and they are now on their honeymoon (no word as to their response about the quilt).

I had written about a portion of my quilting journey on their quilt in last week’s blog and will now continue …

Once the center of the quilt was done, it was time to quilt the borders. The border fabric is quite busy and I was sure any design would end up being seen as mainly texture. I have found “writing” in borders to be a delightful and fun way to finish this process. So I put in a dark green thread and began by writing “Scott and Brianne Trevorrow” across the bottom border.

(here is where I have to apologize and add a “learn from my mistake” portion to the blog. While working with the pictures I took of the border quilting in Photoshop Elements, I neglected to save them while in progress and the program closed down unexpectedly. Photoshop doesn’t do regular saves – and I should have – and the pictures were lost :-(. Since I no longer have the quilt, I couldn’t just snap a few more pics, so I’m hoping your imagination will fill in the blanks)

Next, starting at the lower left corner of the side border. I quoted Matthew 19:5-6 up the left side, across the top, down the right side, and ended with their wedding date in the lower right hand corner of the side border. The words were rather inconspicuous, and it was easier to see them from the back of the quilt, but they are there and I’m hoping it will be a special surprise to them some time in the future.

Once the quilting was done it was time to bind. I did this in the same flannel I used on the back – in keeping with the snuggly theme. I attached the binding first by machine to the back of the quilt, then I folded the binding to the front and secured it on the front with a zig-zag stitch in a matching thread. I typically sew the binding to the front and then hand-stitch it to the back because I find the quilt edge lays best this way, but again, since the quilt was meant for cuddling, I went with this quick way and then attached the label (did I mention I finished attaching the  label the morning of the wedding???)

9-label


I made the label on the computer and printed it on a colorfast printer fabric. This was the first time I included washing instructions on a label, because I felt the wool batt required it.

Next was the scariest part of the adventure. Since the majority of my quilts are made to hang on a wall, I strive for smooth and flat results. I have used washable wool batts in some of my wallhangings for the faux trapunto effect – with very good results, but the difference is I never planned to wash those quilts. This time I’d marked the circles and hearts with a water soluble marker that needed to be removed, and I wanted to see how the “washable” wool batt would react to washing, so I threw it in the washer (front loader) and washed with cool water on a gentle cycle. Then it went into the dryer on very low heat. I had not washed the fabrics in the quilt top or back, because I knew the batt was going to do a bit of shrinking and puckering (even with the cool temperatures), but when I pulled it out of the dryer I noticed immediately that it did shrink up even more than I expected.

So, I took a breath, wrapped myself up in it, and it was VERY SNUGGLY! I then laid it across a chair and got used to the  new effect.

8-quilt-in-chair-

I like it! Different can be good! I would do it again! I feel this was a good experience and hope it was helpful for some of you.

I can’t wait to hear from the newlyweds … and you too! Do you have any wool batt stories to share?

Wedding Quilt

August 25, 2013 1 Comment

First of all, I must begin with a huge thank you to everyone who responded with opinions concerning the cover for my new book. I was blown away by the number of responses and grateful for all of the thoughtful comments. I did not take that decision lightly and feel good arguments were presented for both covers. That being said, I’m not telling which way I went yet :-)! “Where Do I Start With Fiber Art?” is now at the printers and should be ready for my classes at Expo in Madison next month. It will be available on my website shortly after that.

Now for this week’s topic. My August 11th post began with a picture of me basting a quilt in the driveway. I was making it for my niece’s wedding and Brianne and Scott were married this past Friday. They are a very sweet and special couple and their day was beautiful! It was such a blessing to celebrate this joy filled time with family and friends.

Brianne and Scott

Quilting and finishing their quilt was an adventure for me and I’d like to share some of the things I tried and the results. It was actually made for a class sample last semester and as soon as I got the top together and decided on a border (click here for that story :-)) I knew it was the one I wanted to finish for Brianne and Scott. The colors are bright and modern, and I could just picture them cuddled up under it.

When it came time to layer and quilt it, I chose to use a washable wool batt to make it extra snuggly and, while basting it in the frame, I had a thought: I’m always telling my students that quilting the quilt should be as much fun as making the top. So, how should I quilt it?

Sparingly was the answer. No tight and tiny filler designs this time! I didn’t want to flatten the nice poofy wool. I also didn’t want to drive myself crazy with a lot of marking and planning. This quilt wasn’t going to competition, it was meant to keep 2 people I love warm. Here’s what I did:

1. Gridded the quilt on the diagonals, through the dark squares, with a walking foot.

grid quilting

2. Prepared to make fast and fun feathered wreaths by marking a circle around an embroidery hoop,  straight pinning up to the circle and removing any safety pins that were in the way.

quilting simple feathered wreath

3. I began by free motion quilting the marked circle and then “feathering” around the outside. I’ve found feathers to be much easier since I took a class with Diane Gaudynski and she taught that a feather is half of a heart. I doodled loads of hearts when I was a young girl, so I had the shape down. She also showed us how it was easier to “draw” a half heart from the indent at the top, around to the point at the bottom. Here is my first “outside the circle” feather. I’ve come back up from the point and am at the top of the bump which will be the second feather.

quilt simple feathers4. As you can see – my feathers are big. Once I made all of the feathers around the outside, I stitched a second circle inside the first to create a “spine” and then I feathered the inside.

quilt simple feathers

5. They were a joy to make and the wreath was done so quickly I couldn’t wait to start the next one. Here’s a view of a wreath from the top:

quilt simple feathers

and from the back:

5-gridding-and-feathers-back

Notice how the feathers are not consistent in size or shape and yet they look good when all were done? Don’t agonize over each little stitch – revel in the finished effect!

quilting a large quilt

I did the free motion quilting on my HQ Sweet 16 and I used my “Quilt Float” system to lift the quilt and keep the weight of it from dragging me down. Quilts can be floated with a domestic machine also. For info on the “Quilt Float” from 2 previous posts, click here and then here :-).

heart

When all the wreaths were made it was time to fill in the open areas. I did this with free motion hearts.

The adventure didn’t stop there, but the post is getting a bit long. Next week I’ll share my thoughts on border quilting and working with a wool batt.

Oh – just one more thing. I’ll be presenting a program at the library in McHenry, IL in September and I wanted to share their flyer in case you can make it!

Screen Shot 2013-08-24 at 8.59.56 AM


Really 3D Quilts

August 11, 2013 2 Comments

What a beautiful day to baste a quilt in the driveway (to read a previous blog on my quilt basting frame click here :-)!

quilt basting in driveway

My niece is getting married in 2 weeks and it’s time to get this quilted. So I spent part of the afternoon pinning the layers together and now its ready for my Sweet 16, but before I get to that I need to write up this week’s blog…

My Objet D’Arc

A few months ago I blogged about the Double Wedding Ring pattern and how it was used in a Milwaukee Art Quilter’s challenge called Objet D’Arc. To read that post click here!

This was the challenge exhibited at the Milwaukee Machine Quilting show this past weekend and Susan commented on my piece because it is a bit unique. It’s 3-D and reminiscent of an accordion door. About 13 years ago my friend, Tricia Spitzmueller, made an “accordion door” style quilt and I was inspired. I came up with my own technique and “Reflections of My Quilting Heritage” was the result.

Reflections of My Quilting HeritageWhen viewed from the right (top photo) you are looking at my sewing journey beginning with my great, great grandmother who made traditional quilts by hand to keep her family warm, through my mom teaching me to sew, then my friend Sharon teaching me to quilt and finally to my entrance into fiber art. Each of the women in my quilting journey are reflected in a hand mirror.

The view from the left is a quilt in which one half is a reproduction of a log cabin quilt I own made by great, great grandma Mary. The other half is a variation of my Parallelisms technique. I had just started making art quilts and so it was current to the time of the quilt.

This project was actually made from three different complete quilts, two of which were cut into chunks and sewn back together. This unit then hangs on the third quilt!

My recent “accordion adventure” was inspired by the vintage double wedding ring arc. I began by adding fusible to the back of my arc and cutting it into smaller arcs which were then fused to a bright background and quilted (notice the vertical marks dividing the quilt into thirds)

double wedding ring quilt variation

A second quilt was made as a reproduction of the traditional double wedding ring design, but in more modern colors. This was also layered, quilted and marked.

double wedding ring quilt

Once these pieces were quilted I cut them on the vertical lines, alternated them and stitched them together. This new piece was bound, velcro was added to it and to a base quilt and – Voila! I call this quilt “Accordion Arcs”. This is the view from the right:

Accordian-Doors-and-Wedding-Rings-right

And this one is from the left:

Accordian-Doors-and-Wedding-Rings-left

I feel like I’ve only begun playing with this technique and the next project is in the planning stage already :-).

Have you created any REALLY 3D quilts? We’d love to hear about them!

Oh and here’s a quick reminder of an upcoming event:

Madison Quilt Expo

Quilt Expo is always educational, inspiring and fun. I’ll be teaching there once again and I hope you can be there too!

Josie’s Quilt

August 4, 2013 12 Comments

This week I have a very uplifting story to share!

My dear friend Linda works with young girls in 4H and a few weeks ago she called to tell me about Josie. Josie is 14 and very talented. She has entered the Waukesha County Fair in many different categories, but is especially good at quilting. This year she decided to make an art quilt of her own design and was planning to enter it, but when she was in the quilting stage someone had hinted that it wasn’t good enough. Her mother and Linda were looking for a way to encourage her so Linda brought Josie and her quilt to my house. I wasn’t sure what to expect and had put on my best “face of encouragement” when she brought out her truly amazing quilt. It was a pictorial quilt of  a horses head and when I asked her if she knew this horse she said only in her mind. Josie had used black and white prints in raw edge appliqué on a blue background with yarn embellishment for the mane. She had done a bit of quilting and was adding the borders “quilt as you go” with piping. The quilt was wonderful! There was a bit of what I’d call “poofiness”, but I was sure that would be remedied with more quilting, so we talked about how to quilt it and finish the borders. I then shared a lesson I’ve learned over the years: We shouldn’t make a quilt to win awards or please a judge. We should make quilts to please ourselves. She left with a smile on her face and I felt grateful to have met her.

Linda called me a while later to let me know that Josie finished her quilt and not only entered it in the County Fair, but won the grand champion award and it would go on to the State Fair. I was so happy for her and glad that she persevered! This past week my dear friend Sharon Grinyer and I went to the Fair together and we were delighted to see a merit award hanging on Josie’s horse quilt!

Josie's-horse-1

I can’t wait to see what she does next!

eating-our-way

corn

After enjoying the 4H exhibit we decided to “eat our way through the Fair” (a term we borrowed from a winning photo album in one of the exhibits)

And began with the Lion’s Corn roast.

YUM!

I am a member of Patched Lives Quilt Guild and we sponsor 2 awards (non-4H) at the State Fair. So once we were sufficiently full we headed over to see the quilts. Our “small quilt – appliqué” ribbon was awarded to Nancy Gruenewald for her lovely hand quilted piece.

PL-winner-GruenewaldOur “small quilt – pieced” award went to Chris Motl for her delightful circular red and white quilt.

PL-winner-MotlCongratulations to all the winners. The entire exhibit was a feast for the eyes.

eye-feastFrom there we went to Oconomowoc to spend some time enjoying the Milwaukee Machine Quilting Show. The Milwaukee Art Quilters had an exhibit of our recent challenge quilts: “Objet D’Arc” hanging there. Each member was given a vintage arc that never grew up to be a Double Wedding Ring quilt and we all did something innovative with it. Sharon was enjoying the creativity.

Objet-DThe quilts and vendors were all very nice and we were glad we had made time for a visit to the show.

The next day I packed up to teach at the Sewing and Quilting Expo held this past weekend in Platteville, WI.

Quilting Expo

I even talked the ladies in one of my sessions into smiling and waving for you!

expo-2I was invited to present 4 different lectures on Saturday, so packing was an adventure. The students were great and I’m sure a wonderful time was had by all.

If you get to the Wisconsin State Fair be sure to look for Josie’s quilt :-)!

Did you get to any fun, quilt related events this past week?


The Fiberistas at WMQFA

July 21, 2013 1 Comment

Today was the opening reception for a fascinating exhibit of fiber art. It’s a biennale event and it was open to all fiber artists in Wisconsin (think about what you’ll enter in 2015 :-))!

But let me back up just a bit:

A few months ago I had the wonderful opportunity to become part of a new fiber art group that is just starting up in Watertown. We currently have 6 members (and one member wanna be) and a name – the FIBERISTAS!

The idea behind our group is mainly just to encourage one another in our art. At our second meeting we were discussing an upcoming juried exhibit. The Wisconsin Museum of Quilts and Fiber Arts in Cedarburg was inviting entries into their: “First Fiber Arts Biennale: Wisconsin State of the Art”. Three of us decided to enter and we each had two quilts accepted! We were thrilled to be a part of this landmark event. So, two weeks ago we took our quilts to the museum and today was the opening reception!

The museum is housed in a refurbished barn on a farm just north of Milwaukee. It is a lovely venue.

Wisconsin Museum of Quilts and Fiber Art
The Fiberistas at the WMQFA

The Jenning’s Quilt is one of the first things you see upon entering the Museum (along with a yummy opening reception spread and don’t miss the gift shop!)

Wisconsin Quilt MuseumThere were many unique and interesting pieces of fiber art on display.

Fiber ArtQuilts, garments, knitting, rug hooking, beading and more!

Fiber Art

The pictures really don’t do the show justice (the lighting worked much better in person), but I wanted to give you a little taste of the show.

fiber art

And just one more photograph:

fiber art

If you’re a Wisconsin quilter, you need to read the rest!

In talking to Curator Norma Klimpke, she was very pleased with the fiber art entered in the show and the attendance at this opening event. But she had something she wanted me to share – this was meant to be an all Wisconsin show, yet the majority of artists participating were from South Central and South Eastern Wisconsin. She asked me to get the word out that they’d like fiber artists from all over the State to enter in 2015.  So if you live in Western or Northern Wisconsin (or anywhere in between), go to their site:  http://wiquiltmuseum.com/, sign up for their e-newsletter and start thinking about what you’ll  enter in the second biennale show!

I hope many of you have the opportunity to visit this delightful exhibit between now and October 13th. Cedarburg is a lovely community with a downtown area that just begs to be wandered through. I highly recommend spending a day there!

  • « Go to Previous Page
  • Page 1
  • Interim pages omitted …
  • Page 62
  • Page 63
  • Page 64
  • Page 65
  • Page 66
  • Interim pages omitted …
  • Page 77
  • Go to Next Page »

Primary Sidebar

Archives

Recent Posts

  • Quilting in Bloomington ~ Part 2
  • The Indiana Heritage Quilt Show ~ 2026
  • Bird’s Eye View
  • The Birds
  • Sew Much Creativity

Recent Comments

  • Tearle D Dwiggins on Quilting in Bloomington ~ Part 2
  • Laurie Neubauer on Quilting in Bloomington ~ Part 2
  • judy raddatz on Quilting in Bloomington ~ Part 2
  • Kathy Wuhrmann on The Indiana Heritage Quilt Show ~ 2026
  • Doris Ast on The Indiana Heritage Quilt Show ~ 2026

Categories

Footer

My Guide

Whatever you do, do your work heartily, as for the Lord rather than for men.

—  Colossians 3:23

Contact Chris!

  • Home
  • About
  • Gallery
  • Classes
  • Trips
  • Books
  • Blog
  • Contact
  • Sign Up For My Blog

Copyright © 2026 · Chris Quilts · Website by Adunate · Privacy Policy