• Skip to main content
  • Skip to primary sidebar
  • Skip to footer

  • Home
  • About
  • Gallery
  • Classes
  • Trips
  • Books
  • Blog
  • Contact
  • Sign Up For My Blog

Blog

Merry Christmas 2019

December 22, 2019 13 Comments

As I try to keep focused on the true meaning of this beautiful season, and not get too “wrapped” up in the pre-holiday rush, I treasure the traditions that make this my favorite time of the year (it helps that I actually like winter weather too – I know – I’m weird ?)

This past week my friend Sharon and I “rang and sang” for the Salvation Army – our 17th year!

A fun way to share the joy of the season through Christmas Carols, and to help a worthwhile charity.

Next came our annual cookie baking time. My mom and I have been doing this all my life and we’ve never missed a year.

Over the years Mike, my dad, our kids and grandkids have all joined in. This year great grandpa Bruce and the kids were on the decorating team.

Sommer made each cookie a work of art!

Trey tired out early with the pre-baking decorating, but he liked the frosting part,

Grandchildren are a great blessing! As are parents! I am so grateful my mom and dad are still a big part of my life. Dad is 89 and mom is 85 and they’re going strong. Praise the Lord!

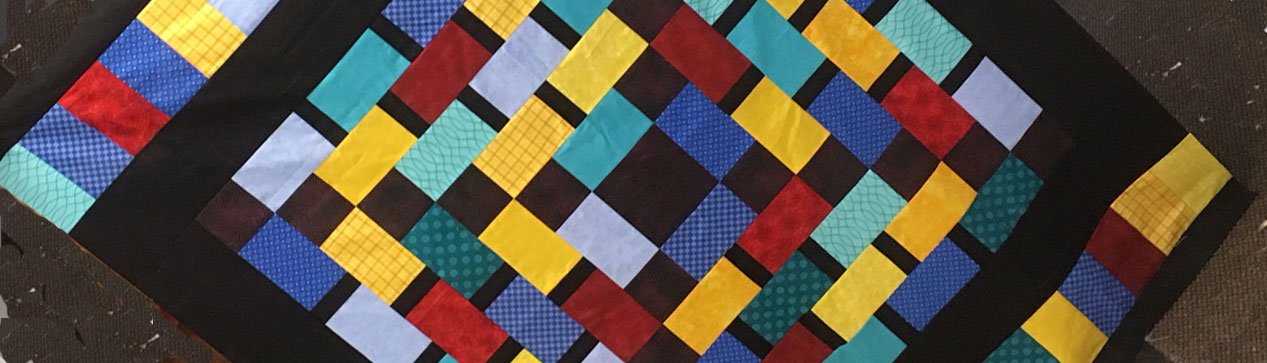
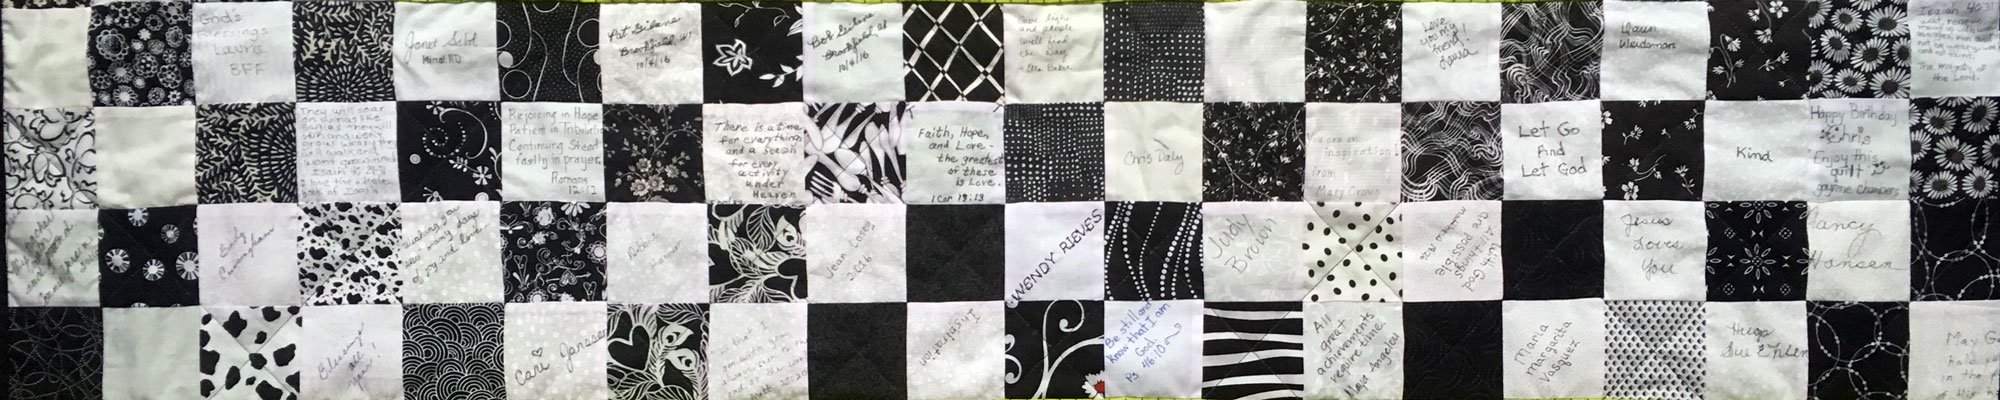
Last Thursday was a bittersweet day for me. After teaching quilting at WCTC for 23 years, they have discontinued the adult enrichment classes and it was my last day. My dear students threw a party with delicious food, thoughtful gifts, lots of hugs and a few tears. This is an amazing group of women and I thank God for each one of them (and the few who couldn’t attend too)!

What made it a bit easier was knowing that I will begin teaching at Sew Much More in Waukesha, beginning in February. Where God closes a door, He opens a window. Thanks Wendy!

The Christmas concert at church was lovely, the presents are wrapped, and the kids are excited. I have so much to be thankful for, and having all of you continue to follow my blog is one of my blessings!

In the words of Tiny Tim: “God bless us everyone!”

Scrappy String Blocks

December 15, 2019 16 Comments

When I wrote about my guild’s retreat back in October, I included a photo of some scrappy blocks we made for a charity quilt.

My friend Judy wanted the pattern and I found instructions for it by Lorraine Mooney on this site (thanks for sharing this Laure!): https://www.handmadeguilders.com/downloads/LorraineMooneyStringBlock.pdf

I had fun making a bunch of these blocks from my leftover strips.

The trick is to use a partial seam. I first learned to do partial seams in the late 1980s when I made a quilt entitled “Around the Twist” from Trudie Hughes’ book “Template-Free Quiltmaking”.

It’s a great technique and I was excited to do it again after all these years.

But I must admit, I felt the on-line step-by-steps on this site were a little confusing and, since I love writing instructions, I’d like to share my own version with you. I began with my fish bowl. If you’ve been reading my blog for a while you know that I keep my scraps in a large fish bowl (I actually have a second one now – to catch the overflow),

and my grandkids love to play with them. (my first post about it was in 2012 – click here to read it)

So I dug out all the strips and chunks that were at least 9 1/2″ long, pressing them as needed,

and then trimming them into a variety of widths, arranged by color.

This block could be done with a “non-scrap” pallette and strips of consistent width also. However I chose to try to lesson the load in my fish bowls ?.

Now for the fun – choosing strips of similar colors and piecing them into units measuring 6 1/2″ x 9 1/2″. Here are my units in progress:

And with a bit of trimming up:

At this point I realized each block would need a pair of 6 1/2″ x 9 1/2″ units, so I continued to sew and voila:

The units are all the same size, I just overlapped them for the photo.

To make a block, select a pair and place a pin at the center of each unit. The easiest way to do this is to cut a 3 1/4″ x 4 3/4″ paper rectangle and place it in the lower left corner of the unit. The pin will mark the upper right corner of the paper:

Lay the 45° line of a ruler along the bottom edge of a unit, with the long edge of the ruler aligned with the pinned center spot:

Cut, and repeat for the second unit in the pair:

Cut a 3 1/2″ center square for your block from a contrasting fabric, and lay it out with these new units:

Flip the lower right piece, right sides together with the center square, and sew a 1 1/2″ seam partial seam as in this photo (this seam is only 1 1/2″ long):

Finger press open:

Flip the lower right piece, right sides together with the center square unit, and sew the complete seam:

Finger press open:

Repeat for the piece in the upper right:

Finger pressing it open:

Pull back the partial seam piece, and sew the unit in the upper left in place:

Flip the partial seam piece, right sides together, with the rest of the block and complete the original seam:

Square up the block to 10 1/2″ (I used scant 1/4″ seams and my blocks required very little trimming):

And your block is done!

I’m seeing a reduction in my scrap stash and I love the way the blocks are coming together.

Have you made quilts with partial seam construction? Would you care to send me a photo to share in a future blog? ?

Gradation Borders

December 8, 2019 1 Comment

The inspiration for this week’s post came from a wonderful event I attended last night called the “On Wisconsin Fiber Arts Biennial”. Every other year the Wisconsin Museum of Quilts and Fiber Arts holds this exhibit to showcase pieces from fiber artists throughout our State. The opening reception was a lovely opportunity to get a first look at this visual feast!

The piece I have on display is the 3D box I made for the ThreadBenders challenge. I posted about this in September (click here to read that post). We decided to each enter our boxes in the biennial as a group, and here they are:

I was honored to be a part of the photograph taken of all the artists in attendance:

Mike and I spent a lovely couple of hours enjoying beautiful downtown Cedarburg, in it’s Christmas finery, before attending the museum reception. I highly recommend exploring Cedarburg and visiting this fascinating exhibit.

So what does this have to do with borders? Well, I met up with Jackie while enjoying the exhibit and she had made a “slice” of the building quilts featured in the photograph at the beginning of this post. As we talked she said she heard me give my Gradation Play lecture at the Sheboygan Quilters guild. Afterwards she was inspired to purchase some gradation fabrics, and wasn’t sure what to do with them. I mentioned a great place to use these fabrics is in borders, and on the way home I decided it was a good idea to share.

A single border of a gradation fabric can add a lot of interest without taking away from the center of the quilt.

Curved Path Pizazz by Chris Lynn Kirsch

I especially loved using a gradation border in How Beautiful – Liberty (to read a post about this quilt click here):

In this next full size quilt top I struggled to find a border that would work. I searched through my stash and was quite frustrated until I found a black to white pointillist gradation.

In the first two borders the gradation ran perpendicular to the edge of the quilt top. In the third one it ran parallel. It’s a good idea to try it both ways.

In the next quilt I appliquéd circles cut from the background fabric onto a black border.

There are so many ways to use gradation or Ombré fabrics, and placing them in borders is one of my favorites. If you’re working on a Christmas project that needs a quick and effective border… this may be the answer ?.

Fitting Pieced Quilt Borders

November 17, 2019 3 Comments

Last week I shared instructions on how to create a twisted ribbon quilt border using Seminole piecing (click here to read that post). Now that we’ve found a simplified way to make this beautiful border – how do we get it to fit the quilt? Even though I love geometry, piecing that corner square didn’t look like fun to me at all. If you’ve taken my classes you know I want my quilts to turn out well, but I’m only willing to drive myself crazy to a point – then I find an alternate plan that will make me happy. That’s what I did on this quilt… Adding corner squares worked for me.

Getting the borders to fit the center of the quilt required some math, and THAT I was willing to do – by way of a slick trick I learned years ago: spacer borders!

Can you see I added an inner border in the rust colored background fabric around the original blocks in the photo above? This separated the center of the quilt top from the pieced border and gave me a great way to make the border fit (plus – it would have been very visually busy to have the pieced border snug against the pieced blocks).

The “spacer border” makes fitting the pieced border a breeze. To begin:

Measure your quilt top from side to side and subtract a 1/2″ to get the finished size. Mine was 20″:

Construct a border strip longer than the width of your quilt top. Measure this strip and subtract 1/2″ to get the finished size. Mine was 24″:

Subtract the center from the border. Mine was 4″. Divide this by half and add 1/2″ seam allowance back to this number. This is the width the spacer border needs to be cut. Mine was 2 1/2″. Sew these strips to the sides of your quilt.

If your quilt is square, use this measurement for the top and bottom also. If your quilt is a rectangle you’ll need to do this same process for the length of the quilt top to determine the width of the spacer borders to be added top and bottom.

Once the quilt top has the spacer borders attached, the twisted ribbon borders can be added top and bottom. To add the pieced side borders:

Cut 4 corner squares from the ribbon fabric at the same measurement as the width of your pieced border (mine was 3″). Sew these squares to the ends of the side border strips. Sew the side borders on.

Once the pieced borders were on, I added another border in the rust colored background fabric to complete the twisted ribbon effect, and framed it all with a larger border of the print fabric from which my original Spin Star blocks were made. It was a beautiful fabric for the final border, and I think it made lovely stars!

I love adding spacer borders because it allows me to make the pieced borders whatever size I like – then adjust the quilt size to fit the borders. It’s a helpful trick to have in your toolbox!

A Fun Twist on Borders

November 10, 2019 13 Comments

I taught my Seminole Sampler workshop a few weeks ago and after lunch Carmen showed me a photo of a recent quilt she’d made. It had a twisted ribbon border and she said it was such a pain to piece she only bordered it top and bottom.

I too attempted to use this border on a quilt years ago, and I gave up. But, as I looked at Carmen’s quilt, it occurred to me that I might be able to Seminole piece it. I was right! And it is much easier than it looks!

To begin, let me share what I call a simple Seminole border. It looks like a row of squares on point.

This may seem complicated, but the trick is strip piecing. Here’s the step-by-steps from my handout (with instructions in the caption):

You simply sew three different fabric strips together into a strata, crosscut units off at the same width as your original strips, sew pairs together – jogging the top unit down one seam, sew all these pairs into a strip, and trim off the triangles.

Making the twisted ribbon border is fundamentally the same process, with one simple change. Here’s the quilt that resulted from this experiment:

And here’s how it’s done:

Choose 3 fabrics: a light background, a pretty ribbon fabric, and a fabric for the “back” of the ribbon. This border can be done many sizes, but to make a sample I used 2 1/2″ strips.

Cut: 2 light background strips, 1 ribbon strip and 1 back of ribbon strip.

Sew: a background strip to each side of the “back of ribbon” strip and press towards the dark.

Cross-cut pieces at 2 1/2″ (or whatever your original strip width was)

Measure these pieces (mine measured 2 1/2″ x 6 1/2″), and cross-cut as many pieces from the ribbon fabric strip at this measurement as you are able. Lay out the seminole border, alternating the pieced units with the “ribbon” rectangles:

I hope you can see that the layout is the same as for the simple Seminole above, the only difference is that every other unit is a full piece of the “ribbon” fabric.

So how do you know how far to jog the top strip down when you sew the pairs together without seams to match up? Simply offset the end of the “ribbon” unit by 1/4″:

Flip the “ribbon” unit on top of the pieced unit and stitch into pairs:

To line up the pairs for stitching offset the lower end of the “ribbon” unit by 1/4″:

Flip and sew once again. To make “foursies”:

Continue in this manner until all the pairs are connected into a border strip. Then trim off the triangles on each side of the strip, 1/4″ from both sides of the “back of ribbon” squares (mine are the black squares):

Make sure your strip is a consistent width when you trim the second side.

Also, be careful with these trimmed strips because the long edges are all bias. I find it best to sew them to the quilt right away. If that’s not an option, stay stitching the long edges would be wise.

To square off the strip, cut squares from the background fabric (mine were 3″), then cut them in half diagonally:

Sew one to the end of each border strip:

Next week I’ll share how to make these borders fit on your quilt!!!

Leaving you with a smile!

I try not to include pics of my grandkids too often, but this week I just couldn’t resist. For those of you not in southeastern Wisconsin – it’s been a very unusual Autumn here. We had a blizzard on Halloween! And less than a week later we got hit with another 4″ of snow! The kids loved it. Trey and I made a snowman after school last Wednesday (he’s in 4K) and there were plenty of leaves stuck in the snow:

Then we got the great idea to swap heads with the pumpkin he helped me carve:

He breaks me up!

A Bricks and Mortar Quilt

November 3, 2019 7 Comments

If you’ve been quilting for a while you’ll recognize the name Mary Ellen Hopkins. She was a very creative quilter, with a great sense of humor and a gift for teaching. The first book of hers I owned was “It’s Okay if You Sit on My Quilt.

She was the originator of what she called the “Connector Block” technique. You may know it better as “Slap Back Triangles” – sewing a small square diagonally in the corner of a larger square to add a corner triangle. It’s a great technique I’ve used many times.

She inspired me with many other techniques and patterns. Way back in the 90’s I attended a group at a shop named “On Pins and Needles” in Sauk City, WI. It was a Mary Ellen Hopkins group called “Quilt Sitters Circle”. In it the owners shared loads of great ideas from Mary Ellen. I was even able to attend a lecture by Mary Ellen in Milwaukee. I learned so much there, and one of my favorite patterns was “Bricks and Mortar”. I made a quilt for my son’s bed using it (he was 9 then and is now 37).

I recently pulled out this pattern to make a quilt for my nephew Kevin and his wife Aly. You may remember me making them placemats for Aly’s shower back in August (to read that post click here). They actually were married before they left for their time with the Peace Corps in the Gambia, and yesterday they finally had a reception so family and friends could gather and celebrate them as a couple.

For their “wedding” quilt I pulled out another piece of the African fabric they brought me after their adventure.

I chose the colors for the quilt top from this fabric. It was too beautiful to cut up. I made the top from those fabrics at my guild retreat a few weeks ago.

Here are the measurements for the Bricks and Mortar pattern, in case you’d like to make one of your own:

The center square was cut 5 1/2″; the cornerstones 3 1/2″; the mortar strips 1 1/2″ x 3 1/2″; and the bricks 3 1/2″ x 5 1/2″. It’s constructed “log cabin” style. Everything fit together beautifully and it was an easy and fun pattern to make!

I finished it up mere hours before their celebration, and forgot to take a picture of it before I popped it into the gift bag. I will hopefully get a photograph of them with their quilt to post next week ?.

Have you made a Bricks and Mortar quilt? Do you have any memories of Mary Ellen Hopkins you’d like to share?

Stitched Circles

October 13, 2019 7 Comments

Many sewing machines have a circle maker for stitching circles onto fabric. I took a class in this technique from Libby Lehman at the AQS show in Paducah years ago. She was an absolutely wonderful teacher, and I was blessed to have taken many classes from her. Sadly, this was the last one prior to her stroke in 2013. Libby was an inspiration to many and her energy, talent, innovative quilts, and crazy sense of humor are truly missed by many of us.

I think of her whenever I look at quilts of mine which she inspired. The samples from her circle class are among those.

I share them in my “Going Round and Round” lecture and the last time I presented it I decided the time had come to put them into a quilt. The kit for the class included some of Ricky Timm’s hand-dyed fabric, we brought along our own variegated threads and… here are the sample blocks I made – up close and personal:

To make the above blocks we layered 2 squares of fabric and used the circle technique to straight stitch 3 circles of different diameters. We then cut away the top fabric from the center, and from the last “ring”. The fun began when we covered that straight stitching with decorative stitches and beautiful threads.

Our first decorated block was made with just a single layer of black fabric, so the circles of stitches are very obvious. Then we jumped into the colorful ringed pieces.

I learned a great hack for doing this type of stitching without the fancy gizmo for the machine, and it’s a lot of fun! Here’s what you need to try it:

  • a sewing machine with fun pre-programmed stitches (these are the stitches we want to play with, but seldom have a use for ?)
  • a 9″ square of fabric
  • a 9″ square of stiff tear-away stabilizer, or plain paper (I like to use scrap sheets from my printer)
  • variegated or bright colored thread in a variety of colors
  • a flat head thumbtack
  • a 2″ square of thin cardboard (cereal boxes work well)
  • clear mailing tape
  • a rubber eraser pulled from a cheap mechanical pencil

1. Fold the fabric square in half and then quarters to find the center. Mark with a pin. Secure the back of the fabric square to the stabilizer/paper square with a light spritz of spray baste, or pins in the corners.

2. Push the point of the thumbtack through the center of the cardboard square,

and place this on the bed of the machine, thumbtack point up, directly to the left of the needle, with the point of the tack half the diameter of your desired circle from the needle (this is called the radius – for a 6″ circle, the tack will be 3″ from the needle). Be sure the tack is directly to the left of the needle. Secure to the bed of the sewing machine with mailing tape, pushing the point through it.

Front view
Side view

3. Push the eraser over the point of the tack to protect your hands until you’re ready to sew.

4. Thread the machine with a pretty thread on top, and a thin polyester thread of similar value in the bobbin. Set the machine for a fun, decorative stitch.

5. Place the marked center of your fabric square onto the thumbtack, right side up. Lower the presser foot and begin to stitch – hands free! This may seem counterintuitive, but the feed dogs will pull the fabric under the presser foot while it pivots around the thumbtack, thus creating a stitched circle.

You may need to adjust the stitch length the last 1″ of each circle to get the stitch pattern to match (this takes a little practice).

Once a circle is stitched you can move and retape the tack a different measurement from the needle, change the thread and chosen stitch (or keep it the same), and create another circle. It’s loads of fun – and sew very simple!

Next week I’ll share an exciting way to put the blocks together – Quilt As You Go!

Birthday Quilt – Done!

October 6, 2019 7 Comments

It is with joyful thankfulness I get to post about my birthday quilt!

Many of you may remember sending me blocks for my 60th birthday because of an invitation from my dear friend Wendy. To read that post click here! You may also remember that I received 60 4-patches by the end of October that year (click here for that post ?).

Around that same time I was playing with scraps and made them into a unique lone star.

I loved the colors and the incredible scrappiness! I did a blog topic on this technique too! Click here to visit that post.

The week after I made the star my ThreadBenders group had challenged us to bring in UFO’s that we liked, but didn’t know what to do with. I brought my birthday blocks and my star. The general consensus at the meeting was to put them together ~ BRILLIANT!

I loved the idea, but all the parts sat in a pile (I’m sure you’ve never done that ?), until a few months ago when I decided I wanted to finish my birthday quilt in time for my 63rd birthday. And I did!

I love it! I put minky fleece on the back so it was super snuggly, and no batting. This made the quilting a bit challenging, it is slightly puckery on the front, but the back looks really cool (sorry for that adjective – it just fit):

The stitching shows up even better in low light:

As you can see, the backing green didn’t match the front, so I had to put a black binding on to separate the two. It’s fun and perfect for these cool Autumn nights.

The best part? Reading all the names and wonderful messages/Scripture verses many of you sent to me. Every time I wrap up in it, I feel like I’m hugging so many dear friends. You are all a blessing to me!

*****************

European Christmas Markets Cruise Update!

For the first time in all of our travels ~ we’ve had as many couples sign up for the cruise as quilters. This means quite a few men will be traveling with us on the Christmas Market cruise. We still have a few cabins left, and they need to be claimed this month (the deposit is due when booked, but the rest of the monies aren’t due until next year)! So, if this was a trip you thought of doing someday but wanted to do it with your husband, join us.  We promise, he won’t feel out of place ?! Then contact Kristi and sign up soon! Click here for all the details!

  • « Go to Previous Page
  • Page 1
  • Interim pages omitted …
  • Page 36
  • Page 37
  • Page 38
  • Page 39
  • Page 40
  • Interim pages omitted …
  • Page 77
  • Go to Next Page »

Primary Sidebar

Archives

Recent Posts

  • The Indiana Heritage Quilt Show ~ 2026
  • Bird’s Eye View
  • The Birds
  • Sew Much Creativity
  • A Last Minute Baby Quilt

Recent Comments

  • Kathy Wuhrmann on The Indiana Heritage Quilt Show ~ 2026
  • Doris Ast on The Indiana Heritage Quilt Show ~ 2026
  • judy raddatz on The Indiana Heritage Quilt Show ~ 2026
  • Jeanette Bussard on The Indiana Heritage Quilt Show ~ 2026
  • clkquilt on The Indiana Heritage Quilt Show ~ 2026

Categories

Footer

My Guide

Whatever you do, do your work heartily, as for the Lord rather than for men.

—  Colossians 3:23

Contact Chris!

  • Home
  • About
  • Gallery
  • Classes
  • Trips
  • Books
  • Blog
  • Contact
  • Sign Up For My Blog

Copyright © 2026 · Chris Quilts · Website by Adunate · Privacy Policy