Two years ago my cousin’s husband passed away unexpectedly at the age of 57. Jim was a wonderful man and this was a difficult time for our family. Another cousin flew up from Florida to stay with Mike and me. The morning of the funeral, as we were all teary eyed, Cindy asked me for a hankie. I handed her a packet of tissues. She then told me that difficult times like these demanded a hankie. I had never thought about it like that.
A few years before this my mom had given me a bag full of aprons and hankies from the women in our family. So I pulled it out

and we chose the ones we took with us that day.
Recently my friend, Eileen, and I were talking about how often we cry happy tears – especially during worship on Sunday mornings, in gratitude for what our Savior has done for us. I mentioned that I really should be following my cousin’s advice and use my heritage of hankies more often. She agreed, and said that she had purchased some hand-dyed hankies when we were in Paducah together, but they were too pretty to use.

I encouraged her to get them out because – if you never use it, you’ll never use it… so use it and enjoy it while you love it.
That was when I pulled out my bag of hankies once again, in preparation for today – Resurrection Sunday. I thought it might be a good topic to remind others of what our mothers and grandmothers knew. Hankies are a blessing.
In 2014 I wrote a post about a memory quilt I’d made called Lacy Hearts. I hand appliquéd hearts to muslin, embellished them and then hand-quilted it all. It was a fun project and I’ve taught a class on it a number of times.

Two of the hearts are made from hankies that were so worn I didn’t mind cutting them. The one in the upper left used the lacy edge of one hankie, and the lower right used the purple embroidery from another.

To read the post about this quilt: click here.
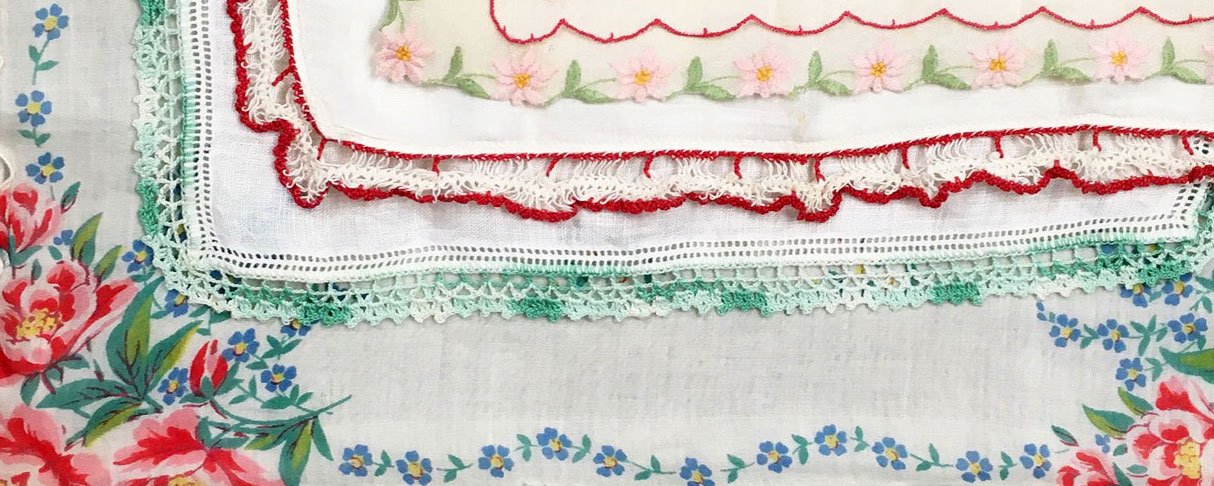
Some of the hankies in my collection look like new, like this one with the lovely edging made from variegated thread.

While many of the hankies in my collection were well used.

So many of them have lovely edging designs, but it seems that is the part that often wears out the fastest.

Others have beautiful embroidery.

I know that all of them came from a woman in my family tree, but I don’t know which one belonged to whom. In the photo above I think the one with the blue flower is likely my grandma Ardis’ because it is in very good condition. Blue was her favorite color, so I could see her saving that one for special occasions.
The next one was a souvenir of New York and I don’t think it has ever been used. The embroidery is lovely, but it has yellowed with age (I placed it on-point atop a white hankie so you could get the full effect).

The ones I have that are made from a printed fabric I think may have been the most utilitarian. This one is still in useable condition.

I think the following hankie is my favorite of the printed variety, but I can’t imagine how it got so stained. I wonder if one of my grandfathers used it to change the oil in the car ?.

Recently my friend, Vicky, made a quilt for a guild challenge centered around a “handkerchief lady” block. Her quilt is entitled “The Symbol of Love is the Heart”. Beautiful!

If you do an internet image search for handkerchief lady quilts, you will be amazed at the beautiful quilts that have been made from these lovely pieces of our past.
Do you have a favorite hankie? Do you use it? Would you like to share it’s story? Have you made a quilt from hankies? Please send me photos and stories at:
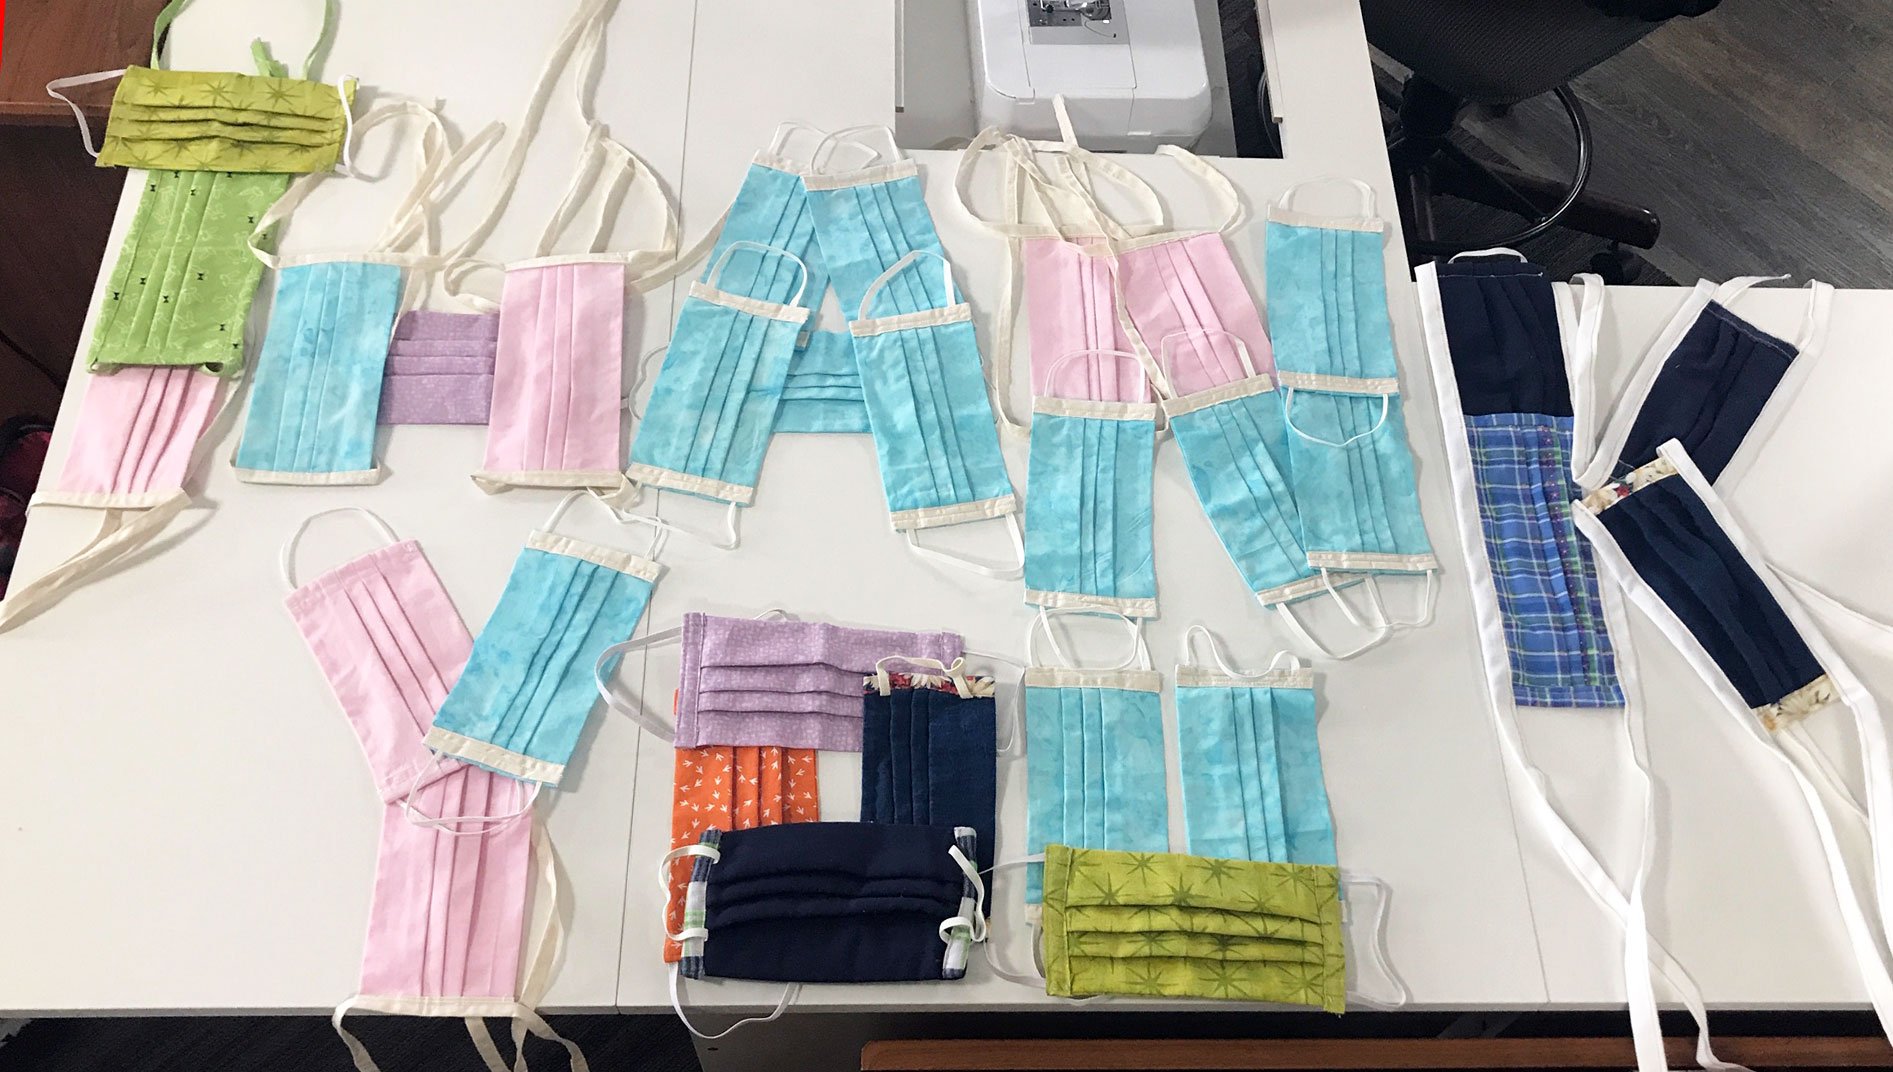
Face Mask Update
We continue to get requests coming in for face masks. As of today over 2750 masks have been donated through this project! Our contact and drop off points remain the same. Thanks to all who have been a part of this great project – and to all who continue to support our heroes! For all the information click here!
Happy Resurrection Sunday!