• Skip to main content
  • Skip to primary sidebar
  • Skip to footer

  • Home
  • About
  • Gallery
  • Classes
  • Trips
  • Books
  • Blog
  • Contact
  • Sign Up For My Blog

Blog

PaintStick “Appliqué”

March 3, 2019 3 Comments

When Wendy and I lead tour groups, we always have at least one project to teach while we’re traveling. Our recent cruise to Hawaii was a bit of a challenge concerning this topic because the ship traveled from island to island during the night and we had almost all of our daylight hours available to explore the islands. This was a good thing – Hawaii is a great place to have time in the sun :-). But, on most of our other trips we had a day or two “at sea”, giving us plenty of project time.

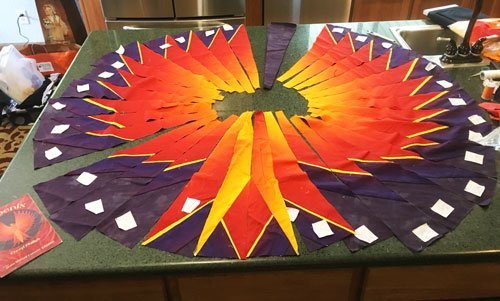
We were able to “squeeze” in two class sessions this trip, so we needed a fun project that could be accomplished in a short amount of time. What we came up with was Hawaiian Appliqué done with paintstick stenciling. I know I’ve posted this photo before, but this time I’d like to share a bit about the technique.

What’s so exciting about this technique is that the Shiva™ Oil Paintsticks are actual oil paint in a crayon form. They create beautiful designs that are permanent on fabric. Therefore they can be used on garments as well as quilts. It’s a wonderful way to put designs on fabric/clothes, but words could be stenciled too! Just imagine the possibilities!

I chose to put my Hawaiian design on a t-shirt.

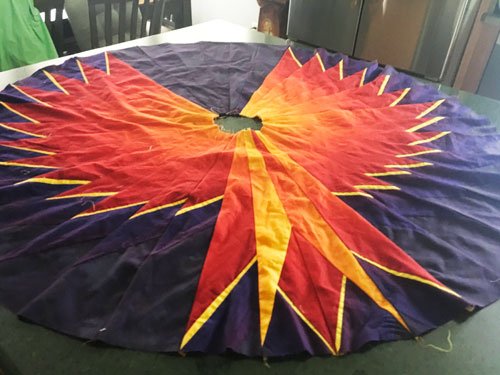
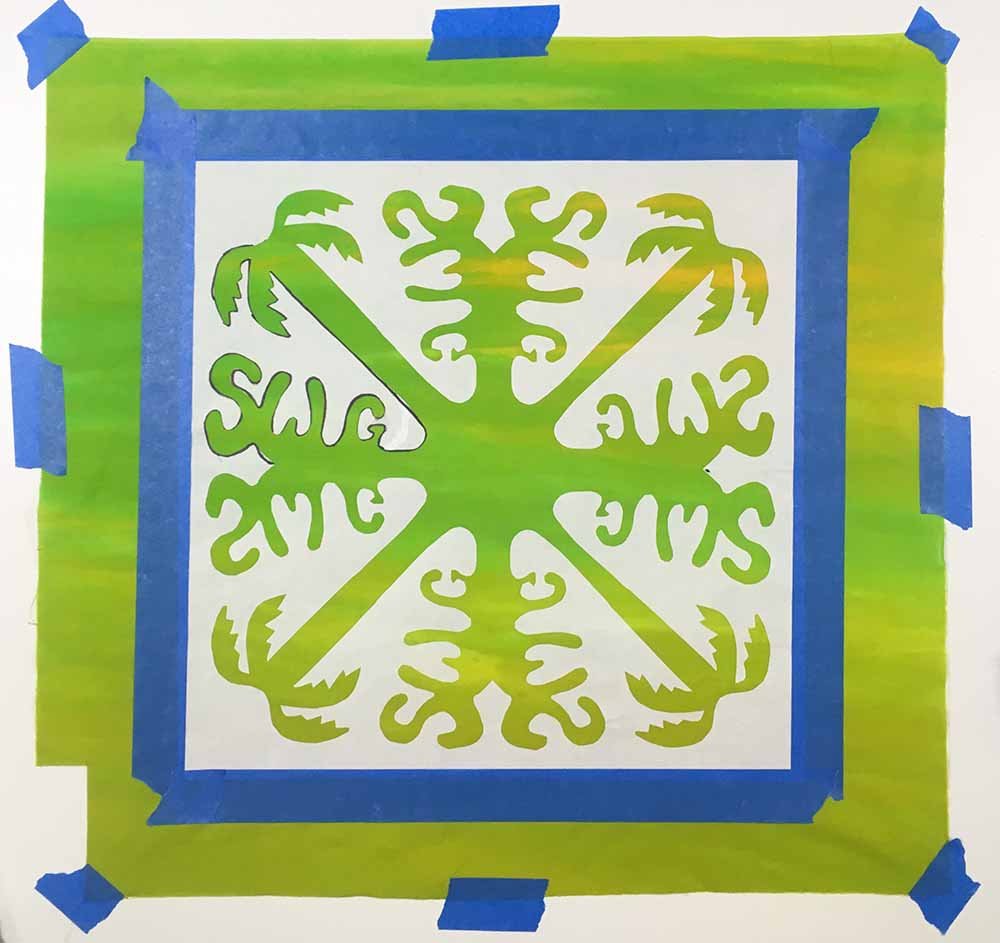
So – here’s how: The first step was to create the pattern “paper snowflake” style using freezer paper.

This was opened up to reveal the pattern and ironed onto the fabric, shiny side down.

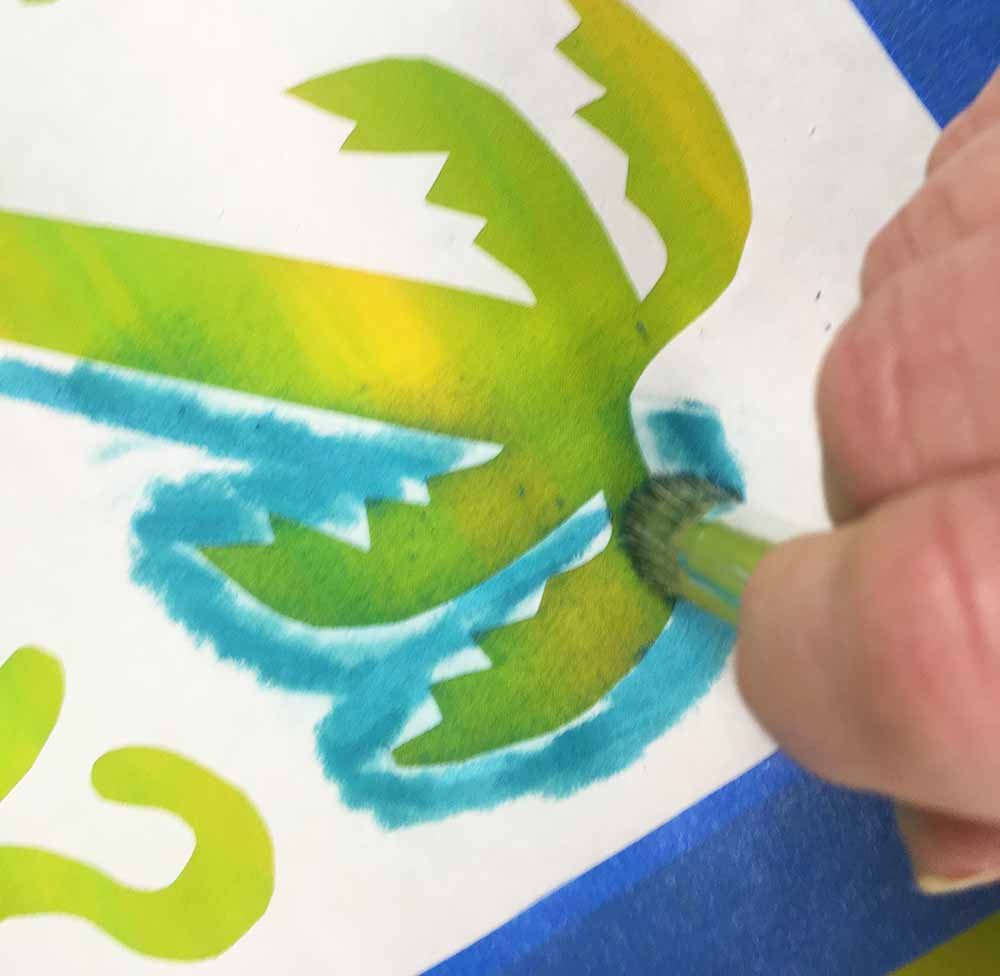
Then we colored along the paper edge with a paintstick, and dragged the paint onto the fabric with a stencil brush.

The results were great – and everyone got them done in the time we had available. We will be having a cruise reunion in April and we’re hoping everyone will bring their finished quilts for show-and-tell. I’ll post pictures at that time!

Quilt Problem Solving

February 24, 2019 12 Comments

Last Fall I was contacted by Renee. She lives in the Milwaukee area and she had a quilting problem. She’d begun an adventurous project, sewn quite a few portions together and then had to stop to have knee surgery. When she went back to it – it was a mass of pieces and she couldn’t make heads nor tails of it.

She invited me to come and see what we could do with her jumbled pile of pieced wedges. When I arrived I began by reading over the pattern. This only confused me more and I felt a little overwhelmed as to what to do next. Then I started looking at the wedges and realized they were numbered, and marked left and right! I told Renee how great it was that she had done this and then I said “let’s lay out what you have so we can figure out what you have left to do”.

With the first layout it was evident she had already done a large portion of the piecing. Whew!

We just needed to figure out which pieces were missing. A sense of relief filled the kitchen (from both of us :-)). We discovered there were 2 more shorter wing portions missing at the top, but we decided they weren’t essential and she could substitute 2  purple background wedges.

The tail portion was missing from the labeled pieces, but portions of it had already been made. Renee was short a few of the “chunks” the pattern called for, so we set up her machine and patched together what was needed from her leftovers. Even though placement of the gradation was not exactly the same as the original pattern, she had enough to get ‘er done .

At this point she felt confident she could piece it together, so we had a lovely lunch and I went on my way. She continued to work on it and got the wedges sewn together:

next she appliquéd the body:

and her Phoenix was ready for the quilter!

I waited a few months to share this post because I wanted to end it with a photograph of Matt and his quilt. Here’s Matt and Grandma Renee after he  got his Phoenix at Christmas. 

She said he was one very happy young man, and added:

“Actually we all thought it looked perfect on our fireplace, so guess what?  I’ll be making another one soon!”

Atta Girl Renee! I’m sure you won’t have any problems with the second one now that you’ve figured it out!

So my advice to anyone who is trying to get back into a previously started project – lay out what you have done before you do anything else.

Help For a Bleeding Quilt

February 17, 2019 8 Comments

A few weeks ago Lynn sent me the following comment. It led me to write this week’s post:

“I recently finished a quilt, washed it with color grabbers and still had the colors bleed.  Purchased the fabric at a reputable quilt shop and began a class using the batik fabrics the same day.  My question is would you please speak on fabric preparation before beginning process and also ways of rectifying disasters such as this?
Normally I wash all fabric before starting, besides bleeding have had unequal shrinking concerns, but when taking a class, this is not always possible.”

Yikes! I have only had this problem happen to me once, many many years ago, and I never did get the stains out. It was a scrap quilt in blues and one of the fabrics bled to the back of the quilt just a little, along the quilting lines, wherever that fabric happened to be in the quilt. I didn’t notice it right away and was grateful it was on the back. I simply use it and ignore the problem, but that probably isn’t the best way to deal with it :-).

I wrote Lynn back with supportive words and questions. She sent me this picture with her response:

“Actually didn’t dry it before noticing the bleeds and even washed it using color grabbers and cold water. After trying all suggested remedies: oxyclean, borax, dawn and finally bleach, (lighter fluid was the exception), I carefully painted worst bleeds with bleach.  Not totally gone, but much better.  Very glad this was going to be my quilt and not made for someone else.

Here’s a picture of her finished quilt. It is lovely!

So – I’m hoping this post will be the start of some information sharing that will help all of us with future problems. As most of us know, color bleed occurs when fabric gets wet and dye leaches out of the fibers. This commonly occurs in the washing machine and can result in color transfer between items in the load.

So here are a few of my own thoughts, and some recommendations I got off the internet:

Prevention is the best solution!

Pre-wash your fabrics! Especially if the quilt is made to be used and washed (I have to admit I don’t always wash the fabrics I use in my art quilts because I don’t plan to ever wash them, but I realize this is not a super wise decision).

I’m always concerned that putting all the fabrics in the washer with a color catcher to pre-wash them may not stop a problem, so I typically fill the sink with a couple of inches of lukewarm water and, beginning with the lightest value fabric, I submerge the fabric and then squeeze out the excess water. If the water stays clear, I throw that piece in the dryer and go to the next lightest fabric. If one of the fabrics does bleed, I continue to rinse it, change the water, rinse it… until it stops bleeding. If it doesn’t after 4 or 5 changes – I don’t use that fabric! When all the fabrics are “safe” I throw in a color catcher/grabber and turn on the dryer. This has worked well for me.

In Lynn’s case, she didn’t have the chance to pre-wash her fabric because she took the class the same day she purchased her fabric. I have had this happen and my solution was to cut a small piece (2″ square) from each of the fabrics that look like possible bleeders, get them wet, squeeze the water out, and lay them on a white piece of paper towel. I leave them for 5 to 10 minutes and if the paper stays white, chances are they’re ok.

Another good idea is to put a color catcher/grabber sheet in with every quilt you wash.

Too late – the quilt came out of the washer bleeding!

Lynn tried some of these options, and didn’t have perfect results, but they are a good place to start:

Don’t let it dry!!!  I’m not kidding – if you let it dry the stain will set and be much harder to remove. Make a paste of a color-safe, oxy-bleach mixed with lukewarm water (not actual bleach!) Spread it over the stained area and allow it to penetrate for 5 minutes. While that sits, mix the oxy-bleach into a bucket full of lukewarm water (follow manufacturers instructions for amounts). Once dissolved, stir in one gallon of cool water and submerge the quilt in the mix. Let soak for one to five hours. Rinse well and repeat if needed.

As I did some research on the web, variations on the above instructions came up again and again. If your quilt does dry it would still be worth trying this process.

Another suggestion I found was in a comment to a blog from “Sarah” who said Carbona Run Remover is “amazing, amazing, amazing! Doesn’t do a darn thing to the colors that are supposed to be there, but gets the ones out that aren’t.” You can find information on this product at: https://carbona.com/products/laundry-care/color-run-remover/ . 

She also recommended Grandma’s Secret Spot Remover. I found both at Walmart and JoAnn’s on-line, and I think I need to purchase them to have on hand – just in case.

I have one more suggestion for a quilt that has dried and no amount of effort or product gets the stain out. My dear friend, Sharon Rotz, had this problem with one of her wonderful quilts. It was featured in her book “Log Cabin Quilts With Attitude”:

I remember her telling me about it years ago, so I emailed her and asked if I could share her story:

“As far as the efforts to clean up the bleeding quilt, I used quilt soap, dye magnet sheets in washer, then desperately, laundry detergents and finally appliqué. On the up side, the quilt is very soft from being washed so many times!”

Appliqué is a good option if all else fails. The worst of her quilt’s bleeding was on the back so, in keeping with the garden theme, she appliquéd fabric printed with seed packets!

She even added a few packets to the front. Here’s a detail photo:

Well done Sharon! 

So now it’s your turn. Do you have a story about a bleeding quilt? Was the outcome good or not so good? Any fixes we haven’t touched on yet? Have you tried any of the products or ideas mentioned with success? Please share so we can all learn!

Fabric Origami

February 10, 2019 7 Comments

A few weeks ago I shared a picture of the origami Hawaiian shirts we made while on our Hawaiian cruise (they measure about 2″ x 3″). The updated picture above shows the shirts with leis Wendy crocheted for everyone.

The idea originated with an ornament my friend Jean blessed me with a few Christmas’ ago. She’d found the pattern while vacationing in Hawaii and was kind enough to share it with me. The problem – we wouldn’t have access to enough irons to make this project according to directions while on board the ship. Hmm…

First I tried making a shirt out of scrapbooking paper, but it wasn’t fabric (I really prefer fabric – and I’m sure you get that).

Next, I found a “Layer Cake” of tropical batiks that I thought would look great (in case you don’t know, a “Layer Cake” is what quilters call a pack of 10″ squares). I shrank the pattern down a bit and tried to make a shirt by simply finger pressing the tightly woven batik, but it was too limp.

Then I had a very distant memory come to the surface: years ago, when I first taught quilting at MATC in Watertown, my friend Barb told the story of her time in nursing school when she and her roommates would need to make their caps crisp and stiff. To do this they soaked them in liquid starch and smoothed them onto the shower stall. It was worth a try!

Our shower stall has never been this colorful! When they were dry I peeled them off and ironed them smooth. The side of the squares that touched the shower came out shiny, so we folded that side to the inside when doing the origami. It was simple to cut the squares into the appropriate sized rectangles and the fabric finger pressed beautifully. All of our travelers were successful.

I didn’t get a photograph of the group with their folded shirt ornaments, but we’re having a cruise reunion in a couple of months and I’ll be sure to have everyone bring their’s along so I can send a quick pic in a future post :-).

So, if you ever want to try an origami pattern with fabric – now you know the easy way! And if you’d like to try making your own Hawaiian shirt ornament – I did an internet search for videos on origami shirt ornaments and there were quite a few to choose from :-).

Treadlemusic

February 3, 2019 5 Comments

Last October I had a wonderful time teaching at a Quilt Festival in Spring Grove, MN (Click here to read the post I wrote about that visit). While there I met a very talented quilter and I was blown away by her work. Her name is Doreen and she describes herself as “A quilter who rides a motorcycle, living on a small hobby farm in southeastern Minnesota. Grandmother and Great Grandmother and now retired.”

Treadlemusic is what she calls her business and it is a fitting name for what she does. Her machine quilting is exquisite (she was actually doing it while at the show, but what I found most engaging about her work is what she does with vintage linens!

Aren’t they amazing?!? She truly gives new life to old pieces. In this picture you can see her “before” and “after” on a simple embroidered doily.

Here’s a link to just one of her blog posts: https://treadlemusic.wordpress.com/2018/11/05/aurorafinal-chapter/

Have you ever used vintage linens in your quilts? Doreen has really encouraged me to look at my collection of doilies and tablecloths as a drawer full of opportunities. Thanks Doreen, for letting me share your quilts and inspiration!

*********************

Also… Today was the Artist Reception for the Quilt As Art exhibit at the Cultural Arts Center in Whitewater, WI. I’m posting a little late, as I just returned home. The exhibit is being held in a lovely old building on Main Street. There are seven artists whose work is on display and the variety of work is fascinating. Here are just a few pictures:

The show runs from today until February 24th, and the gallery is open Thursday – Sunday; noon to 5pm. For all the details please go to: https://www.whitewaterarts.org/quilt-show-february

Silhouette Appliqué

January 27, 2019 1 Comment

I’ve posted about my Repliqué technique a few times in the past, but I don’t think I’ve ever featured the great way it works to create silhouettes on your quilts.

The very first time I tried it was for a challenge back in the 90’s. A year ago I did a post about that challenge (please click here to read that post), and this is the quilt I made for it:

Just so you aren’t too impressed with my artistic abilities, the floral design was actually printed on the fabric, white-on-white, and I simply stitched along the foliage.

What I loved about the technique was that it used machine free-motion stitching, but I didn’t need to be perfect at it, because the stitches wouldn’t show like they do when free-motion quilting. I’ve used it for many quilts since then. Here are just a few:

Silhouette design 1
Aunt Gracie’s Farm
Brad’s Grad Quilt

One of the projects I’ve been working on recently involves silhouettes of Mike and me with our grandkids. This one is of Hanna and me when she was 2 (she just turned 13 – oh my!)

After making this one I needed to do one of Grandpa with Willy when he was 2 (now he’s almost 11 – the years do fly by).

This past year I’ve made a quilt of Trey helping grandpa stack wood (he’s 3).

And Sommer quilting with me. She was almost 6 at the time. She may be a bit older than the others, but I loved the photo.

I hang them in a grouping using my Modular Memory Quilt technique (please click here for a previous post about it).

I’m in the process of writing a book on many of the techniques I use in my Modular Memory quilts and silhouette appliqué will be covered in it. So if you’re intrigued by this technique – stay tuned :-).

If you live nearby, and would like to try your hand at creating silhouettes in fabric, please consider signing up for my February 22nd class at WCTC.

You’ll learn to repliqué the floral pattern onto a beautiful background fabric, and the exciting part is – we’ll be doing free-motion satin stitching! It’s actually fun because the stitches are so close together it’s almost impossible to do it wrong :-). You can sign up at www.wctc.edu, but please do it soon. I need a few more students for the class to run. Email me at with any questions.

******************************

and one more thing:

I’m participating in an upcoming quilt show in Whitewater, Wisconsin called:

The Art of the Quilt

and here are the details:

A quilt show will be featured at the Whitewater Arts Alliance’s Cultural Arts Center, 402 West Main Street, from February 1 to 24, Thursdays through Sundays from noon to 5 p.m.  There is a free reception, open to the public, on Sunday, February 3rd from 1 p.m. to 3 p.m. at the CAC.  

February will find one of the Whitewater Arts Alliance’s most popular exhibits returning to the Cultural Arts Center.  “The Art of the Quilt” will feature the work of several talented area quilters.  As of this date, the WAA has commitments to share their creativity from Mary Althaus (Whitewater), Chris Kirsch (Watertown), Rita Oehrke (Palmyra), Lori Schloesser (Watertown), Michele Smith (Whitewater), and Sue Theune (Whitewater).

I’d love to invite you to the reception on Sunday, February 3rd. All the artists should be there and it promises to be a fascinating show. I will have many of my favorite quilts on display. If you can’t make the reception, but you live in Southeastern Wisconsin, please consider taking a ride out to Whitewater during the month of February to add a bit of color to your snowy winter!

Aloha

January 20, 2019 7 Comments

Our Hawaiian cruise was a sunny, fun and fascinating time in paradise. It may be over, but I have so many wonderful memories and I’d like to share a few with you!

Wendy and I began our trip with a few days in Honolulu simply getting use to the warmth and sunshine. By day two we were ready to walk to the top of Diamond Head.

That evening the rest of our group joined us and the next morning we were on our first tour – to Pearl Harbor. It was a very moving experience.

From there we boarded the Pride of America (how fitting). There were 40 of us total and it was a fun and friendly group.

We visited 5 ports of call on 4 islands and were blessed to see volcanos, waterfalls, rain forests, sandy beaches, along with macadamia nut, cocoa and coffee plantations. This trip had it all!

Fern Grotto flat bottom boat ride in Kauai
Napali Coast

Some of us were even able to swim under a waterfall!

Not only were the flora and fauna beautiful, but we found a few quilt shops along the way:

Yellow Hibiscus – the State flower
Quiltina just can’t resist a bit of photo-bombing!

Our class time went well. All participants had great results with their Hawaiian Paintstik Appliqué projects.

And we even threw in some extra fun – making fabric origami shirts to be kept as Christmas ornaments. A lovely reminder of the trip.

I will be sharing some additional photos and inspiration in the next few blog posts, but today I’d like to leave you with this lovely sunset view.

***********************

And one final note:

I came upon this information recently and I’d like to share it before I forget. In my free motion quilting classes we talk a lot about machine tension. In Bob’s latest email from Superior Threads he posted a great handout on thread tension, complete with easy to understand diagrams. Click here to see it – and print it out!

Merry Christmas 2018

December 23, 2018 15 Comments

Christmas is such a beautiful season and I’d like to set the tone for this year’s post with a picture of a lovely Christmas angel made from a hymnal by my dear friend Maria. 

What a treasure. Thank you Maria!

Every Christmas my friend Sharon and I like to ring and sing for the Salvation army. This year my grandson Trey joined in for the first half hour. We’ve been doing this for at least 16 years, and it’s still a bright spot in my Christmas season! 

Another tradition is cookie baking. My mom and I have never missed a year since I was old enough to help. Dad’s a big help too. His best skill is tasting our results, but he’s gotten quite good at decorating gingerbread men and unwrapping kisses with Trey. My daughter-in-law Betsy, along with Sommer and Trey, are now part of the tradition. So much fun!!!

The tree is up, the gifts are wrapped, and the house is ready for the upcoming celebrations.

For years I used to overdo and stress about the holiday preparations, but in recent times I’ve cut back to just the essentials and my focus is daily on the true gift of Christmas – the birth of our Savior – who became a man, lived a sinless life, then suffered and died to save us from our sins and prepare a place for us in heaven. 

“For God so loved the world that He gave His one and only Son, that whosoever believes in Him shall not perish, but have everlasting life” John 3:16

What a wonderful reason to celebrate! God bless us, everyone!

  • « Go to Previous Page
  • Page 1
  • Interim pages omitted …
  • Page 40
  • Page 41
  • Page 42
  • Page 43
  • Page 44
  • Interim pages omitted …
  • Page 77
  • Go to Next Page »

Primary Sidebar

Archives

Recent Posts

  • Quilting in Bloomington ~ Part 2
  • The Indiana Heritage Quilt Show ~ 2026
  • Bird’s Eye View
  • The Birds
  • Sew Much Creativity

Recent Comments

  • judy raddatz on Quilting in Bloomington ~ Part 2
  • Kathy Wuhrmann on The Indiana Heritage Quilt Show ~ 2026
  • Doris Ast on The Indiana Heritage Quilt Show ~ 2026
  • judy raddatz on The Indiana Heritage Quilt Show ~ 2026
  • Jeanette Bussard on The Indiana Heritage Quilt Show ~ 2026

Categories

Footer

My Guide

Whatever you do, do your work heartily, as for the Lord rather than for men.

—  Colossians 3:23

Contact Chris!

  • Home
  • About
  • Gallery
  • Classes
  • Trips
  • Books
  • Blog
  • Contact
  • Sign Up For My Blog

Copyright © 2026 · Chris Quilts · Website by Adunate · Privacy Policy