• Skip to main content
  • Skip to primary sidebar
  • Skip to footer

  • Home
  • About
  • Gallery
  • Classes
  • Trips
  • Books
  • Blog
  • Contact
  • Sign Up For My Blog

Blog

A Lunch Bunch Quilt – Part 2

September 13, 2015 Leave a Comment

This past weekend was the Madison Quilt Expo. It was a great show! I’m inspired, and exhausted 🙂 . I’ll post about that soon, but this week I want to continue the lunch bunch quilt story:

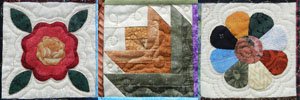
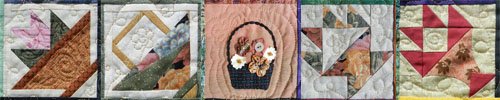
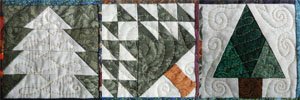
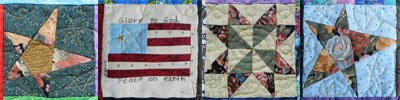
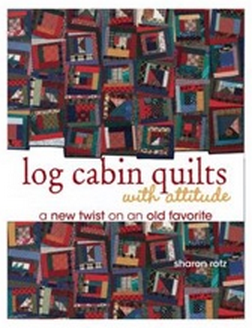
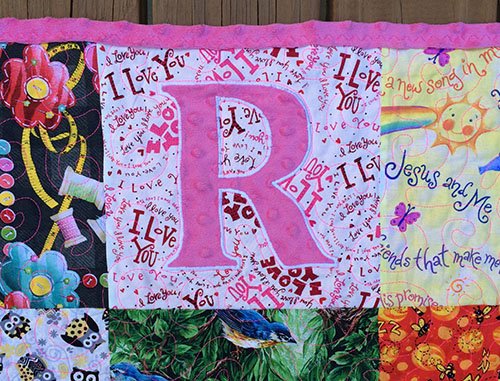
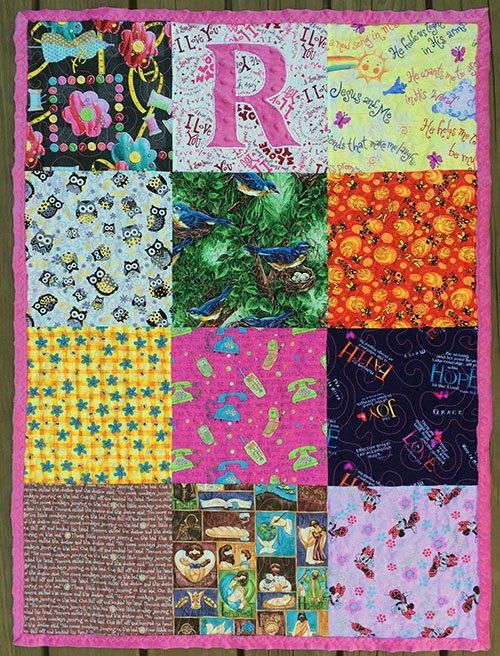
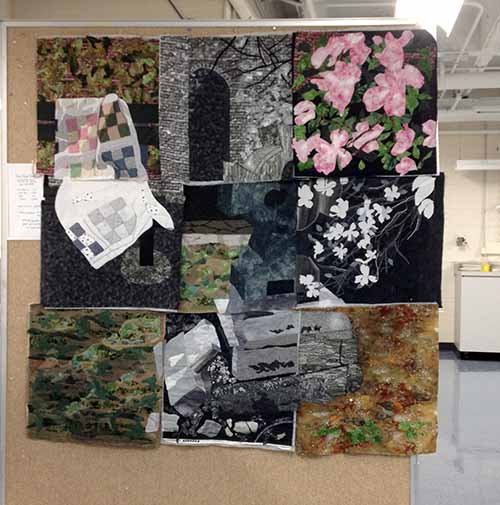
Last week I introduced you to my Lunch Bunch blocks and the idea for using them in a bed-sized “Log Cabin Quilt With Attitude” (if you’re new to the blog this week, please click here for the original post). Once I made all the wonky log cabin blocks, I stitched them into columns, and decided it would be a great idea to layer and quilt these columns individually, rather than make and quilt the entire top.  It was so enjoyable quilting the long skinny pieces!

Lunch Bunch Quilt column

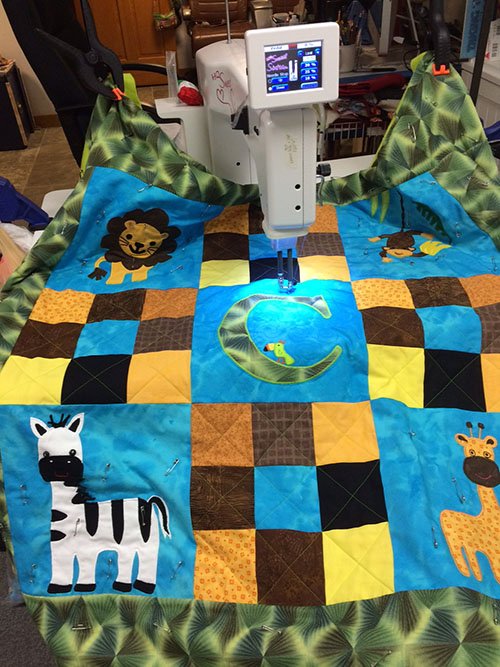
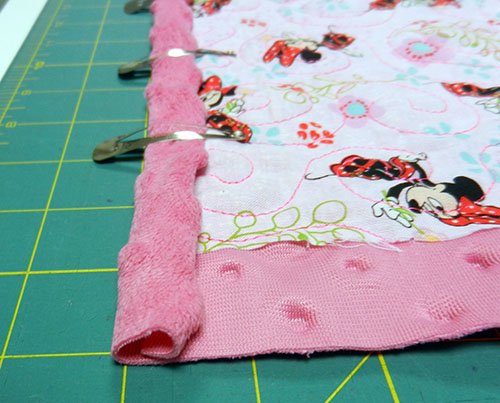
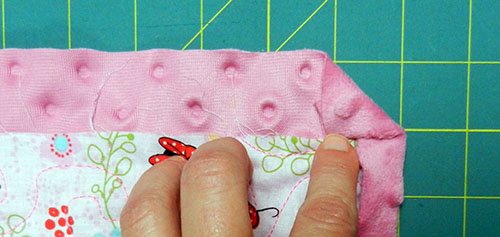
Once all the columns were quilted, I connected them with the “Reversible Quilt as You Go” technique I used in my grandkid’s quilts. (click here to read that post).

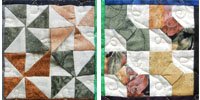
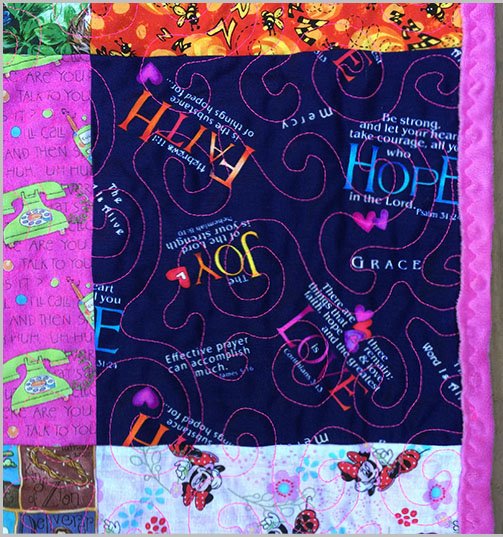
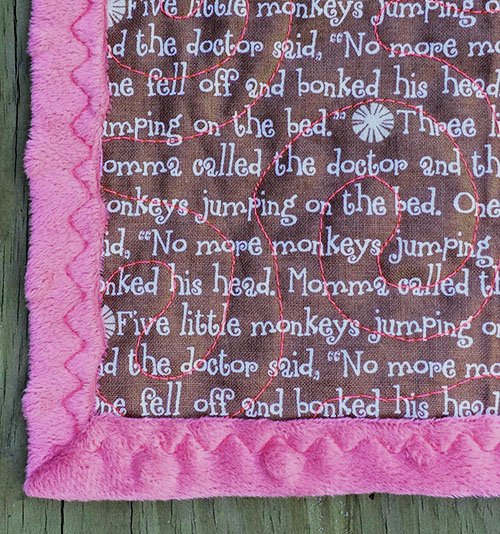
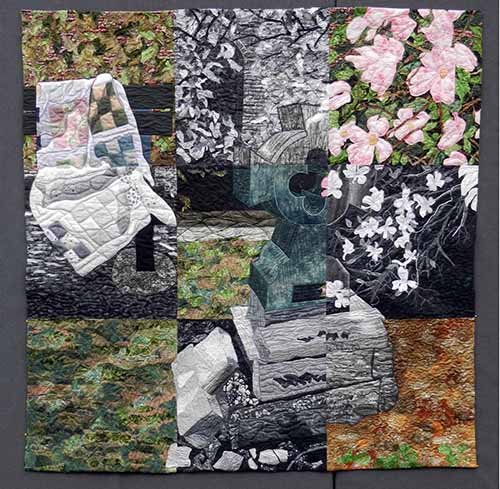
I decided to use 2 different backing fabrics on the columns, this made the back of my quilt quite interesting.

Lunch Bunch back
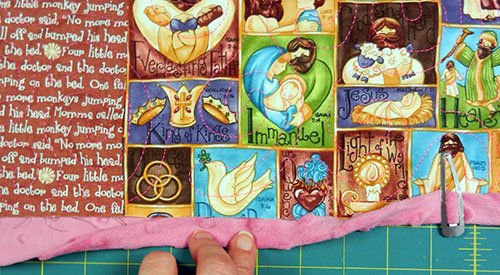
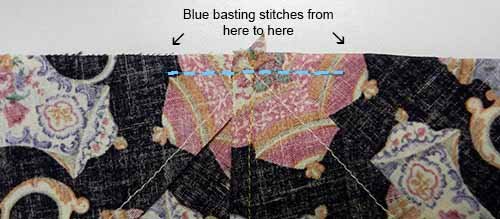
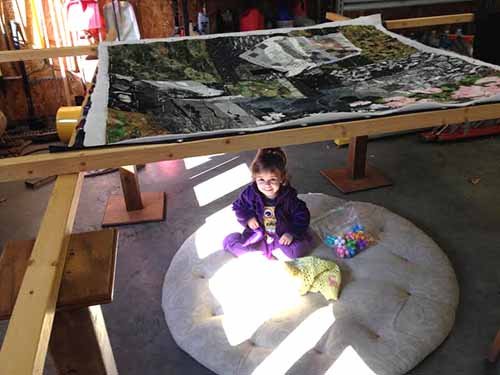
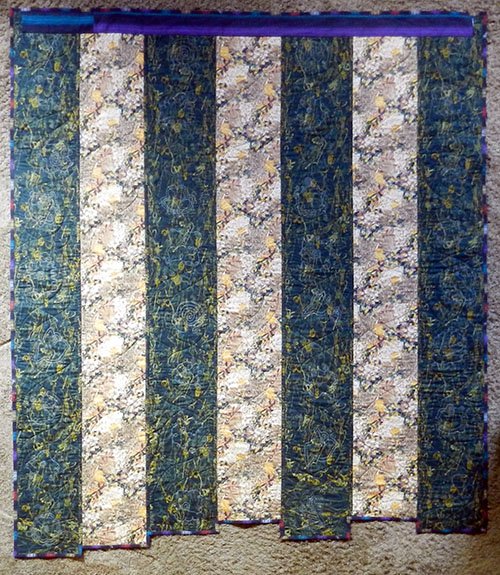
You may remember that the blocks were all squared up to 10 ½” in width, so that they’d fit together into the columns, but the lengths were all different. As you can see, this left me with a very unusual lower edge. Sharon showed this bottom edge effect in her book, and I like it! But how does one bind such a quilt? That will be the “topic of the week” next time. I’ll show you the finished front then too.

Don’t Forget the Block Stack Challenge!

I’ve had 2 pictures of exhange blocks sent in. Others emailed that they didn’t know if they’d have time. There is no time limit and no one seems to have an abundance of time. So, if you are at all inclined, please send a picture of your blocks. It may be a ways off into the future, but you just might get yours together and win. Here is the challenge once again:

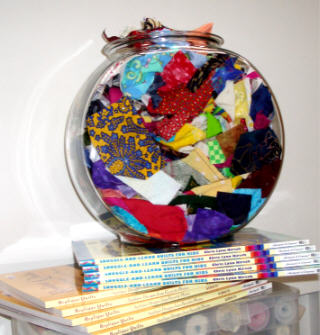
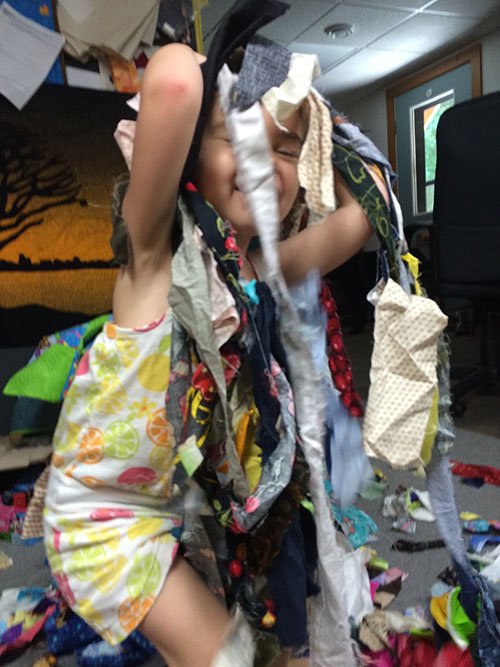
Do you have a stack of exchange blocks just waiting to become a quilt? I’d like to challenge you to send me a picture of your stack of blocks (feel free to arrange them any way you like – thrown all over the room, or in one tall stack, or artistically draped, or… ???). I’ll then post the pictures (without naming names) and challenge each participant to put them in a quilt. The first one to actually make their blocks into a quilt will get their name and photo in the blog, along with a wonderful prize of my choosing!!!

A Lunch Bunch Quilt

September 6, 2015 4 Comments

Before we get to this week’s topic, I just have to share a picture of three quilts. After last week’s post about baby Caleb’s quilt, Eileen emailed me this message:

“Hello Chris, Delighted to hear more Mom’s are going for the “jungle theme”!  I made these three quilts (my own design) for my Goddaughter’s baby boy.  Couldn’t settle on which animal she might like.  As it turned out she went with elephants for much of her theme in the baby’s room.  Whew – glad I made one!!  But she got all three and seems to love them.  Little too early to tell which one Baby Bennett will like!”

Eileens animal quiltsWhat a lucky little boy – to get all three! I think Eileen may have to market her designs – those animals are adorable. Thanks Eileen!

So – what’s a “Lunch Bunch” quilt?

Back in the late 90’s I belonged to a local guild, Common Threads, that met on Wednesday mornings. One of the great things about this larger guild, was that it had smaller sub-groups called “Bees”. These smaller groups allowed us to get to know some of the members one-on-one. There was a “Scrap Bee”, “Charity Bee”, “Miniature Bee”, and an “Appliqué Bee”, just to name a few. Each “Bee” had a “Queen Bee” who ran that group and chose the time and location for the bee. All of the bees were kept organized by the “Beekeeper”. It was a great idea!

The “Bee” I joined was called the “Lunch Bunch Bee”. We met at a different restaurant for lunch after the meeting each month, and exchanged 4″ blocks. We chose a different block theme each month. There were 7 of us in the group,

lunch bunch quilt makers
Sally Boaz, Pat Smith, Mary Camacho, Joan Wilson, Elrid Johnson, Ann Wanke and me

which meant we needed to make 7 identical blocks each month and we did this for 8 months. We kept them in fabric covered boxes we covered in a guild class. Joan is holding hers in the picture above, and here’s a close-up of mine:

Lunch Bunch box

I didn’t think to photograph all the blocks before making a quilt with them, but I did take pictures of some of my favorites after the quilting was done (these were placed together as you see them here in Photoshop, you’ll need to wait to see how they fit into a quilt):

3d board
3-D Blocks
bird board
Bird Blocks
heart board
Heart Blocks
flower board
Flower Blocks
basket board
Basket Blocks
tree board
Tree Blocks
leaf board
Leaf Blocks
star board
Star Blocks
Screen Shot 2015-08-09 at 3.46.03 PM
You can order one on her website:  http://www.bysher.net/bysher/Books.html

These blocks sat in the box for a long, long time! Then my friend, Sharon Rotz, wrote a book called Log Cabin Quilts With Attitude.

I decided my 4″ block collection would make great centers for these crazy log cabin blocks.

It was so much fun, I wanted to make more blocks and came up with additional centers.

Lunch Bunch Quilt wonky block2

I cut each block to finish 10″ in width, but I let the length be determined by the wonky strips added to each one. I then sewed them into long columns. Because the blocks were the same width, they all fit together into the column, but the columns themselves ended up being a variety of lengths.

Since this quilt is one of my bigger ones, and it took many years to create, I’ve decided to make this a series post. Next week you’ll find out how the columns were quilted and  put together. The following week will have information on a slick binding technique – and a picture of the finished – yes, I said finished – quilt!

A Block Stack Challenge

Do you have a stack of exchange blocks like mine, just waiting to become a quilt? I’d like to challenge you to send me a picture of your stack of blocks (feel free to arrange them any way you like – thrown all over the room, or in one tall stack, or artistically draped, or… ???). I’ll then post the pictures (without naming names) and challenge each participant to put them in a quilt. The first one to actually make their blocks into a quilt will get their name and photo in the blog, along with a wonderful prize of my choosing!!!

Coordinating a Baby Quilt

August 30, 2015 4 Comments

My niece, Rachel, is expecting in October and this past weekend was her baby shower. Three weeks prior to the event I realized I hadn’t made a quilt (the story of my life lately). I went through my stack of crib sized UFO’s, but nothing seemed right. Rachel was registered at Buy Buy Baby, so I went to the store registry listed on the invite and discovered that all the nursery items had a jungle theme and are from the Lambs & Ivy® Peek-a-Boo Jungle collection (please visit their website: http://lambsivy.com/pages/bedding-collections – their designs are delightful!). The jungle animals on the crib sheets and room decor were adorable. I thought it would be fun to make a quilt that coordinated with them.

Now I need to add a disclaimer. I made my own versions of these designs for my own personal use, to go with the other pieces purchased for baby Caleb. Please be aware of copyright!

I used my Repliqué technique to create the animal blocks. I added Caleb’s initial and set these squares with 9-patch blocks. What fun! Next it was time to quilt. About half way into the quilting I realized there was a problem. Can you find it?

Caleb quilt quilting - mistake

I decided to go with the Amish adage “Only God is Perfect”, and continued quilting. (In case you didn’t find it, one of the 9 patch blocks is turned)

While Wendy and I were in Portland last month we visited the Rose Gardens. They were spectacular.

Caleb roses 1 Caleb roses 2

In the gift shop we both had to purchase new “free motion quilting gloves” – so I decided to give them a try (can you believe some people actually use them for gardening?!?).

Caleb quilt quilting gloves

They are oh, so pretty, and they work great too!

I put fleece on the back of the quilt, and turned it to the front for the binding, just like I did for my granddaughter Rainee’s quilt. It really is soft and squishy – just right for a baby!

Caleb quilt back
Outline and spiral quilting from the back

I finished quilting it just as Trey got up from his nap.

Caleb quilt - Trey

I think he approves 😀 !

I presented the quilt to Rachel at her shower and she was very excited! It is such fun to give a gift we make ourselves. I just wish I’d taken a picture of her with the quilt. Maybe in a future post 🙂 !


The Sisters Show

July 13, 2015 4 Comments

I’m writing to you from Oregon where Wendy Rieves and I are enjoying the company of 31 delightful quilters while participating in every aspect of the 40th Annual Sister’s Quilt Show! We began our trip in Portland and then bussed our way down to Sisters, shop hopping to 4 quilt shops along the way. Each one was unique and we loved them all!

We began at the Cotton Patch in Keizer, OR – a bright and cheery store with a generous owner and a friendly staff. Then it was on to Salem and Greenbaum’s Quilted Forest. A big store in the heart of downtown, with lots of fabrics and sample quilts. We also visited BJ’s Quilts in Bend. Another friendly shop with loads of exciting things to choose from.

shop hop or

The 4th shop we visited was the the Stitching Post in Sisters! This is the store where Jean Wells started it all 40 years ago!

Stitchin Post Sisters

This was on Thursday, because we wanted to beat the crowds to this special store. There were still plenty of people there, but the shopping was good. This store had so many creative patterns and little extras, plus a huge fabric selection.

Stitchin Post

When Jean Wells started the Sisters Outdoor Quilt show, I’m sure she never imagined it would become the quilter’s “bucket list” destination it is today. The quilts are hung on the second Saturday in July, on the outsides of the buildings, for one day only. I decided I needed to take a picture of the main street two days before the show for comparison purposes  🙂 ! So hear it is on Thursday:

sis Thursday

And this was Saturday:

Sisters Quilt show

Friday we went to visit the vendors at the Fair Grounds in Redmond – and then it was off to the picnic. 800 quilters were fed a yummy meal of hamburgers, watermelon, and cupcakes!

Sisters picnic

This was followed with a greeting by Jean Wells herself, and entertainment which included Alex Anderson, Laura Wasilowski and some wonderful singing by 5 of the Gee’s Bend quilters.

Sisters picnic Gees Bend quilters

The next morning we arrived back in Sisters for the show. Over 1400 quilts were hung that morning (most attached to heavy wire with clothes pins), and it was even better than we’d imagined. This was our first view of the side of the Stitchin Post that morning:

Sisters quilt show 2015

But that was only the beginning of the quilts. They were hung on just about every building on the main street, plus many buildings on many other streets. The shops in the town were varied and wonderful – from art galleries to antique stores. There were also vendor tents set up wherever there was room. Good food, good music, great shopping and…

The weather was amazing! 70’s and partly sunny! We didn’t have to deal with the usual high temperatures and blazing sun. It couldn’t have been a better day for an outdoor quilt show. However, the wind did pick up in the afternoon and we were able to see a Quilt Rescue Team-member in action  😛 .

Quilt Rescue Team

It was a very full and extremely enjoyable day! I highly recommend a visit to the Sister’s show. I hope to return some day soon.

This was our 9th Sew We Go adventure! We traveled with a great group who loved to laugh and socialize. We really enjoyed getting to know each other and traveling together on this exciting trip which also included Portland and the Columbia River Gorge.

If sharing a Sew We Go adventure with Wendy and me is on your bucket list, please consider saving the date for our upcoming cruise of the Adriatic! Our travel planner Kristi, is putting the final details together for September 24th to October 1, of 2016. We will be visiting Venice, Croatia, Turkey and Greece, seeing all the sites and including many memory making extras – arranged just for quilters. As soon as the details are ready, I’ll share them here on the blog!

******************************

And just a quick update on the quilt I featured in last week’s post. I had a wonderful visit with Hanna, Willy and Rainee this past week. I gave Rainee the quilt for her birthday – and she loved it!

Rainee Gma quilt 7-15

Turned Binding

July 5, 2015 4 Comments

Our youngest granddaughter, Rainee, lives in Washington State, and she just turned 3. I decided she needed a new snuggly quilt (with only a short amount of time to make it). I asked Sommer to help me pick out “I Spy” type fabrics once again. This time I cut 9″ squares and pieced them together. I also thought it would be fun to Repliqué her initial in one of the blocks using the technique from my Snuggle & Learn book.

turned back to front binding

A number of friends have been backing their kid’s quilts with Minky fleece recently, and it sounded like the perfect choice. Sommer loved it’s softness! I also wanted to turn the back to the front for a soft edge, as opposed to a traditional binding. While backing and finishing the quilt, it hit me that this would be a good topic of the week, so here are some of the things that worked for me.

*  When laying out the Minky backing, I smoothed it on the work surface, but didn’t stretch it at all. In the past I’ve had pucker problems if I stretched it (even a little).

* I made sure the backing was at least 3″ larger than the quilt top, and I chose not to use any batting.

*I smoothed the top onto the wrong side of the backing and safety pinned it well. Then I free motion quilted it (this also helped to not stretch anything) – in my favorite spiral pattern.

turned back to front binding

* Once the quilting was complete, I trimmed the backing 1 ¼” away from the edge all the way around.

turned back to front binding

*Then the fun of turning began. Step 1. Begin on a long edge and fold the raw edge of the backing up to meet the raw edge of the quilt top. Then bring the fold up to the top and clip or pin.

turned back to front binding

2. Do this all the way off the next edge.

turned back to front binding

3. Bring the folded outside edge up to the raw edge of the quilt top, gift wrap style, creating a miter.

turned back to front binding

4. Fold the new raw edge of the backing to the raw edge of the quilt.

turned back to front binding

5. Then bring the folded outside edge up to the top and clip or pin.

turned back to front binding

6. Continue all the way around and then machine stitch in place with a decorative stitch.

TB miter stitched

Voila – a quilt with a snuggly soft back and edge!

turned back to front binding

The day Sommer helped me pick the fabrics for her cousin Rainee’s quilt, she noticed my fish bowl full of scraps. She hadn’t played with it for months and asked if I could bring it down off the shelf.

fishbowl

I’ve posted pictures previously of various grandkids playing with the scraps, and she had so much fun I had to post a few more! She had a blast pulling and throwing.

sommer scraps 6-15bWhen she tired of plopping them on her head, she took aim at me.

Sommer scraps 6-15c

Then she laid on the floor and did a bit of scrap swimming.

Swimming in fabric scraps

She’s big enough now to do a good job of picking up afterwards – so it’s fun for both of us!

Multi-seam Centers

May 24, 2015 1 Comment

Recently I taught a Lone Star workshop for a delightful guild in Burlington, WI – the Chocolate City Quilters (don’t you just love that name?). We used the Quiltsmart™ interfacing method I shared about in my February 15th post (click here if you’d like to revisit that post). Twenty-two quilters participated in the class and the quilts they worked on were varied and gorgeous. I so wish I had taken some pictures. So here’s a quick request before I get to my “topic of the week”. If you’ve taken a Lone Star class with me, and you’ve finished your star, please email me a picture at: . I think these quilts will make an exciting blog quilt show.

Now on to medallion centers. This is one of my Lone Star tops in which I used a Pointillism fabric for the background (I really need to border and quilt this one  🙂 ):

Lone Star with Pointillism background

When making a medallion style quilt, like a Lone Star or a Mariner’s Compass; or whenever a block has 8 seams coming together in one center point – it can be difficult to get the center right the first time. The biggest problem with this is that ripping and resewing can cause the fabric to weaken and the center to get worse instead of better. There is a slick trick for making this easier, and the ladies in the Chocolate City Guild class said they thought it would be a good one to share on the blog. So here goes. My sample was done on a  “Spin Star” block .

1. Once you have the 8 sections ready, sew them together in pairs (making quarters); and then sew the pairs into two halves.

2. Line up the halves, and pin into position along the entire seam.

3. Set the sewing machine for a long basting stitch and sew a short portion of the seam only, beginning 1″ prior to the center seam and ending 1″ beyond it (my sewing machine stitches didn’t show well, so I drew in the blue stitches to make it clearer).

DSCN8513


4. Remove the block/top from the machine and peek at the center. If you got it right, set the machine for a regular stitch length and sew the entire seam. If it wasn’t quite right,

center seam off

remove the basting stitches, re-pin, and resew with basting stitches once again until you get it right, then sew the entire seam.

center seam block

In this way you only need to rip out 2″ of basting stitches if it isn’t correct, and not a long seam of normal length stitches.

Have a blessed Memorial Day weekend. I’m praying for all our service men and women, and their families, as well as our veterans. How blessed we are to have the freedoms we do, and how grateful I am for those who serve, and have served, to keep us free!


Alternate Blocks

May 17, 2015 5 Comments

Mary Ann brought a lovely pattern to my Open Lab class at WCTC:

IMG_3893

She wanted to change it a bit by adding alternate blocks. I don’t currently have a quilt building program on my computer, but I did take a class in Photoshop™ recently, so I thought I’d give it a try. I opened the cover picture from the pattern in Photoshop™, and then searched the web for a few simple blocks.

Screen Shot 2015-05-01 at 9.43.45 AM


I was so pleased to figure out how to “plug” the squares into the pattern. The pictures aren’t perfect, but it was a good way to visualize. Here’s the photo I sent to Mary Ann with all 4 options (I recolored the blue “snowball” block to match the quilt better):

Mary Ann

It’s amazing how different the pattern looks in each quilt. I’m not sure which block  Mary Ann will choose, but I’ll keep you posted!

*************

qmn
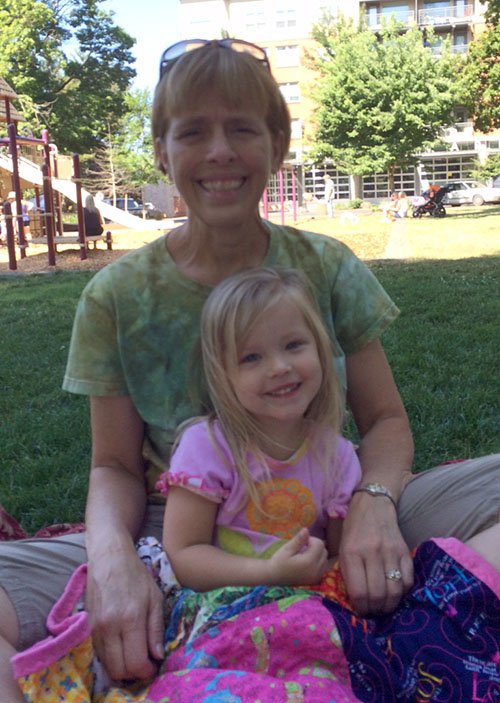
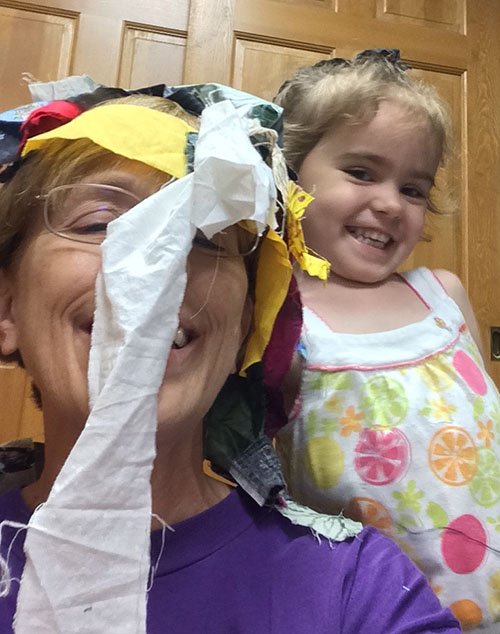
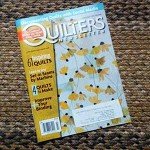
Now I’d just like to share a blessing – a number of months ago I submitted a story for Quilter’s Newsletter’s “300 Words” feature and it was published in their latest issue. The topic was quilts and kids, and I wrote about my granddaughter Hanna’s first quilt. The article is on page 23! Praise the Lord!

And speaking of grandkids – I took some fun photos of Trey recently – he’ll be 3 months old this week. Grandpa and I are watching him and Sommer full time – and loving it. So I’d like to leave you with a shot of a very content sleeper, and a smile.

Trey sleeping 5-15

Trey Gpa sm

Garden of Grace

April 26, 2015 3 Comments

What a wonderful trip to Paducah! The quilts were amazing, the crowds were huge, and a good time was had by everyone I spoke with! As I mentioned last week, Wendquilt lunch at Kirchhoffs
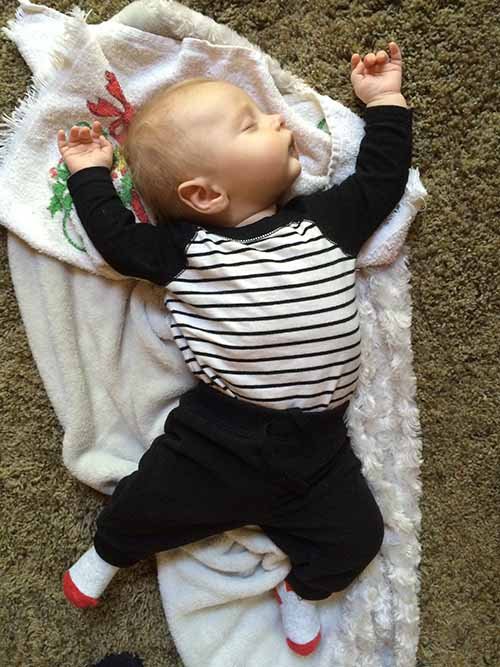
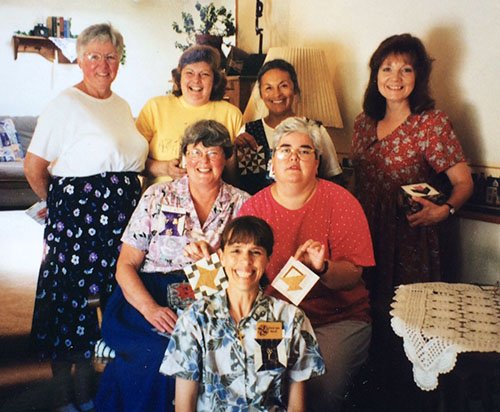
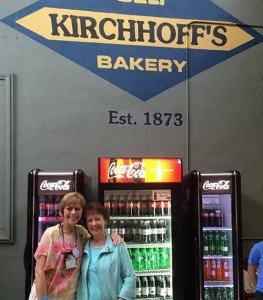
y and I had a display of our quilts at the Tribeca Gallery, but Wendy wasn’t able to spend Quilt Week in Paducah this year (It is her birthday today though – happy, happy birthday Wendy!). Another dear friend, Linda, joined me in the fun. Here we are having lunch at Kirchhoff’s:

One of the quilts hanging at the gallery was a collaboration quilt between Wendy and me entitled Garden of Grace. Last year, while having a lovely quilter’s lunch at Grace Church in Paducah, I took this photo (the dogwoods were at their peek!)

cross and dogwoods

Wendy and I had talked about doing a “slice quilt” together, and decided this was a good photo to start with. The National Quilt Museum’s traditional block for the “New Quilts From an Old Favorite” contest this year was the ever popular 9-patch. We decided it would be fun to photoshop in a 9-patch quilt,

Garden of Grace quilt 9-patch

enlarge the photo to 50″ square, and divide it into a large 9-patch. Colored corner and center squares alternate with black and white ones (you’ll have to look closely to see it in the picture).Garden of Grace with black and white squaresThis made the entire quilt one large 9-patch. A line drawing was made next,

Garden of Grace cartoon

and each of the 9 squares were printed out full size. We each chose the sections we wanted to make and got together when most of the blocks were done.

GofG block in progress

At this point we decided it might actually work – and scurried to finish all the blocks.

Garden of Grace blocks The blocks were sewn together and Sommer helped me layer the quilt in a frame.

Garden of Grace in frame

Wendy and I took turns quilting it, and Wendy did the finishing. Our quilt was not accepted into the museum contest, but we were thrilled with the memory quilt we had created, and we both felt we learned a lot in the process. It was very exciting to have the opportunity to display it in Paducah, even if it wasn’t at the museum. This is the finished quilt:

Garden of Grace

So, Linda and I had lunch this past Friday at Grace once again and I was surprised to find that the crumbling base on the cross in the church yard had been repaired and the large dogwood branch cut away.

GofG cross repaired

It looks lovely, but I think the photo from last year was much more interesting  🙂 !

I spoke with some of the ladies from the church and they’re very interested in having it hang at their quilter’s luncheon in 2016. What a blessing!

I’d like to leave you with a few more photos from the AQS show. One of my favorite quilts (and there were many) was made by Nancy Prince. I couldn’t take my eyes off it. The figures in the foreground were machine embroidered and then applied to the quilt. It was amazing.Nancy Prince quilt

A fun way to get around town was to ride in the bicycle rickshaws provided by Quilt in a Day.

Paducah bicycle rickshaw

Linda and I really enjoyed an evening Ghost Walk tour through the streets of downtown Paducah. We were led by a costumed guide from the Market Street Theater who entertained us with many gruesome tales.

Ghostly guide

And at the end of the day on Friday, Lisa gave new meaning to the phrase “shop til you drop”.

quilt shop til you drop

I went up to her and asked if she was alright and, when she assured me she was, she gave me permission to take her picture. We introduced ourselves and had a nice conversation  😉 !

Now I’m home, having great fun reliving a wonderful week in Paducah, and looking forward to Quilt Week 2016!

  • « Go to Previous Page
  • Page 1
  • Interim pages omitted …
  • Page 55
  • Page 56
  • Page 57
  • Page 58
  • Page 59
  • Interim pages omitted …
  • Page 77
  • Go to Next Page »

Primary Sidebar

Archives

Recent Posts

  • Quilting in Bloomington ~ Part 2
  • The Indiana Heritage Quilt Show ~ 2026
  • Bird’s Eye View
  • The Birds
  • Sew Much Creativity

Recent Comments

  • Tearle D Dwiggins on Quilting in Bloomington ~ Part 2
  • Laurie Neubauer on Quilting in Bloomington ~ Part 2
  • judy raddatz on Quilting in Bloomington ~ Part 2
  • Kathy Wuhrmann on The Indiana Heritage Quilt Show ~ 2026
  • Doris Ast on The Indiana Heritage Quilt Show ~ 2026

Categories

Footer

My Guide

Whatever you do, do your work heartily, as for the Lord rather than for men.

—  Colossians 3:23

Contact Chris!

  • Home
  • About
  • Gallery
  • Classes
  • Trips
  • Books
  • Blog
  • Contact
  • Sign Up For My Blog

Copyright © 2026 · Chris Quilts · Website by Adunate · Privacy Policy