• Skip to main content
  • Skip to primary sidebar
  • Skip to footer

  • Home
  • About
  • Gallery
  • Classes
  • Trips
  • Books
  • Blog
  • Contact
  • Sign Up For My Blog

Blog

Seminole Borders

August 6, 2017 5 Comments

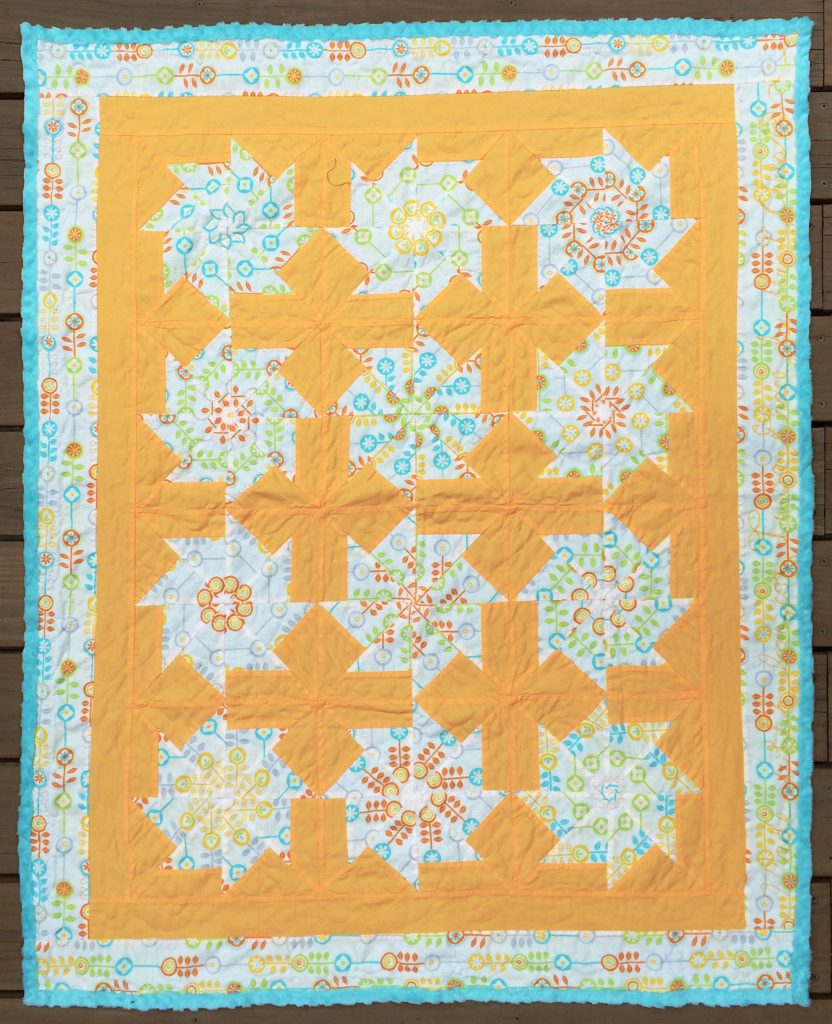
I’ve had the wonderful privilege to teach at the Madison Quilt Expo every year since it began. After each show I begin thinking of what new project or technique I should share the following year. While noodling on this after last year’s show an idea began to form. I learned to do Seminole patchwork back in the early 90’s. I hadn’t seen or heard much about it recently and thought it might be a good topic to revisit. I found 2 great books in my own collection and couldn’t wait to start playing with some of the patterns. The quilts I have to share at this time are just tops, three of which I’ve shared for various reasons in previous posts, but I’d like to point out the extra zip the Seminole style borders give to each piece.

Simple Seminole Border
Simple Seminole Border 2 – on all four sides of the center “square on point”
Seminole Braid Border
Straight Seminole Borders – top and bottom only

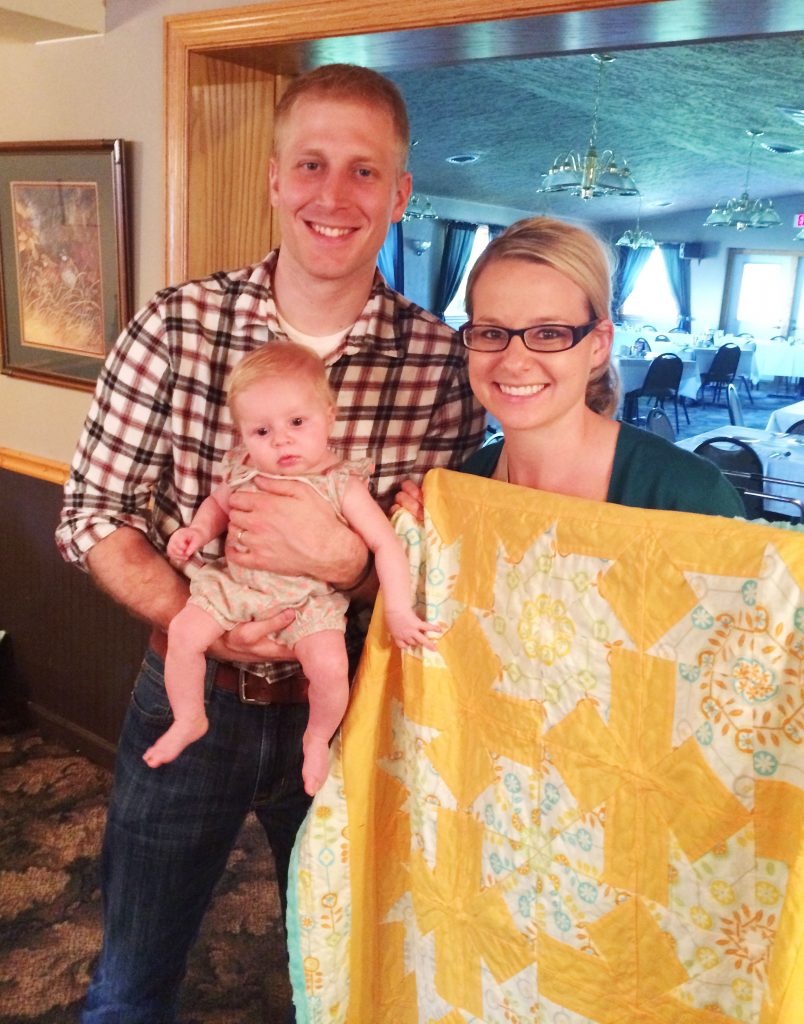
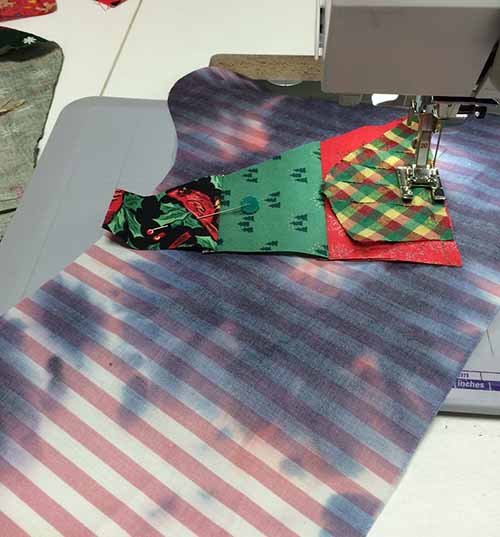
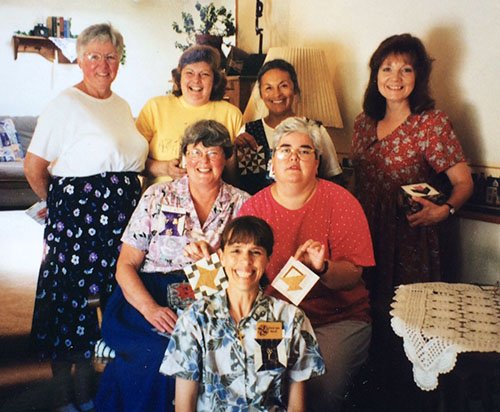
I shared my way of doing Simple Seminole with my Open Lab class at WCTC and some of the ladies jumped right into it. Three of them were kind enough to allow me to share these pictures:

Judy’s Simple Seminole border – it seems her cat approves!
Sue’s Simple Seminole border, done in short segments on all four sides.

And Laurie has used the technique on 2 bed sized quilts.

Simple Seminole using 5 strips
Simple Seminole using 3 strips (laid out, but not yet trimmed and sewn on)

I recently put together a 3 hour workshop on Seminole piecing and taught it at the Wisconsin Museum of Quilts and Fiber Art earlier this Summer. It was a hit! I’ll share pictures from the class and some background information on Seminole piecing in next week’s post.

Strip Pieced Topper

July 30, 2017 2 Comments

My friend Barb sent me a picture she found on Facebook of a lovely table topper. It was a pattern by Ruthann Eckersley called Sew Easy Strata Star (all of her patterns are available at: https://ruthsquilting.com/patterns/).

I decided to play with this design, but in my own way (of course). I pulled out a 1 yard batik from my stash that was dyed in gradation,

and cut it into 1 ½” strips.

I sewed these strips back into strata and cut the triangles to make the topper. I didn’t have enough fabric for the small triangles that complete the 3D effect in Ruth’s pattern, but was happy with the spinning star. Here are the 3 possible layouts I came up with:

I pressed the strata using my strip stick. It’s a wonderful tool, and I posted about it a few years ago https://chrisquilts.net/?p=3497. It was so helpful in this project, because I wanted the seams to press crisply. The Strip Stick is a padded piece of half round moulding covered in muslin. By laying a seam at the top of the curve, and pulling the adjacent strips down with my thumb and forefinger,

I’m able to press the seams to the side without any pleats or puckers on the right side. It also allows me to only press one seam at a time. I love it!

To purchase your own, go to: http://www.thestripstick.com/.

Since I didn’t have enough fabric for the pieced corner turn triangles, and I didn’t want to figure out how to finish those 45 degree points, I added corners and made a square.

It’s ready for quilting, but I really wanted to try the original pattern, so I pulled a gradation of blues and greens out of my stash and here’s the results:

I like them both.

**************************

And I’d like to leave you with this parting picture my friend Eileen’s husband took of her while she was quilting.

She had quite a special helper :-)! Thanks for sharing the picture Eileen!

Two Compass Journeys

March 12, 2017 3 Comments

I’ve had two students do some pretty terrific things with my Mariner’s Compass technique recently. I hope you enjoy the quilts and the stories.

Story #1

I’ve known fiber artist, Mary Alice Hart, for awhile and am pleased to call her my friend. I was delighted to find she had signed up for my class when I taught for her guild. A short while after the class she sent me this note with pictures:

“Chris, Thought you might like to see the end result of the Compass I started in your class last October in Monroe. Knew it had to have a life beyond tradition so threw it into space. Thanks for a great class!
Mary Alice”

Not only was her quilt incredibly innovative, but so was the label:

Mary Alice did a wonderful lecture for my guild last year. To learn more about her and her quilts,

go to: https://maryahartcreates.wordpress.com/

Story #2

Debbie Hawver took my Mariner’s class at WCTC  in 2016. She is a regular in my Open Labs, and brought it to class with four additional compass portions added in the corners.

She then decided to turn it on point with white and gold fabrics in the new corners. The problem was, the quilt top wasn’t square and the gold triangles she added were not matching up. We noodled on ways to fix it. The best way was to take it apart and redo the corners – a lot of work. This is an email she sent me that week:

“Well…As I mulled over the Mariner, yesterday I decided to take it apart.  Took off the 4 corners, squared up the main block and needed to create 2 new corners that had perfect right angles.   After attaching those, re-cut gold triangles and replaced the white border with new fabric that was wider (definitely now had more “wiggle room”).  Started at 2PM and the dog finally came in at 10:30PM wondering why we weren’t in bed yet 🙂

This afternoon I finished squaring it all up and I’m much happier with it.  Even though I’m at the same place I was last Thursday, I feel a lot better with the way it looks and the next step is to add the final border and binding.”

The following week she came to class with it redone. And it was done well!!!

Next we brainstormed borders and finishing. These she pursued, but with quite a bit of ripping and frustration along the way. The quilt wasn’t cooperating, but Debbie was so determined, and the final result is stunning.

Debbie's Mariners Compass

It’s one of the loveliest compass quilts I’ve seen. I really learned a lesson in perseverance from Debbie. Sometimes it is worth the extra effort to get it right. Great work Debbie!

Thank you Mary Alice and Debbie for sharing you delightful quilts with us!!!

******************************

And here’s a special FYI – I’ll be teaching at:

Spring University Days Wisconsin Museum of Quilts and Fiber Arts

You’ll find all the details in their lovely 2 page brochure. Click here for a printable pdf of page 1. Click here for page 2. Or visit their website: http://wiquiltmuseum.com/ 

Sign up quick – it’s a wonderful event!

A Consistent Seam Allowance

October 16, 2016 Leave a Comment

turkey-blog

Happy Autumn! As I was about to post to this week’s blog, Mike hollered for me to come quickly to the kitchen window. This is what I saw – a large Tom turkey and 9 hens running through the leaves. I must admit – this has nothing to do with the topic of the week, but it’s Autumn, so I couldn’t resist! Now on to the topic at hand  🙂 !

I often have students who struggle with keeping their 1/4″ seam allowance consistent, or their blocks always end up too small, or they are using 2 different sewing machines on the same project and the distance between the needle and the edge of the foot differs between the machines. If your seam allowance isn’t accurate or consistent, your frustration level can really skyrocket.

I have a trick to help with all of these issues. I don’t remember where I learned it, but I’ve used it for years and shared it with many quilters.

To begin with, I prefer to sew with a scant 1/4″ seam allowance, because I like to press my seams to the side and this always takes up an extra thread or two, thus shrinking the blocks. By using the scant 1/4″, my blocks remain the correct size. So… here’s the trick:

  • Take an index card, marked with 1/4″ lines, and cut off the bottom of the card on the lowest blue line.
  • Place the card under the needle of the machine and lower the needle by hand so that it pierces the card just to the right of the next blue line. When the needle is at the lowest level, it should be “kissing” the line.
  • sa-index-card-hole-1Place masking/painters tape along the right side of the card, making sure you don’t cover the feed dogs.sa-index-card-tape
  • If you struggle with keeping your seam allowance consistent, it’s helpful to stack a number of layers of tape on top of one another, to make a thicker edge to run the fabric along (sort of like the bumpers in bumper bowling  🙂 ). I’ve really appreciated knowing this technique when teaching children to quilt.
  • Remove the card and piece to your heart’s content.
  • Keep this card. sa-index-card-holeIf/when the need arises to sew on a different machine, put the needle down in the hole on the card, tape along the right side, and be assured you will be stitching with the same seam allowance on both machines!

This can be especially helpful when a group of quilters is working on the same quilt, for charity or competition purposes. If one person tapes each machine using the same card (or if the card is passed around), everyone will be making blocks the same size!

***********************

Birthday Block Update

Thanks again to everyone who gifted me with a 4-patch birthday block. So far I have 42 beautiful squares! This was Wendy’s comment to last week’s post (click here to read that post):

“Anyone is welcome to send a four patch to Chris. I am sure she would love to have a block from any of her blog friends!”

I will gladly keep you posted on what these blocks will become – as soon as I figure it out!

Another Spin Star

July 24, 2016 3 Comments

You may remember a post I wrote last January. I was hosting a “Tie Dye” baby shower for my niece Brianne. Well, Tessa Grace made her arrival later that month, and I needed to make her a quilt! I decided I was in the mood to make another “Spin Star” (my version of a fussy-cut quilt – click here for more on my technique), and I found a bright and pretty print fabric that was just right. I cut my identical repeats from the fabric, and stitched together 12 unique stars on a yummy butterscotch color background.

Tessa-quilt-web

When it came to the quilting, I wasn’t sure what would work best in the open areas. I decided to cover one with Glad Press n Seal™, and audition a variety of designs using washable markers, erasing and redrawing until I found the pattern I liked. Then I just quilted through the Press n Seal™ and tore it away.

marking quilts with Glad Press n Seal

I found a beautiful turquoise blue “Minky” fabric for the backing and turned it to the front, to give it a soft outer edge. For instructions on this technique, click here!

Tessa-back-web

The Minky had a lovely texture, and the free motion quilting made it even more fun.

Tessa-quilt-back-detail

Here are Scott, Brianne and Tessa with the quilt.

Tessa-and-quilt

It took me a few extra months to complete the quilt, but I don’t think Tessa minded the wait. What a blessing to give a gift of hand-made love. I hope she enjoys it!

*****************

And just a little FYI 🙂 ! _QE2016_I'mTeaching_225x225Click here for all the information!

Crazy Quilt Christmas Stocking

December 20, 2015 2 Comments

My daughter-in-law recently texted me this picture with the message “something seems to be missing :-)”.

crazy quilt christmas stockings

Well, the empty hook belongs to Trey and, since this is his first Christmas, grandma needs to get busy! I made Brad, Betsy and Sommer’s stockings using my own drawing of a stocking and “crazy piecing”, without all the thread embellishment typical of Crazy Quilting. The year after Sommer’s was made Betsy asked me to teach her how to do this, so she could make bone-shaped stockings for their dogs. She’s a quick study!

I thought some of you might like to know how to “crazy piece”. Here’s my version:

  •  Choose your favorite stocking pattern and cut out the basic shape, to size, from muslin or some undesirable fabric (like this pink stripe I attempted to snow dye in blue, with lousy results. It will be completely covered, so it works well here). I then gather up fabric scraps and leftover “pieced units” in appropriate colors.
  • To begin, pin a scrap or “pieced unit” with an odd shape and an odd number of sides to the fabric base – like the black/green/red “pieced unit” below. Lay a new scrap along one edge, right sides together, and stitch in place: CQS begin 1
  • Fold this new piece open and press. Since this process will be repeated many times, I like to use a wallpaper roller, instead of keeping an iron hot for the duration.crazy quilt stocking
  • Repeat this along all sides of your shape. Strips can be used, but it also adds interest to attach triangles and odd shaped pieced.Crazy quilt stockingCrazy quilt stocking
  • When edges get long, select a “pieced unit” again, or feel free to sew some smaller chunks together into “pieced units” and then add them to the crazy quilting. CQS adding pieced unitCQS pressing pieced unit
  • Continue in this manner until the base fabric is covered.
  • There may be times when things look a little ragged. Then just grab a long, wide strip, CQS adding cleaner upper 1lay it over everything and stitch, lay it over everything, fold back and press. crazy quilt stockingWhen you’ve covered a portion of an edge, it’s a good idea to stitch from the back, close to the outer edge of the base fabric, crazy quilt stocking

and then trim the excess away.crazy quilt stockingContinue until the base pattern is covered.

crazy quilt stocking

7.  Cut out a reverse pattern from backing fabric and two linings also (one and one reverse). Because mine has a cuff, it needs to be sewn between the stocking and lining pieces. The crazy quilt is sewn to one lining piece, and the backing fabric to the other.

crazy quilt stocking

8.  Then these pieces are put right sides together and sewn all the way around, leaving a 3″ opening somewhere in the lining for turning.

9.  Turn it right side out, stitch the opening closed, push the lining into the stocking and press. Add a hanging loop and you’re done!

#crazyquiltstocking, #crazyquilt, #stockingTrey’s stocking is now hanging with all the others – ready for Christmas.

crazy quilted christmas stockings, #Christmasstockings, #crazyquilt

*******************************

Christmas-2012

Each year I spend time focusing on the true meaning of Christmas – Jesus, the Savior of the world, who came to earth in human flesh to save humanity from the curse of sin. “For God so loved the world that He gave His only Son, that whoever believes in Him should not perish, but have eternal life” John 3:16. What an awesome gift! It gives meaning to everything else in our lives. My Christmas wish for you is that you may know Him as your Savior. Merry Christmas!

*******************************

PS Here’s just one last picture to make you smile:

Sommer cookies for web

A Lunch Bunch Quilt

September 6, 2015 4 Comments

Before we get to this week’s topic, I just have to share a picture of three quilts. After last week’s post about baby Caleb’s quilt, Eileen emailed me this message:

“Hello Chris, Delighted to hear more Mom’s are going for the “jungle theme”!  I made these three quilts (my own design) for my Goddaughter’s baby boy.  Couldn’t settle on which animal she might like.  As it turned out she went with elephants for much of her theme in the baby’s room.  Whew – glad I made one!!  But she got all three and seems to love them.  Little too early to tell which one Baby Bennett will like!”

Eileens animal quiltsWhat a lucky little boy – to get all three! I think Eileen may have to market her designs – those animals are adorable. Thanks Eileen!

So – what’s a “Lunch Bunch” quilt?

Back in the late 90’s I belonged to a local guild, Common Threads, that met on Wednesday mornings. One of the great things about this larger guild, was that it had smaller sub-groups called “Bees”. These smaller groups allowed us to get to know some of the members one-on-one. There was a “Scrap Bee”, “Charity Bee”, “Miniature Bee”, and an “Appliqué Bee”, just to name a few. Each “Bee” had a “Queen Bee” who ran that group and chose the time and location for the bee. All of the bees were kept organized by the “Beekeeper”. It was a great idea!

The “Bee” I joined was called the “Lunch Bunch Bee”. We met at a different restaurant for lunch after the meeting each month, and exchanged 4″ blocks. We chose a different block theme each month. There were 7 of us in the group,

lunch bunch quilt makers
Sally Boaz, Pat Smith, Mary Camacho, Joan Wilson, Elrid Johnson, Ann Wanke and me

which meant we needed to make 7 identical blocks each month and we did this for 8 months. We kept them in fabric covered boxes we covered in a guild class. Joan is holding hers in the picture above, and here’s a close-up of mine:

Lunch Bunch box

I didn’t think to photograph all the blocks before making a quilt with them, but I did take pictures of some of my favorites after the quilting was done (these were placed together as you see them here in Photoshop, you’ll need to wait to see how they fit into a quilt):

3d board
3-D Blocks
bird board
Bird Blocks
heart board
Heart Blocks
flower board
Flower Blocks
basket board
Basket Blocks
tree board
Tree Blocks
leaf board
Leaf Blocks
star board
Star Blocks
Screen Shot 2015-08-09 at 3.46.03 PM
You can order one on her website:  http://www.bysher.net/bysher/Books.html

These blocks sat in the box for a long, long time! Then my friend, Sharon Rotz, wrote a book called Log Cabin Quilts With Attitude.

I decided my 4″ block collection would make great centers for these crazy log cabin blocks.

It was so much fun, I wanted to make more blocks and came up with additional centers.

Lunch Bunch Quilt wonky block2

I cut each block to finish 10″ in width, but I let the length be determined by the wonky strips added to each one. I then sewed them into long columns. Because the blocks were the same width, they all fit together into the column, but the columns themselves ended up being a variety of lengths.

Since this quilt is one of my bigger ones, and it took many years to create, I’ve decided to make this a series post. Next week you’ll find out how the columns were quilted and  put together. The following week will have information on a slick binding technique – and a picture of the finished – yes, I said finished – quilt!

A Block Stack Challenge

Do you have a stack of exchange blocks like mine, just waiting to become a quilt? I’d like to challenge you to send me a picture of your stack of blocks (feel free to arrange them any way you like – thrown all over the room, or in one tall stack, or artistically draped, or… ???). I’ll then post the pictures (without naming names) and challenge each participant to put them in a quilt. The first one to actually make their blocks into a quilt will get their name and photo in the blog, along with a wonderful prize of my choosing!!!

Multi-seam Centers

May 24, 2015 1 Comment

Recently I taught a Lone Star workshop for a delightful guild in Burlington, WI – the Chocolate City Quilters (don’t you just love that name?). We used the Quiltsmart™ interfacing method I shared about in my February 15th post (click here if you’d like to revisit that post). Twenty-two quilters participated in the class and the quilts they worked on were varied and gorgeous. I so wish I had taken some pictures. So here’s a quick request before I get to my “topic of the week”. If you’ve taken a Lone Star class with me, and you’ve finished your star, please email me a picture at: . I think these quilts will make an exciting blog quilt show.

Now on to medallion centers. This is one of my Lone Star tops in which I used a Pointillism fabric for the background (I really need to border and quilt this one  🙂 ):

Lone Star with Pointillism background

When making a medallion style quilt, like a Lone Star or a Mariner’s Compass; or whenever a block has 8 seams coming together in one center point – it can be difficult to get the center right the first time. The biggest problem with this is that ripping and resewing can cause the fabric to weaken and the center to get worse instead of better. There is a slick trick for making this easier, and the ladies in the Chocolate City Guild class said they thought it would be a good one to share on the blog. So here goes. My sample was done on a  “Spin Star” block .

1. Once you have the 8 sections ready, sew them together in pairs (making quarters); and then sew the pairs into two halves.

2. Line up the halves, and pin into position along the entire seam.

3. Set the sewing machine for a long basting stitch and sew a short portion of the seam only, beginning 1″ prior to the center seam and ending 1″ beyond it (my sewing machine stitches didn’t show well, so I drew in the blue stitches to make it clearer).

DSCN8513


4. Remove the block/top from the machine and peek at the center. If you got it right, set the machine for a regular stitch length and sew the entire seam. If it wasn’t quite right,

center seam off

remove the basting stitches, re-pin, and resew with basting stitches once again until you get it right, then sew the entire seam.

center seam block

In this way you only need to rip out 2″ of basting stitches if it isn’t correct, and not a long seam of normal length stitches.

Have a blessed Memorial Day weekend. I’m praying for all our service men and women, and their families, as well as our veterans. How blessed we are to have the freedoms we do, and how grateful I am for those who serve, and have served, to keep us free!


  • « Go to Previous Page
  • Page 1
  • Page 2
  • Page 3
  • Page 4
  • Page 5
  • Go to Next Page »

Primary Sidebar

Archives

Recent Posts

  • London ~ and More
  • Designed For a Purpose
  • Squirrel Quilts and More
  • Vintage Appliquéd Arrows and More
  • Fascinating Tidbits

Recent Comments

  • Karen Ann Moore on London ~ and More
  • Cheryl McLean on London ~ and More
  • Sue Halpern on London ~ and More
  • judy raddatz on London ~ and More
  • Joanne Corrigan on London ~ and More

Categories

Footer

My Guide

Whatever you do, do your work heartily, as for the Lord rather than for men.

—  Colossians 3:23

Contact Chris!

  • Home
  • About
  • Gallery
  • Classes
  • Trips
  • Books
  • Blog
  • Contact
  • Sign Up For My Blog

Copyright © 2026 · Chris Quilts · Website by Adunate · Privacy Policy