• Skip to main content
  • Skip to primary sidebar
  • Skip to footer

  • Home
  • About
  • Gallery
  • Classes
  • Trips
  • Books
  • Blog
  • Contact
  • Sign Up For My Blog

Blog

Cookie Nana and the Seven Tree Skirts

December 12, 2015 28 Comments

This is a Christmas story I think you’re going to love! It may be a little long, but it’s worth taking the time to read 🙂 !

Connie came to my Open Lab class with a unique project idea. She had inherited a huge bin of handmade doilies from her husband’s grandmother – and she had a plan!

doilies

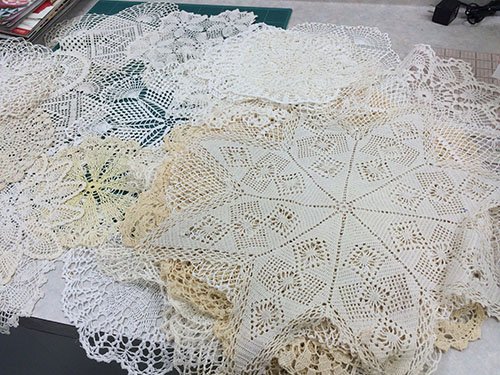
She wanted to make them into tree skirts, but didn’t have a pattern. I started by asking her the story of the doilies. She told me the story of:

“Anna Yersin” Cookie Nana

“Anna Yersin’s hands were never idle. Her days were filled with the duties of wife and mother. In the evening she crocheted or tatted, for many years by the light of an oil lamp. Hand crocheted whole table cloths have been passed down to family members through the years. The crocheted doilies, dresser scarves and table runners used in these tree skirts were found in the homes of her and her children. While Anna may not have made all of them, certainly the bulk of them were her handiwork.

strudelScreen Shot 2015-12-12 at 9.43.34 PMAnna was also a great cook and baker. Her chicken and dumplings with apple strudel for dessert were family favorites. It was, however, her cookies that inspired her oldest Great Grandson Michael Scott to call her “COOKIE NANA.” At the age of 3 he had no idea how appropriate the name was.

During WWII Cookie Nana sent cookies to service men, not a simple task since sugar and butter were rationed. She continued this practice even after the war, always supporting those who served. Her children, now married with families, always had cookie jars in their kitchens filled with her cookies. Her cookie baking was especially prolific at Christmas. She began her baking after Halloween.   Not too early when you understand that she baked 25 to 35 different types of Christmas cookies, many of which were decorated and intricately done. She also doubled and tripled many of the recipes. The cookies were packaged for mailing and sent all over the United States to family and friends. She filled large sturdy department store gift boxes with cookies for her children and grandchildren. This was her Christmas gift to her family. In turn, we never had trouble deciding what to give Cookie Nana for Christmas or Birthday gifts. We gave her flour, sugar, butter, postage, nuts, chocolate, the list was endless.

Cookie Nana gladly shared her recipes, loved to share her secrets, but, no one in the family has ever been able to exactly duplicate her cookies. She was blessed with a gift, and we are blessed to call her our “Cookie Nana.”

The story continues with Connie’s memories:

“The process of designing and sewing the tree skirts triggered many of my own memories of Grandma Yersin, “Cookie Nana.” When I married Bob, Grandma gave us a wedding gift that I came to realize carried great meaning. I was now a Yersin, and every Yersin household had a Kitchenaid mixer. Screen Shot 2015-12-12 at 9.19.00 PMIn 1970 Kitchenaid was not sold in department stores. It was purchased through the Hobart Co., maker of heavy duty commercial mixers. At the time I wondered what I was supposed to do with this tall machine sitting on my counter since it didn’t fit anywhere else. Forty five years later it is still on my counter. It has never been repaired and is continues to be the workhorse of my kitchen.

When I was pregnant with Jill(1973), I spent one whole very hot summer day at Grandma’s house learning how to make strudel. She gave me a special table cloth to be used when I “pull” the dough. Yes the dough is pulled from the bottom and stretched until very thin, later to be used in the layers of the pastry. “You have great fingers for pulling the dough” she said, but, though I may have great fingers, I didn’t have her stamina. I never again made strudel by pulling the dough, not after I learned about phyllo dough!

I fondly remember, The Farm. Cookie Nana and her husband Anton bought 6 acres of land in Franklin, WI on 35th and Puetz Road in 1945. The 2 buildings built closest to the road were summer homes for Adolf and Philip. The lower building close to the pond belonged to the senior Yersins. There was electricity, beds, stoves, and sinks, but no Screen Shot 2015-12-12 at 9.24.26 PMrunning water and no bathrooms in these buildings. The outhouse was centrally located on the land. While most of the acreage was grass, large gardens were planted every spring. Many of my unforgettable memories were from the frequent summer picnics on a 20 foot long picnic table housed in a large screen house. We never knew how many relatives, friends, or neighbors would stop by.   Cookie Nana came from the old country where the women were the cooks and the men always came first. The Yersin women were all outstanding cooks and always made plenty to share. These wonderful meals were then followed by card playing and baseball games.  

In closing Grandma’s house I chose 3 things that are currently used in my home.   I have Grandmas cake decorating kit. I absolutely love it. It is made of stainless steel, with interchangeable decorating tips. I use it every Christmas for my decorated Christmas cookies. I also have her oil lamp. Phil always told me it was the lamp he used for studying before they got electricity. It is displayed on an antique Singer treadle machine in our entryway. I also have a glass basket. It had a paper taped to the bottom, “Wedding Gift from Mama 1912.” Inside the basket, I have placed her tatting tool with about 18” of tatting. It was labeled the last tatting Grandma was working on. I found the tatting in the box of crocheted items used in the tree skirts.”

*******************************

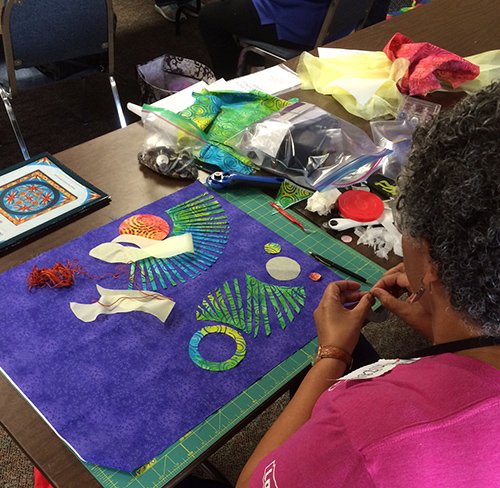
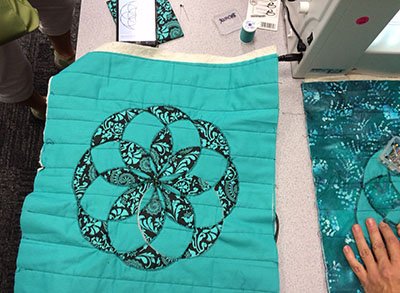
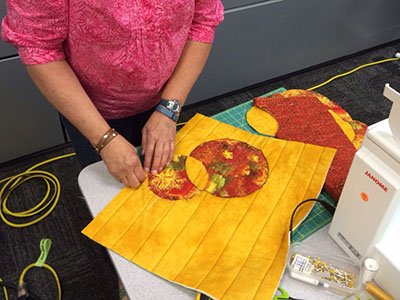
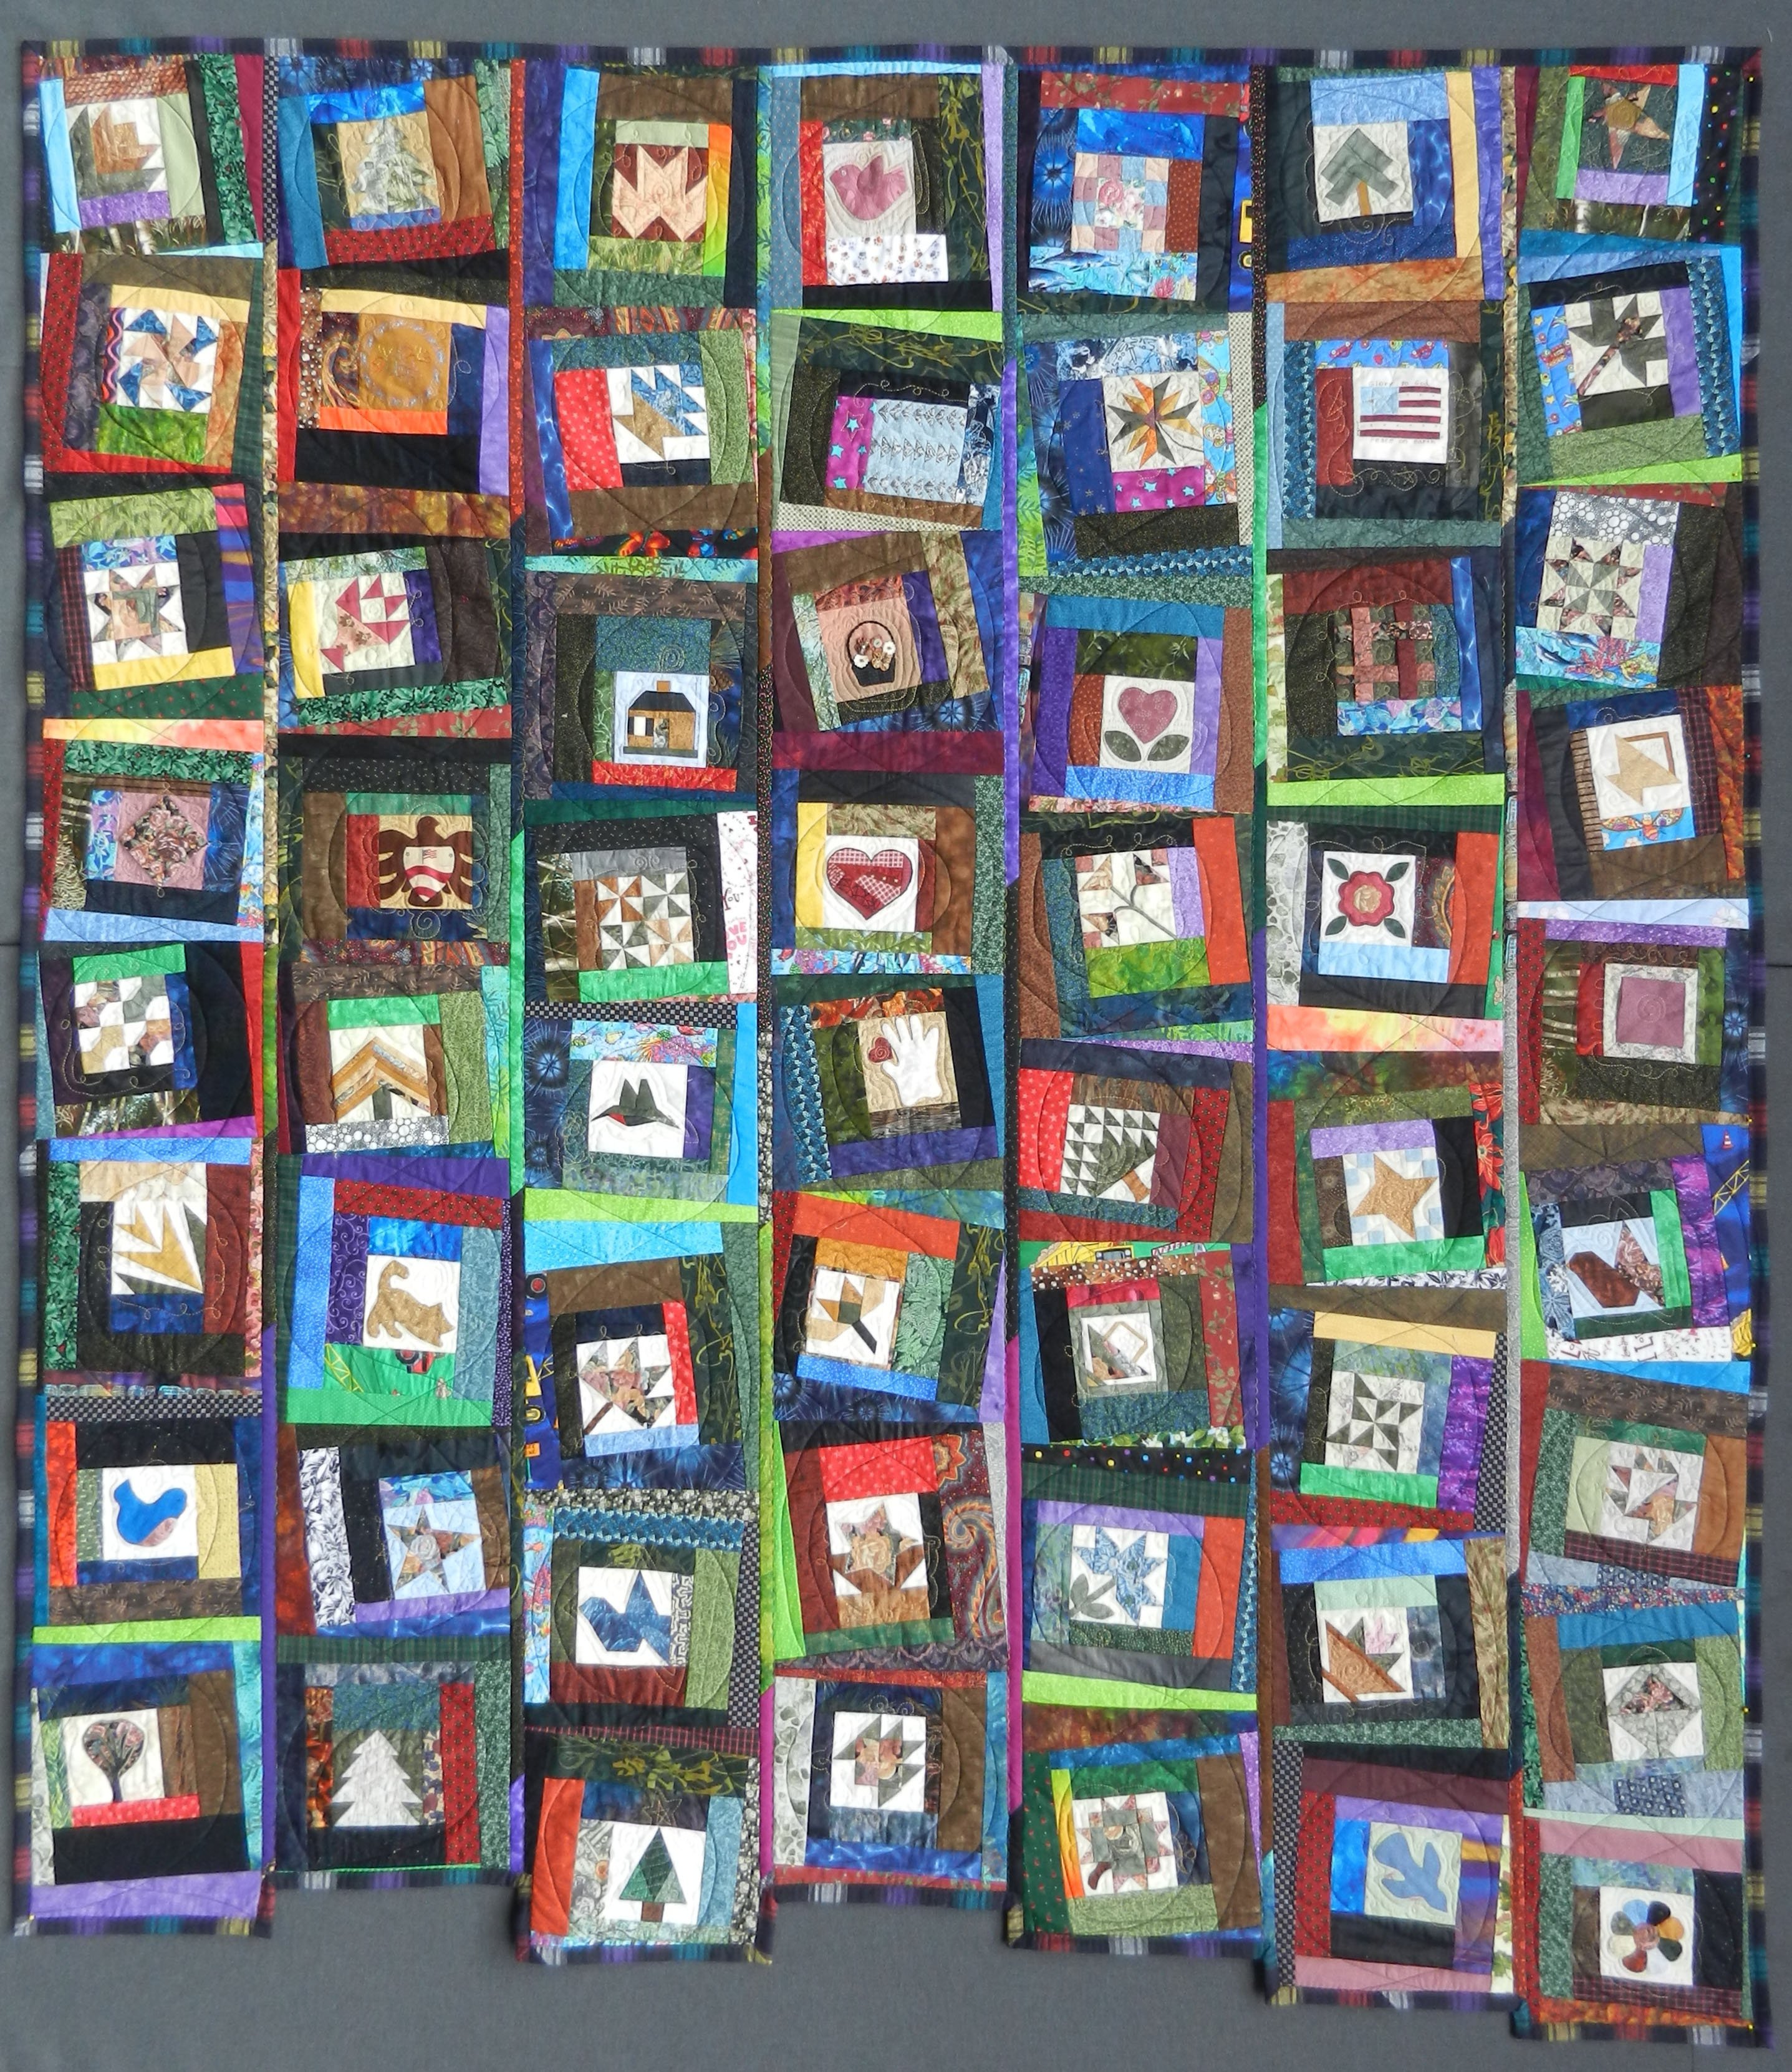
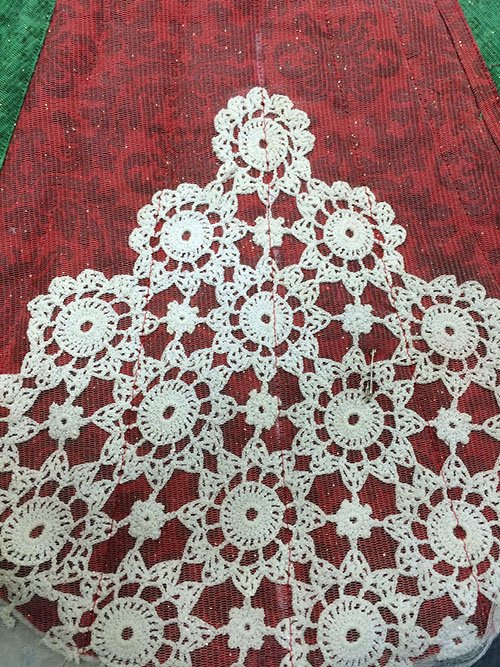
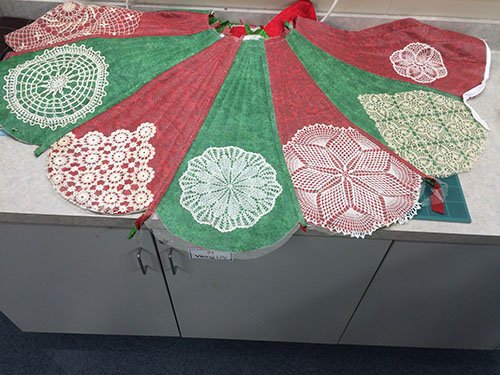
After a bit of brain storming, Connie decided to make the tree skirts “dresden plate” fashion and to place a doily at the rounded end of each “blade”, whether they were round or not.”

doily tree skirts, #doilies, #treeskirt #chrisquilts.net/blog

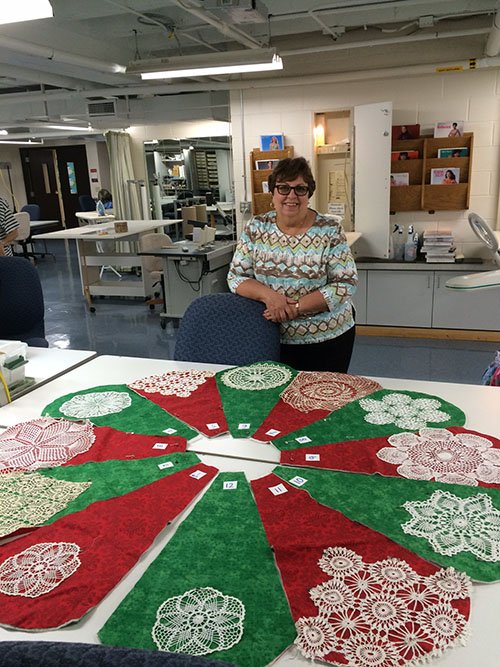
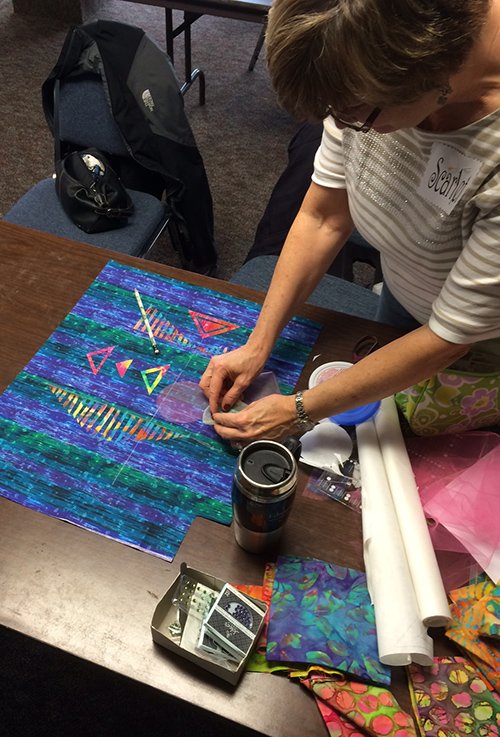
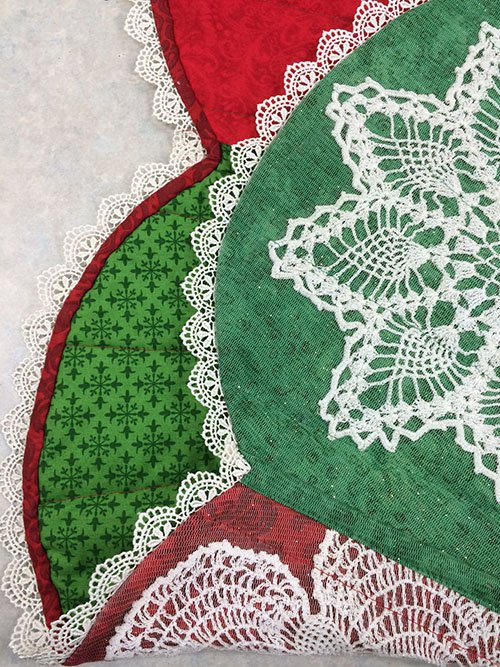
Now the question was, how do you attach the doilies and keep packages from catching on them. The answer: cover each blade with tulle (sparkle tulle added to the Christmas charm), layer and quilt.

doily tree skirt

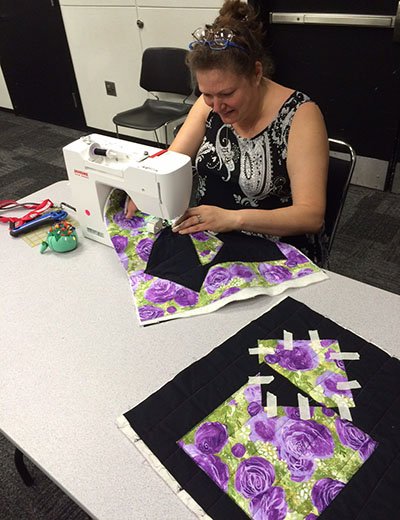
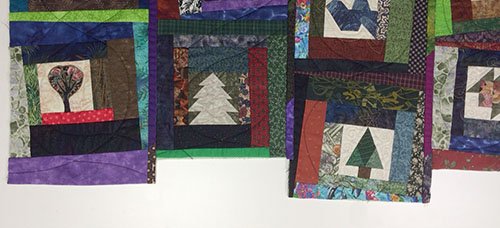
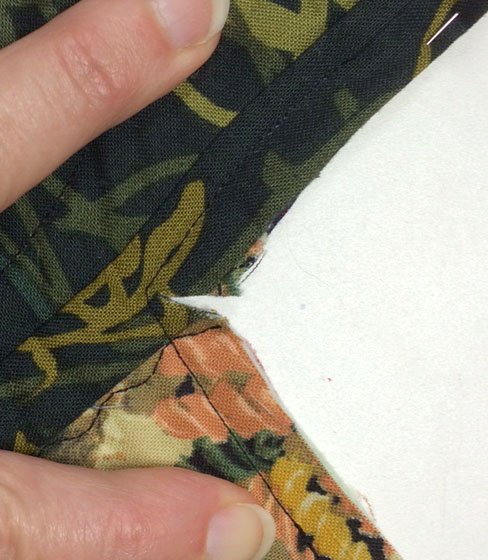
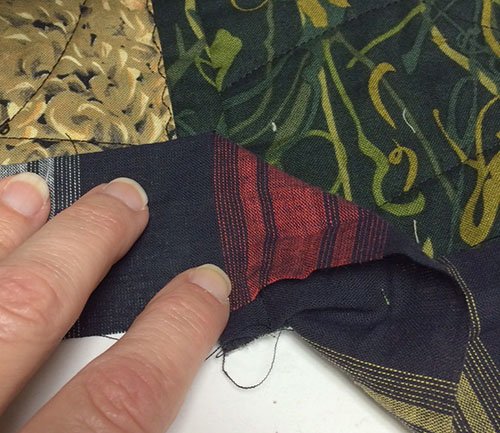
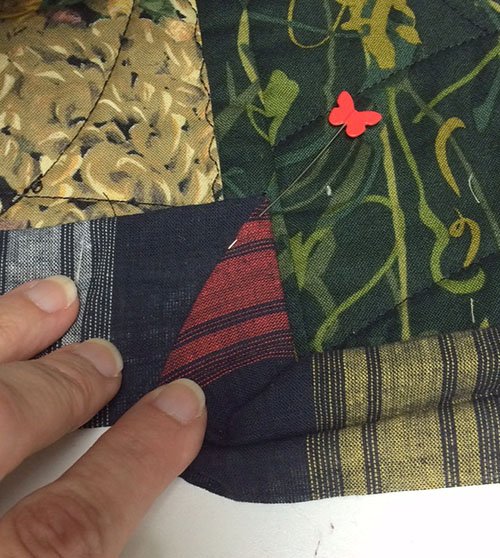
Once they were quilted, she sewed them together with the “reversible quilt as you go” technique I’ve shared previously (click here to read about it).

doily tree skirts

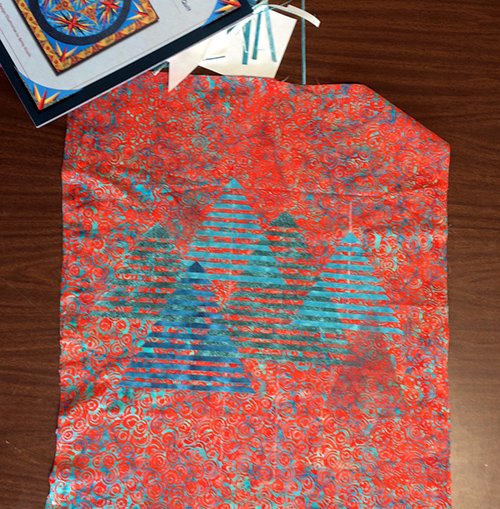
Then she finished the outer edge by attaching lace with a facing.

doily tree skirts, #doilies, #treeskirt

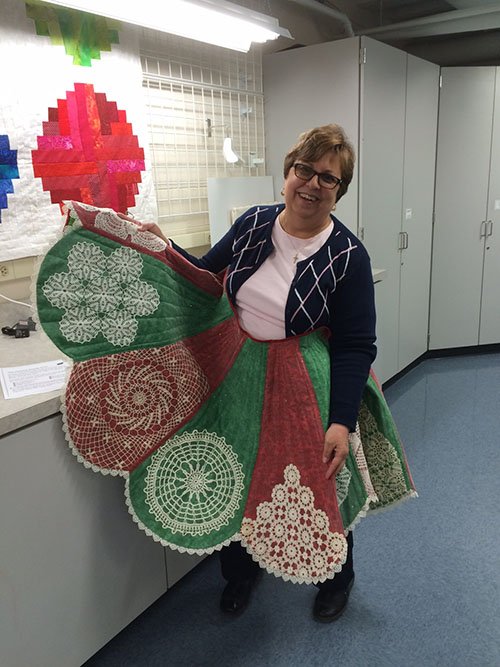
Connie set a goal that she’d have them all done by Thanksgiving – and she did it!

doily tree skirts

She printed the story shared above on labels she has lovingly handstitched to the back of each tree skirt. What wonderful Christmas gifts her children have to look forward to!

doily tree skirts, #doilies, #treeskirt #chrisquilts.net/blog

Great job Connie! Thank you so much for sharing your talents and your family story with us!

If you enjoyed Connie’s story as much as I did, feel free to comment to this post. I’ll make sure she receives any and all comments 😀 !

Faux Piped Binding

November 29, 2015 2 Comments

faux piping

I recently learned a very easy way to get the look of a piped binding, with a lot less effort than the traditional method (it’s the little sliver of blue, next to the binding in the quilt above). The best part is that it is all done by machine – no hand finishing! I’m posting it for my friend Laura, who hasn’t seen it yet, and for any of you who are in the same boat 🙂 .  Here it is in 5 easy steps.

  1. Cut binding strips 1 3/8″ wide (one and three eighths -sorry, the blog font looks wierd in odd fractions). Cut enough to go around the entire quilt and piece together, end to end. Cut piping strips 1 5/8″ wide (one and five eighths), and piece together as you did with the binding strips. It seems a little wierd that the piping strip is wider than the binding strip, but trust me – it works!
  2. Sew the binding strip (black) to the piping strip(blue), with a ¼” seam allowance.faux piping
  3. Press the seam towards the binding strip,faux piping then press the strip in half, wrong sides together.faux piping
  4. Align the raw edges of this binding unit with the outer edge of the quilt, on the back of the quilt, piping side up, and attach with a 1/4″ seam allowance.
  5. Turn the binding to the front of the quilt and pin or clip in place, mitering the corners. Stitch in the ditch between the binding and the piping, in a color thread to match the piping.faux pipingVoila! A great look with only a little extra effort. Please let me know if you use this technique – and what you think!

Fiber Art Earrings

November 22, 2015 3 Comments

Greetings from snowy Wisconsin (I couldn’t resist including a picture – large pre-Thanksgiving snows are not that common here)!

snow 11-15

*********************************

Before I get to my new “topic of the week”, I wanted to thank everyone whocloset clean mags gone commented on my “Closet Clean-up” post a few weeks ago. Many of you expressed a concern that recycling the magazines might deprive others of their value. You will be happy to know that someone did claim them and Mike was  kind enough to “dumpster dive”, and put all the loose ones into boxes for me to deliver 🙂 .

Then Judy sent me an email about her own Closet Clean-up adventure which involved a trip to the container store and a clever way of labeling. Here’s what she wrote:

“Chris: I really wanted to tell you how much I admire and am always searching for those  perfect solutions to sewing room organization.  Last year, I was able to move my sewing room into a bigger space thanks to my really awesome husband.  That space came with an enormous walk-in closet!!  I wasn’t sure how to organize my stash, so one trip to The Container Store and voila!!  Men’s shoe boxes from The Container Store are the perfect size for your stash!!  I then bought chalkboard fabric and labeled each box.  They are also the perfect size for projects.  Here’s a picture to share.”

And here’s the picture:

Judy Fox storage pic

Chalkboard fabric! What a great idea! It looks so much better than my taped on “scrap paper scribblings”, and the labels are easy to change. Thanks Judy!

**************************************

And now for my “topic of the week”:

I have a new pair of hand made, fiber art earrings – and I love them!

Earrings by Sher

I receive many compliments every time I wear them. Here is a little about the earrings:

Screen Shot 2015-10-23 at 11.01.44 PM

Now, let me tell you about their maker. I met Sharon Rotz when we taught together at a retreat in Central Wisconsin. We hit it off right away and have become good friends. I’ve mentioned Sharon in a number of previous blog posts because we’ve had the chance to exhibit our work together, and I’ve been inspired by her books and techniques. We’ve also collaborated on 4 quilts together: “Tumbles the Cat”,

tumbles the cat quilt

“Two Friends Monkeying Around”,

Quilt - Two Friends Monkeying Around

“The Rose of Chris and Sharon”,

RoseOfChris&Sharon-ps300for

and “Goyne Round in Circles”.

Goyne Round in Circles

Sharon is an incredible talent and It’s been a joy to quilt together. Now she’s on to a new adventure with her hand-made jewelry and, like everything else she does, it is incredibly creative and well done. Please visit Sharon’s website: http://www.bysher.net/bysher/Welcome.html  to see her wonderful work.

Screen Shot 2015-06-22 at 9.03.53 PM

I highly recommend clicking on her jewelry page, you just may need to own a Sharon Rotz original!

Happy Thanksgiving to you all !!!


The International Quilt Study Center and Museum

November 15, 2015 5 Comments

This past week was a wonderful adventure! I was invited to lecture and teach for the Lincoln Nebraska Quilters. There were so many reasons this trip was special. First – it was a great group!

Second – my niece and her family recently relocated to Omaha (which is less than an hour’s drive from Lincoln). Kaitlin and Marty have 2 adorable little ones and I was able to stay with them for a couple of days.

walsh blog

Third – Barb and the guild invited me to take a tour of the International Quilt Study Center and Museum, at the University of Nebraska in Lincoln.

Screen Shot 2015-11-15 at 1.52.43 PM

I’d heard about it for years, and it was truly a blessing to be able to see it. Especially since I was given the tour by a guild member who is also a docent at the Museum.

The IQSCM was a gift to the University by Robert and Ardis James, who are famous for their quilt collecting and generosity to the quilt world.

Lincoln Ardis collection

Ardis wanted the Center to be called the “Quilt House”, and this is the dedication at the entrance to the building.

Lincoln quilt house

The exhibits were fascinating, from a collection of African American quilts:

Lincoln African

through a thought provoking exhibit of Michael James quilts made in memory of his wife:

Lincoln Michael James

to my personal favorite – “Covering the War”, an exhibit of quilts made during war time in our nation (very fitting since I was there just before Veteran’s Day). These quilts were displayed with their touching stories:

Lincoln war quilts

And this was only a small part of the Center’s collection, and all of it’s other attributes. They often have charity sew-ins in the atrium, and the community is invited to be involved in many activities.

I really admired the Center’s logo – a lovely circle of needles:

Lincoln needles

Lincoln pinAnd Pat was kind enough to give me her pin as a remembrance of my visit. Thank you, Pat.

If you’re ever near Lincoln – I highly recommend this as a “not-to-be-missed” attraction!


Fourth – I got to share my passion for quilting and two suitcases full of quilts! The night of the IQSCM tour, I presented my “Journey With a Compass” lecture to a large and delightful group of quilters, and the next day I taught my beginning fiber art class entitled “Where Do I Start With Fiber Art”. These mainly traditional quilters had a lot of fun stepping outside of their comfort zones to play with fabric, color and design.

Lincoln FA2

Lincoln FA3

Lincoln FA4

Lincoln FA1

Lincoln trees

I always learn as much as my students, and it was quite obvious that a good time was had by all  😀 ! What a wonderful guild! Thanks for everything!

I had never been in Nebraska before, but now I’m scheduled to return in March to lecture and teach for a guild in Fremont. I can’t wait!


Closet Clean-up

November 1, 2015 12 Comments

Two years ago I wrote a blog post entitled “Magazine Issues” in which I shared my frustration with my “collection” of old quilting magazines. My system was to put them in boxes and shove them in the bottom of the closet. From there I started just stacking them on the boxes:

mags-2

(to read that post click here!). Many quilters responded to that post with great suggestions on how to organize my mess, but as of 3 days ago it still looked like this photo, plus 2 more year’s accumulation! Ugh!

A few months ago we had a professional organizer speak to our guild. She helped me face the fact that I hadn’t looked at a single one of these magazines after they found a dark home in the closet. Obviously I don’t need them. What I do need is space! I’ve cleaned and organized most areas of my sewing room a time or two in the 11 years we’ve lived here, but THAT closet had not been cleaned, in fact, it just kept getting more and more stuff shoved into it. I finally reached the point that no more would fit, and I had new stuff piling up in the rest of the studio with no place to put it. Since I just finished my 5 month long competition quilt, and the room was closing in on me, I decided enough was enough. Now what did that professional say I should do???

Oh yeah! Pull everything out of the area you want to organize (that way you can’t quit half way 🙂 )

cleaning my sewing room closet
I didn’t think to take the picture until after I had folded my medium/large quilts and re-filled a shelf with them – progress already!

I emptied the closet during the kid’s naps last Thursday. When Trey woke up I went upstairs to get him, that’s when Mike came home – looked at my studio – and asked me who I was mad at (it was a fast and furious mess). I guess the answer would be me, for letting it get so out of hand.

Since I hadn’t looked at a single old magazine, I decided it was time to “release” them. Most of my friends already have a lot of magazines of their own, so I “bit the bullet” and dumped them in the recycle bin. Actually, there were so many, and they were so heavy, that half will have to wait until next recycle day (the boxes in front of the bin).

closet clean mags gone
The recycling doesn’t get picked up until Thursday. If anyone wants them, let me know and I’d be happy to pull them out for you to pick up.

Well, yesterday I had an entire rainy, “non-babysitting” day, and this is what my studio looked like after one trip to the store for bins, and before Mike took me out to dinner to celebrate a hard day’s work:

cleaning my sewing room closet

And here’s the pile of stuff that’s going to my guild’s rummage sale:

cleaning my sewing room closet

There are still a few odds and ends to be put away, but many of my closet bins now have breathing room in them. Ahh! Next, I need to clean up the rest of the room once again. I think I’ll take a week off. And, oh yeah, there’s another challenge quilt I was thinking of making  😀 !

Cleaning does make one feel virtuous, but a person can only clean so much before they deserve a reward!

PS I still love quilting magazines. So, for a short while now, I’ve been much better about what I do with my new issues. I read them, copy anything I want out of them, and place the issue on the “share” table at my next guild meeting. This way I don’t have to “clean it up” later, and my friends benefit.

Blocks, Blocks and More Quilt Blocks!

October 11, 2015 1 Comment

In my series of posts about my Lunch Bunch quilt, I asked you all to send me a picture of your stack of challenge blocks. These were the three photos I received (thanks ladies – and no names are included so as not to induce guilt)!

Joyce Egle blocks
These blocks were made by an Amish friend of the owner, in all different sizes, and are kept in the vintage Santa box.

Cathy Swinkowski 1 at 500 Cathy Swinkowski 2 at 500

I hope this may encourage you to put them together, and I can’t wait to hear all about it  😉 . If you have been meaning to send me a photo of your stack of blocks – there’s still time – just email them to me.

On this same topic of bunches of blocks that are waiting to become a quilt, a few weeks ago I did a class on Repliqué for the Chocolate City Quilters in Burlington, WI. They are a really fun group and they did a great job creating their house blocks. Whenever I teach my Architectural Repliqué class I make a sample house block along with the students. During this class I actually counted them only to reveal that I’ve taught this particular class 70 times!

Replique blocks

If a person made that many of the same block, they probably would get a bit wacky with their fabric selections. And I’ve done just that. I have many seasonal themed blocks, and I chose these four as close-up examples:

Replique Blocks

I thought you might like to see some of my more “interesting” ones up close.

Replique Blocks
With curtains
Replique Blocks
While teaching in Alaska
Replique Blocks
After chaperoning my Son’s orchestra trip to England
Replique Blocks
Fun fabrics
Replique Blocks
It is football season!
Replique Blocks
Silly fabric in the windows
Replique Blocks
Made in a class on 9-28-01

You may have noticed writing on the blocks. Each time I make one I ask the students to sign the block, and then I write the name of the guild, location and date on the paper backing. I think you can tell I’ve really enjoyed making these blocks. I have so many wonderful memories of these classes and students. When I finally put them together I will have one REALLY BIG Autograph quilt (or maybe two normal sized ones  🙂 )

Who knows when that will be? If you are interested in my Repliqué technique, you may purchase either of my books on the subject at: https://www.chrisquilts.net/books/.

My First Two Quilt BooksIf you’d like to have me present a class for your guild, please send me an email at .

Madison Quilt Expo 2015

September 27, 2015 2 Comments

I think this year’s Expo was better than ever! They say attendance was up 4% over last year and everyone seemed to be having a wonderful time. It has really become a national level quilt show.

I headed to Madison the day before the big show began to hang a special exhibit of quilts by the Milwaukee Art Quilters. As I pulled into the parking lot I saw the Ducky car. It’s here every year and lets me know the fun is about to begin!

Ducky Car

The Marq exhibit was entitled “Color Wheel Opposites” and the quilts looked great (if I do say so myself  🙂  ).

Expo 2015 marq1 Expo 2015 marq2

From there I checked into my hotel room and set up a mini-studio.

Expo 2015 Clarion

I spent the afternoon happily stitching away on my latest challenge quilt. I don’t tend to get much quantity/quality quilting time while watching 2 small children, so this was a treat. My husband is amazing – he had Sommer and Trey all to himself for three days and did a great job – while I ran away to the Quilt Expo. I’m very blessed!

Wendy arrived late in the afternoon and set up her machine. We had a lovely evening of eating, sewing and giggles.

The next day the show began. I presented my Great Finishes lecture each morning of the show and then taught a class I call “Quilt, Slash, Create” in the afternoons. This class is a crazy way of playing with fabric that turns 4 fat quarters of fabric into 2 reversible art quilts! The students were fantastic! Here are a few pictures of the fun:

Expo class2 Expo class3 Expo class4 Expo class5 Expo class6 Expo class7

Expo class 1

The quilts in the show were very inspiring, the Fall Challenge quilts were delightful,the vendors were enticing, spending time with friends was the best, and … I can’t wait for next year!

Did you make it to Expo this year? What was your favorite part?

A Lunch Bunch Quilt – Part 3

September 20, 2015 1 Comment

Binding an Inside Corner

Every so often a quilt comes along that has an odd outer edge – the question is “how do you bind it?” This was a problem I had to overcome in the Lunch Bunch quilt I’ve been sharing with you. Because the quilt was done “quilt as you go” style, in columns, I ended up with an interesting bottom edge.

in corner 1 - whole edge

All the corners are right angles. The “outside” corners are easy – they miter like the corners on a square or rectangular quilt. The “inside” corners are a bit trickier, but not too bad if you know the “tricks”.

1. Begin by stay-stitching, inside the seam line, about 2″ from both sides of the inside corner “pivot point”.

in corner 2 stay stitch

2. Clip to the stay-stitching “pivot point”, stopping a few threads from the stitching.

in corner 3 clip 3. Attach the binding down one side of the inside corner, stopping with the needle down at the binding “pivot point”.

in corner 4 sew side 1

4. Leave the needle down, lift the presser foot, and pull the quilt straight (the clip will allow you to do this). Lay the binding strip even with this new edge and continue stitching the binding to the quilt.

in corner 5 sew side 2

5. The binding will be standing up on this corner.

in corner 6 miter 1

To create the miter on this first side, fold one side flat, as in the picture:

in corner - miter 2

Then fold the other side until a 45° miter is formed.

in corner 9 - miter 4

Pin or stitch this side of the miter to secure.

6.  Turn to the other side and fold this new miter – fiddling until it looks good. Repeat to pin all inside corners and then stitch the binding to this side of the quilt, using your preferred method.

in corner 99 - frontIt really is quite simple and the effect is worth the effort!

And now (drum roll please!) Here is the finished Lunch Bunch Quilt!

Scrappy Log Cabin Quilt

Almost 20 years in the making – and finished! It was even juried in to be featured at the in the Fine Furnishing Show held this weekend in Wauwatosa, WI. It was hung in the entry to the show and I was very pleased – praise the Lord!

Lunch Bunch quilt at FF show

So, are you considering sending me a picture of your blocks? I hope so!


  • « Go to Previous Page
  • Page 1
  • Interim pages omitted …
  • Page 54
  • Page 55
  • Page 56
  • Page 57
  • Page 58
  • Interim pages omitted …
  • Page 77
  • Go to Next Page »

Primary Sidebar

Archives

Recent Posts

  • Quilting in Bloomington ~ Part 2
  • The Indiana Heritage Quilt Show ~ 2026
  • Bird’s Eye View
  • The Birds
  • Sew Much Creativity

Recent Comments

  • Tearle D Dwiggins on Quilting in Bloomington ~ Part 2
  • Laurie Neubauer on Quilting in Bloomington ~ Part 2
  • judy raddatz on Quilting in Bloomington ~ Part 2
  • Kathy Wuhrmann on The Indiana Heritage Quilt Show ~ 2026
  • Doris Ast on The Indiana Heritage Quilt Show ~ 2026

Categories

Footer

My Guide

Whatever you do, do your work heartily, as for the Lord rather than for men.

—  Colossians 3:23

Contact Chris!

  • Home
  • About
  • Gallery
  • Classes
  • Trips
  • Books
  • Blog
  • Contact
  • Sign Up For My Blog

Copyright © 2026 · Chris Quilts · Website by Adunate · Privacy Policy