• Skip to main content
  • Skip to primary sidebar
  • Skip to footer

  • Home
  • About
  • Gallery
  • Classes
  • Trips
  • Books
  • Blog
  • Contact
  • Sign Up For My Blog

Blog

A Two Women Show in Paducah

April 19, 2015 8 Comments

Greetings from Paducah, Kentucky! We had to drive through some pretty heavy downpours in southern Illinois, but we knew we’d arrived when we drove over the “flying geese bridge”:

flying geese bridge

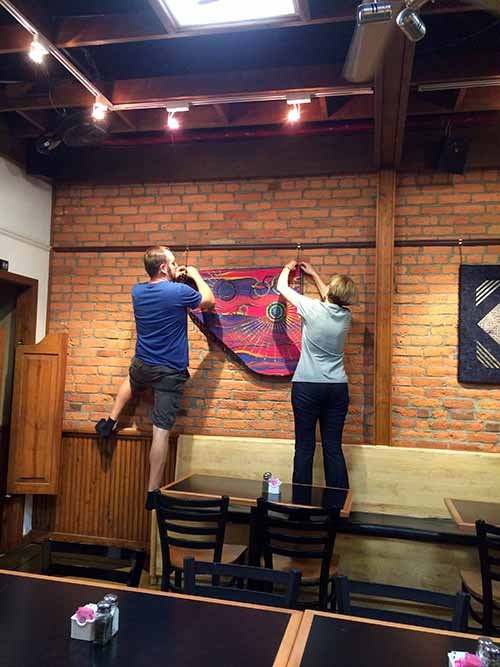
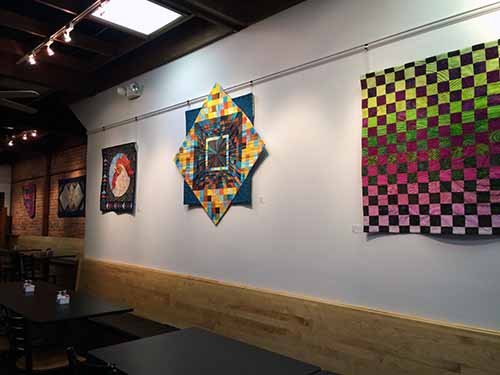
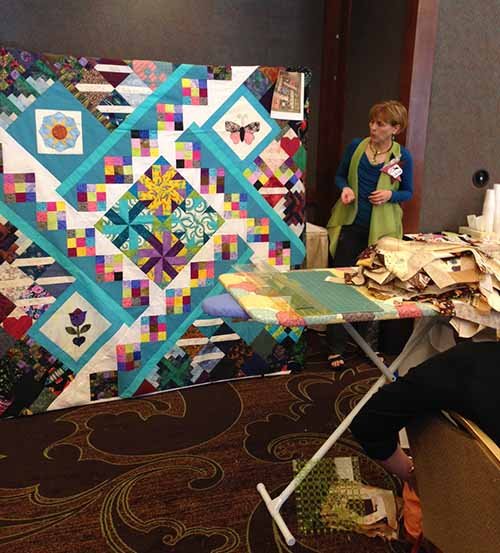
Wendy couldn’t make the trip this year because of a family wedding, so my friend Linda joined me. The first order of business when we got here was to meet Philip and hang a “2 women show” in the gallery of Tribeca restaurant.

Fiber Art Exhibit Paducah 2015

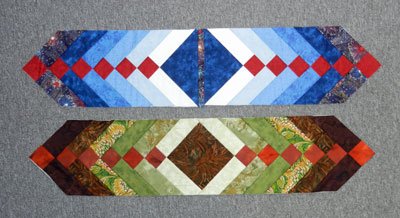
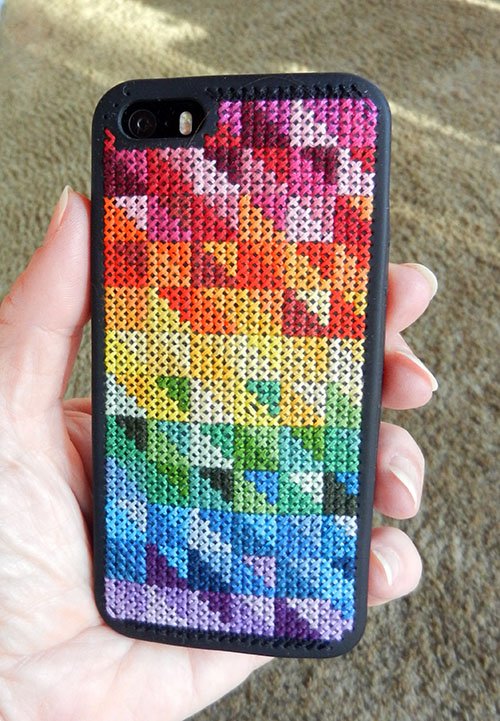
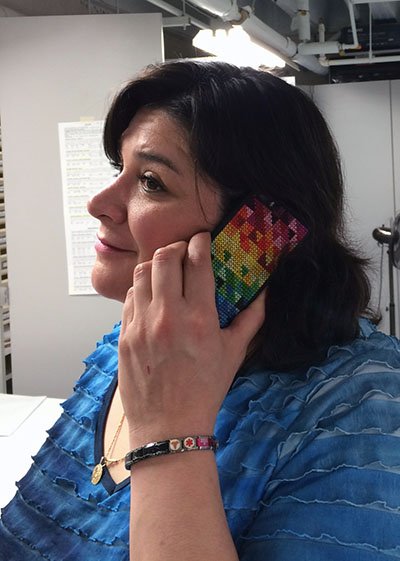
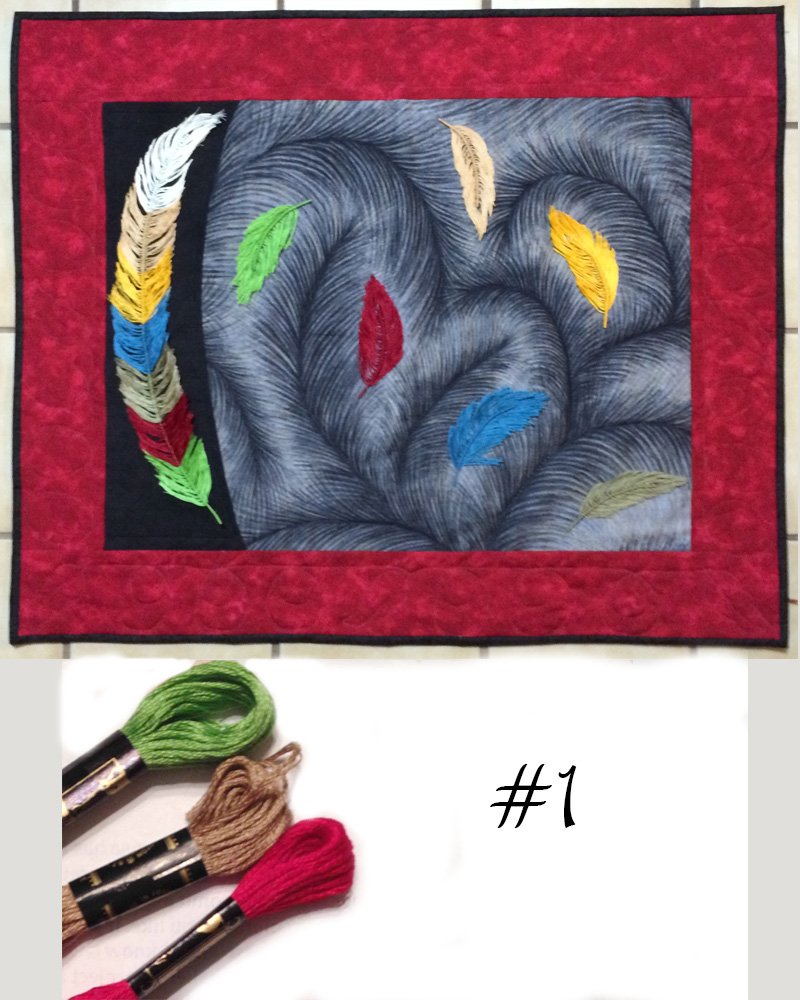
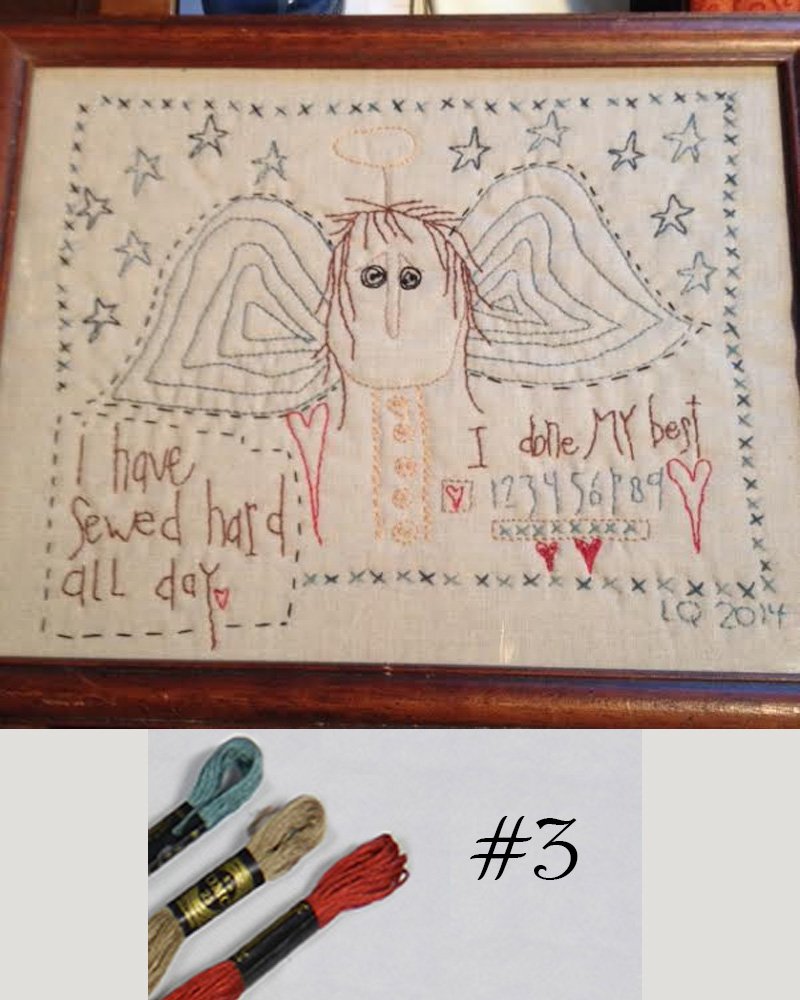
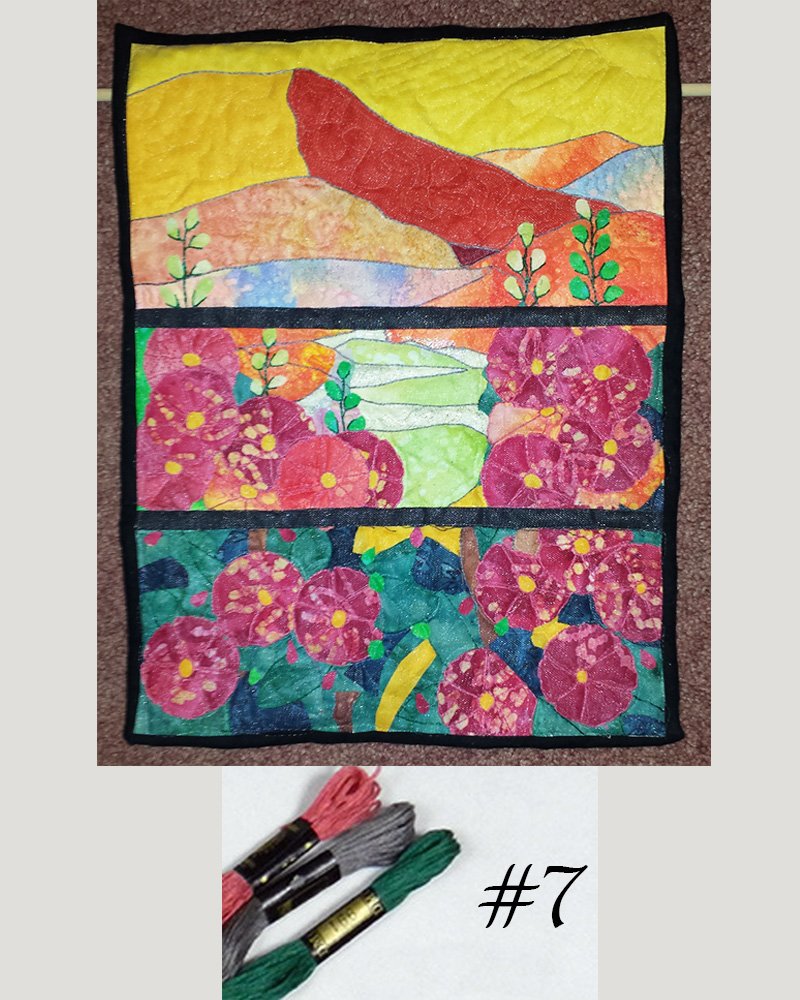
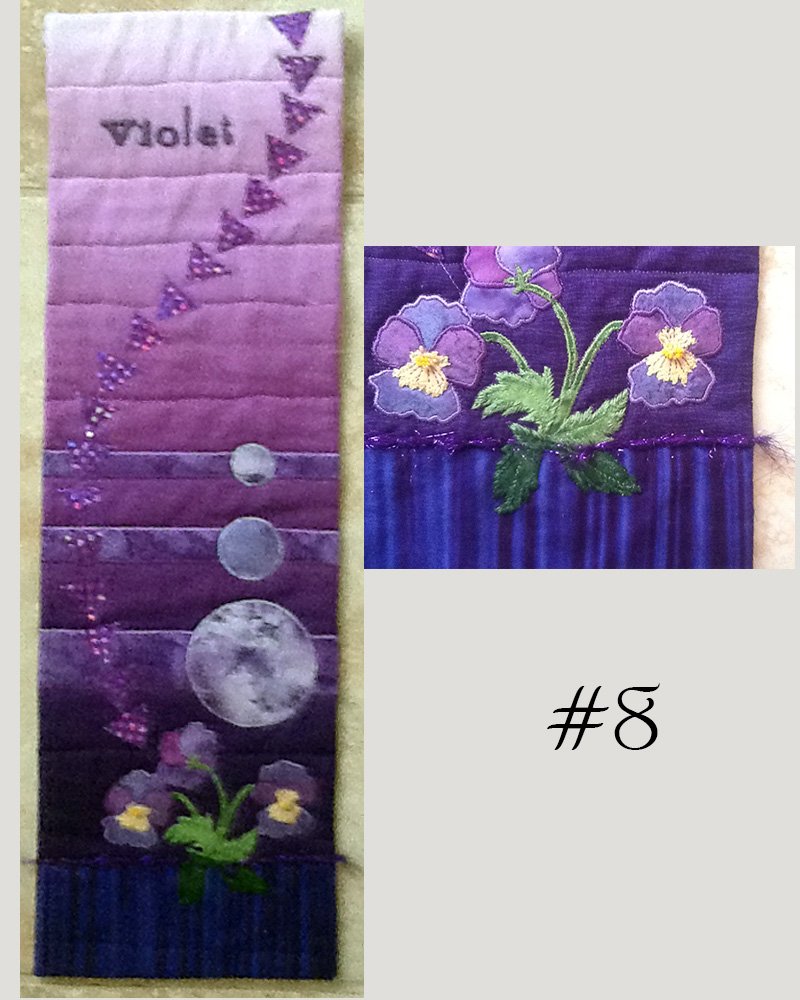
Wendy Rieves and I will have our fiber art on display during AQS Quilt Week in Paducah 2015! (I’m just a little excited!)

You may remember that the past few years we’ve stayed at a B&B on the second floor of a downtown building, just upstairs from a Mexican Restaurant.

Paducah 15 Tribeca front

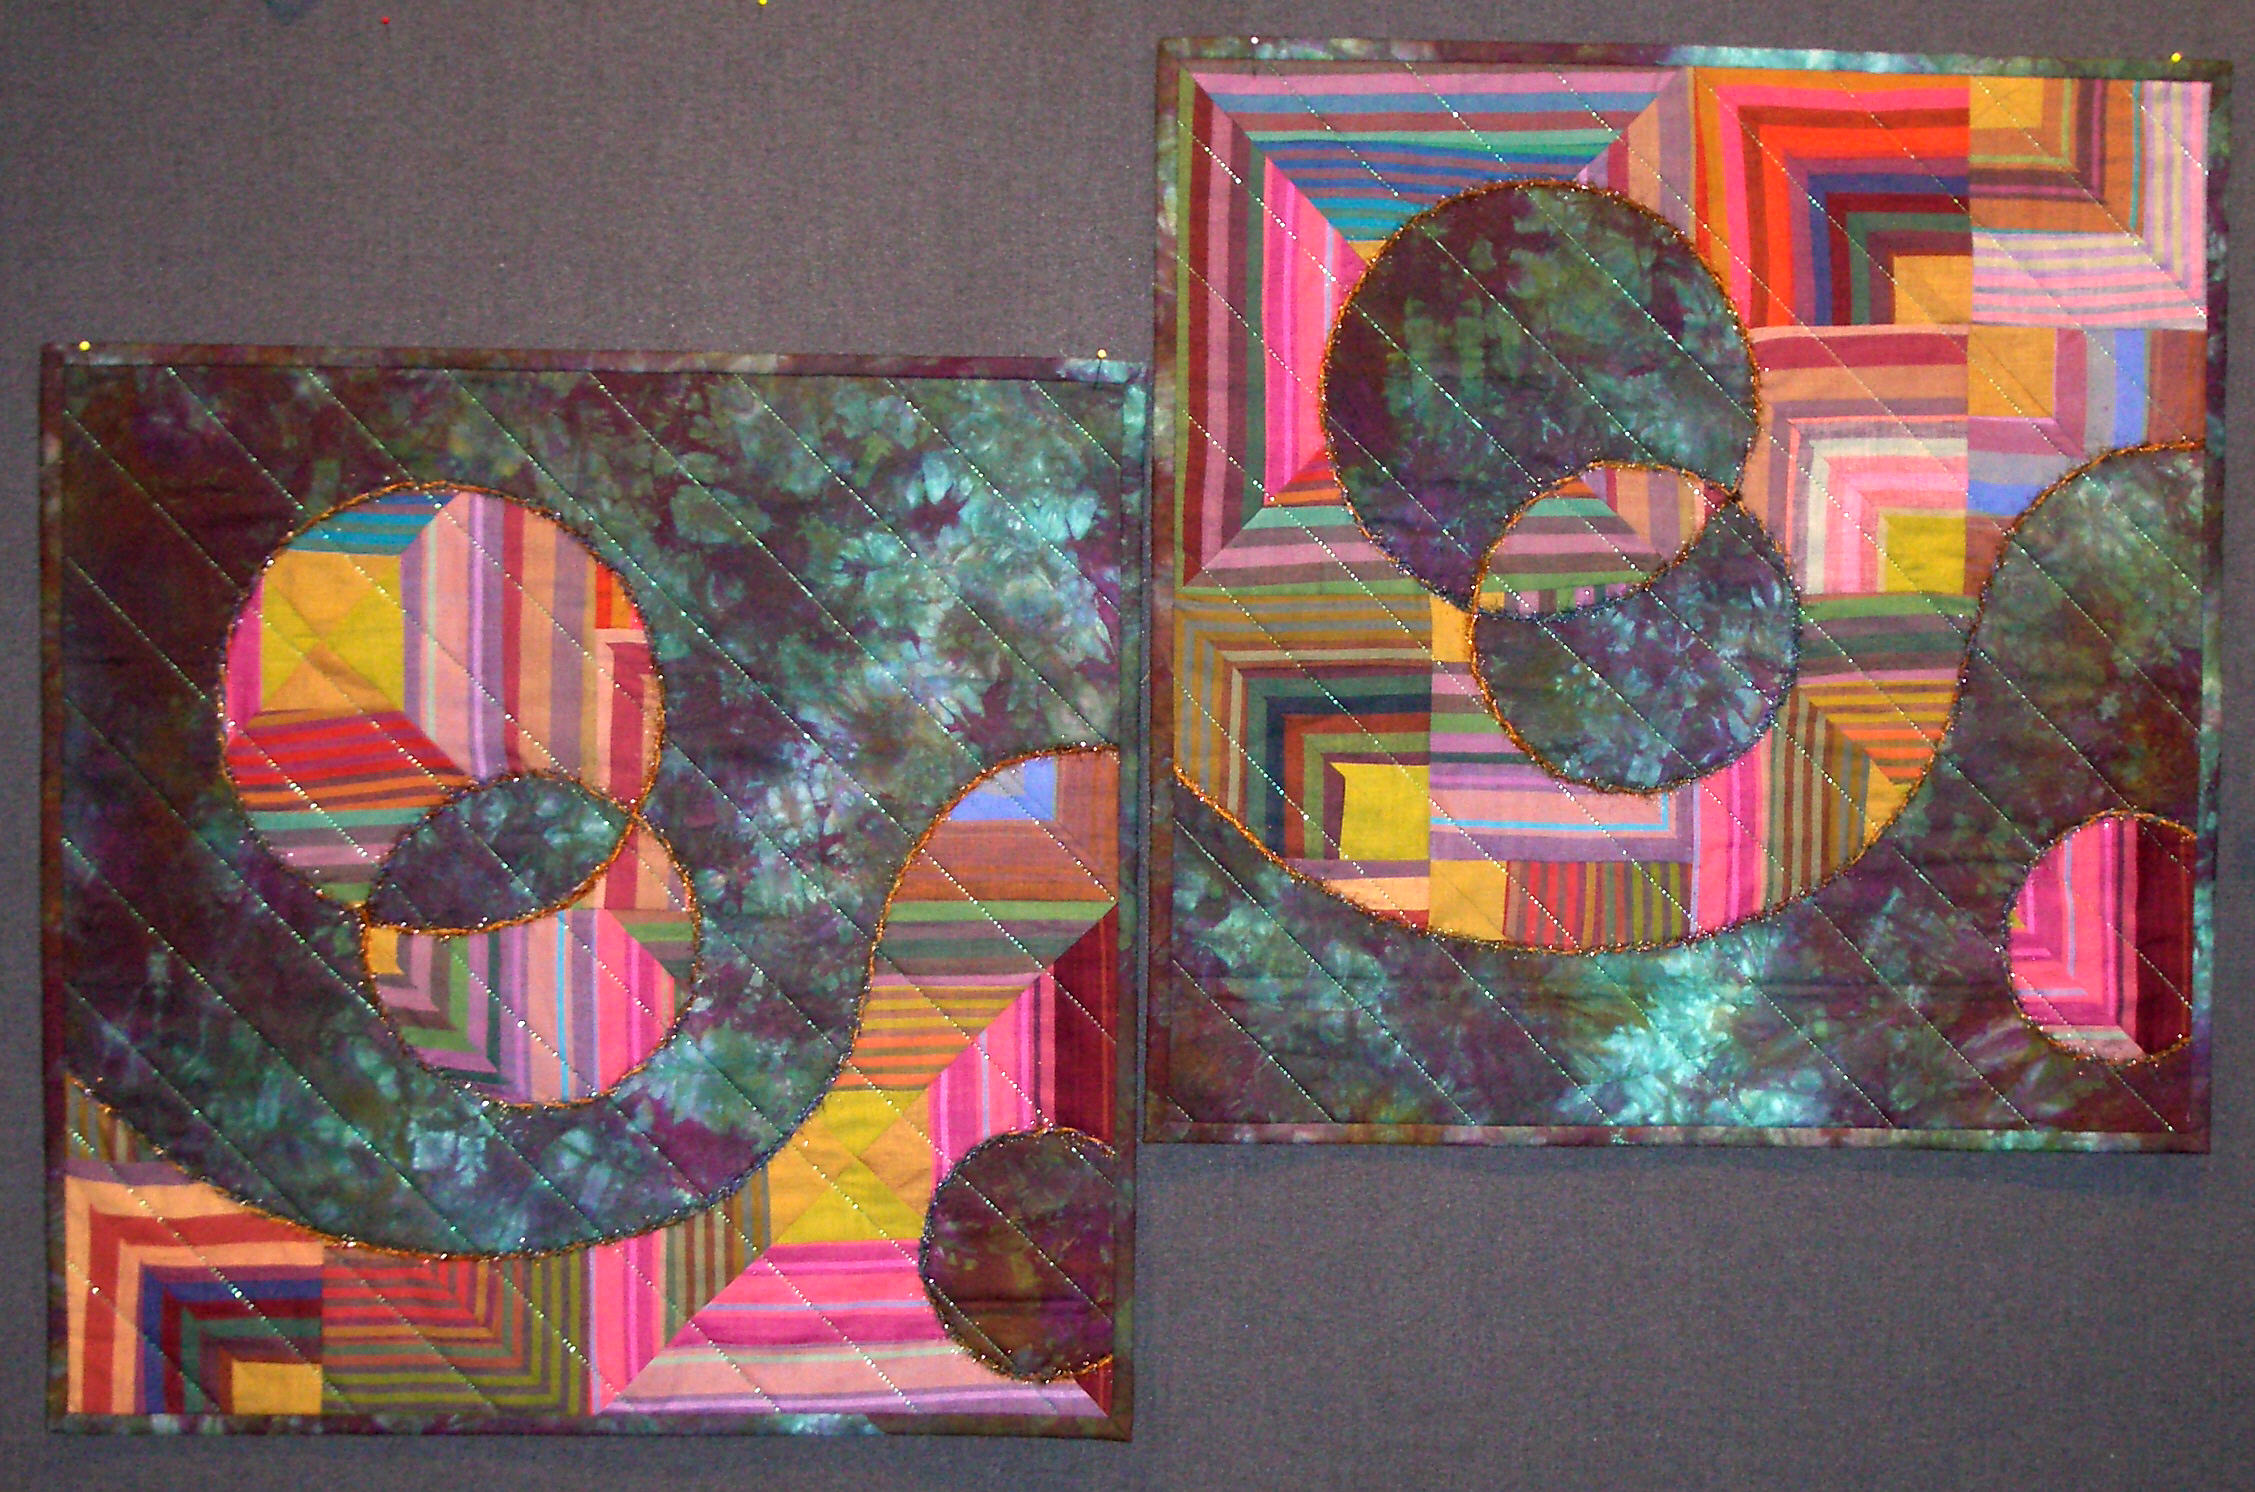
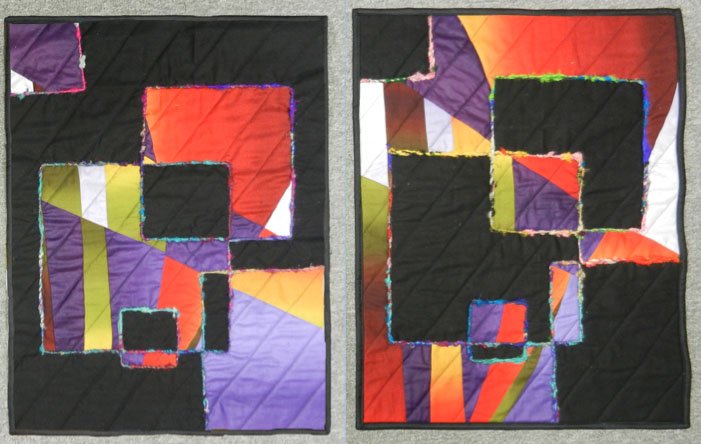
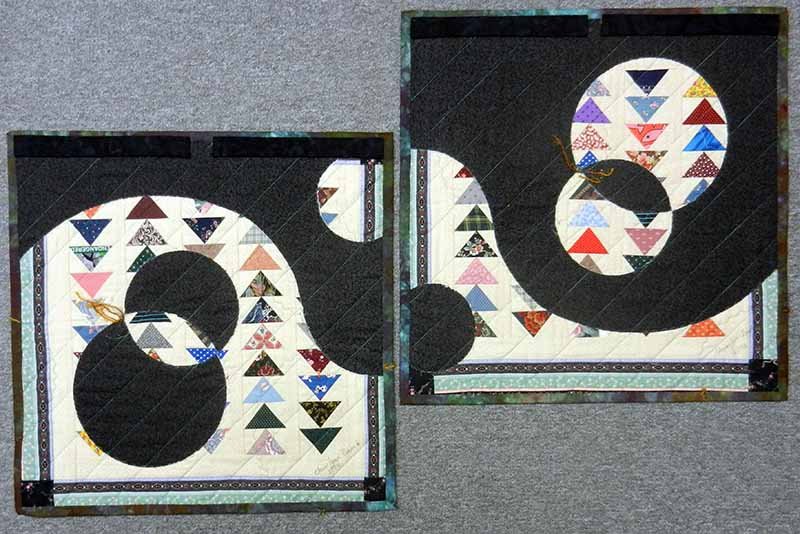
Well, last year the owners of Tribeca invited us to display our fiber art during this year’s show. Here’s a sneak preview!

Paducah 15 exhibit 2 Fiber Art Exhibit Paducah 2015

Paducah 15 exhibit 3

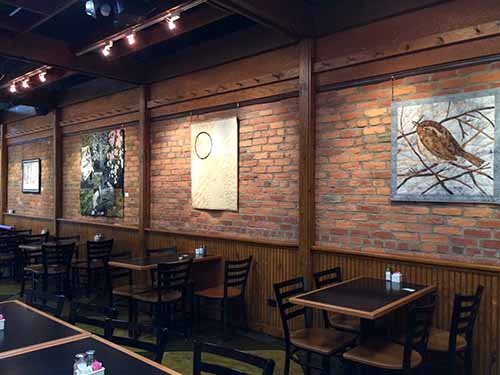
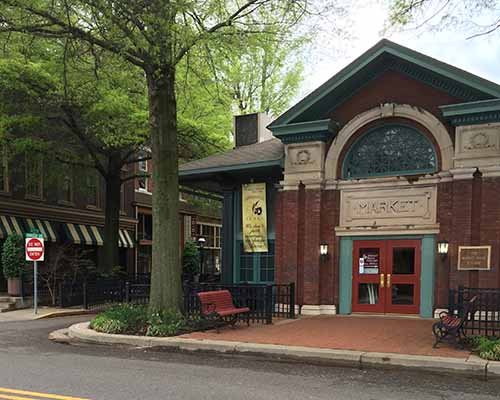
This post is a bit later than usual, because we just finished hanging the quilts and they’re ready for you to see. So, if you’re planning on visiting Paducah this week, here’s how to find us: When heading from the convention center towards the National Quilt Museum, go past the museum, and straight ahead you’ll see the Yeiser Art Center.

Screen Shot 2015-04-18 at 6.19.54 PMWalk down the cobblestone street to the right, and Tribeca is half way down the block.

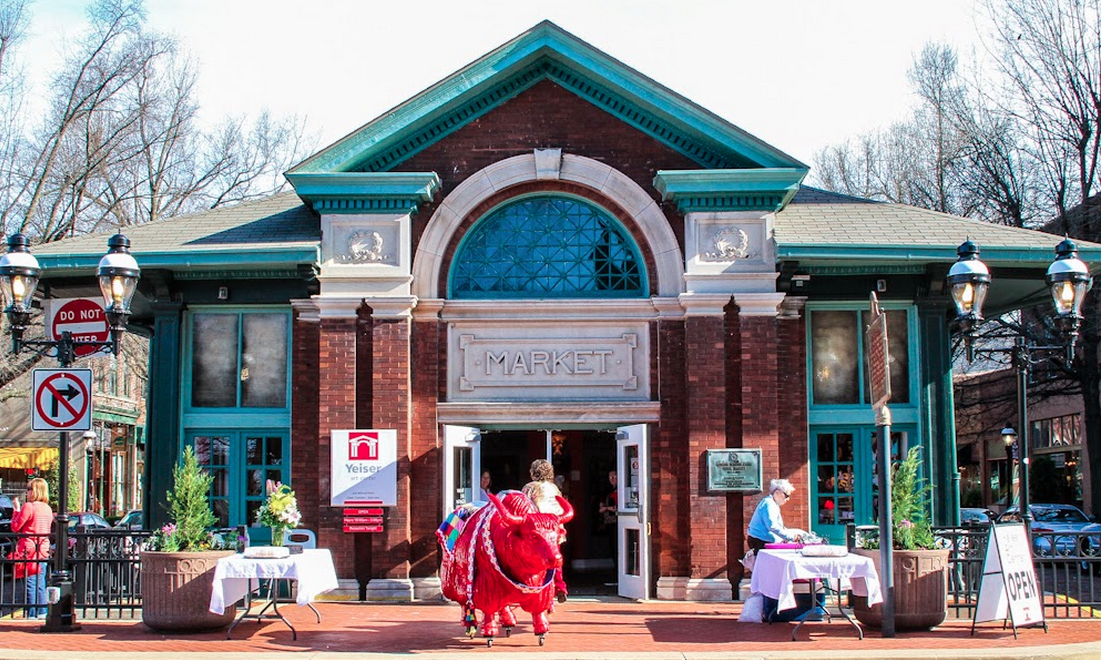
If you’re at the big, pink Finkel building, doing some shopping, this is what you’ll see when you walk out the main door (it’s the theater on the opposite end of the Market building from the Yeiser).

Paducah 15 market-finkel

Between the tree on the left and the Market, you can see Tribeca. Oh, did I mention, the food is great too? So please stop in for lunch or dinner!

If you’re unable to make the AQS show this year – never fear, I’ll share some additional pictures next week!

From all our friends in Quilt City USA – have a wonderful week!

Paducah 15 faces

Quilt-Slash-Create

April 12, 2015 Leave a Comment

Before I get to this week’s topic, I want to share my weekend adventure. I’m writing from the Osthoff Resort in Elkhart Lake, WI. This weekend I had the delightful opportunity to teach at/attend a retreat sponsored by Ben Franklin in Oconomowoc, WI. The Osthoff is
a spectacular facility! And what a wonderful group of 89 quilters/scrapbookers. These ladies know how to do a retreat! The theme was “I Love Mustache” (my stache)”, and all weekend long the play on words included mustaches.

stashe

Our Fearless Leader - Terrie Siefert
Our Fearless Leader – Terrie Siefert
Kathy and me stashe pic
Two of the retreat teachers – (we’re not sure who they are :-)!
stashe Kim
Kim’s mustache quote: “I love my stash and my stash loves me”


stashe Cindy
In case you missed the last line on Cindy’s – she does not share!

This retreat was a blast. So many fun quilters/crafters, so many projects being made, and a great time was had by all!

stash scrap quilt

I taught a scrap class (in keeping with the theme of using our stache), and as an aside I shared my new favorite technique for finishing the tails of a no-end binding. I learned it on Nancy Zieman’s blog and trust me – you need to know how to do this! For the step by step demo go to: http://www.nancyzieman.com/blog/quilting-2/how-to-sew-quilt-binding-2/.

Now for my “topic of the week”:

A number of years ago I read an article about cutting identical portions out of two quilts, and swapping them. This intrigued me, so I decided to try it. I had been given a bag of leftover pieced squares in an art quilt challenge. I decided to piece them into a small square quilt. I then cut a piece of a beautiful hand-dyed fabric the same size. I layered both pieces separately, and quilted them identically. Once they were squared up, I stacked them and rotary cut a circle through both quilts. After separating the quilts, I swapped out the circles and ziz-zagged them into their new “home”. That was fun, so I stacked them and made another cut. This continued until it felt done, and I was quite pleased with the results!

Marq grab bag challenge

A few years went by and I got the urge to play with this technique again – with very different fabrics!

Quilt, Slash, Create 2

Well, it was kind of addicting.

Quilt,Slash, Create 2

The fun part was that I put interesting pieces on the backs, and they ended up being reversible.

qsc geese back

qsc brown back

It takes a bit of courage to cut up a quilted quilt, but it can be quite entertaining. If you’re feeling adventurous, but you’re not sure about jumping in on your own, I’ll be teaching a class on this adventurous technique called “Quilt, Slash, Create!” at Waukesha County Technical College on Friday, May 1st. You can register at wctc.edu, or call the college at (262)691-5566.

Getting Random Quilt Blocks to Fit Together

March 29, 2015 1 Comment

Grand Canyon for blogI’ve returned from the sunshine of Arizona to the freezing rain of Wisconsin. It was a wonderful trip and the beauty of God’s creation is truly awe inspiring.


I’m glad to be home and excited to be back in quilting mode. So, here’s the quilty post I promised  😀 !

If you’ve ever won a stack of blocks at a guild meeting and wanted to put them together into one quilt, but found they were not all the same size – read on! I often see stacks of blocks like this brought into my open lab classes. I must admit, I’ve had two projects of my own – “block of the month”stacks,  that were supposed to become a sampler quilt, but they didn’t all match up. I’ve tried a number of solutions, and this one is my favorite. It uses a technique I shared in a blog post a few years ago (https://chrisquilts.net/?p=4070), and I’d like to revisit it now. In essence, each block is turned on point, and these added triangles make alternate hourglass blocks.

Making quilt blocks measure up

Another advantage to this technique is that your quilt doubles in size from the area covered by the initial blocks.

Turning all the blocks on point

1. Square up all your blocks (they will be different sizes, but that’s ok – they just need to be square).

2. Choose two fabrics to be the “hourglass” corners.

3. Find the largest block and place the ruler as in the picture (diagonal line on vertical center of block, and even along both edges – mine are at 6 1/4″).

turning a block on point

Add 2″ to this measurement and cut out two squares of one “hourglass” fabric this size. Cut both squares on one diagonal, and sew to all four sides of your block. This will turn the block “on point” (for the more detailed instructions from my previous post, please click here and scroll down to the blue/black star block).

turning a quilt block on point

You’ll need to cut 2 squares (yielding 4 triangles) for each block from one “hourglass” fabric. Half of the blocks will be from one fabric, and the other from the second fabric. In this way you’ll be able to “checkerboard” your blocks, by alternating the hourglass fabrics, when you put the top together.

4. Square all the blocks up to the size of the smallest.

5. These blocks may now be sewn together into a lovely quilt, but I would be remiss if I didn’t mention that they need to be put together on the diagonal. If you don’t know how to do that, I found wonderful instructions on this site:  http://delawarequilts.com/HelpfulHints/DiagonalSet.html. The measurements given are for an exact fit. Since I like to give myself a little margin for error (and I like a bit of float around my points), I would add 1″ to the cut sizes for the squares.

Modern Quilts

A few weeks ago I invited readers to send pictures of their modern style quilts. Mary Ann and Juleen did just that, and I know you’ll enjoy them. Mary Ann’s is a crib quilt she’s been working on in my Open Lab class. She finished it since our last class and sent this lovely photo:

Mary Anns modern crib quilt

Juleen sent photos of two of her recent projects. Both are delightful!

modern quilt - Jaeger1Juleens modern quilts

Thanks ladies!


My First Modern Quilt

March 15, 2015 5 Comments

My first attempt at a modern quilt was the one I just finished for our new grandson Trey Michael.

trey and his quilt 2

Mommy had chosen navy, green and brown for the nursery colors, and she likes a more clean, modern look. So I decided to give it a try.

I chose a tan for the background, to match the walls, and began cutting out circles of the fabrics I’d used for the curtains. I added some other circles that fit the look, and stitched them in place using Sharon Schamber’s Piece-liqué technique.

Treys quilt layout

I decided to “poof” the circles using a faux trapunto technique (perhaps a future blog topic 🙂 ). And did some really fast, simple and fun echo quilting.

Trey quilt close up

Then I realized the trapunto poly batt circles weren’t anchored, so I did some quilting inside each circle too. Each circle was quilted, but the “wagon wheel” in the brown circle and the spiral in the green circle are the most visible.

Trey on his quilt 1

I also quilted in his initial, the year, and signed the quilt on the front with contrasting thread. It was an easy and enjoyable process, and Trey seems to really like it!

When the top was done and it was ready to baste, I had an “aha” moment. I like to safety pin baste my quilts in a frame (it really helps to prevent puckers on the back). I did a blog post on this many years ago (click here to read about it). My problem has always been that my boards for the frame are king sized and it’s such a pain to use them when doing a smaller quilt. So Mike and I made a trip to the lumber yard and purchased four 60″ boards for under $6. Why didn’t I do this sooner? Well, it works great, and I can easily put the frame up in the dining room, because I don’t need a 12′ open area.

quilt basting frame

This project was a joy. I don’t think I’ll become a “modern only” quilter, but I’m sure I’ll try another one soon.

Are you a modern quilter? Would you like to share one of your quilts with us? If so, please send me a picture at:

And on a personal note –

This past week Trey turned 3 weeks old and Sommer turned 3 years old. We had her birthday party this weekend and grandma made her a princess cake (Belle) to go with the party theme. It was fun, but I think I’d rather work with fabric than frosting  🙂 !

Princesses

And the Floss Frenzy Winner Is:

March 8, 2015 3 Comments

Because of some time-sensitive information, I’m actually sharing two blog topics this week. The challenge results are the most exciting, so they come first. But please continue to the end for a bit of sharing about the French Braid pattern.

I’ve had an exciting week of tallying votes in the Floss Frenzy Challenge. All of the entries were delightful! They received so many wonderful comments, and many voters mentioned that they wished they could vote for more than one. But one vote a piece was all that was allowed and the winner is:

Ida Porzky of Watertown, WI,

for her crocheted button flower wall quilt!

FF Ida Porzky

Ida is a dear friend of mine. She is a talented quilter and her crochet work is spectacular also (I have the privilege of owning a number of her doilies!). She has won a basket full of floss – 237 skeins to be exact, one each of all the different colors I was originally gifted   😀 ! Congratulations Ida!

Next I need to make a special mention of Patt Nieman’s quilt. Patt had requested only red floss, because she wanted to make a redwork quilt. She completed her beautiful quilt, and sent me pictures well before the deadline. I’m sorry to say, I misplaced her picture and it wasn’t included in the initial posting of the challenge. Patt emailed me concerning my error a few hours after the challenge began. I put it into the blog as soon as I could and, even with the late start into the viewer’s choice voting, her quilt still won second place!

Patt Nieman quilt

Patt will also receive a prize of embroidery floss!

Thanks so much to all the participants. You are all winners to me!!!

A few interesting challenge statistics:

37 packs of floss were sent out.

18 stitchers returned pictures in time for the challenge.

Over 120 votes were cast.

Quite a few people have let me know that they are still working on their projects, but they just couldn’t get them done in time. If you’re one of these – keep at it – and then send me a picture when it’s finished. I plan to feature a Floss Frenzy II showing in a future blog post!

Braids and French Braids – Quilt As You Go

Doing a braided table runner – quilt as you go, is a quick and easy way to complete a pretty project. Many of you may know how to do this, but just so we’re all on the same page, I’ll share a brief “how-to”:

1. Cut a piece of batting and backing fabric slightly larger than the size of the runner you desire. Layer the backing, wrong side up, on the work surface. Smooth the batting on top of this. These layers may be held together with basting spray, or a few pins. Mark center lines down the length and the width on the batting, with a removable marker.

quilt as you go

2. Cut a square of fabric that will fit the width of the runner, when placed on the diagonal. Pin in place at the center.

quilt as you go

3. Cut strips of fabric for the braid. It looks nice in either a planned palette or scrappy. You will complete one side of the runner first, and then the other. The strips will be added chevron fashion on two adjacent sides of the center square. Choose a strip and lay it, right sides together, even with one edge of the center square, and with the tail hanging off the edge of the runner. Stitch in place with a 1/4″ seam allowance.

quilt as you go

4. Carefully press the strip open, and trim off the tail even with the runner edges.

quilt as you go

5. Lay a strip of fabric along the adjacent side of the center square, even with the square/strip portion of the runner, and with the tail hanging off the outer edge of the runner again. Stitch as in step 4, press open and trim the tail.

quilt as you go

6. Repeat steps 4 & 5 until one half of the runner is pieced and quilted. Finish the other half of the runner the same way.

quilt as you go

8. Square off with pointed ends (as in my sample) or rectangular, bind and enjoy!

quilt as you go


A technique with a similar look, but an added bit of pizazz is called a French braid. This pattern became very popular a few years ago. The original book constructed the pattern as a top, in need of quilting. It struck me that doing it “quilt as you go” would be a great option. I played a bit and created this lap sized quilt:

french braid

Adding the squares was the tricky part, but I came up with a fun way to make it work. Each row was made separately and then I put them together with the Reversible Quilts method I used for Hanna and Willy’s I-Spy quilts (to read the post on that technique – click here). Each row was actually a runner, so I made that option into a class and I’ll be teaching it the end of this month at Waukesha County Technical College. Here’s the info:

CRN 21783 French Braid Runner


Quilting Workshop: French Braid Runner – Friday, March 27th, 9 – 2:30

Use a gradation of color or value to create this stunning table runner. The best part is the piecing is done “quilt-as-you-go”. Once the top is done, the quilting is too! This technique can be used to create a bed-sized quilt and instructions for doing so will be included in the class.

If you are interested, please sign up soon!  You can register on-line at  http://www.wctc.edu/ or by phone at 262.691.5578. The Course Reference Number (CRN) is 21783.

Floss Frenzy Challenge – Revealed!

March 1, 2015 2 Comments

I’m so excited! The entire Floss Frenzy adventure has been so much fun: getting the floss, figuring out what to do with it, and then … receiving all the pictures of your wonderful projects. What a joy!!! (if anyone is new to the blog, click here for the original post)

To begin this post I’d like to share “my challenge project”. I cross stitched a cover for my Iphone. I’d seen something like it on Pinterest and felt it was a great use for embroidery floss!

The base was purchased on Amazon.com and it was fun to cross stitch through the silicone (there were perforations for the stitches). It must be an Amish iPhone case because I didn’t cross one of the stitches, proving only God is perfect (LOL – can you find it?)

embroidered iphone case

The problem is that the case didn’t fit my phone as tightly as I’d like, so I gifted it to my friend Maria – who was thrilled! I enjoyed making it and I’m glad it found a good home.

Maria and phone1After issuing the challenge I realized that I still had way more floss than I could ever use, so I sent an email out to the missionaries my church supports, asking if they could use it in their ministries, and quite a few of them responded. It’s been fun to see how far the floss is traveling and to hear about the crafts it’s being used for in Peru, Mexico, Estonia, Sweden and even Micronesia!

So now – it’s time for the challenge. Please remember that most all of the floss “three packs” were chosen at random by me – and please only vote once 🙂 .

Virtual Floss Frenzy Challenge Exhibit and Viewers Choice Voting

FFblog Newsham

The following projects are numbered and anonymous. Please vote for your favorite by emailing your chosen number to me at

#1

An embellished wallhanging

#2

A quilted map of Watertown, WI

#3

FFblog Qui
An embroidered sampler

#4

FFblog Han
An embellished purse.

#5

FFblog Por
A wall quilt of a vase filled with crocheted button flowers.

#6

FFblog Gil
An embroidered mug rug

#7

FFblog PorL
An embellished wall hanging

#8

An embellished wall hanging. (sorry I didn’t take a “floss” shot, so I’ve included a detail of the embroidered portion)
An embellished wall hanging
(sorry I didn’t take a “floss” shot, so I’ve included a detail of the embroidered portion)

#9

FFblog mag
An embroidered wall quilt

#10

A needle punched purse

#11

A needle punched mug rug

#12

Embroidered block that will become a label for a granddaughter's quilt
An embroidered block that will become a label for a granddaughter’s quilt

#13

Wallhanging quilted with embroidery floss
A wallhanging quilted with embroidery floss

#14

An embroidered quilt top

#15

An embroidered and quilted prayer flag

#16

An embroidered pillow case

#17

An embroidered modern sampler

#18

A redwork quilt
A redwork quilt

Thanks to everyone for the great response. I loved seeing what the floss became. Finishing by the deadline makes you all winners in my book, but it will be fun to see which project wins the prize!

Please vote soon everyone!

Eureka! A Mariner’s Victory!

February 22, 2015 2 Comments

Two years ago I put together a lecture called Tradition With a Twist. In it I share antique quilts in traditional patterns, and the modern variations I’ve created. Collecting the antique quilts for the talk was a big part of the fun. By the time I presented thCompass-Capers-to-Di
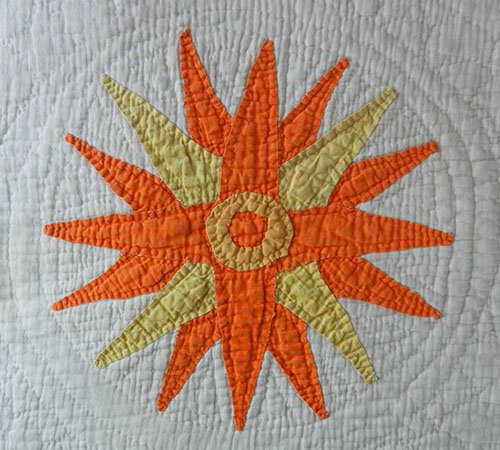
e lecture for the first time I had found antique versions for all but one pattern – Mariner’s Compass. This was particularly frustrating because I’ve made so many unique Mariners variations – and even written a book about it!


Fast forward to this past January. Our life has taken a new direction because Mike retired on December 31st. This change has presented many new things to deal with, and one was to adjust our cell phone/internet plan. As many of you may know, there are tons of options out there, and it’s all so confusing! As a part of this adventure, we spent one night “trying out” a new WiFi possibility. In the midst of this Mike told me to just “surf the web” and see how the speed of the connection was (silly man 🙂 ). I don’t surf often, but when I do, it’s usually to try to find an antique Mariner’s Compass quilt in my price range (a seemingly hopeless plan). Well … a lovely quilt in white, orange and yellow popped up, and 12 hours later it was mine!!!

Vintage Mariner's Compass quilt

I’m thrilled! I had really wanted a medallion style Mariner’s quilt, and I love yellow and orange. But this one really tickled me – and here’s why!

Mariner’s Compass quilts tend to be rare because of the degree of difficulty involved in the traditional template method for piecing them. Those long skinny points require a lot of patience and skill. I didn’t get into making this pattern until I discovered that compasses could be made with paper piecing. This made accurate blocks attainable for average quilters.

MC vintage center

Now, look closely at the above picture of the central medallion from the quilt, and prepare to be impressed. Those points were not foundation pieced, they were not even template pieced… they were hand appliquéd!!! It’s a bit easier to see on this picture of one of the small corner compasses.

MC vintage detail

The quilt is hand quilted also. The stitches are not the finest I’ve ever seen, but they have kept the quilt together through much wear and numerous washings. Oh how I wish it could talk and tell me who made it and when. That’s why I’m always telling students to label their quilts!

So, would you like to see this quilt “in the cloth”?

TWT pub webI’ve been blessed with the wonderful opportunity to be one of the keynote speakers for University Days 2015, at the Wisconsin Museum of Quilts and Fiber Art in Cedarburg, WI. This event takes place May 1st and 2nd. I’ll be presenting Tradition With a Twist on Saturday morning at 9am. University Days is an exciting event with a lot of great activities. For all the information go to:  http://wiquiltmuseum.com/education/classes-workshops/university-days-2014


Then, on a personal note – Sommer has a new baby brother!!!

Trey Michael Kirsch was born this past Friday night, February 20th.

Trey and gma2-21 blog

Brad and Betsy (our son and daughter-in-law),Sommer Trey for blog are doing well. We’re all thrilled and Sommer loves her “bay brudder”.

Decking Out the Nursery

February 8, 2015 1 Comment

I’ve been doing more sewing than quilting lately. Sommer’s baby brother is due February 26th, and Betsy is in nursery preparation mode. The color scheme she’s chosen is navy blue, kelly green and brown. She asked me to make the curtains …

nursery curtains

bumper pads, and a hanging diaper holder.

nursery diaper holder

I’m continually being amazed by my daughter-in-law’s abilities. She’s a loving wife and mother. She’s done the design work on two of my books. But I never realized what a talented painter she is, until now. Here’s a picture of Sommer with their two doggies, Moseley and Nershi (Sommer is quite an artist herself – and two fisted).

Sommer painting 1-14aAnd these are the pictures Betsy painted recently for the baby’s room:

Nirshy painting Mosely paintingDidn’t she capture them well? The finishing touches on the nursery will be completed this weekend, and I put the final stitches into the baby’s quilt this past week. So, he can come any time now 😀 ! I’ll send pictures once he’s arrived!

Yo Yo update!

I recently received an email and photo from Lorraine about her yo yo project. I just had to share:

“Hi Chris,
A few weeks ago you talked about yo yos on your blog and asked for pictures of our yo yo projects.  Here is my story:

When I bought my first yo yo maker I decided to make a vest.  I spent several evenings making yo yos and after I had a big pile of them I decided I had enough to put the vest together.  I took a vest that fit me well, laid it on the floor and began arranging my pile of yo yos to duplicate the front panels.  My big pile of yo yos did not come close to finishing the front panels!  I had to spend many more evenings making many many more yo yos in order to finish the front panels and then do the back of the vest.  Although it took much longer than I thought and many more yo yos than I anticipated I like the finished project and get lots of compliments when I wear the vest.”

IMG_0084Lorraine, It is lovely! Thanks for sharing!


  • « Go to Previous Page
  • Page 1
  • Interim pages omitted …
  • Page 56
  • Page 57
  • Page 58
  • Page 59
  • Page 60
  • Interim pages omitted …
  • Page 77
  • Go to Next Page »

Primary Sidebar

Archives

Recent Posts

  • Quilting in Bloomington ~ Part 2
  • The Indiana Heritage Quilt Show ~ 2026
  • Bird’s Eye View
  • The Birds
  • Sew Much Creativity

Recent Comments

  • Tearle D Dwiggins on Quilting in Bloomington ~ Part 2
  • Laurie Neubauer on Quilting in Bloomington ~ Part 2
  • judy raddatz on Quilting in Bloomington ~ Part 2
  • Kathy Wuhrmann on The Indiana Heritage Quilt Show ~ 2026
  • Doris Ast on The Indiana Heritage Quilt Show ~ 2026

Categories

Footer

My Guide

Whatever you do, do your work heartily, as for the Lord rather than for men.

—  Colossians 3:23

Contact Chris!

  • Home
  • About
  • Gallery
  • Classes
  • Trips
  • Books
  • Blog
  • Contact
  • Sign Up For My Blog

Copyright © 2026 · Chris Quilts · Website by Adunate · Privacy Policy